


Mailgun, Postmark, and SMTP2GO are reliable email delivery services to send transactional and marketing emails through SMTP. If you need a hassle-free and straight-to-the-point formula to connect SMTP, these email delivery services are the supreme solution for your email marketing tool.
Let’s connect Mailgun and Postmark SMTP with MailBluster.
Table of contents
- Connect MailBluster with Mailgun and Postmark Step-by-Step
- Connect Postmark with MailBluster
- Connect Mailgun with MailBluster
- Connect SMTP2GO with MailBluster
- Wrap Up
Connect MailBluster with SMTP Providers: Step-by-step Guide
Connecting Mailgun, Postmark and SMTP2GO with MailBluster requires your time, managing server connections, and adding records to your DNS server. Here, we will show you the step-by-step procedure for connecting Mailgun and Postmark with MailBluster.
Let’s see how to connect Postmark with MailBluster.
Connect Postmark with MailBluster
You can either watch the Postmark video tutorial or follow our step-by-step process mentioned here.
Step 1: Create server and add the token
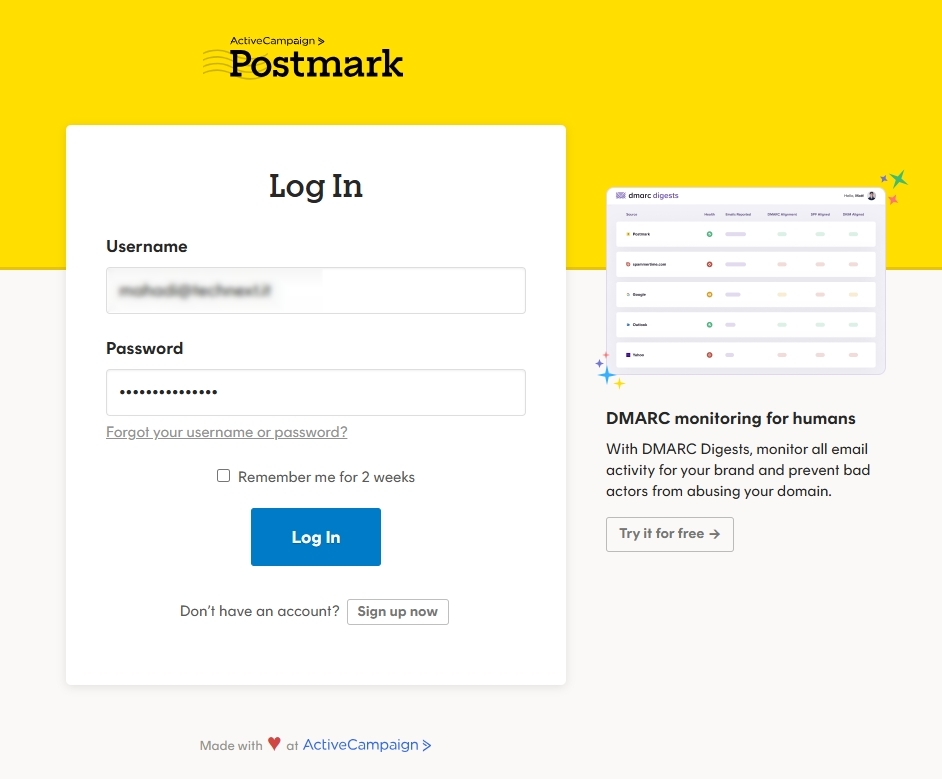
First of all, sign in to your Postmark account.
Click “Create Server” from the top right.
Provide a name for the server and click Create server.

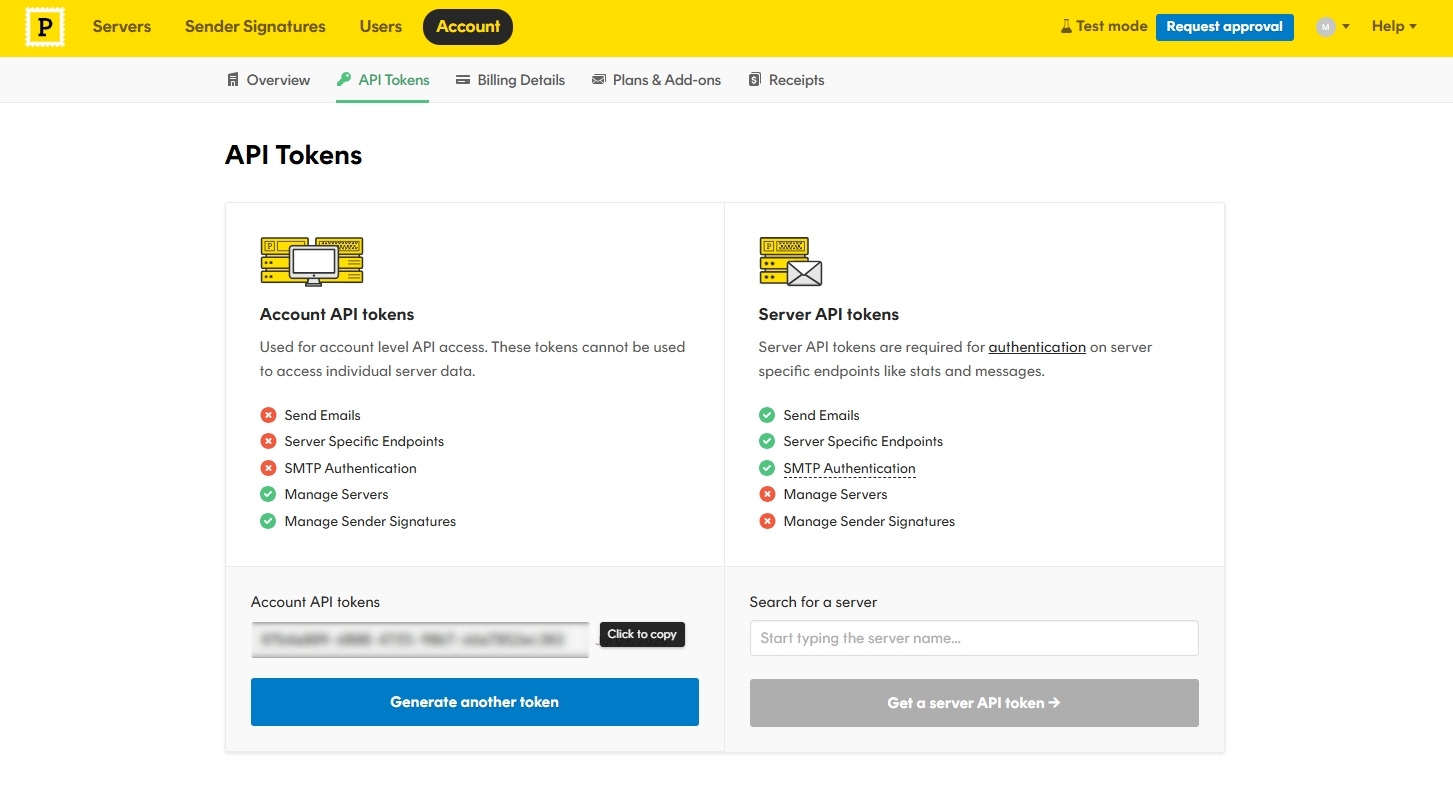
Now, click the server you have just created and navigate to API Tokens and copy the Server API tokens.
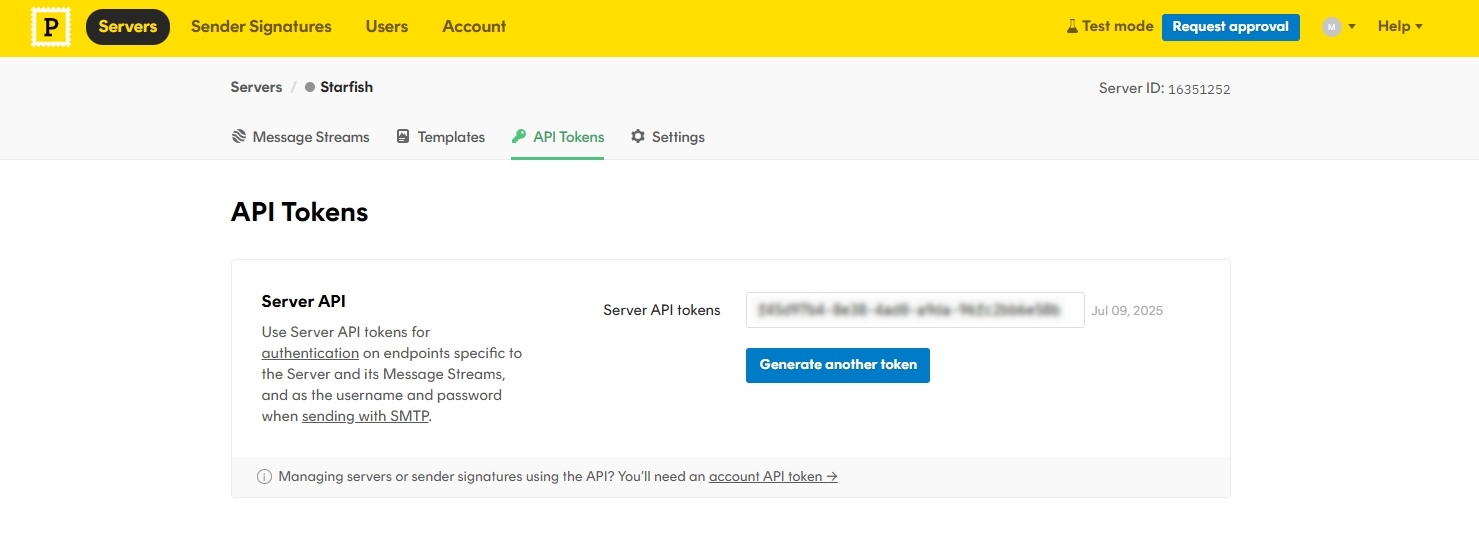
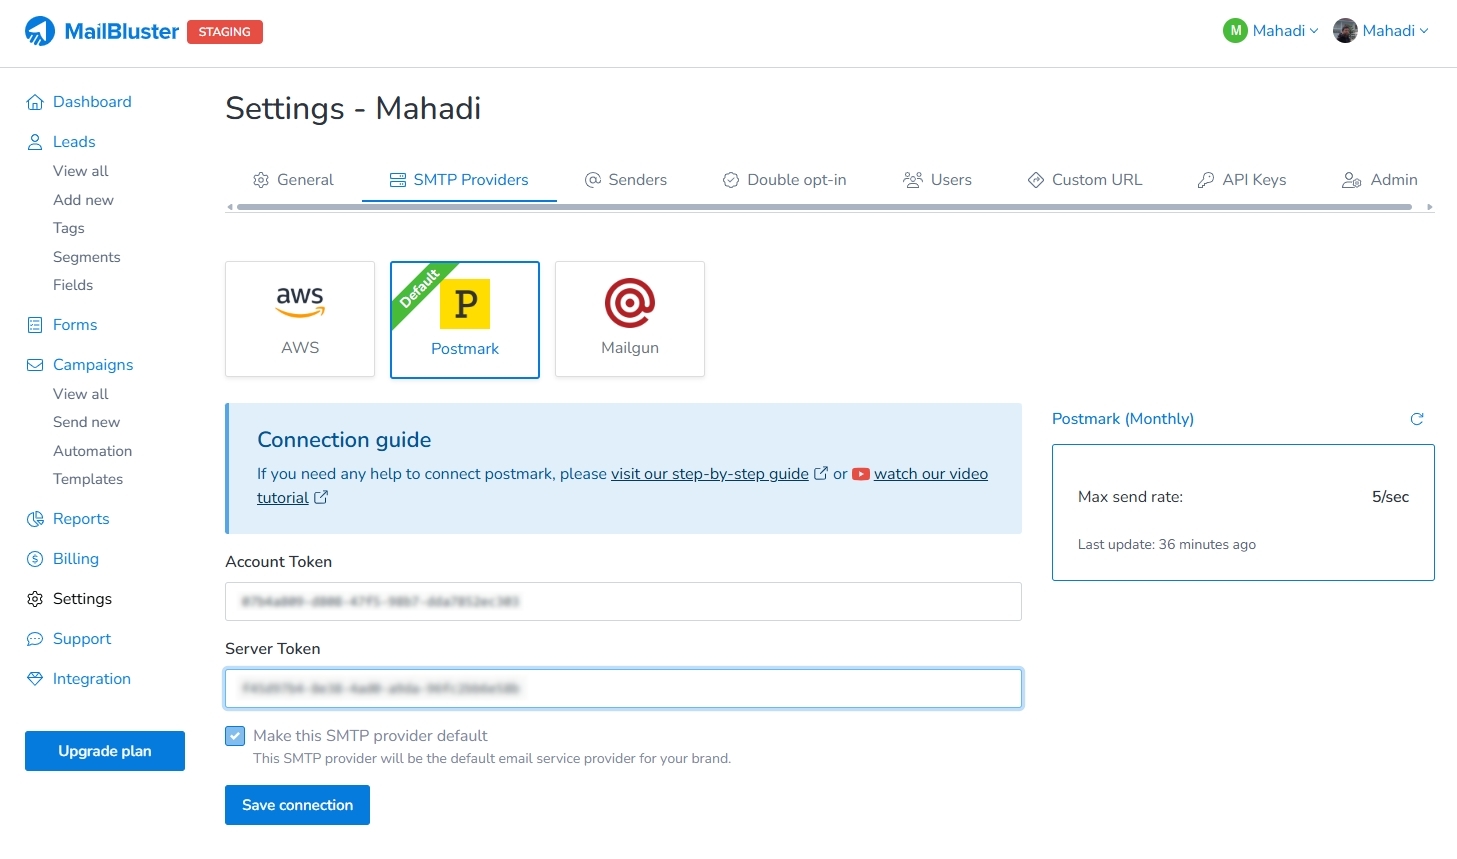
Now, Sign in to your MailBluster account. Go to Settings>SMTP Providers>click Postmark SMTP and paste the token into the Server Token field.
Step 2: Add the API and Domain
Now, go back to your Postmark account. Click Account>API Tokens and copy the Account API tokens
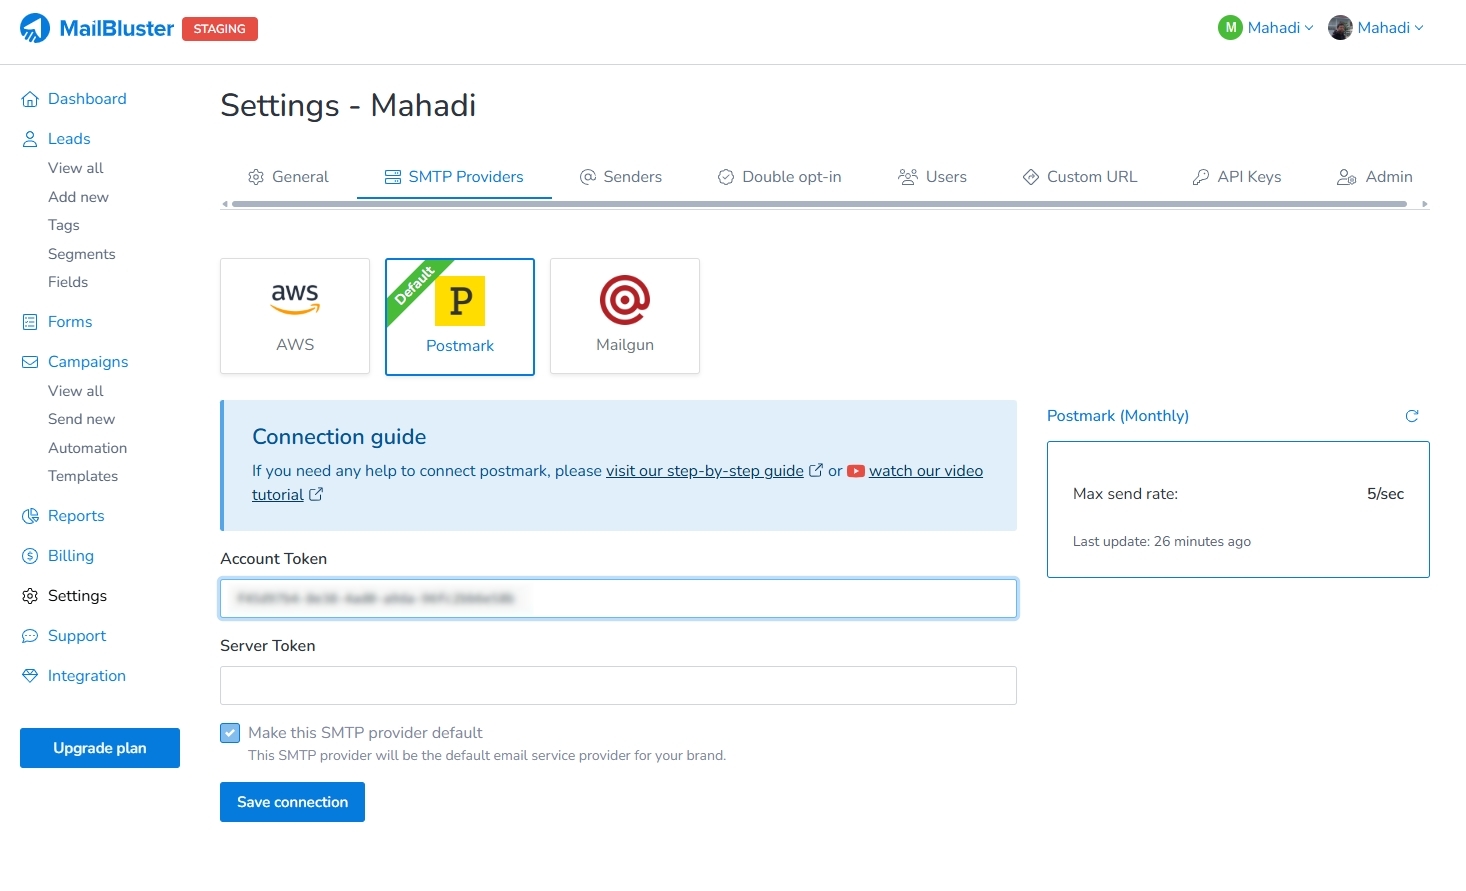
Sign in to MailBluster to add the API token to Postmark SMTP from Settings→ SMTP Providers. If you get both token fields, click Save connection.
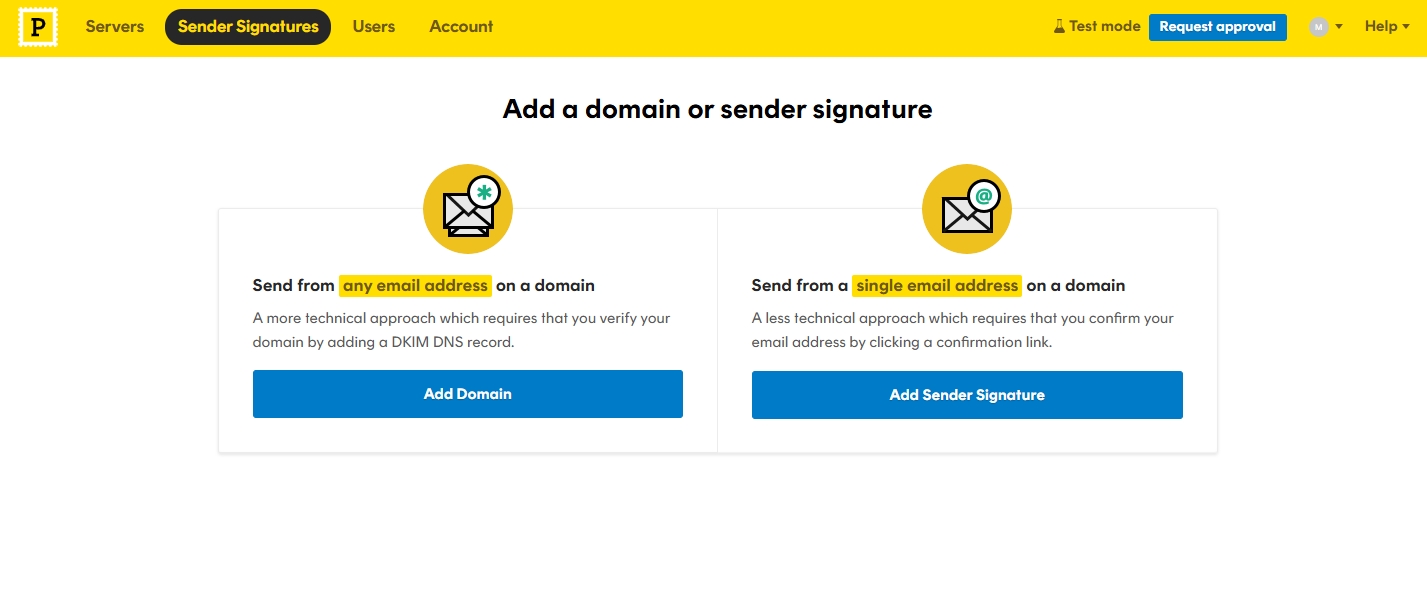
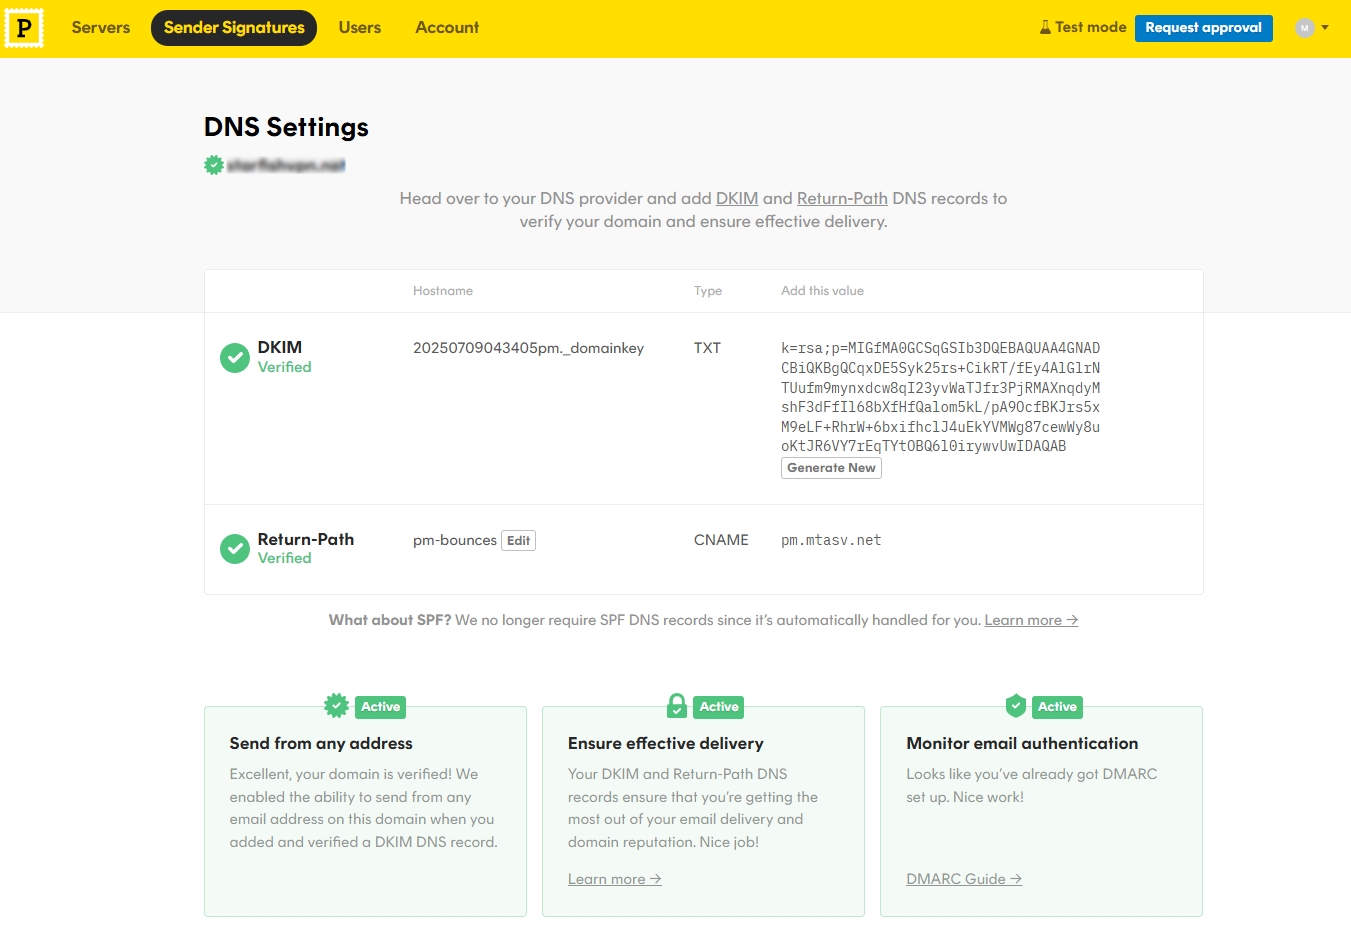
Now, add your domain to Postmark’s Sender signatures. Select the Send from any email address on a domain and click on Add Domain. This will let us add the DKIM and DNS records.
A domain adding window will pop up, add your domain there, and click Verify domain. This will lead us to the DNS Settings page.
Step 3: Add DNS records to the server
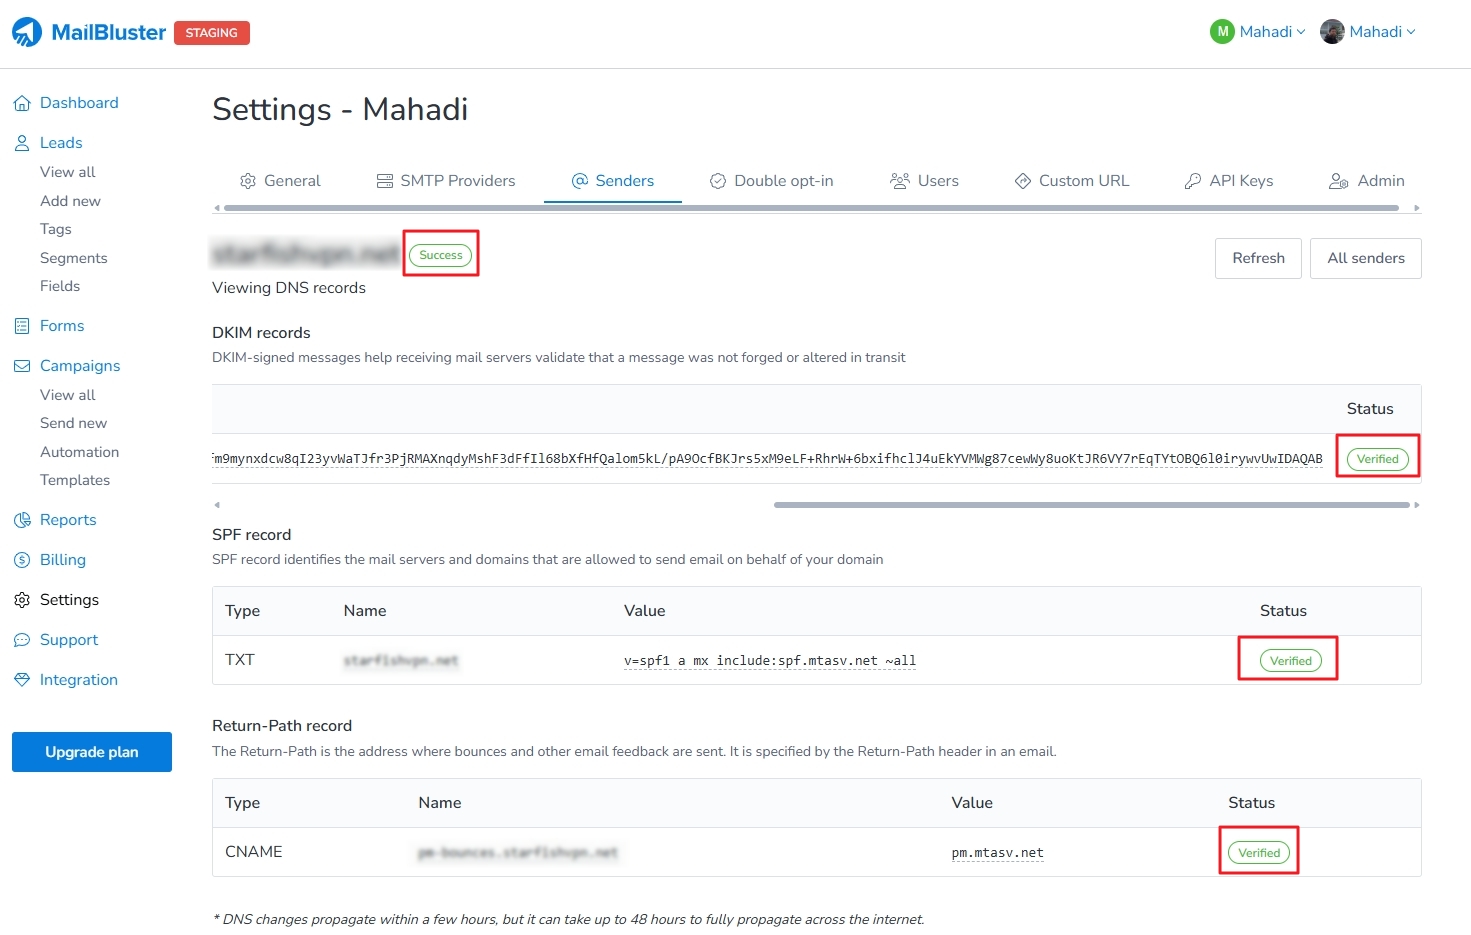
Now, you need to verify the DKIM and Return-Path values. Go to Settings → Senders on MailBluster and click the added domain.
This will show you the DNS records. Copy and paste all the Names and Values to your DNS server to verify your domain on Postmark.
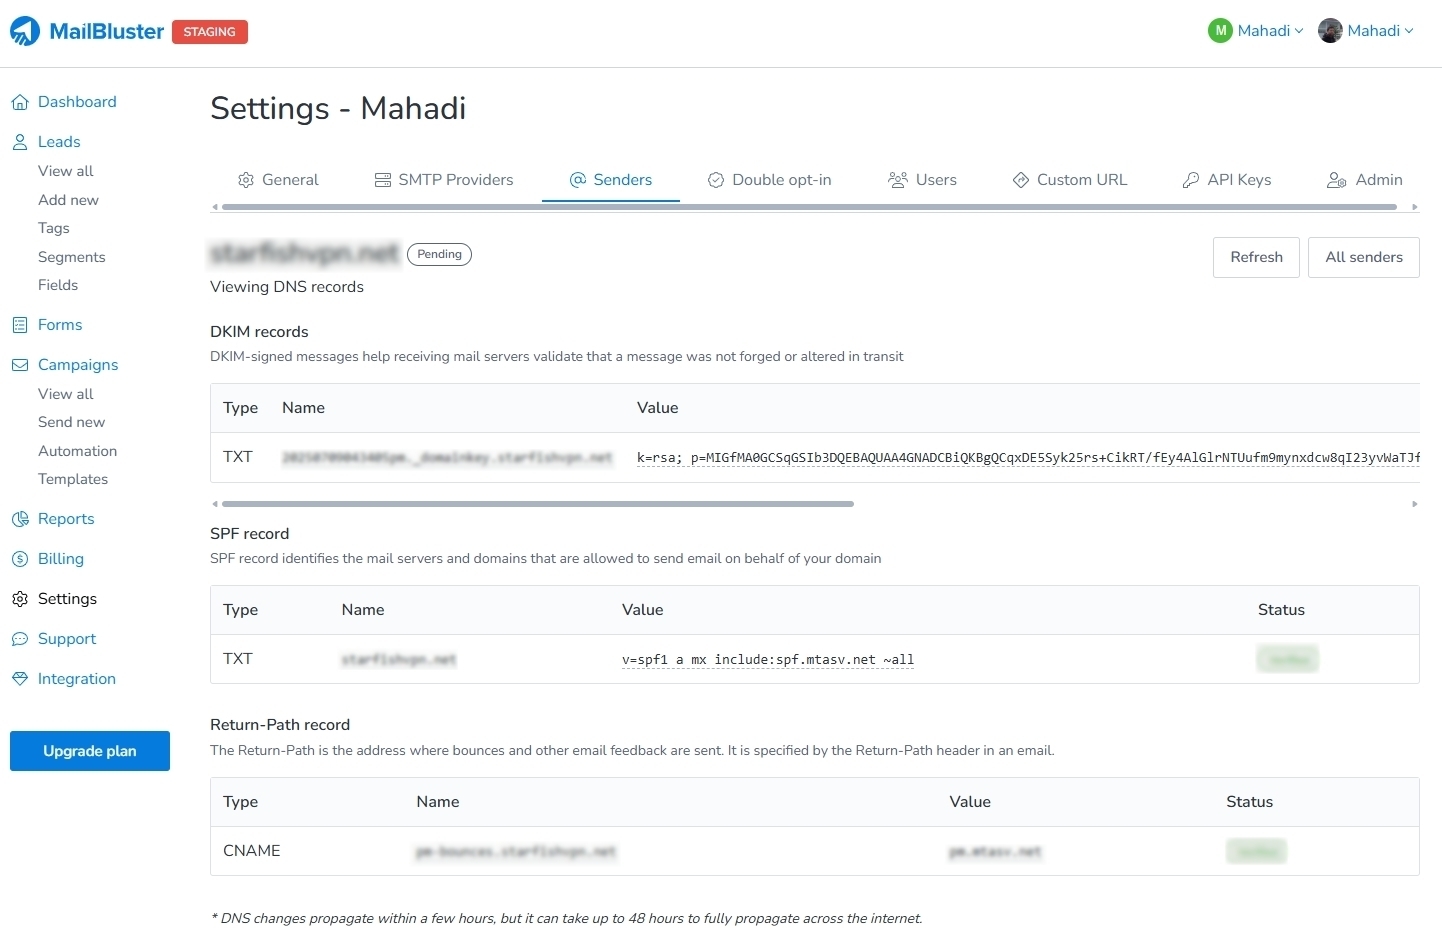
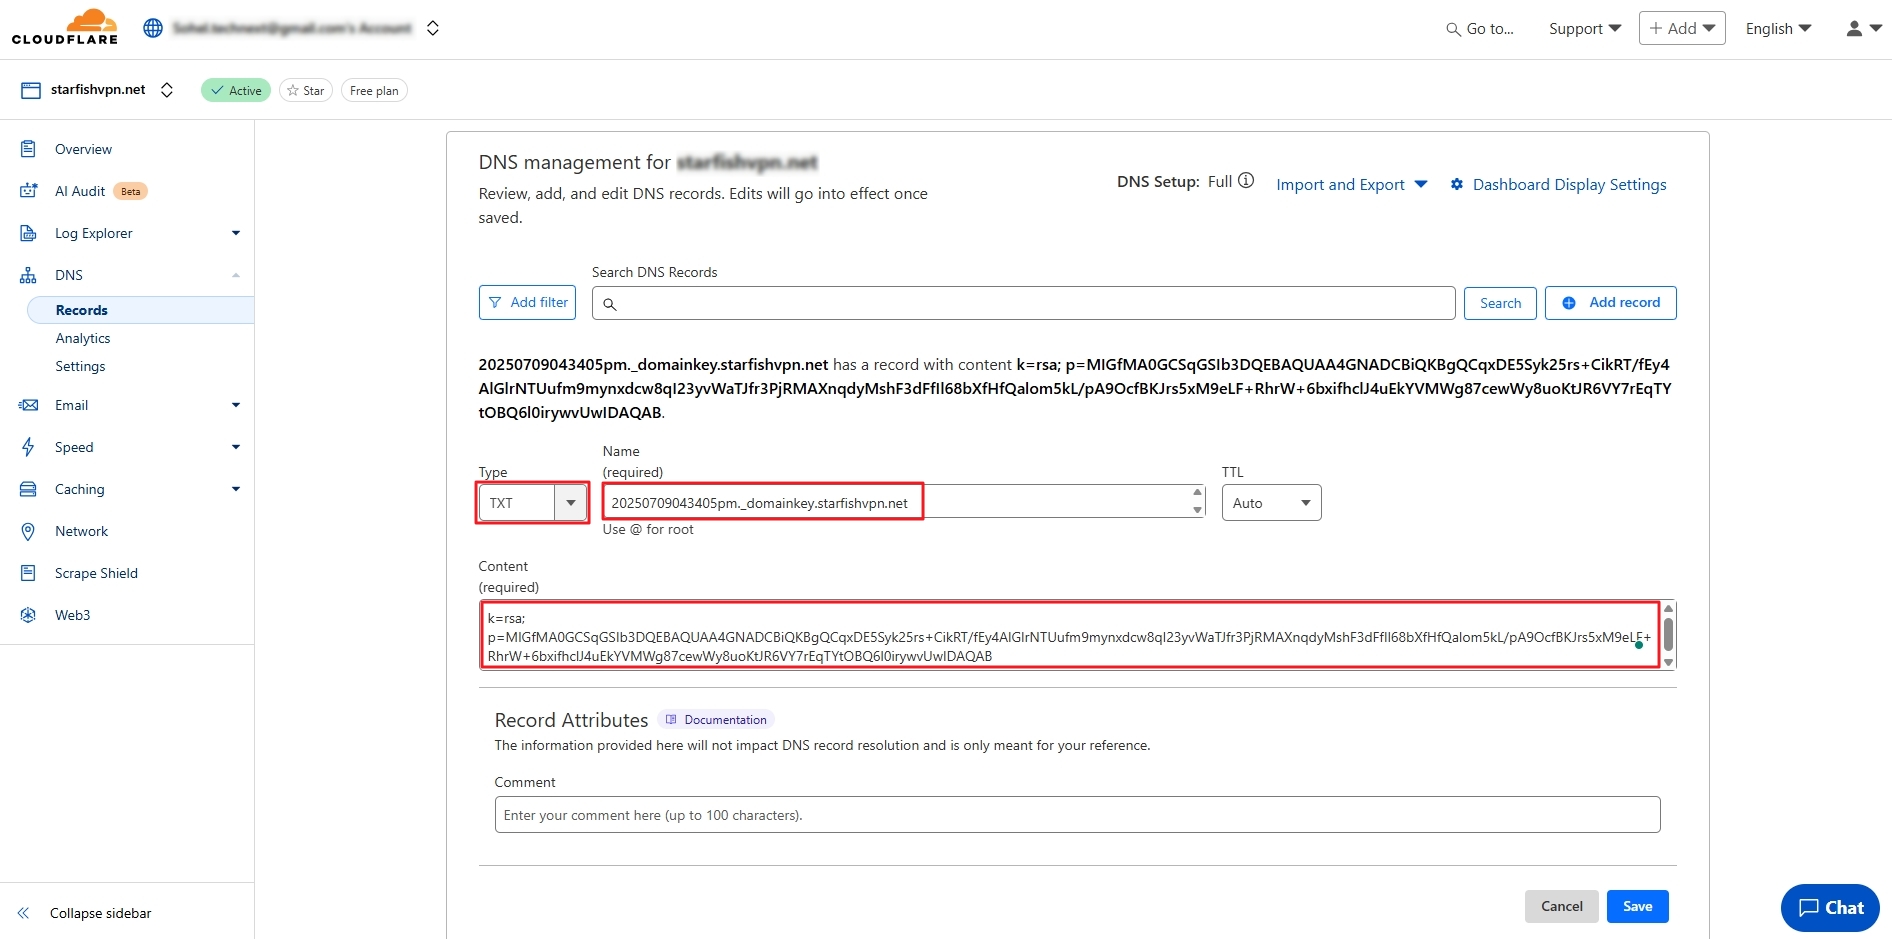
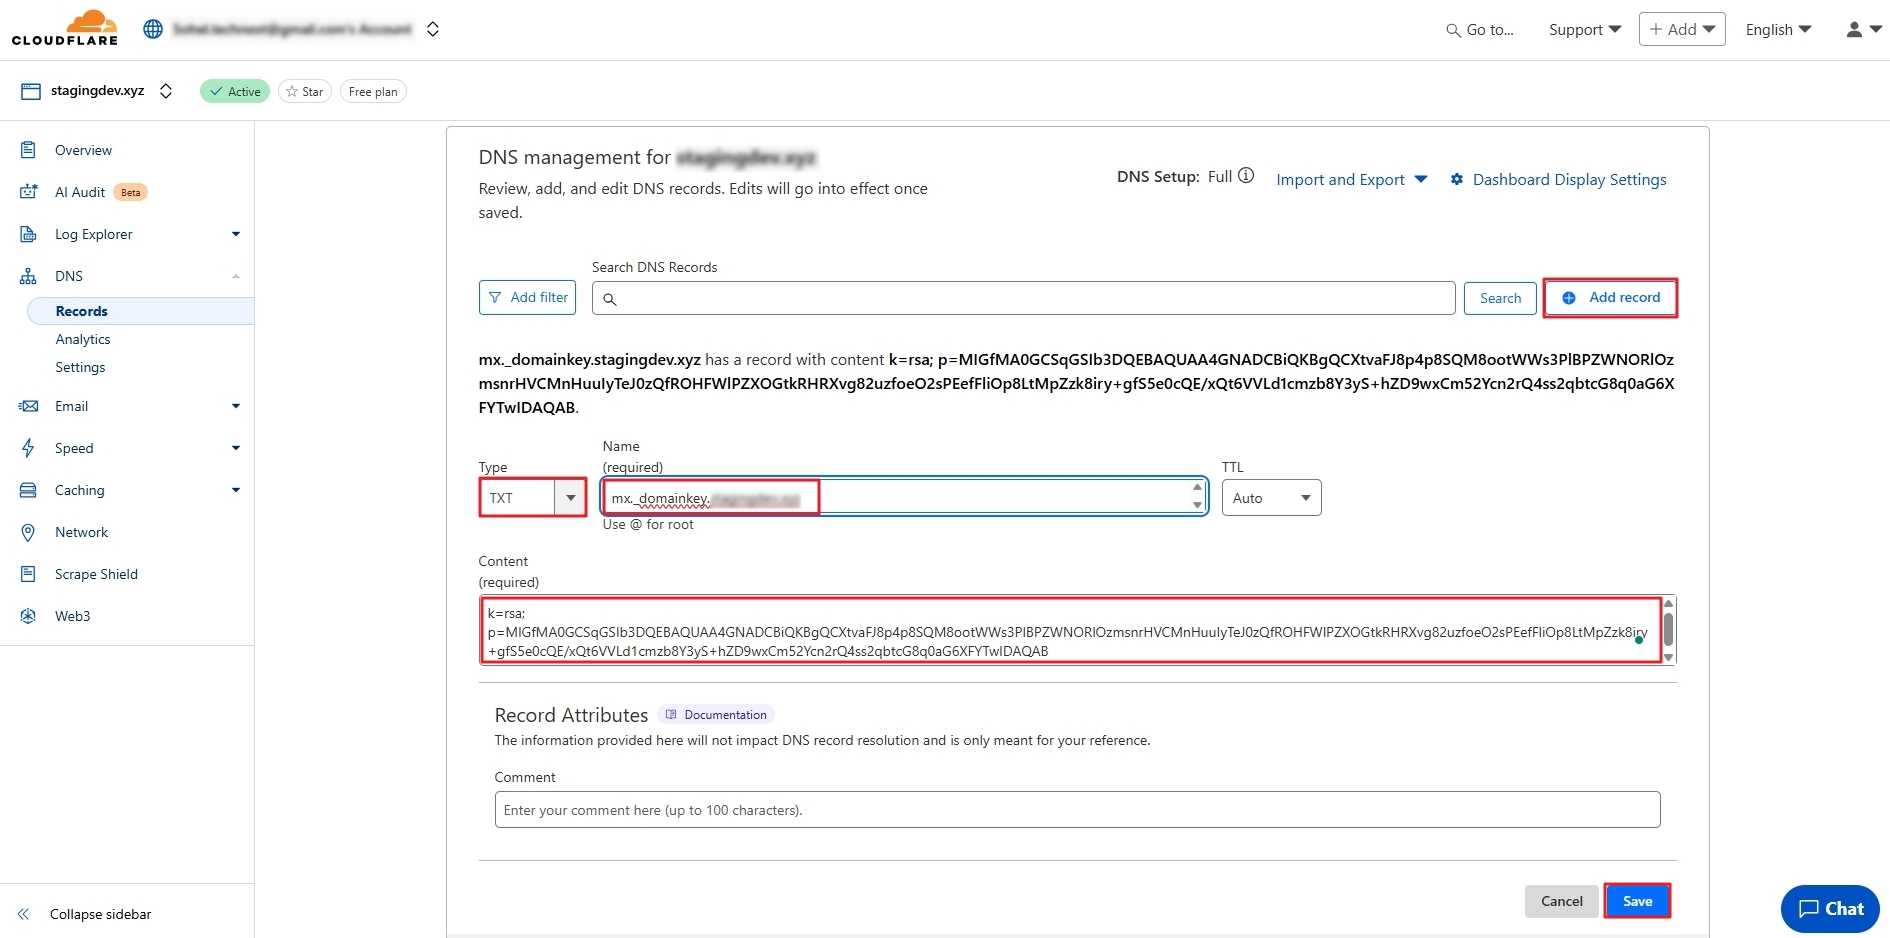
Take the DKIM, SPF, and Return-path records value from MailBluster and paste them into the DNS server by opening Add records and adding CNAME, TXT types.
Wait for a minute, and click Refresh, you will see the Verified green Success on MailBluster.
Click “Verify” on Postmark’s DNS settings, and it will display “Verified” in green. Now, Postmark and MailBluster are connected.
Now, let’s head to connect MailBluster with Mailgun this time.
Connect MailBluster with Mailgun
You can either watch the Mailgun video tutorial or follow our step-by-step process mentioned here.
Step 1: Sign in and Add your Domain
Sign in to your Mailgun account
Click on Send→ Domains and click on Add new domain in the top right corner.
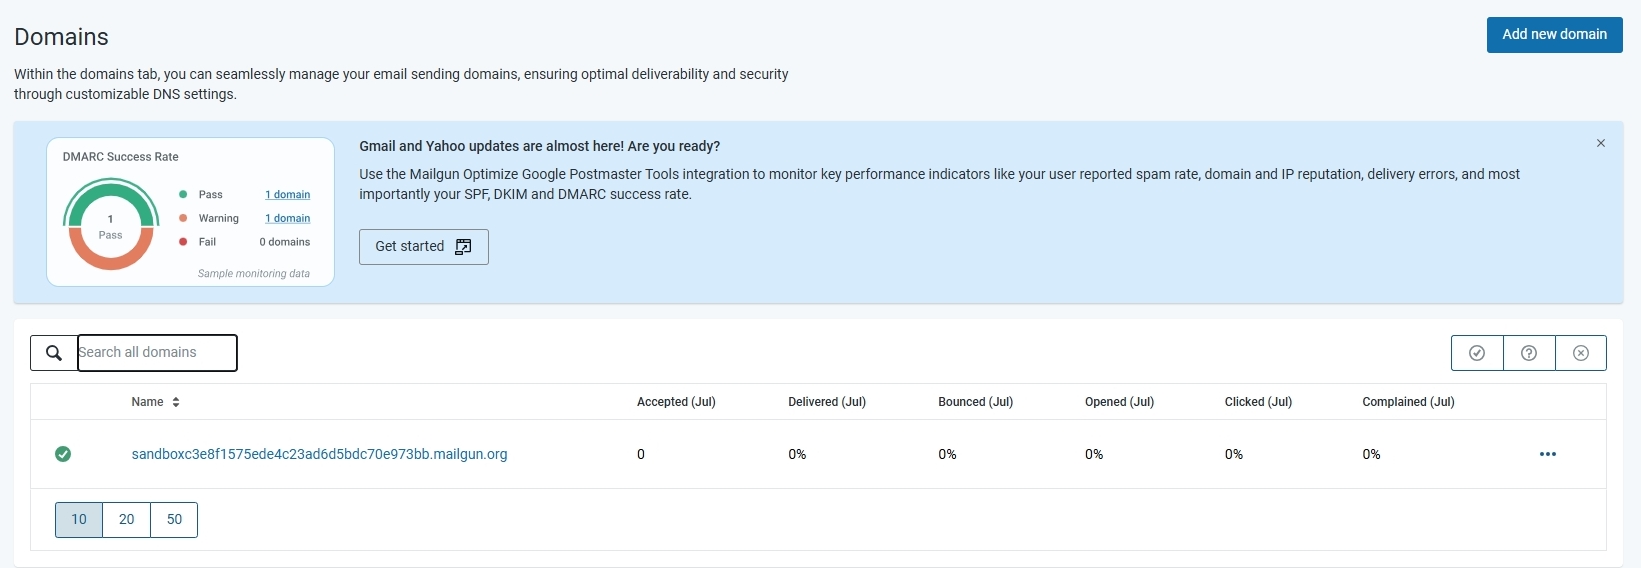
This will take you to the Add New Domain window. Type your Domain name, select Domain region, IP assignment option, and keep the Advanced settings the same as it is.
Step 2: Create API Key
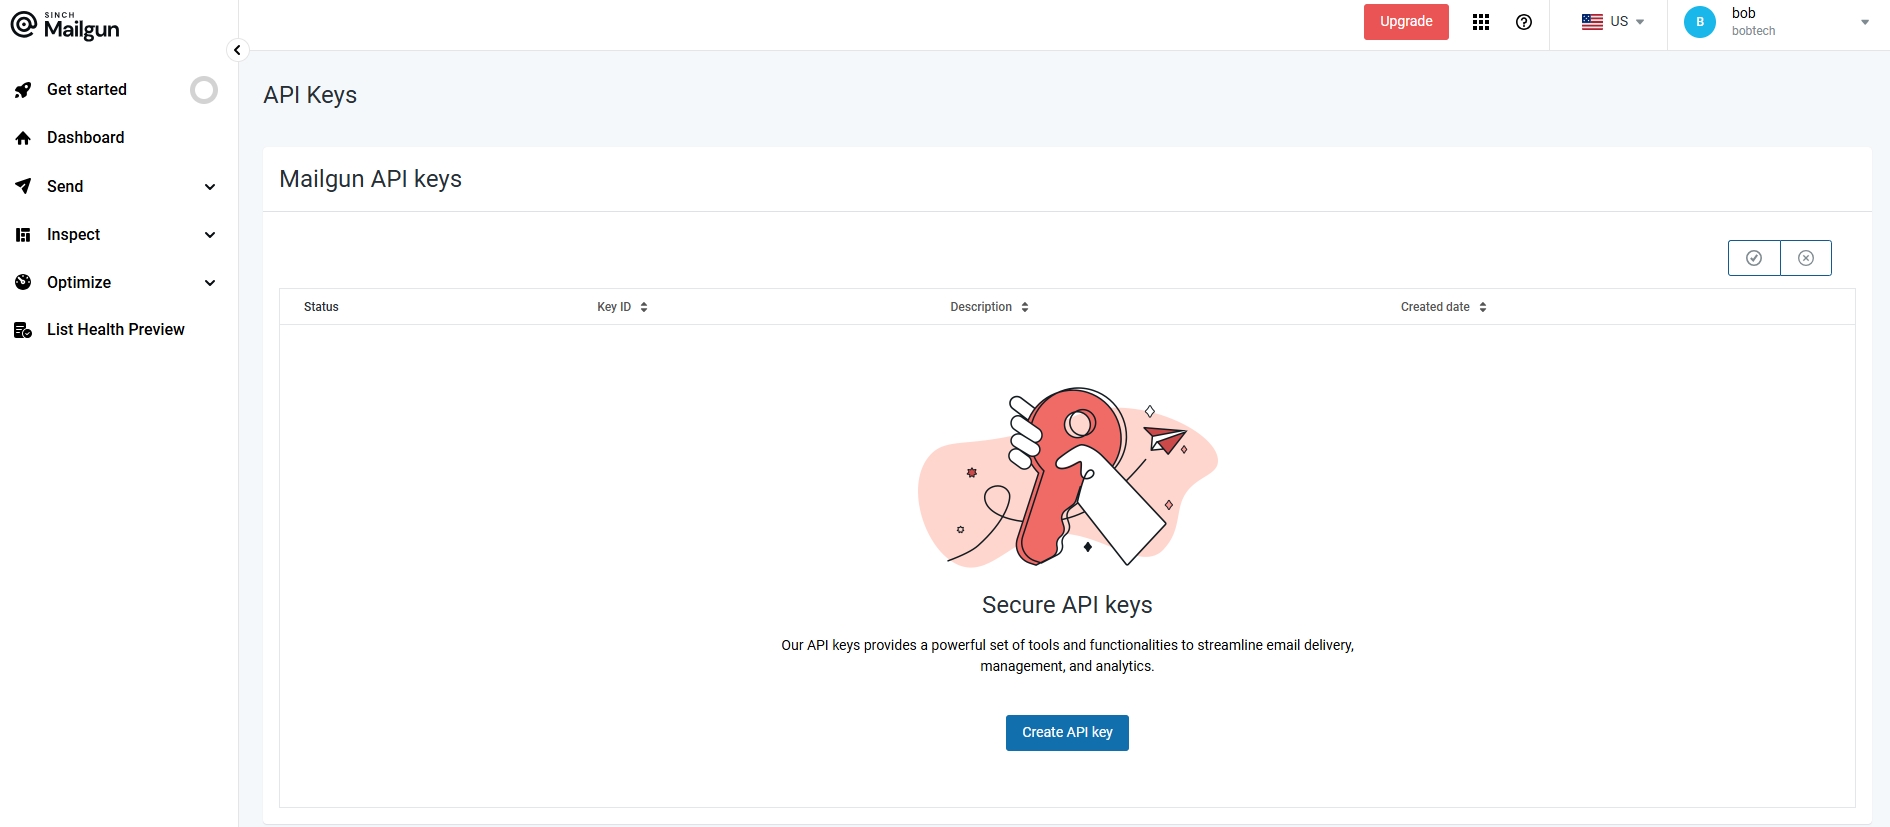
To create an API key, click the down arrow sign on your profile from the top right corner and click API Security from the dropdown.
On the API Keys page, click Create API Key, and a pop-up window will appear.
Write your suitable API Key Description there. Click on Create Key.
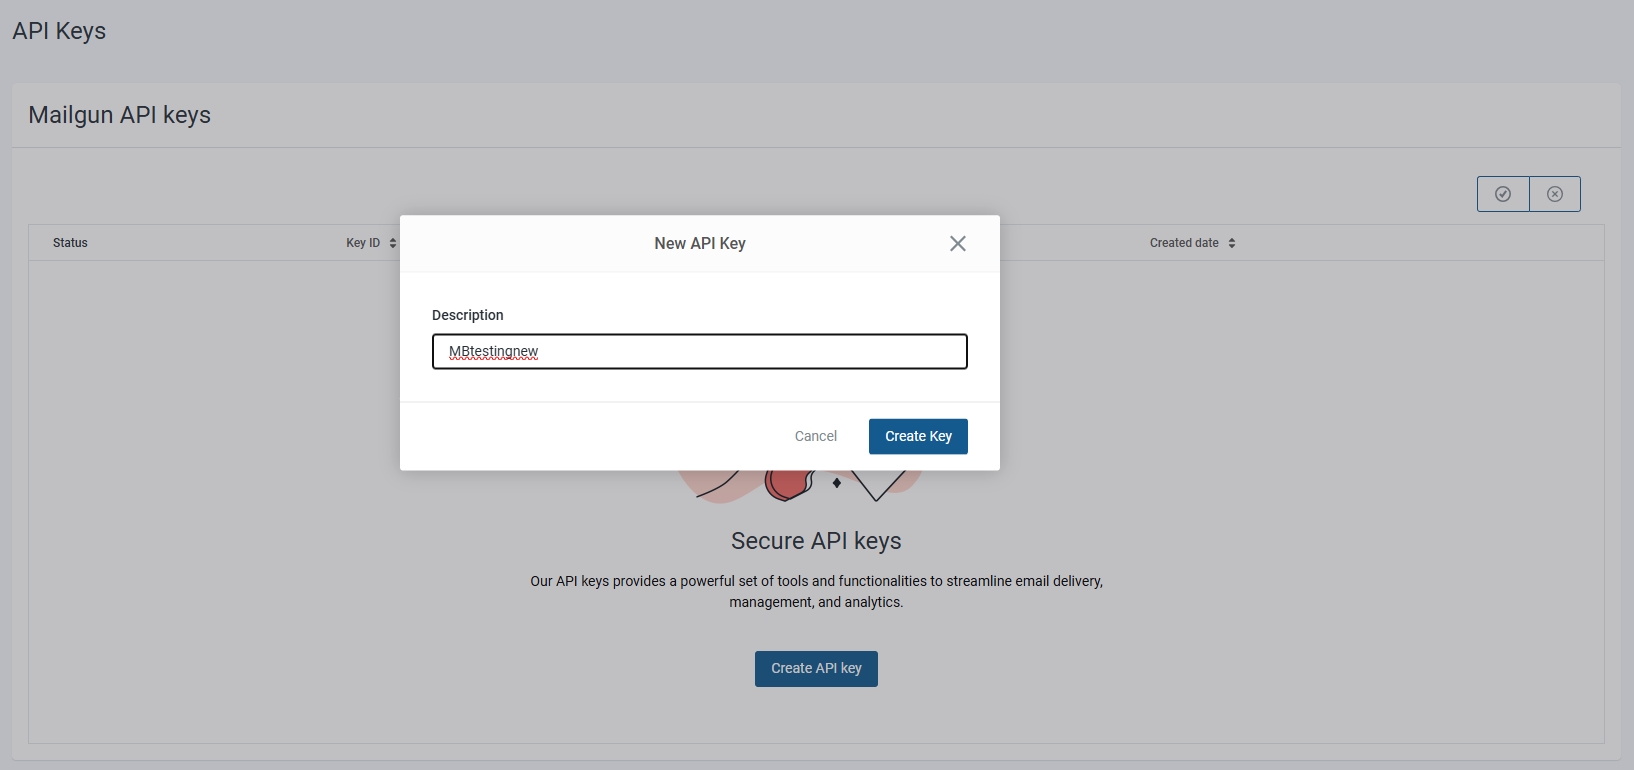
Copy the New API key
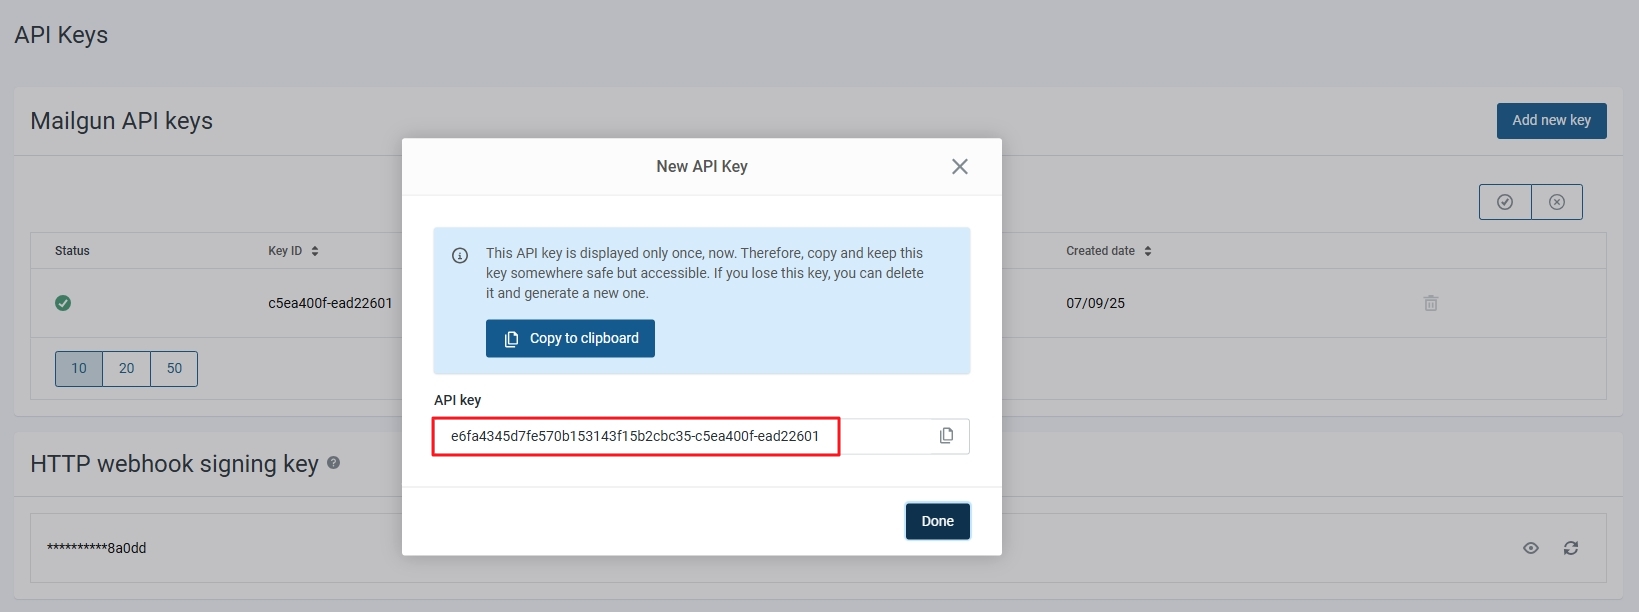
Paste it into Mailgun’s SMTP settings on MailBluster’s SMTP Providers
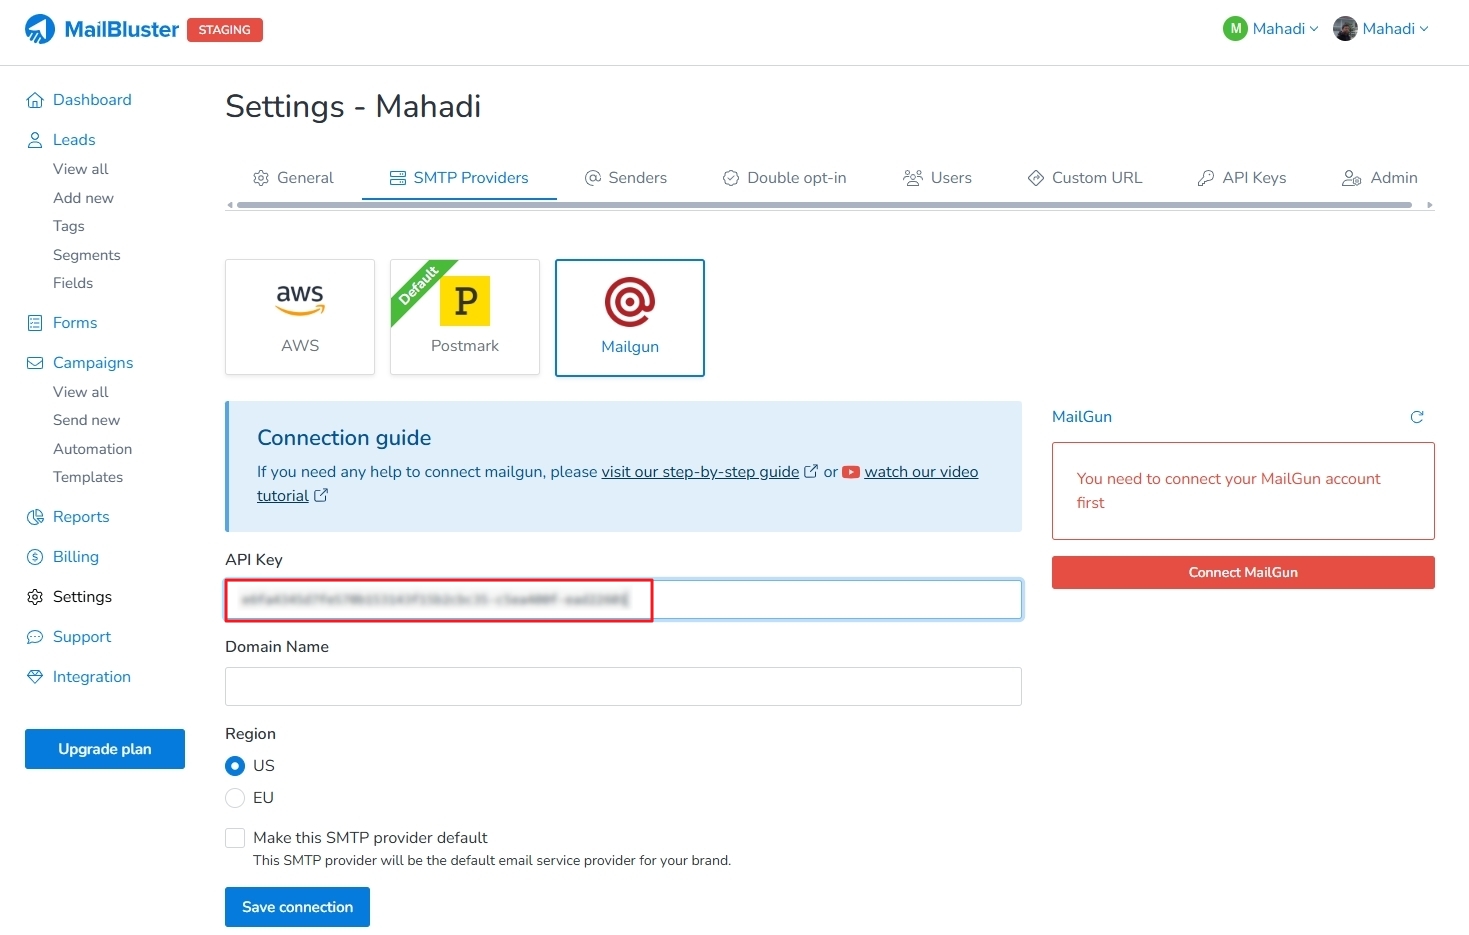
Step 3: Add Domain Name on MailBluster
Type your domain name in the Mailgun SMTP settings field on MailBluster, select the Region, and click Save connection.
Step 4: Add DNS records to DNS server
Now, go to Senders on MailBluster and select the domain you have just saved in the Mailgun settings.
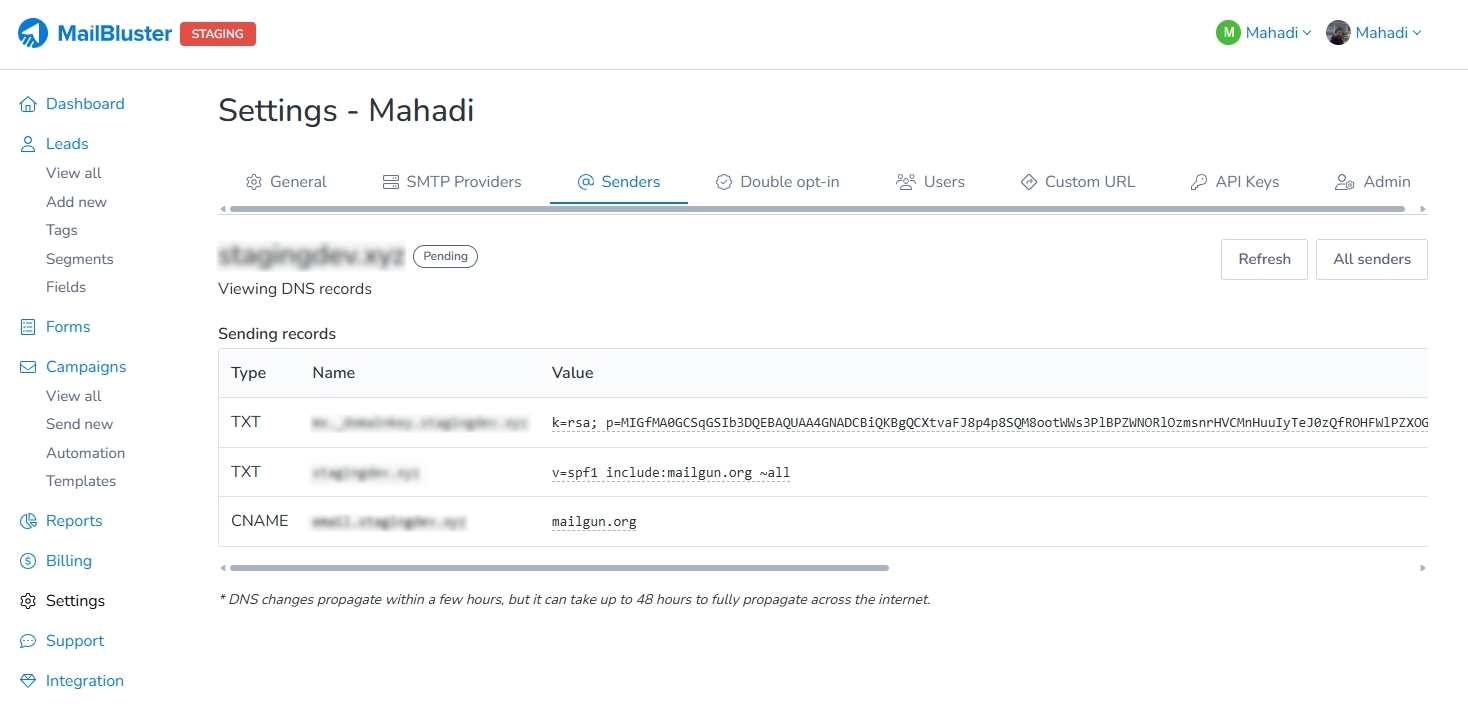
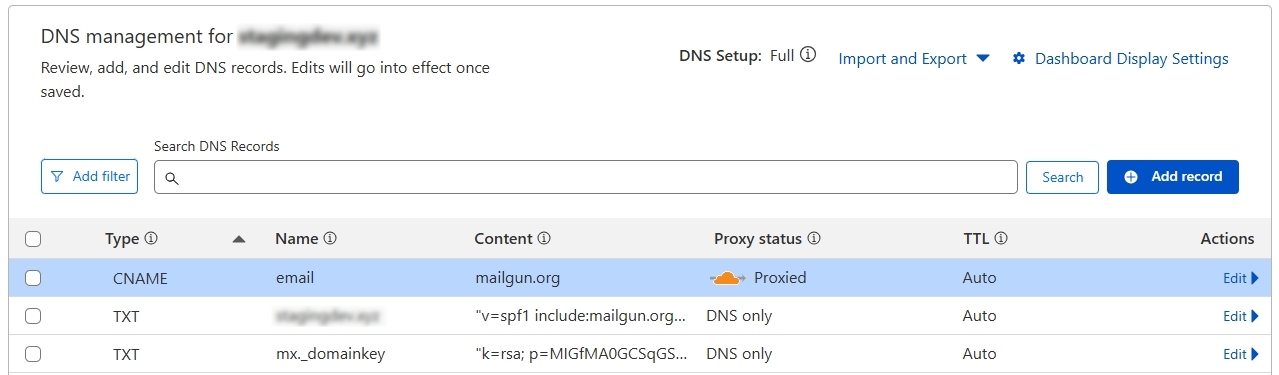
See the Sending records on DNS settings, and input all the Names and Values to the DNS server by opening the Add record. After some time, it will display ‘Success’ on MailBluster’s DNS settings.
Mailgun’s DNS records are successfully inserted into the DNS management system.
Now, go to Mailgun and select Send → Domain settings for the Receiving records, Tracking, and Authentication records.
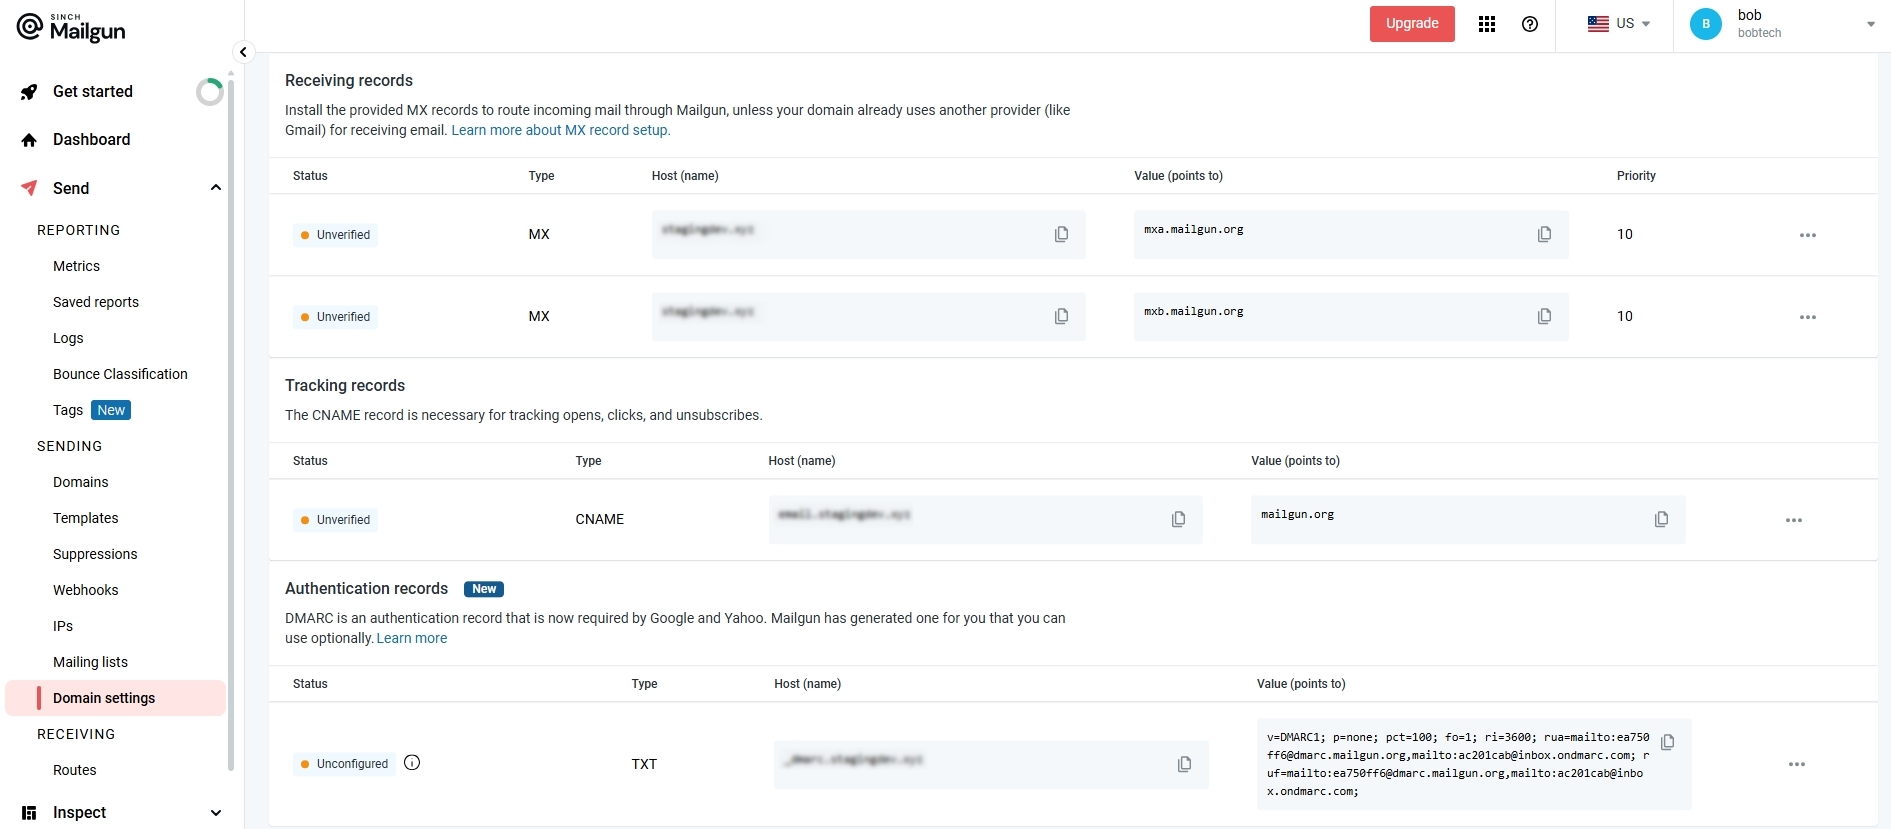
Add all the Values to the DNS server by opening the ‘Add Records‘ section in your DNS management settings.

After adding values in the DNS server, click Verify to update the status of the values. The status will display as ‘Verified’ and ‘Active’. Note that some values may take longer to verify within a short timeframe.
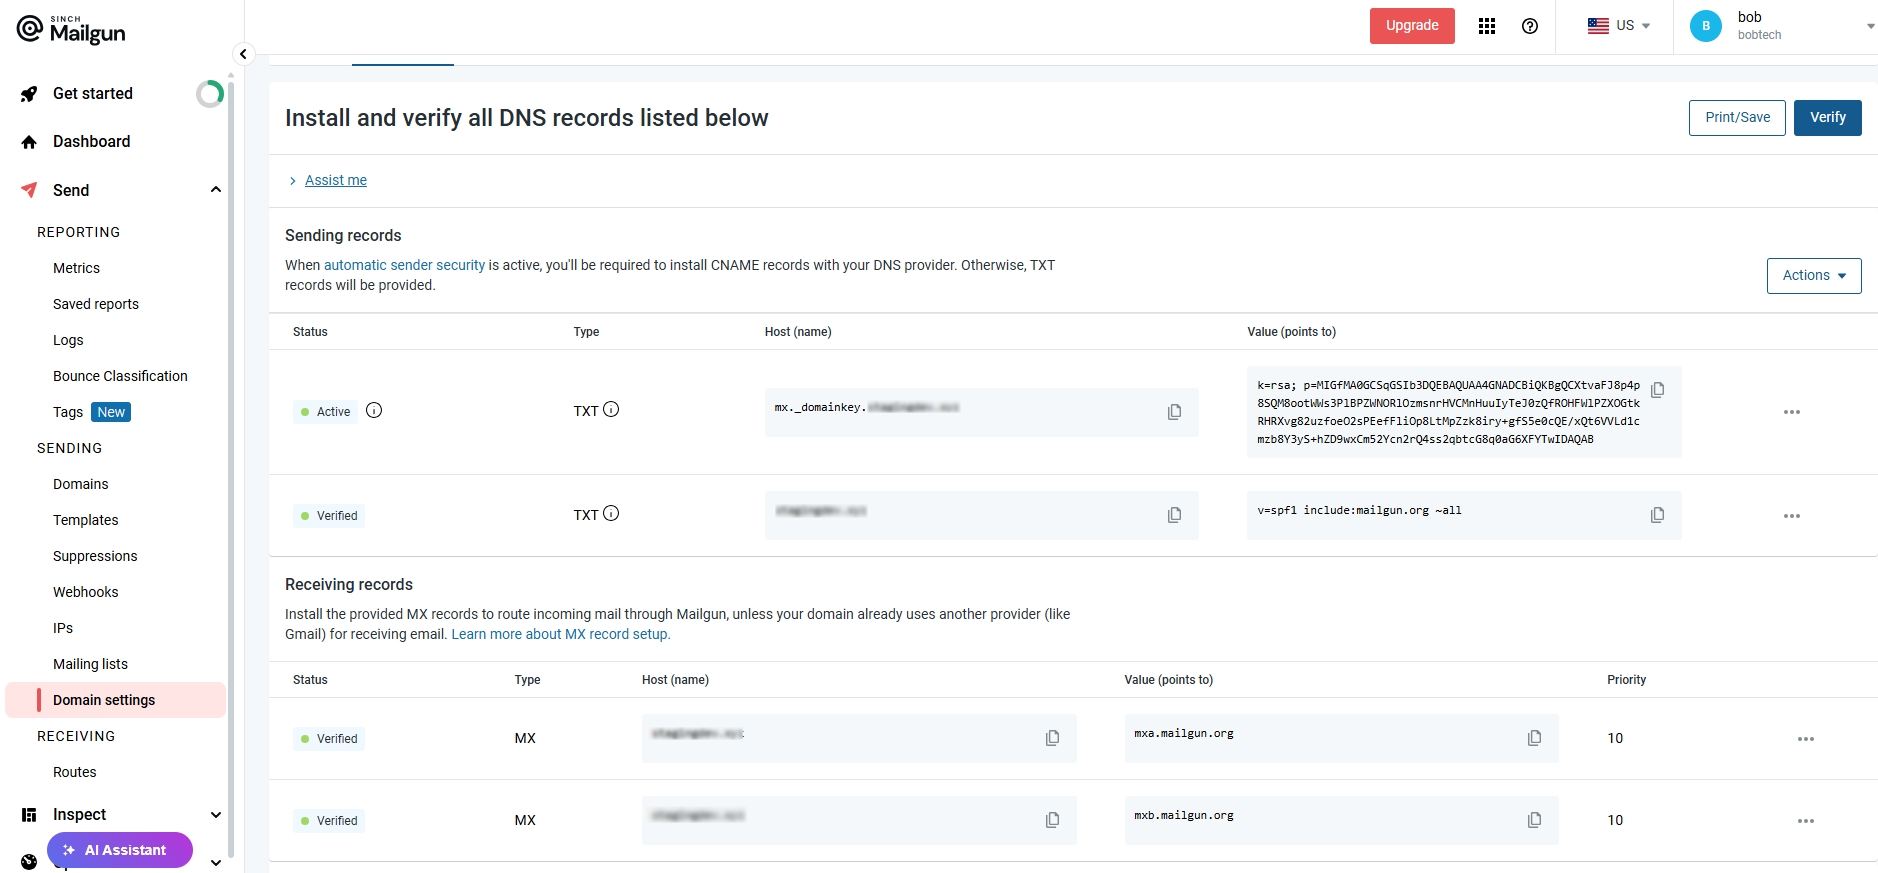
This way, MailBluster and Mailgun will be connected.
Connect MailBluster with SMTP2GO
You can either watch the SMTP2GO video tutorial or follow our step-by-step process mentioned here.
Step 1: Sign in & Add the API key
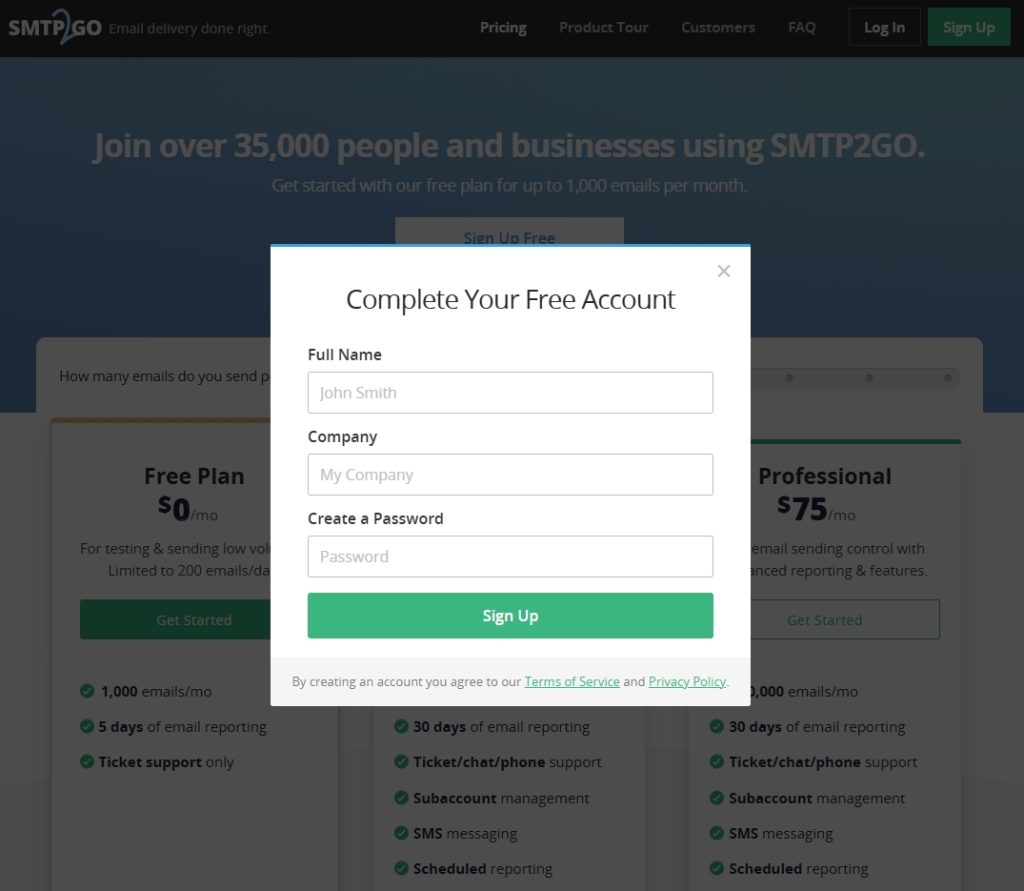
Sign up on the SMTP2GO website. Go to the homepage and click on Sign Up. Fill in your work email and continue.
A pop-up appears, fill in the Full name, Company, and Password fields. Click Sign Up.
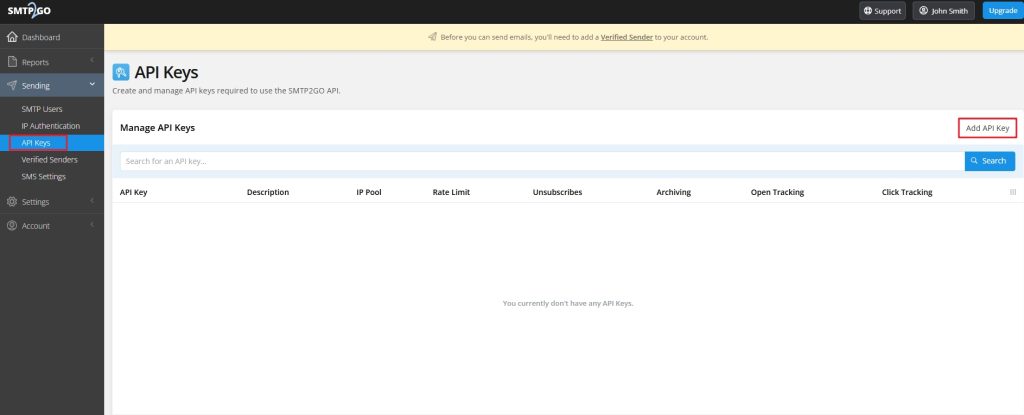
Next, sign in using your email and password, and click on Sending>API Keys>Add API Key.
A new window will appear. Here, you can create an API while modifying the different settings. Check the necessary Permissions, Tracking & Status in the Add API Key box and click on Add API Key. API Key is created!
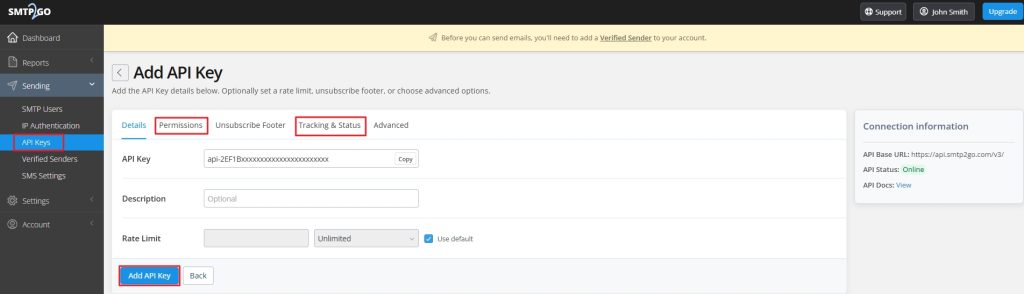
Now, copy the created API Key by clicking on the small Copy button.

Sign in to MailBluster account and go to Settings>SMTP Providers>SMTP2GO. Paste the API Key and click Save provider.
Step 2: Adding Verified Senders
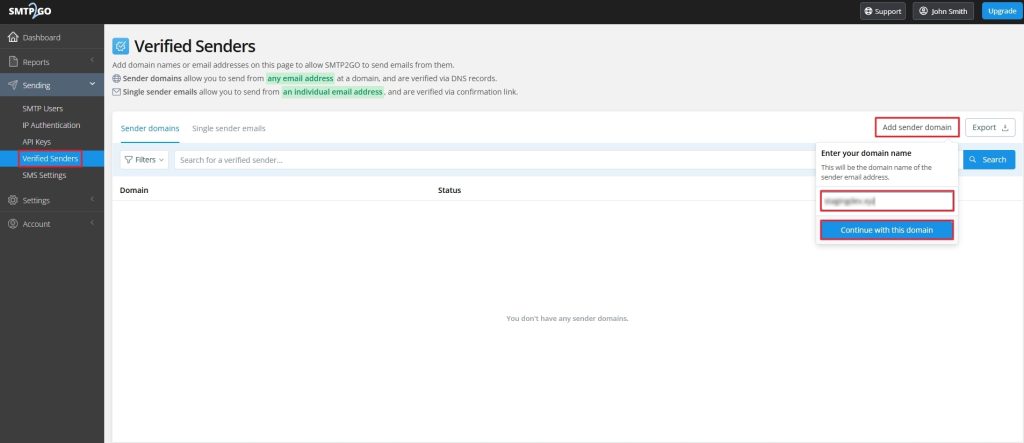
Go back to SMTP2GO. Click on Verified Senders>Add sender domain>Enter your domain>Continue with this domain.
Step 3: Adding DNS records and Verify
Now copy all the values and set the records to your DNS provider (e.g., Cloudflare, Namecheap).
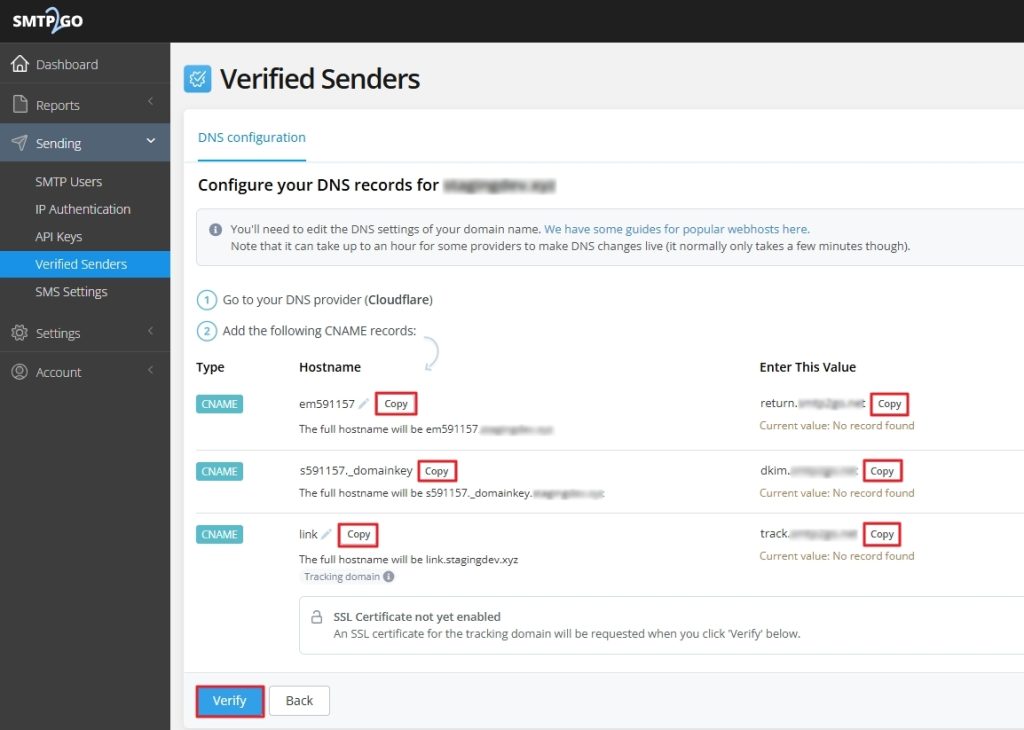
After adding all the values to the DNS records, click on Verify, and all the values will show a green tick.

Step 4: Check DNS records on MailBluster
Go back to MailBluster and go to Settings>Senders>vertical three dots ellipsis under your domain>View sender.
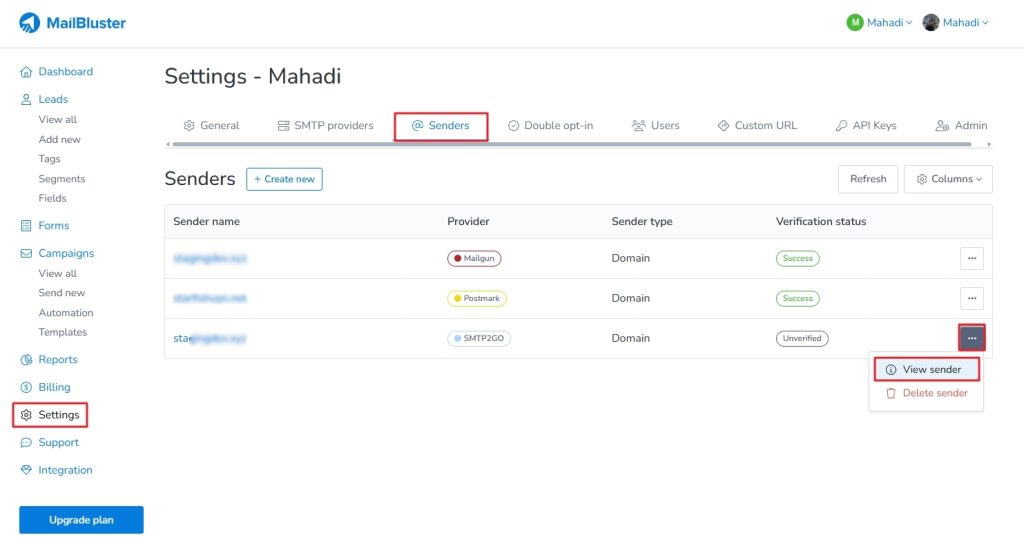
Click Refresh. All the records will show Verified & domain shows Success. Remember that Tracking records will take some time to show the Verified status.
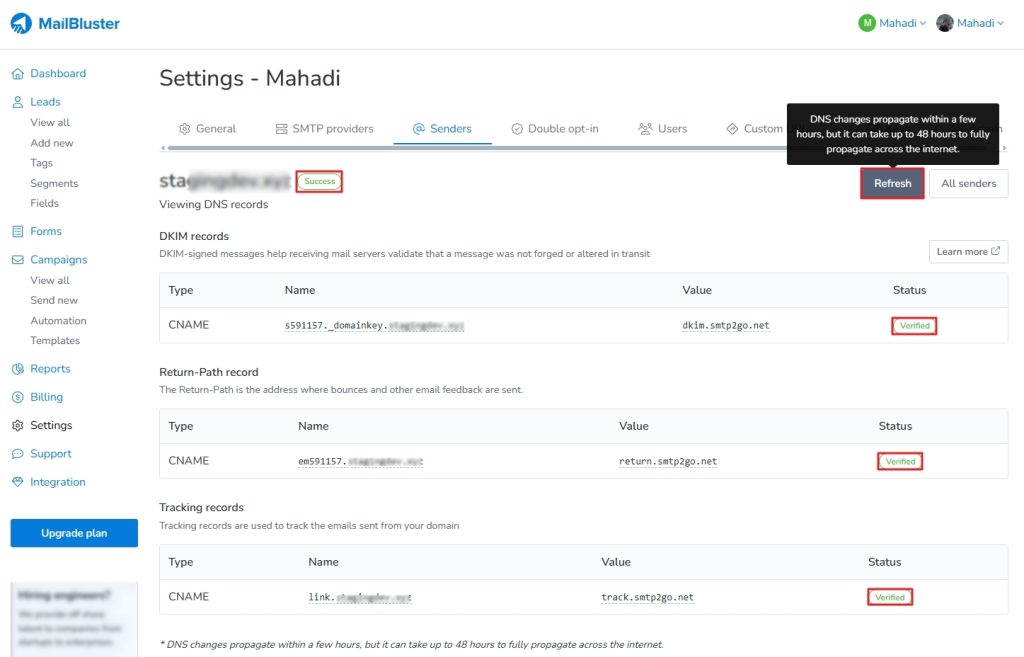
Now, MailBluster and SMTP2GO are connected!
If you have difficulty getting the Verified status, go back to your SMTP2GO account>Sending>Verified Senders>click Verify. This will assist you in getting the verification status on MailBluster.
Wrap Up
Connecting MailBluster with Postmark, Mailgun & SMTP2GO might seem daunting, but it doesn’t take much technical expertise to work on the connection. Just follow this tutorial and input all the records systematically into the DNS server. For more assistance, you can follow the help section on MailBluster or contact MailBluster support.