Automation has become an integral part of running any business more efficiently. For an online business, it is crucial to use automation tools as much as possible and wherever possible to save time and money.
Any little manual time and effort you save adds up and contributes massively to the overall improvement in the revenue. However, choosing the right automation tool to automate tasks and workflows is essential. The wrong tool could do more harm than good for your business.
For small to medium-sized businesses that want to automate the tasks, it is vital that the tool should be easy to use. Also, setting up the automation process should be simple without spending much time on it.
Currently, there are more than 300 apps available in Integrately to connect and build automation workflows. More apps are consistently added, and you can request the apps based on your requirements.
All the majorly known applications in the widely used categories like CRMs, Email Marketing, Project Management, Forms & Surveys, Website & Funnel Builders, etc. are available in Integrately. The apps are also categorized so you can find the specific app you want to connect to.
As soon as you select an app, you get to see the list of all the available integrations. This makes it very easy to get a good view of all the workflows you can build for the app of your choice.
Connecting GoogleSheet and MailBluster using Integrately is relatively easy. Here, the primary purpose is to provide MailBluster integrations for non-techies. You can combine lots of applications to MailBluster through Integrately.
After the initial sign-up process, the welcoming User Interface is refreshingly simple, neat, and easy to navigate Integrately.
Adding Leads from Google Sheet to MailBluster using Integrately
1 Login to Integrately with your credentials.

2 You will be forwarded to the following screen after signing in. Type, Google in the search app bar, then clicks to select Google Sheets. It will be set as App 1.


3 Then type MailBluster then click to select MailBluster which will be selected as App 2.

4 Now from When select the “Spreadsheet row is created or updated in Google Sheets” and then from Do select “Create lead in MailBluster”. Then click Go.

5 Processing starts and the following screen appears to show the progress.

6 Now Integrately asks for permission to access Google Sheets. Click Continue.

7 Sign in to your Google Account. And tick all the checkboxes. Then click Continue.
8 Prepare a Google Sheet with the following header: First Name, Last Name, Email and Subscribed especially made for the MailBluster Leads. Follow the format and you will be able to upload leads in no time.
Google Sheet Link for sample leads: Sample Leads for MailBluster.
So that you know, the Subscribed column should be either TRUE for subscribed or FALSE for unsubscribed customers.
9 A set of new input options will appear. Select the Spreadsheet which contains your Leads. Click on your Google Sheet from the Select option.

10 Select Worksheet and click on Sheet1 from the Select option.

11 Select Column and click on All Column from the Select option. Then click Continue.

12 Integately processes for some time.

13 Integrately asks for an API key from MailBluster.
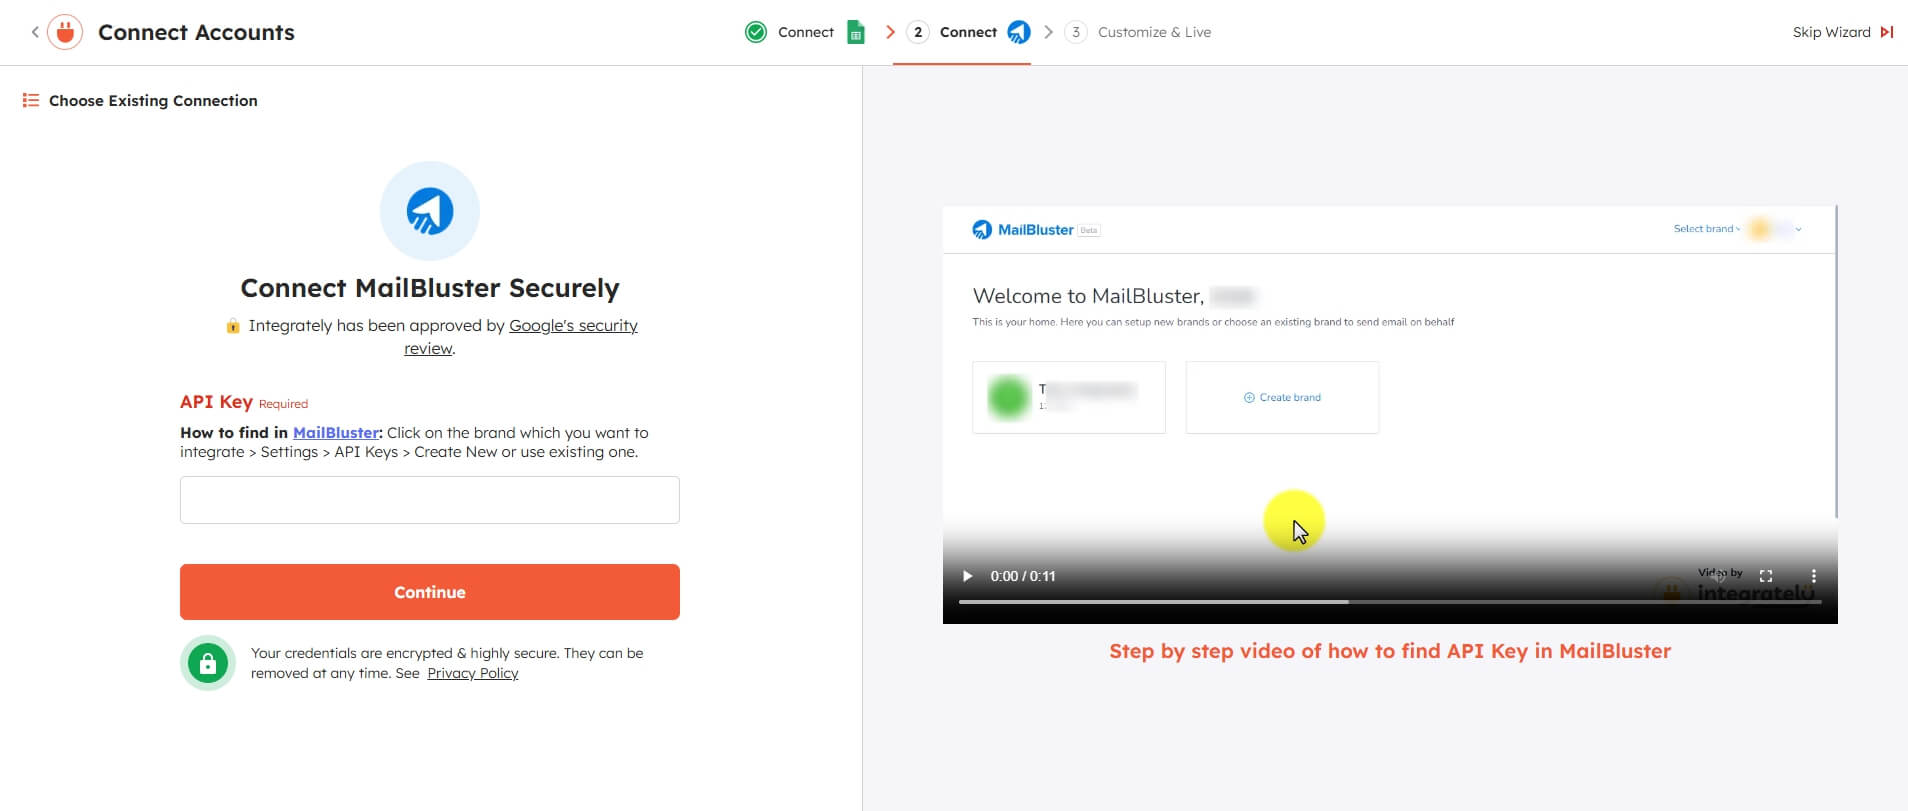
14 Go to MailBluster > Brand > Settings > API Keys and generate a new key by clicking Create new.
15 Enter the API key name. Then click Create API key to generate.
16 Copy the generated API Key value by clicking Copy.
17 Paste MailBluster API key here then click Continue. Wait for the Authentication successful message to appear.
18 Your Automation is Ready message pops up. If you want to add more apps, conditions or branches then click Yes otherwise click No.
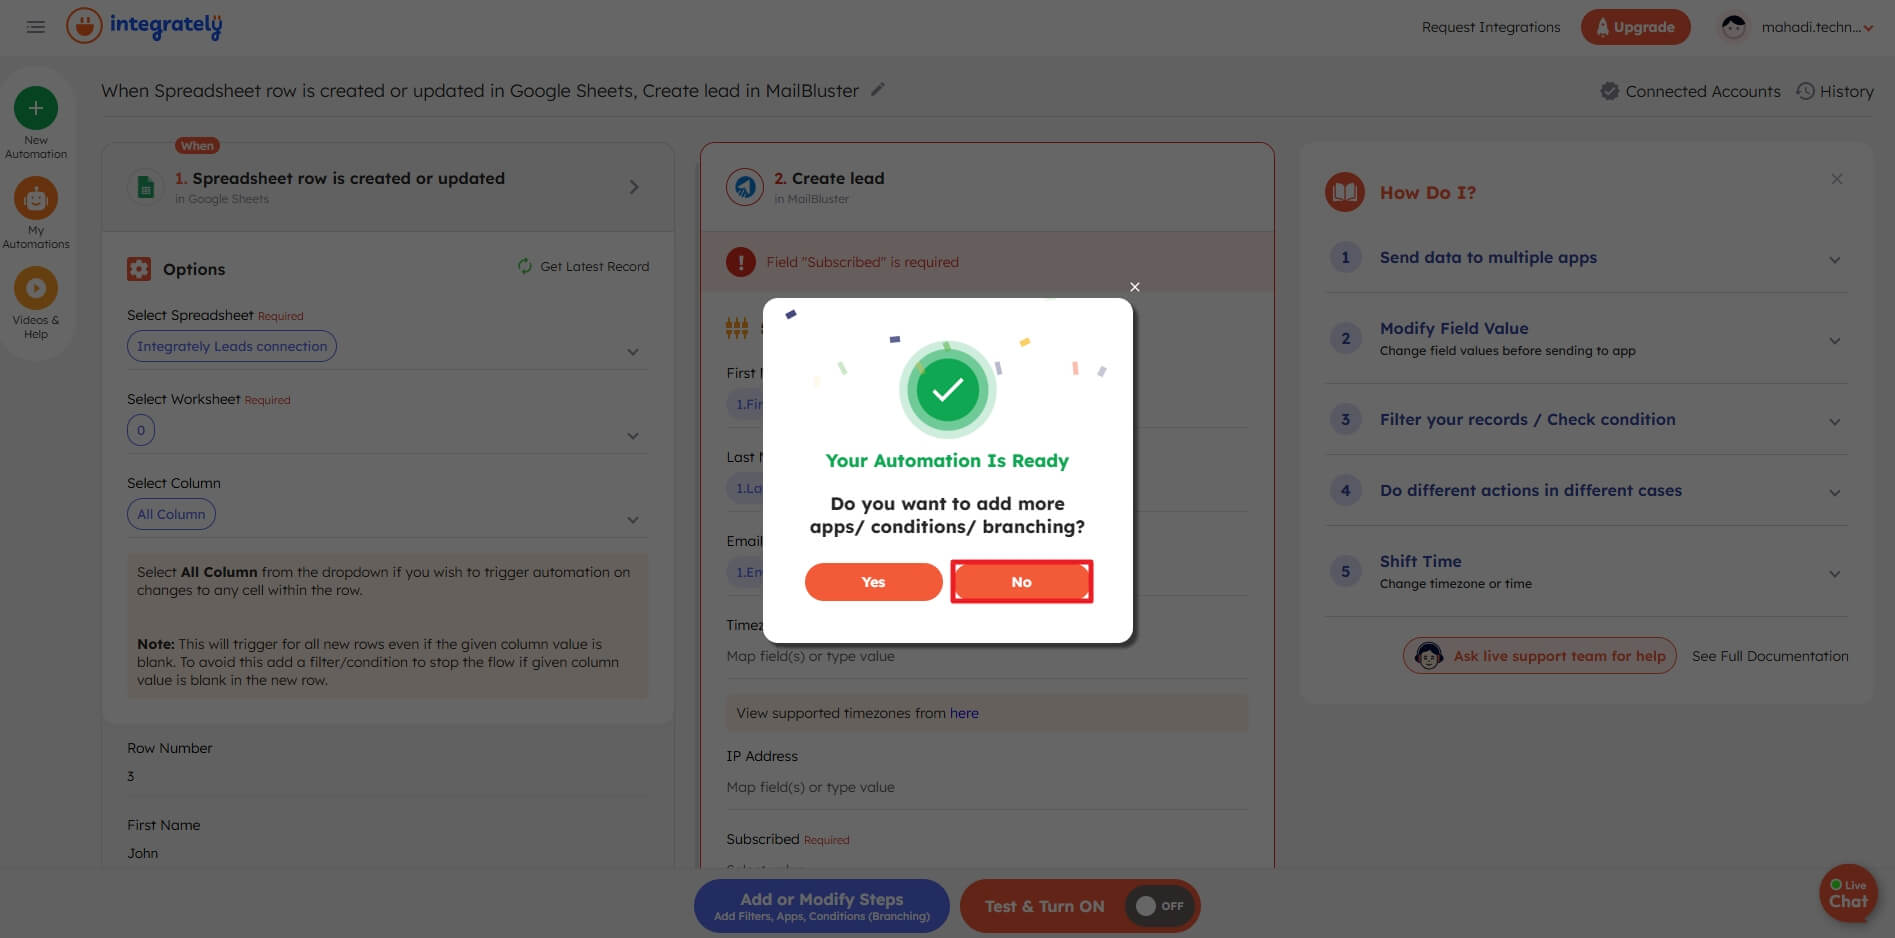
19 You’ll be prompted with this screen. Be sure to click Refresh Data in “Spreadsheet row is created or updated in Google Sheets”. Then Refresh fields in “Create lead in MailBluster”. If the fields are failed to populate then manually go through the numbers as shown below and set the data sequentially. Be sure to select Override Existing to Yes.


20 Now select the Subscribed field from Create lead in MailBluster.On the right side, a pop window will appear. Select Map Field. Click on below the Subscribed to populate the field Subscribed of Create lead in MailBluster.

21 Now click on Modify Data Value and a new window will pop up.

22 After the Modify Data window pops up, click on Change to lower case.
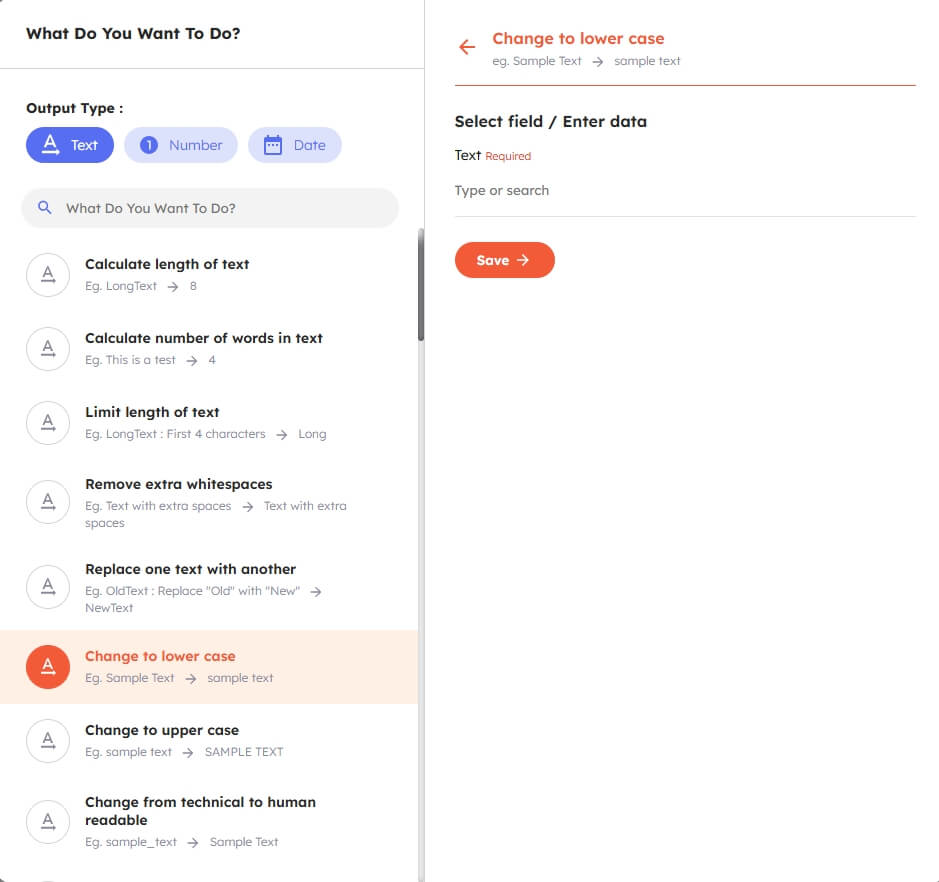
23 Click on the Map field, then Subscribe, & Save.


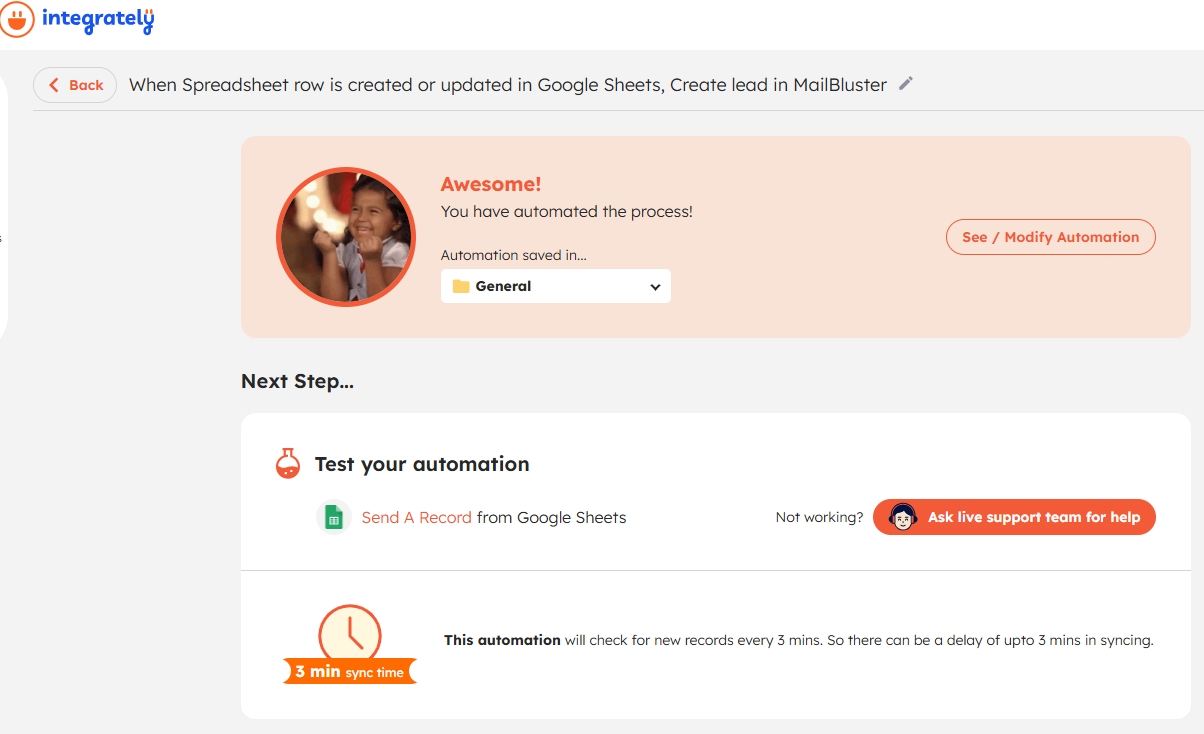
24 Now Click on Test & Turn ON to verify the changes in the automation process.

25 The following message: You have automated the process! will appear if everything is done correctly showing that the whole automation process has been configured successfully.
26 Now you are all set. Check whether the process is working properly or not. Simply go to your Google Sheet and enter the data under First name, Last name, Email and Subscribed as shown below.
27 Then Sign in to MailBluster, select the Brand for which you have set the automation. Then click on Leads and check. As you can see 2 New leads have been added in MailBluster while inputting the data in Google Sheets. The old one which was inserted in the Google Sheet before automation is not added.
Conclusion
Integrately is an excellent tool for automated workflow between MailBluster and Google Sheets. It supports other integrations with MailBluster as well. There is a short description available on each of the apps with a one-click workflow and what you can accomplish with it through connecting with Integrately.
Also, if you own a SaaS tool for yourself, you can request to add it by submitting a form.



 Contents