


This comprehensive guide will delve into the intricacies of AWS-Email-Domain-Verification, providing step-by-step instructions to help you easily navigate this process.
It’s worth mentioning that there are two main types of identities that you need to verify in AWS. The first is email or domain identities, which confirm that you own it and help prevent unauthorized use. Another one is IAM identity, which confirms that it is a legitimate user or entity and helps prevent unauthorized access, especially when there are multiple users, groups, or roles you use to access AWS resources.
You can easily deal with the first one by getting assistance from this guide. If you want to create and verify an IAM user in AWS, click here.
For more on AWS security, read this blog.
How to Verify Email and Domain in AWS?
Validating email address identity and conducting AWS SES domain verification is paramount for security. It guarantees authorized access, minimizes risks, and safeguards sensitive data, fortifying your AWS environment against potential threats and unauthorized access.
Here is a video guideline to help you verify your email and domain as Amazon SES identity.
For more details, just keep reading.
Email Identity Verification
You can simply start using MailBluster by creating an AWS account and connecting with MailBluster, and then verifying your email address for Amazon SES.
Here are four simple steps for your email verification process.
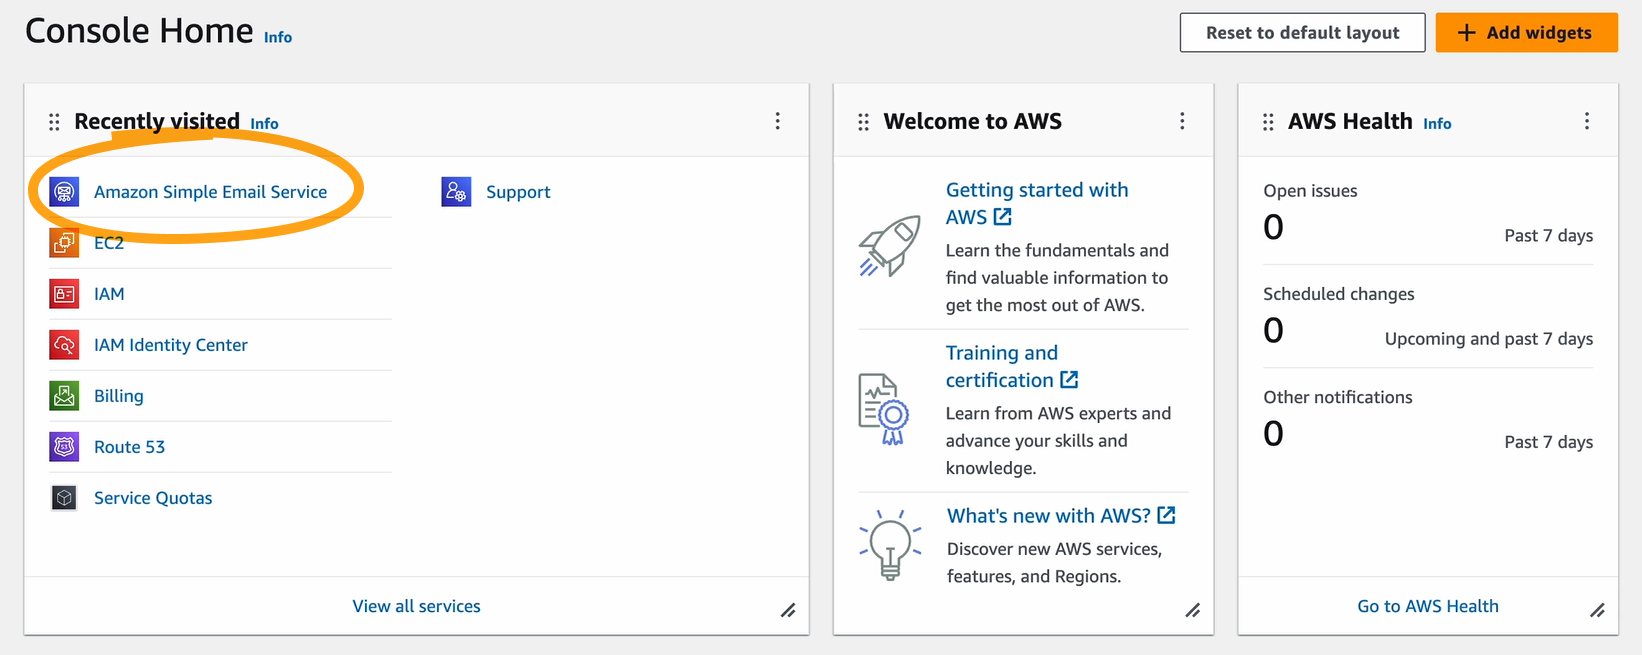
1Navigate to AWS
Upon creating your account, go to your console home. Click on “Amazon Simple Email Service,” as depicted below.
2Click “Create identity” and Choose “Email address”
Next, access the “Verified Identities” section in the left menu, as shown below. Click the “Create Identity” button on the right side.
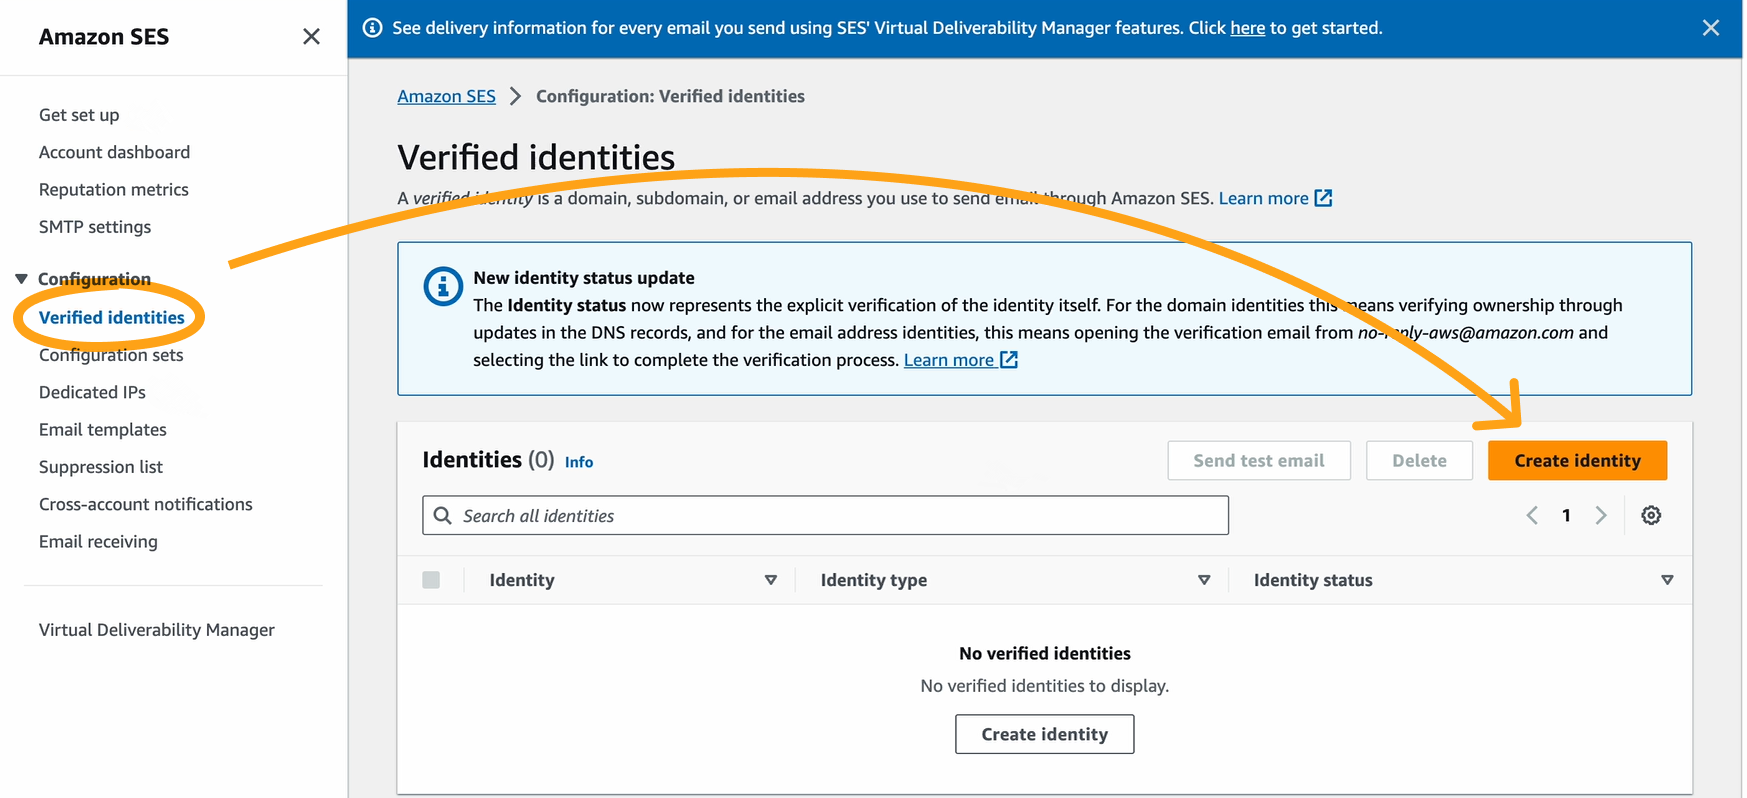
The identity details page will then appear.
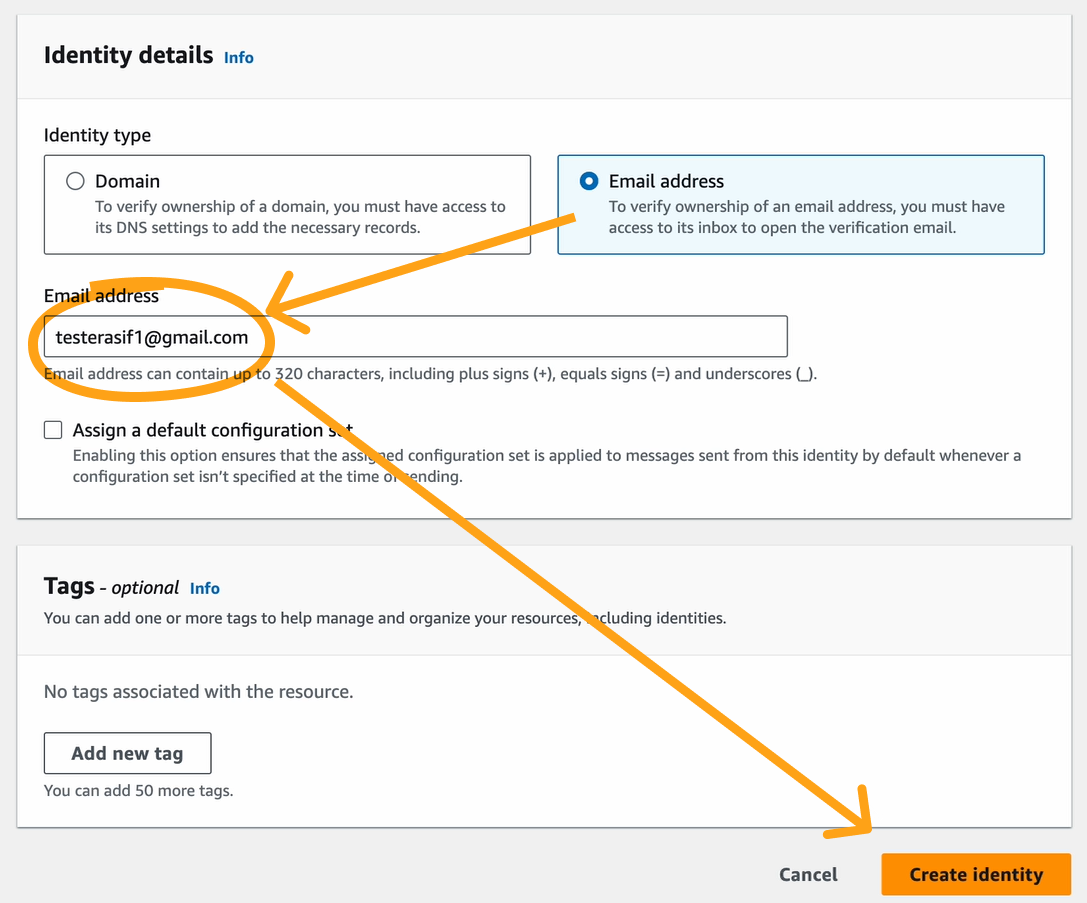
3Insert Email
Select “Email address” and enter your email in the designated field below. Click the “Create Identity” button at the bottom right.
Receive a notification as shown below.
4Check Your Email for Verification Link
Receive a mail including a verification link from AWS, as depicted below. Click the link to complete the process.
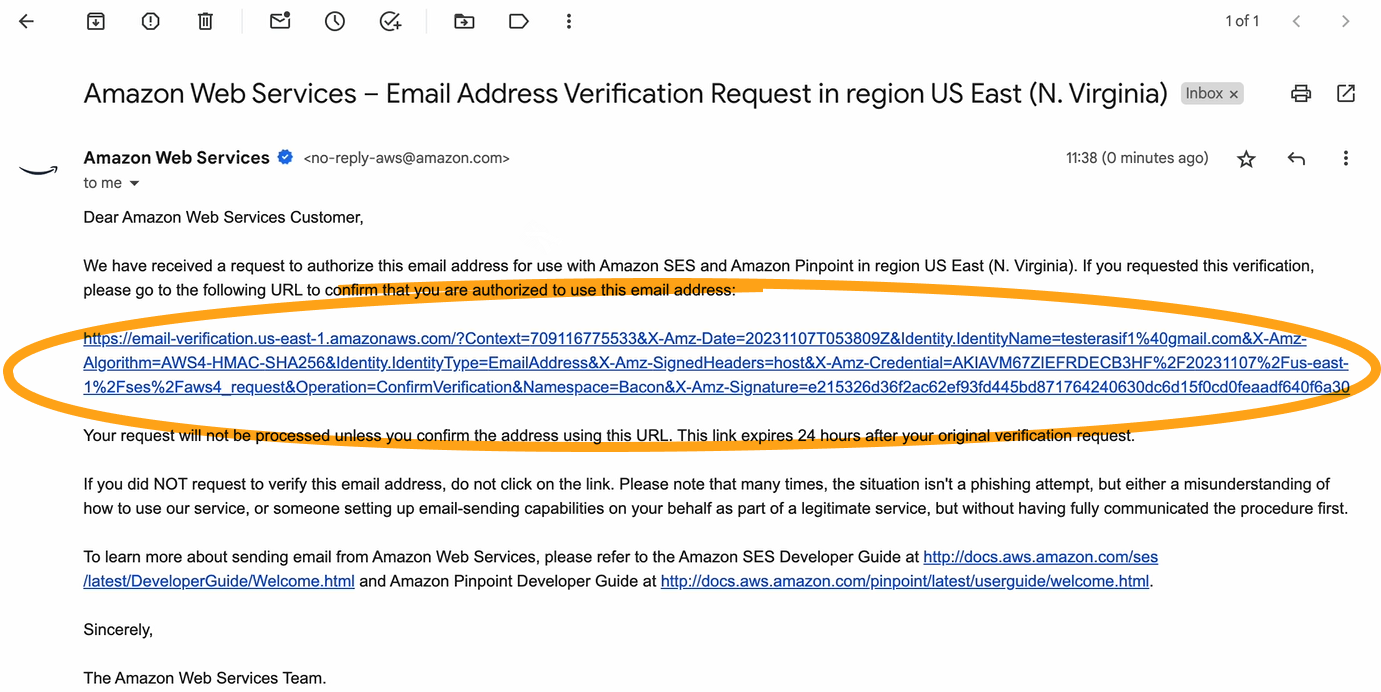
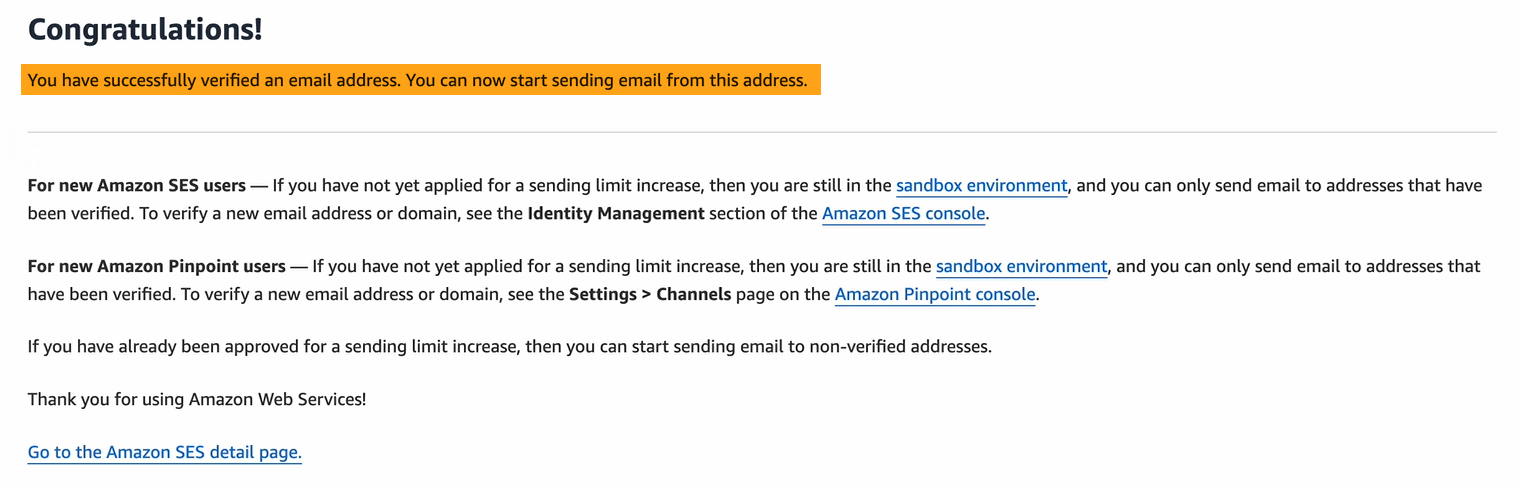
And voila, your email address is verified!
AWS SES Domain Verification
Verifying your domain in AWS ensures that all subdomains and email addresses associated with it are also authenticated.
Here are 5 steps to verify your domain for Amazon SES.
1Choose “Domain” and Insert Your Desired One
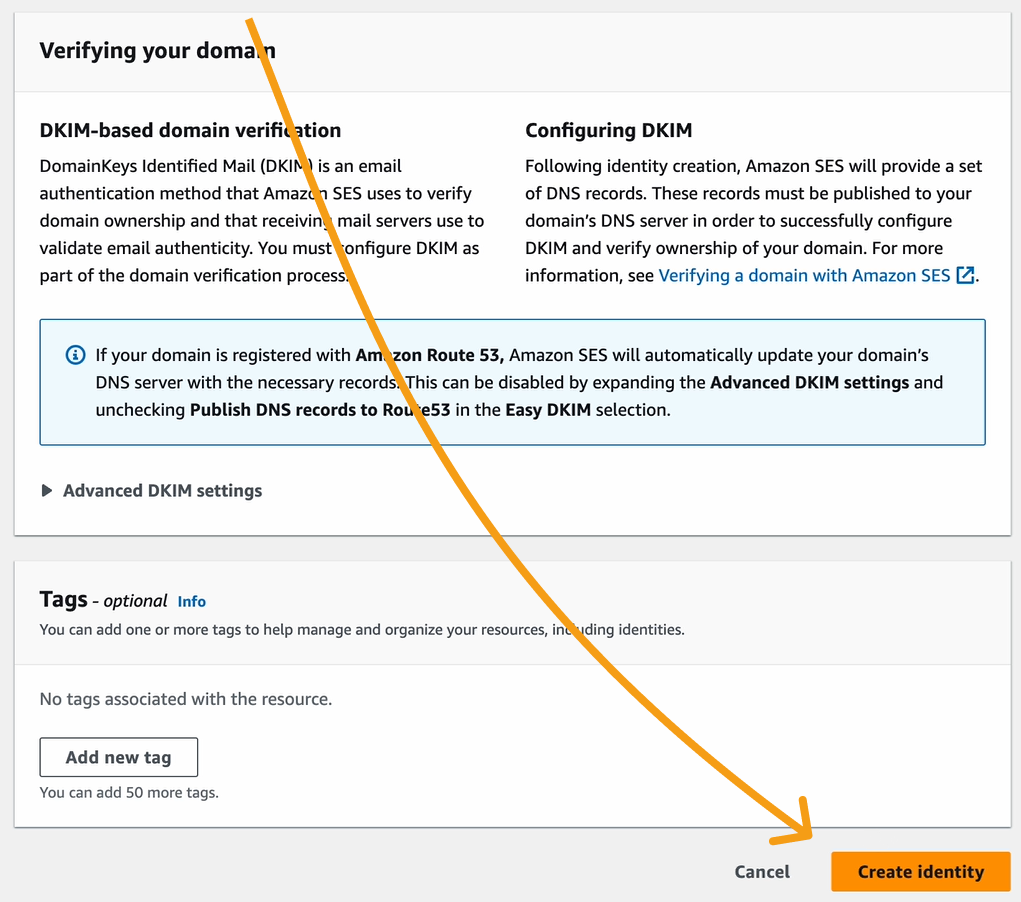
Begin by selecting the “Domain” section within the “Identity details” of the “Create Identity” page. Enter your domain.
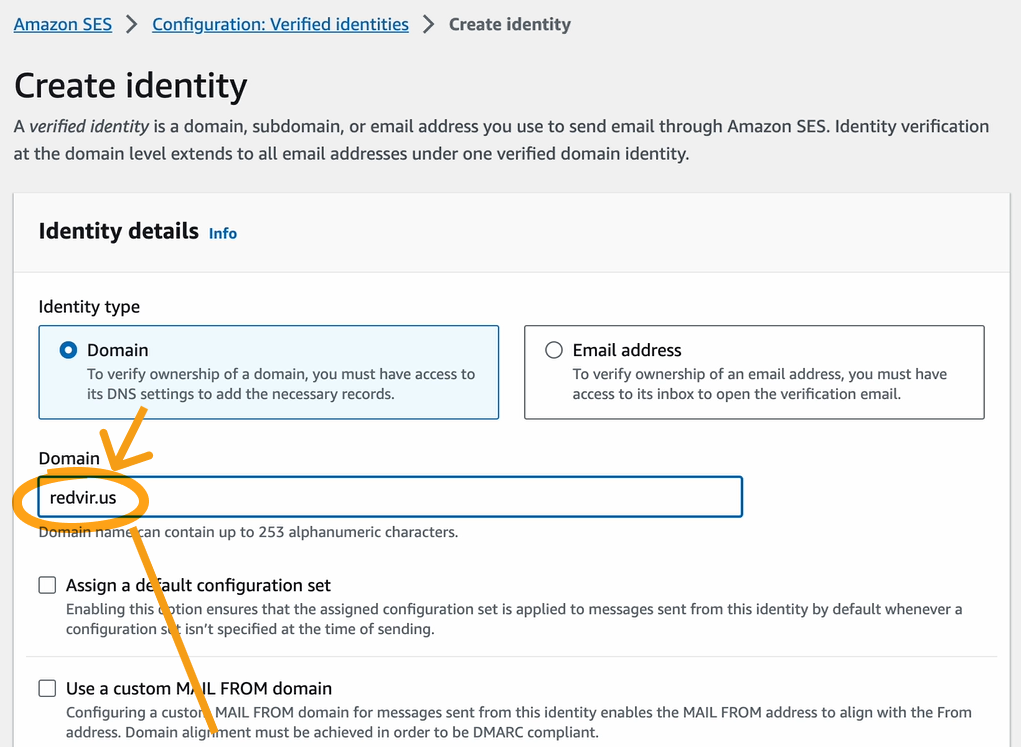
Scroll down to find the “Create Identity” button and click it.
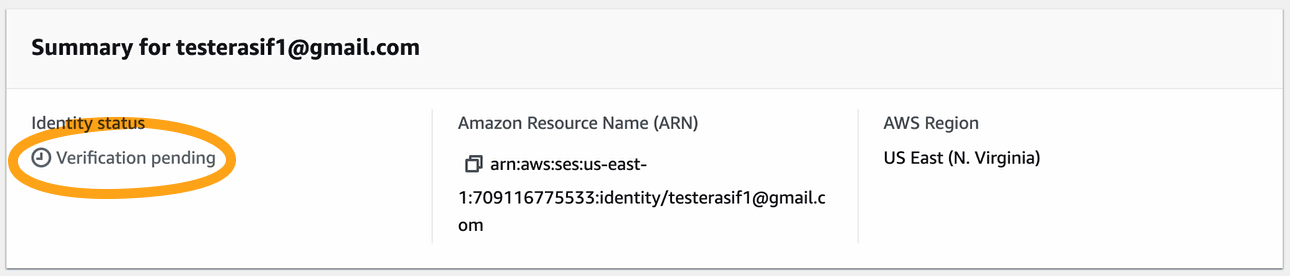
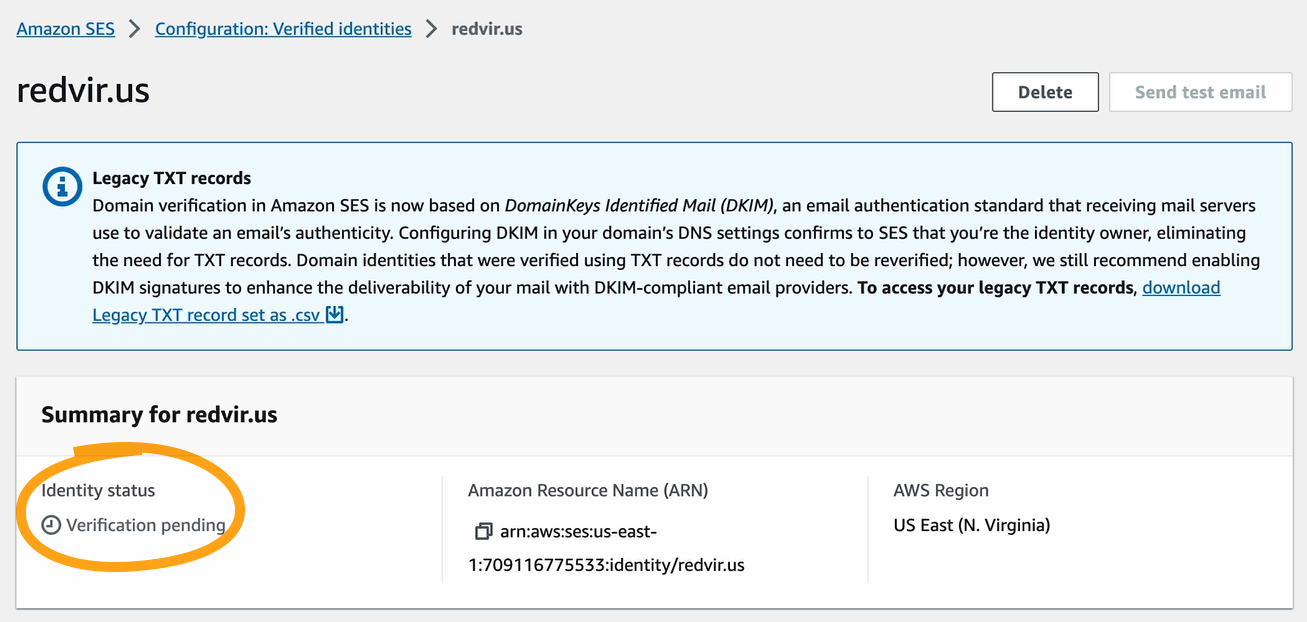
2Navigating to the DKIM Setting
Next, navigate to the DKIM settings. Initially, you’ll notice the verification is pending.
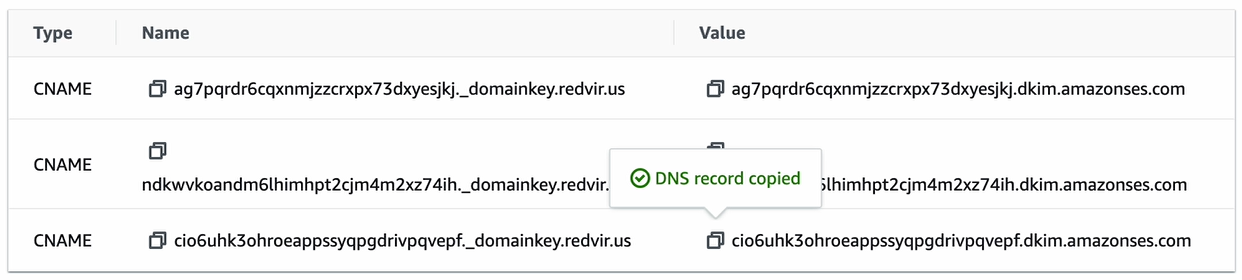
Scroll down to the “DomainKeys Identified Mail” section, where the DKIM configuration is also pending. Below that, you’ll find the DNS records.
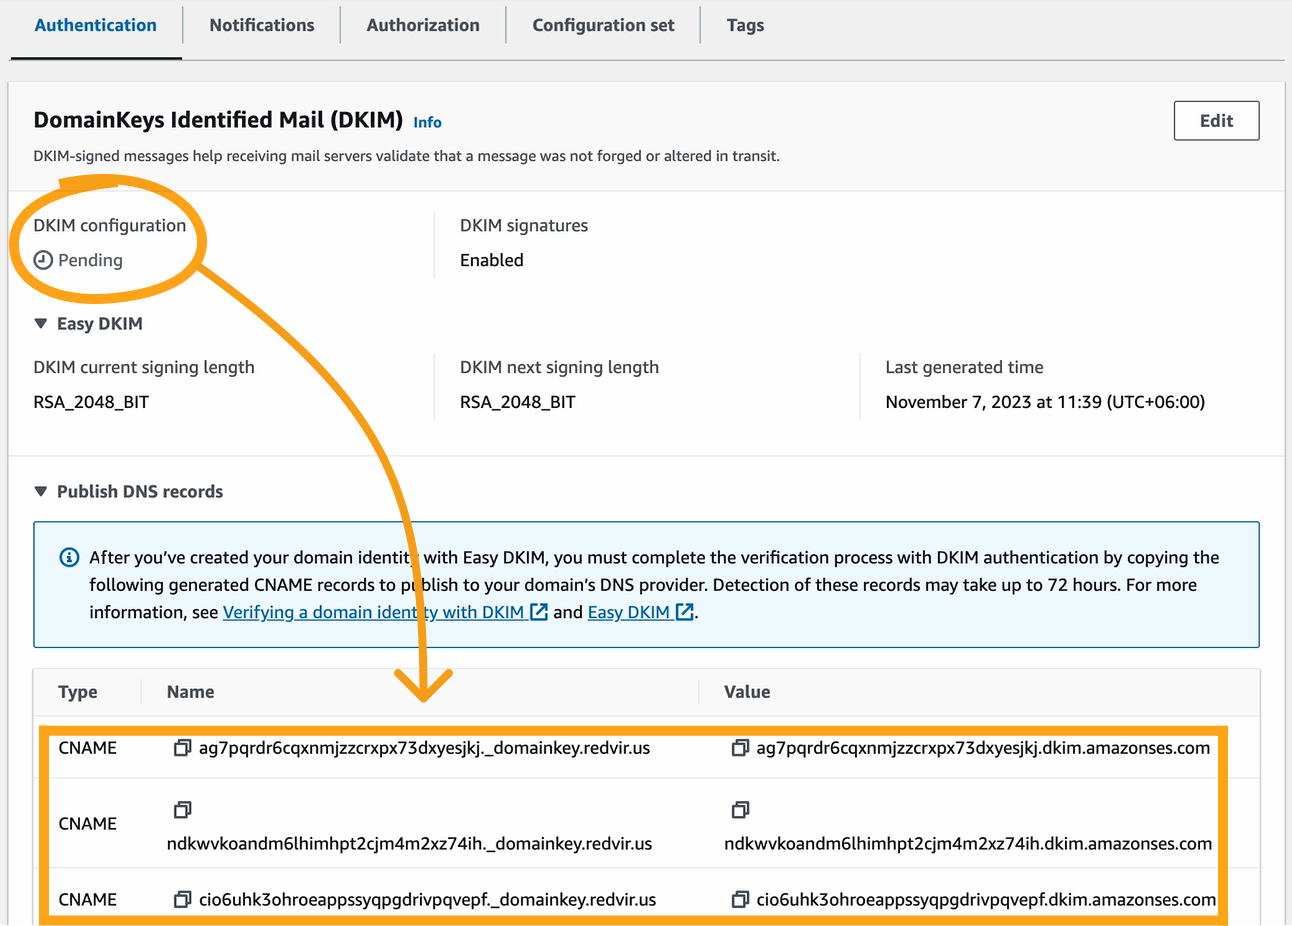
Simply copy-paste these records into the “DNS management” page.
3Navigating to Your DNS Management
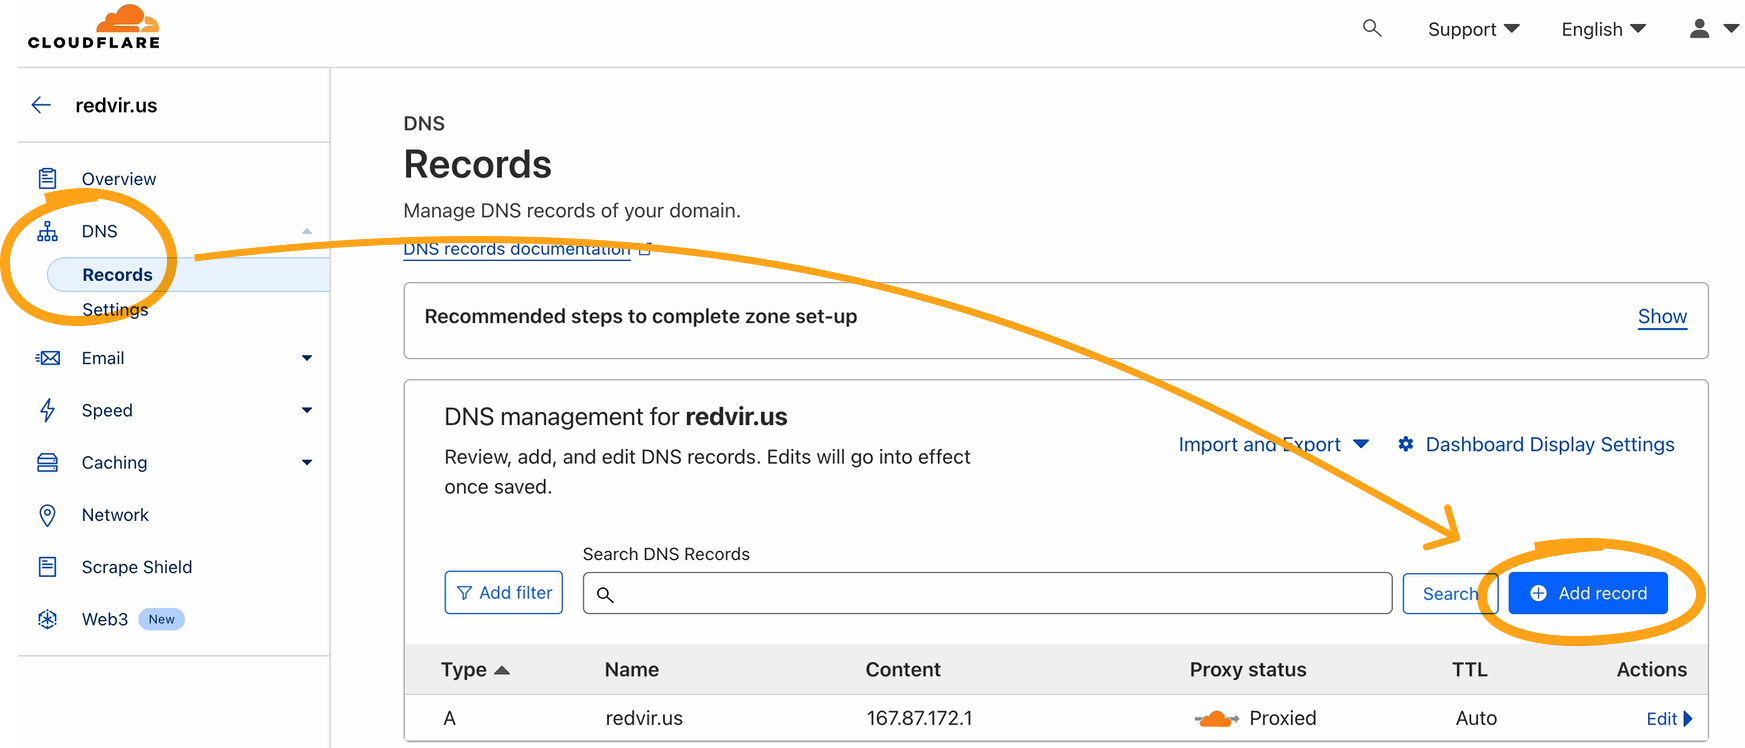
Now, proceed to your DNS records page. Copying DNS records from Amazon SES DKIM settings is crucial for secure email delivery and sender verification.
Click on the “DNS” section, then the sub-section “Records.” Finally, click the “Add record” button on the right side, as illustrated below.
4Add DNS Records for DKIM
Upon accessing the page, you’ll find fields for “Type,” “Name (Required),” and “IPv4 address (Required).”
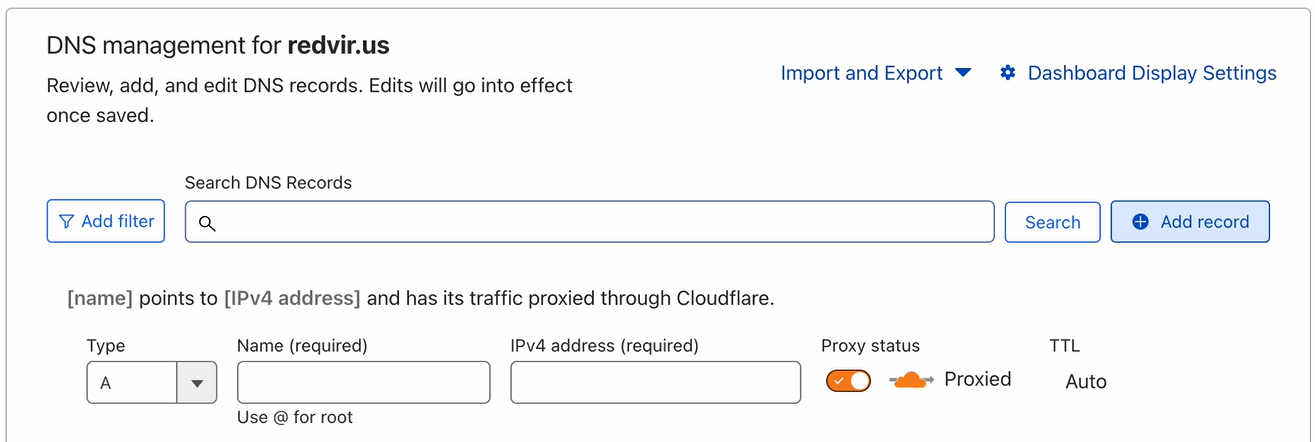
Copy and paste the data from your DKIM settings onto the DNS records page.

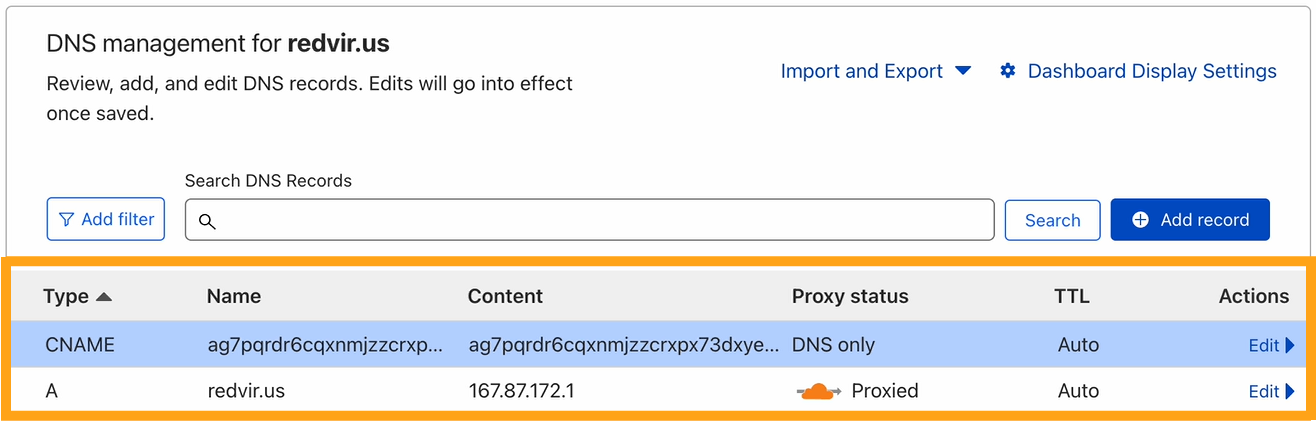
After copying the first record, turn off the “Proxy status” button. Confirm the successful saving of the first record.

You will see your first record has been saved.
Proceed to copy the second record and repeat the process.

Like the first one.

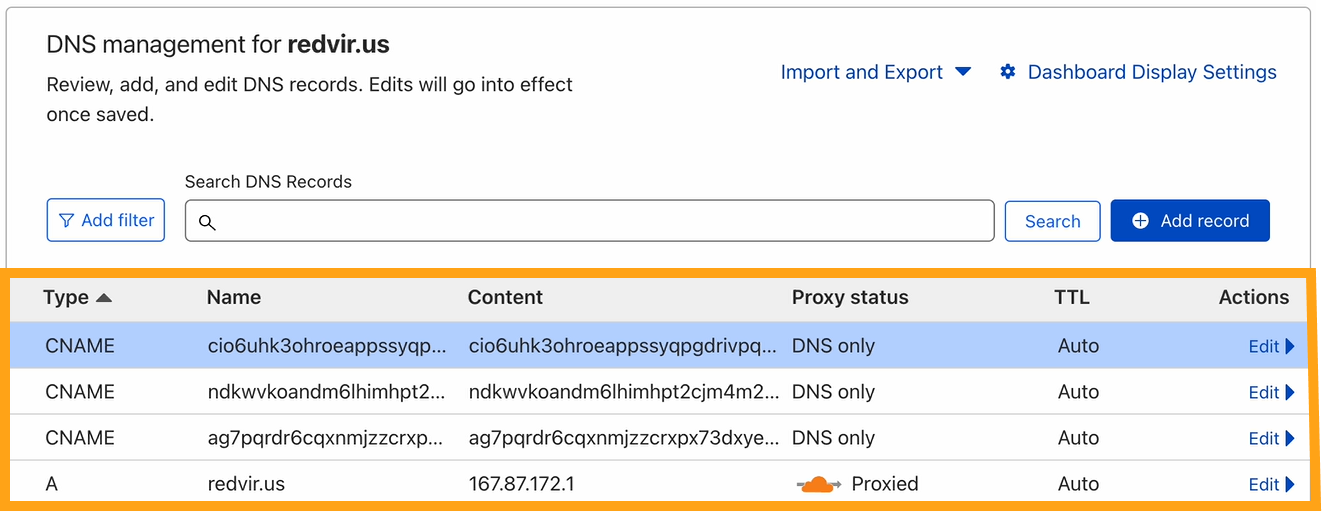
Duplicate this step for the third record, also.
Once completed, verify that all your records are saved in your DNS management.
5Wait for a Couple of Hours
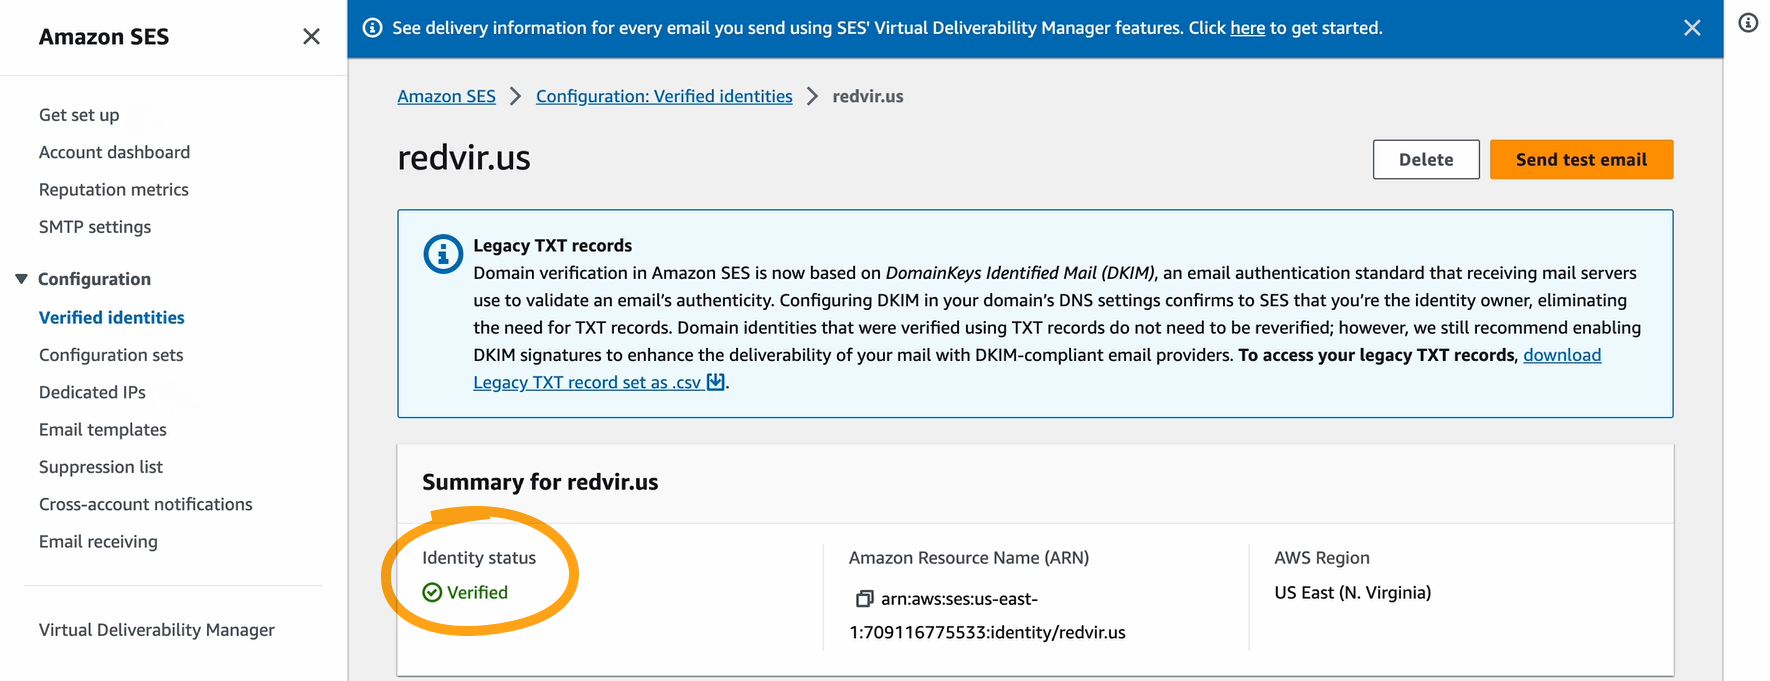
After a few hours, verify your identity status. Likely, you’ll be verified.
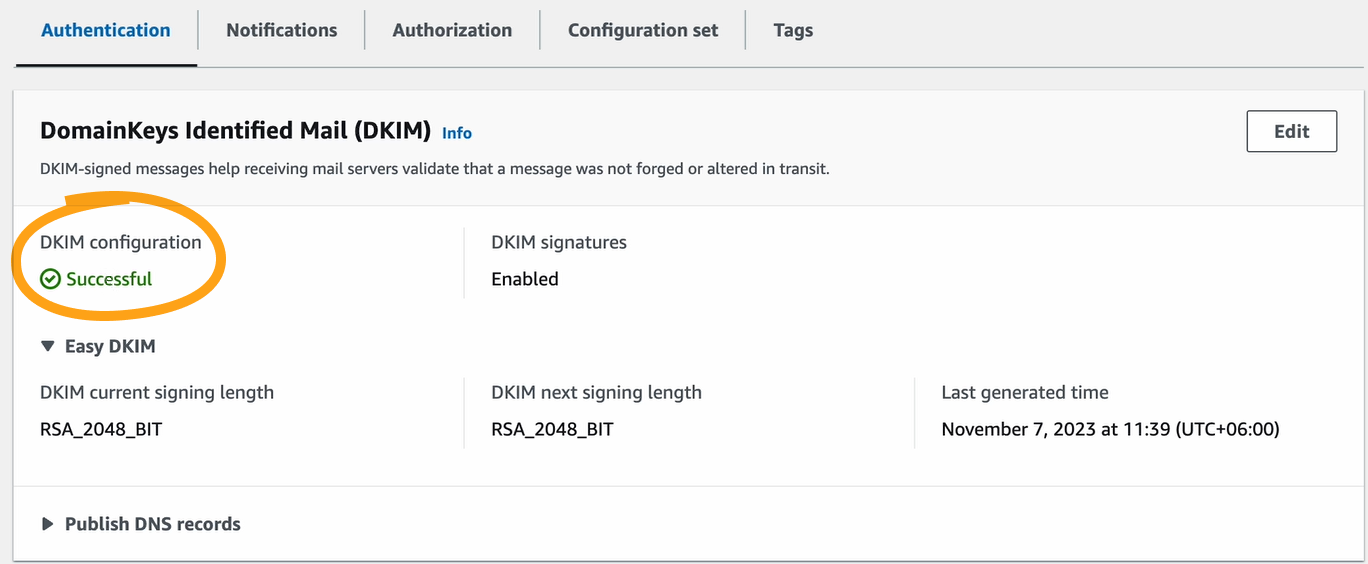
Scroll down to confirm the successful configuration of your DKIM.
Wrap-Up
After verifying your identity in Amazon SES, connecting with MailBluster, and getting out of Amazon SES Sandbox, you can have access to mass emailing at the cheapest cost with MailBluster!
If you need any assistance throughout this entire process, our support team is always there to help.
Good day!
