Looking for Zapier integration with MailBluster?
If you are stuck with Zapier-MailBluster integration, we are bringing you this integration guide. The integration is intended to provide a seamless way to connect MailBluster with Zapier.
So, why connect MailBluster with Zapier?
Zapier is an automation integration platform where you can easily create Zaps (workflow) or add leads to the Zapier Table. This workflow will help you integrate the information or leads through thousands of apps in Zapier to the MailBluster.
So, let’s head to the Integration right away!
table of contents
Before integrating Zapier with MailBluster
Integrating Zapier with MailBluster is not a hard task, but it requires adding a few apps. Since Zapier doesn’t have a MailBluster app in its repository, we need to use an external app for the integration.

Let’s have a look at how the integration rolls-
- Adding triggers and actions in the workflow
- Adding leads to the Zapier tables
- Connecting Google Sheets in workflow
- Using Make to connect MailBluster & Zapier
Zapier Integration with MailBluster
Before we step into the integration process, we want to let you know that Zapier integration will use the Make integration platform for MailBluster integration. You can also check different integration processes with MailBluster, such as Pabbly integration, Zoho integration, and more.
You can watch the full process in this tutorial video-
Let’s get to the integration steps now.
Step 1: Working on Zapier
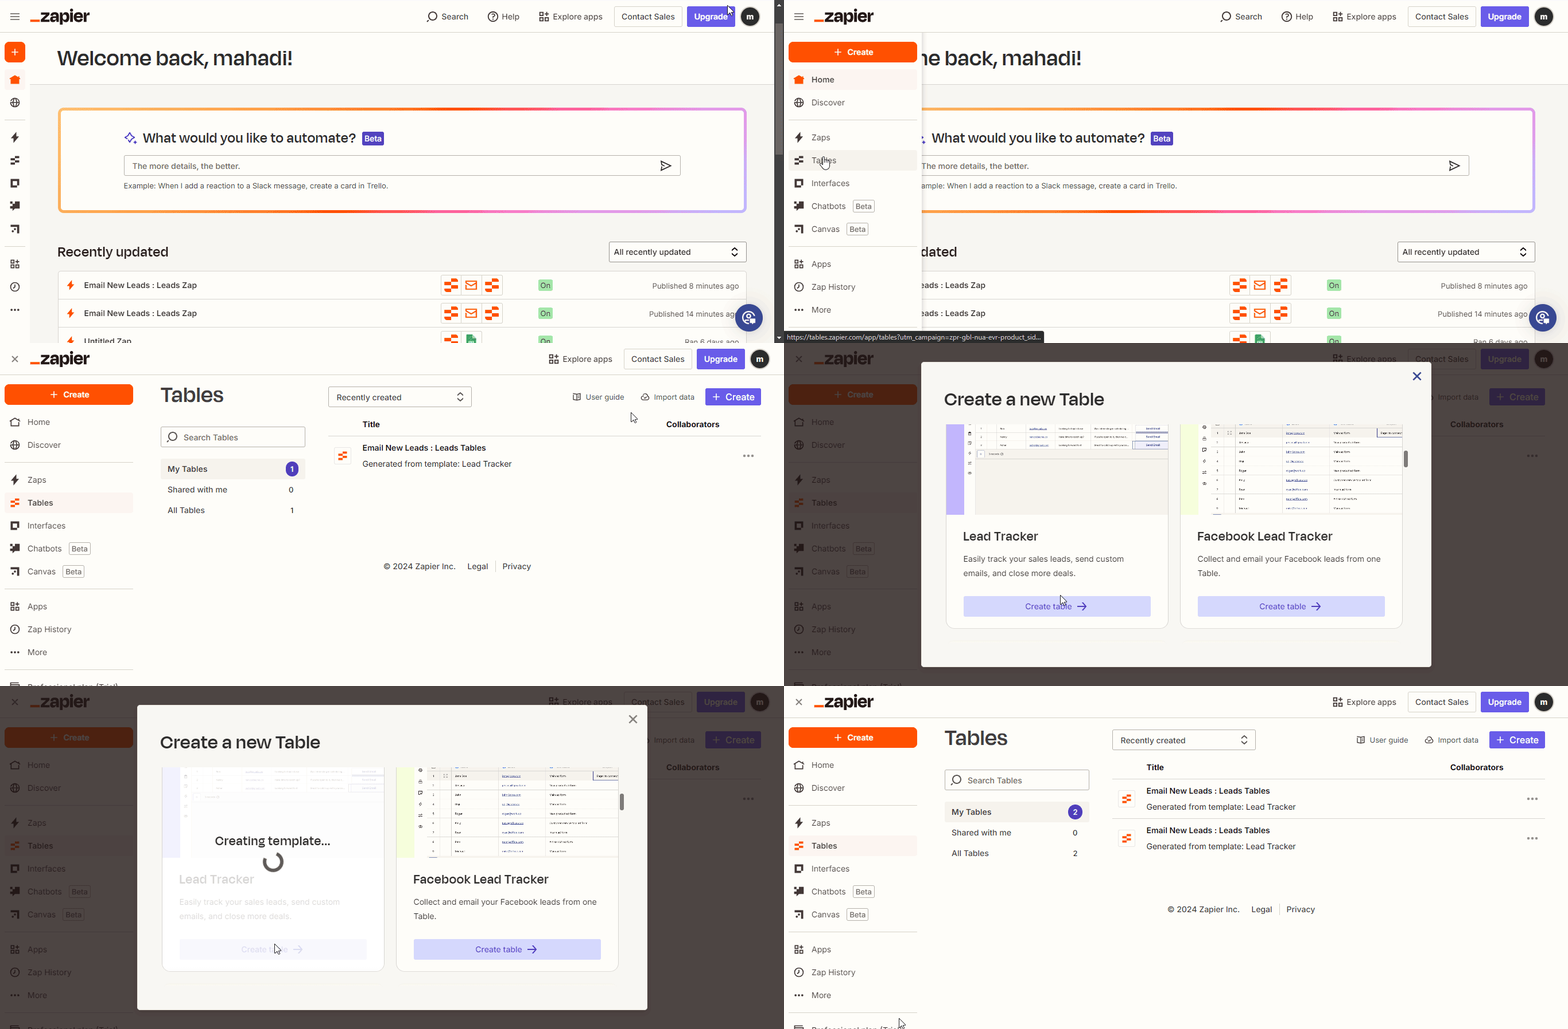
1. First, Sign in to Zapier and click +Create>Tables to create leads. On Create a New Table, click on Lead Tracker to create a table.

2. Now, go back to the Zapier Dashboard and click on Zaps>Create>New Zap. This will create a workflow.
3. Add Trigger and Action app in the workflow. First, click on Trigger flow.
Add the Zapier Tables from the search option.
4. Now, you need to select a condition for the triggering. From App & event, select New or Updated or Deleted Record.
Next, on the Trigger option, select the table you previously created from the list.
5. Now, Test the Trigger. The Trigger option will load the information that contains the table.
Now click on Continue with the selected record.
6. Next, select the Action app. Search Google Sheets.
In App & event, select Create Spreadsheet Row.
7. Later, on the Account tab, connect your Google Sheets by signing in. Your integrated leads will appear here.
Remember to create the Email and Name field to successfully integrate leads. Click Continue.
8. Here, on the Action tab, select the Google Drive from Drive, Title of your Google Sheets on Spreadsheet, and select the Worksheet. Edit Name field and select the Name string, do this for Email as well.
9. Now, Test the step and start integrating the lead to Google Sheets. The saved lead on Zapier Tables will appear in Google Sheets.
Click Publish to set your integration live.
The lead appeared on the Google Sheets
Zap is now live after publishing
Step 2: Working on Make
10. Next up, you need to integrate the Google Sheets into MailBluster for successful integration. Now, login to Make, click on Create a New Scenario.
Select Google Sheets from the Trigger module.
11. Select Watch New Rows in Modules search
and Create connection by signing in with your Google account. Click Ok to continue.
12. Now, on Google Sheets module edit section, On Spreadsheet ID, click Click here to choose file and select the name you have given for the spreadsheet. Leave the other fields to remain as they are.
13. On the Action tab, search for the MailBluster app and select the Create Lead module.
Now, Create a connection with MailBluster by clicking Add and filling in the blank field by API Key.
Go to MailBluster and log in to your account. Go to Settings>API Keys>Create Now>Name your API>Create API. Copy and paste the API into the API Key field on Make.
Click Save and Ok to continue.
14. In the MailBluster app field, select Email and Name string to edit the Email and Name field. Select your preferred options for Subscribe or other options. Click Ok.
15. Now, click Run once to see if the lead is added to the MailBluster Leads section. Click Scheduling to automatically run the integration process. Remember that Make will add your leads every 15 minutes.
Step 3: Lead integration testing
16. Now, test the automatic integration process by going to your previously created Zapier Table. Add a lead to the table by adding New Record, Name, Email, and tick the Email Sent. Also, click on Send Pending Records.
The lead will appear on Google Sheets and MailBluster.
Wrap Up
This Zapier integration with the MailBluster process might seem long, but it doesn’t require advanced knowledge. That is the power of the workflow integration process. Make sure you complete every step of the Zaps workflow process for a successful integration.


 Contents
