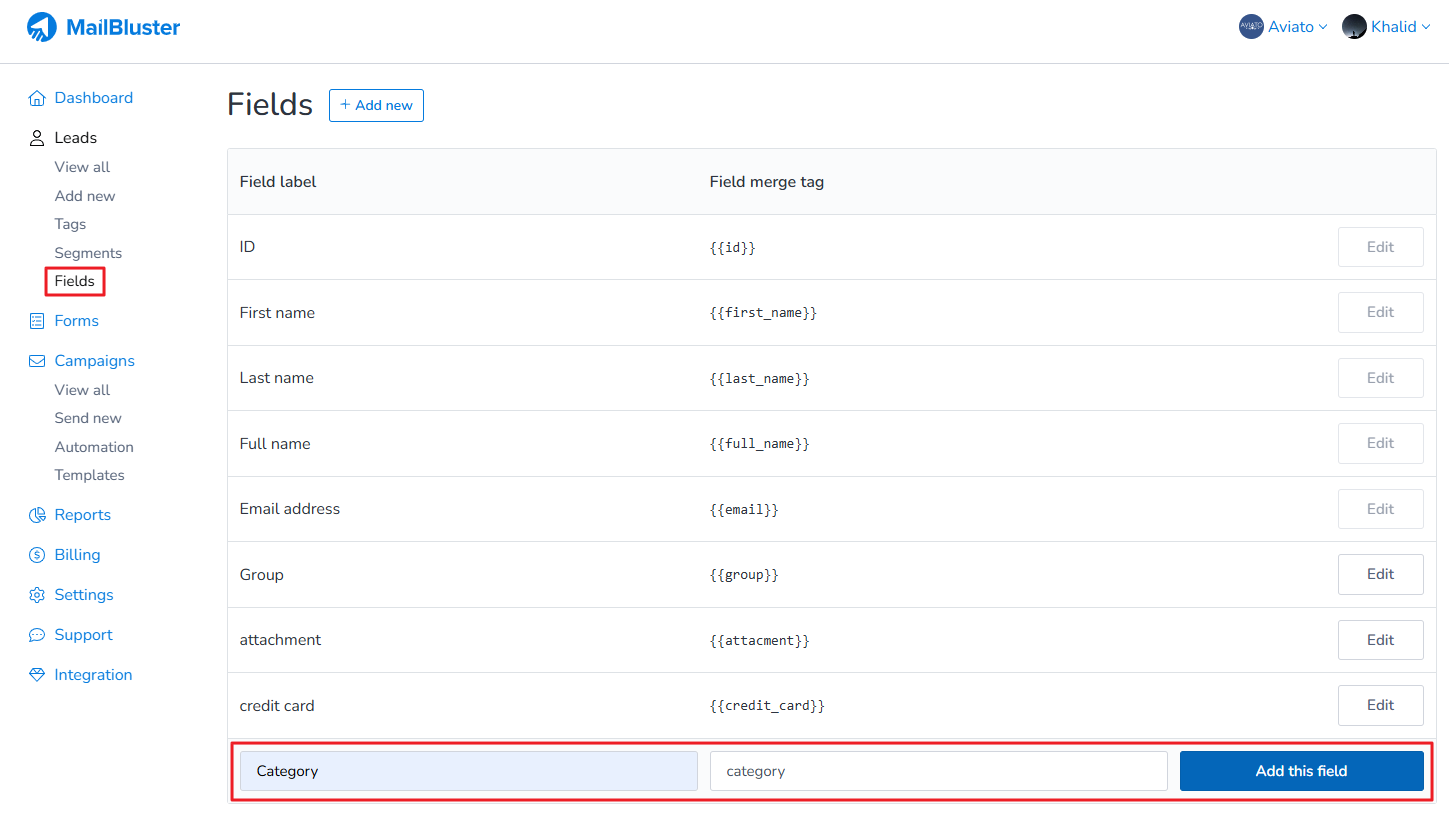
First you need to go to Fields. Then create a custom field for example “Category”. Click Add this field.
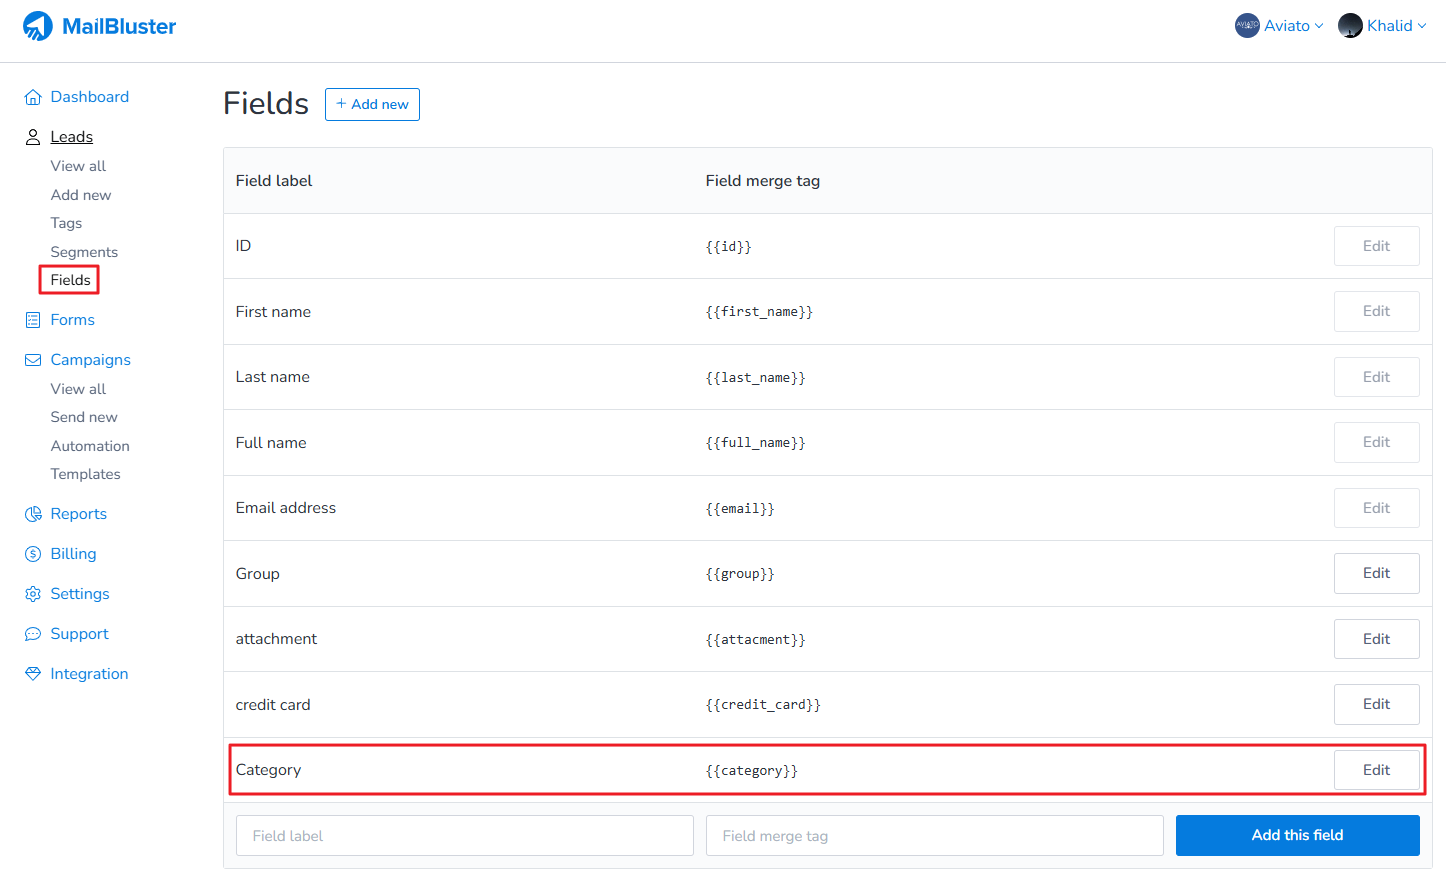
Here custom field “Category” has been created as shown below.
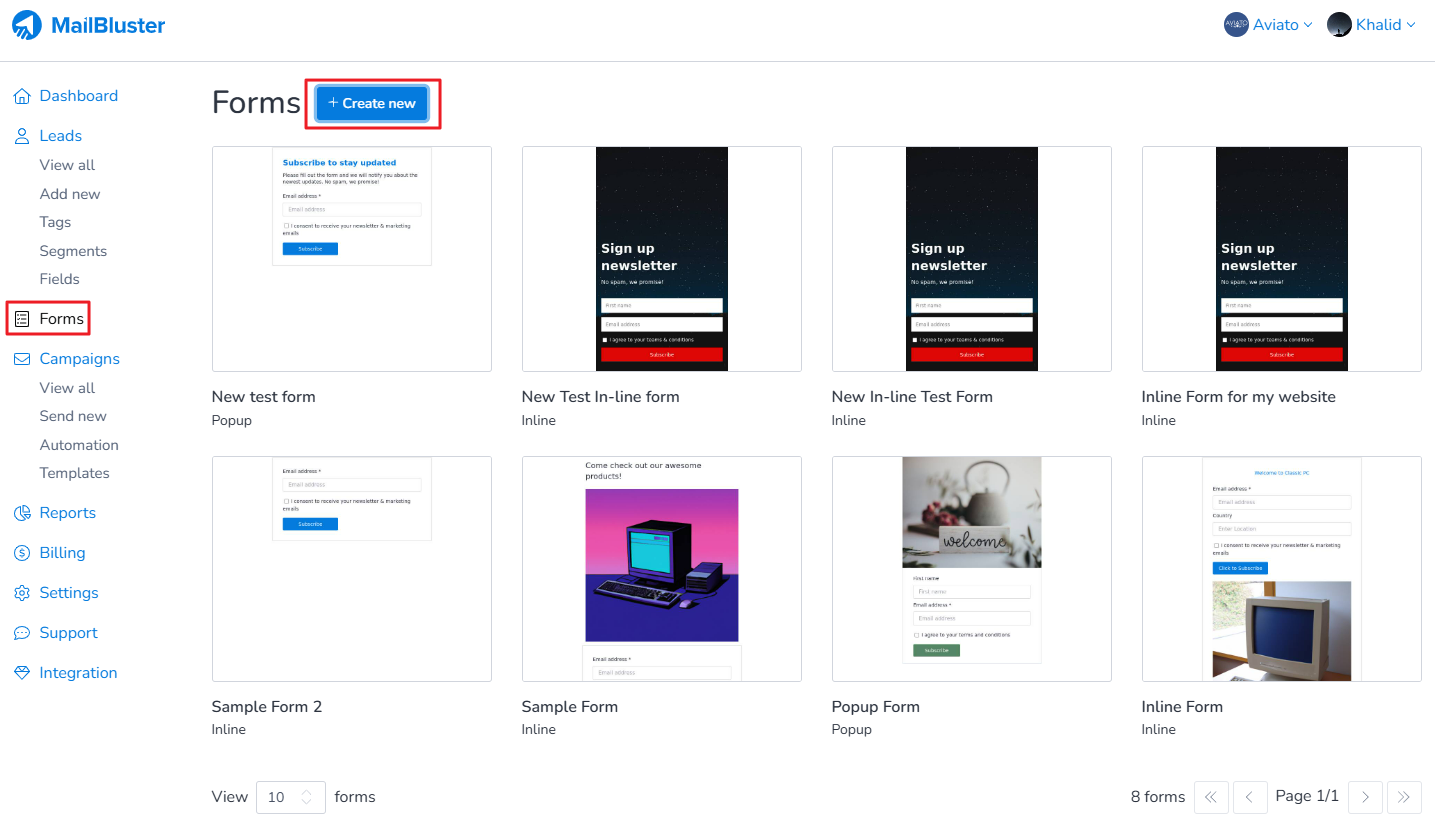
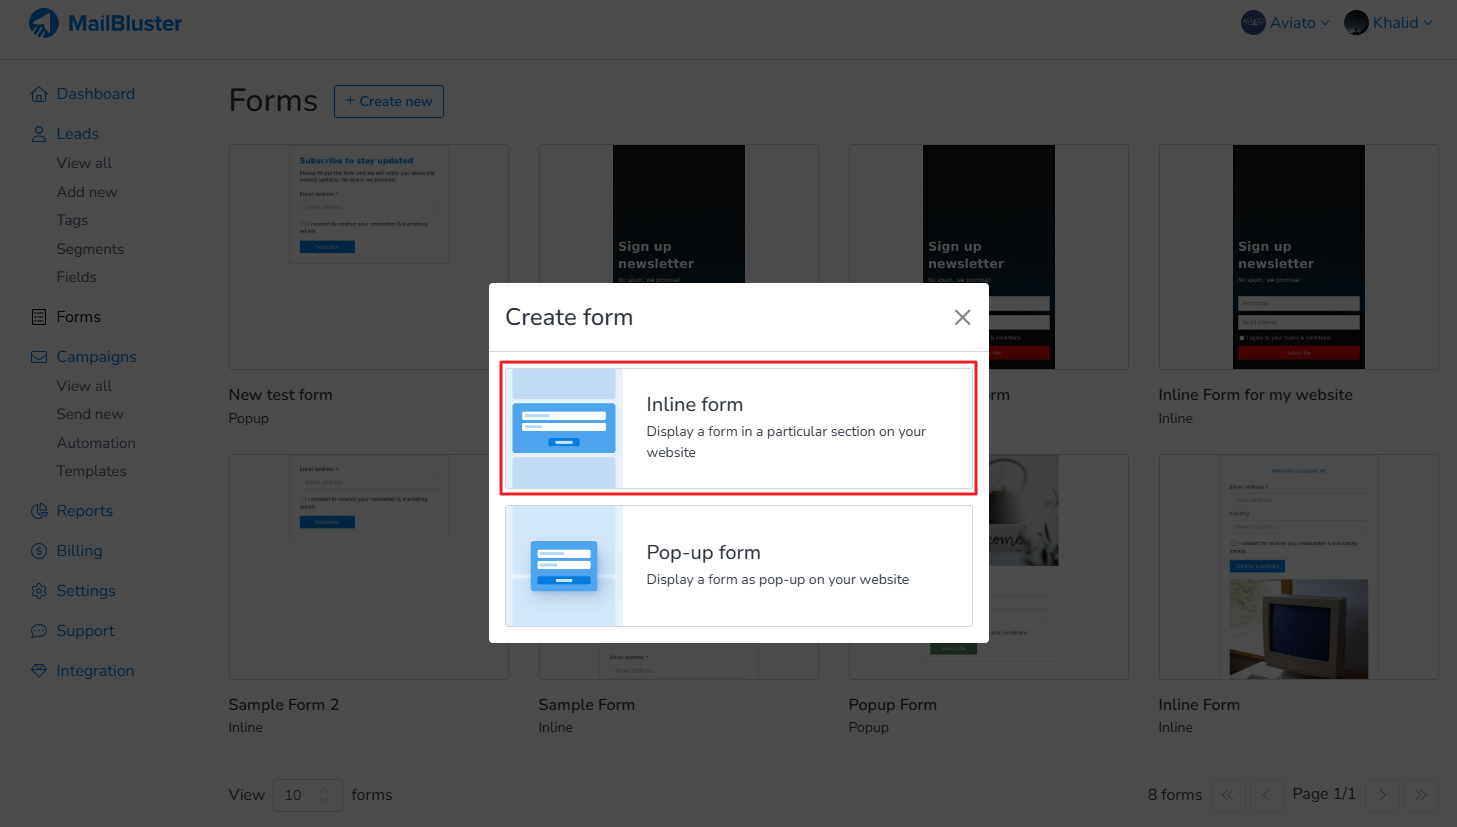
Now go to Forms and click Create new to create an Inline form.
Select Inline form.
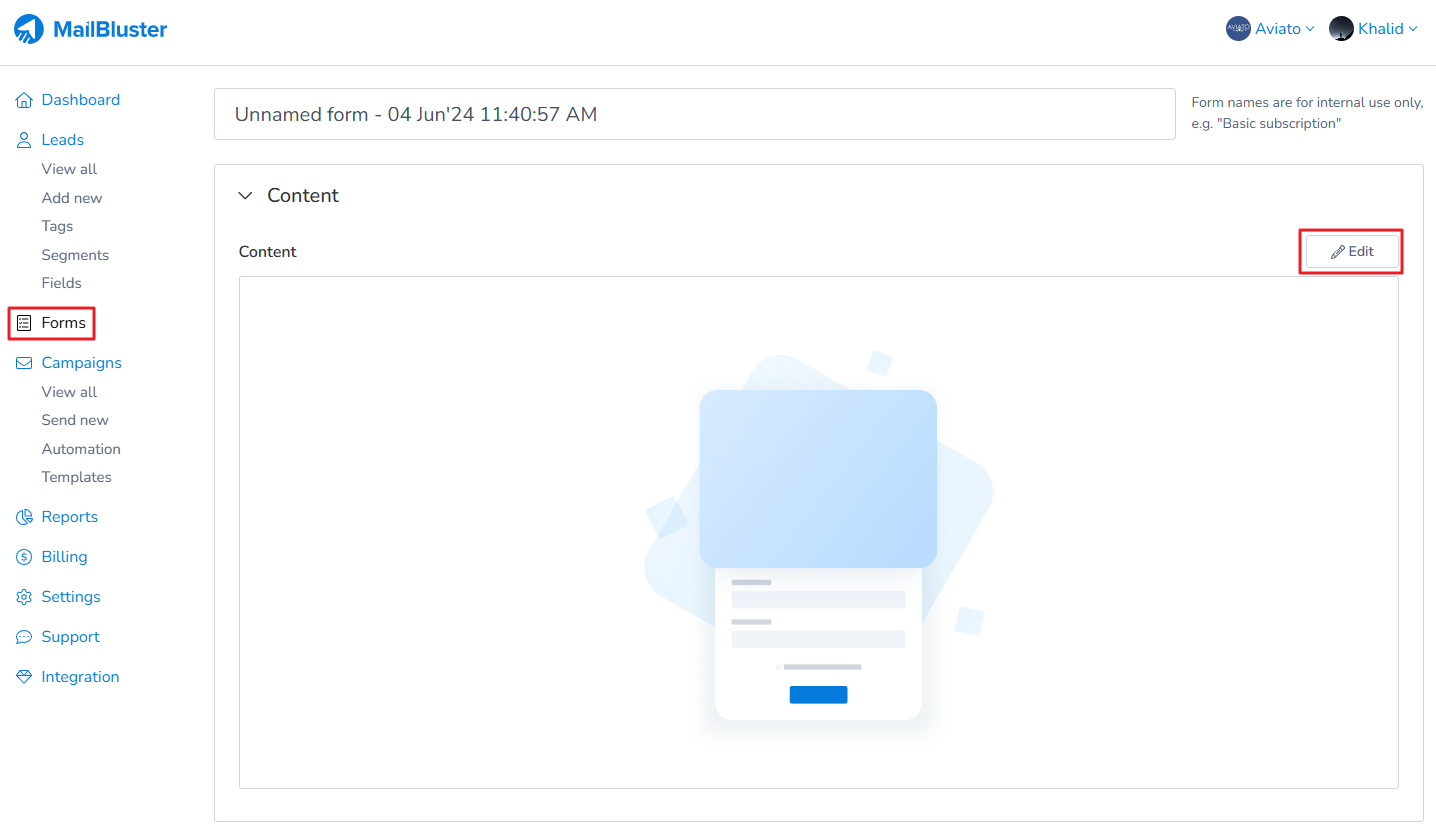
Now click on Edit to edit the form.
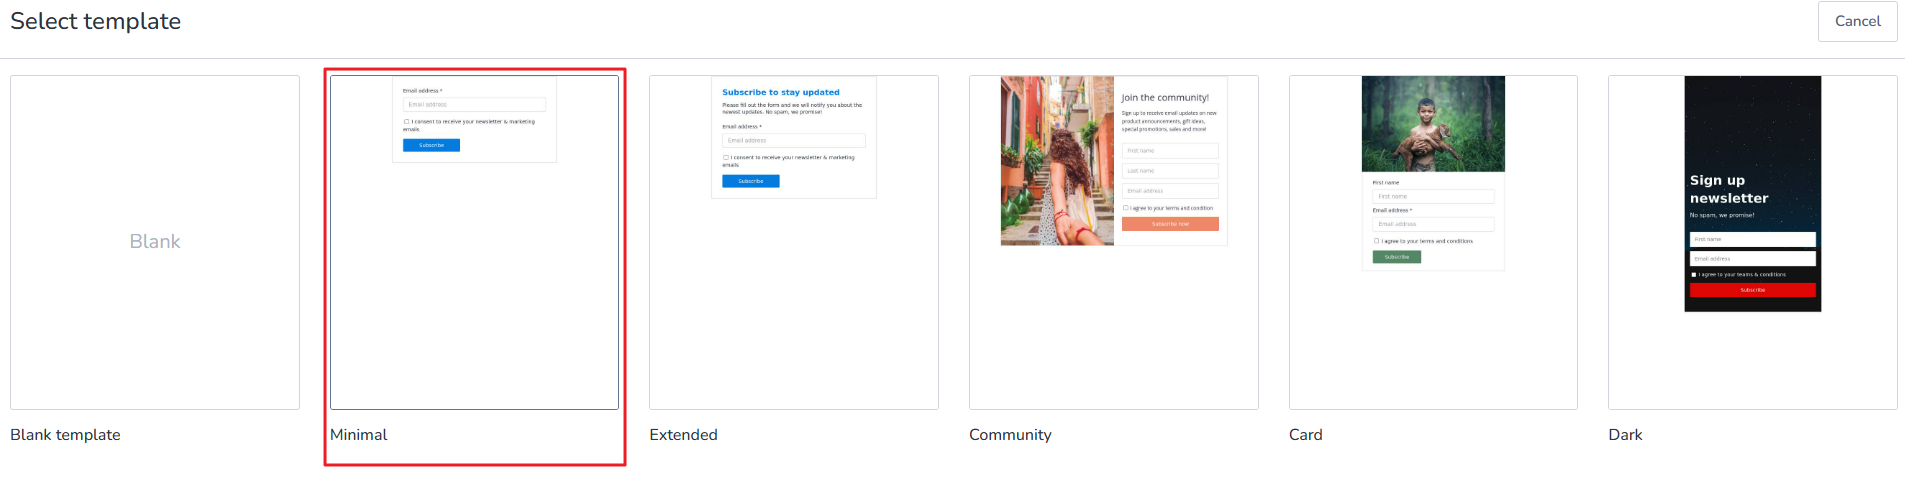
Select template of your choice or you can select a Blank template. Here we selected Minimal template.
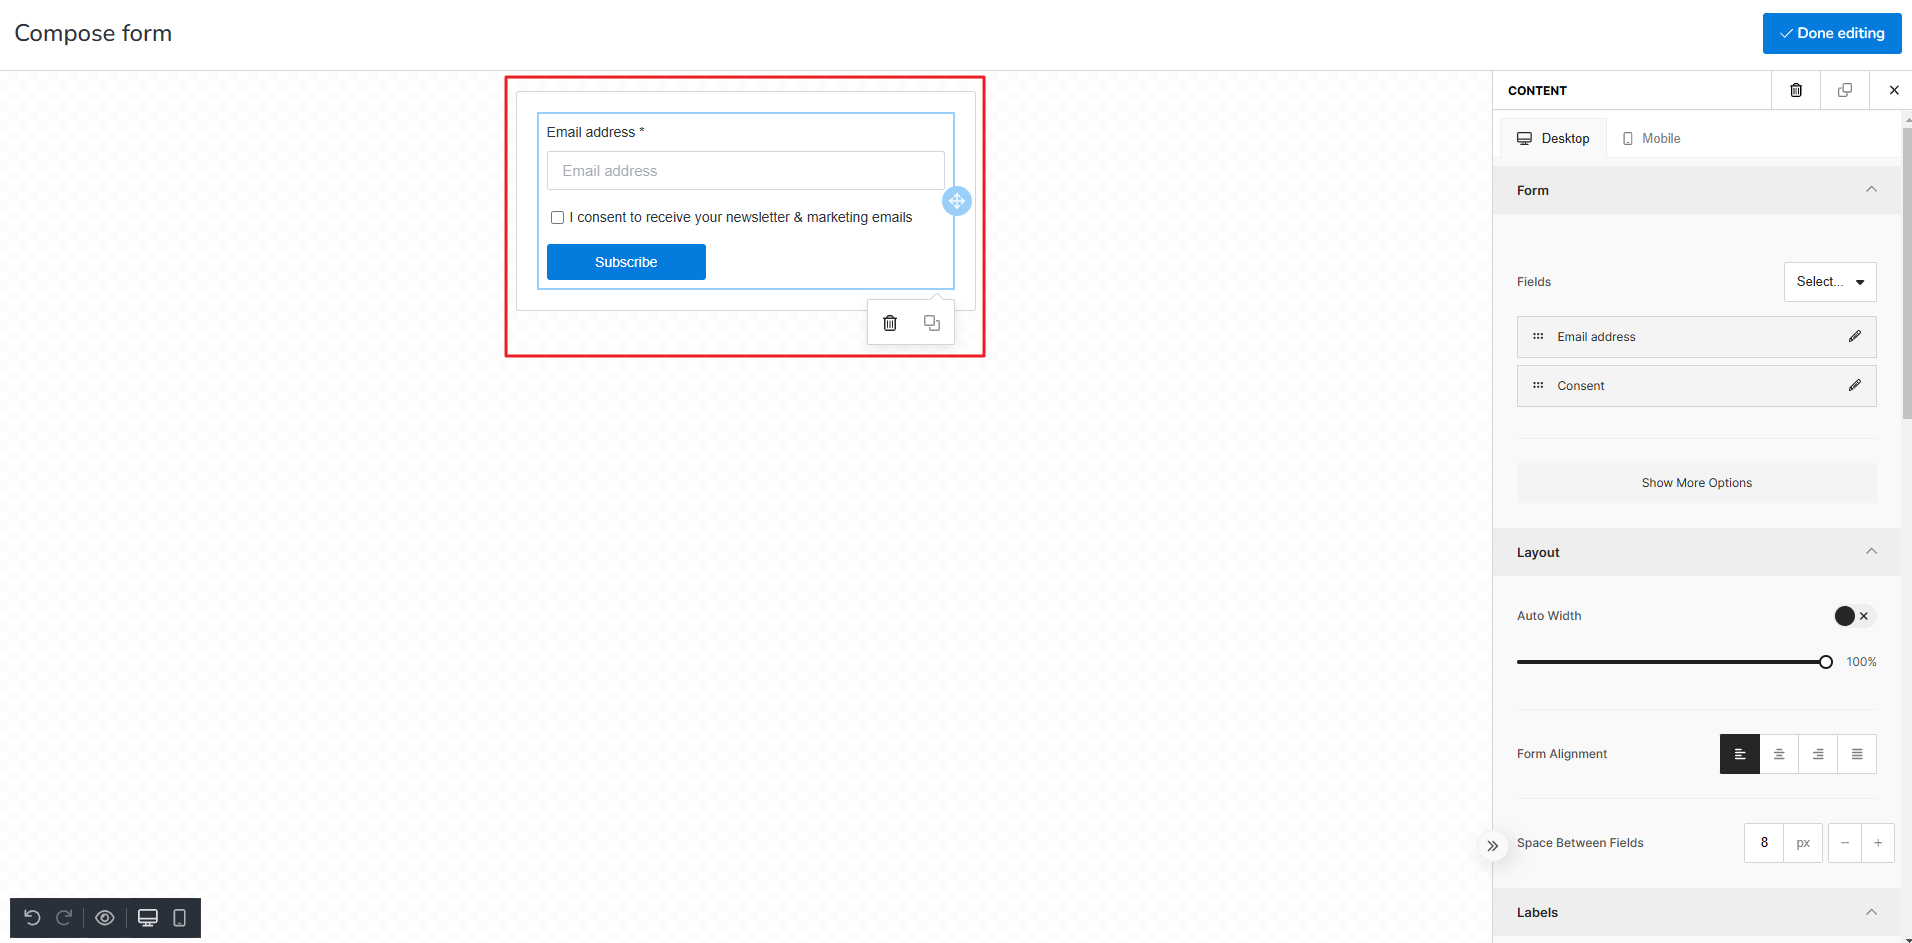
The template form is generated as shown below.
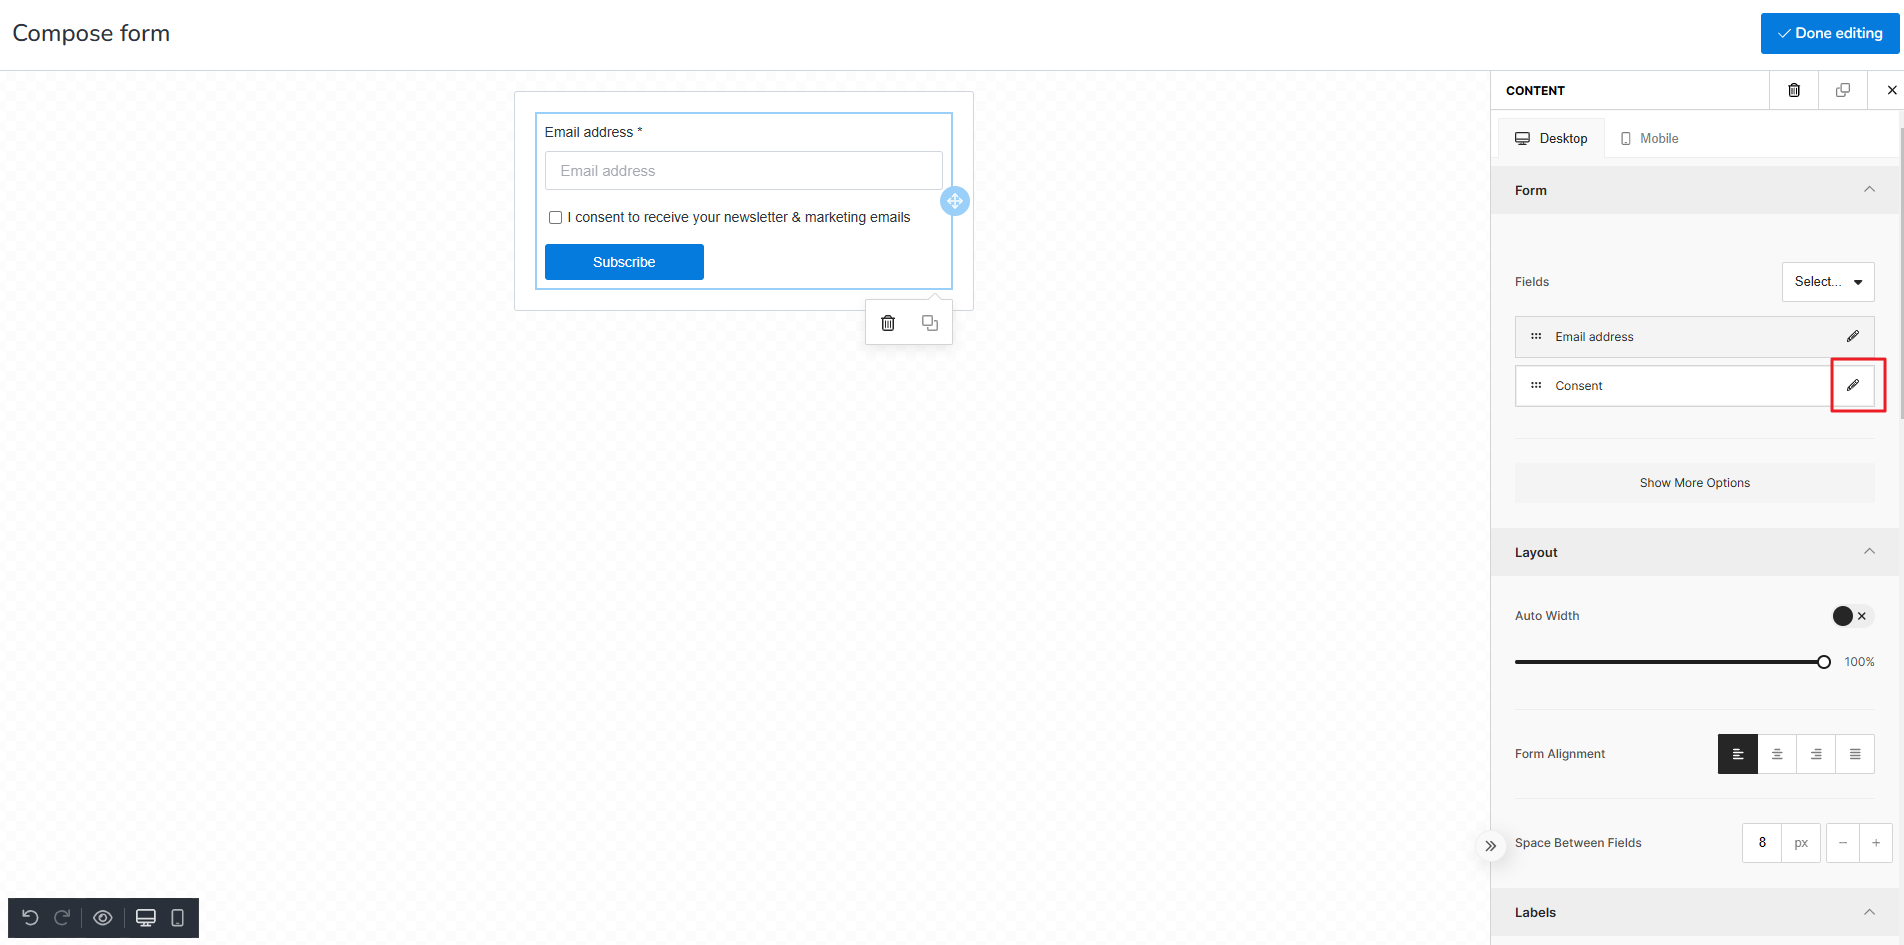
Click over Edit on Consent.
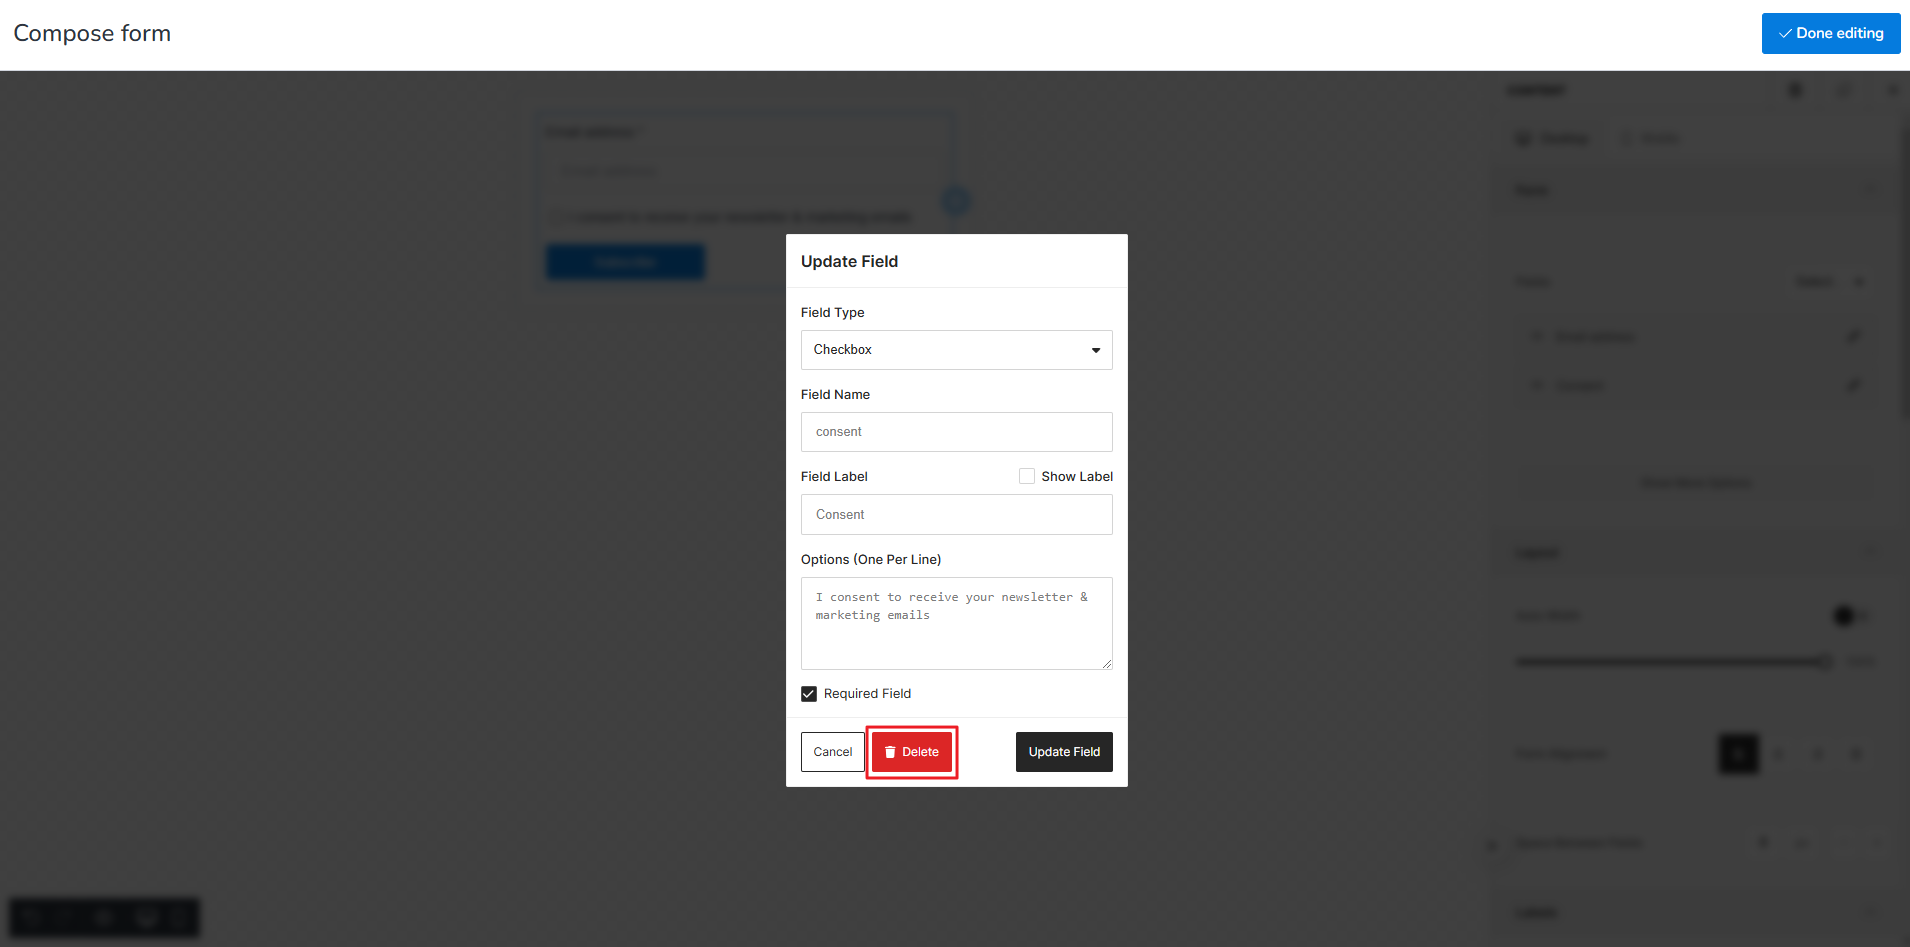
Update Field dialogue box opens. Click on Delete.
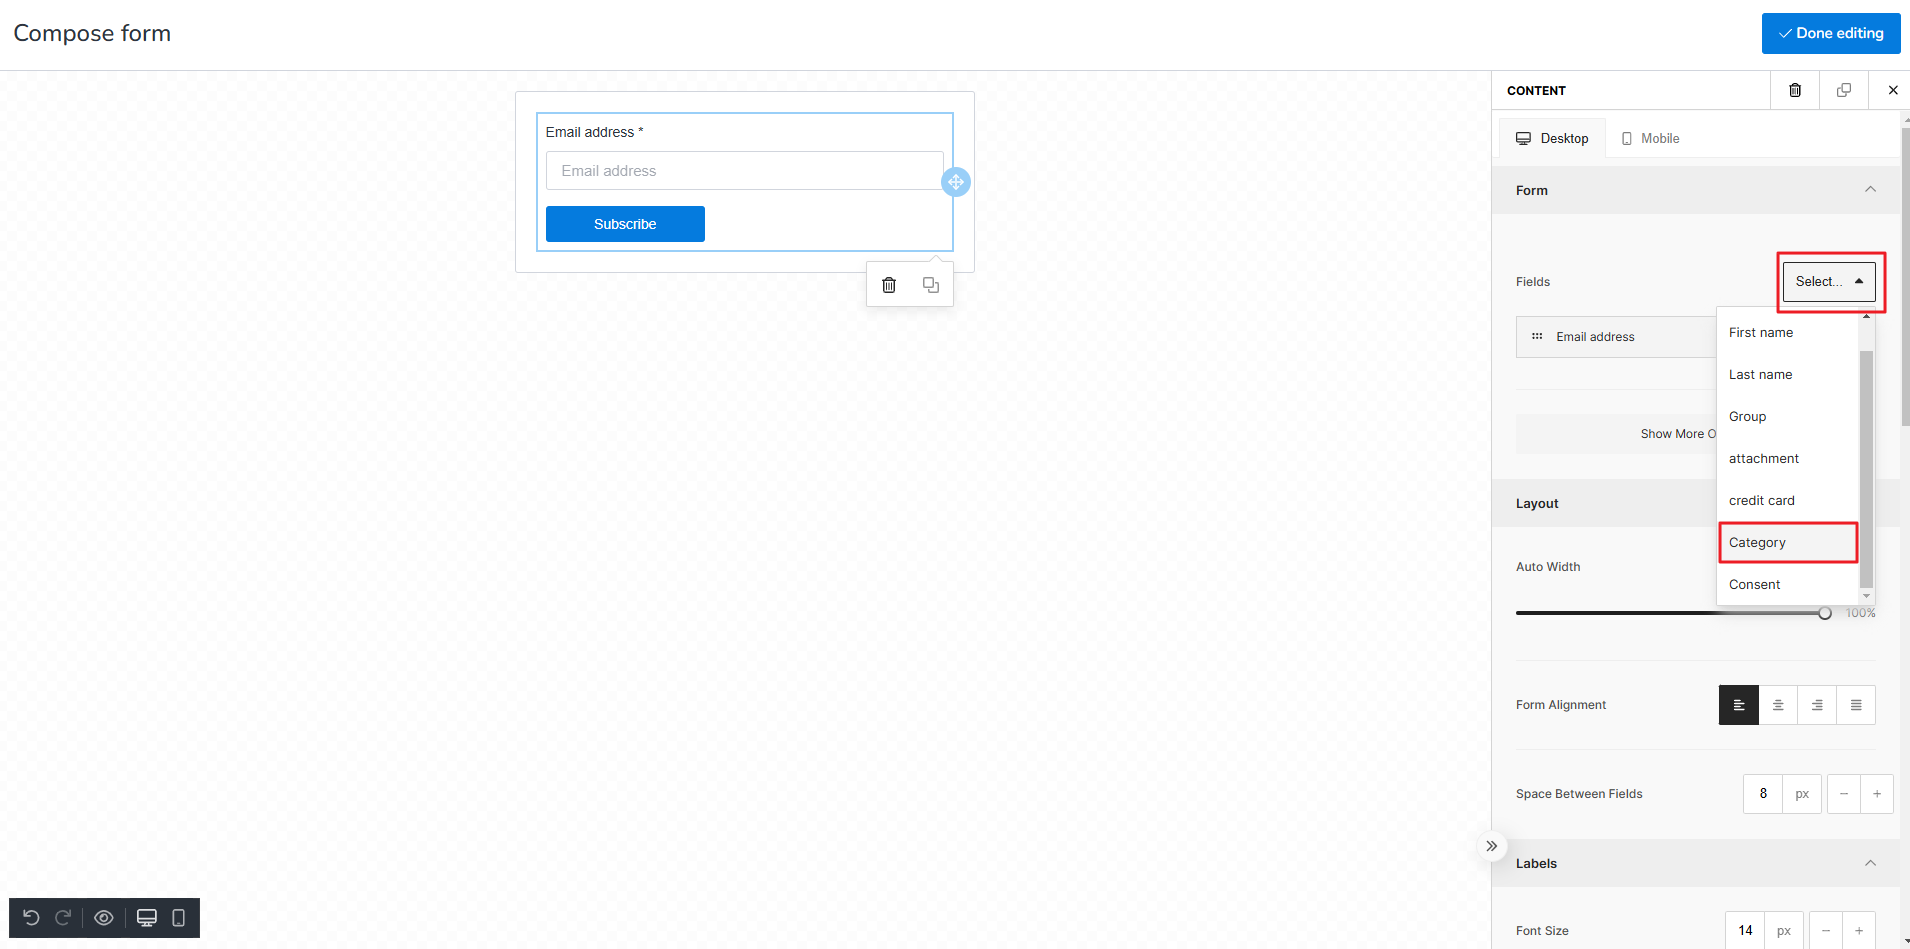
Now click on the drop-down Select box and the select the field Category.
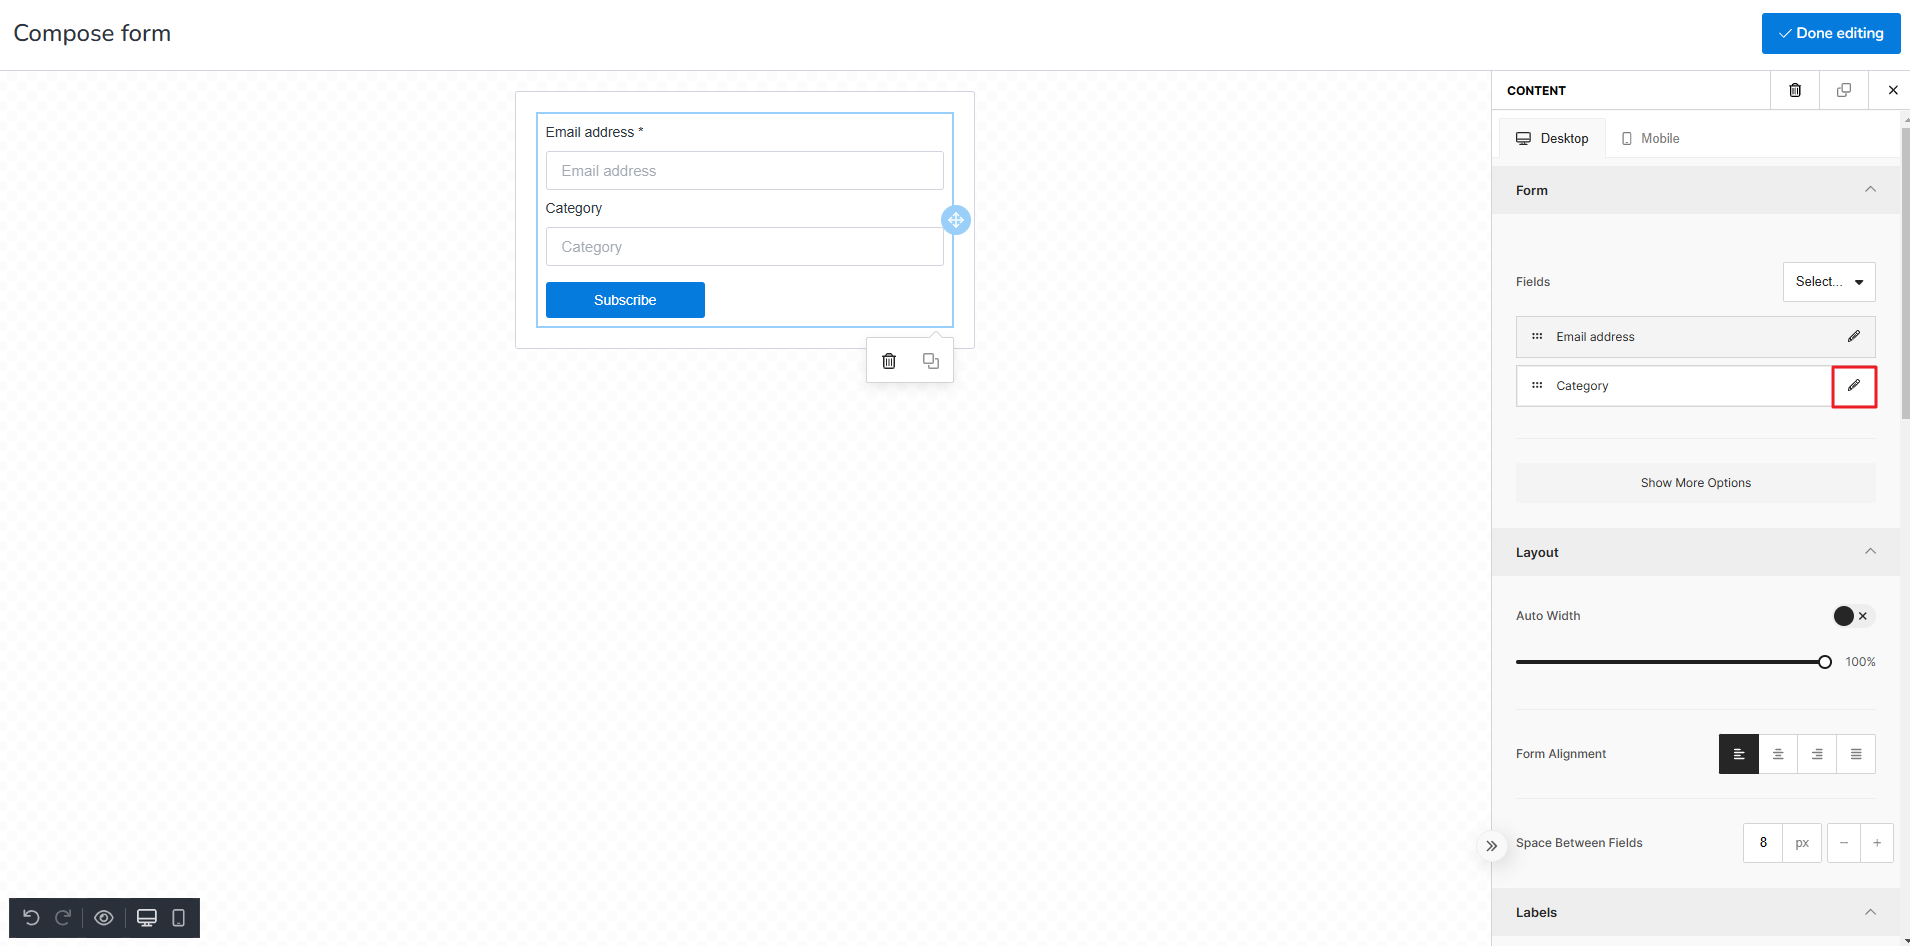
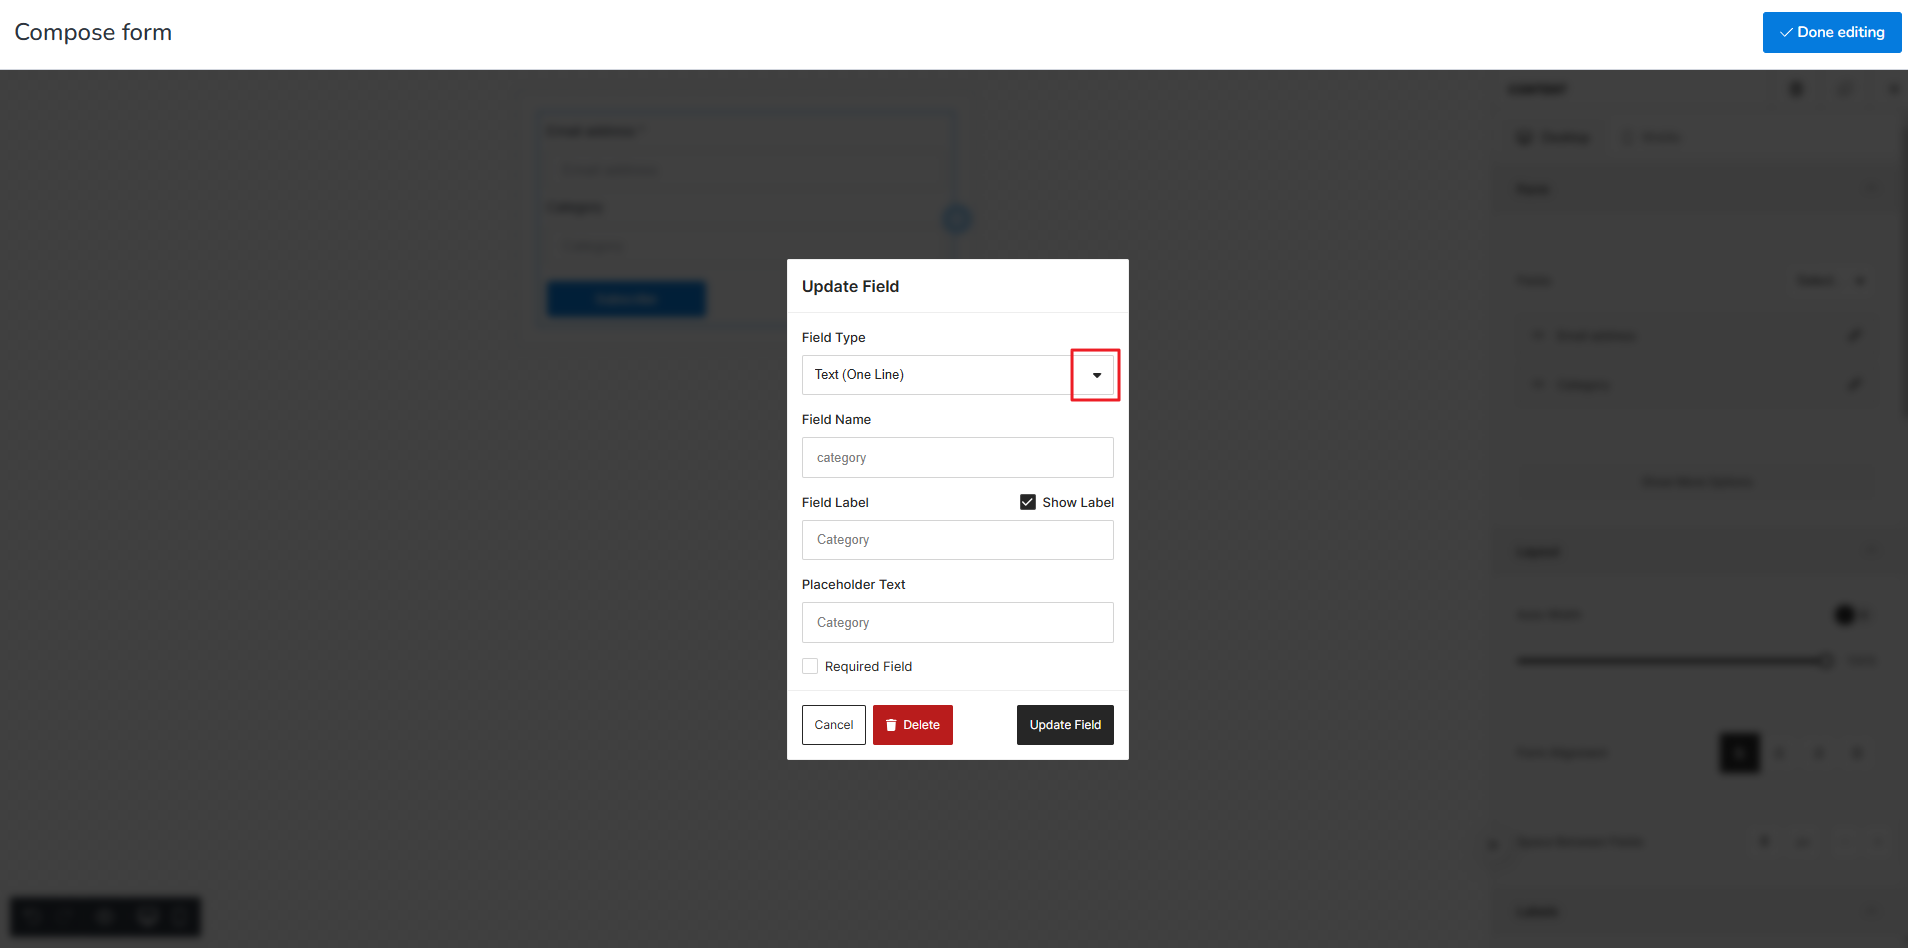
Click over Edit on Category.
Update Field dialogue box opens. Click on the drop-down Field Type.
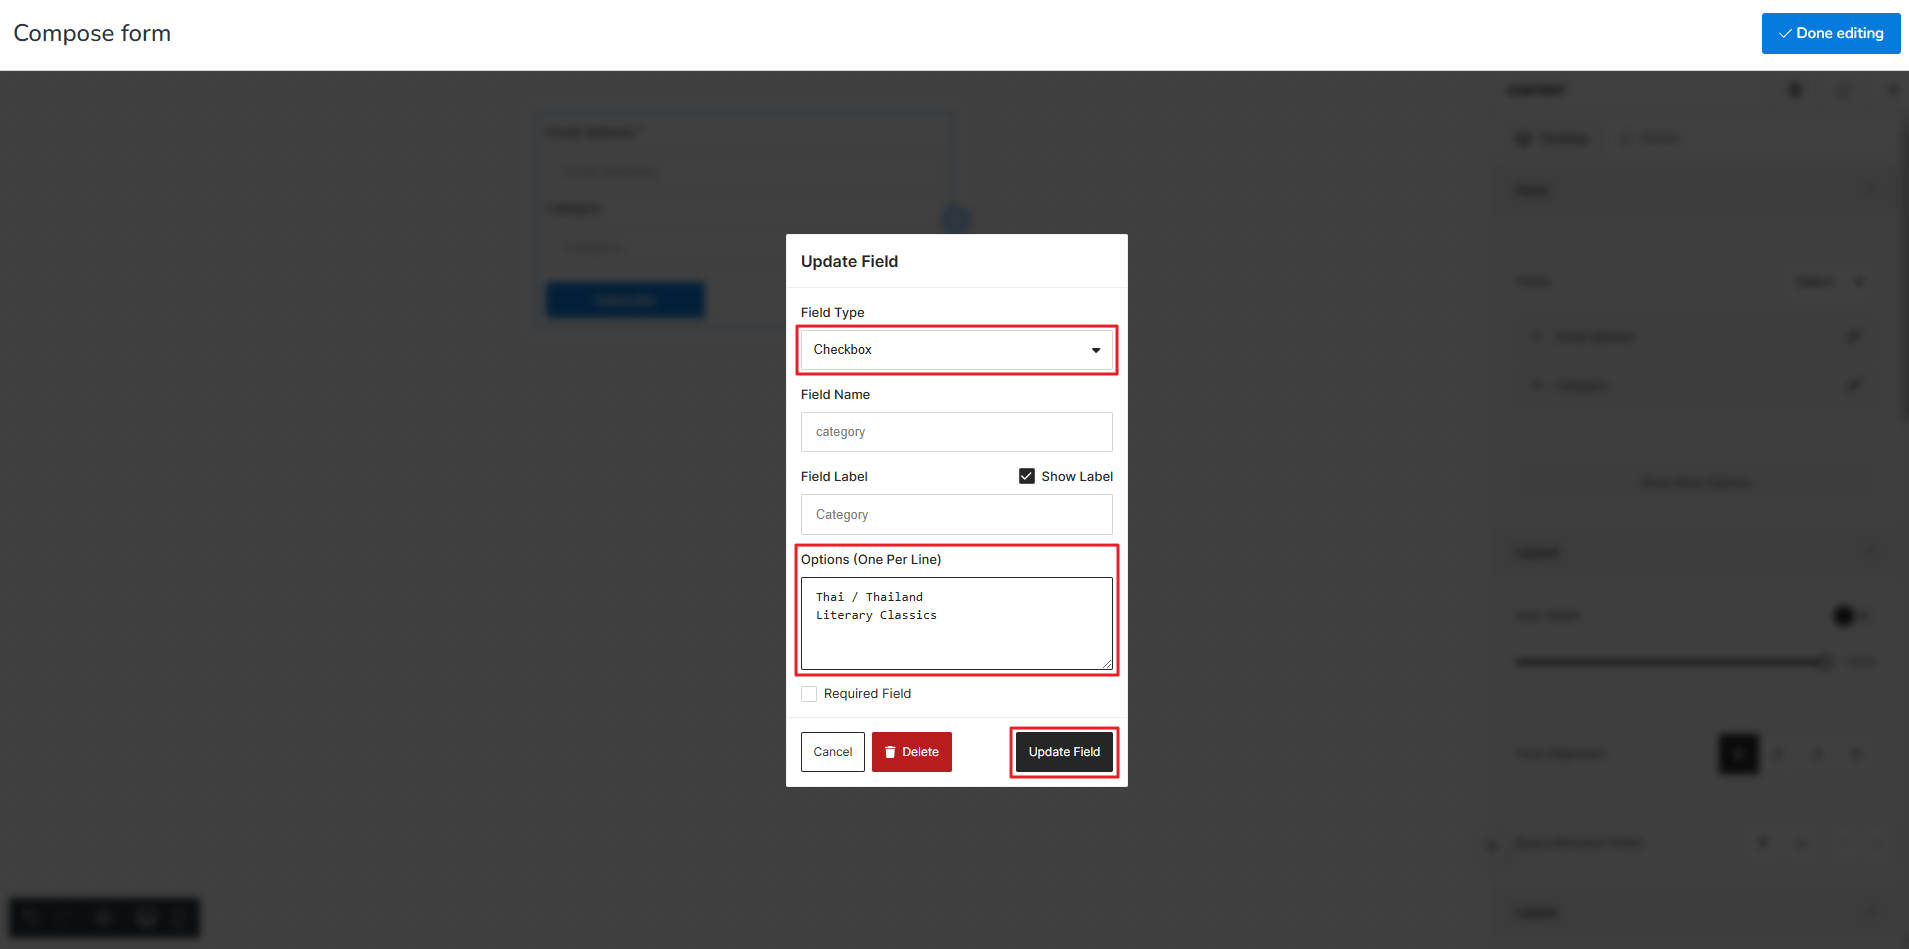
Select “Checkbox” under Field Type and write the text of your choice under Options (One per line). Then click Update Field.
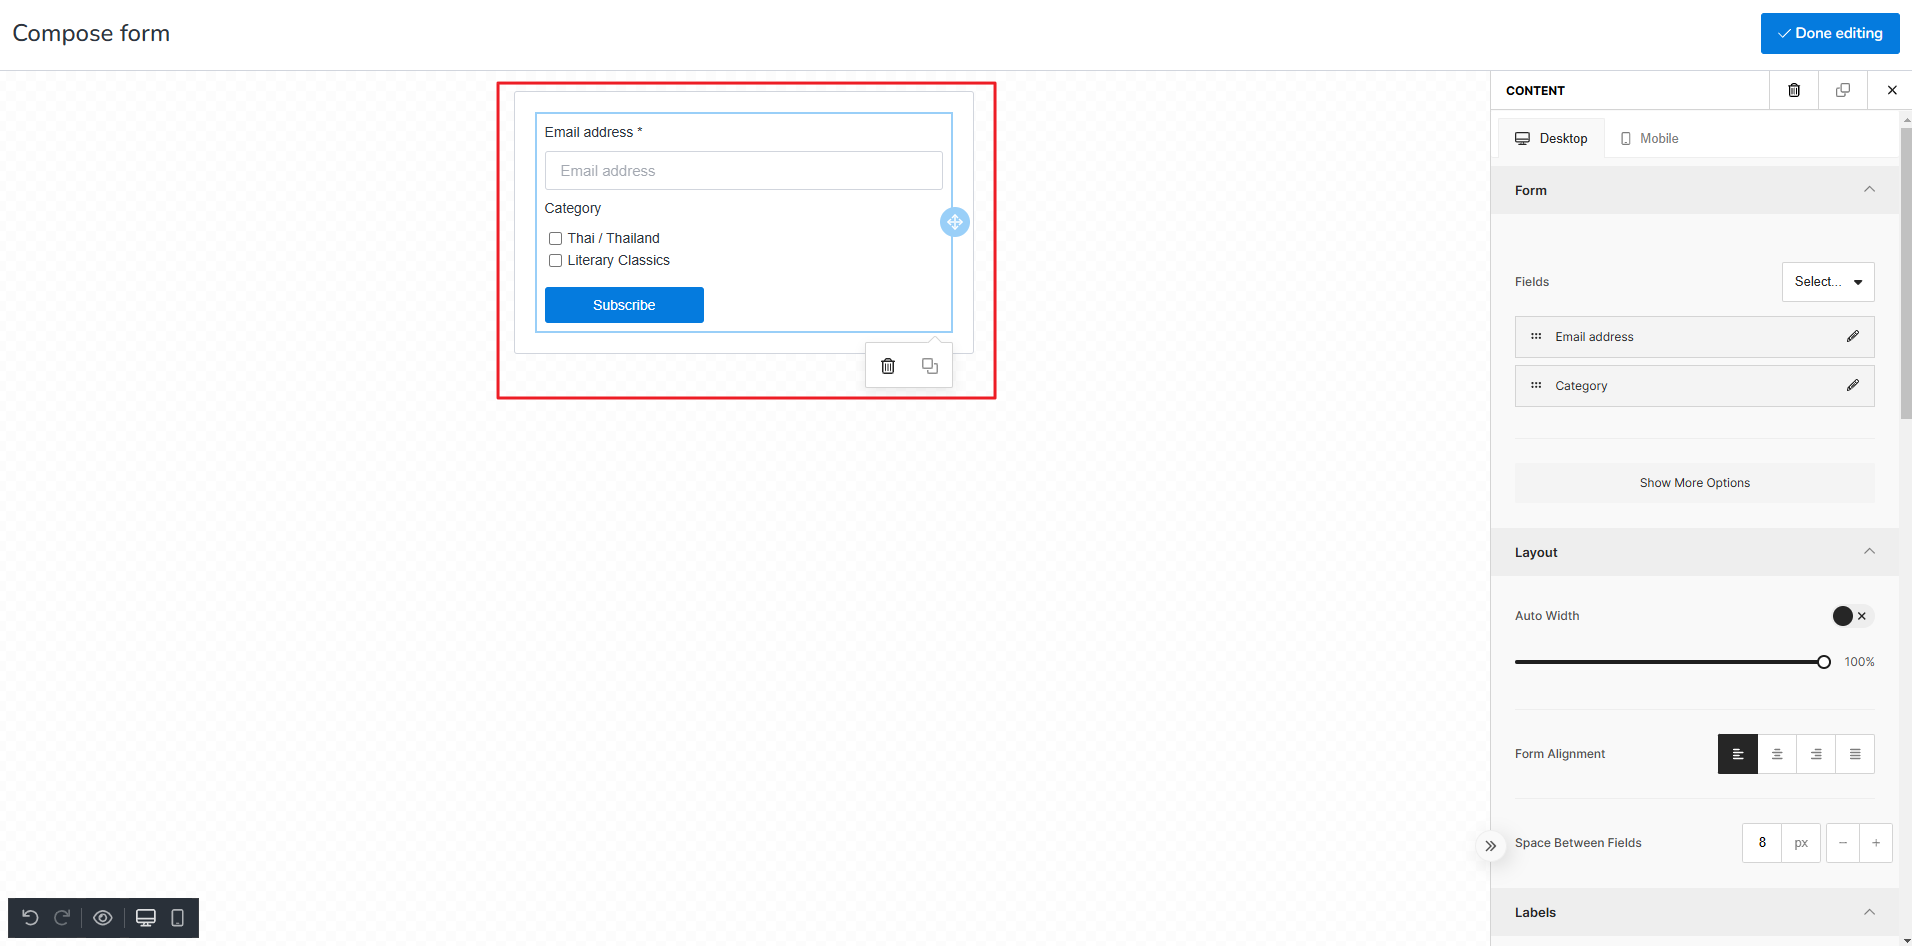
You will now notice two new checkboxes appeared under “Category” as shown below.
Click on Done editing.
Now scroll downwards as shown below. You can rename the form as we did.
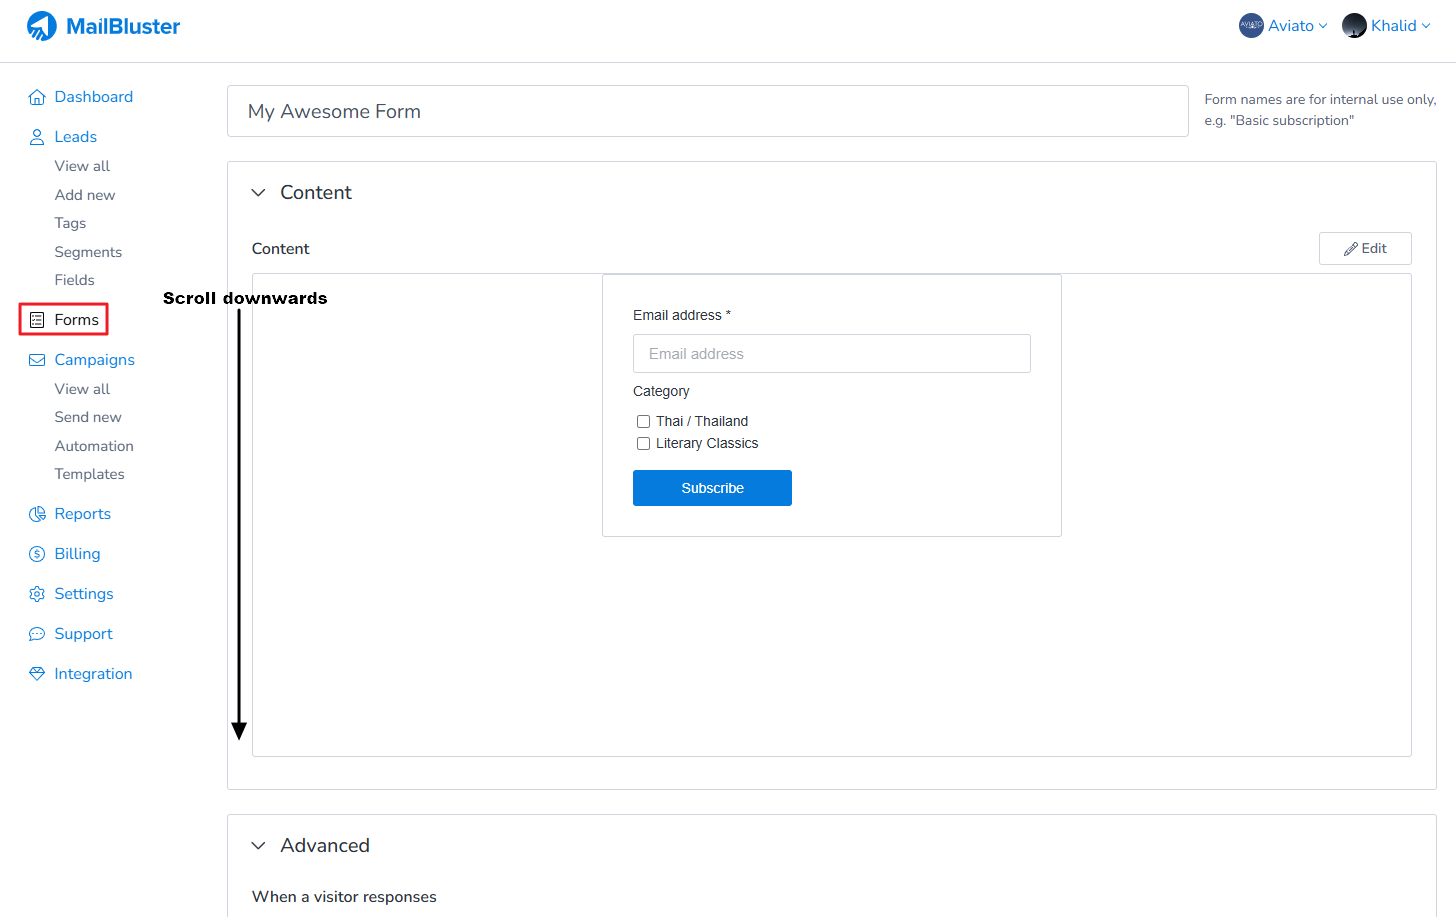
Click on Save changes.
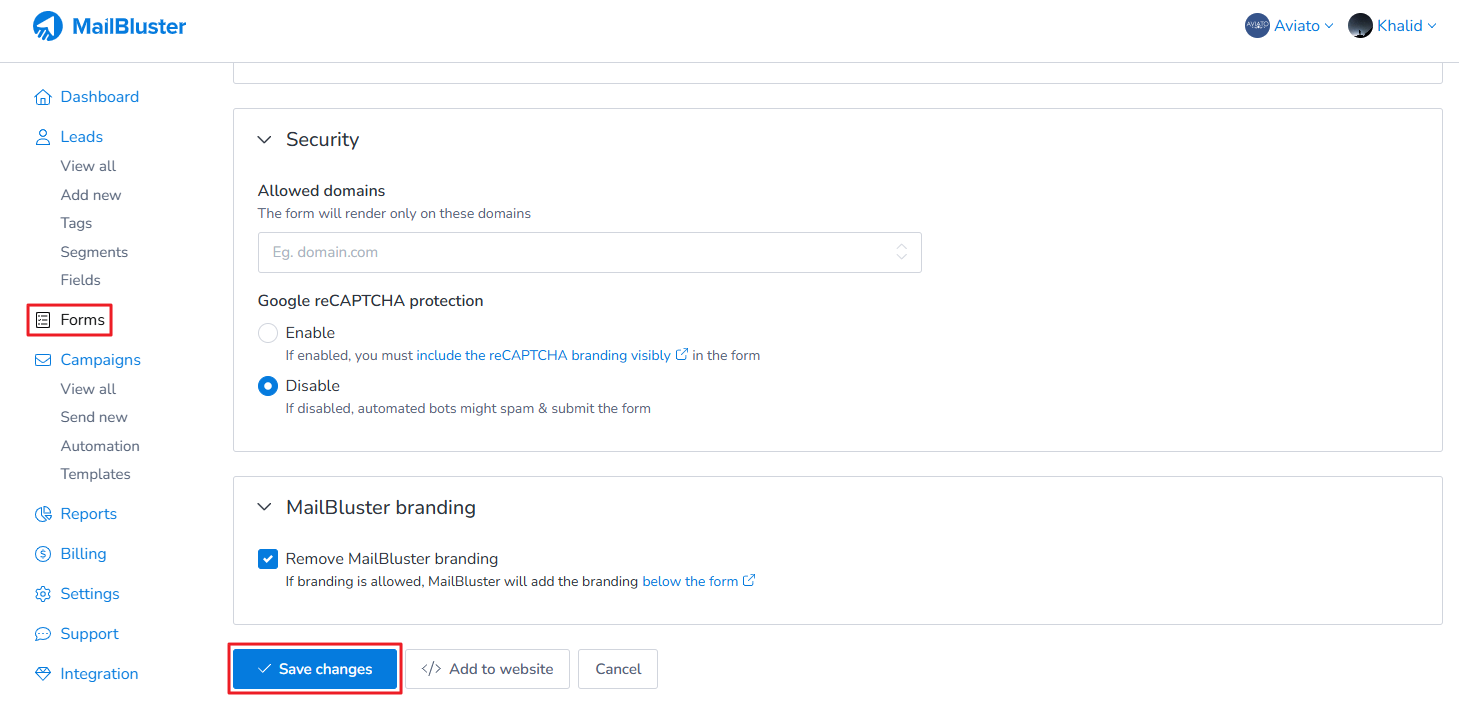
Write your domain name without https here in Allowed domains as shown below. Then click on Add to website.
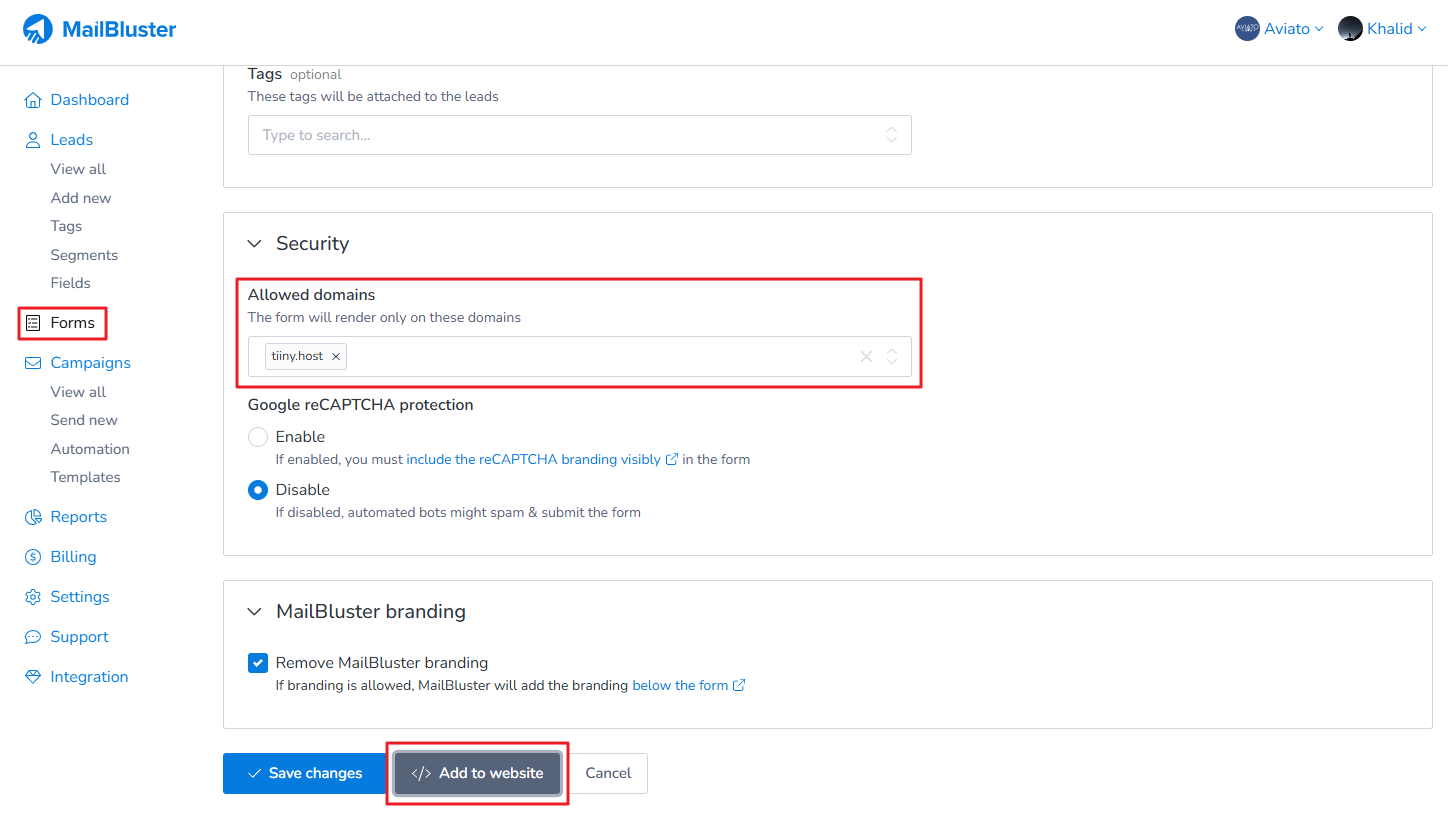
Add to website popup window opens. Click on Copy code.
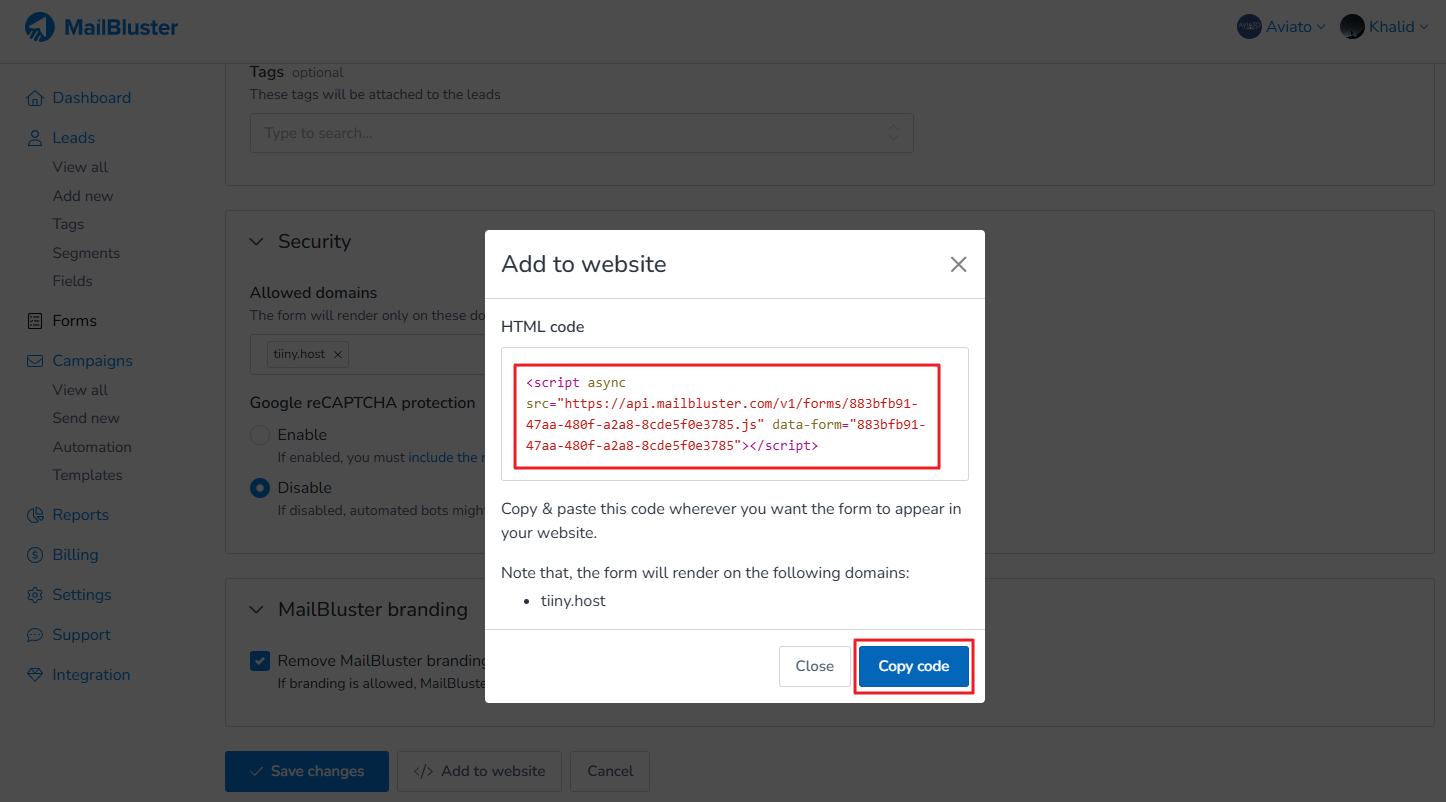
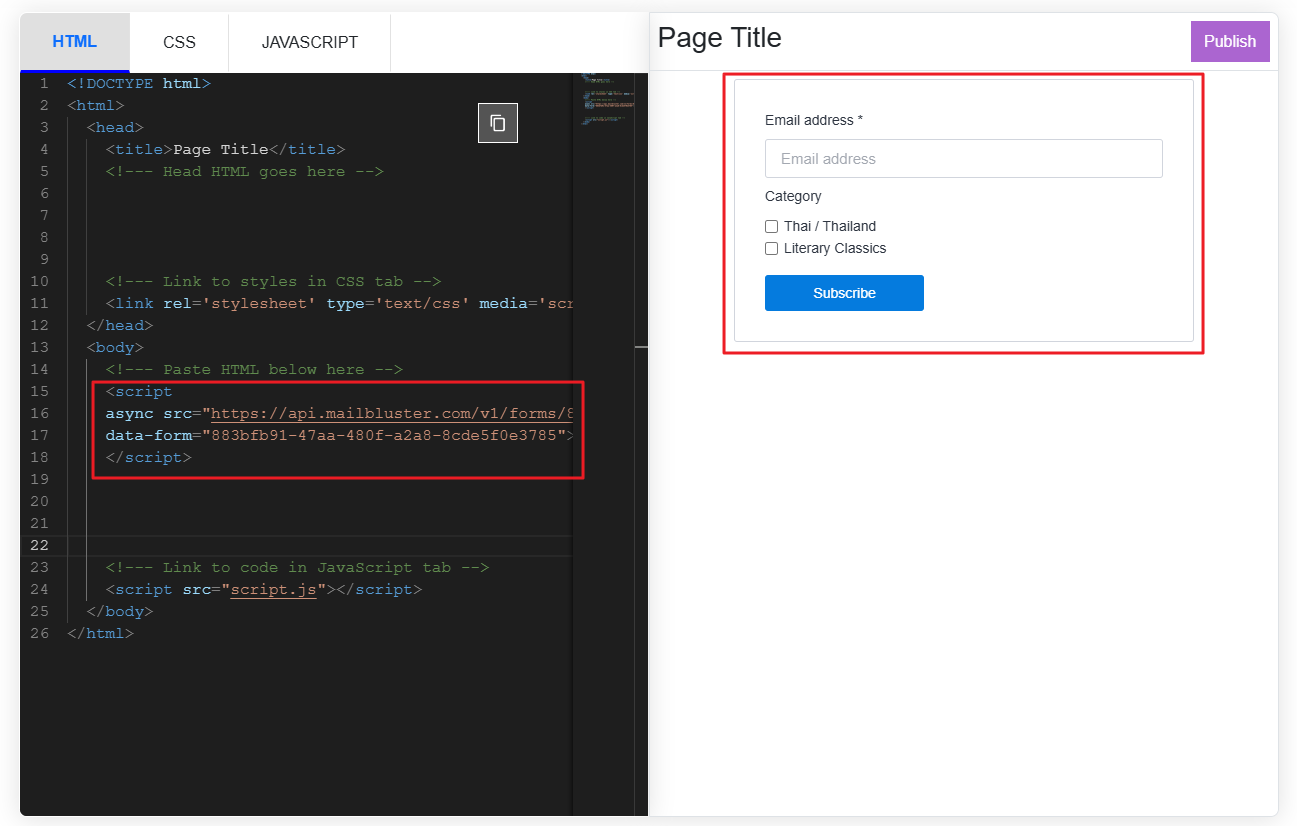
Now copy and paste the generated code to your website as shown below. This will generate your form in the website.
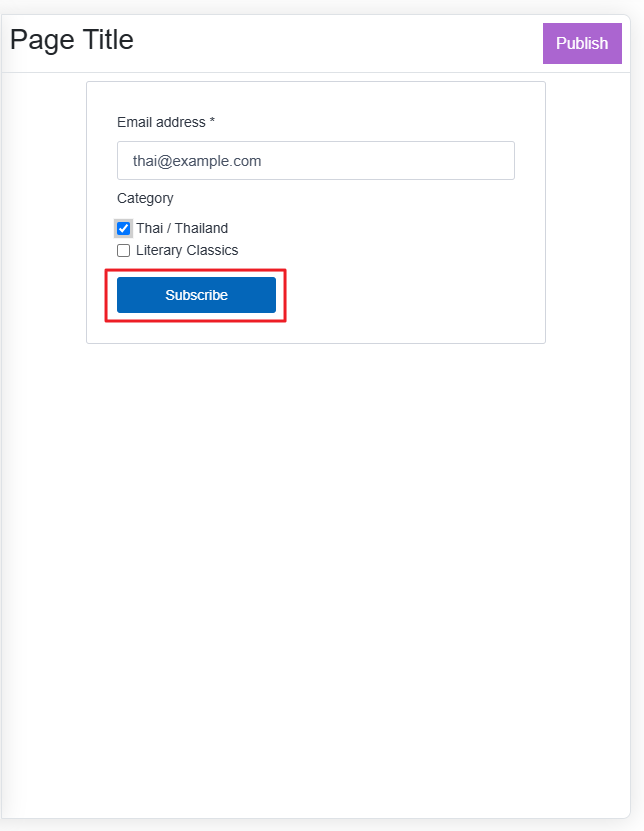
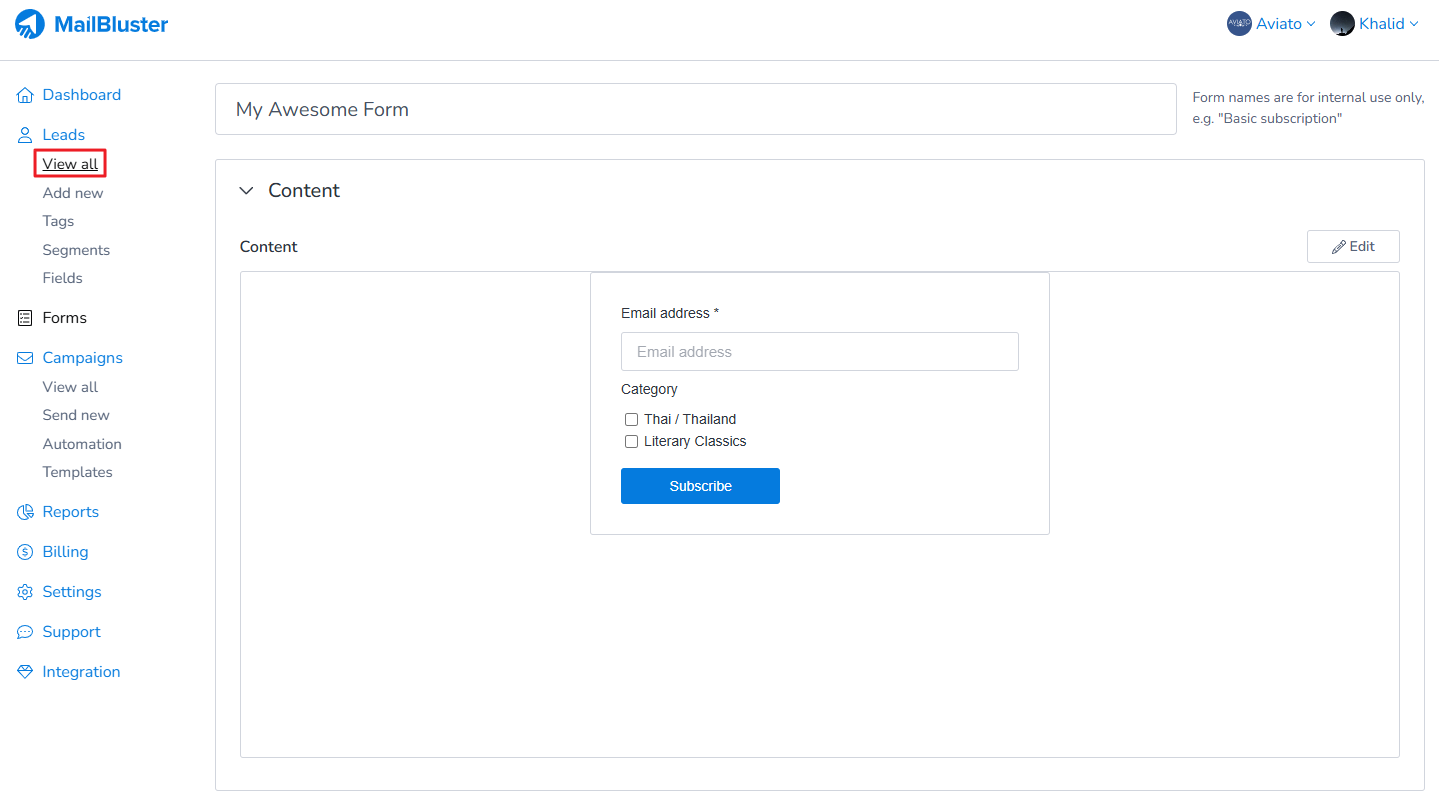
Now enter email address, click the first checkbox and hit Subscribe.
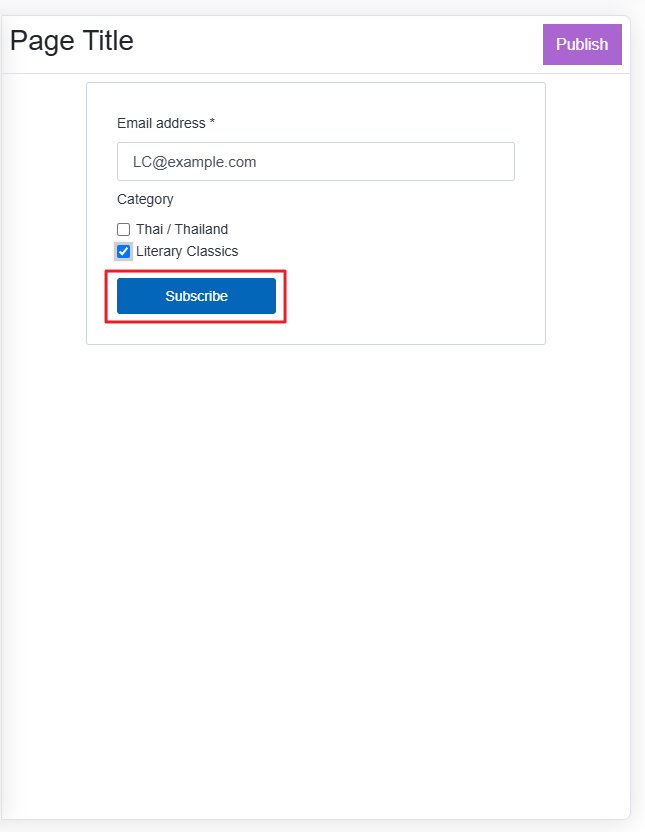
Then enter another email address, click the second checkbox and hit Subscribe.
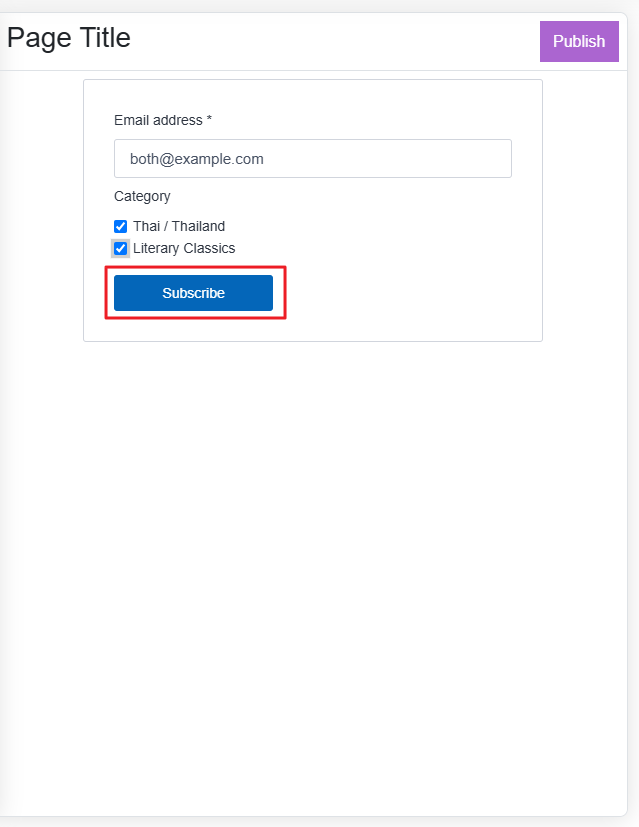
Then enter another email address, click on both checkboxes and hit Subscribe.
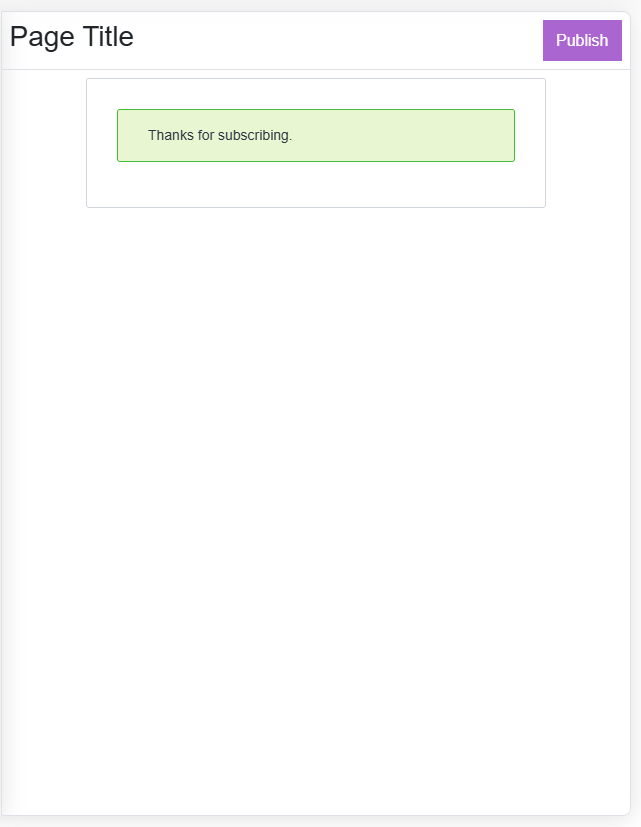
You will see success message for all the three options in your website.
Now go to your Brand in MailBluster and click View all.
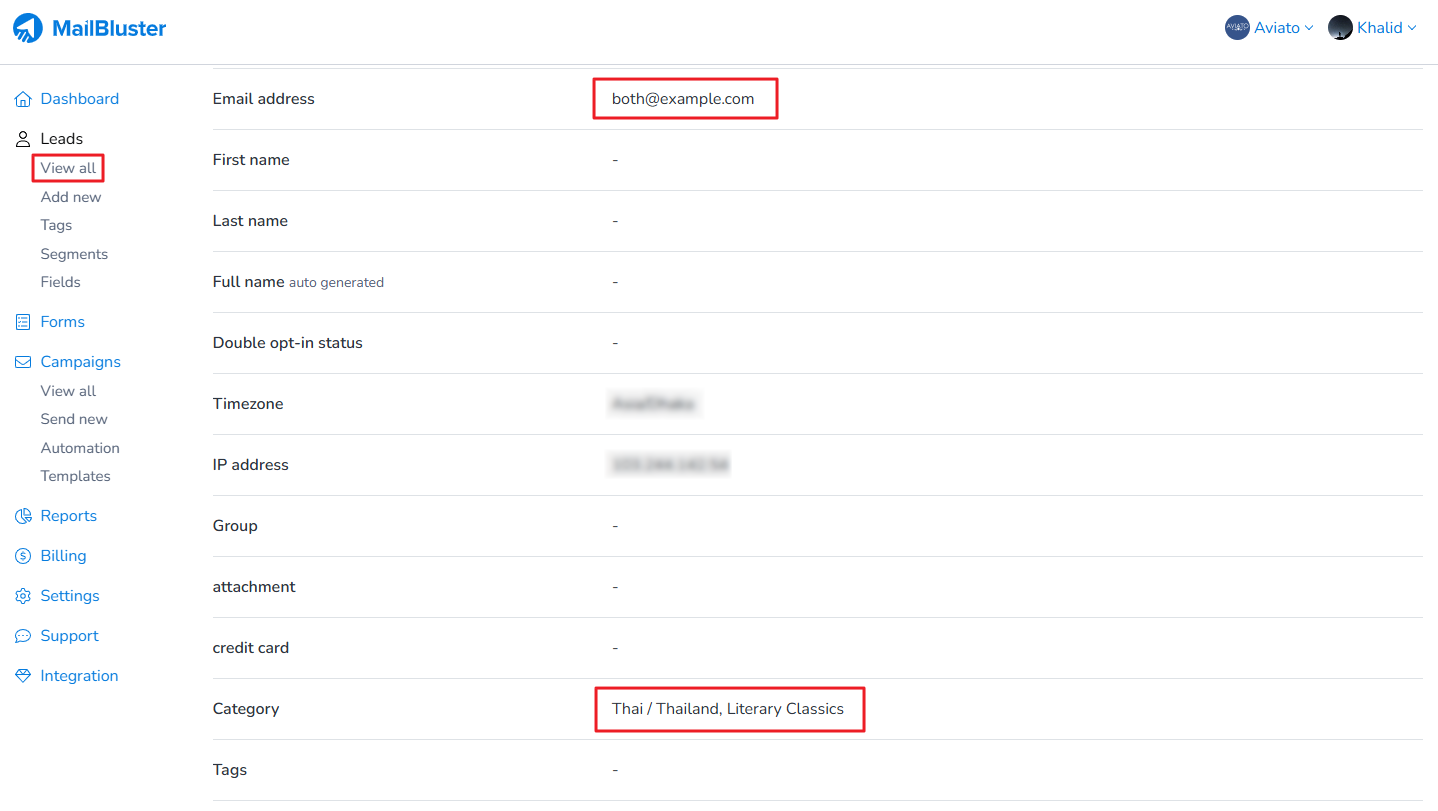
You will see three different email addresses has been added to Leads in MailBluster. Now click on each of the email address to check whether they are in respective category.
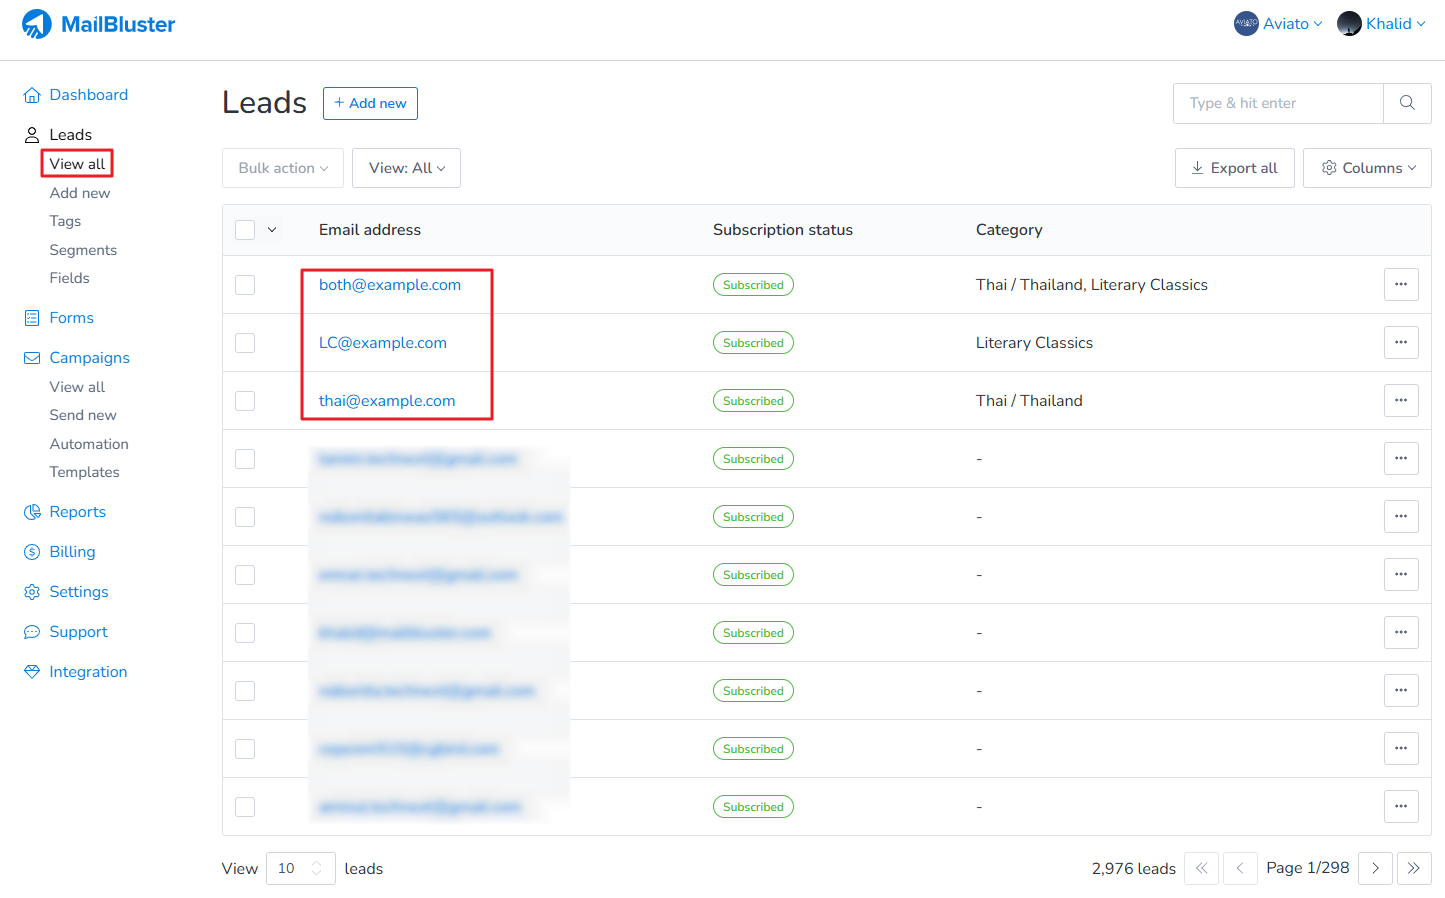
First email id stored is under its own category.
Second email id stored is under its own category.
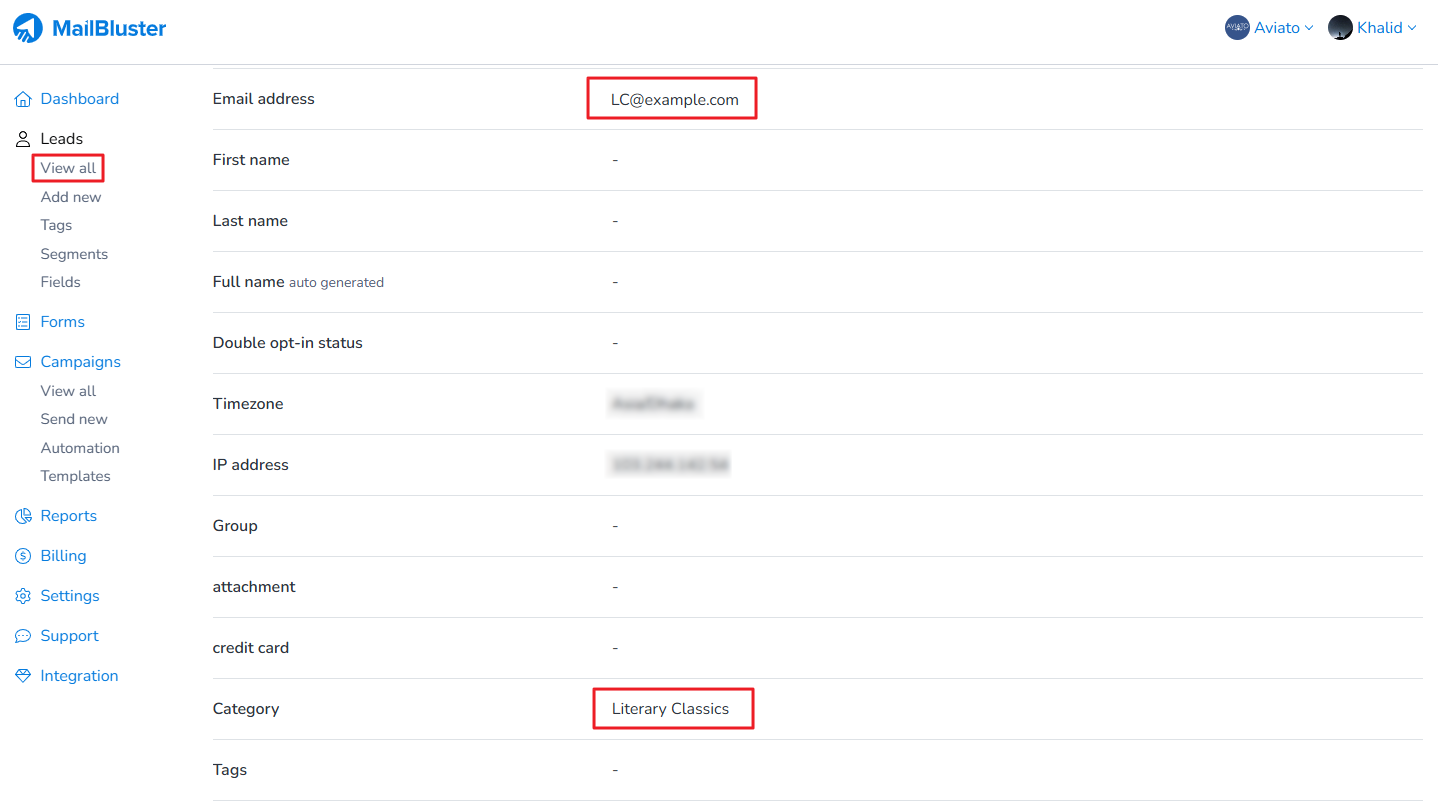
Third email id is stored under its own category.

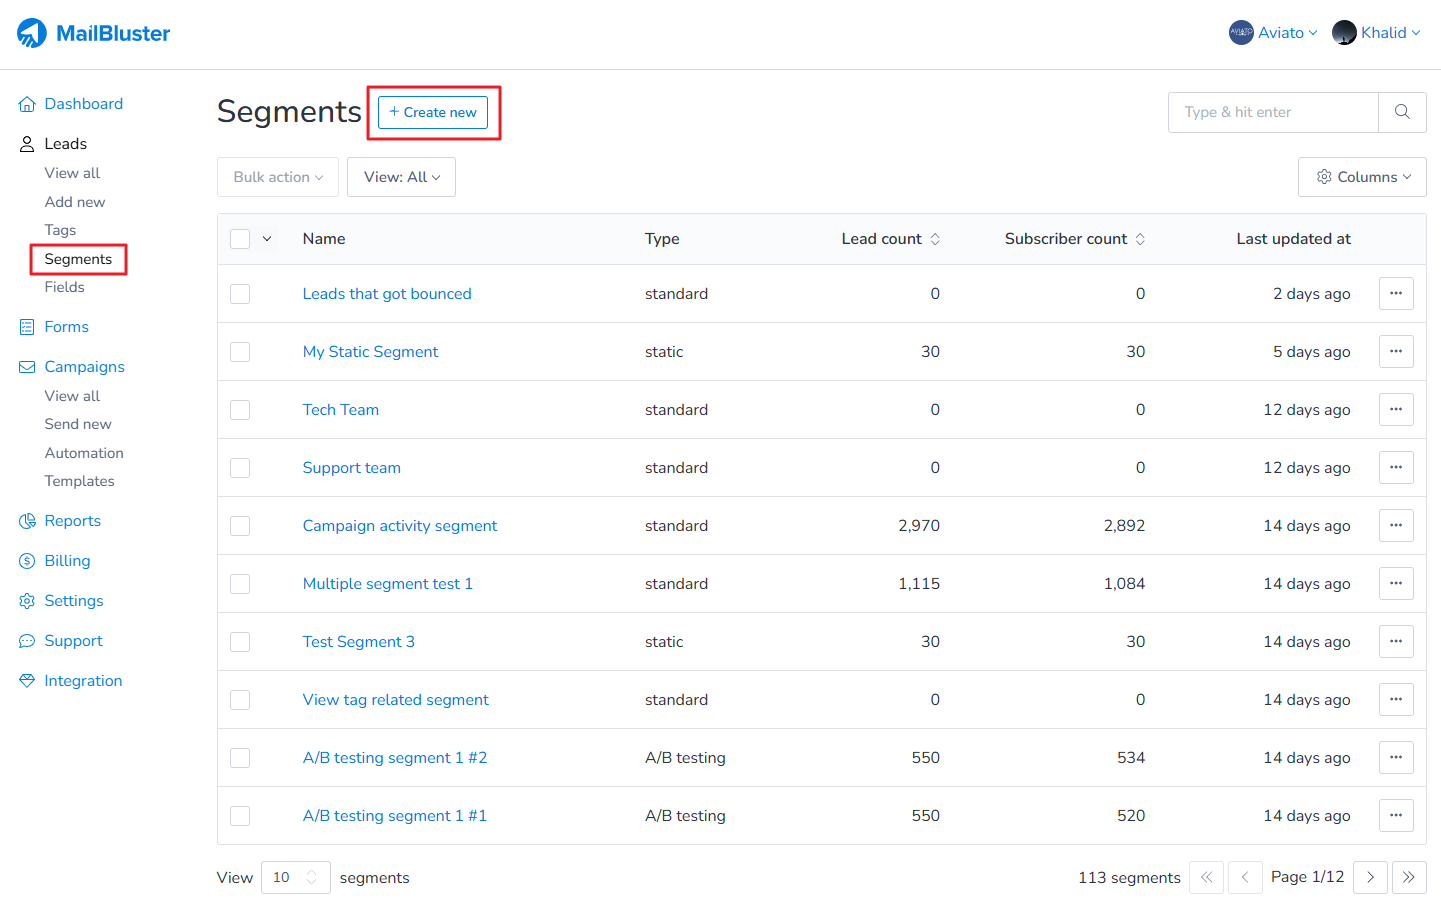
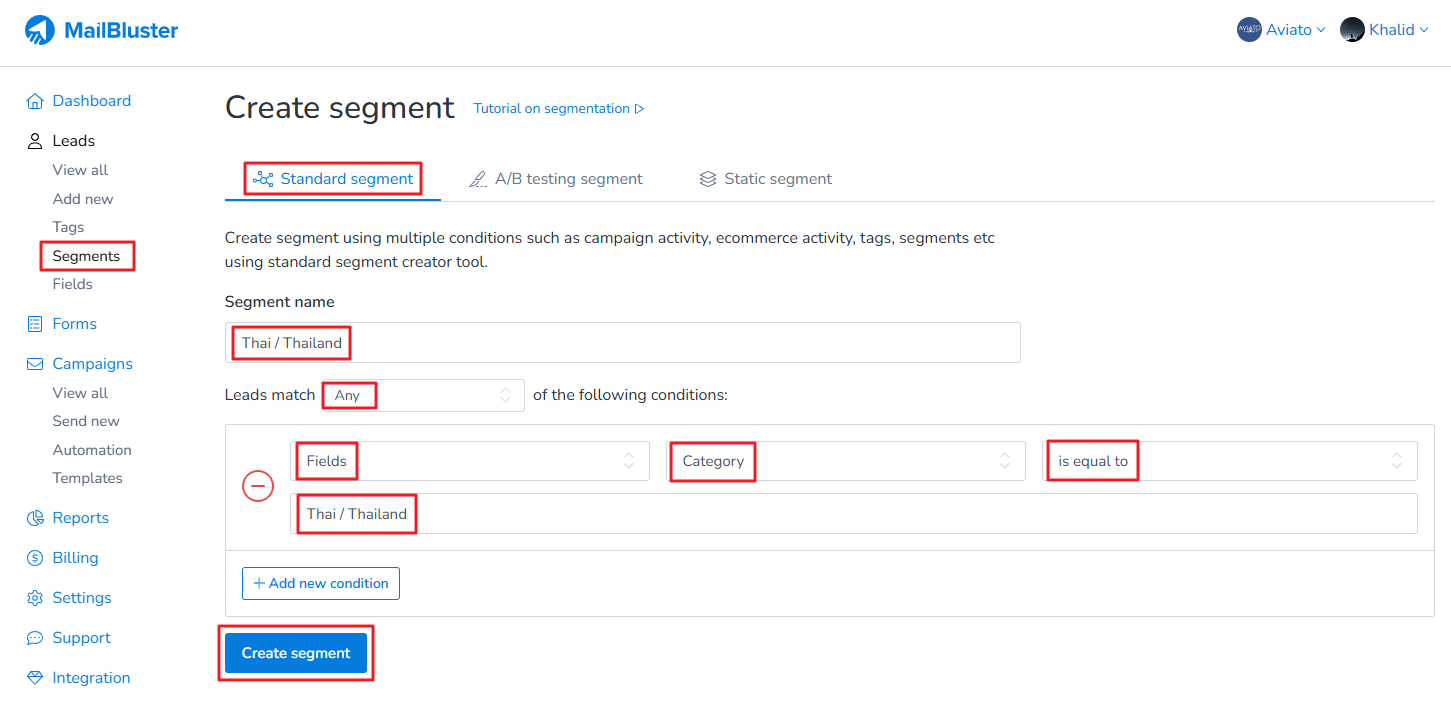
Now go to Segments and click on Create new.
Create standard segment for first category using the following conditions.
The standard segment is created using the first category. We named the segment same as the first category for understanding purpose.
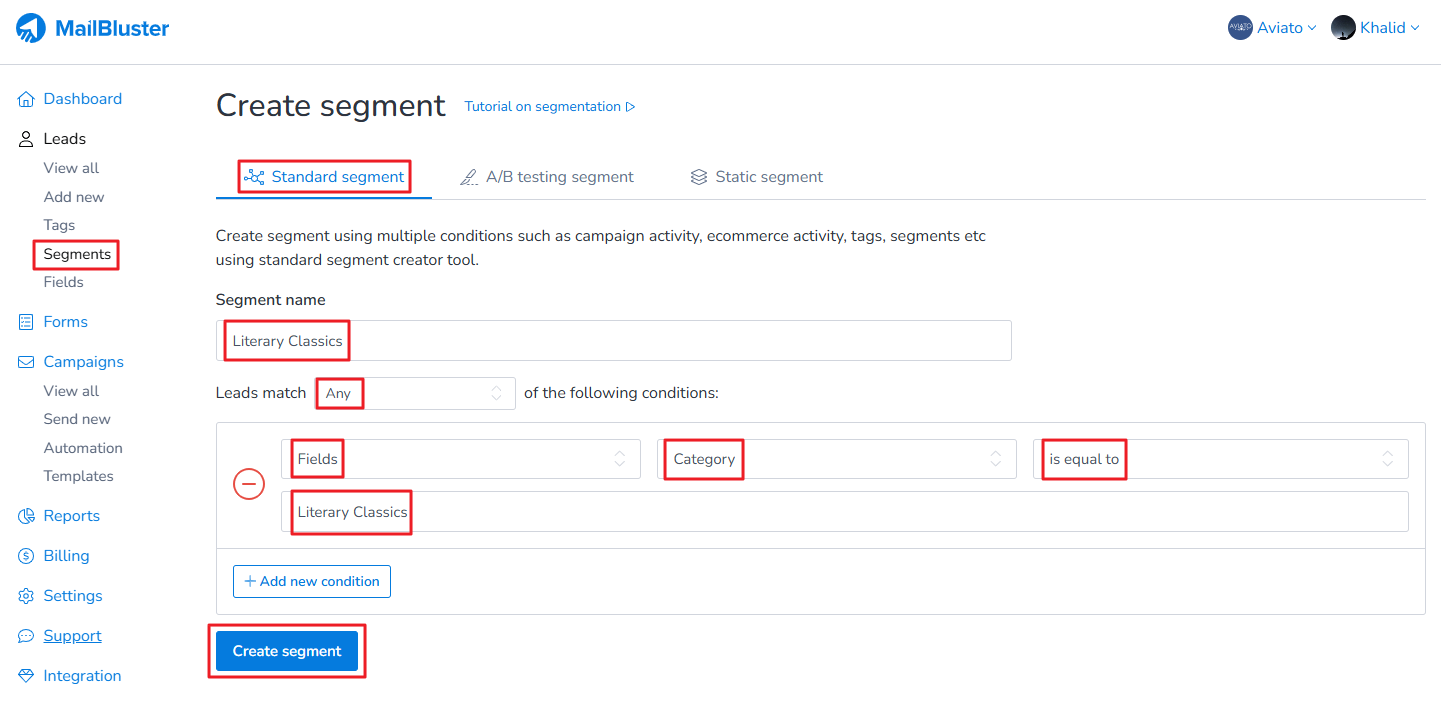
Create standard segment for second category using the following conditions.
The standard segment is created using the second category. We named the segment same as the second category for understanding purpose.

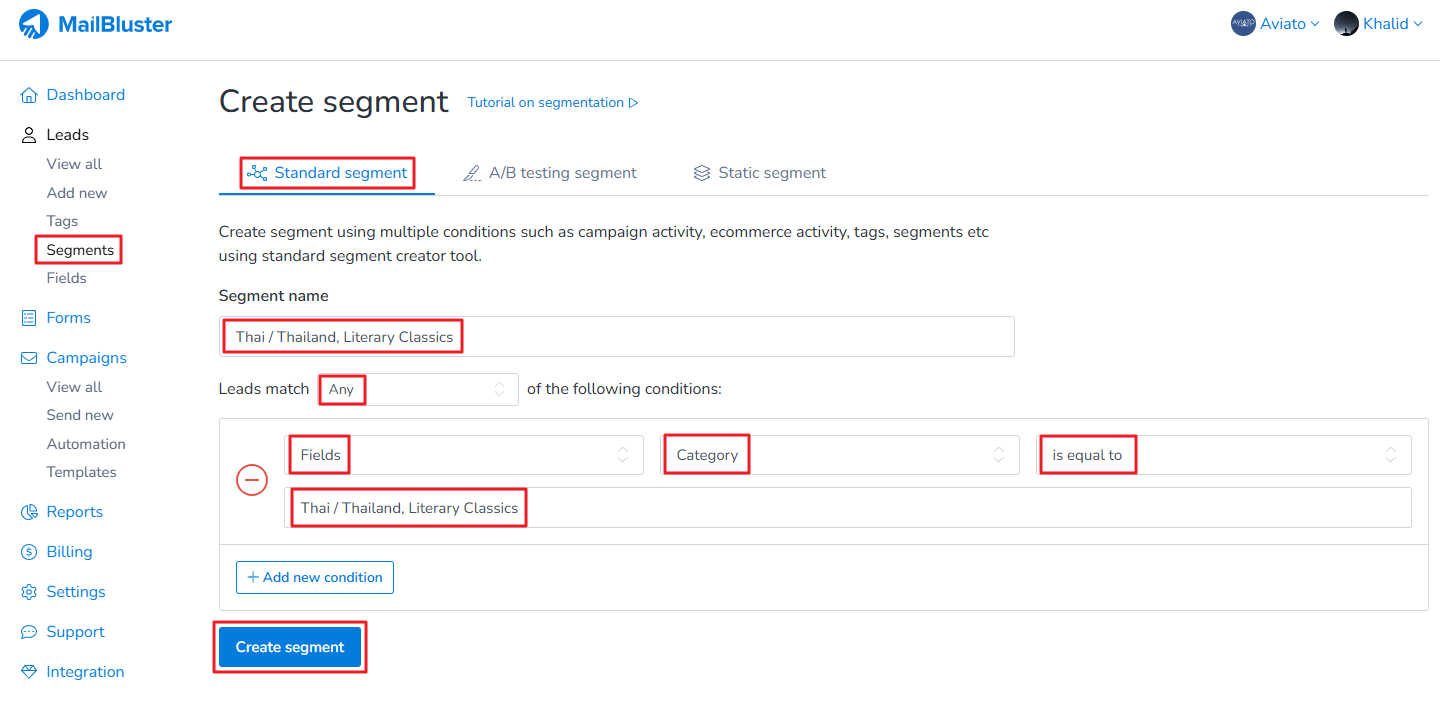
Create standard segment for third category using the following conditions.
The standard segment is created using the third category. We named the segment same as the third category for understanding purpose.
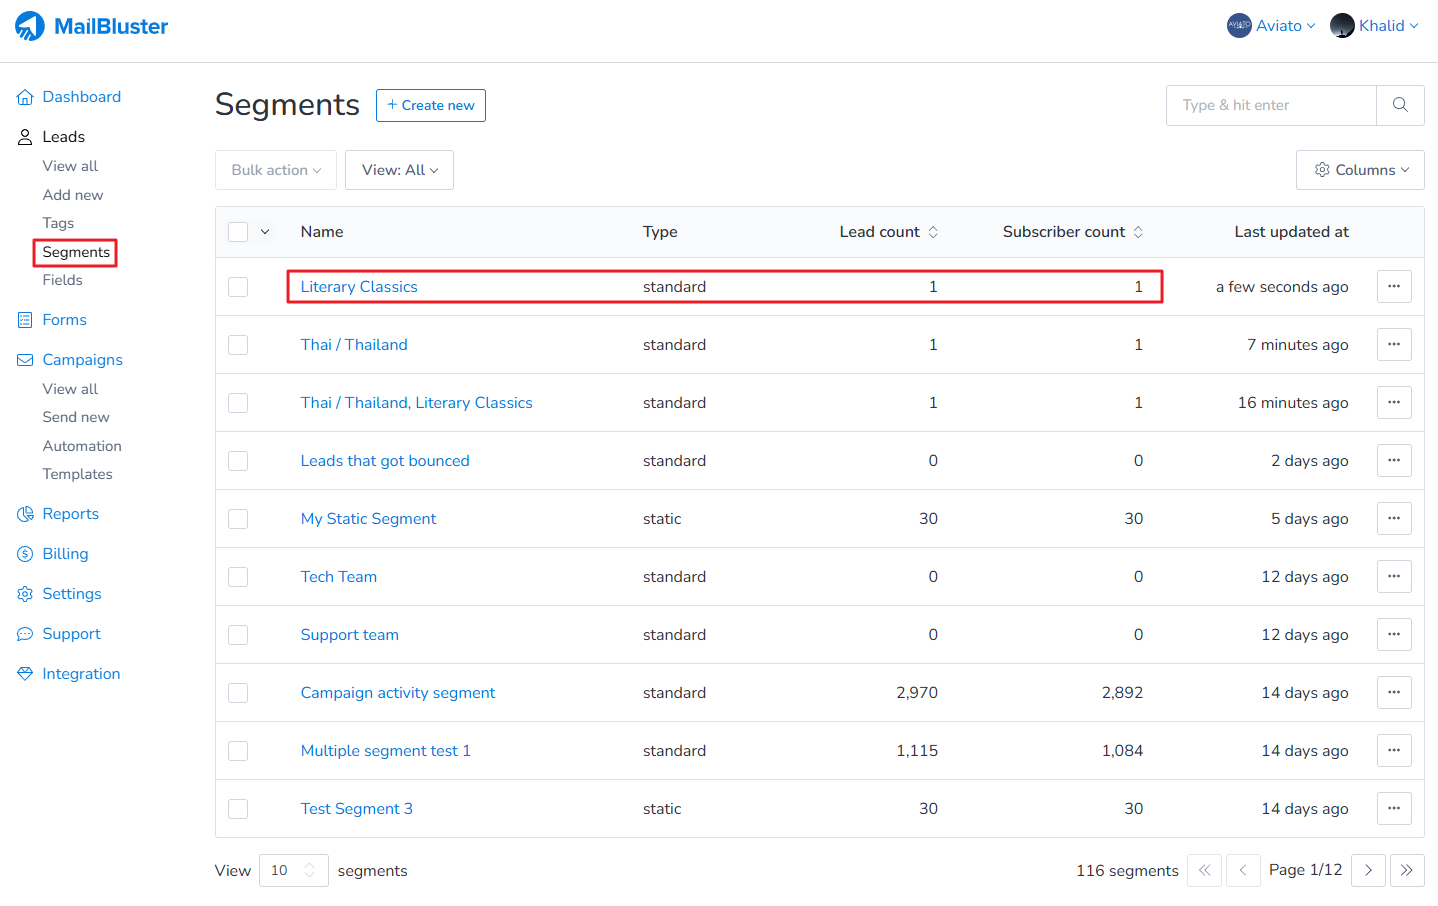
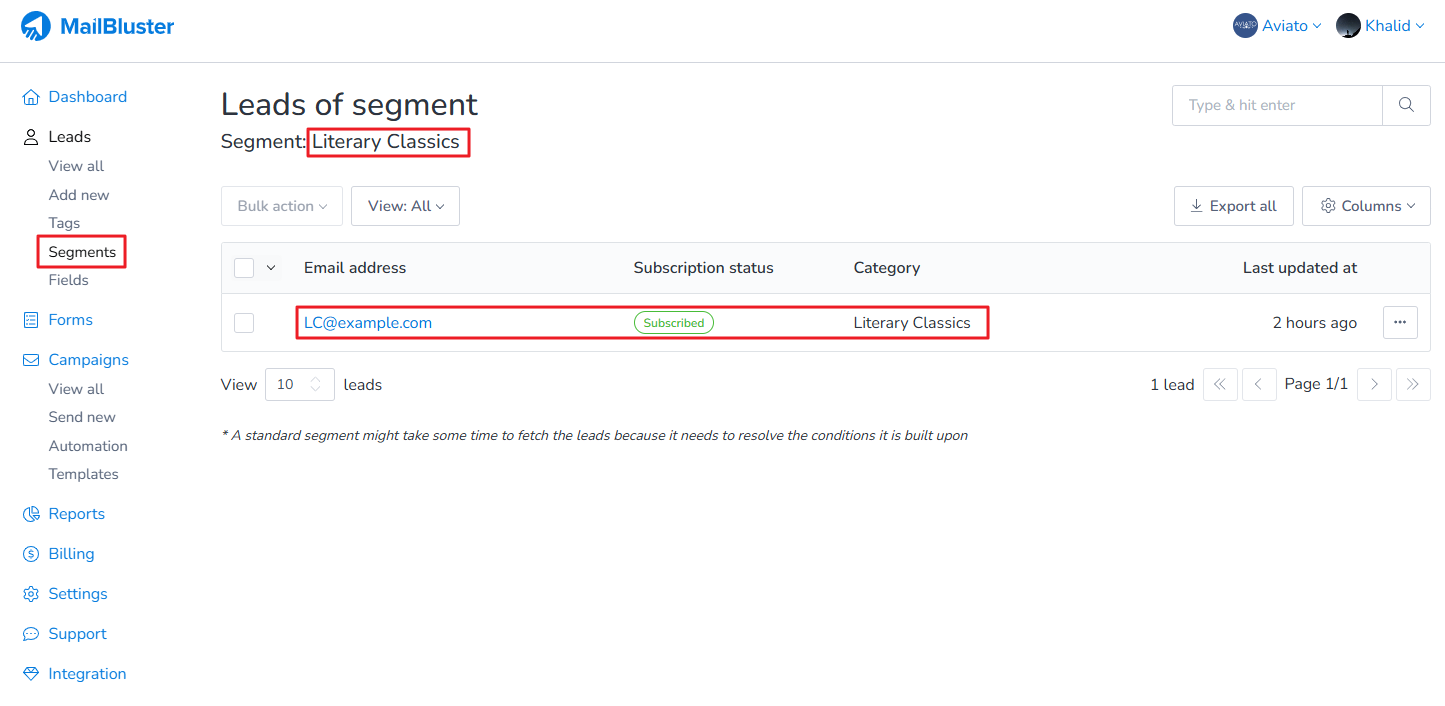
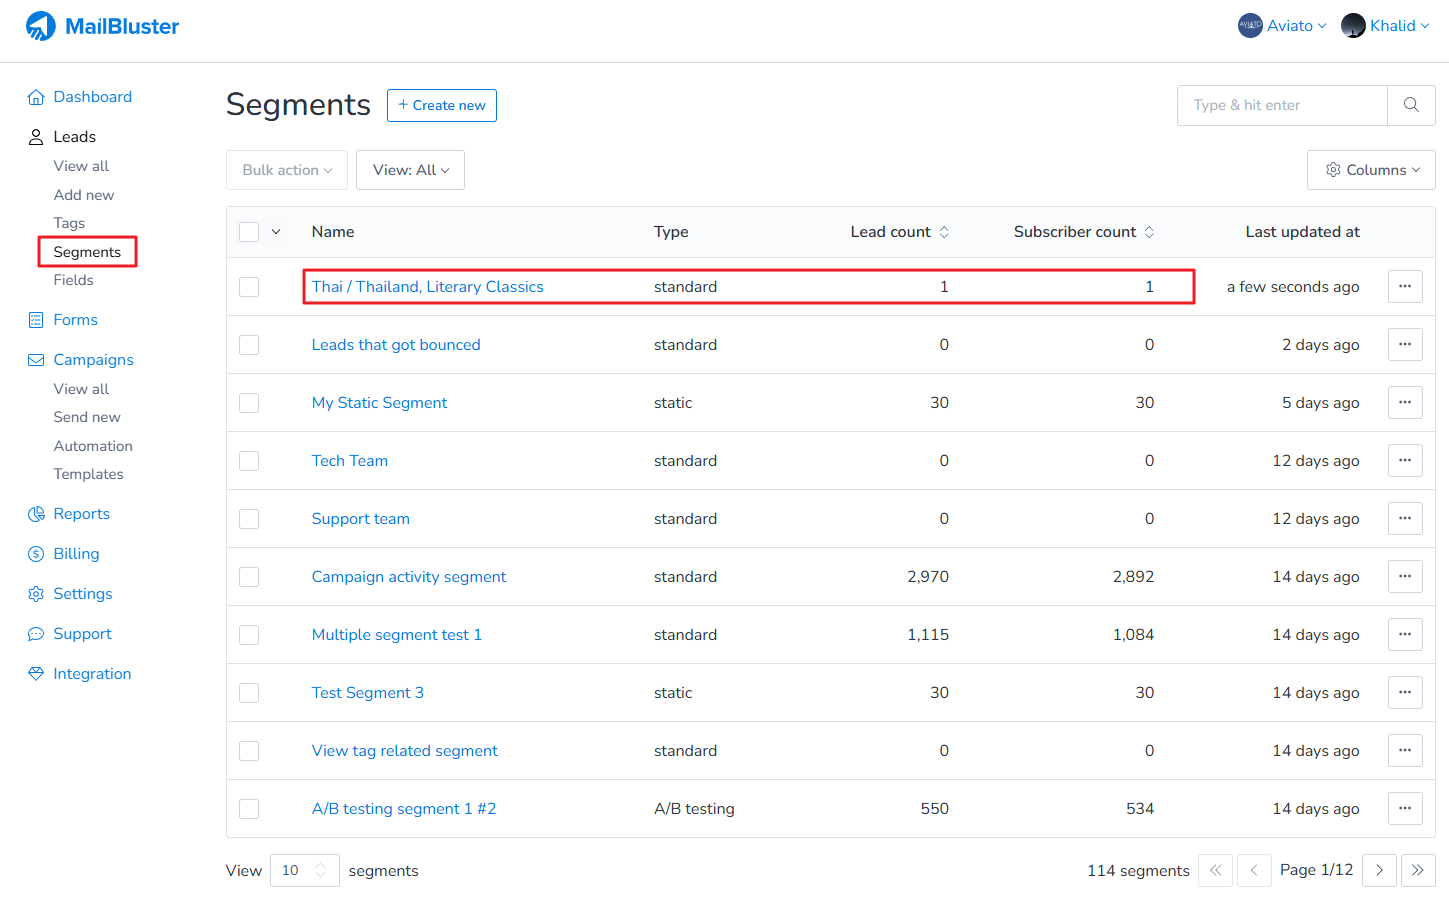
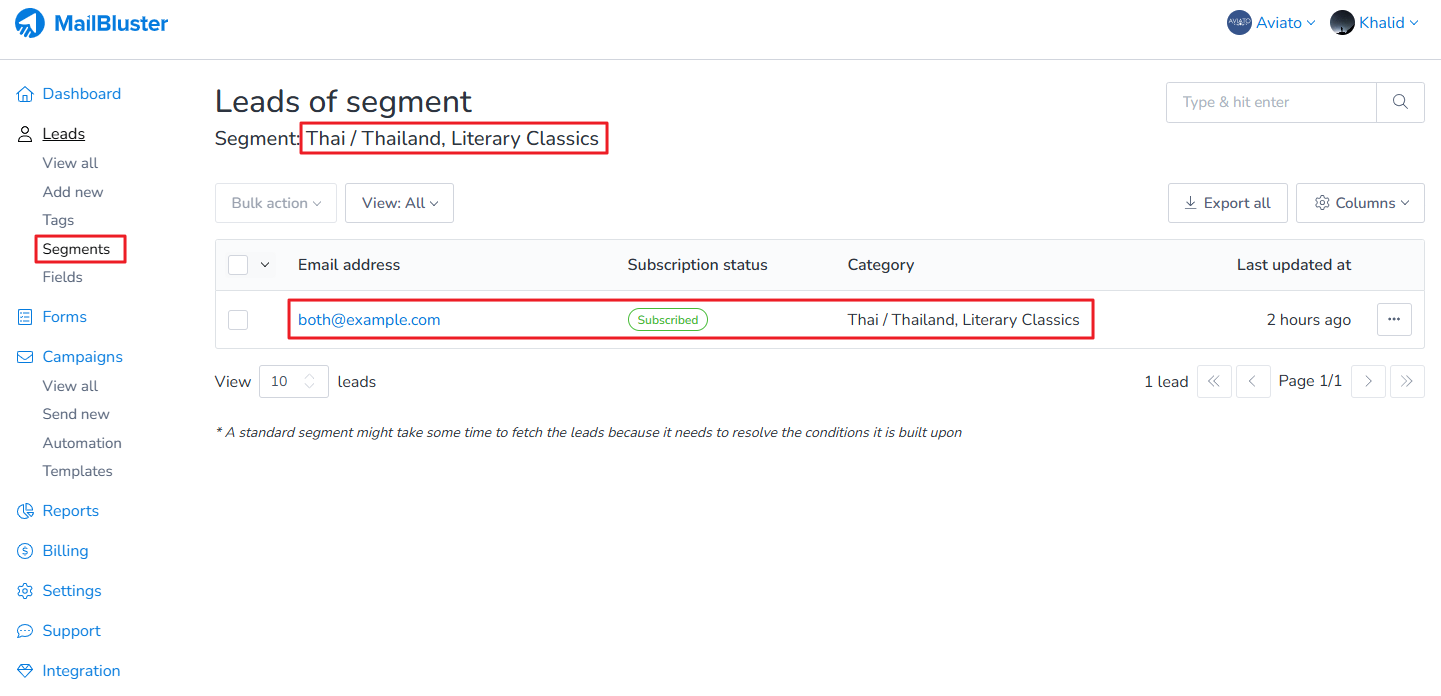
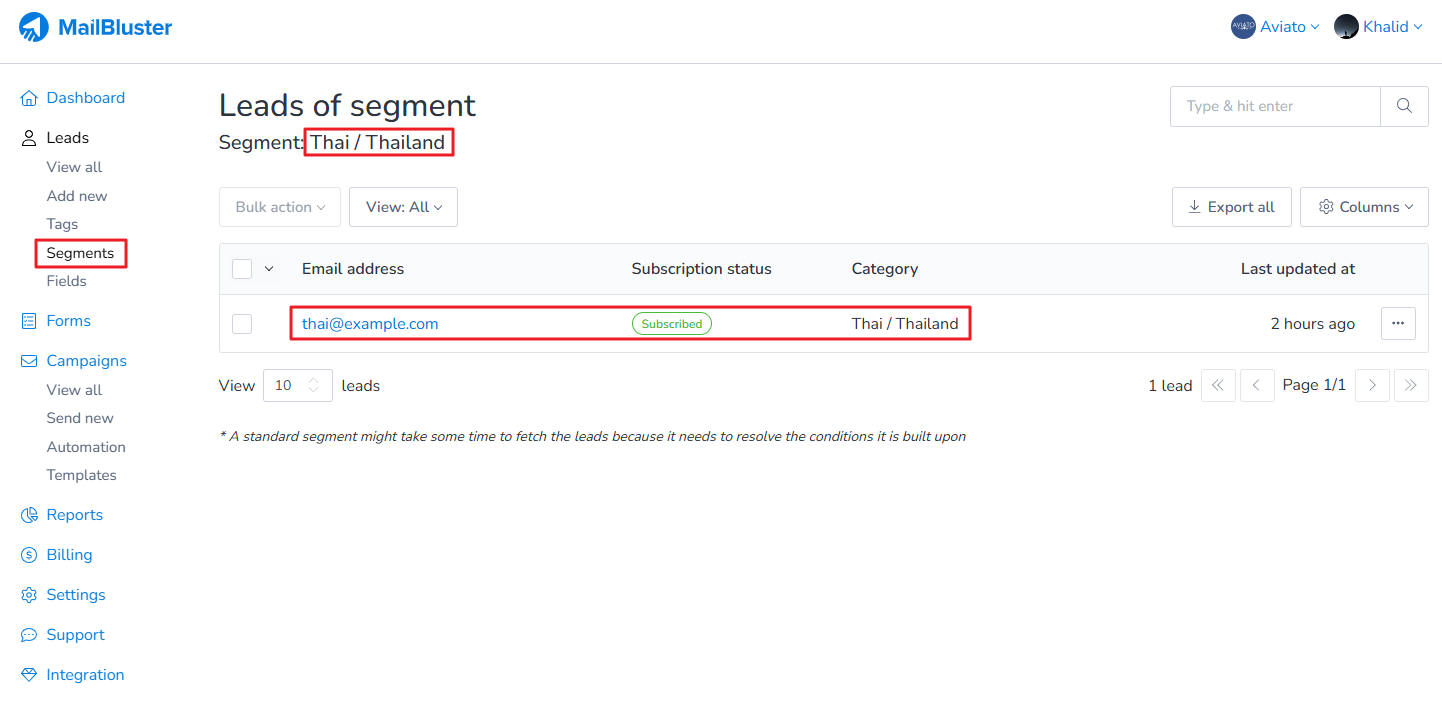
Now if we click on each of the above segment, we will see the lead (email id) under that segment in its respective category.
This is the lead (email id) under the second standard segment.
This is the lead (email id) under the third standard segment.