Email automation in campaigns works as a tool that automatically sends emails based on specific triggers—such as when a new lead subscribes through your website or app, when a tag is added or removed, or when a lead opens or clicks a link in a campaign, or when you want to send a series of emails in sequence. Instead of sending each email manually, the system handles it for you, making the process more efficient and organized. You can also use automation to send Welcome Emails and Email Sequences.
Here you will learn the basics of Automation workflow in MailBluster. Using this automation, you can automatically send emails (or a sequence of emails) to those recipients when they join your website, are added or removed from a tag, or interact with a campaign by opening or clicking a link
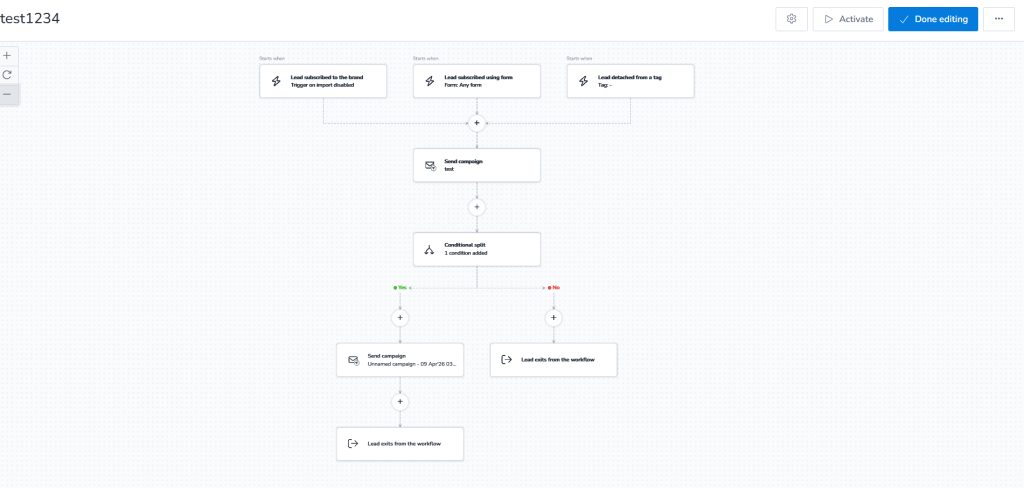
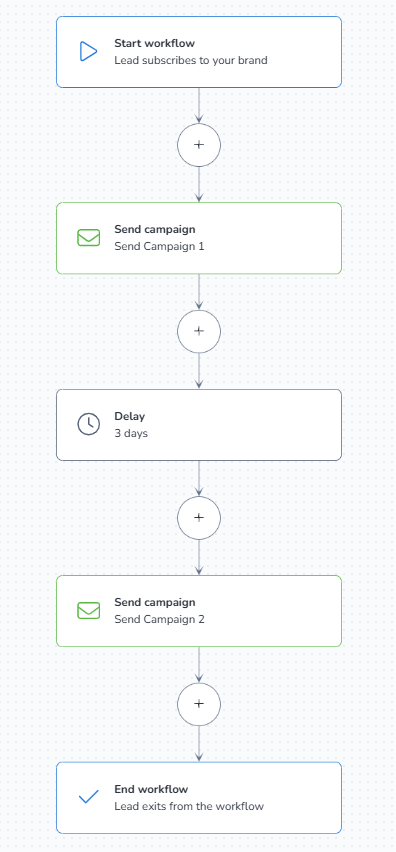
This is an example of an Automation workflow in MailBluster:
If you modify the Automation workflow, the behavior may vary for each lead because not all leads start the workflow at the same time. Different leads will be at different steps depending on when they entered the workflow. Leads that haven’t yet reached a newly added step will be eligible for it, while those who have already completed the workflow will not be affected by the changes.
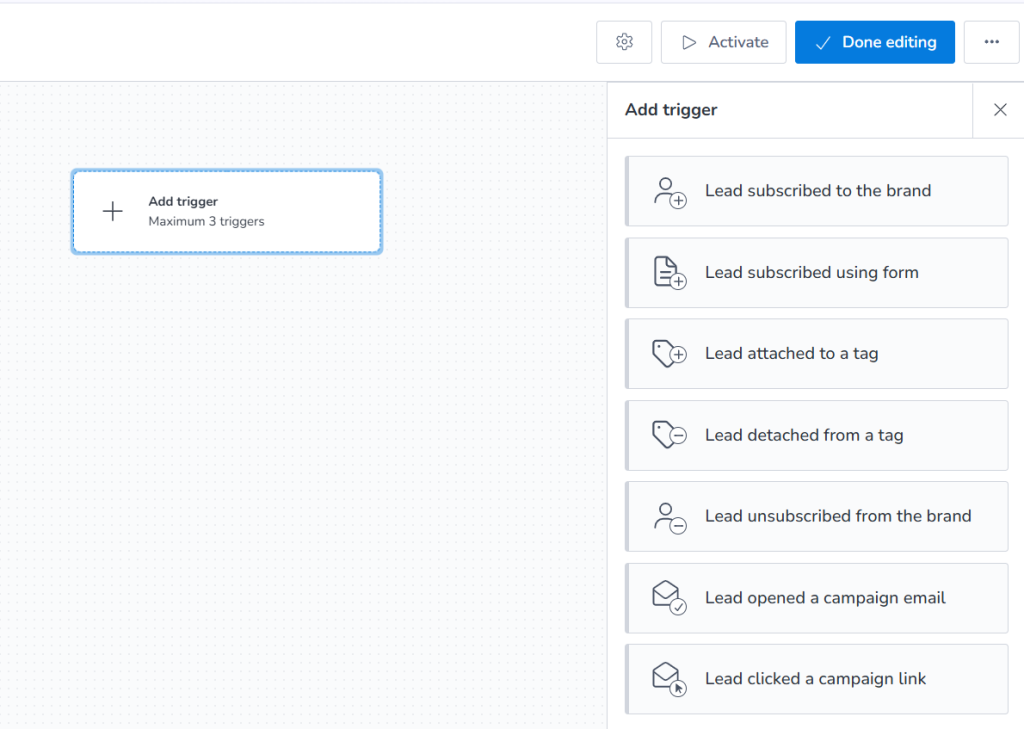
MailBluster automation feature helps you to automatically send a sequence of emails to your audience based on the triggers you set. It helps streamline your communication and build engagement effortlessly. MailBluster offers seven trigger options in the Add trigger to enhance the convenience of your automation:
Lead subscribes to the brand
The Lead subscribed to the brand trigger occurs when a user subscribes to your brand. You have two options for lead triggering on Subscribe –
Trigger on imported leads
Trigger on manually subscribed leads
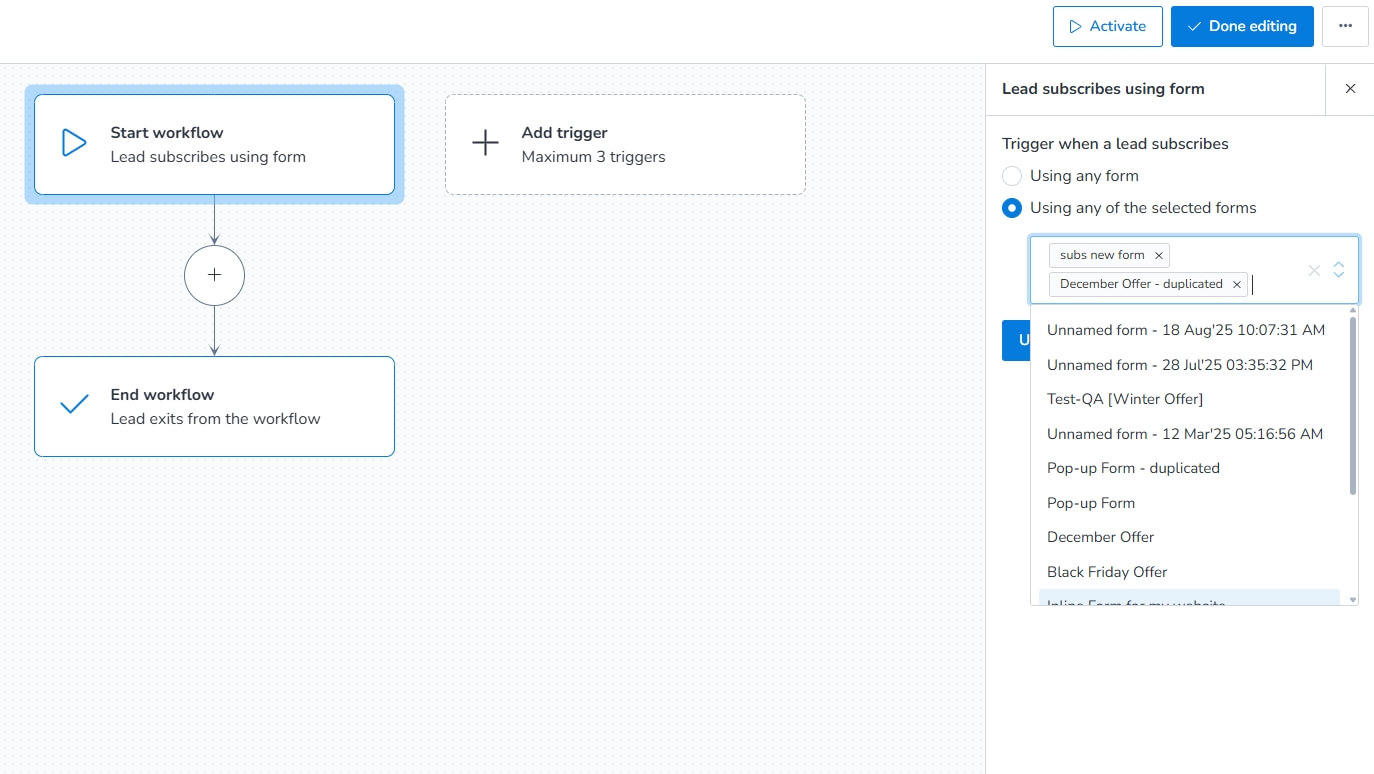
Lead subscribes using form
When you add Forms (Inline forms or Pop-up forms) using MailBluster and users subscribe using this form, this will trigger the automation workflow.
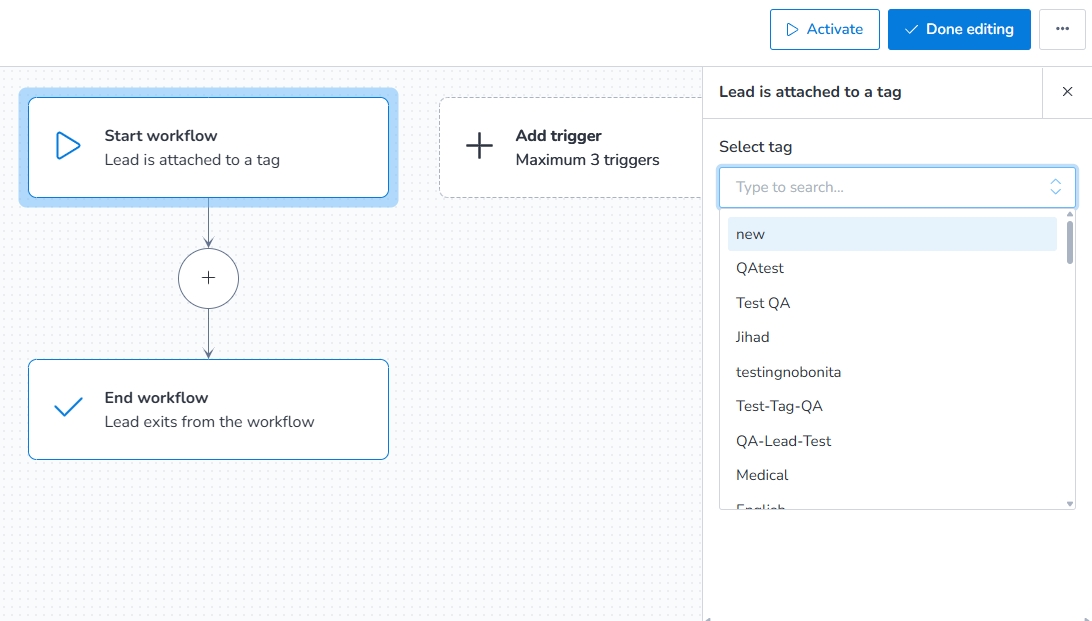
Lead is attached to a tag
Lead is attached to a tag trigger works under a specific tag, where users subscribe through a specified section, set by you. You create a section in the form, API, or integration, and give it a title. Now, create a tag using the title and add the tag from the Select tag and Update.When a lead subscribes through the form, API, or integration under your specified section that you add as a tag, this will trigger the automation workflow. For more information on tag adding, see segment leads based on tags.
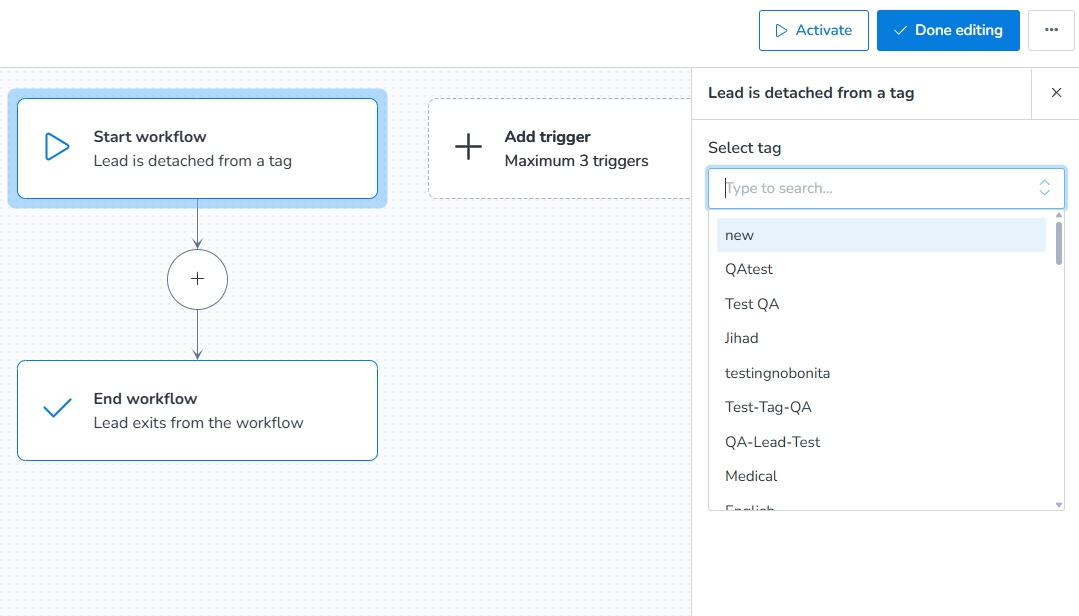
Lead is detached from a tag
The Lead is detached from a tag trigger works for the subscribers who detach from a specific tag (remove tags documentation for API call). Suppose you attach a tag in Forms or in an integration under particular criteria, like a customer finished purchasing. Create an API call or integration when the customer finishes purchasing. When a specific customer completes the purchase, it will trigger the workflow and remove them from the previously attached tag.
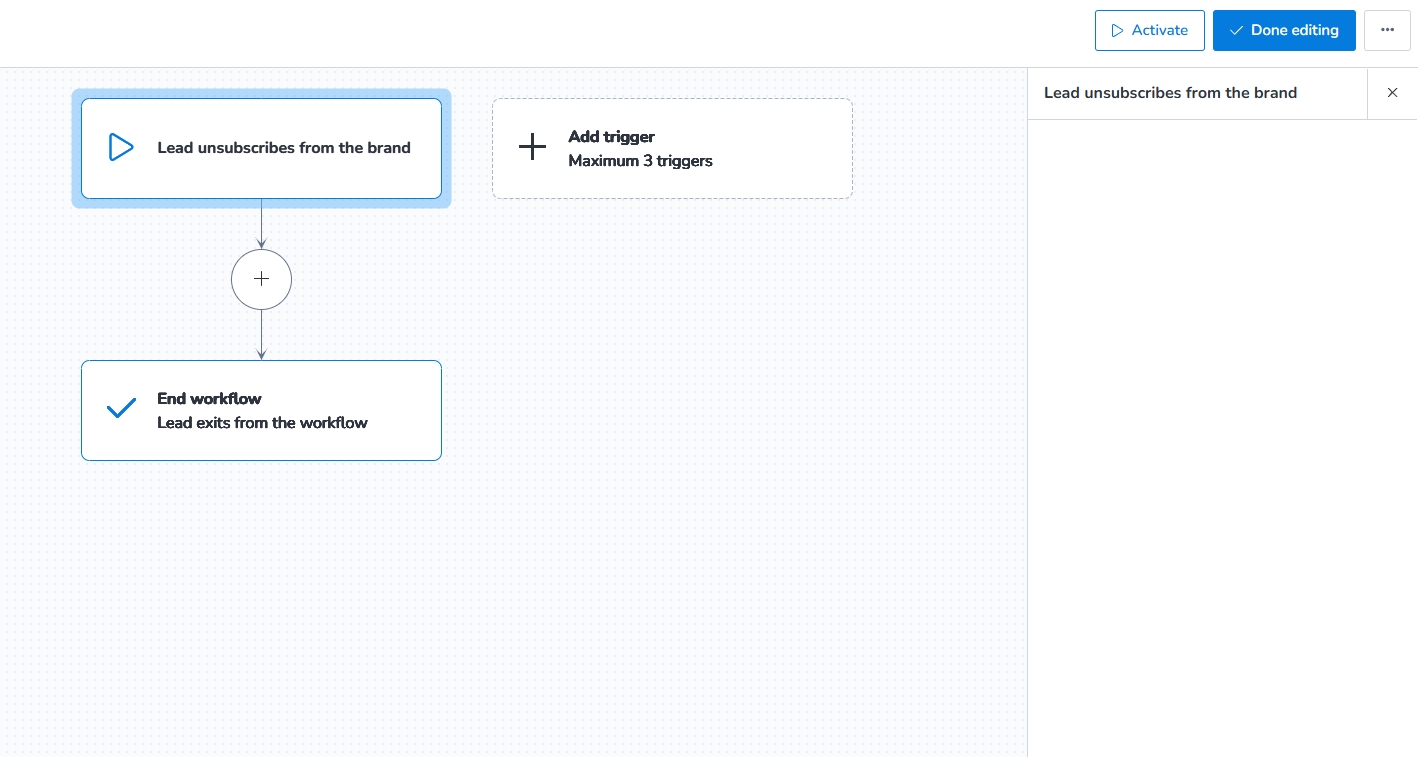
Lead unsubscribes from the brand
When subscribers unsubscribe from your brand, this will trigger the workflow.
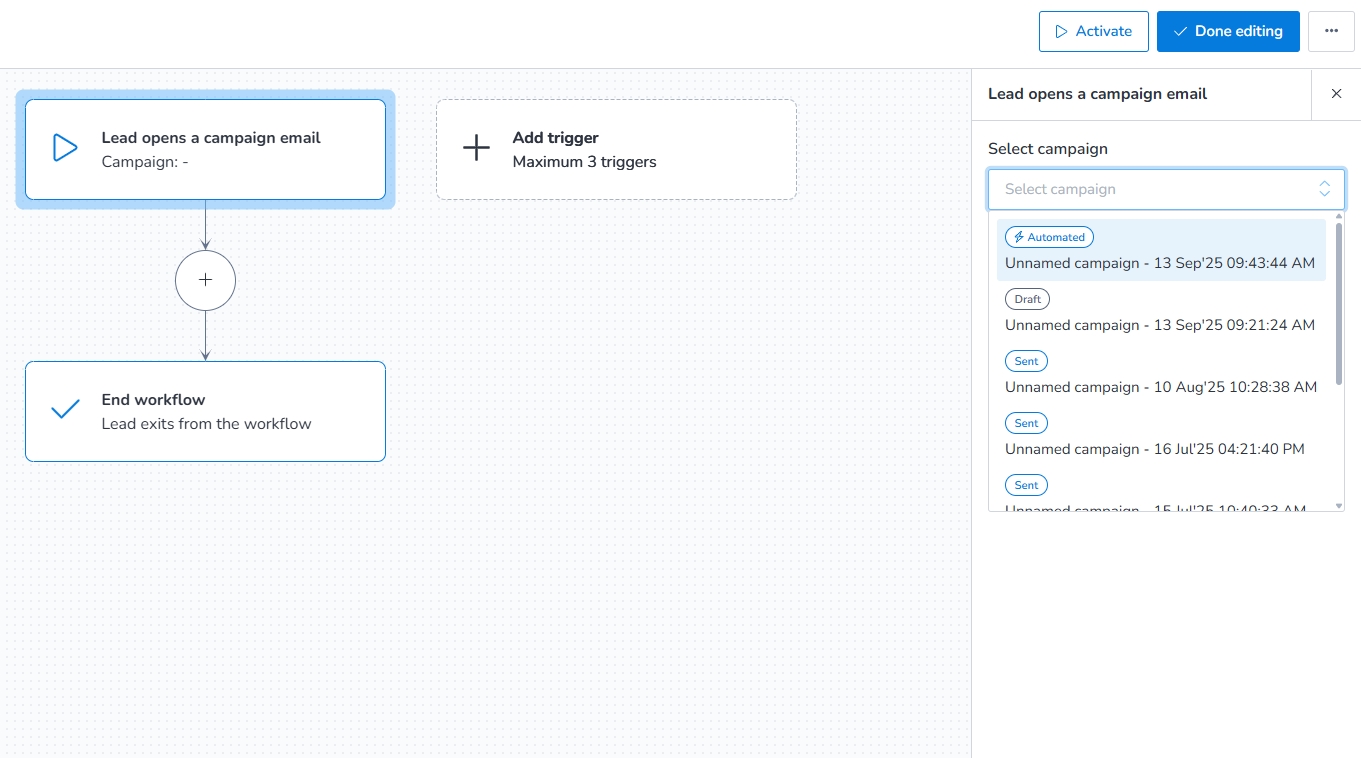
Lead opens a campaign email
When you add the open campaign email to the Add trigger, the lead who opens your campaign email will trigger this block. You can add your created campaign from the Select campaign box by selecting this trigger block. Remember that you can only select campaigns that are draft, automated, and created within 1 year.
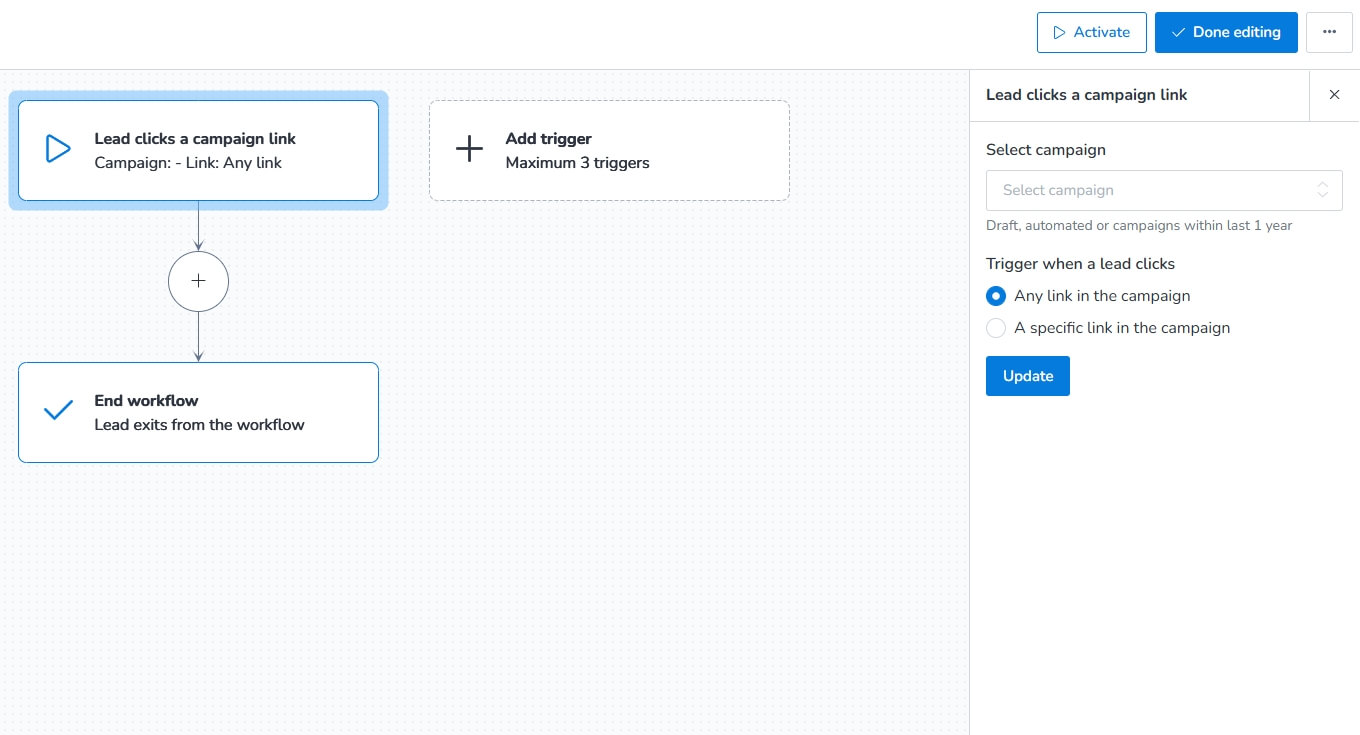
Lead clicks a camapign email
The Lead clicks a campaign email trigger lets you know which link in a specific campaign is clicked or you can specify any specific link in the email. Add this trigger in the trigger block, click this trigger, and add the campaign you want to track. Remember that you can only select campaigns that are draft, automated, and created within 1 year.
Please Note:
You can add a maximum of 3 Triggers at a time.
The campaign management and campaign reports can be found inside the workflow of Automation.
Reports for automation emails are generated inside the Automations section. Here you will learn to track automation campaign reports by checking your Automation Workflow from time to time.
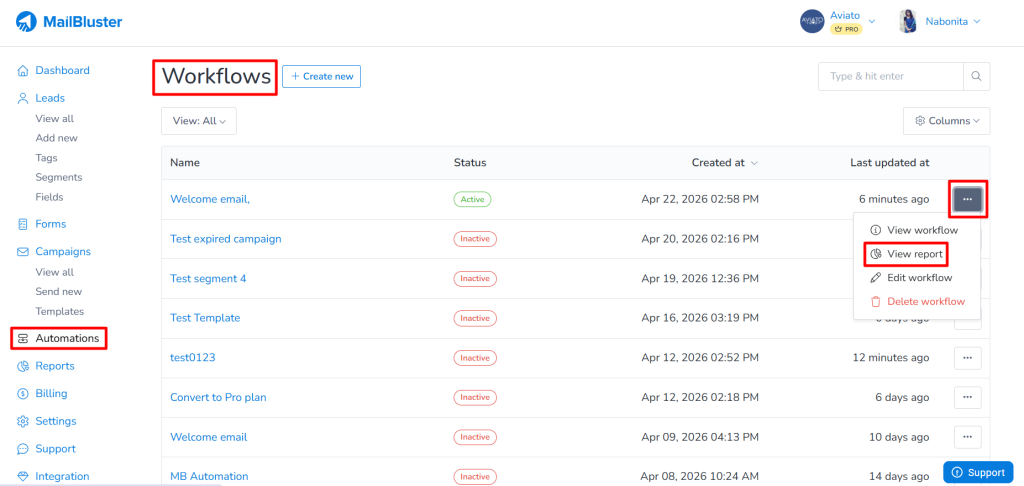
You can track Automation Campaign Reports directly inside the Automation section of your MailBluster account for each individual Automation workflow. Each Automation Report can be found under Automation > Workflows. Select any Workflow and then click on 3 dot (…) ellipsis. Then click View Report.
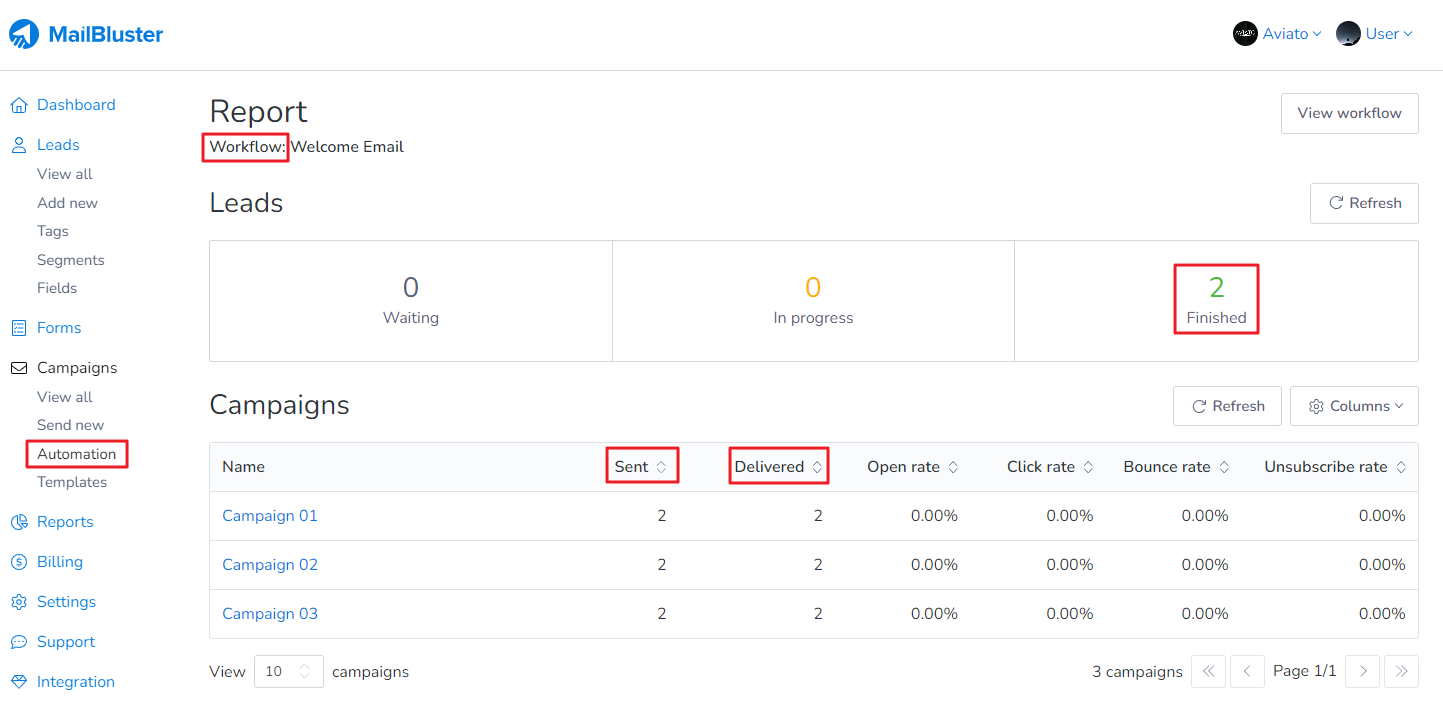
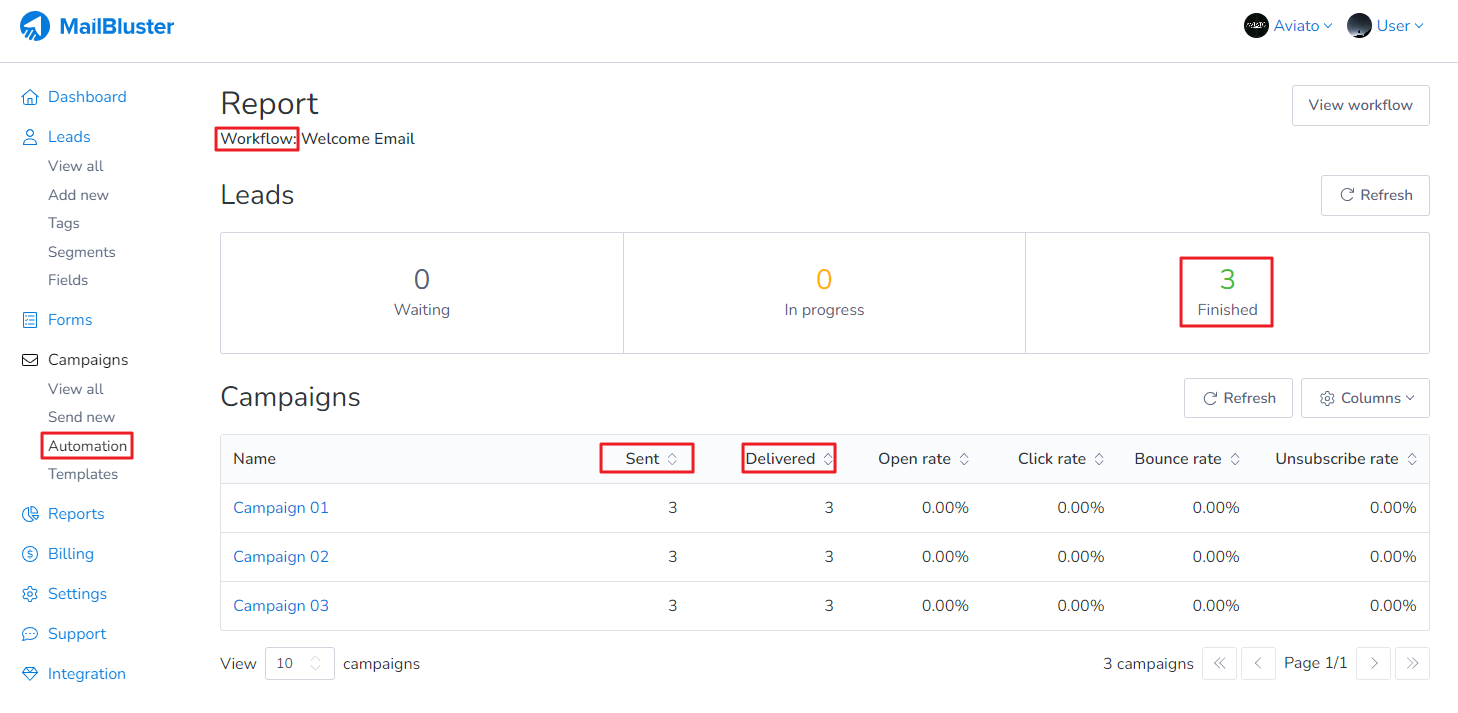
After clicking View report under Workflow, you will see a generated report like this based on your email campaigns set in the workflow:
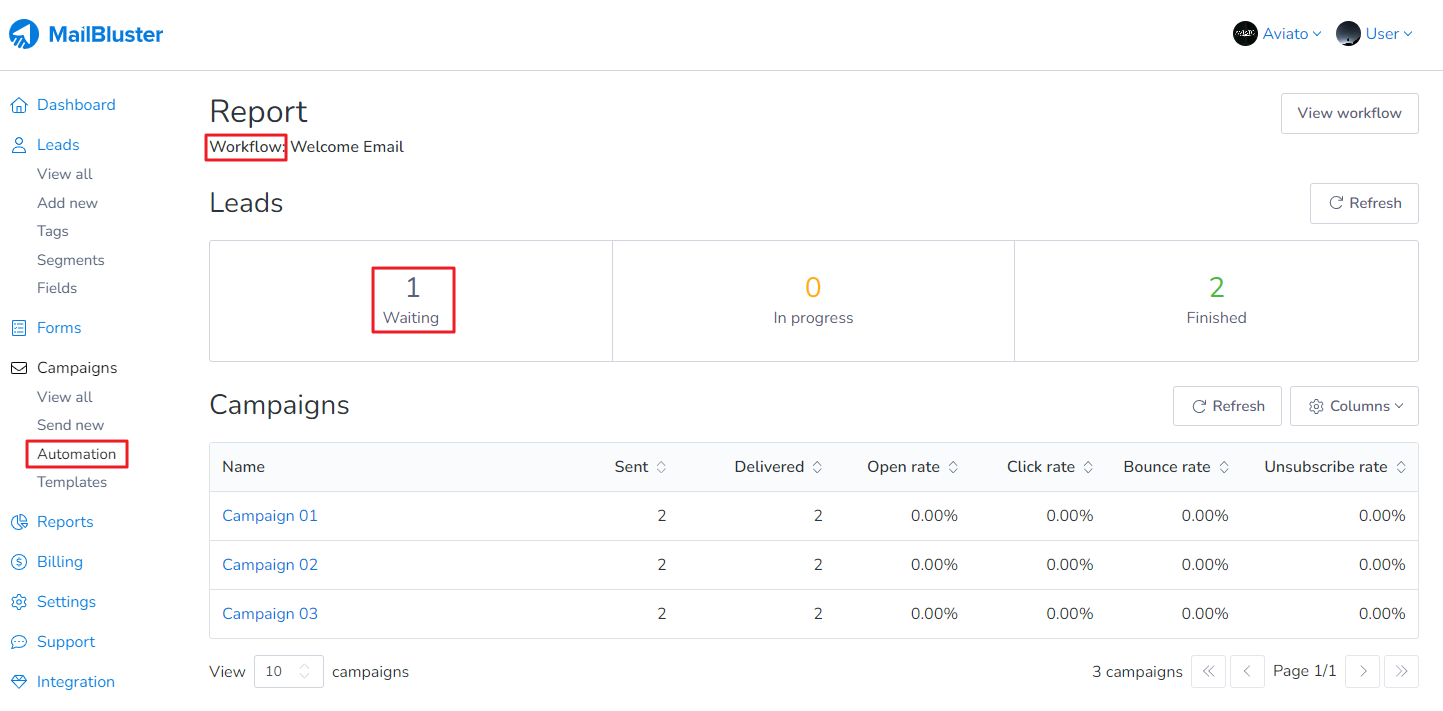
If you import another new subscribed lead, the lead will be in Waiting state before starting its journey through the Automation workflow:
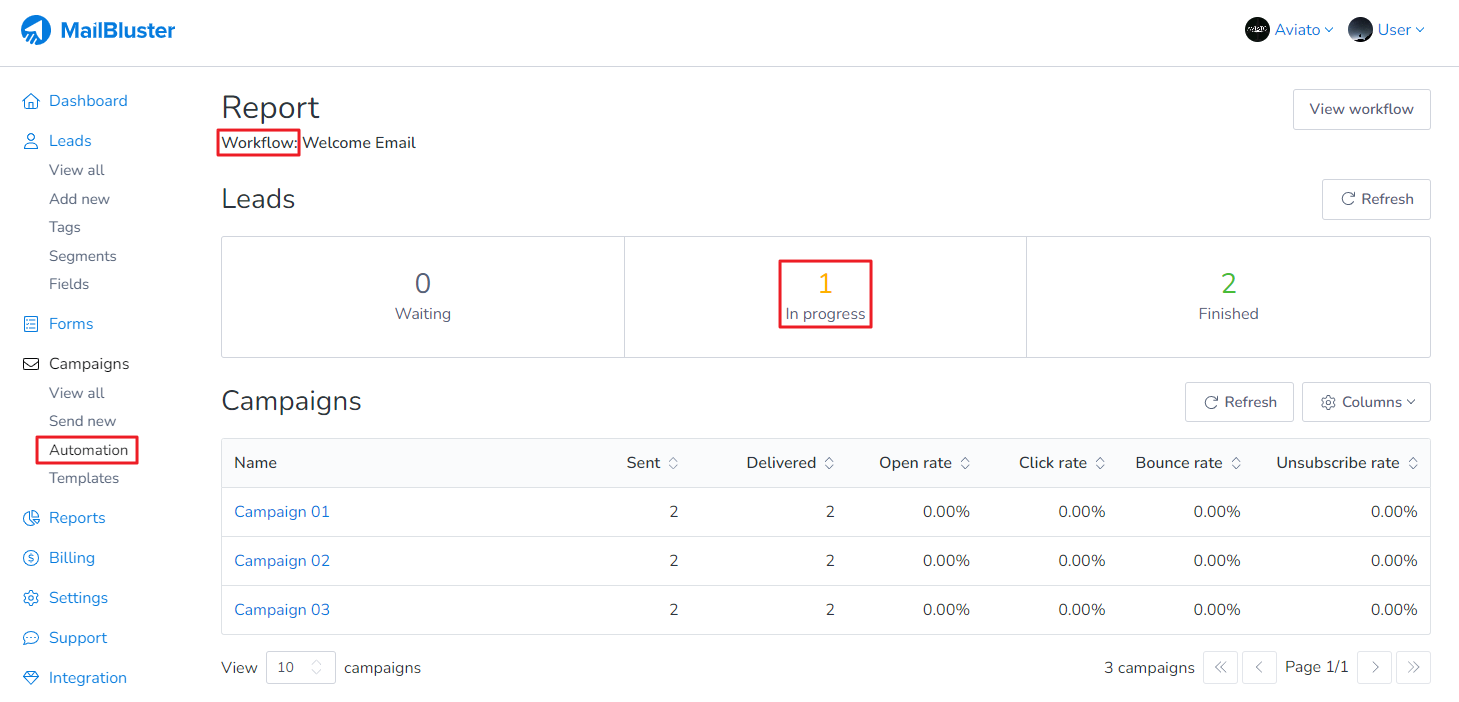
And if the lead already started the workflow, then it will show In progress as shown below:
Once the lead finishes its journey through the workflow, it will be added to Finished as shown below:
Please note: Automation reports are not generated in the Reports section of MailBluster; they are only available under Automation Workflows.
To build strong relationships with new subscribers, it’s important to set up Welcome Email campaigns in MailBluster. A Welcome Email is the very first message your audience receives after signing up, making it the perfect opportunity to greet them, confirm their subscription, and introduce your brand. When you set up Welcome Email properly, it increases engagement, builds trust, and encourages subscribers to interact with your future emails.
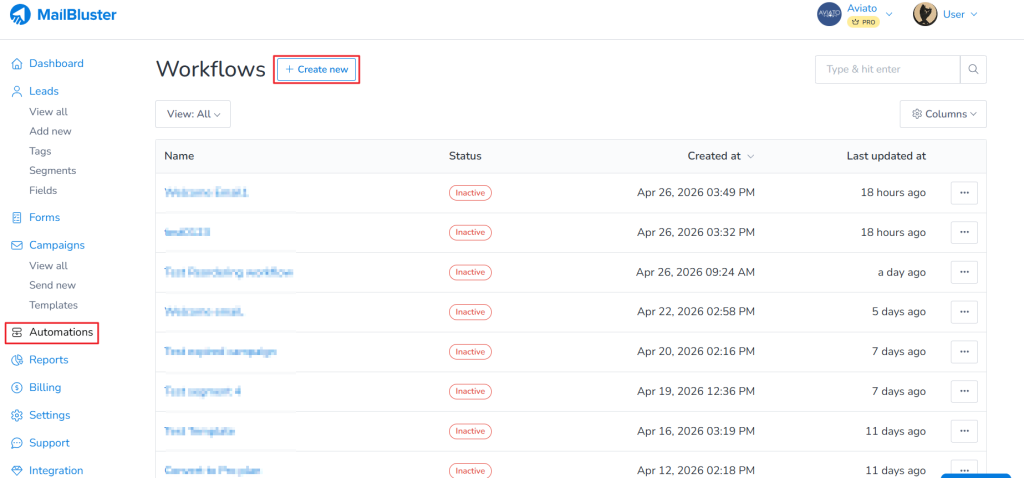
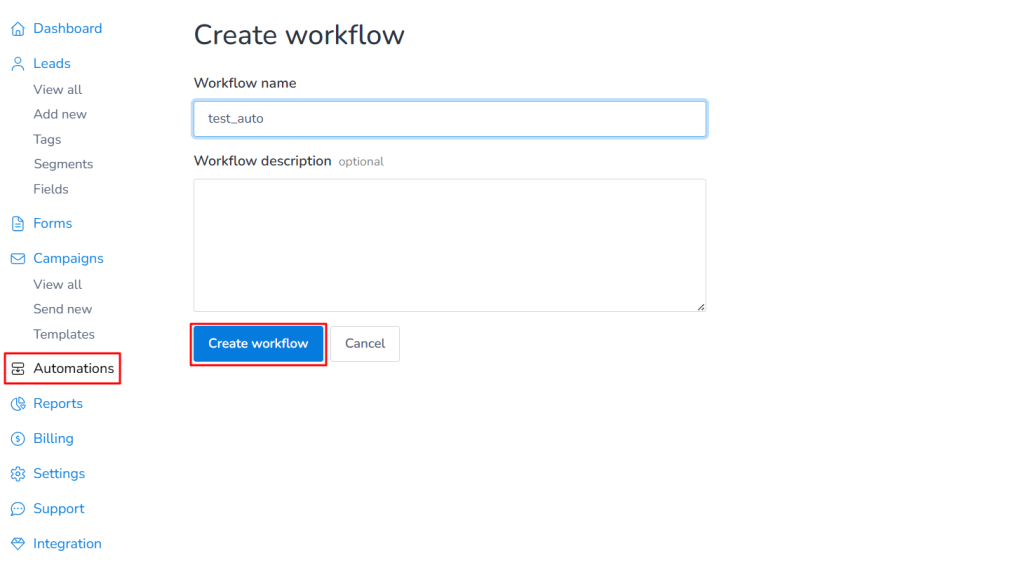
1. To send Welcome Email from MailBluster, first go to Automations. Click on Create new.
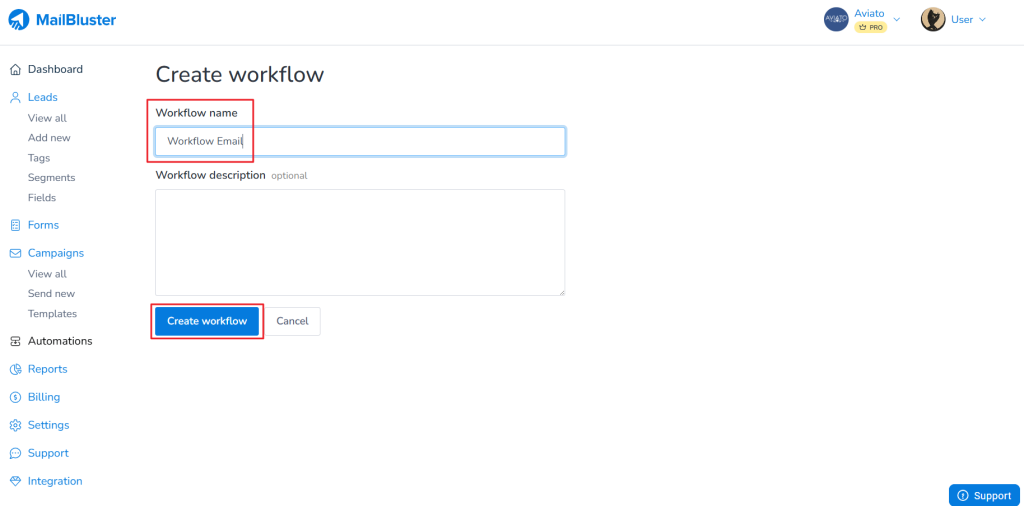
2. Create workflow opens. Enter the Workflow name and Workflow Description. Then click Create workflow.
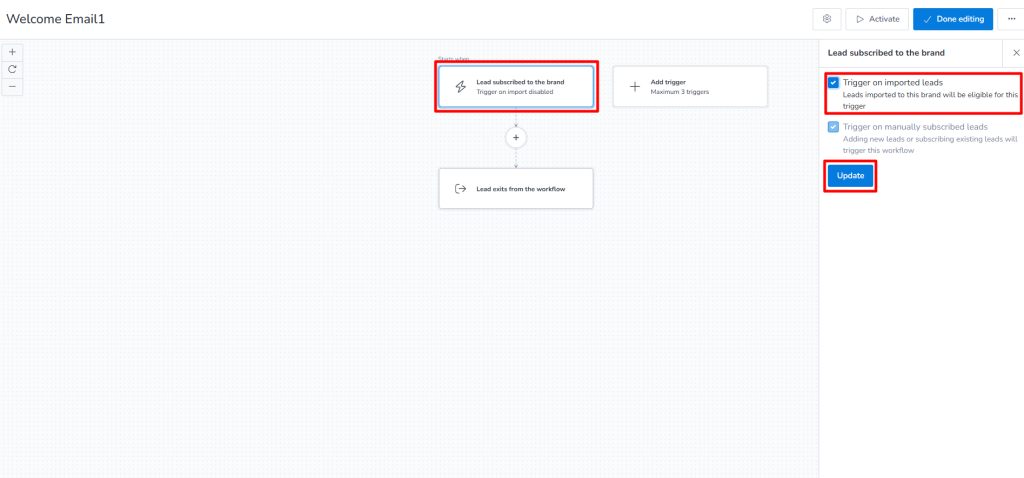
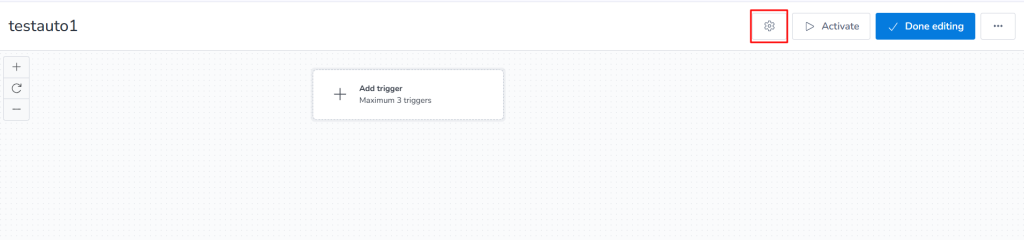
3. Click on the Add trigger, then Lead subscribed to the brand, and tick the checkbox Trigger on imported leads and then click Update button.
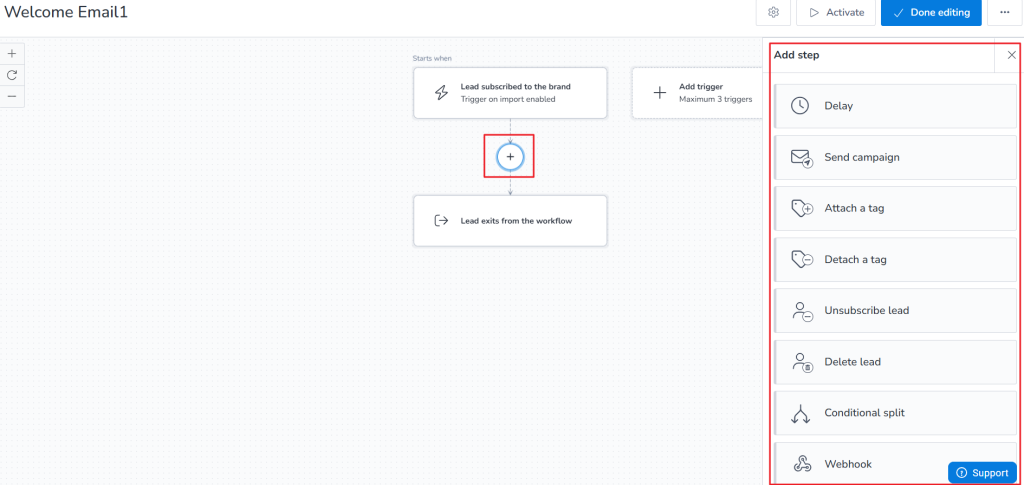
4. Now click on the circular “+” sign and under Add step, you will get many option: Delay allows you to set schedule for that campaign while Send campaign allows you to set the campaign for sending.
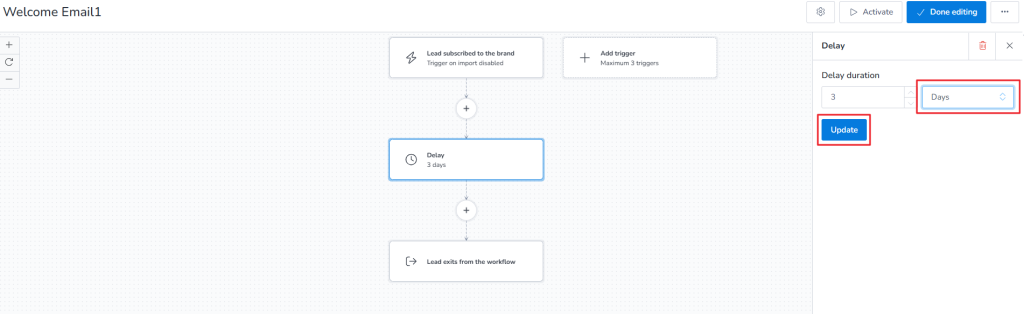
5. If you select Delay then the following option appears, through which you can delay your particular campaign.
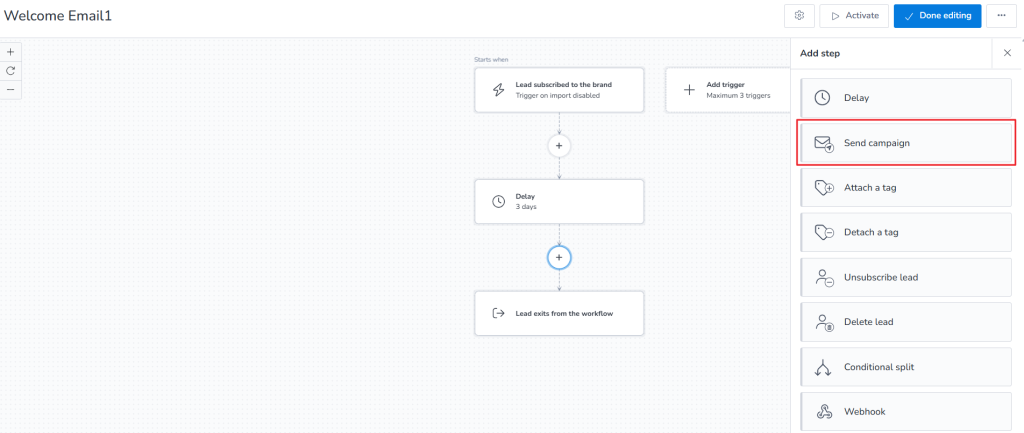
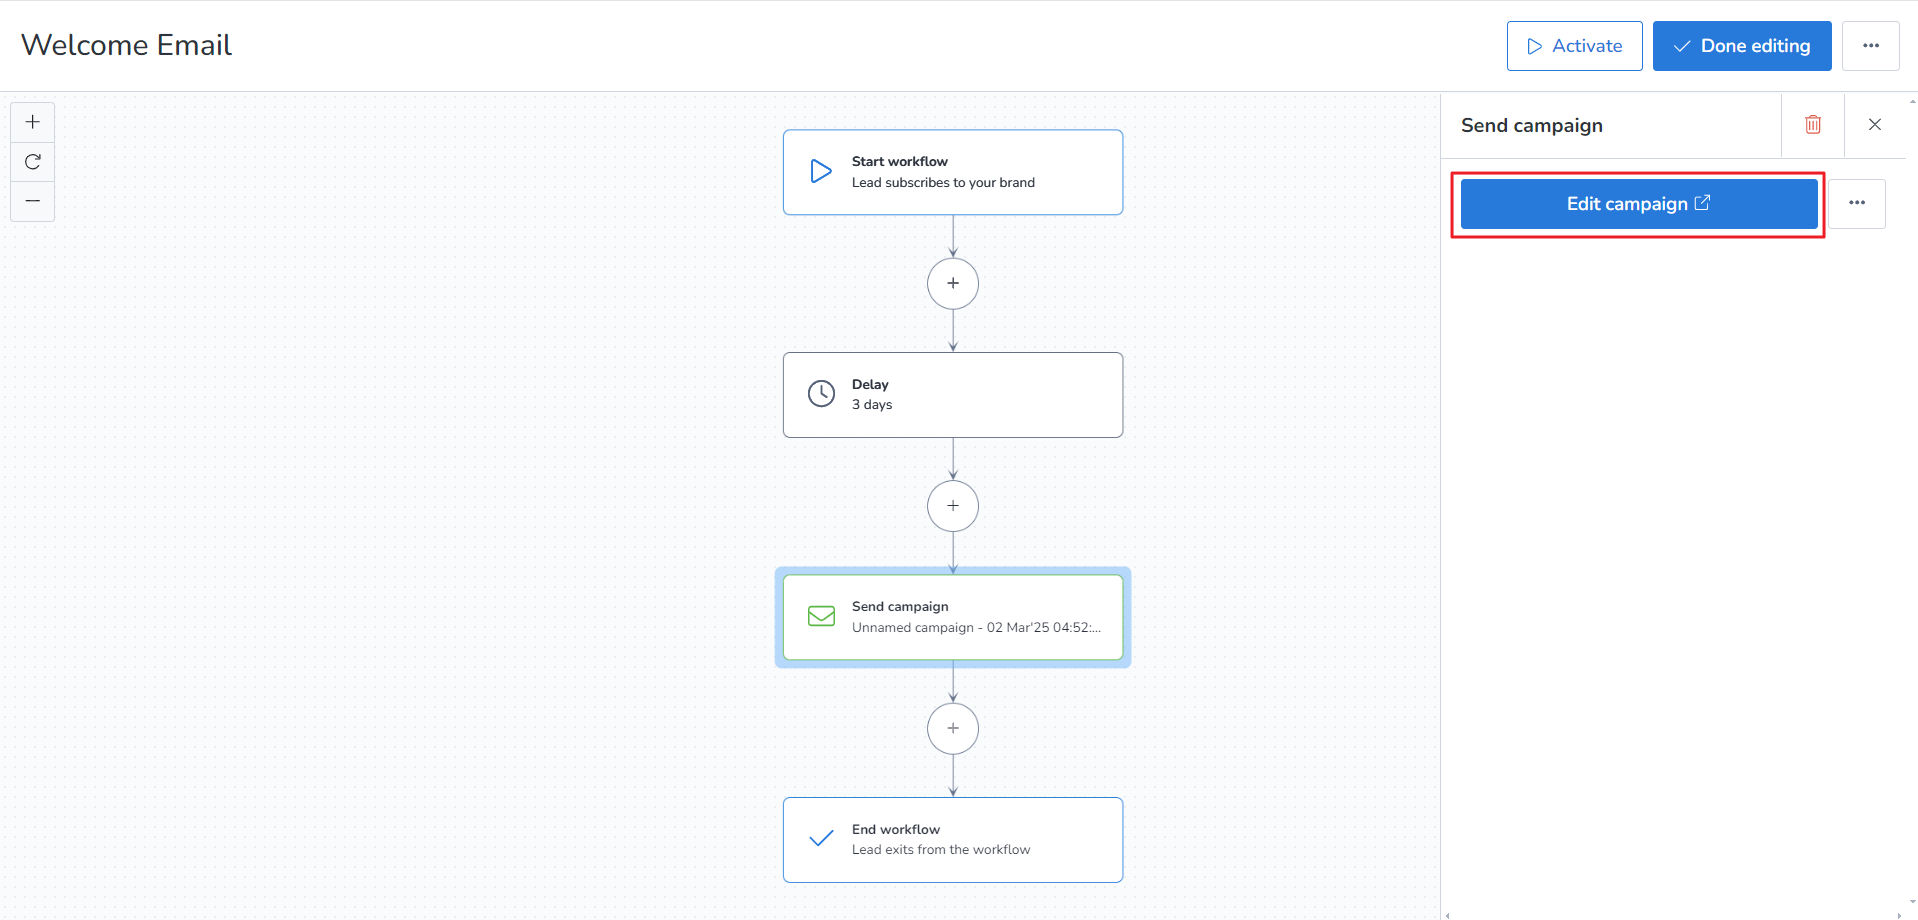
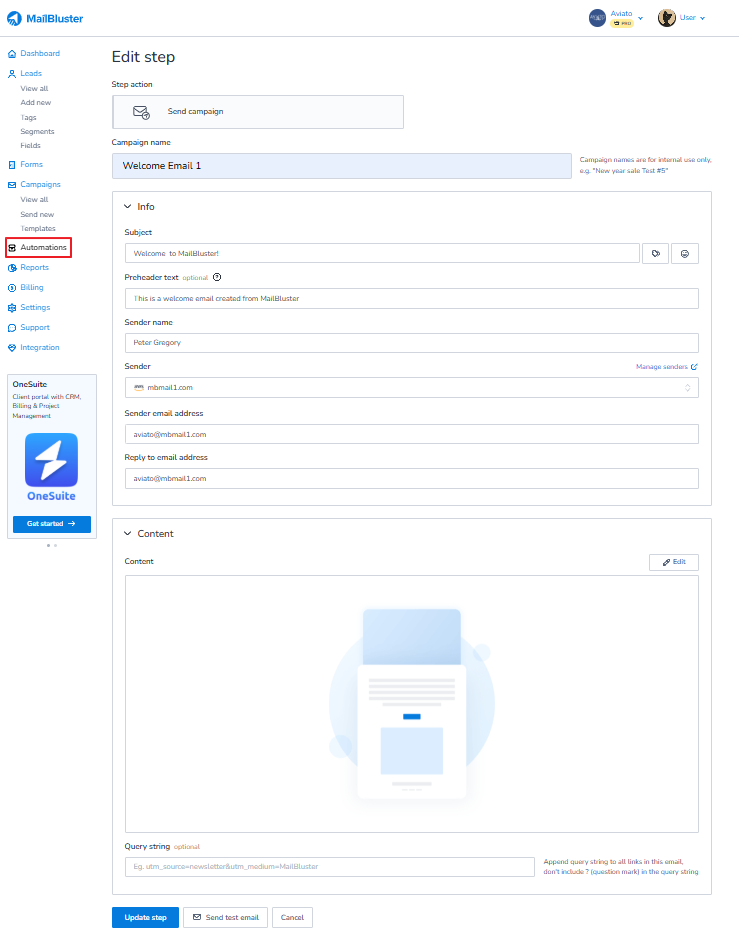
6. If you select Send campaign then you will be forwarded to Edit campaign which is show in the next screenshare.
7. Click on Edit campaign button.
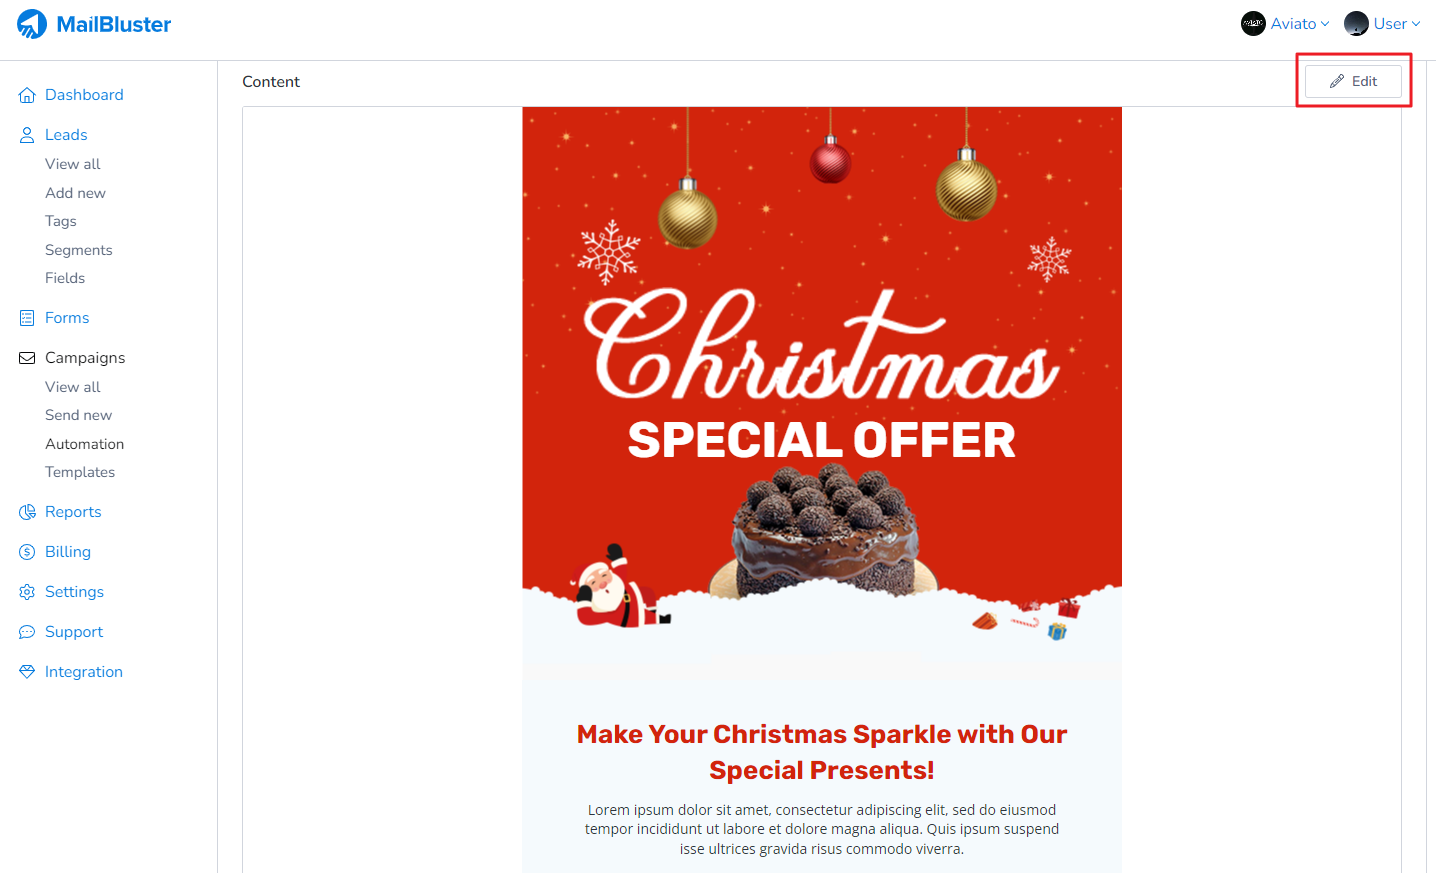
8. Now enter campaign details as shown below. Click on Content.
9. Here we have set a sample campaign.
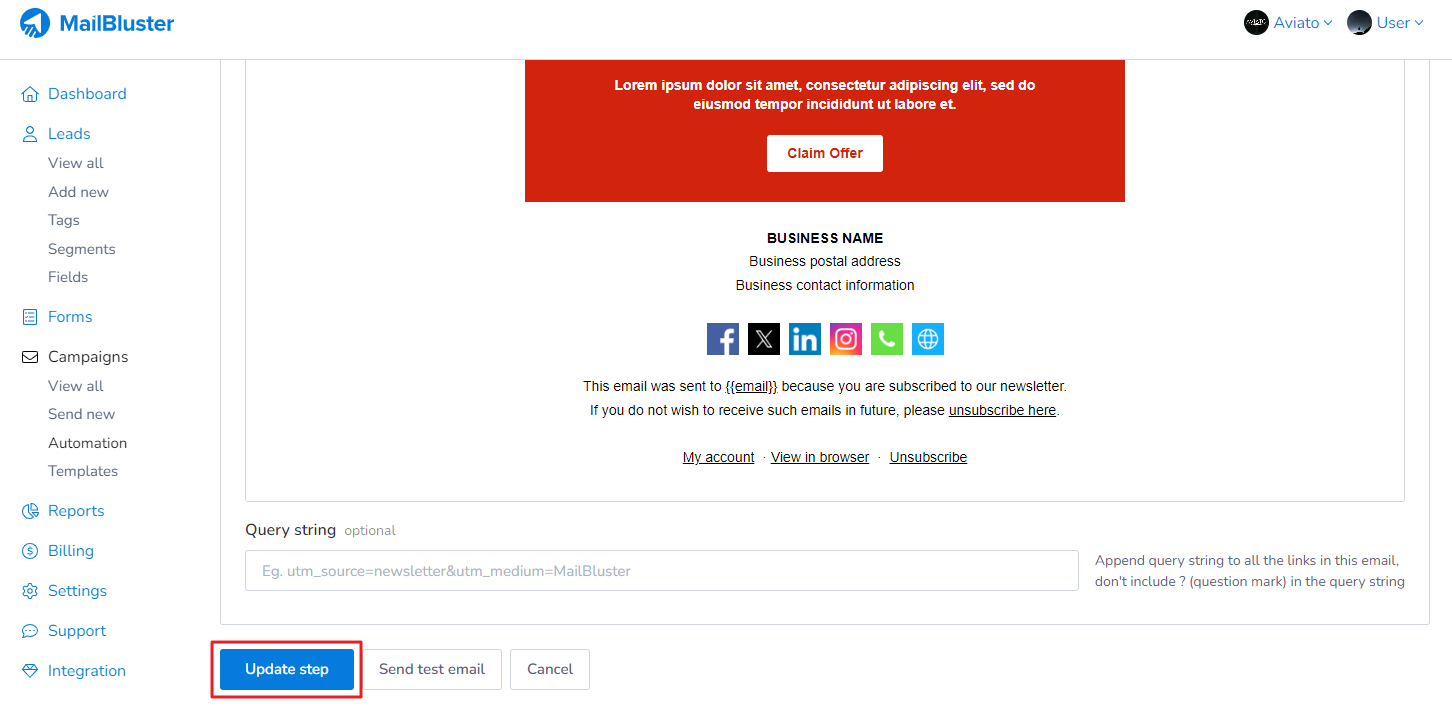
10. Now scroll downwards and click Update step
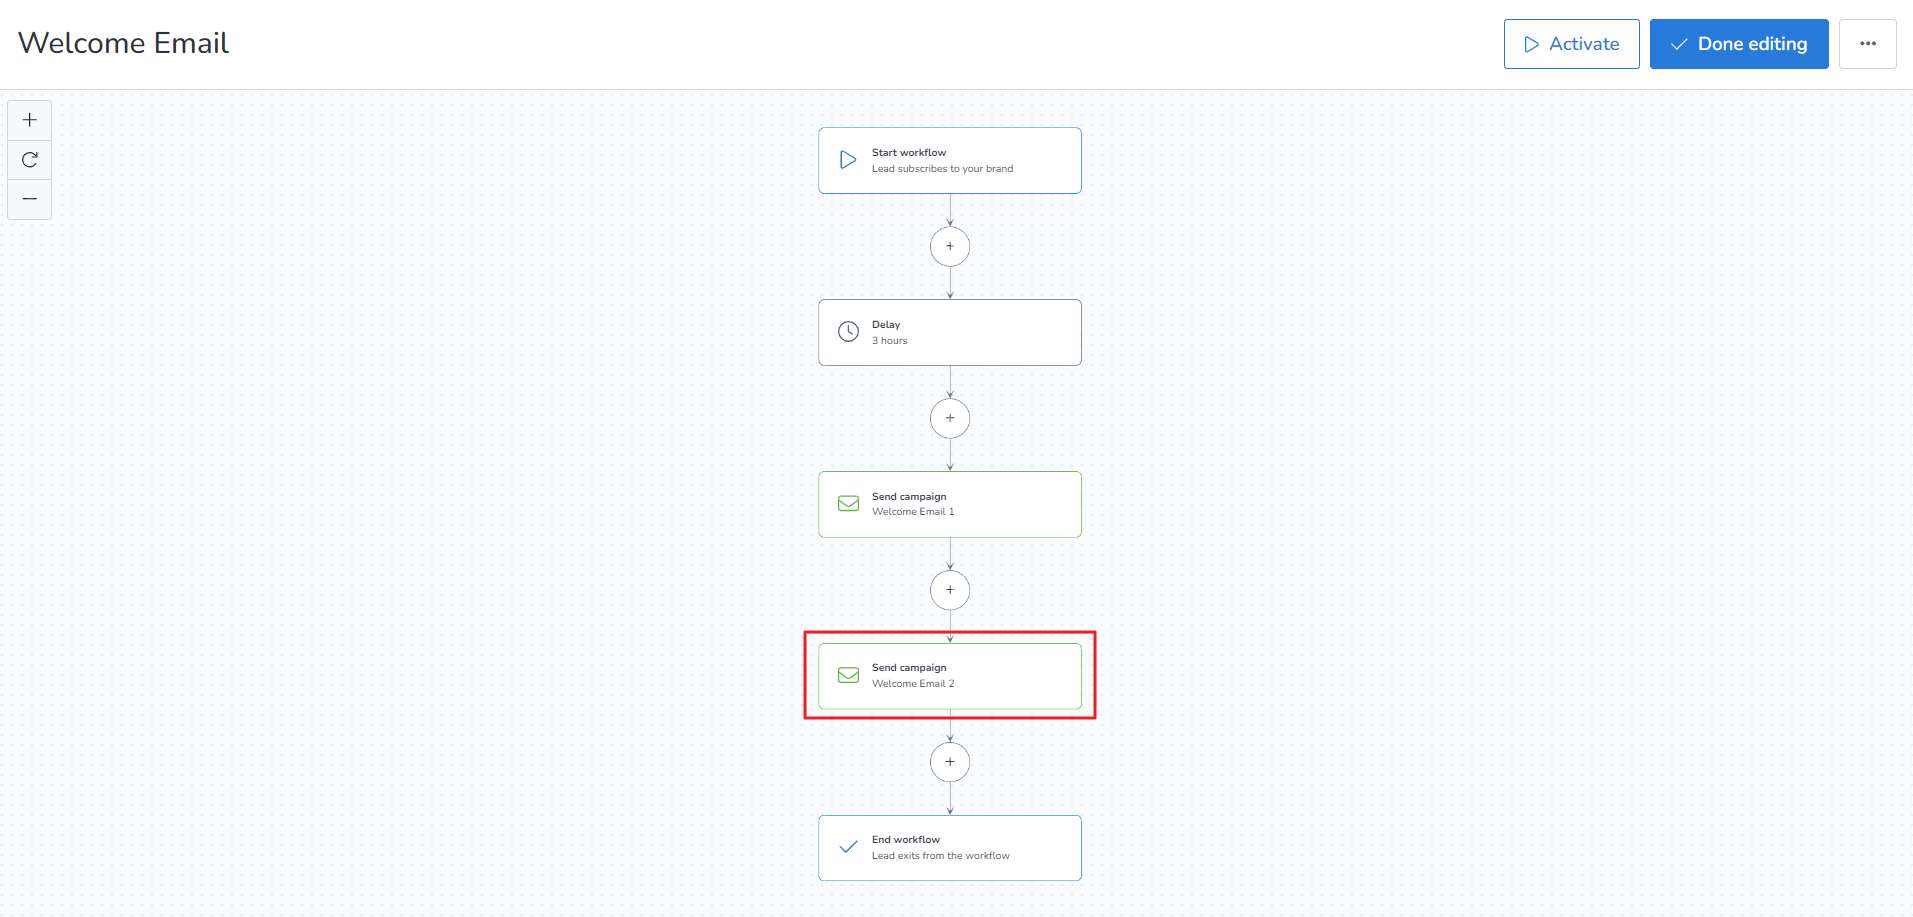
11. You can repeat step 5 and step 7 and create another campaign.
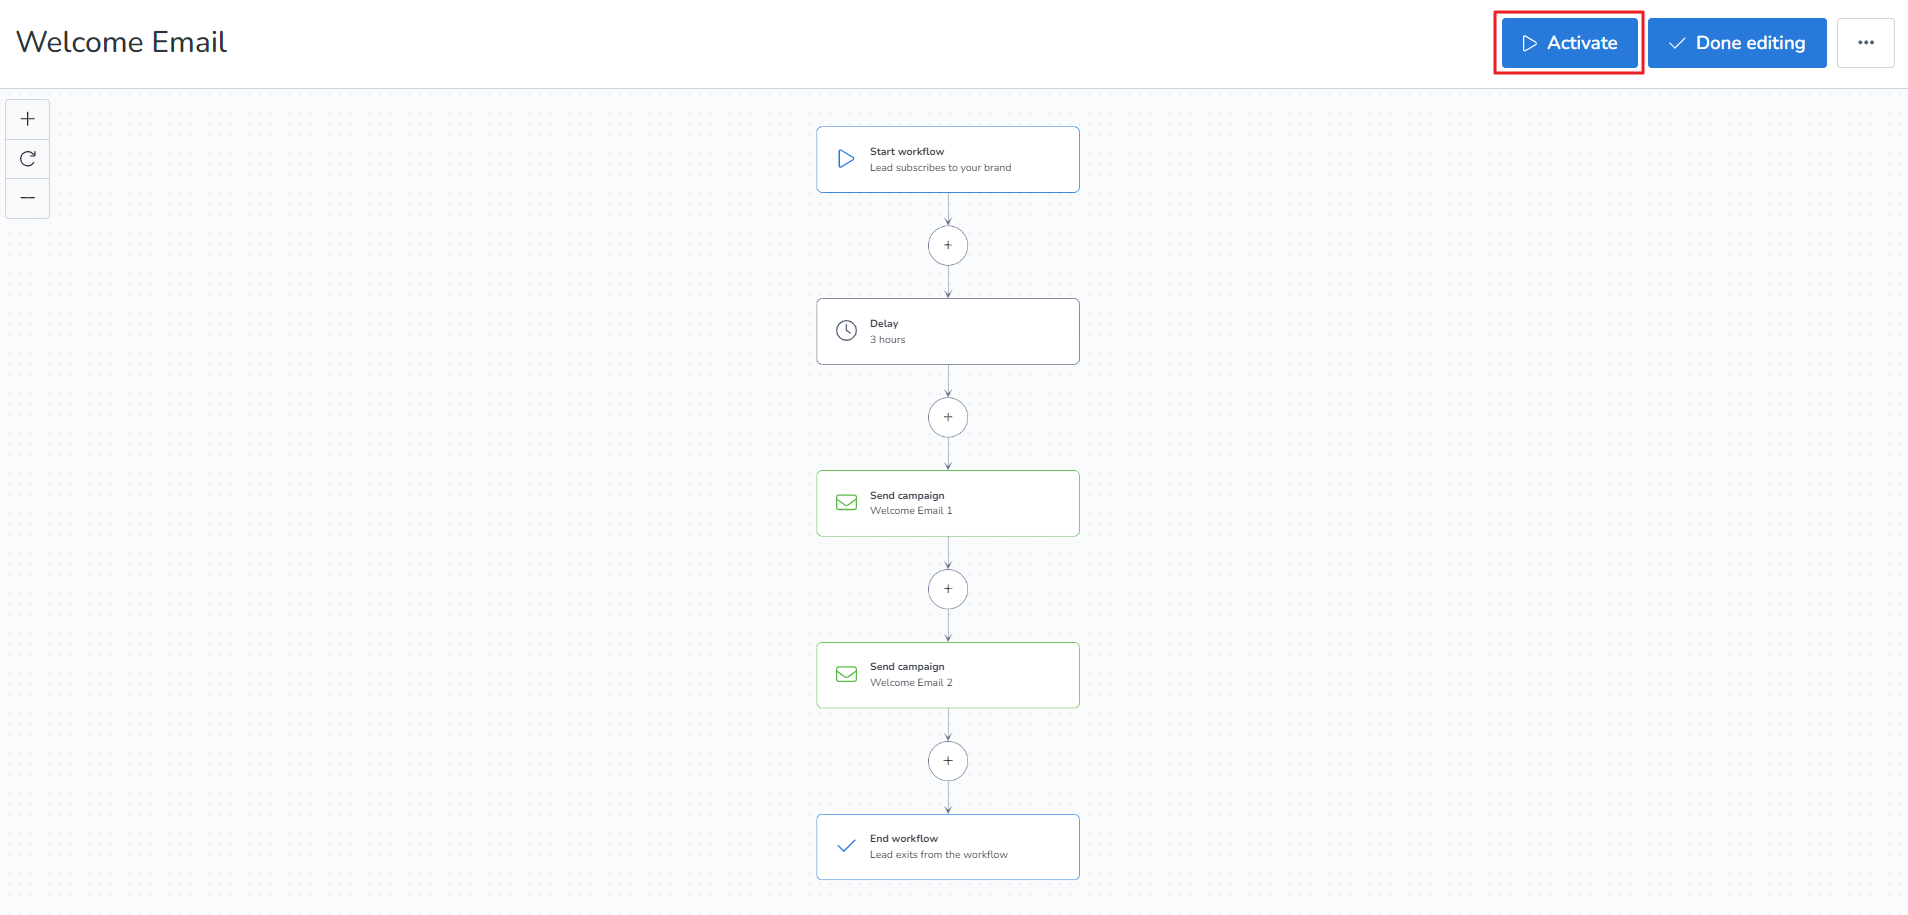
The workflow should look like this.
12. Click Activate to start the Automation workflow.
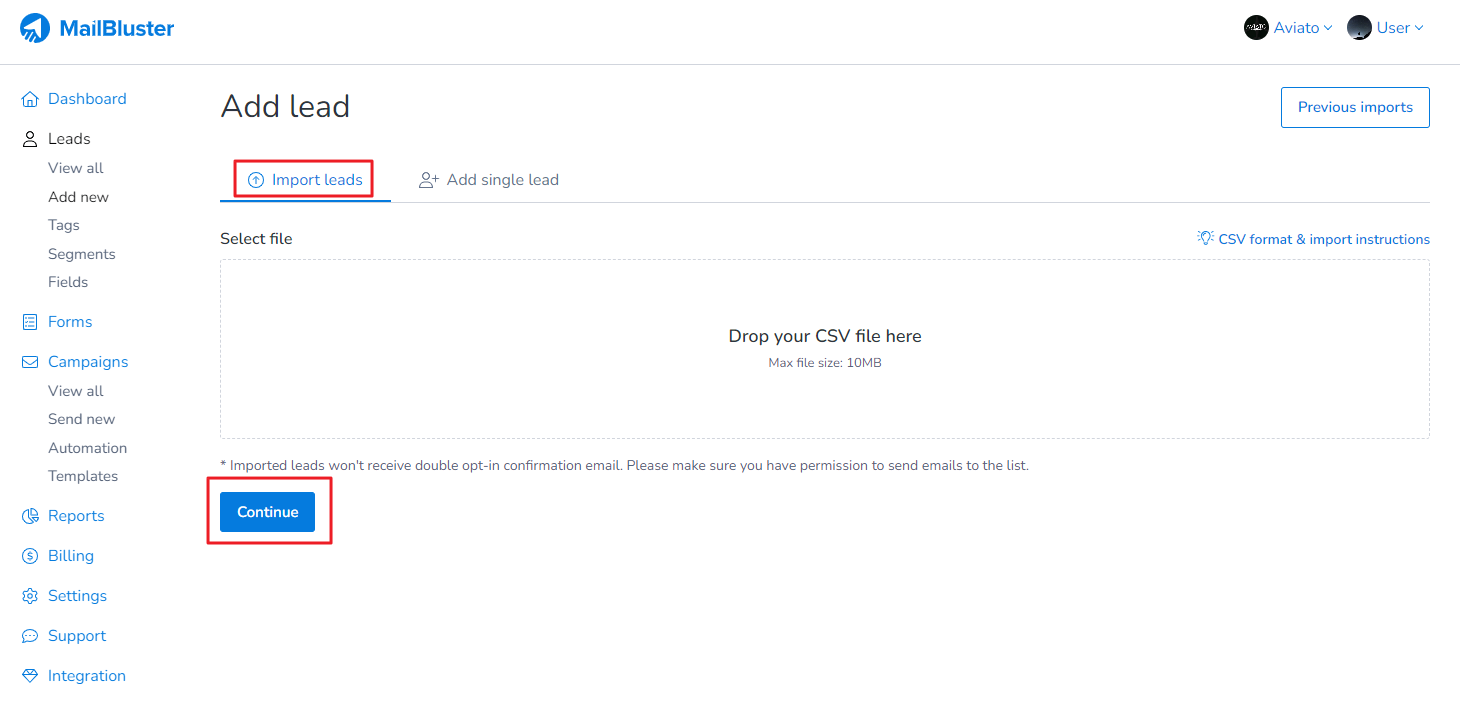
13. Now import new leads (who has just subscribed) from Add new > Import leads and attach a CSV file then click Continue.
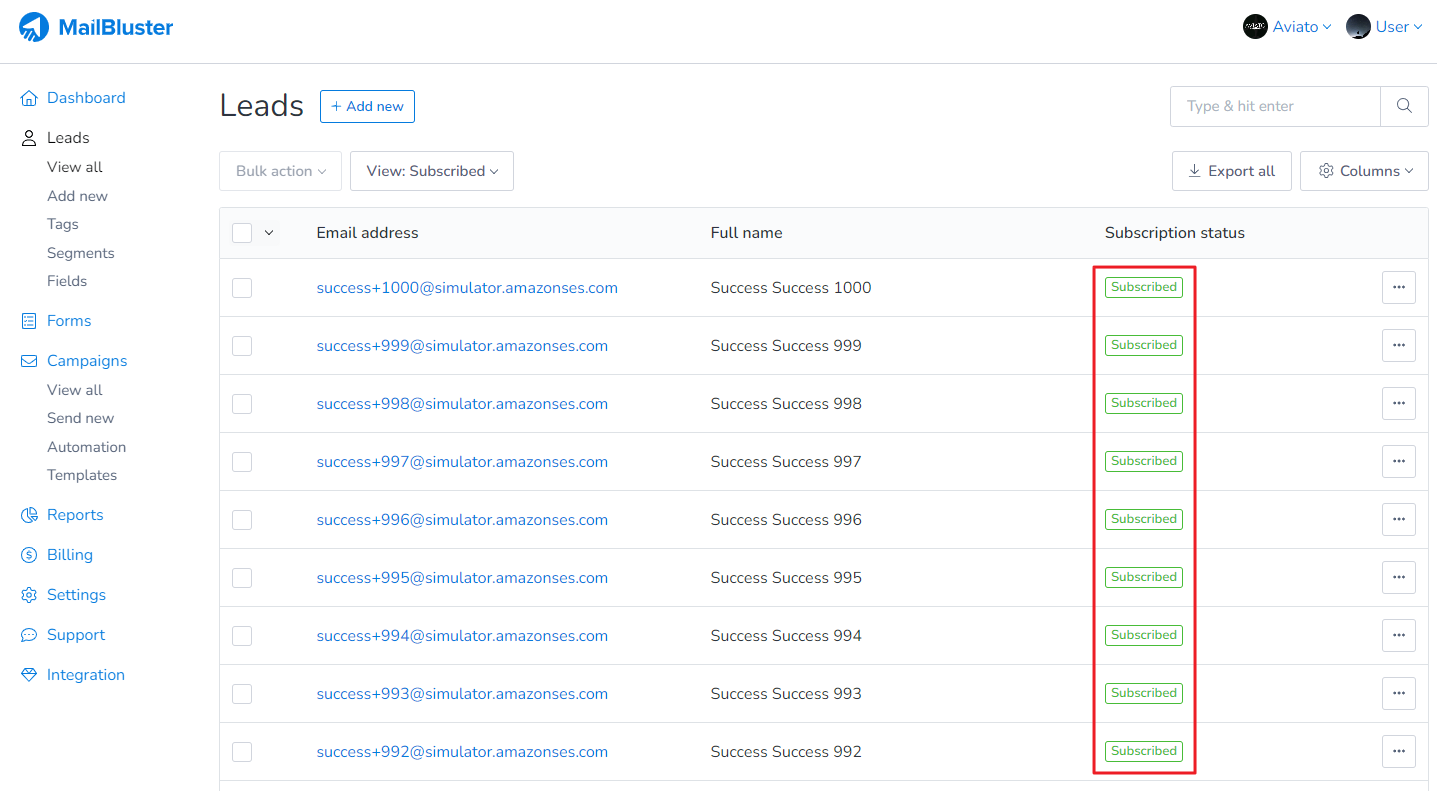
14. The subscribed leads will receive the Automation campaigns.
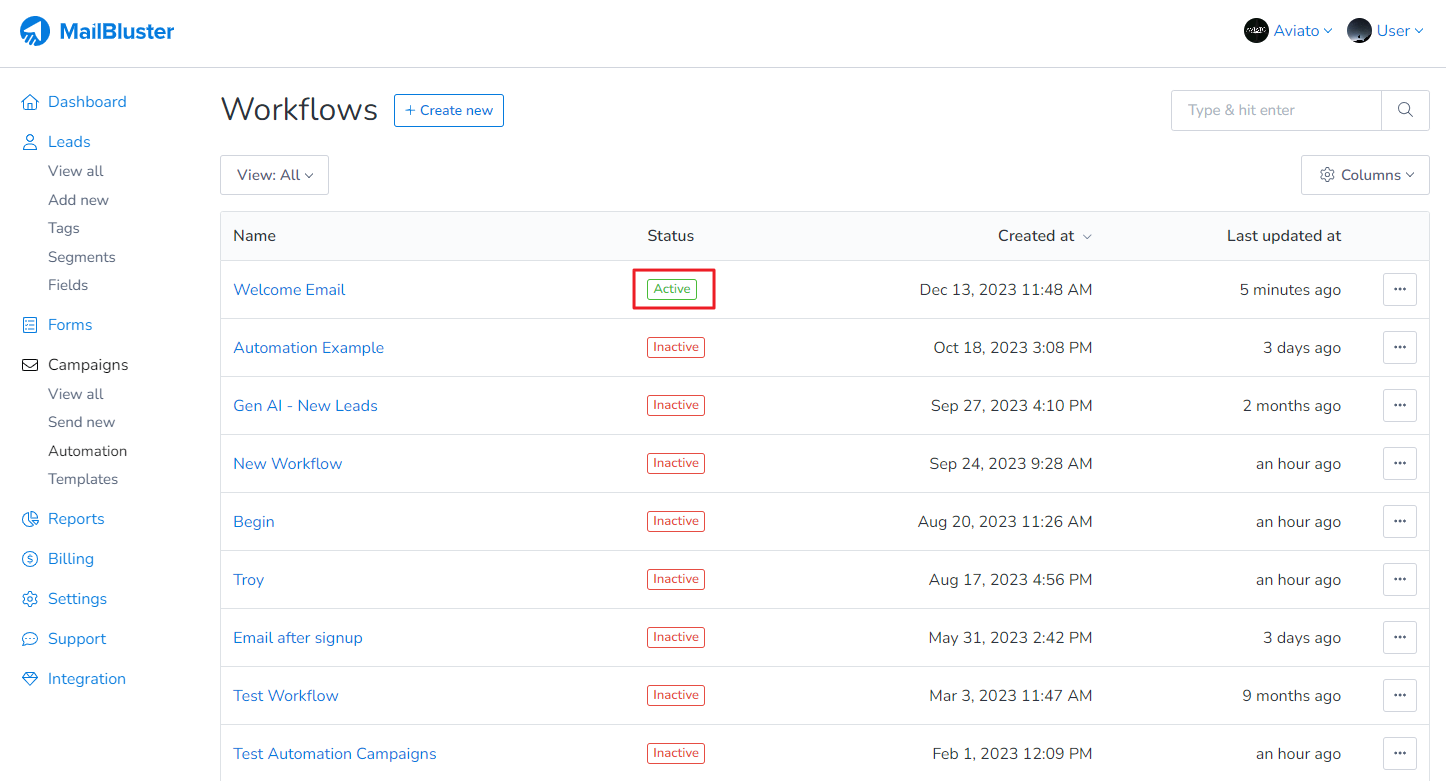
15. Make sure the Workflow remains Active while you import new subscribed leads into MailBluster.
Please Note:Automation emails are paid emails because they don’t have any branding on them. To use automation feature in MailBluster, your brand must be upgraded to the Pro plan.
Eligibility for Automation on imported subscribed leads is an important consideration when managing your email campaign. Automation emails are not eligible for your old leads or while importing the same old subscribed leads. It is only eligible for newly subscribed leads. If you try to import the same old subscribed leads, then the leads won’t receive your automated emails.
To send Automation Emails to newly subscribed leads in MailBluster, you first need to set up a campaign within the Automation workflow. Once defined, this campaign will automatically send marketing emails to new leads who subscribe to your brand including those imported via a CSV file in MailBluster. This means that when you import a CSV file with leads marked as subscribed, they will automatically receive the campaign you’ve set up in the Automation workflow. If you’ve set a delay, the email will be sent after the specified delay duration.
Automation emails are not being sent to those imported leads that are already stored in the Leads section with ‘subscribe’ status.
Also, if you fail to enable this trigger before starting the workflow, the subscribed leads will not receive automation emails.
Please note: Automation in MailBluster is a Pro plan feature, and hence, MailBluster does not brand itself on these emails. So there is no way to send automated email campaigns without any cost.
Workflow changes affect Leads in Automation depending on where each lead is in the process. If you change the workflow, the behavior may vary for each lead because not all leads start the workflow at the same time. Each Lead can be at different steps depending on when they entered the workflow. If a lead hasn’t yet reached a newly added step, it will be eligible for that step. However, if a lead has already passed a modified step in the workflow, it won’t impact the lead.
Each delay step counts the days from the previous step. If you modify the workflow, the behavior may vary for each lead, as they don’t all start at the same time and different leads will be at different steps based on when they started the workflow. A lead who hasn’t yet reached a newly added step will still be eligible for that step.
Here is an example of exactly how workflow changes affect leads in Automation and how you can track these differences effectively.
Step 1.Start
Step 2.Send campaign 1
Step 3. Delay 3 days
Step4. Send campaign 2
Step5. End
The Cases are as follows: – LeadL1 started the workflow and finished it. – LeadL2 started the workflow and is waiting in Step 3 (Delay 3 days). – LeadL3 did not start the workflow yet.
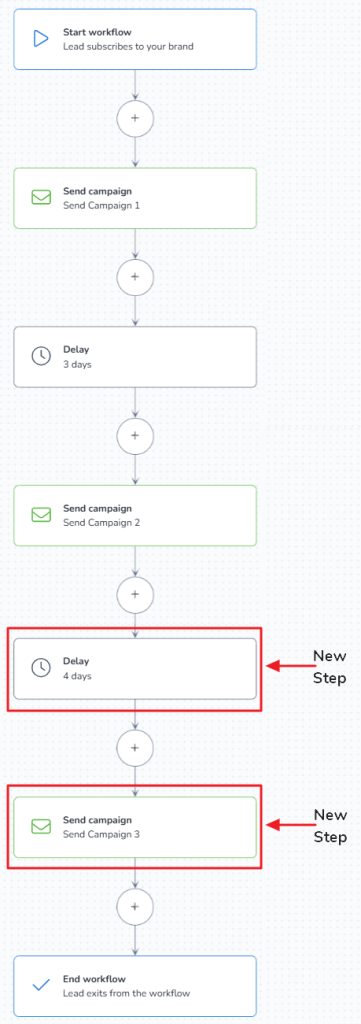
And then add two new steps ‘with delay’ and ‘new campaign’ at the end of the workflow resulting in: Step 1. Start
Step 2. Send campaign 1
Step 3. Delay 3 days
Step 4. Send campaign 2
Step 5. Delay 4 days<– this is a new step
Step 6. Send campaign 3 <– this a new step
Step 7. End
Then, – LeadL1 won’t be eligible for Steps 5 and 6 because the lead already finished the workflow (or passed the step). – LeadL2 will be eligible for Steps 5 and 6 as the lead hasn’t passed the step. – LeadL3 will be eligible as well.
This example shows the complete timeline of a lead who successfully progressed through every step of the automation workflow:
Step 1. Jan 2, 9:00 AM runs – Start
Step 2. Jan 2, 9:00 AM runs – Send campaign 1
Step 3. Jan 2, 9:00 AM starts –Start
Jan 2, 9:00 AM ends – Delay 3 days
Step 4. Jan 5, 9:00 AM runs – Send campaign 2
Step 5. Jan 5, 9:00 AM starts –Start
Jan 9, 9:00 AM ends – Delay 4 days
Step 6. Jan 9, 9:00 AM runs – Send campaign 3
Step 7. Jan 9, 9:00 AM runs – End
* it might take some time to send campaign, so there might be some delay to process step
Here, you can see all the existing leads have fully completed the workflow, so any changes made to the workflow won’t affect them. But anyone new who starts the workflow will receive the changes made.
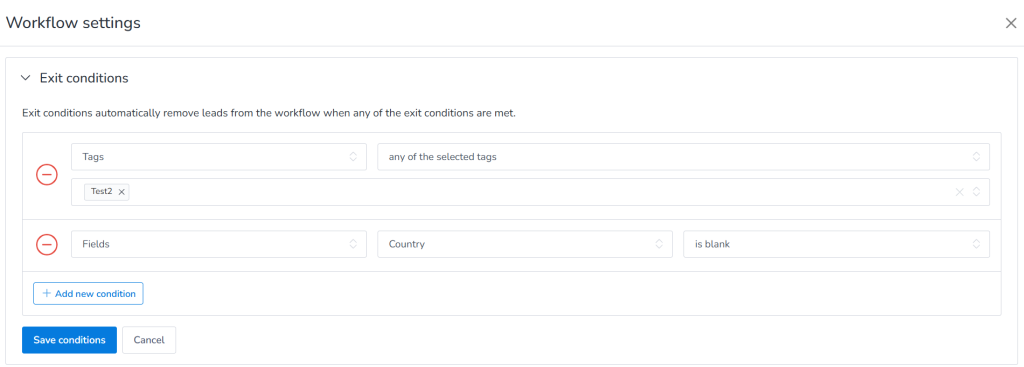
Exit Conditions let you automatically remove leads from an automation workflow when they meet specified conditions.
Once a lead meets an exit condition, MailBluster immediately removes them from the workflow, and they will not receive the remaining automation emails.
To Configure Exit Conditions:
1. Go to Automations and click Create New. Enter a name for your automation workflow.
2. Open the workflow, then click the Settings icon in the top-right corner.
3. In the Exit Conditions panel, click Add Condition, configure the condition(s) based on your requirements, and then click Save to apply the changes.
Once a lead meets any of the configured exit conditions, MailBluster automatically removes them from the workflow, and they will no longer receive the remaining automation emails.
You can automatically segment leads based on email link engagement in your email campaign. Follow the steps below to segment leads by email link engagement:
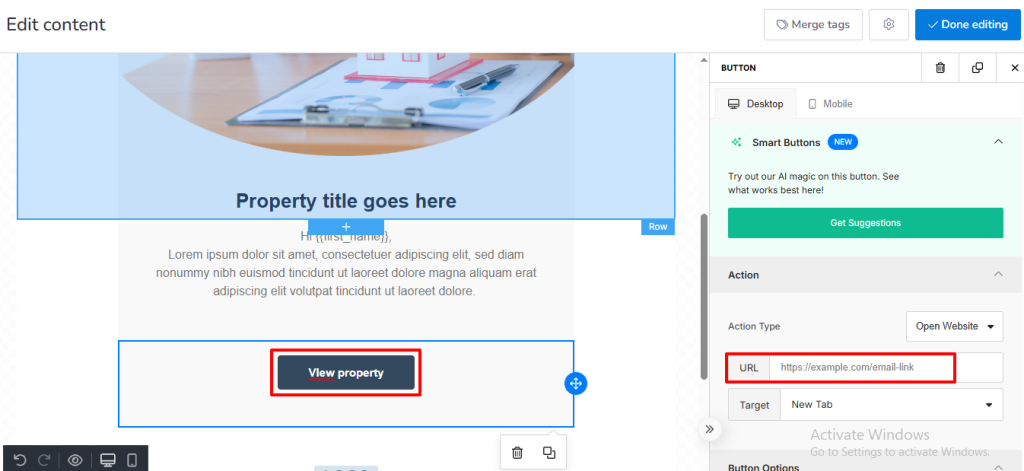
Add a Button or Link in Your Email Campaign Create or edit your email campaign and insert a button or hyperlink. Set the button action to open a website link. (Refer to screenshot 1.)
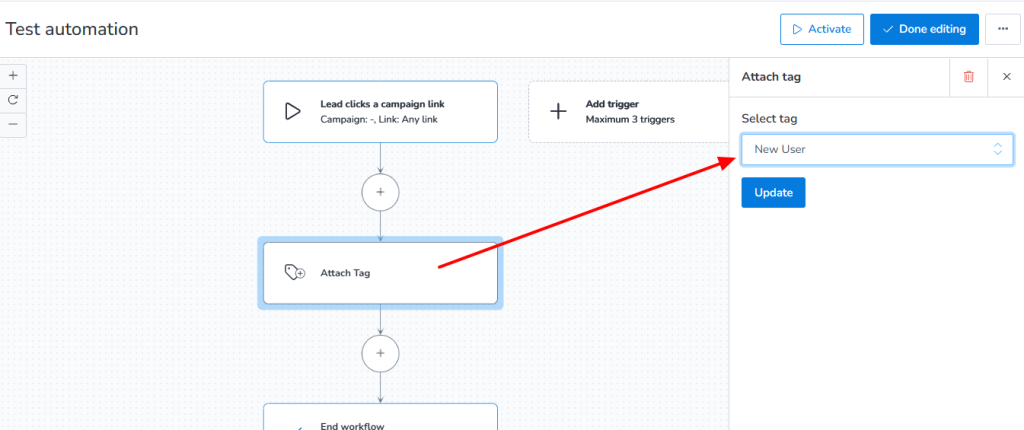
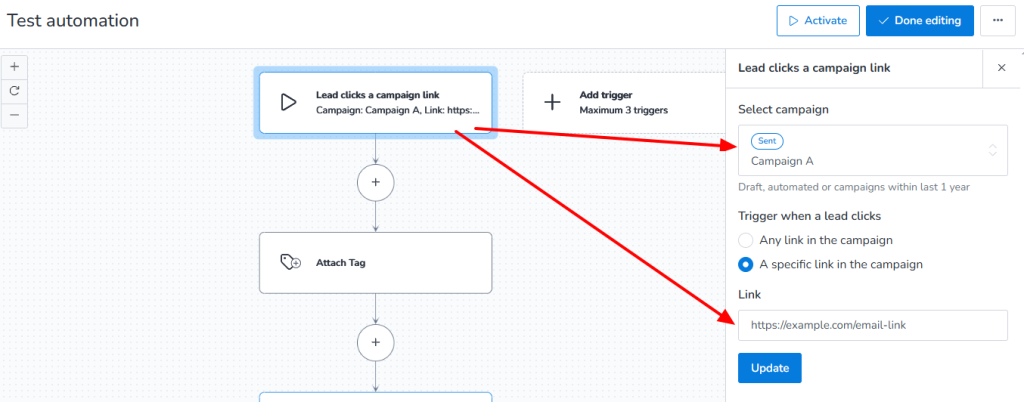
Create an Automation Workflow Go to Automations and create a new workflow. Set the trigger to “Clicks campaign email.” Add an action step and select “Attach Tag.” Choose the tag you want to assign to any lead that clicks the email link. (Refer to screenshots 2 and 3.)
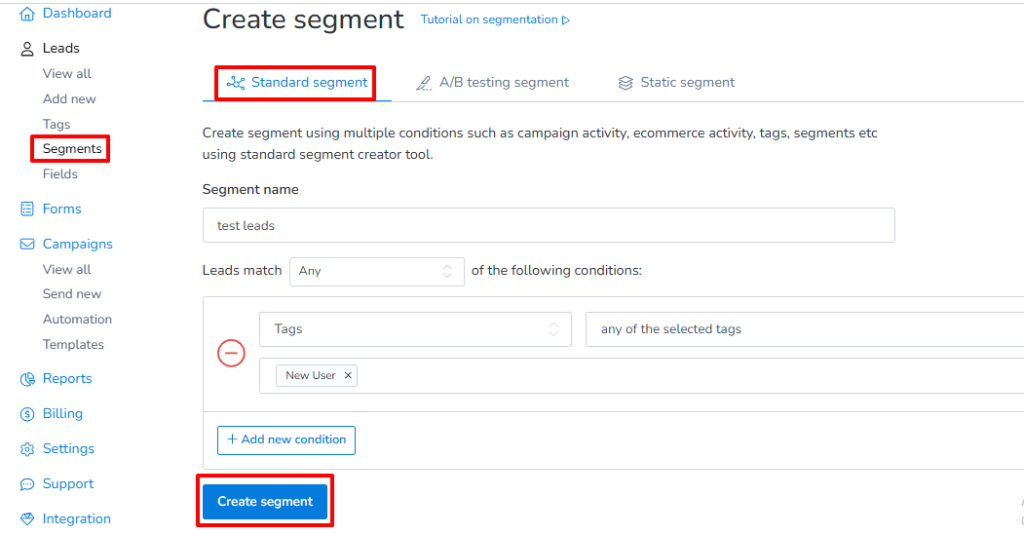
Create a Segment Based on the Tag Create a new segment and filter contacts using the tag added in the workflow. Now, any lead who clicks your email link will automatically be added to this segment. (Refer to screenshot 4.)
This setup helps you easily identify engaged leads, personalize follow-ups, and improve campaign targeting.