You can easily add first name and last name to leads in MailBluster, whether you are updating a single lead or multiple leads at once.
For Single Lead (email ID) update:
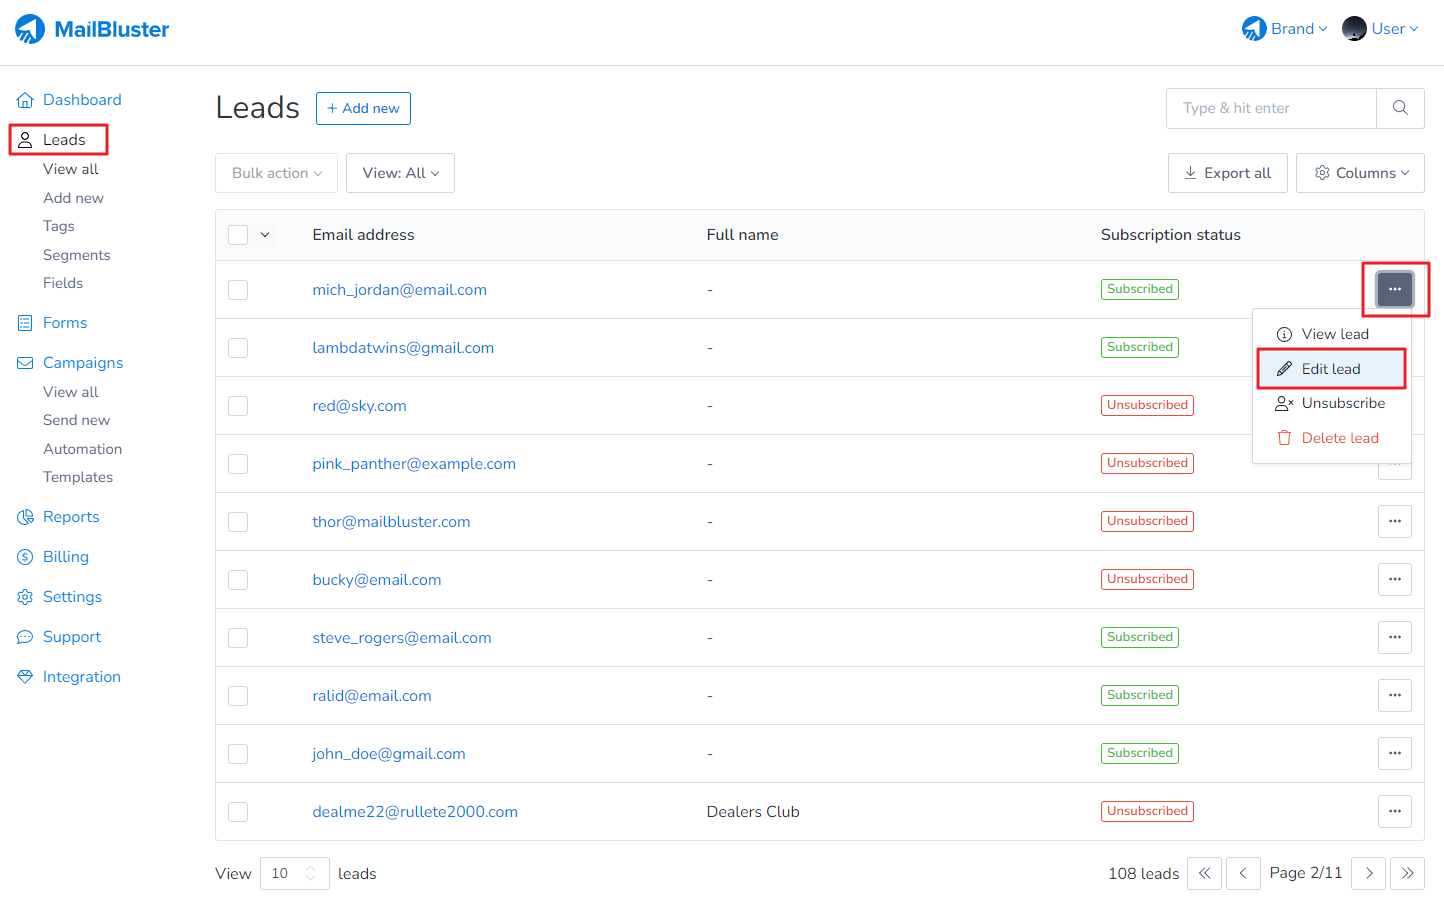
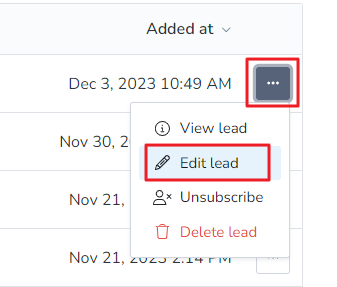
To add the first name to individual leads, you need to navigate to Leads section and then click on 3 dots (…) ellipses.
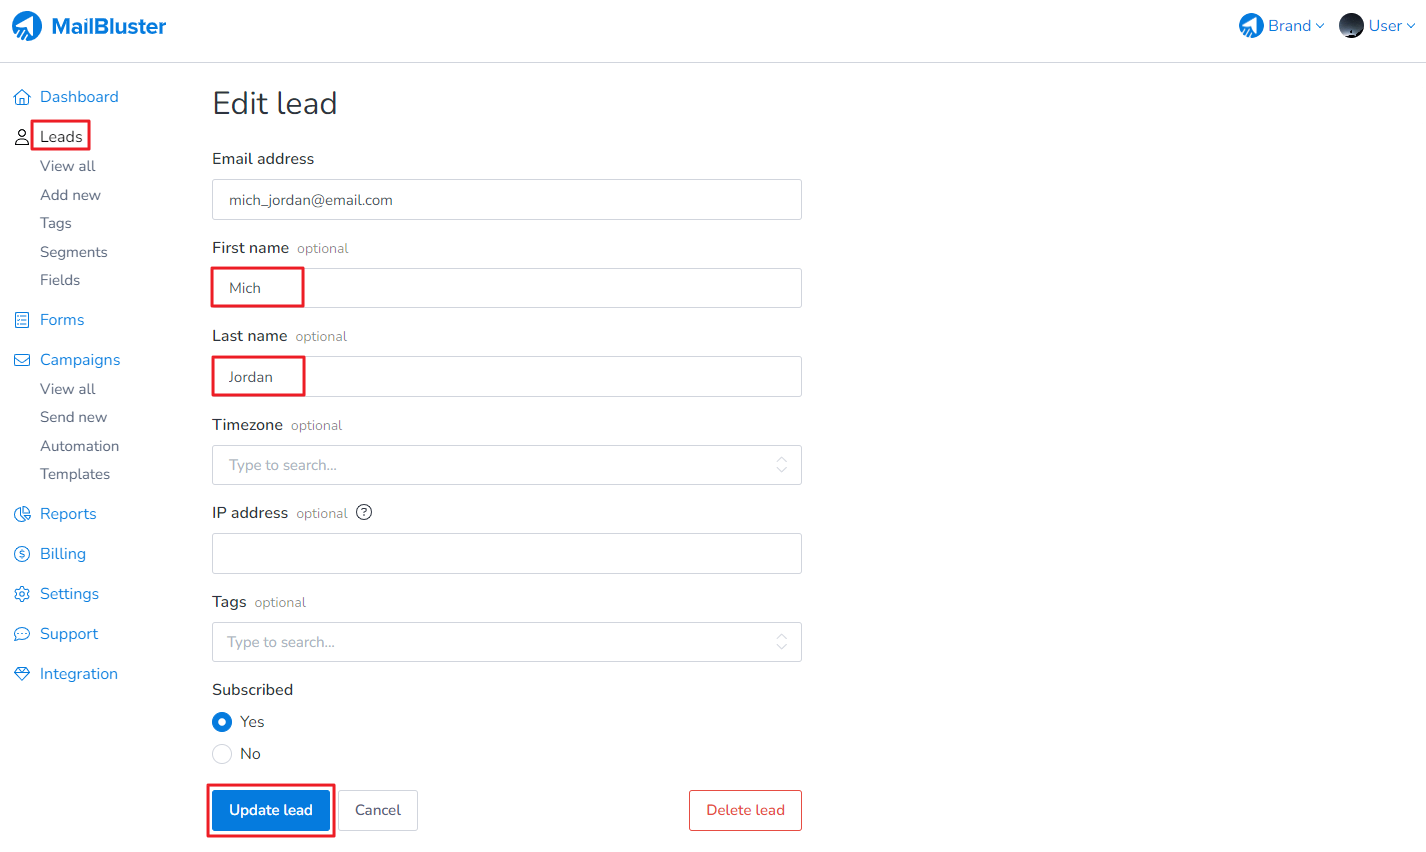
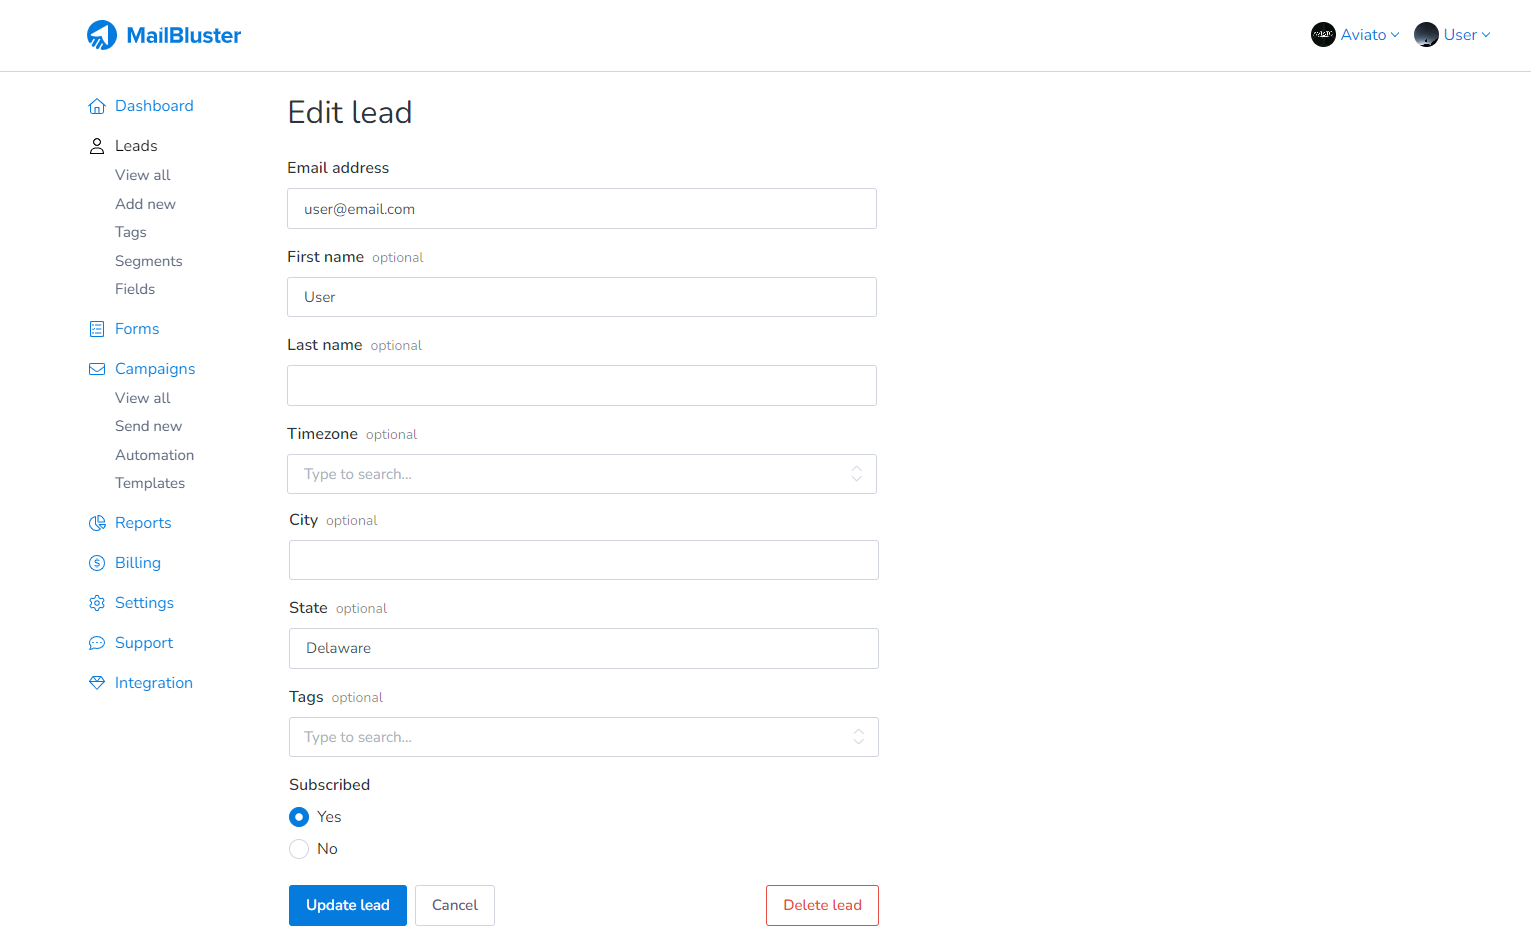
Click on the Edit lead, provide the first name/last name, and then click Update lead.
For Multiple Leads (Email IDs) update:
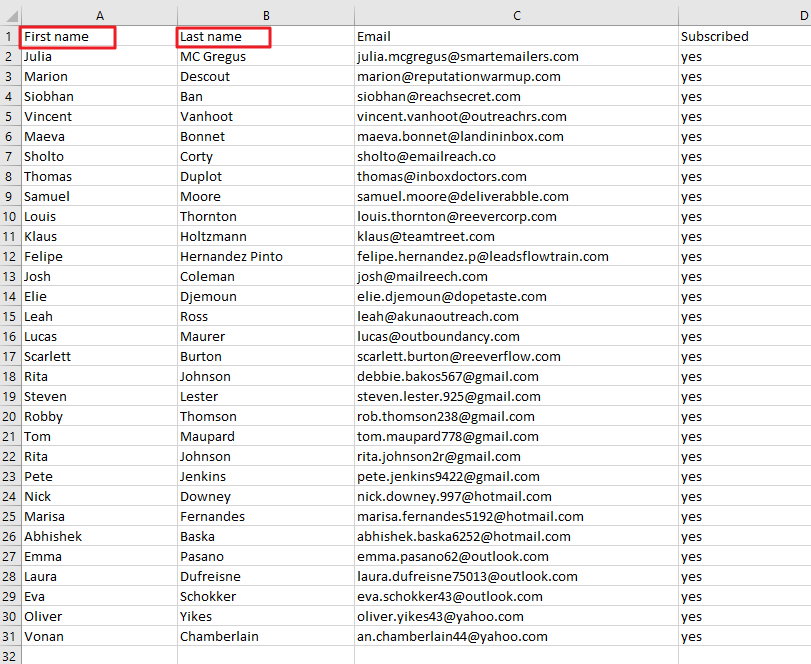
To add the First name/Last name to multiple leads, you need to create a column inside the CSV File and then add first name and last name to each of the email addresses.
Then import the CSV file containing the First name/Last name and the Email address with subscription status of the leads.
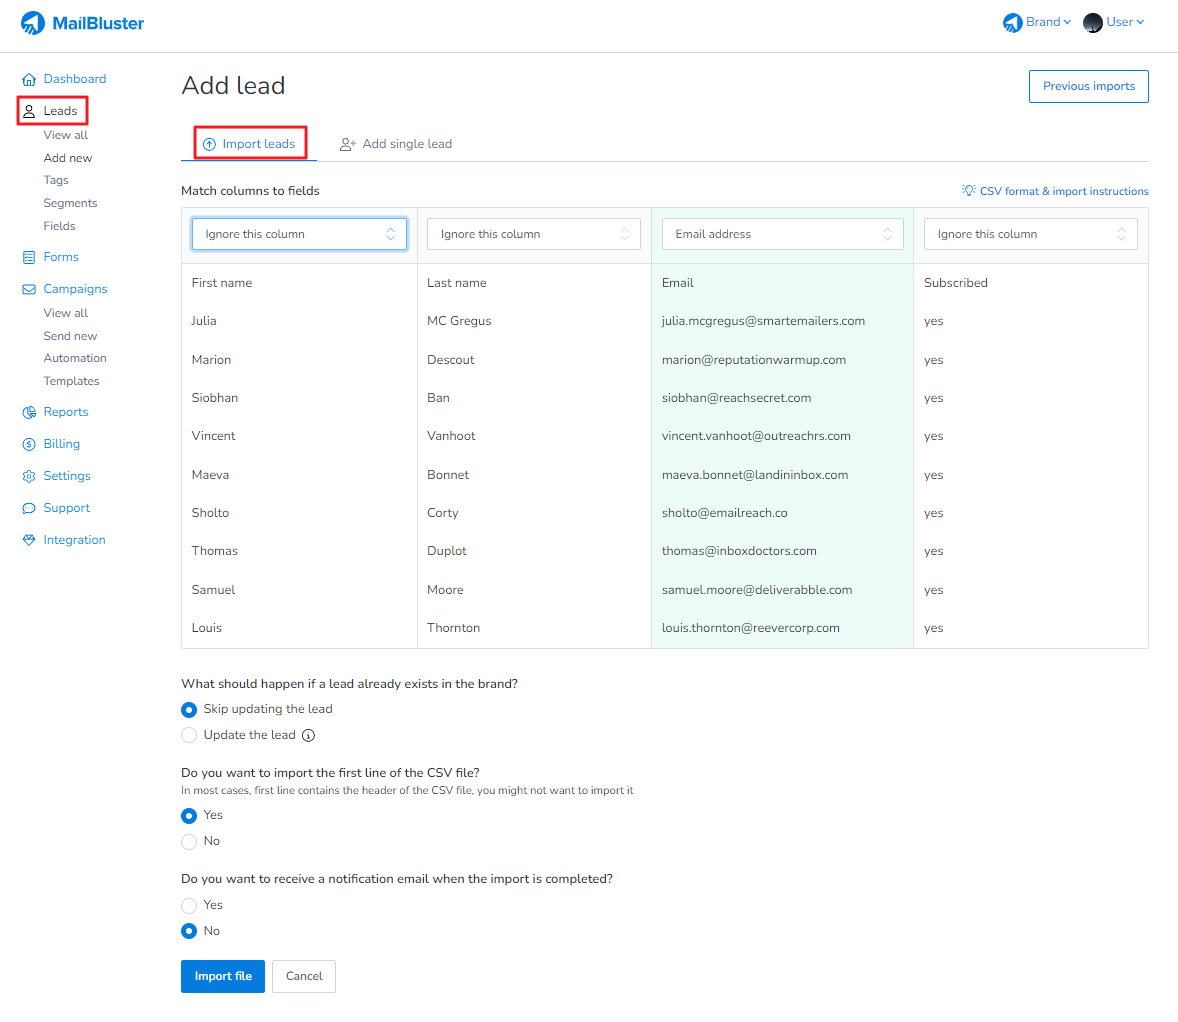
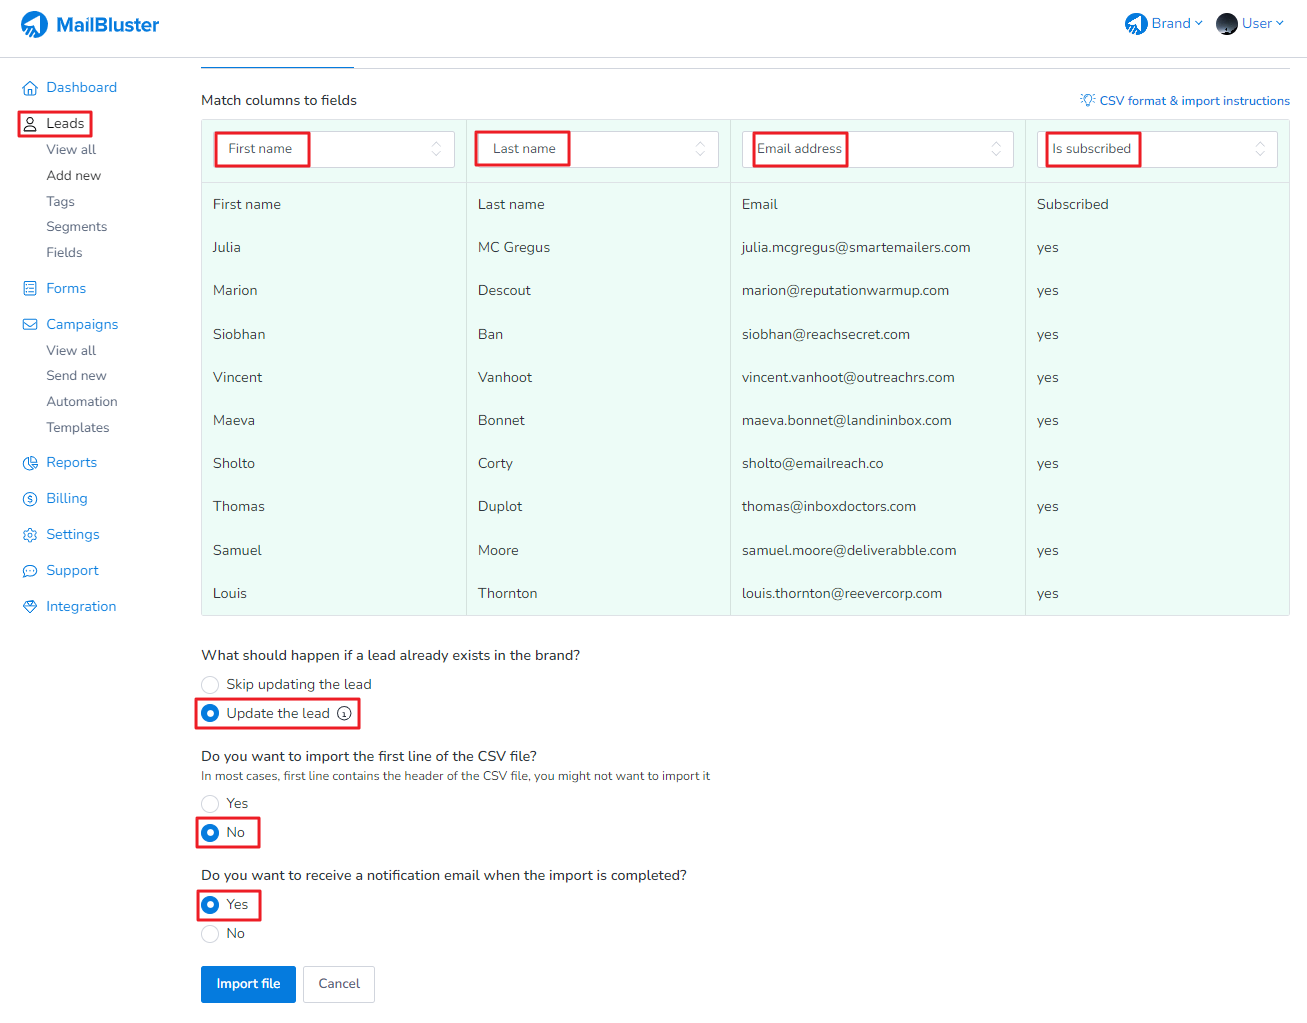
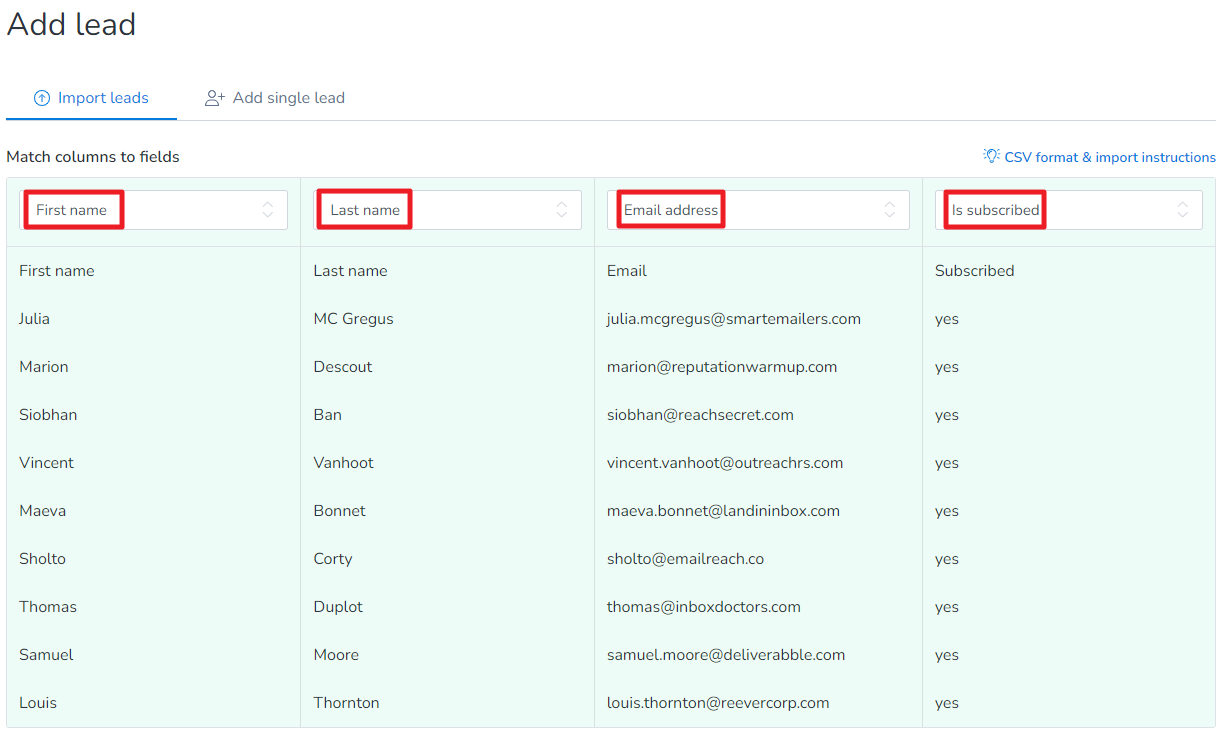
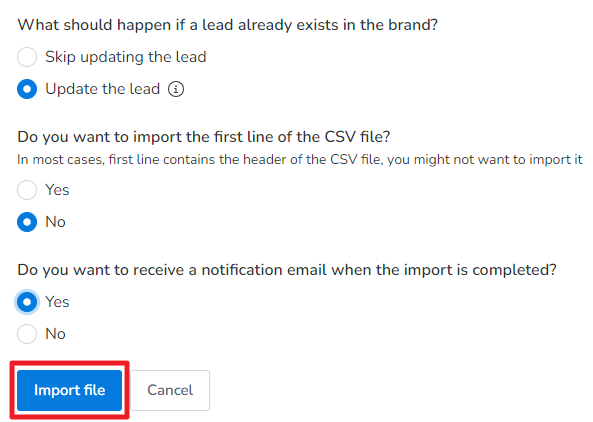
Finally match the first name/last name column of your CSV file to the first name/last name field and Subscribed with Is Subscribed. Email column is automatically matches with Email address field. Be sure to set Update the lead if lead already exists, “Do you want to import the first line of the CSV file” to No. Then click Import file.
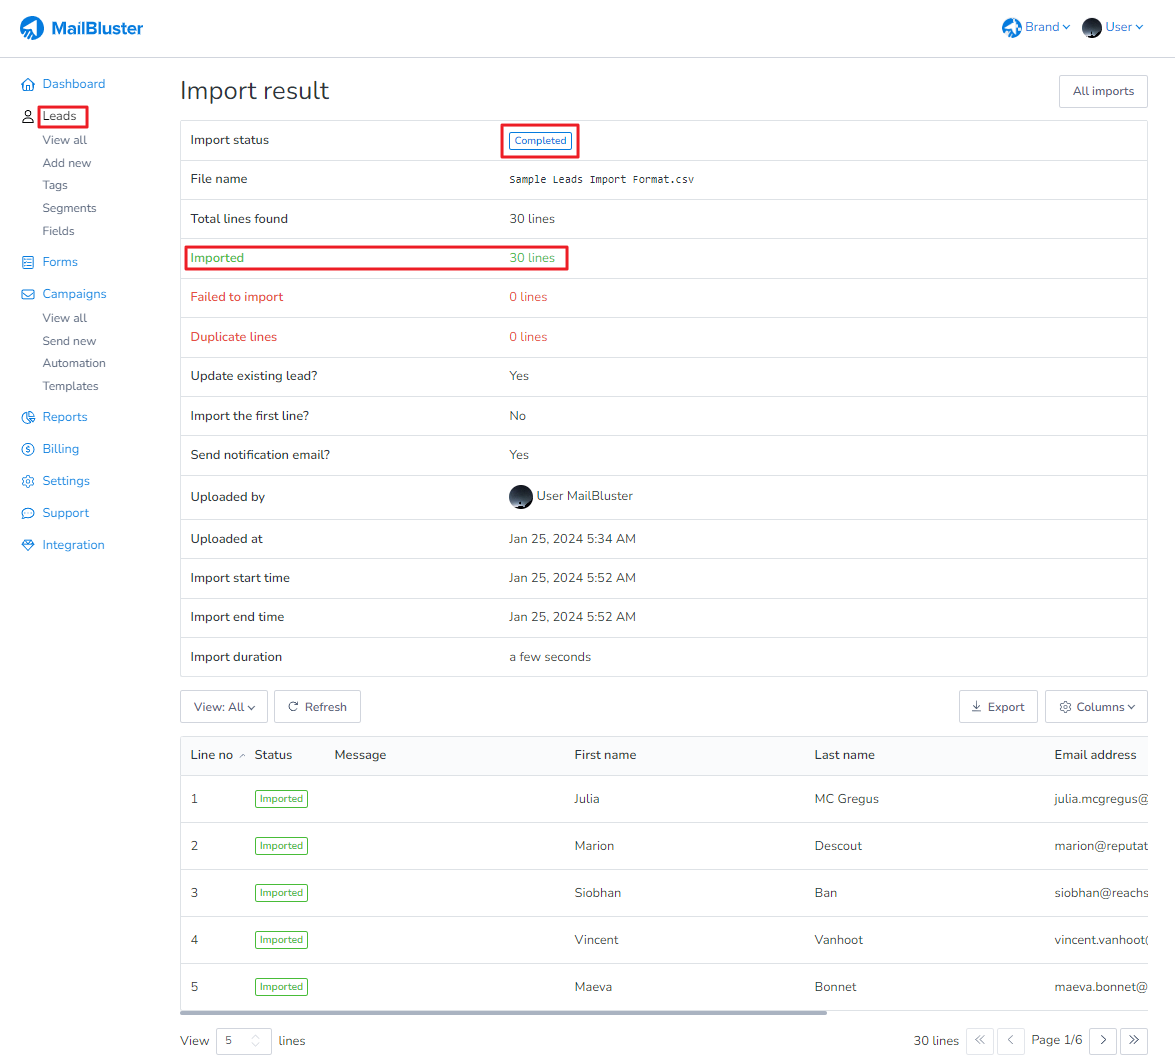
After clicking Import file, lead will be updated as shown below:
By following these steps, you can add first name and last name to leads quickly, ensuring your email campaigns feel more personalized.
Importing leads, subscribers, or email addresses to MailBluster is pretty simple. You’ll need a file that supports Comma Separated Values or CSV File format. Make sure your file has two specific columns – for instance, if you have columns labeled “Email” and “Subscribed,” you’ll need to point them to “Email address” and “Is subscribed” before importing them into the Leads section of MailBluster.
In MailBluster, follow these steps to import leads successfully:
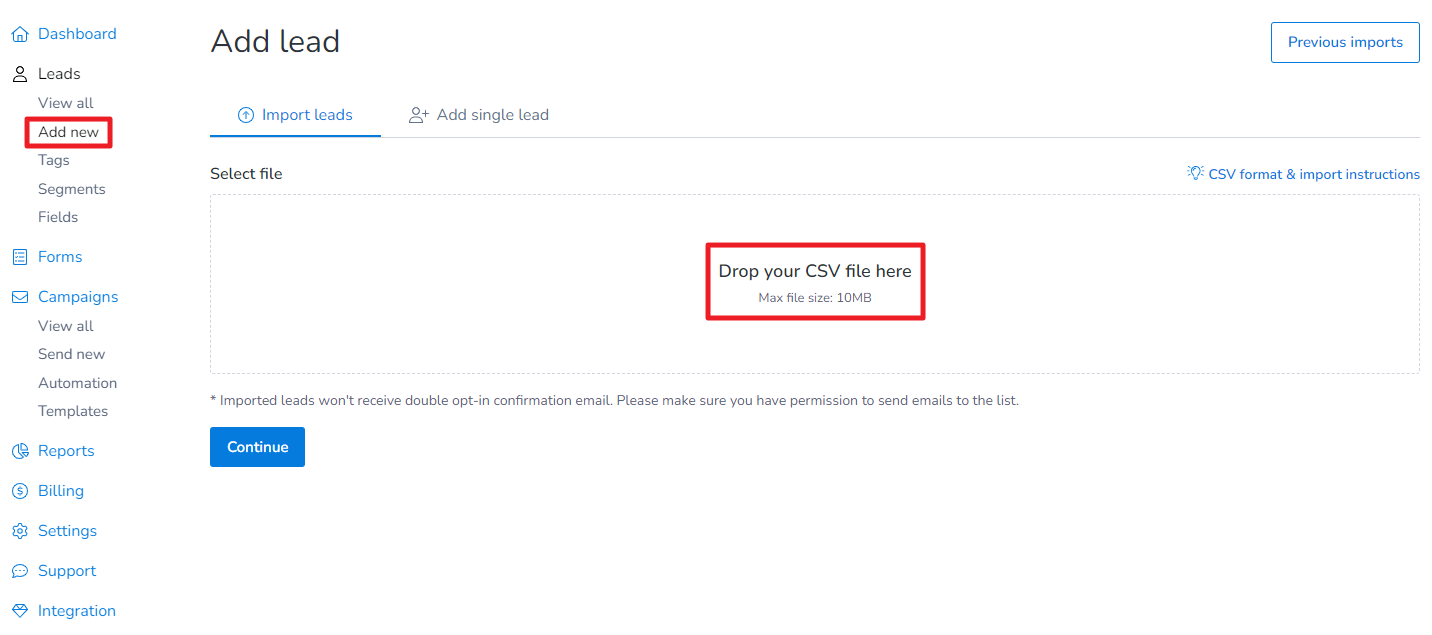
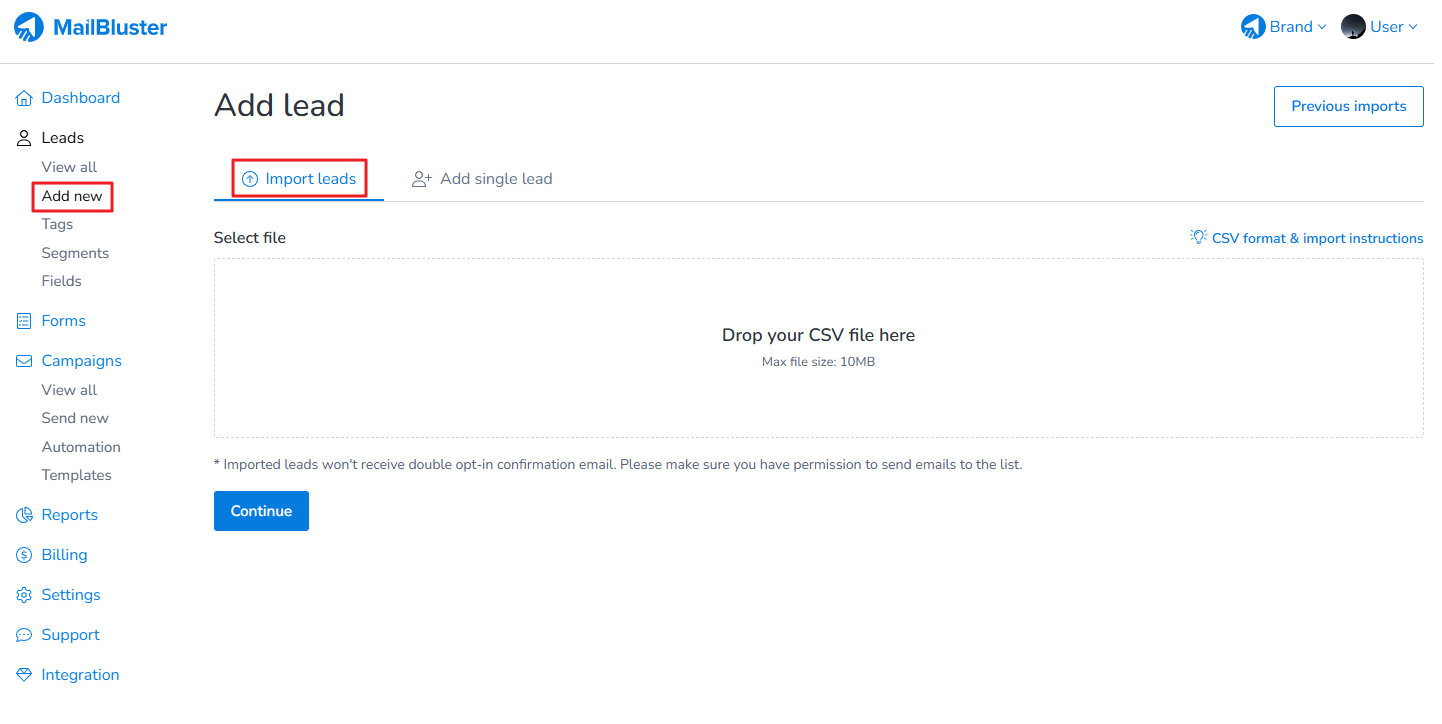
1. Just go to Leads > Add new then drag and drop your CSV file.
2. After dropping the CSV file, the following structure of the file will be generated just before import confirmation. Highlight the respective field according to the title of the CSV columns.
3. Scroll down and select these options then click Import file:
Please Note: If your CSV File has the title “First name, Last name, Email, Subscribed” then you need to select “No” for the option “Do you want to import the first line of the CSV file”.
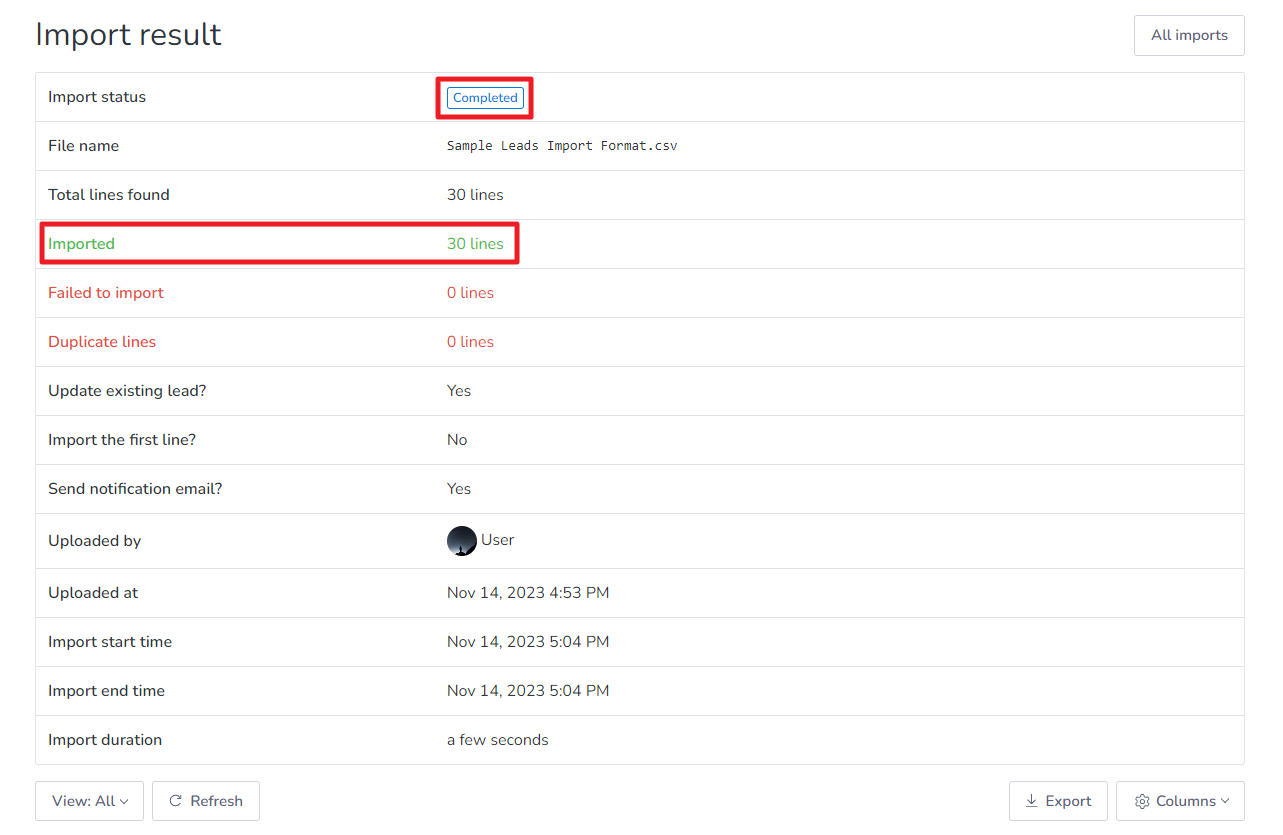
4. Once imported successfully, you will get the results similar to the one shown below:
Here is a sample CSV file on Google Sheets with the mandatory columns highlighted for uploading leads to MailBluster. You can follow this format to upload your data to Leads section of MailBluster.
Please Note: The required columns are Email address and Subscribed.
To import leads with Tags, first you need to sign in to MailBluster > Brand > Add new > Import leads. Then Drag and drop a CSV file containing Leads with Tags.
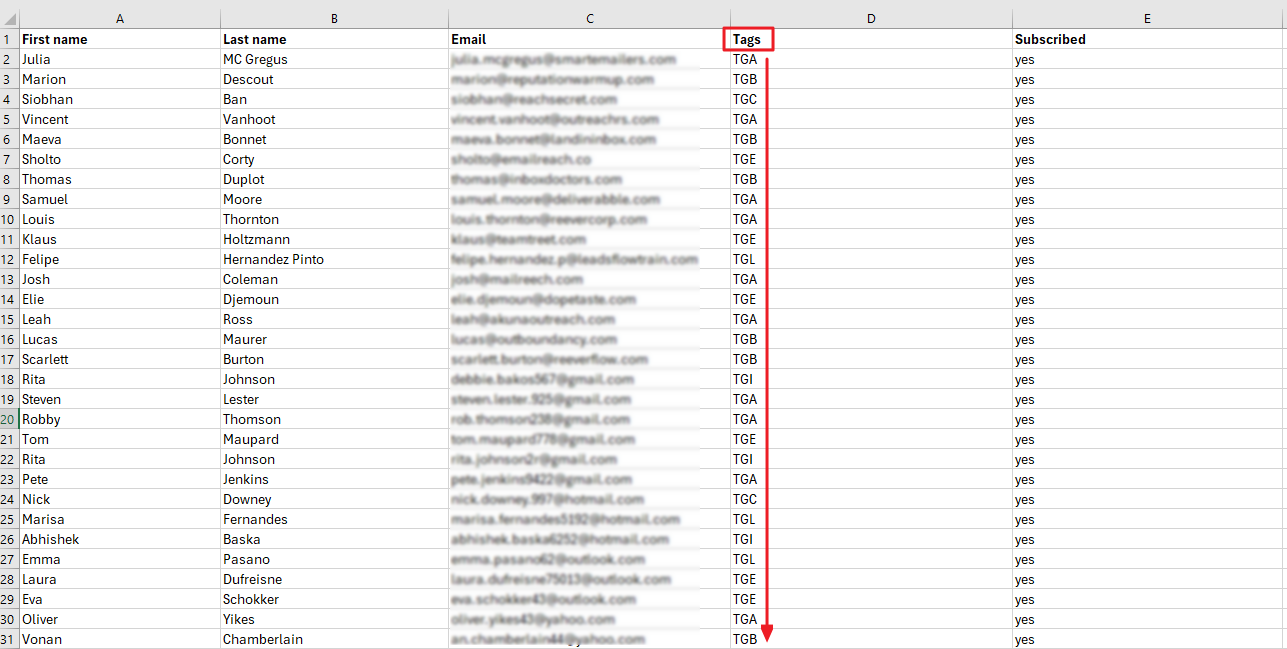
The format of the CSV file should be exactly like this as shown below. There should be a column named “Tags” along with First name, Last name, Email and Subscribed.
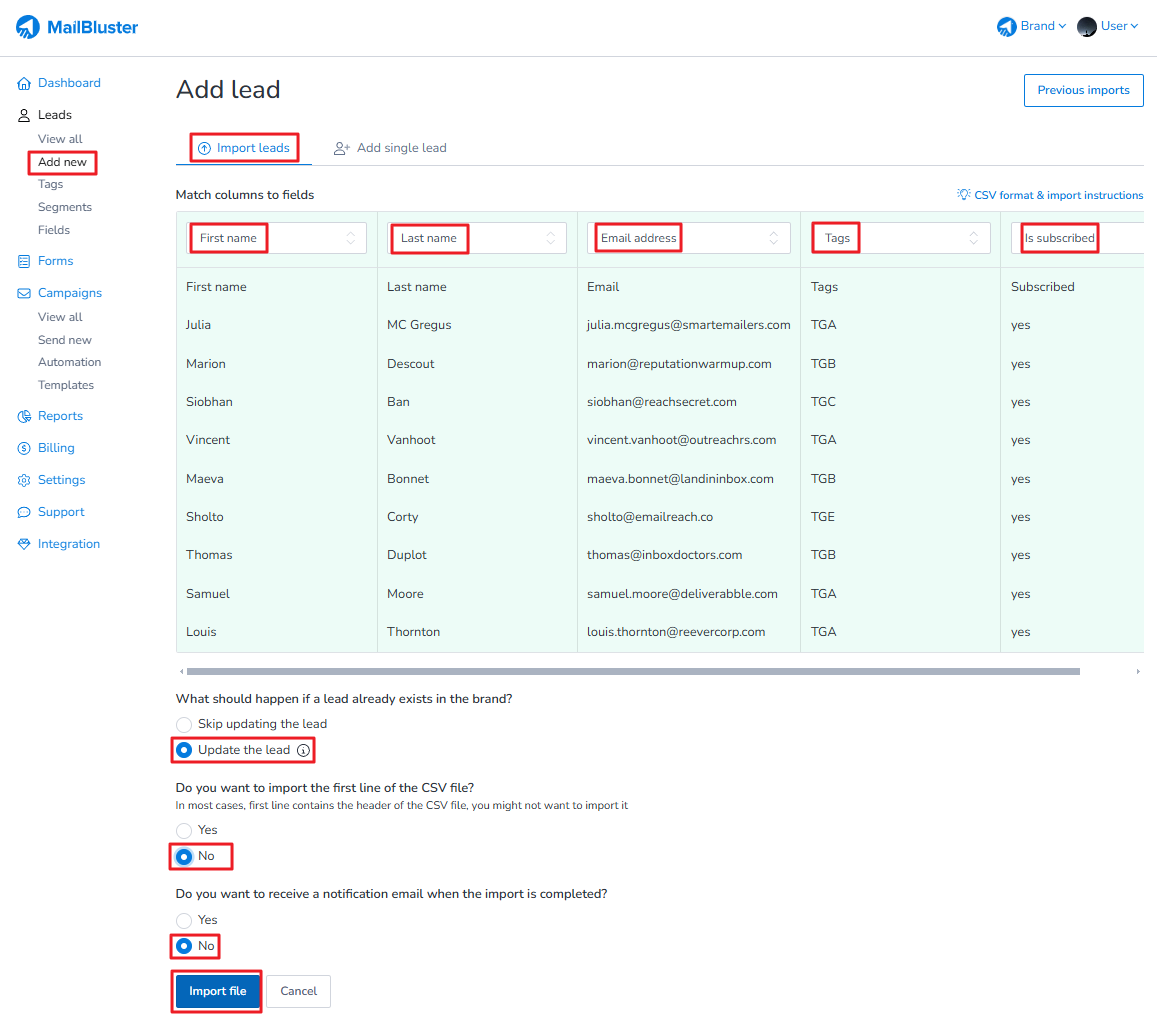
After dragging and dropping the CSV file, match the appropriate fields. Each title column will be same as the first line of their respective column as shown below. Then select the required options. After selecting the required options, click Import file.
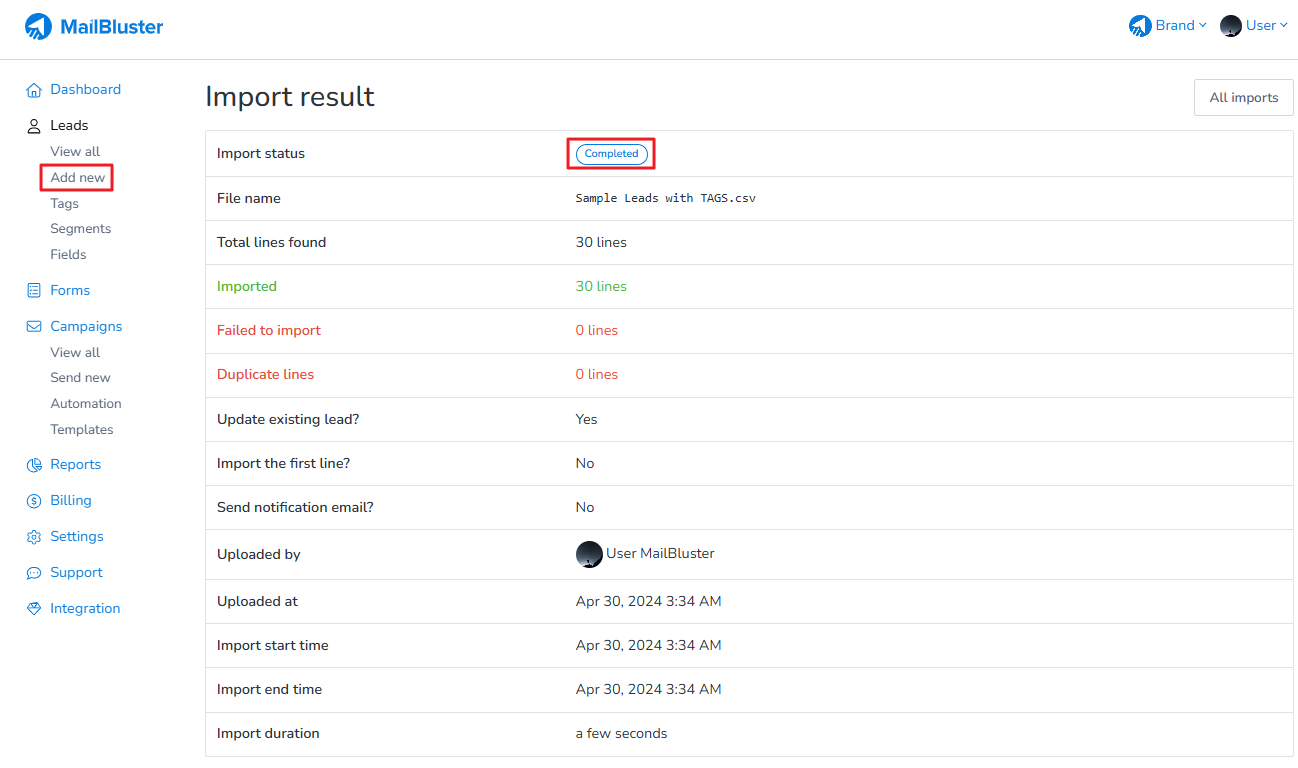
Once the CSV file imports successfully, it will show “completed” as shown here.
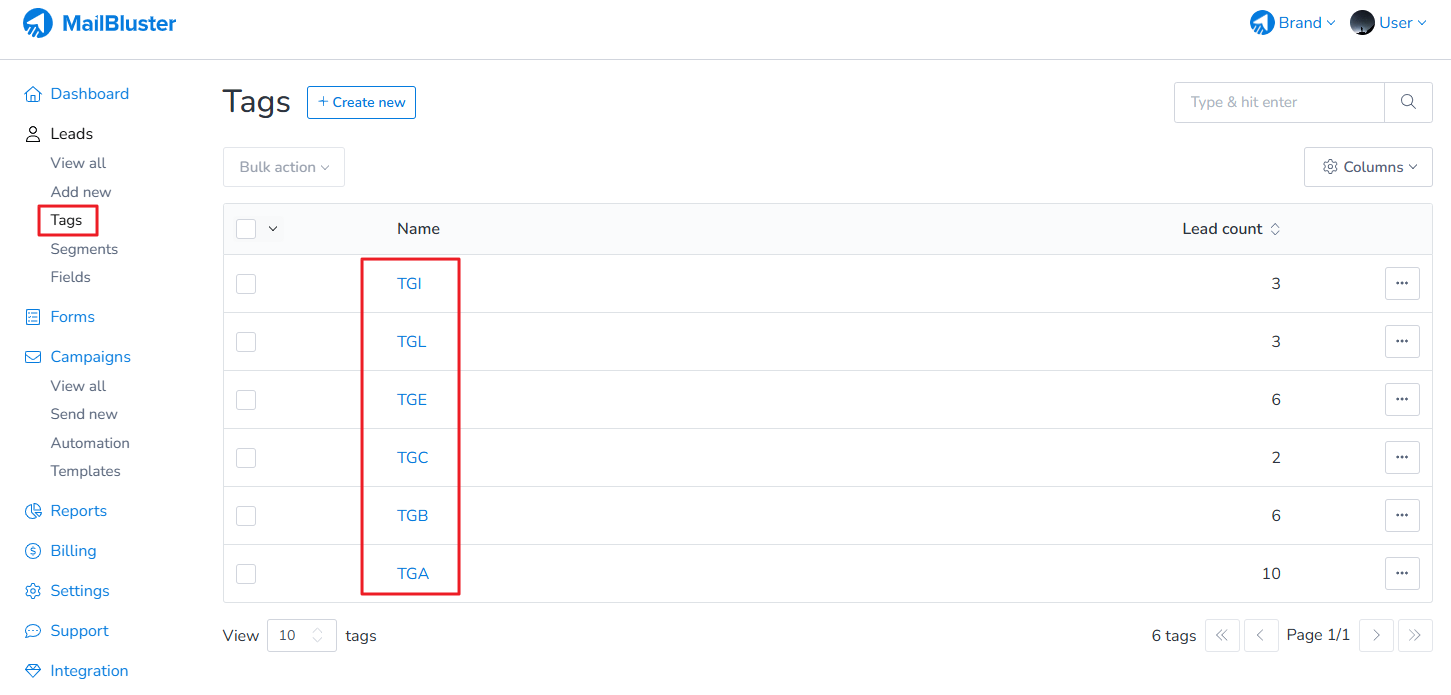
Now go to Tags of your Brand and you will see the Tags list which are imported from the CSV file. The Tags are already assigned to the Leads from CSV file.
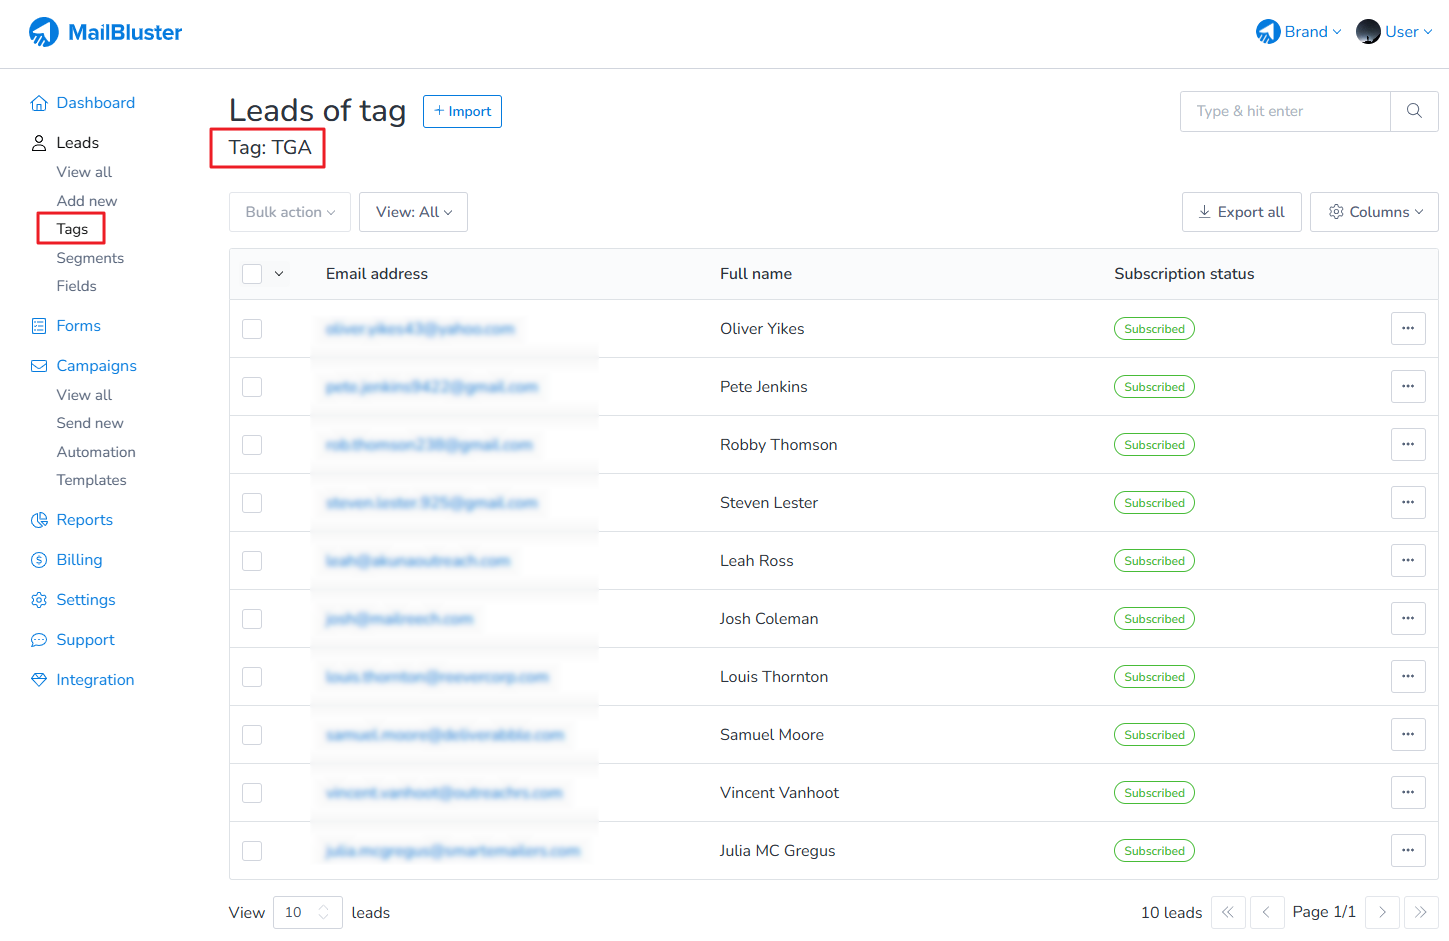
Click on any of the tags from the list, and you will see the list of leads that contain the respective tag.
By following these steps, you can successfully import leads with tags in MailBluster and segment your audience for more personalized campaigns.
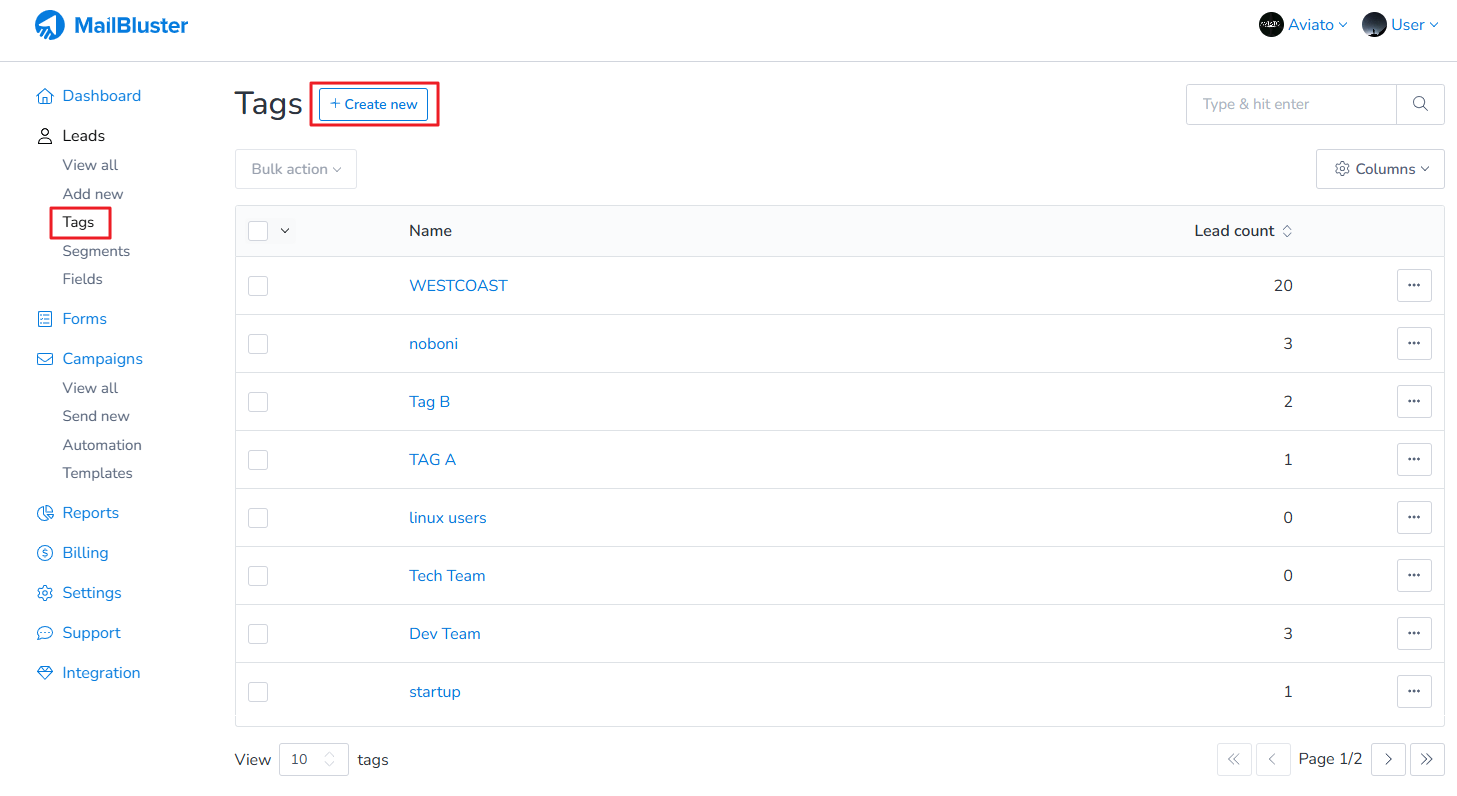
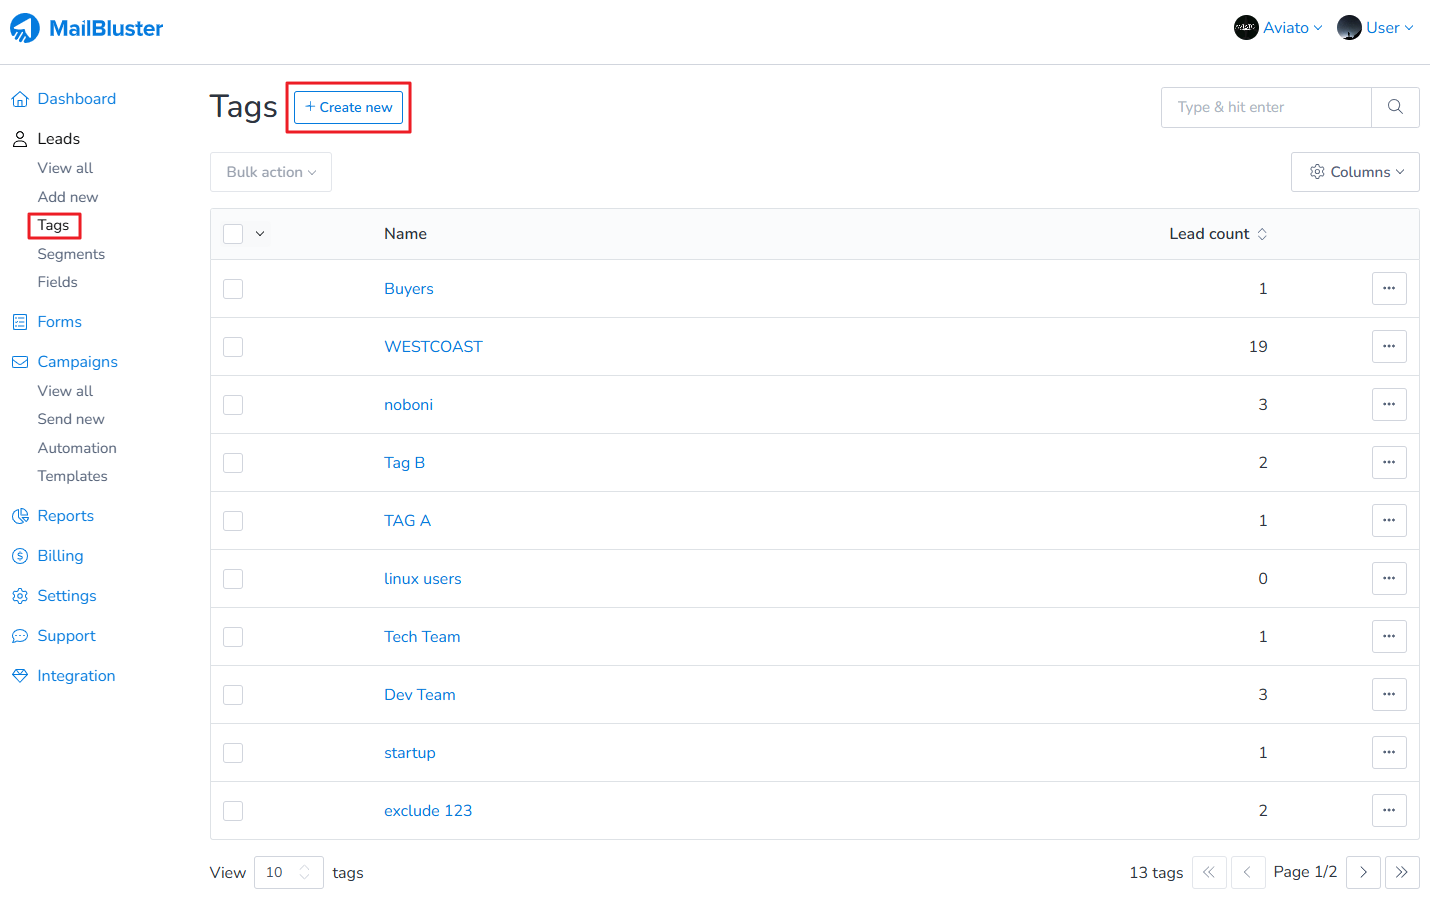
To assign Tags to individual lead, first you need to go to Tags and click on Create new.
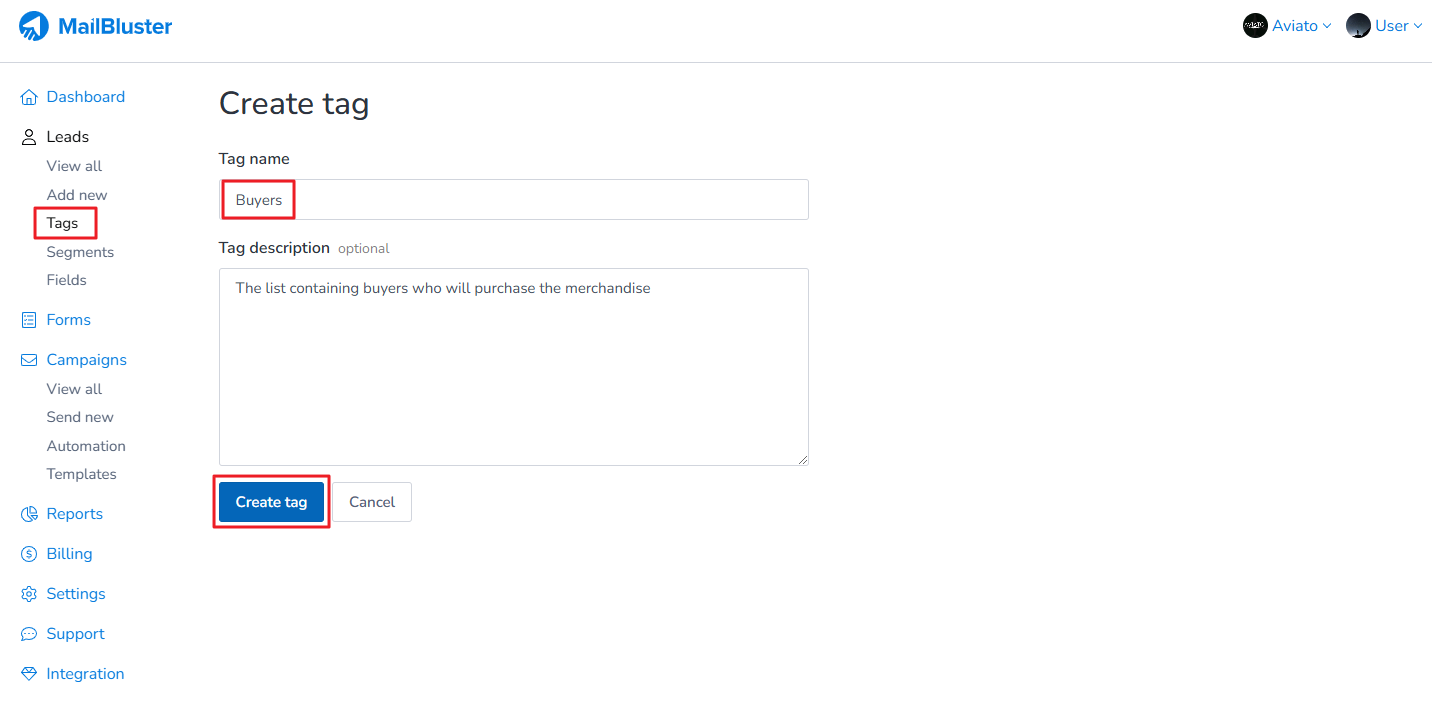
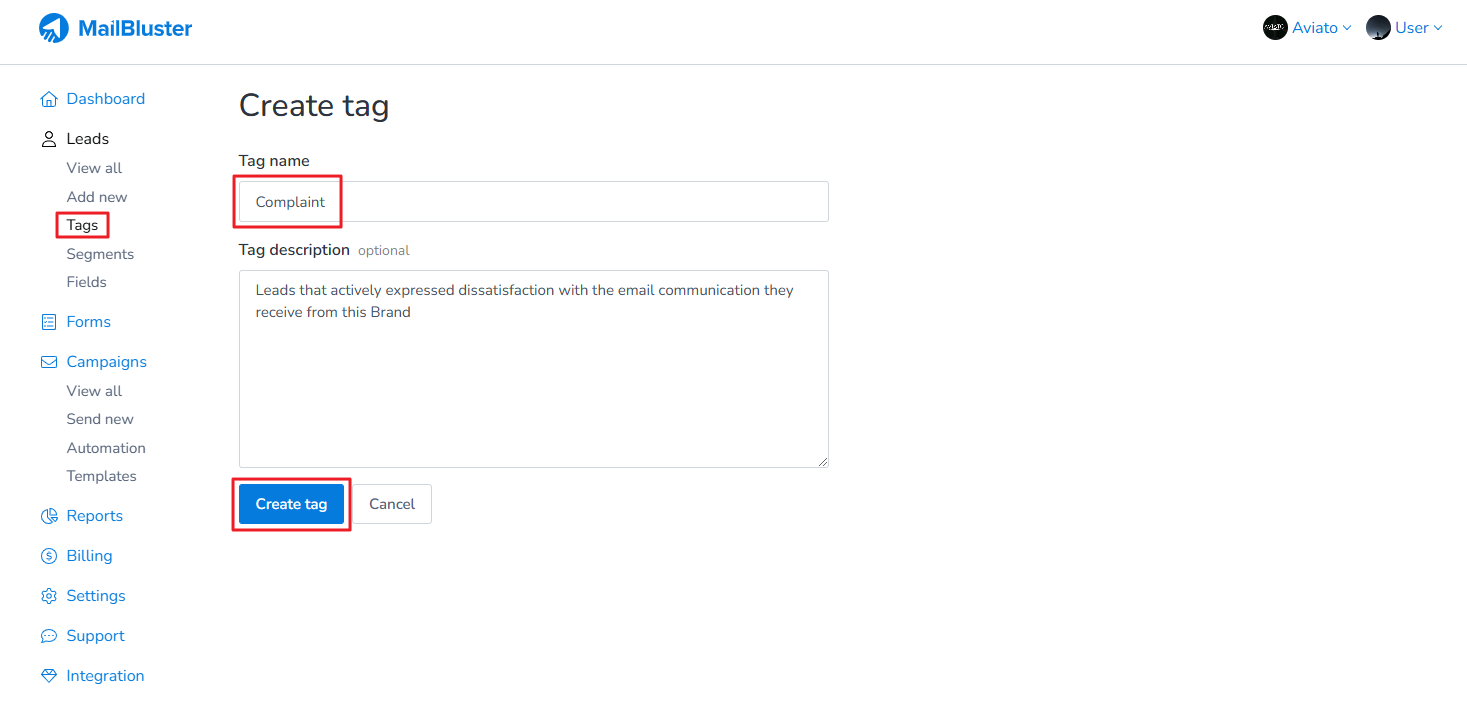
Enter the Tag name and Tag description, then click on Create tag.
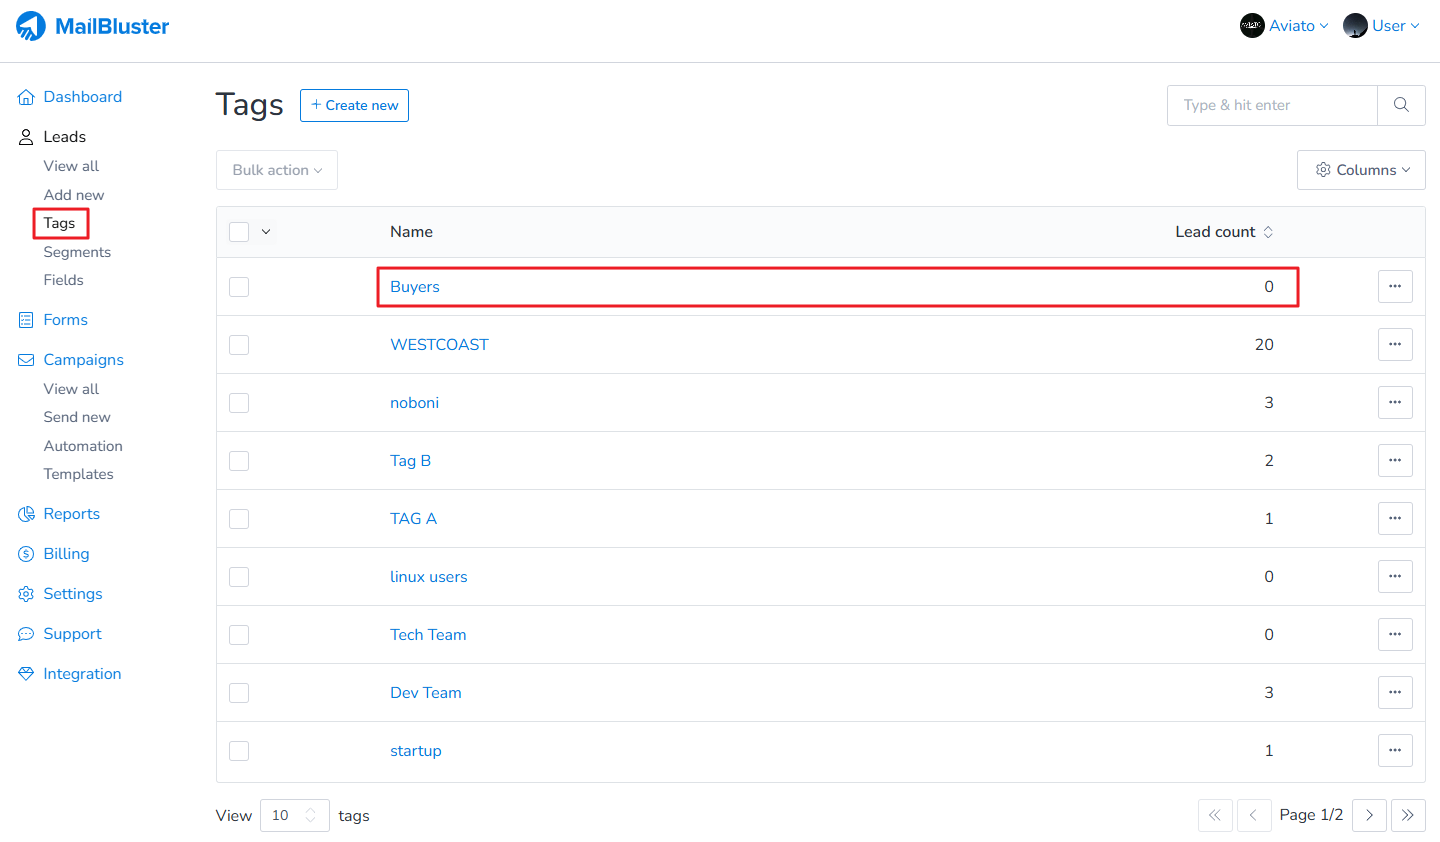
Here we have created a tag name “Buyers” as an example. The tag shows 0 lead count.
If you click on the Tag name Buyers, you will see no leads have been assigned to it.
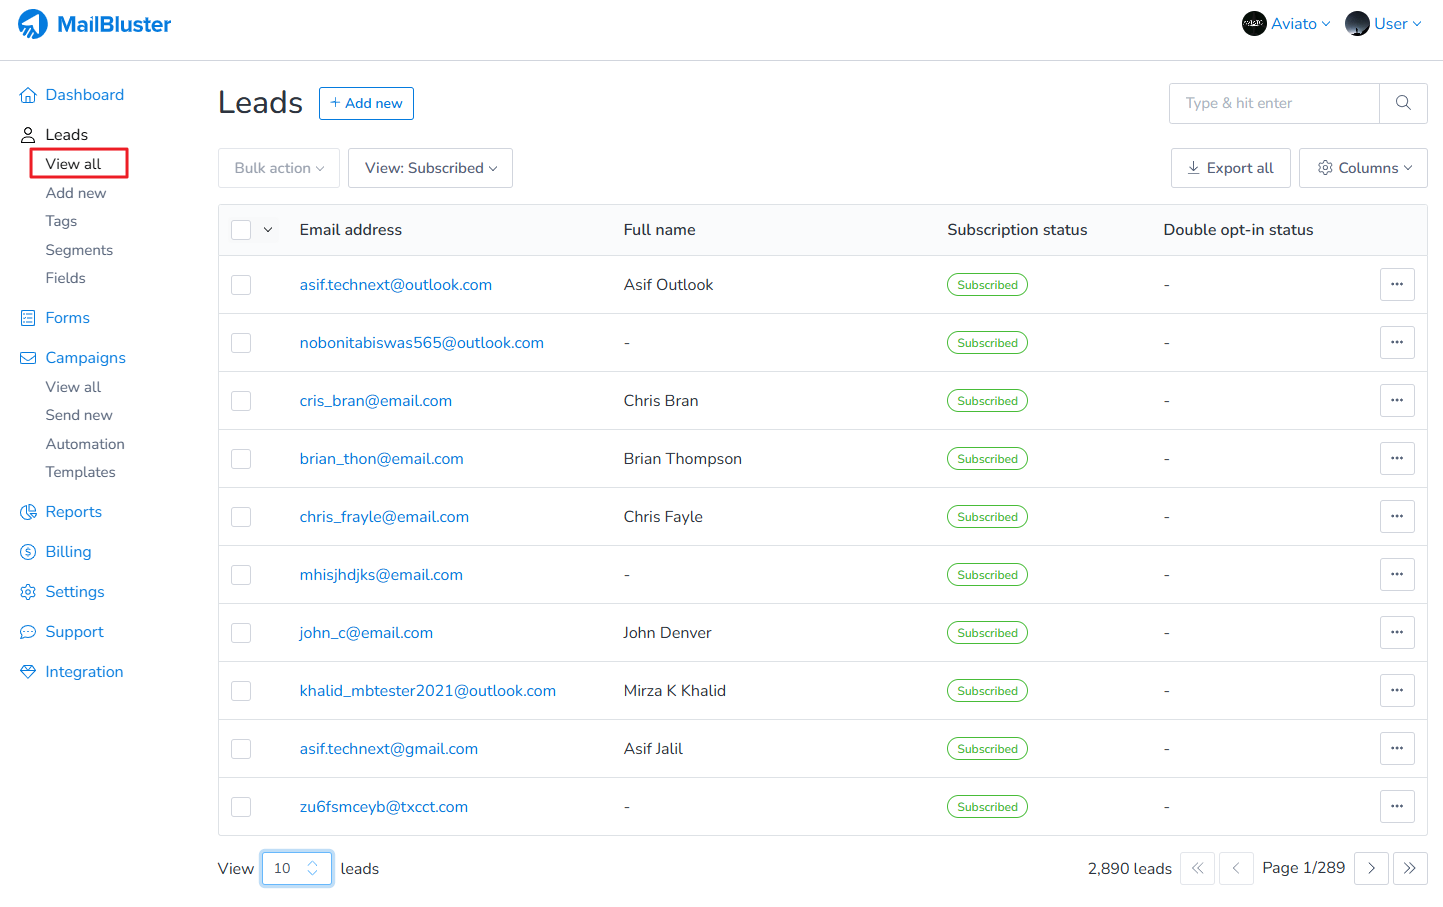
Now click on View all and select any lead of your choice.
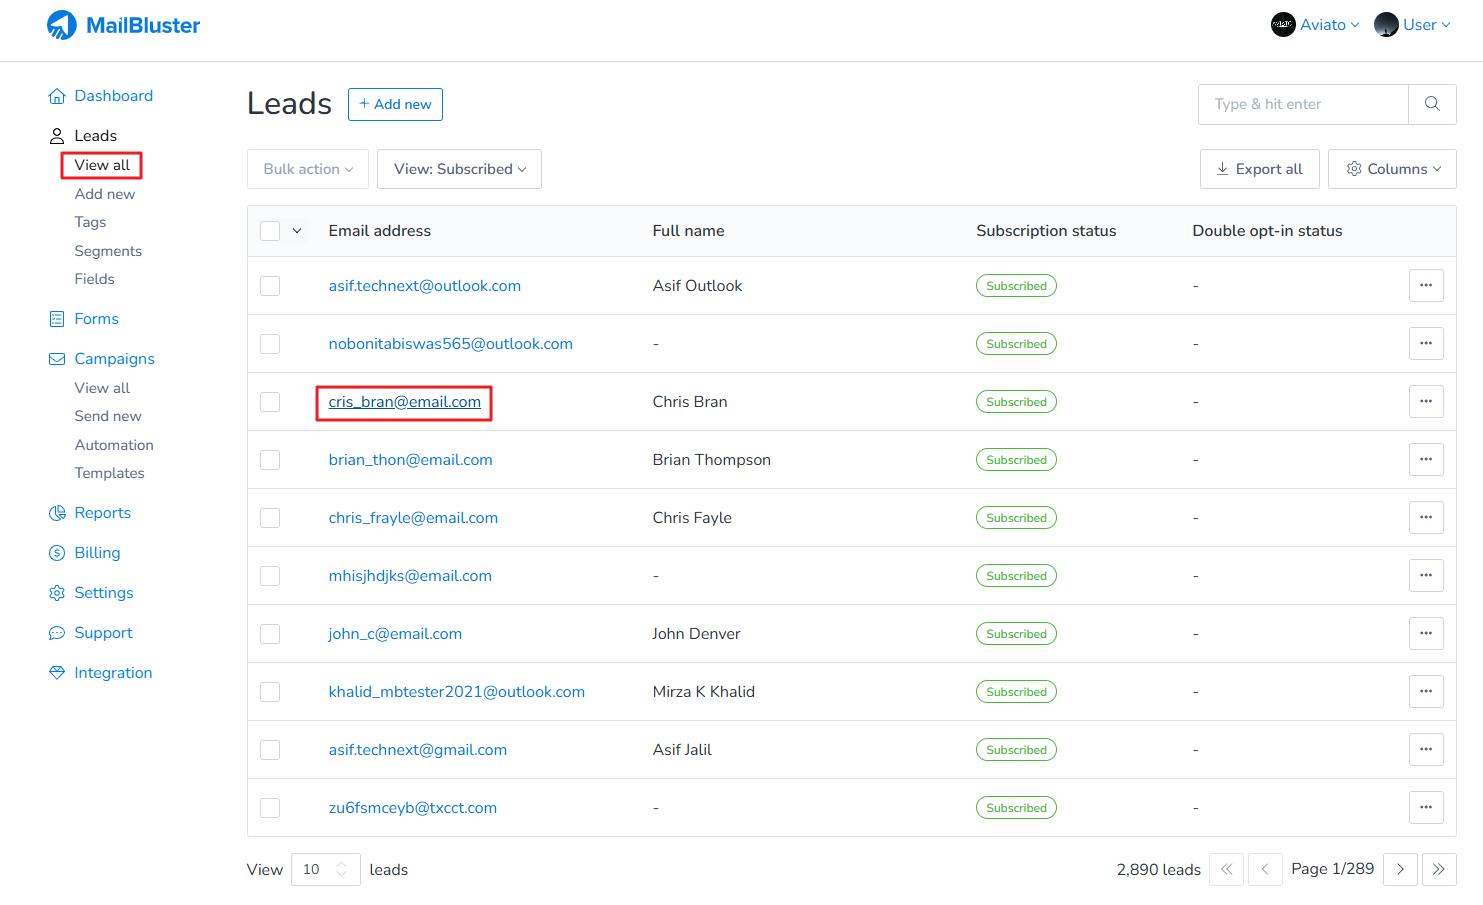
Here we selected a sample lead of our choice. Click on the lead.
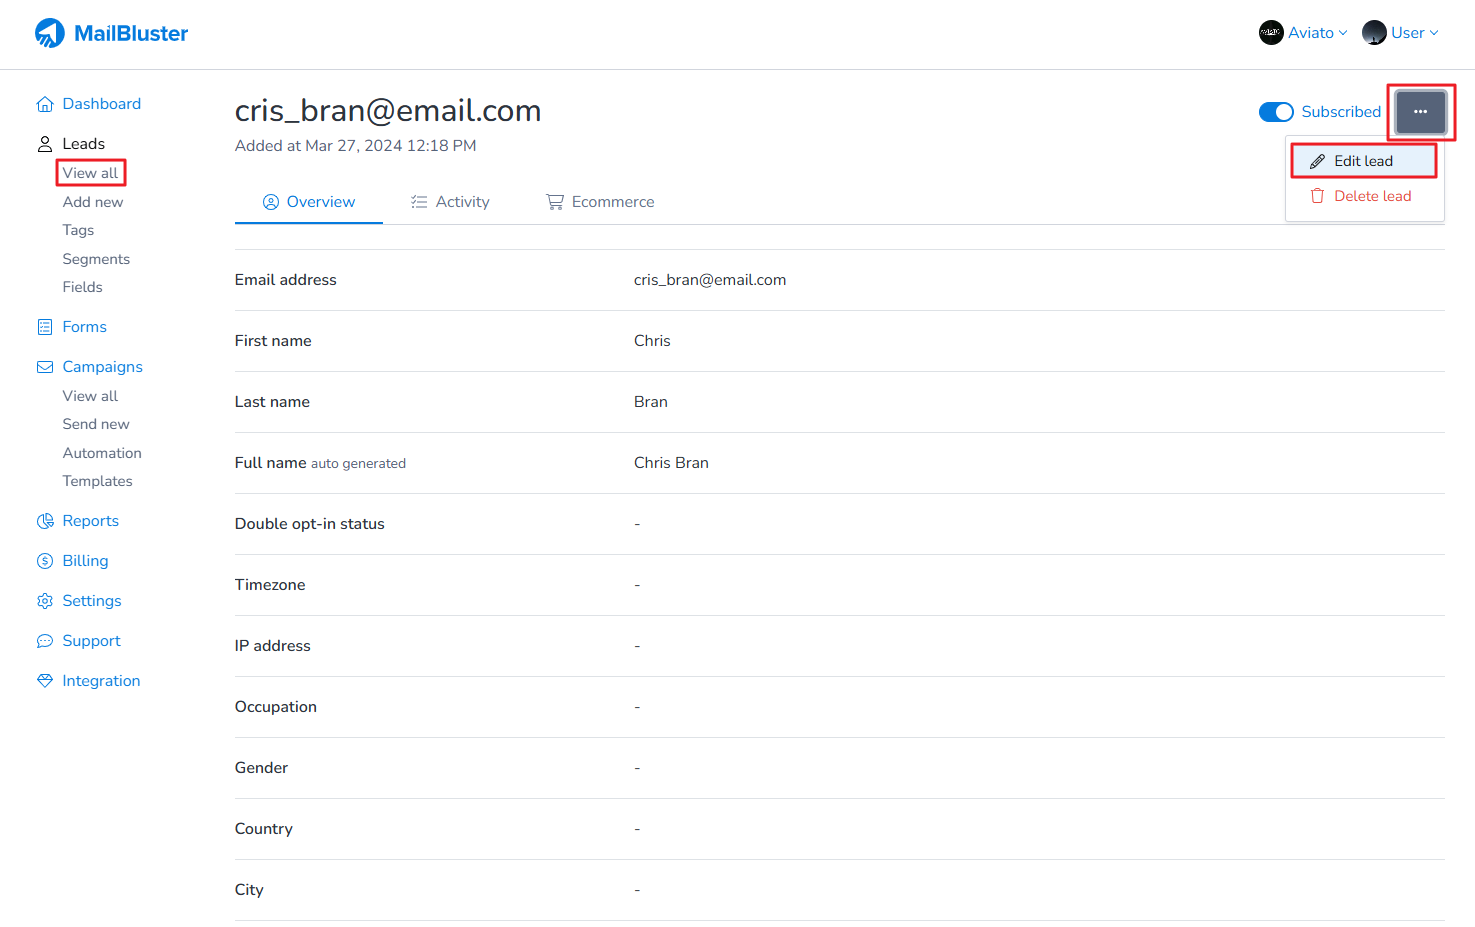
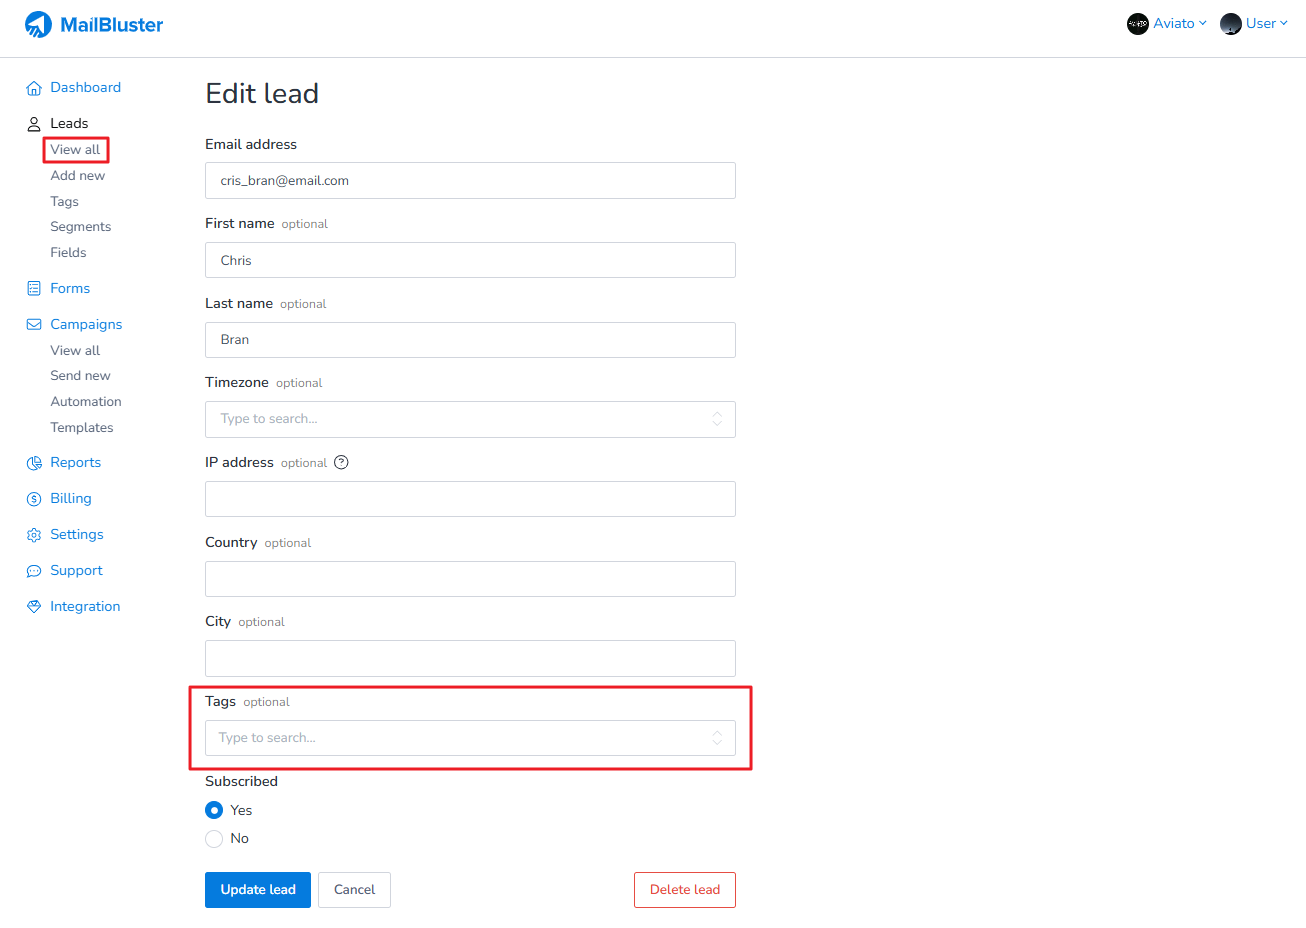
Click on 3 dot ellipsis and then click on Edit lead.
Then click on Tags.
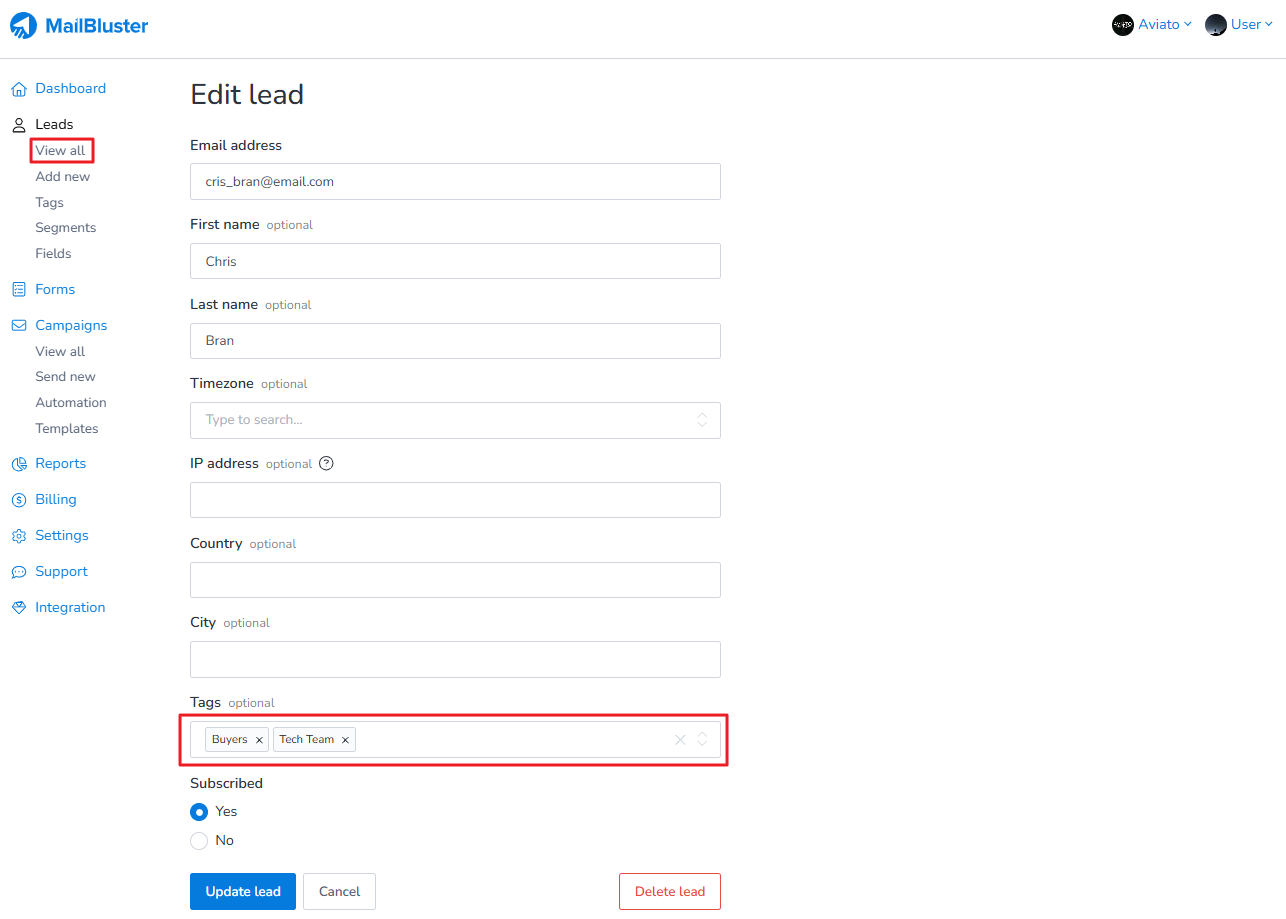
Select a single tag or multiple tags to assign to this lead. Here we selected 2 tags to assigned to this lead. Then click on Update lead.
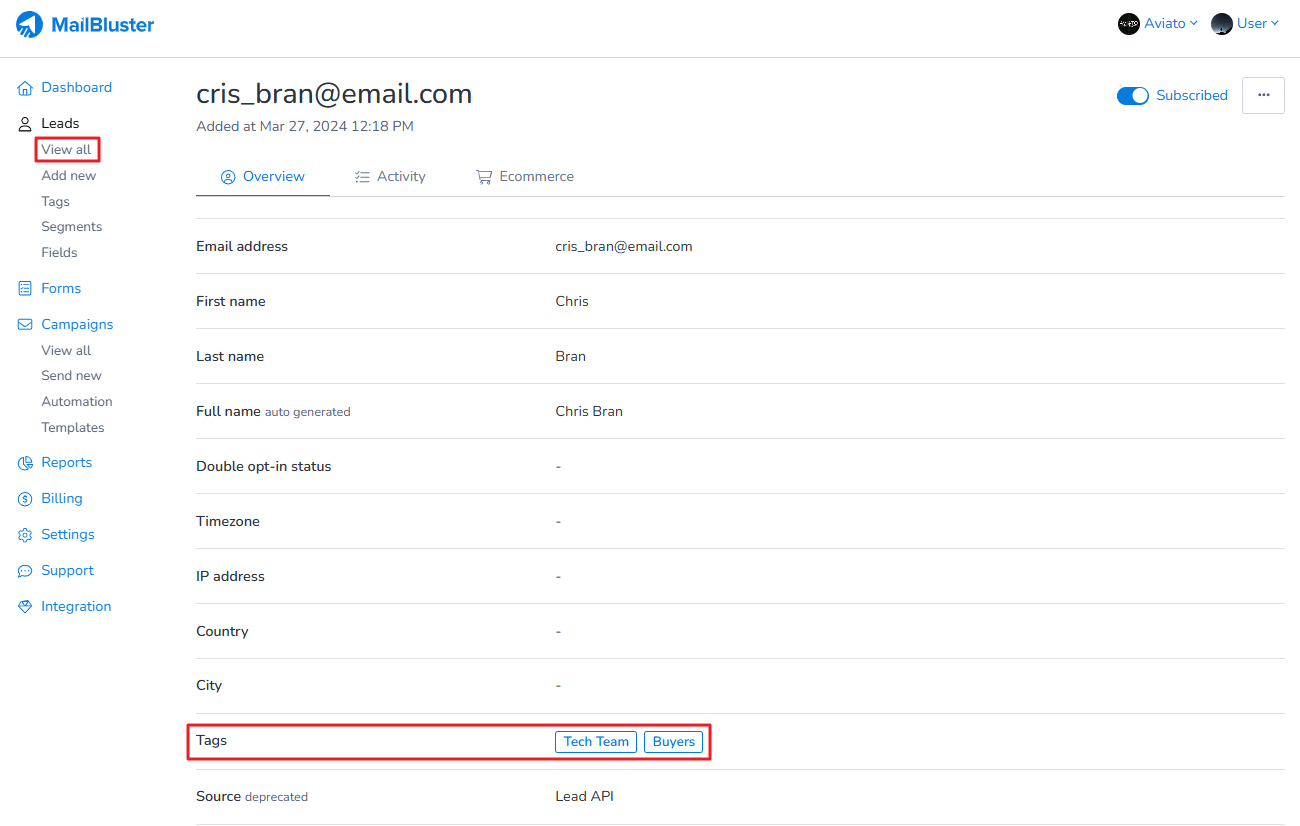
As you can see now 2 tags have been assigned to this lead. One is an old tag (created before) and the other is the new tag we have created just now.
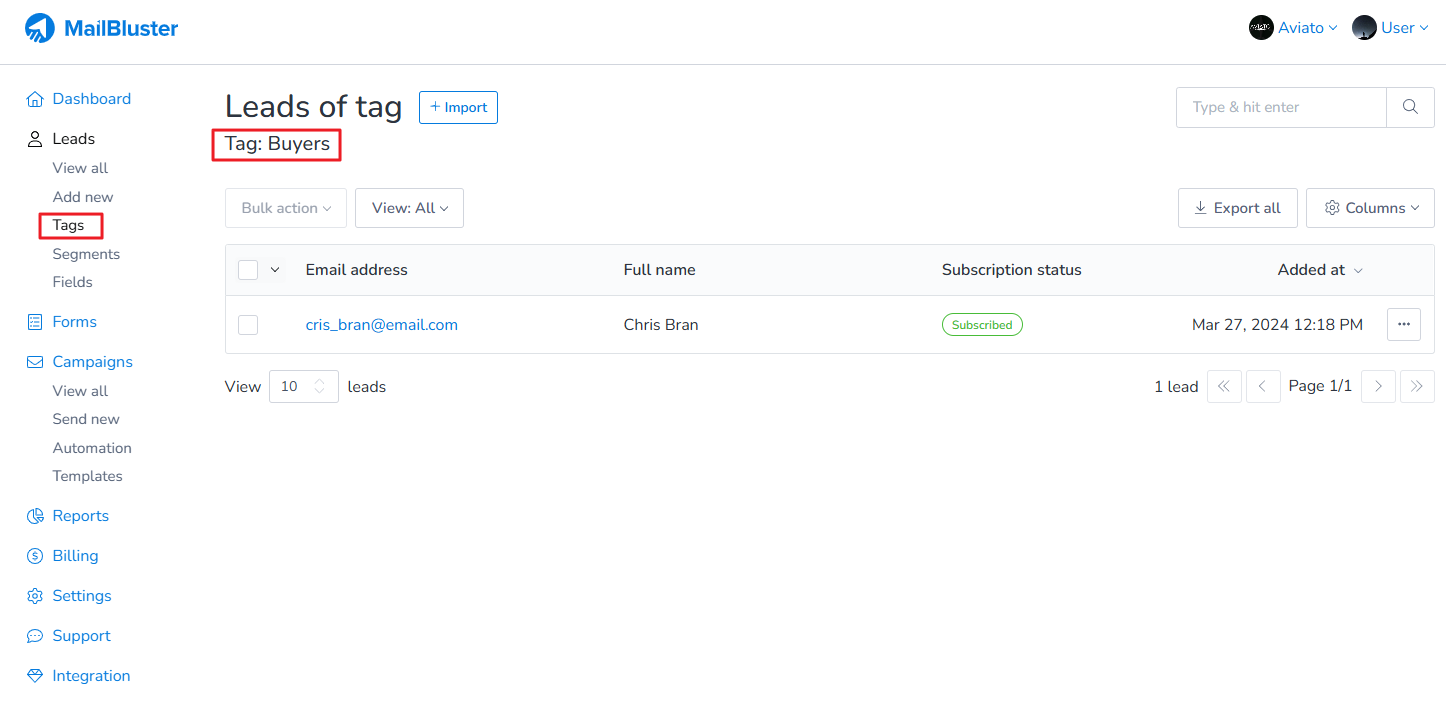
Now go to Tags again and click on the newly created tag.
You will now see that the new tag “Buyers” have been assigned to individual lead.
By following these steps, you can efficiently assign tags to individual lead in MailBluster. Using tags effectively allows you to organize your subscribers, segment your audience, and create highly personalized campaigns that drive engagement. Additionally, this method ensures that your email lists remain structured and actionable.
If you want to bulk manage tags in MailBluster, you can tag multiple contacts at the same time using two simple methods.
1. Adding tags via import
First go to Tags. Then click on Create new.
Create a tag by inserting Tag name in the field as shown below. Then add a tag description. Then click on Create tag.
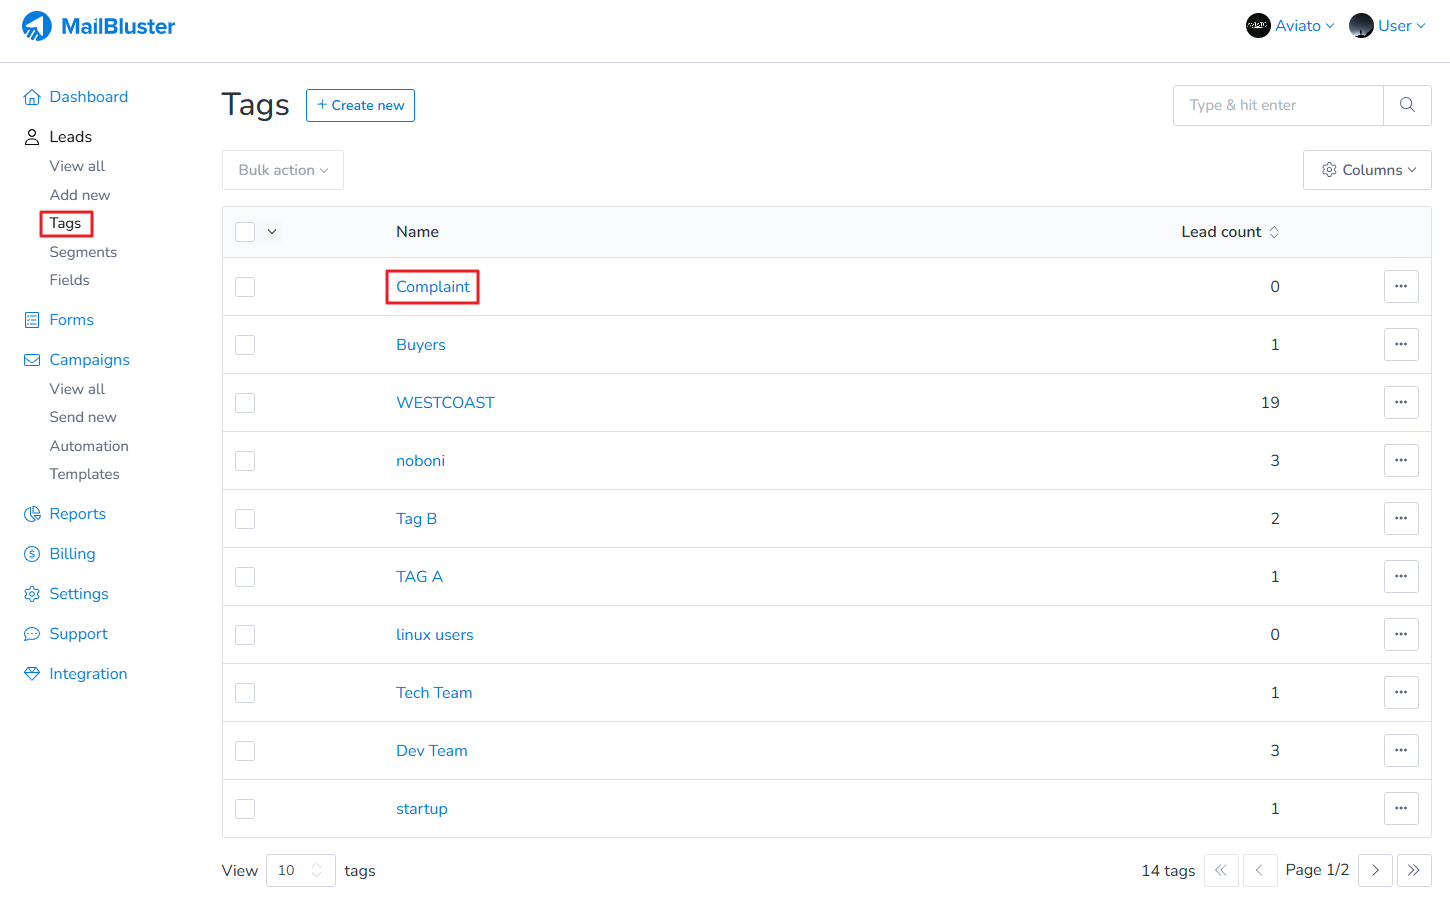
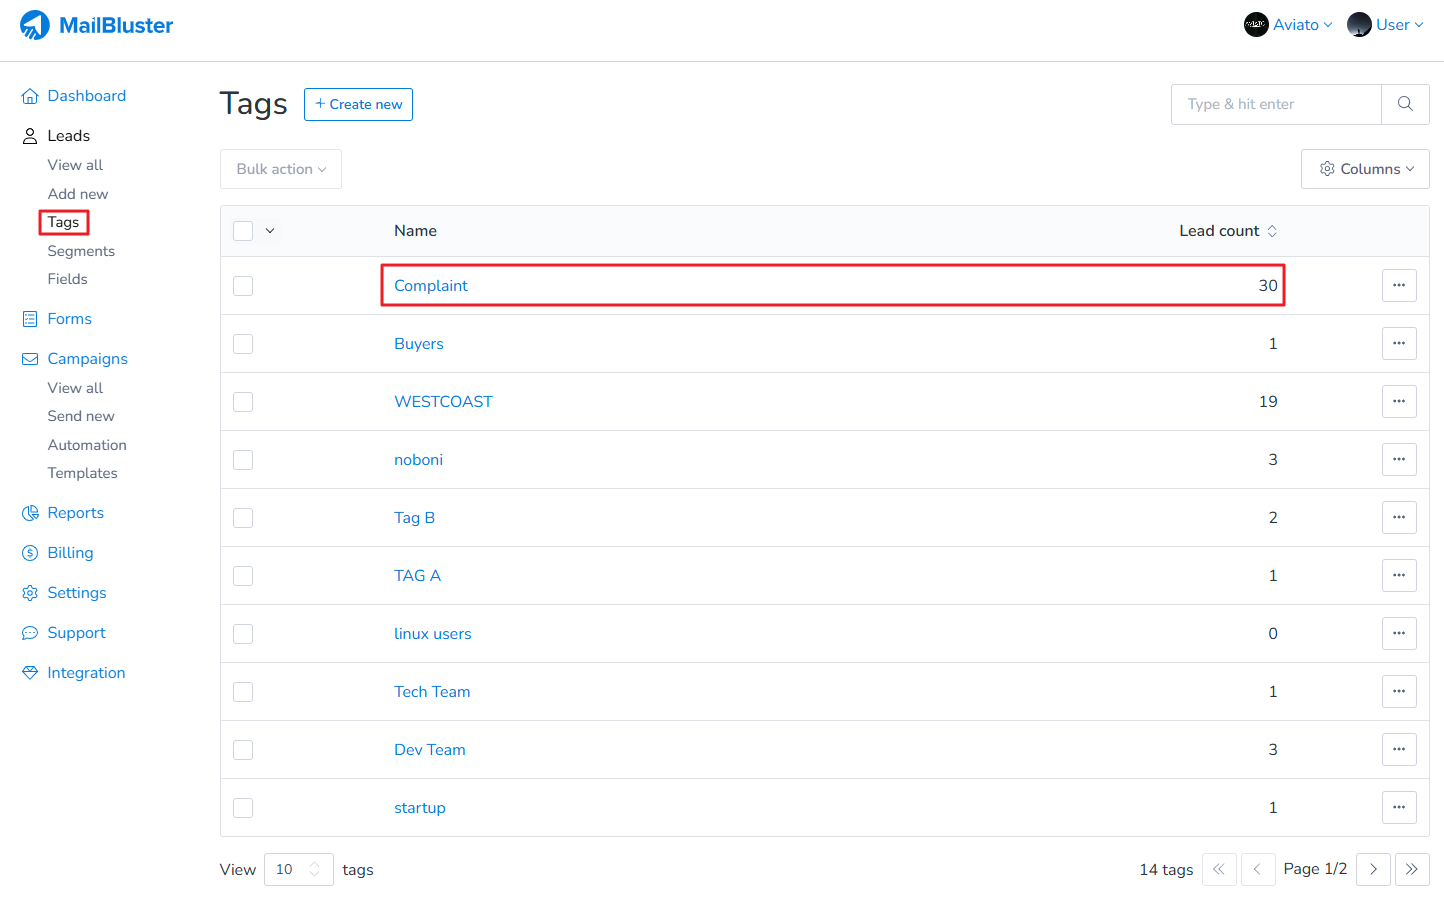
Here we created a tag name “Complaint” for example. Now click on the tag.
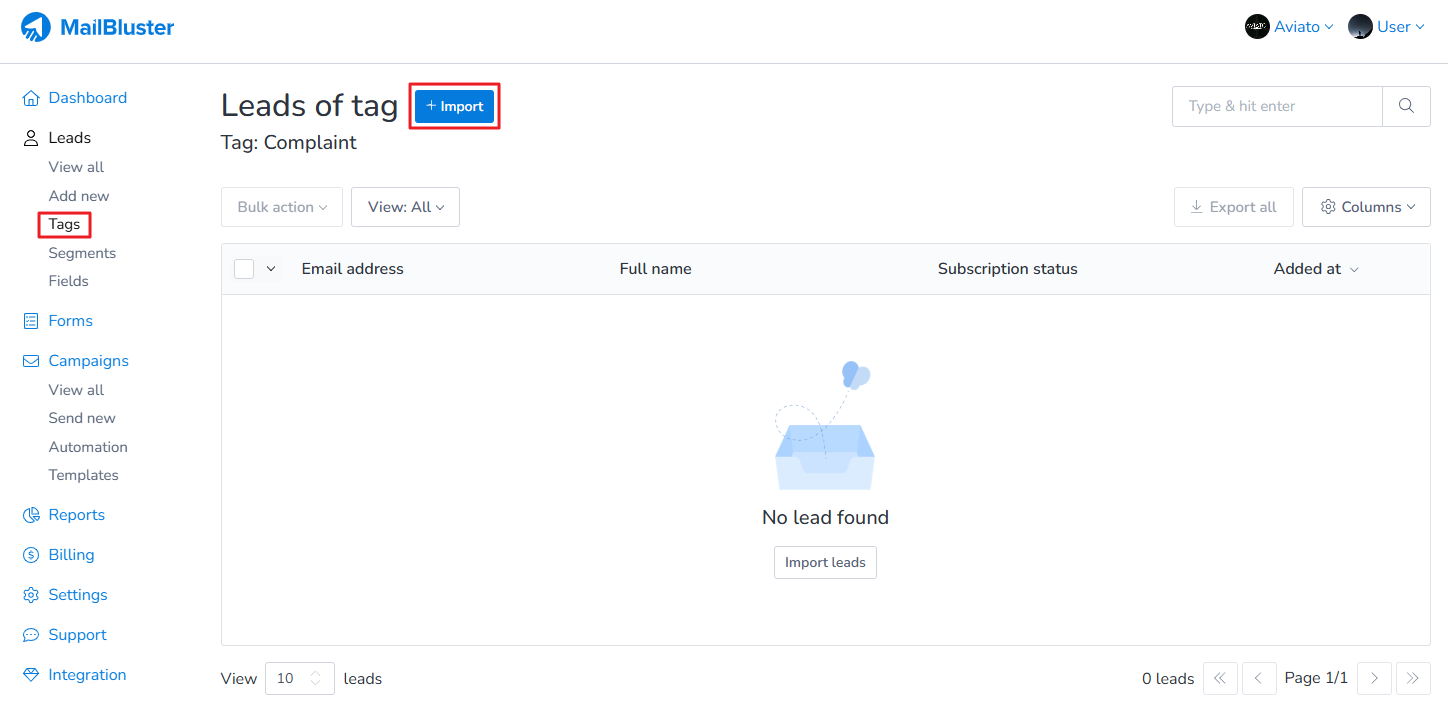
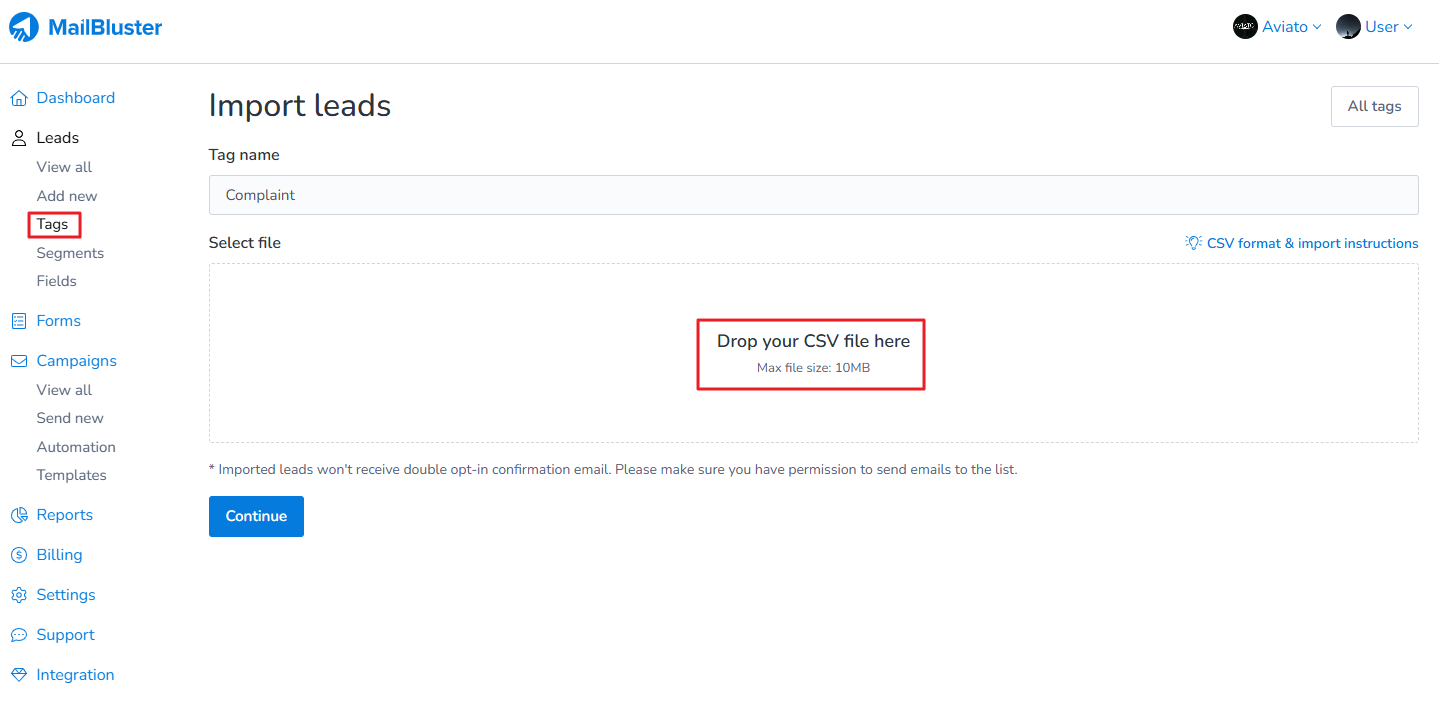
Once you are inside the tag, click Import.
Then drop a CSV file containing leads as shown below.
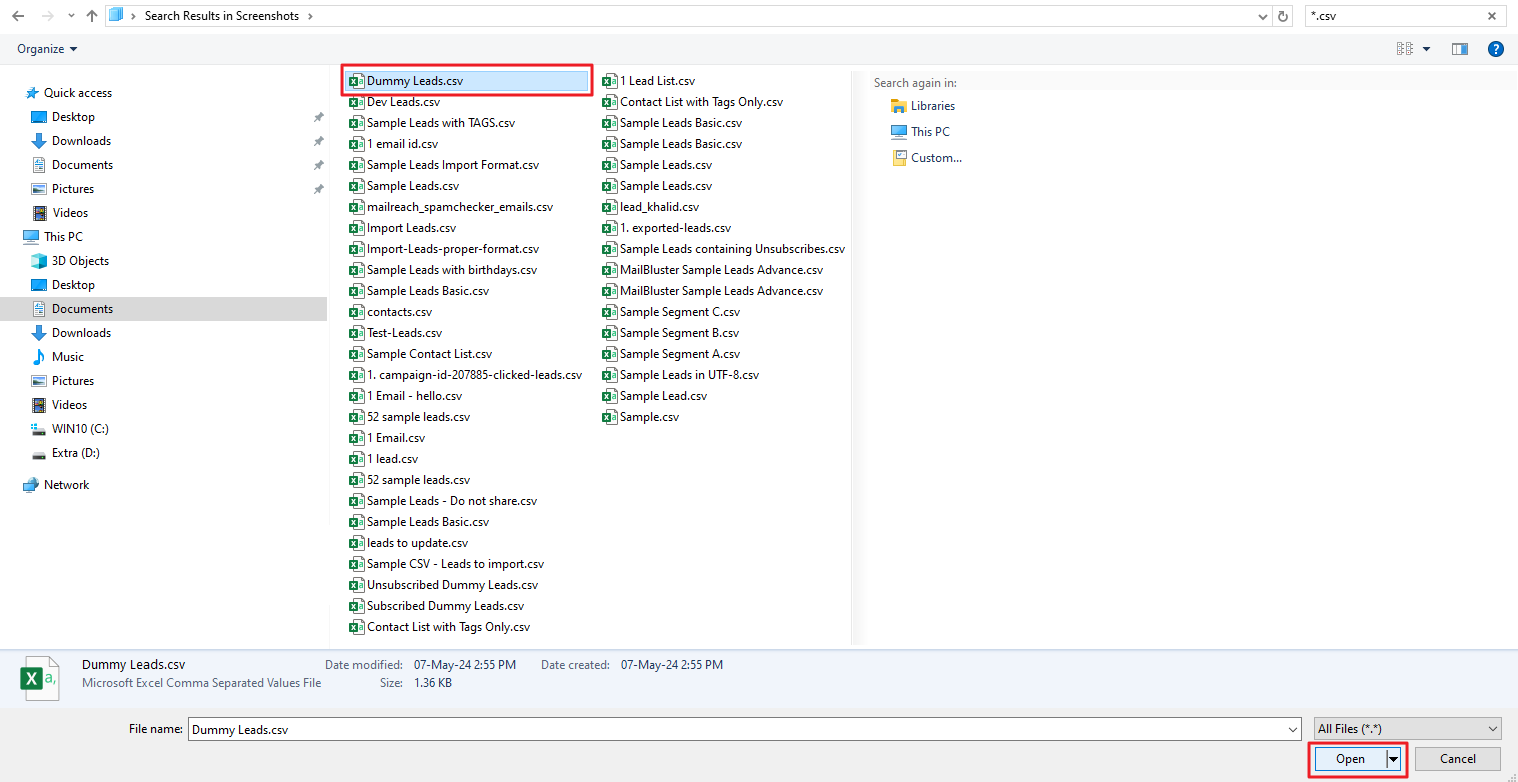
Select a CSV file and click open.
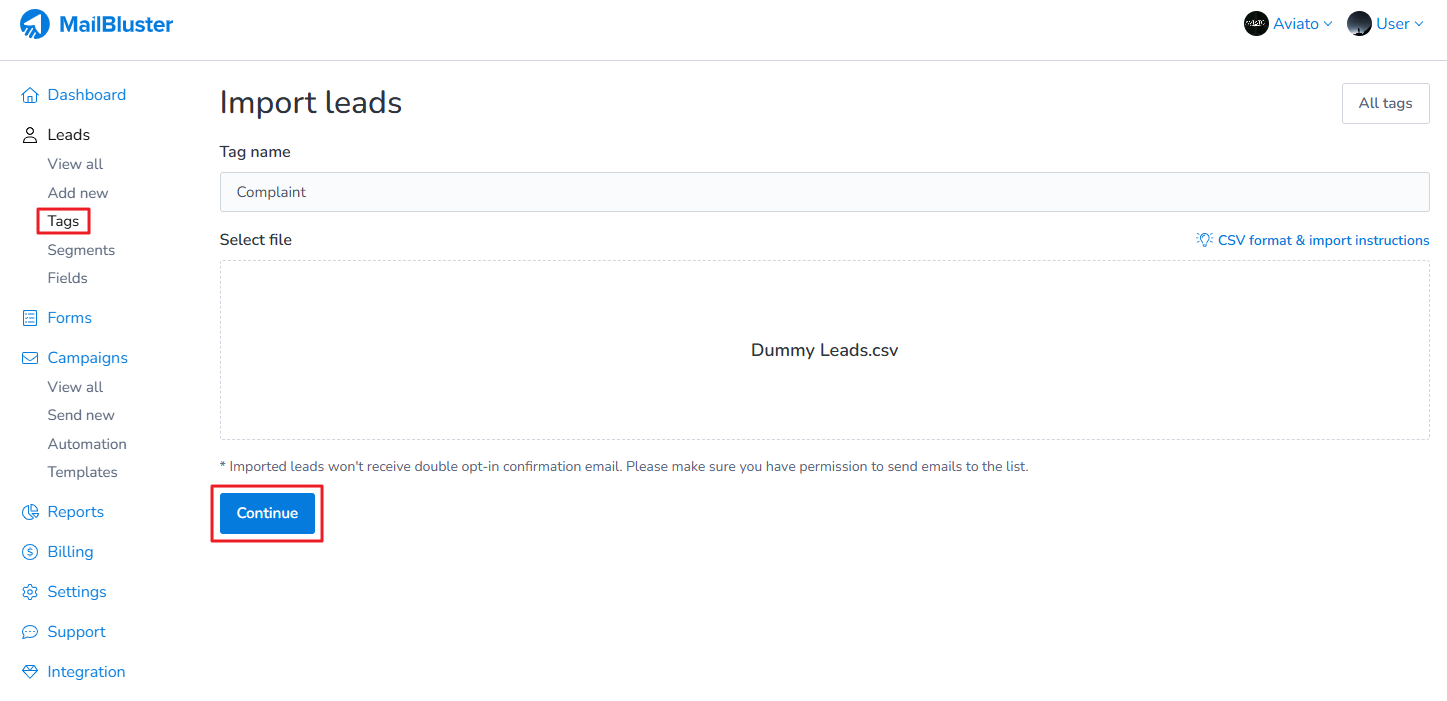
Once the CSV file is selected, click Continue.
Now highlight the headers according to the fields in the CSV file as shown below. Also set the proper conditions like “Update the lead if lead already exists”. Finally click the Import file button.
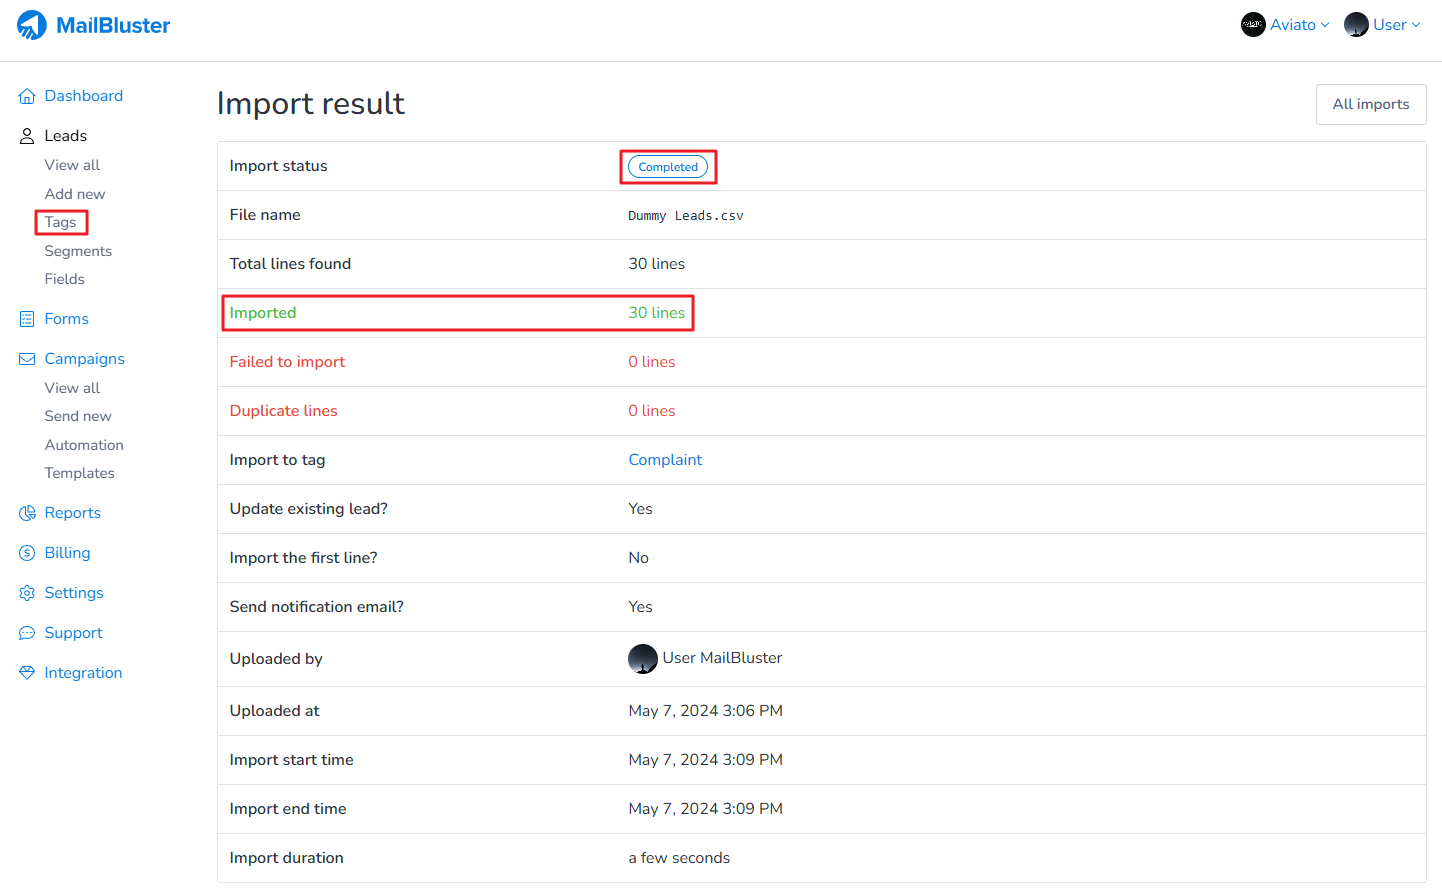
Your leads will be imported successfully under the tag you have just created.
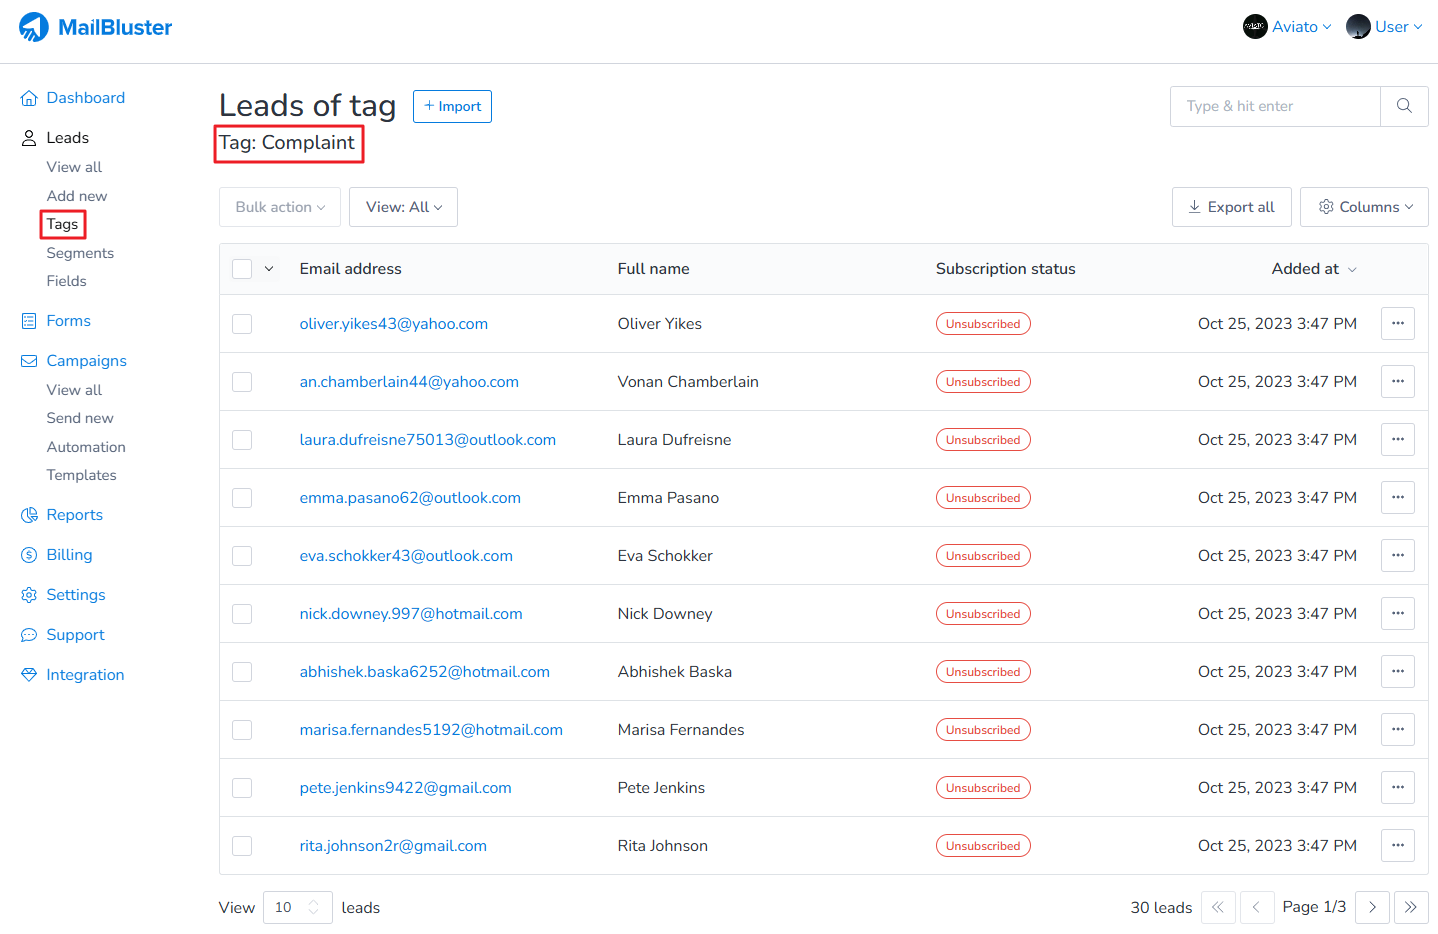
Now if you click on the Tags, you will notice that it now contains the imported leads. You can click on the tag to see all the imported leads.
Here is an example of dummy leads imported under Complaint and they are all at unsubscribed state.
2. Adding and Managing tags using Bulk action
Adding tags
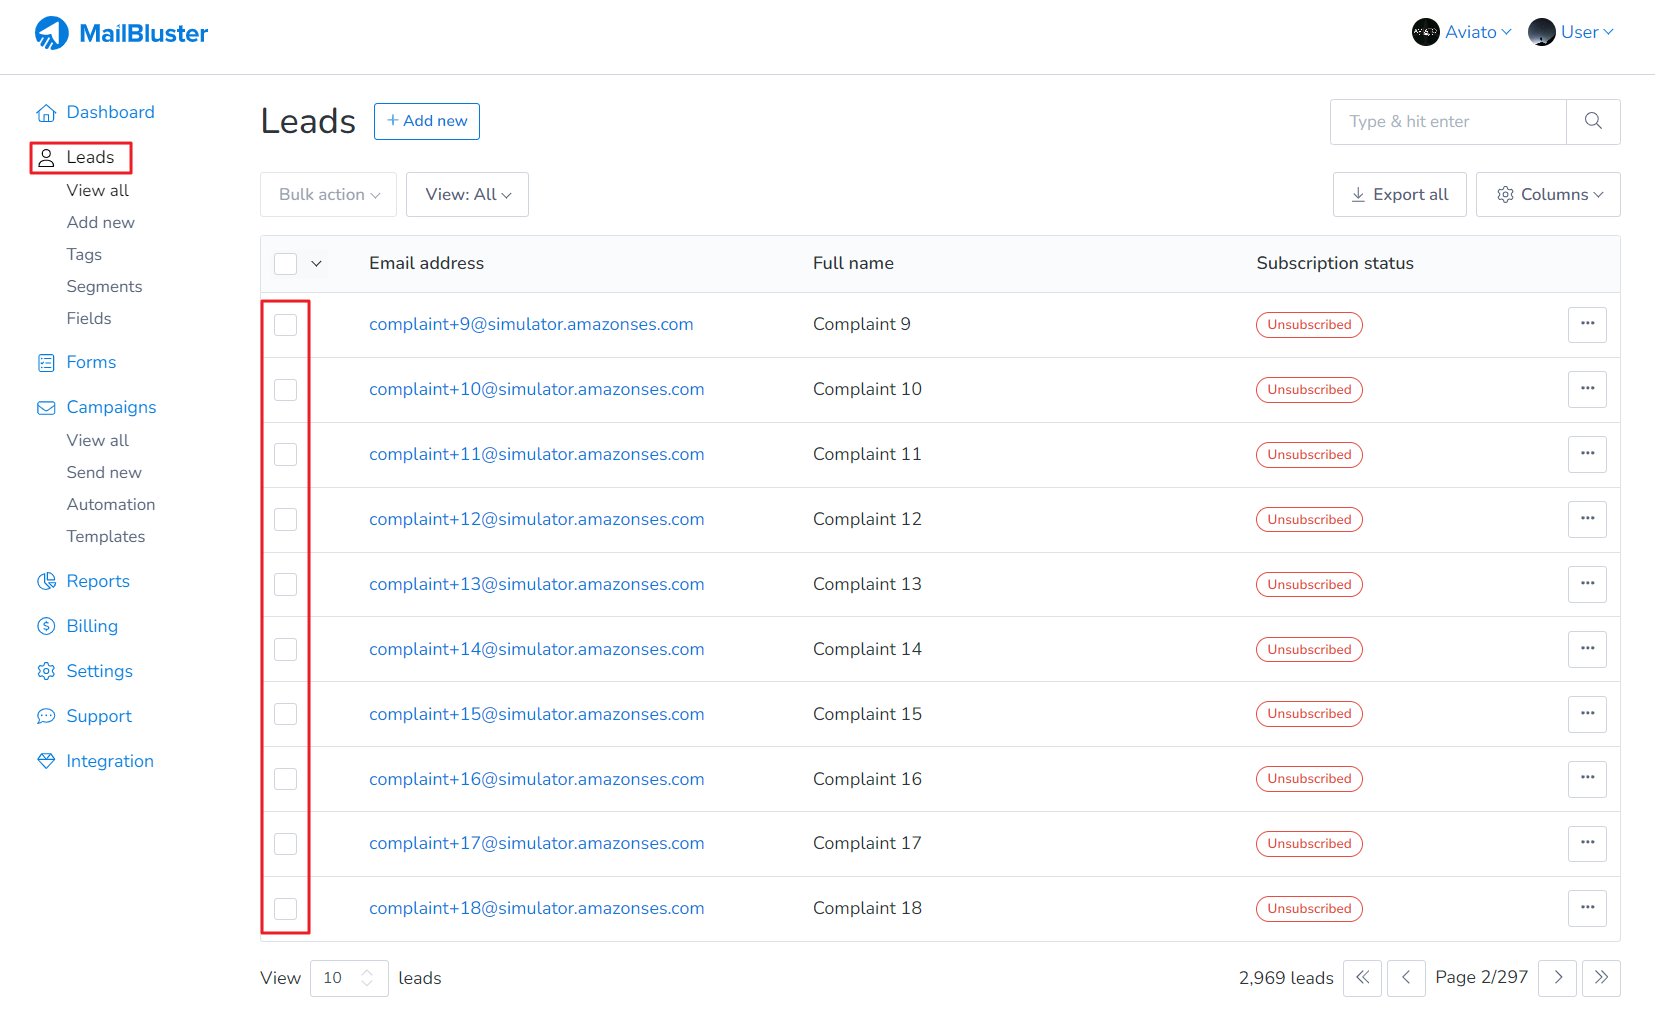
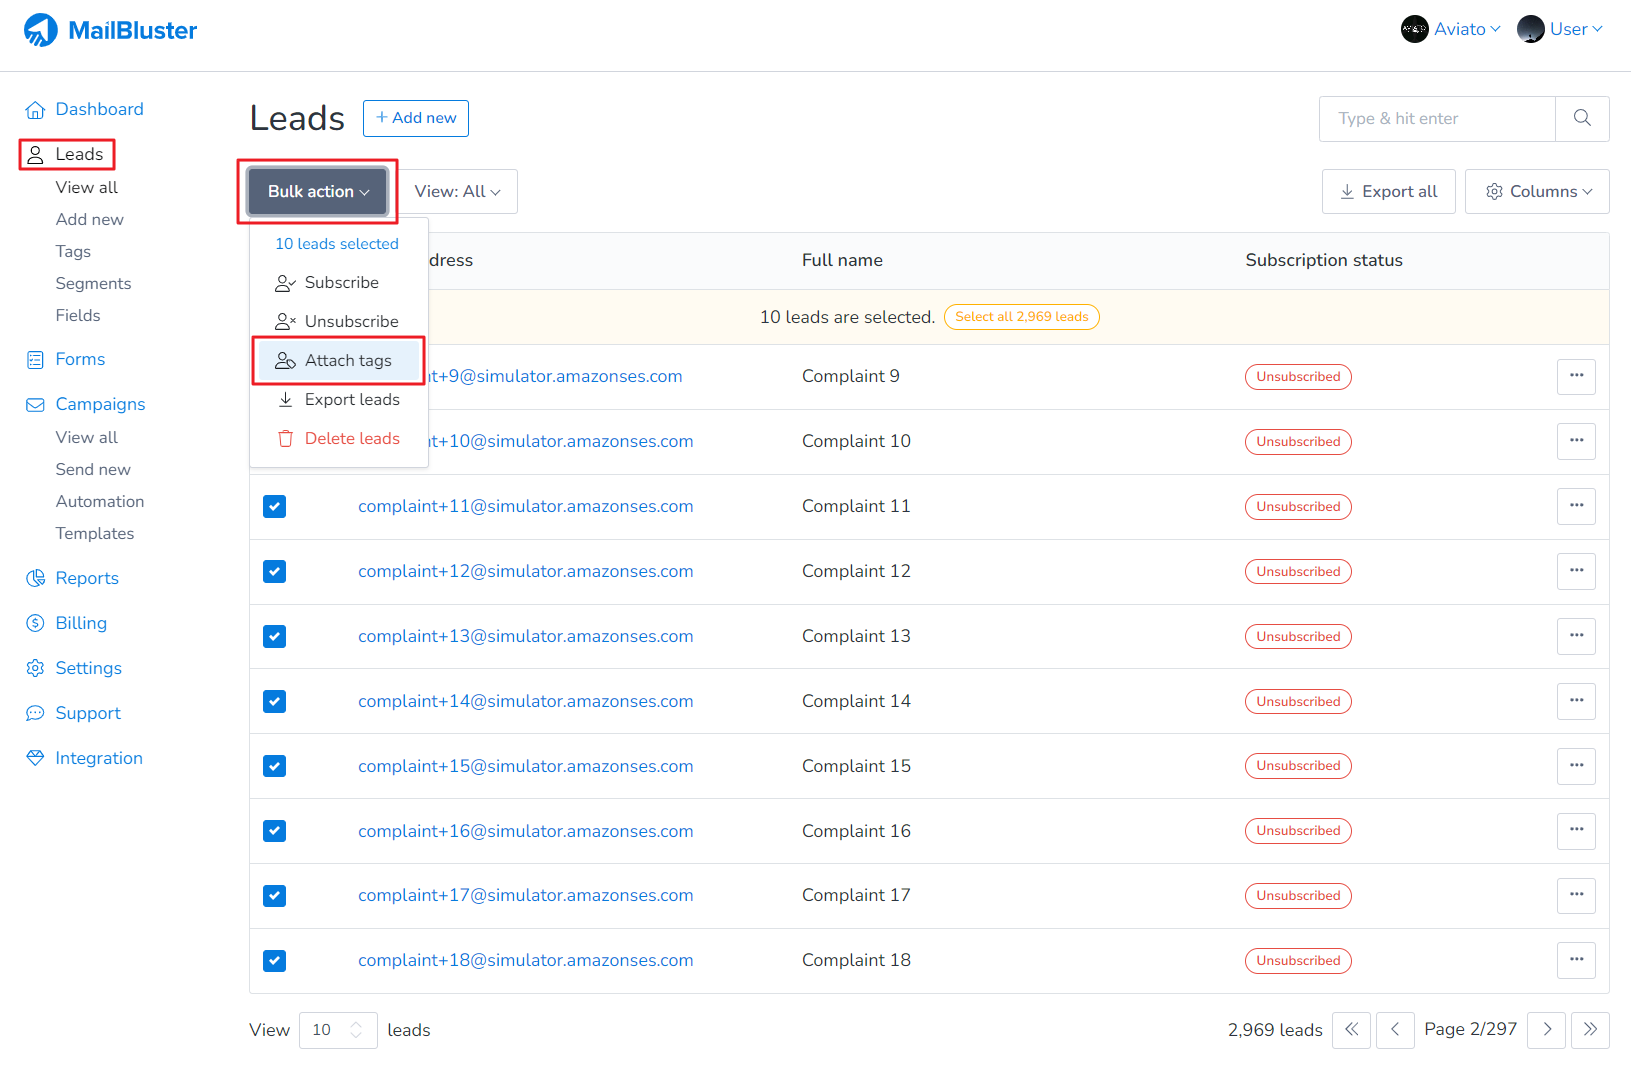
Go to Leads and select any lead that you want to tag by clicking on the checkbox next to their email addresses.
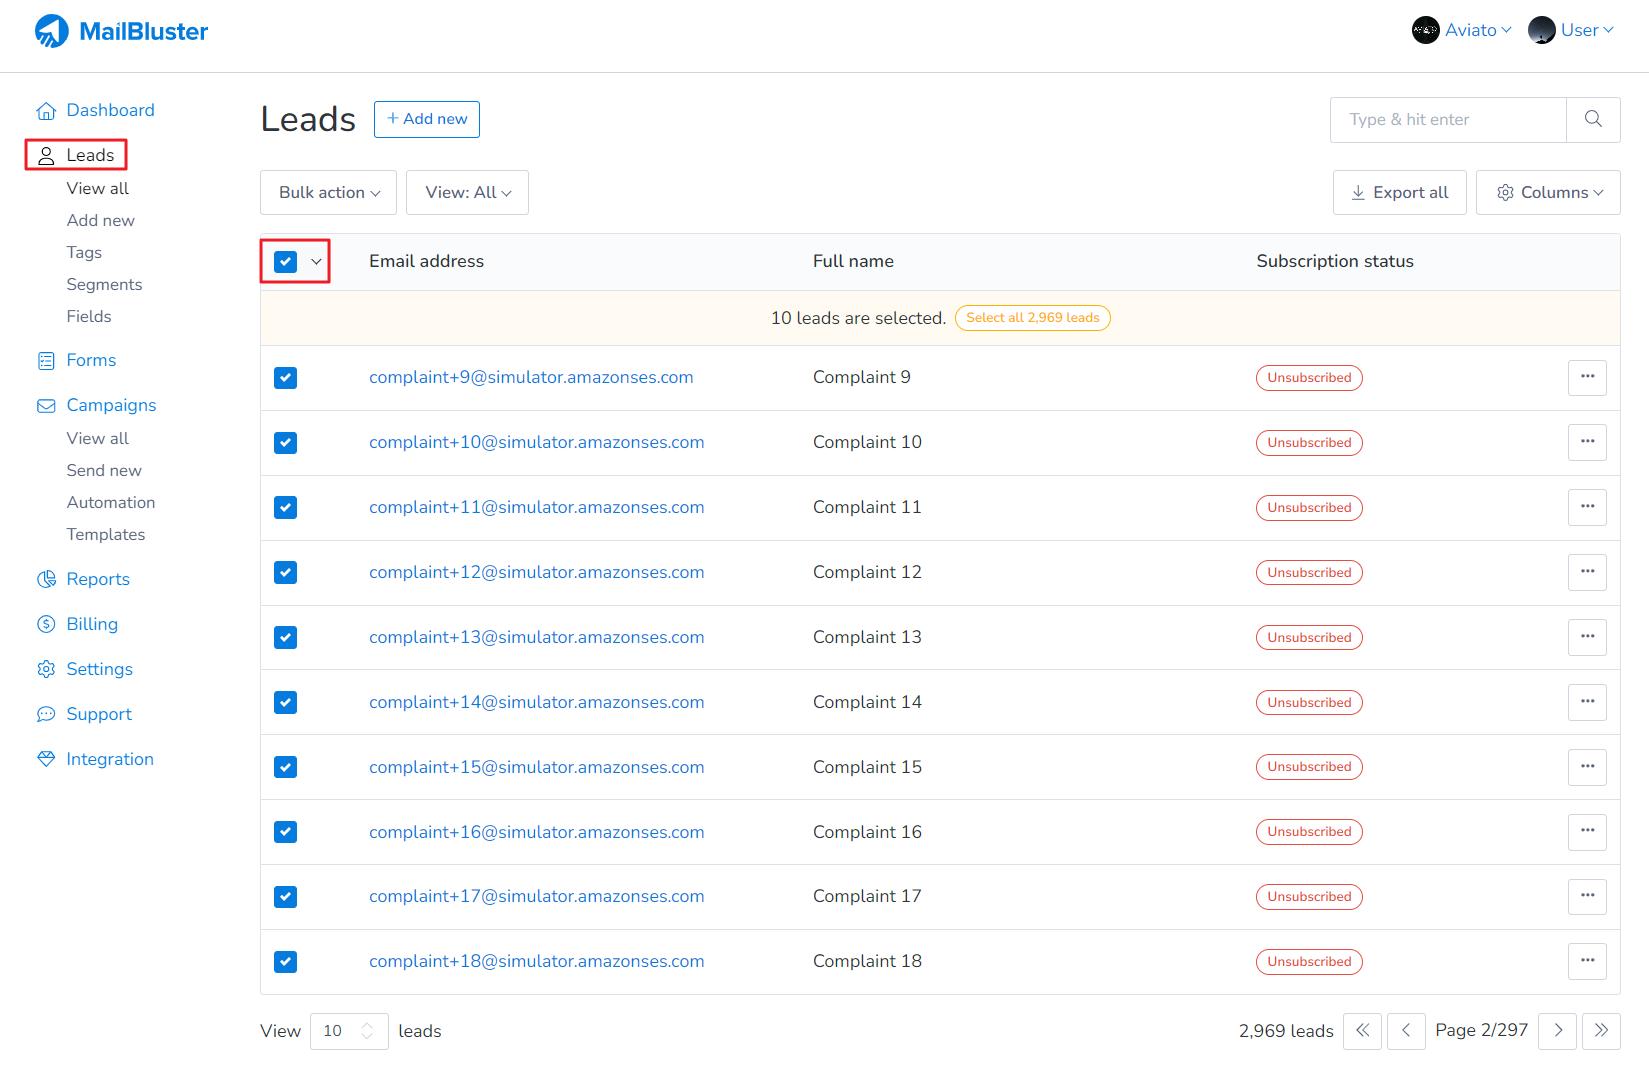
You can also select more contacts by clicking on the drop-down next to the “Email address” header:
Now click on the Bulk action and then click Attach tags.
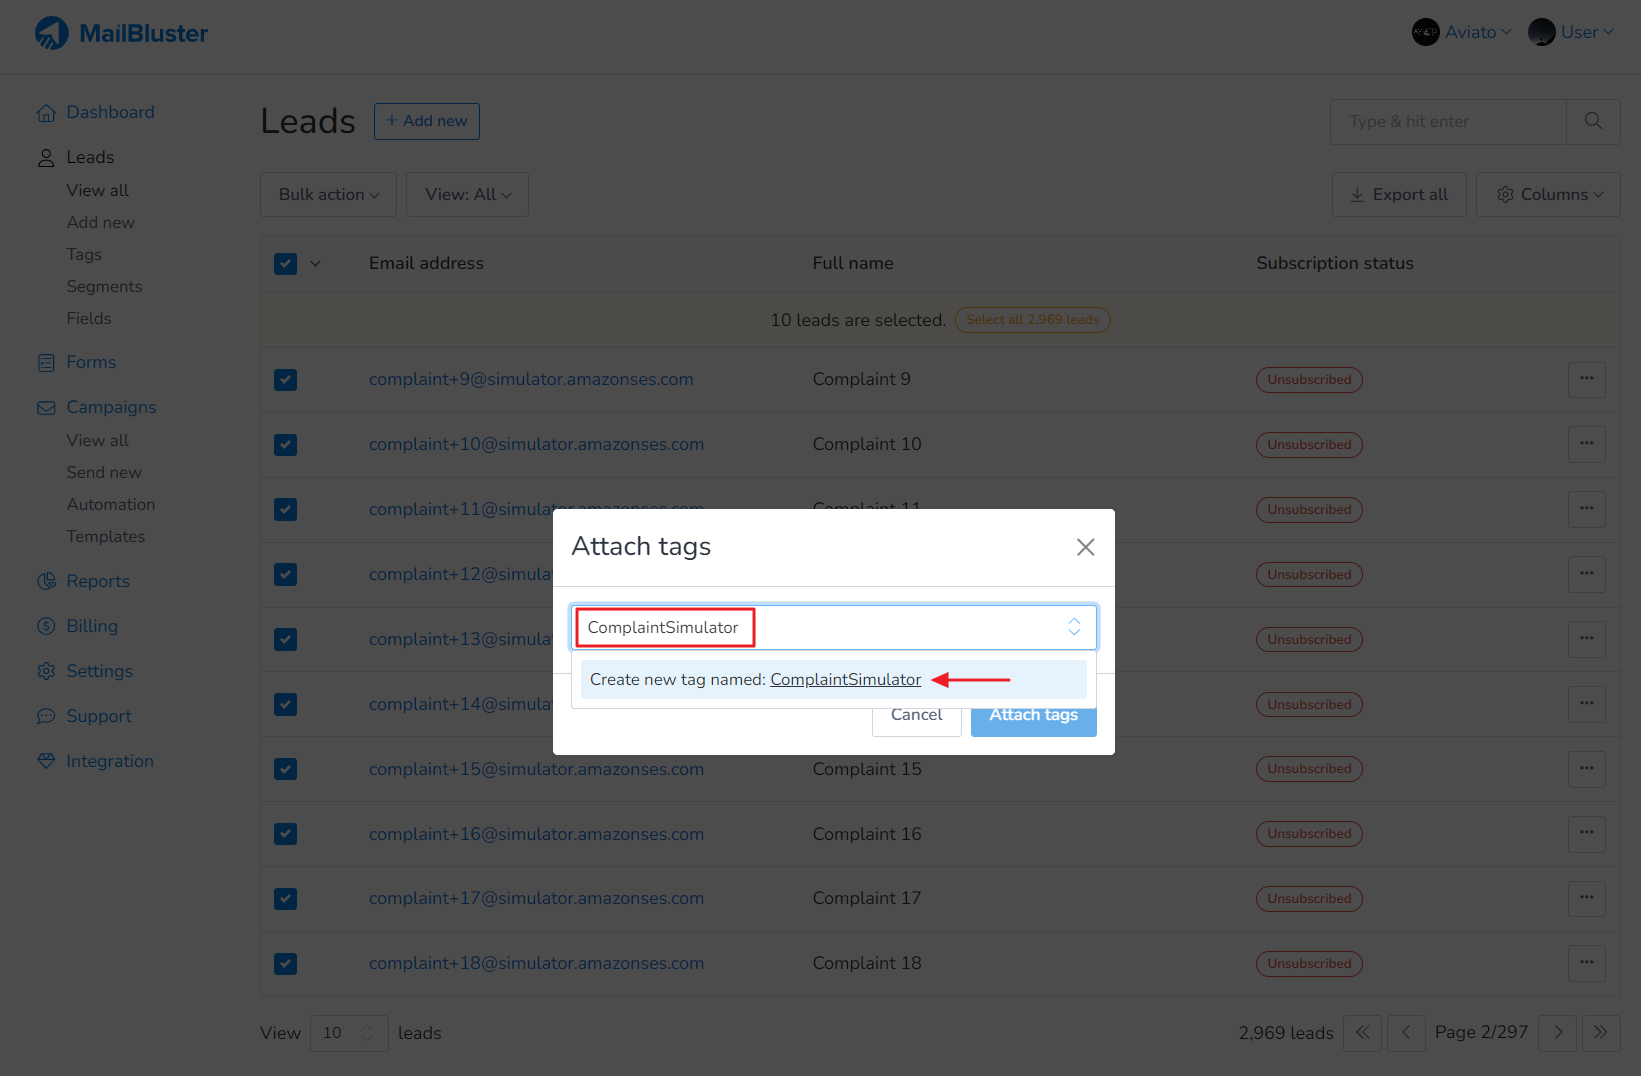
Attach tags popup window will appear. You can select an already created tag or create a new one as shown below. Here we created a tag name “ComplaintSimulator”.
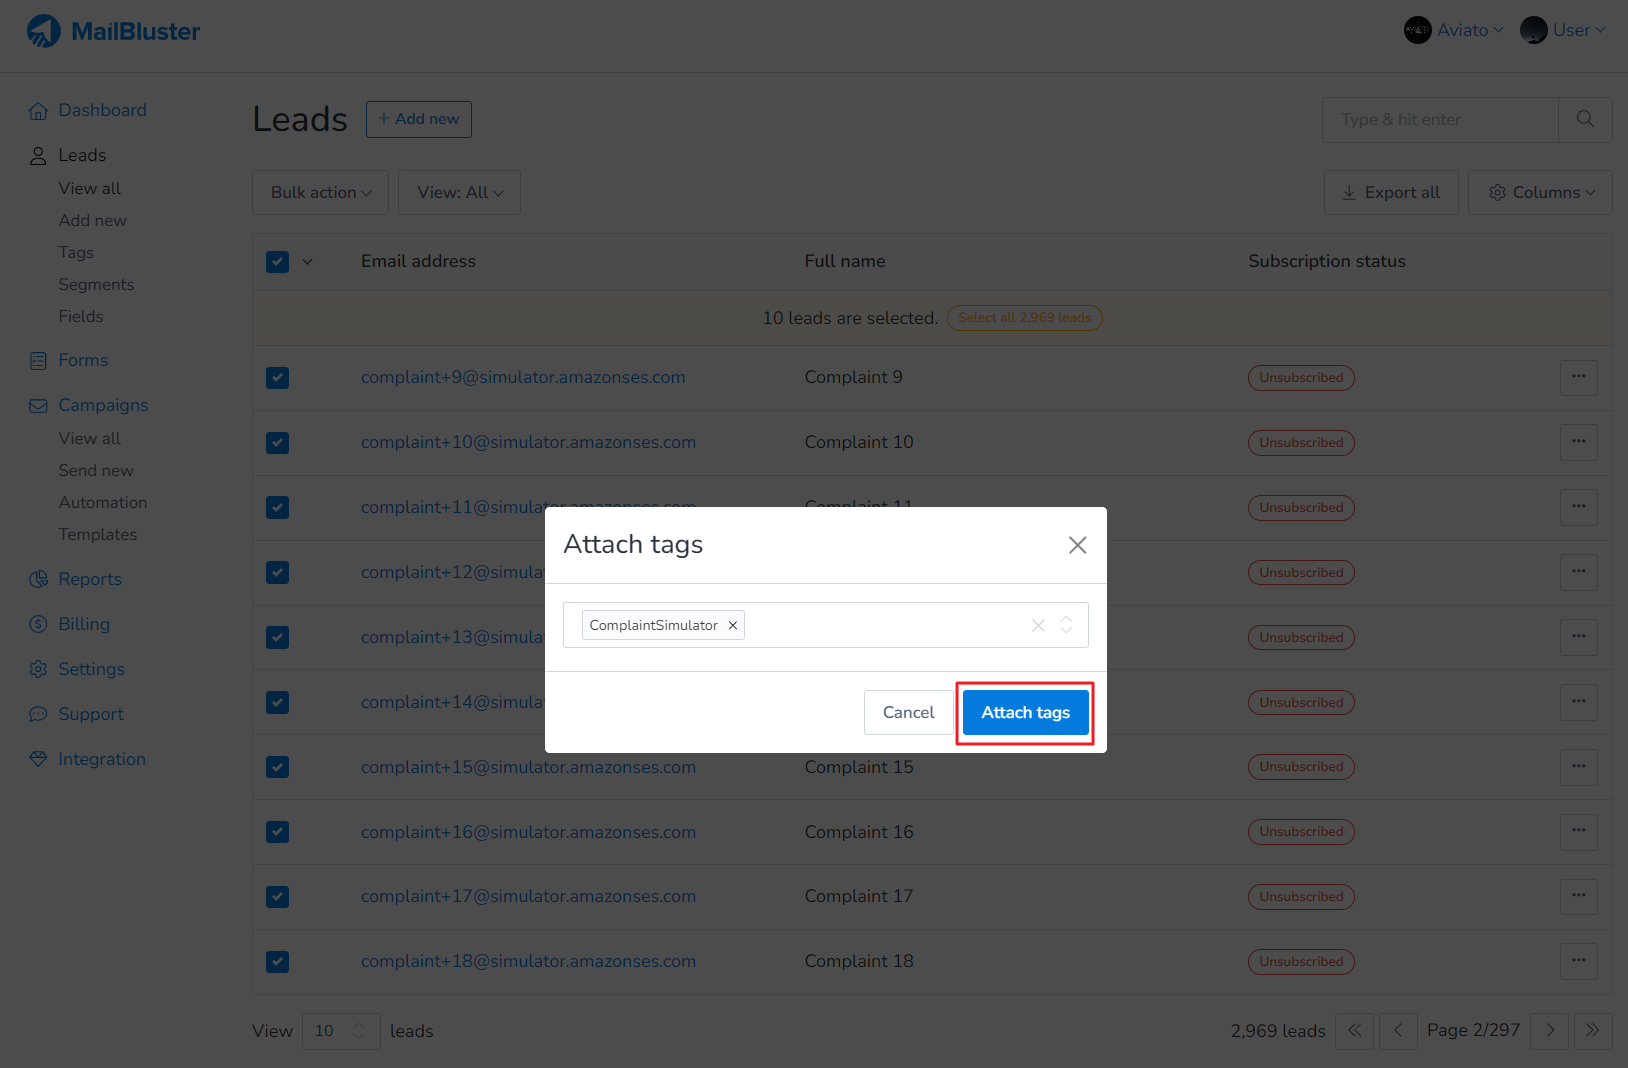
Now click on Attach tags. Multiple pre-created tags can also be attached at this time as well before clicking Attach tags.
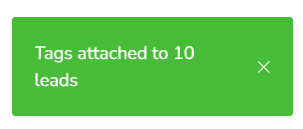
Notification like this will appear at the bottom left corner.
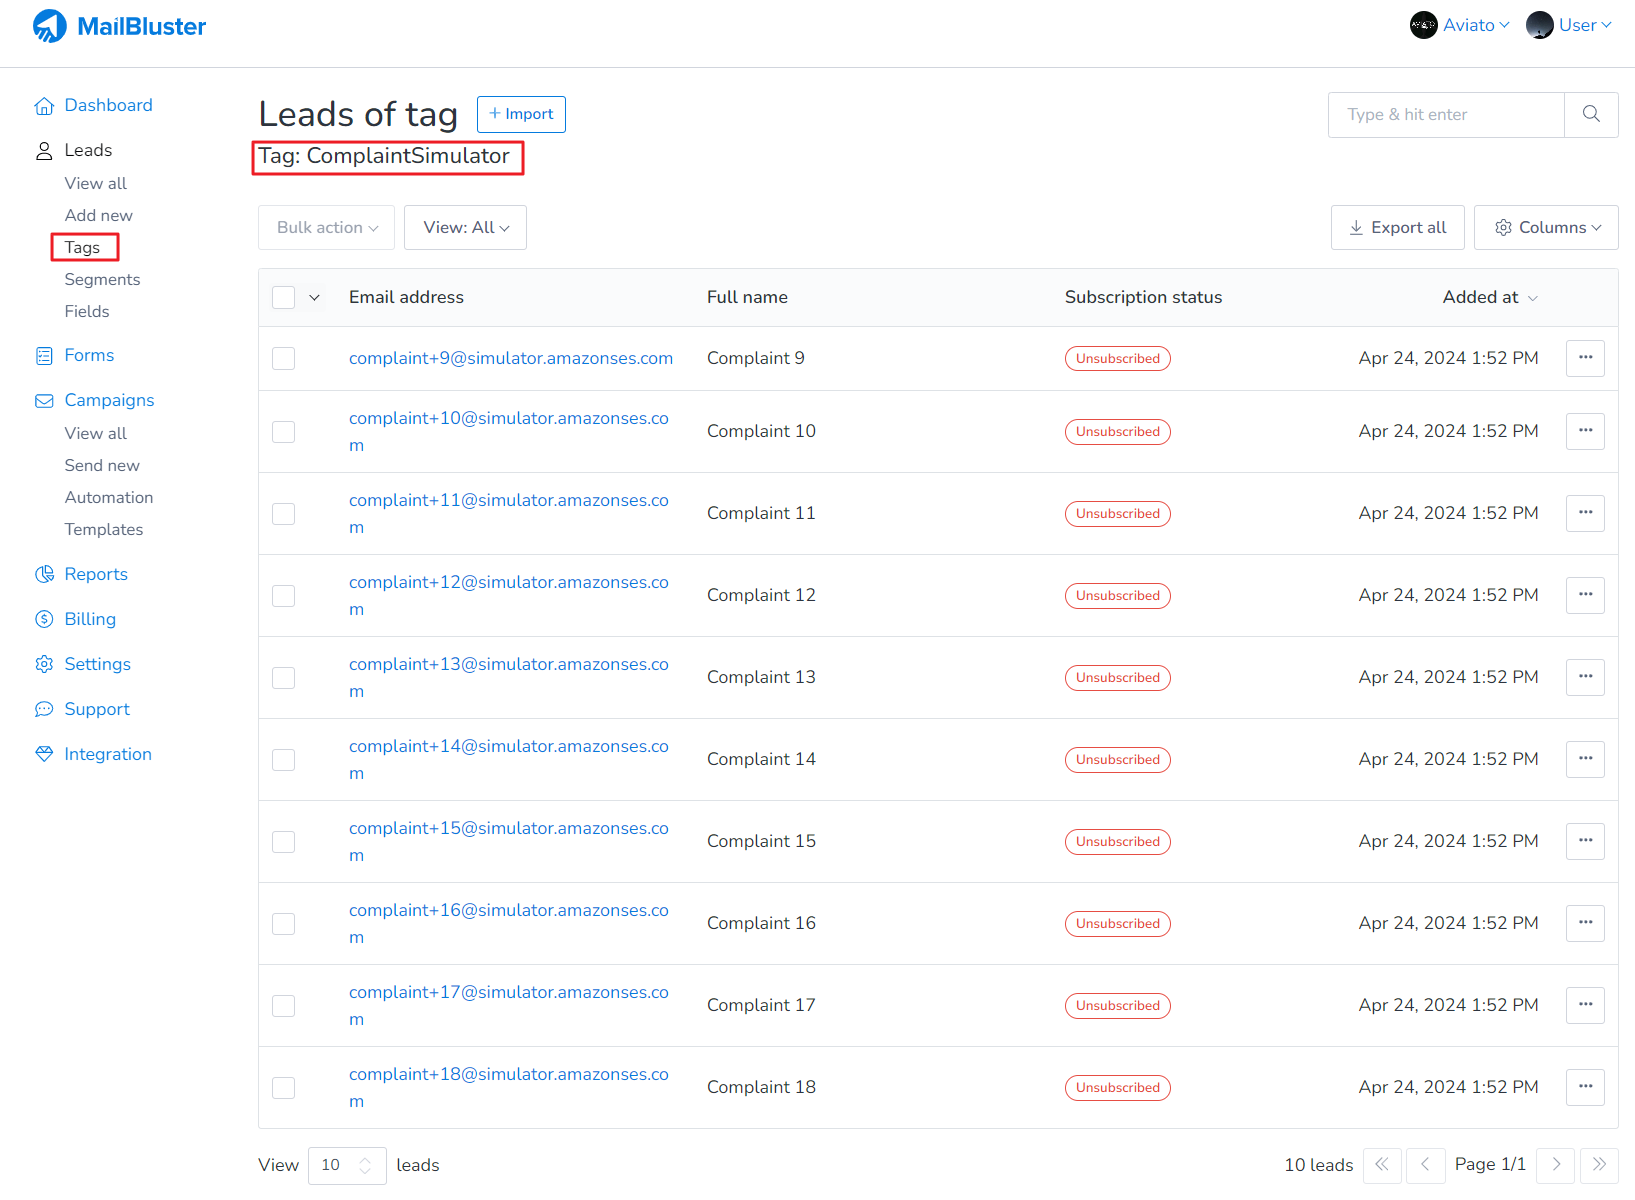
Now click on Tags and you will notice that the tag name “ComplaintSimulator” has been created and the Lead count shows the number of leads assigned to this tag. Click on the tag.
You will see a list of leads attach to this tag. Here 10 dummy leads has been added to tag name “ComplaintSimulator”.
Manage Tags
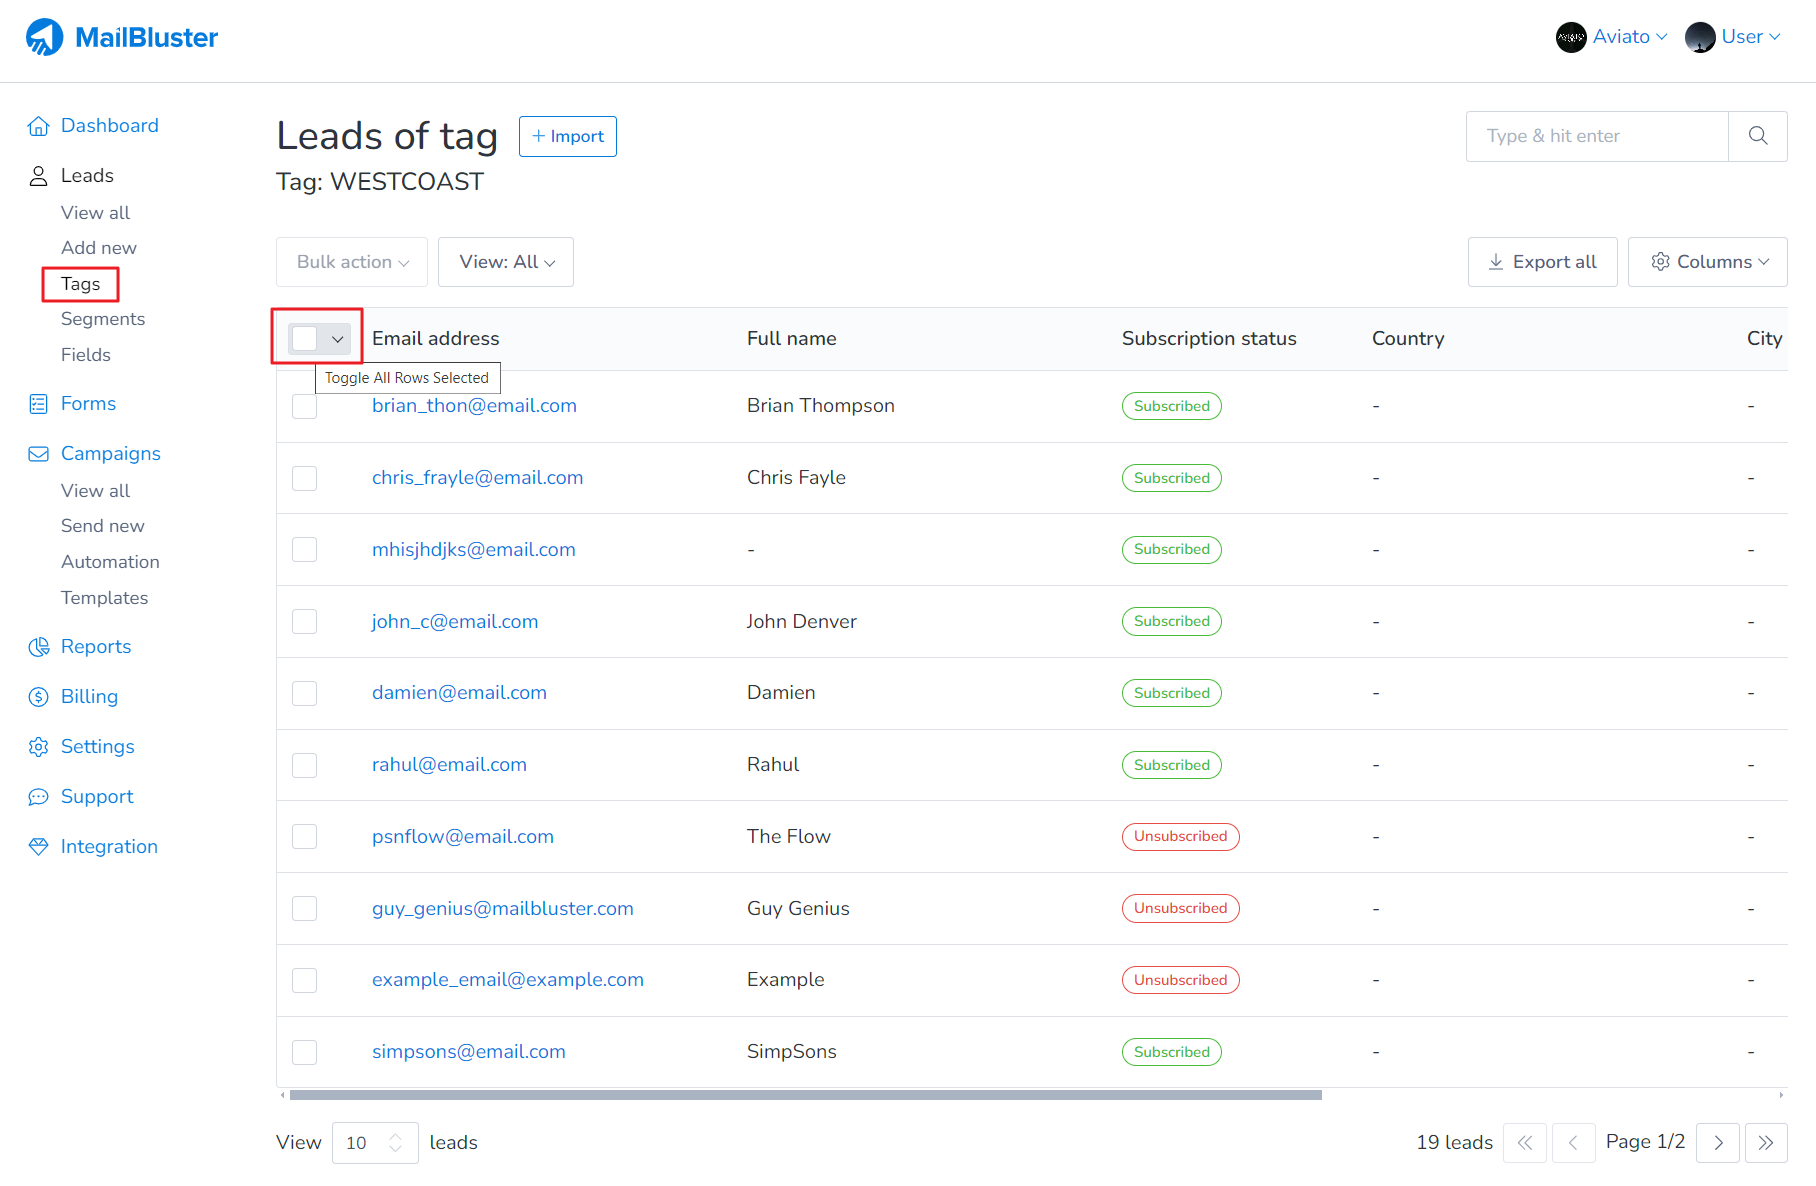
To manage tags, go to Tags. Select any tag of your choice by clicking on it.
You can also select more contacts by clicking on the drop-down next to the “Email address” header.
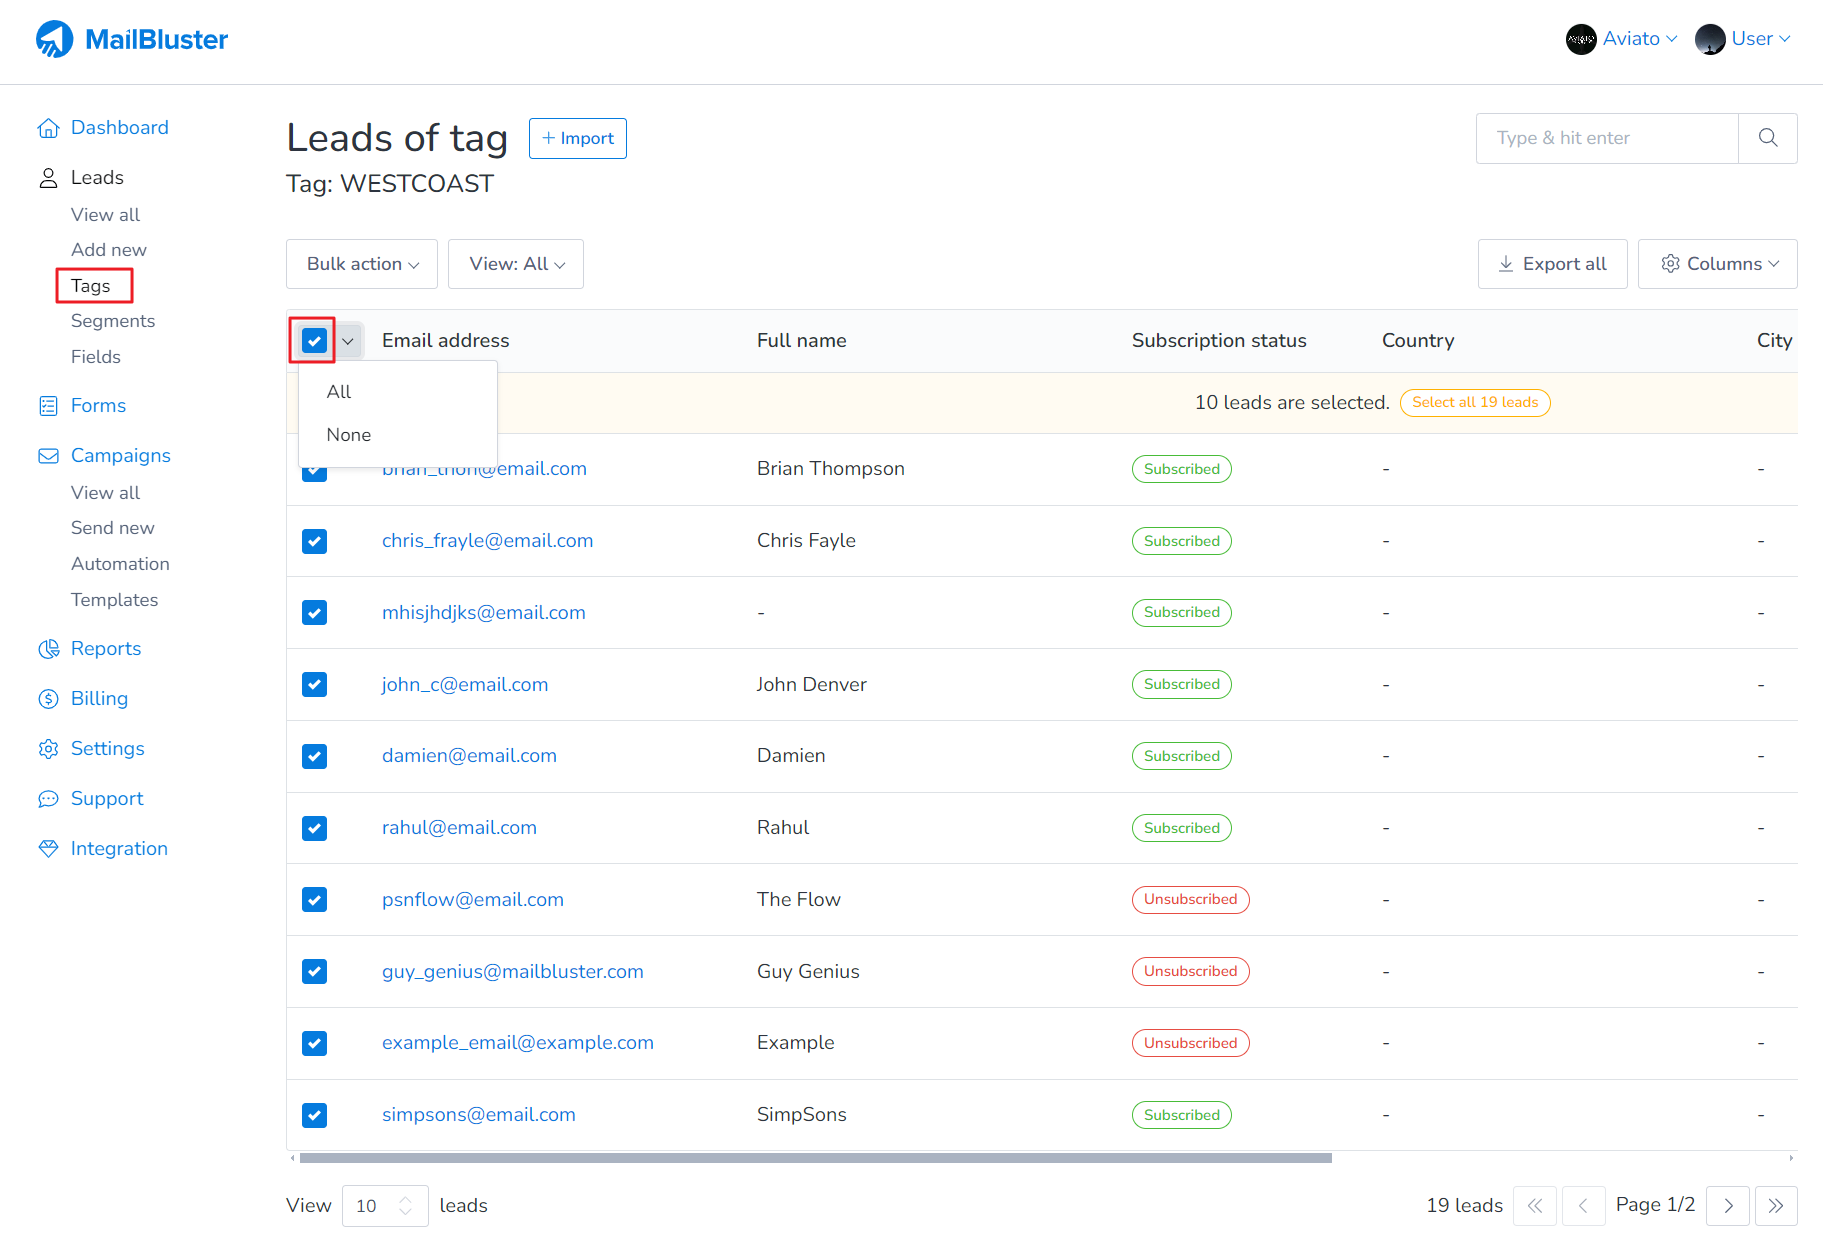
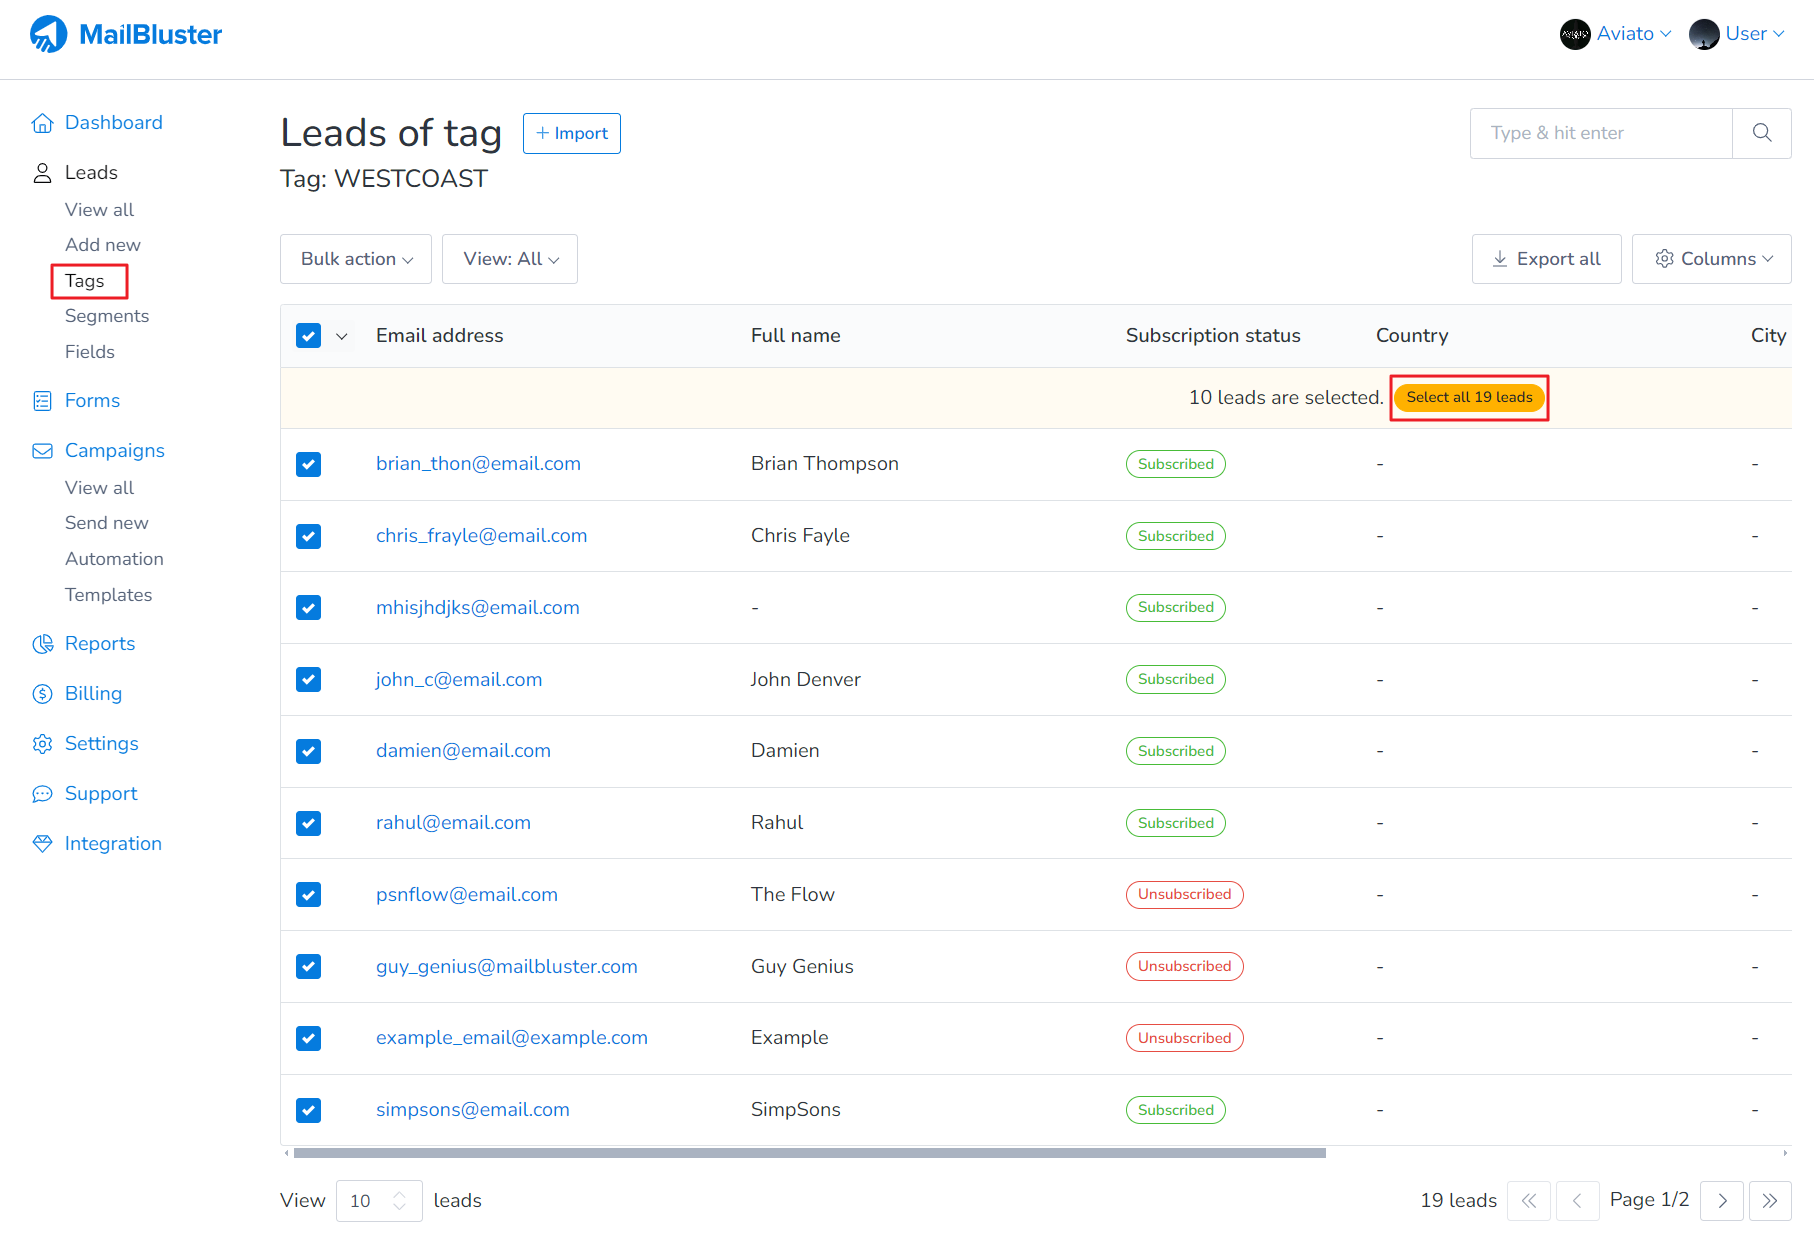
Selecting All will select all 10 tags shown in this page. You use the checkbox to select the specific leads on this page as well.
You can also select all the leads assigned to this tag. Here we clicked on Select all 19 leads under this tag.
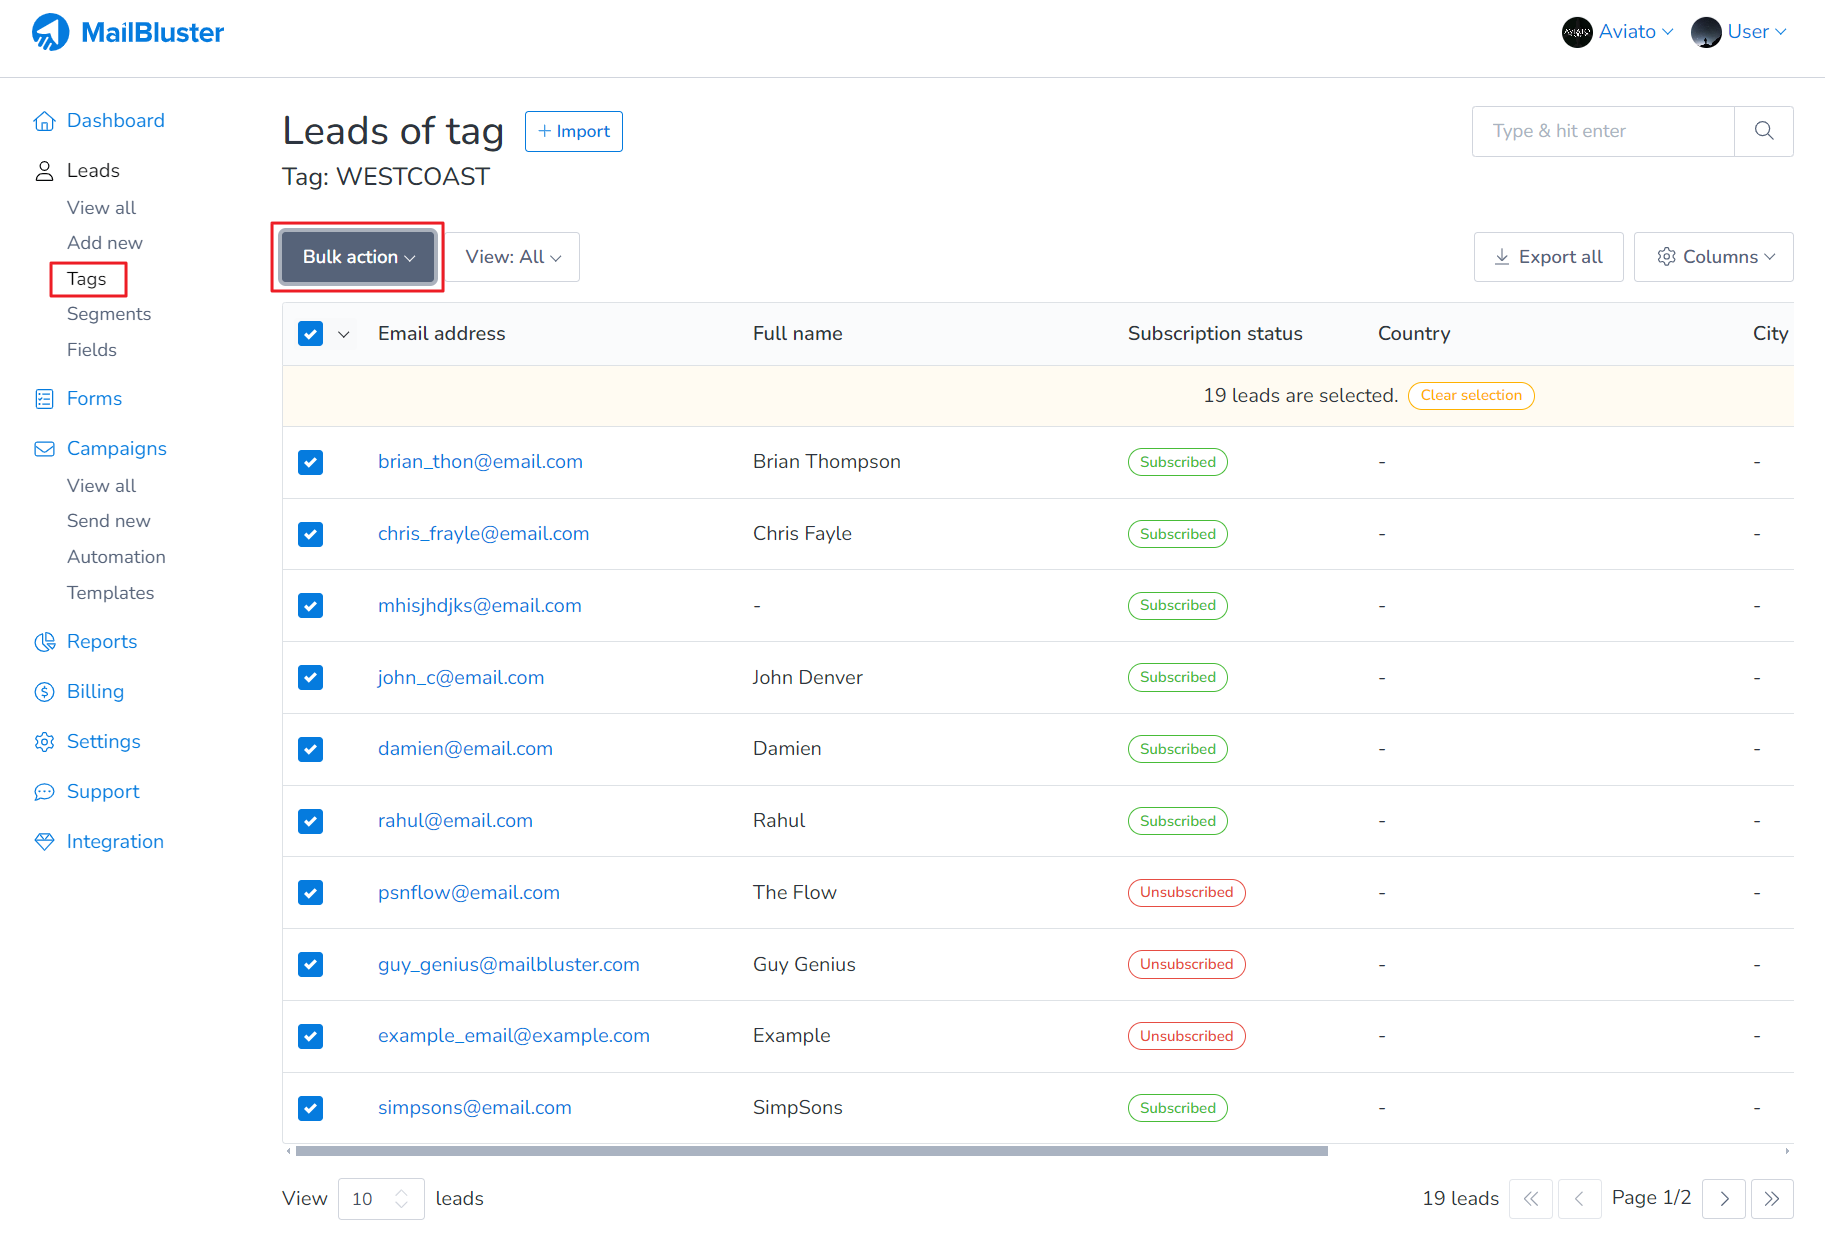
Now click on the Bulk action.
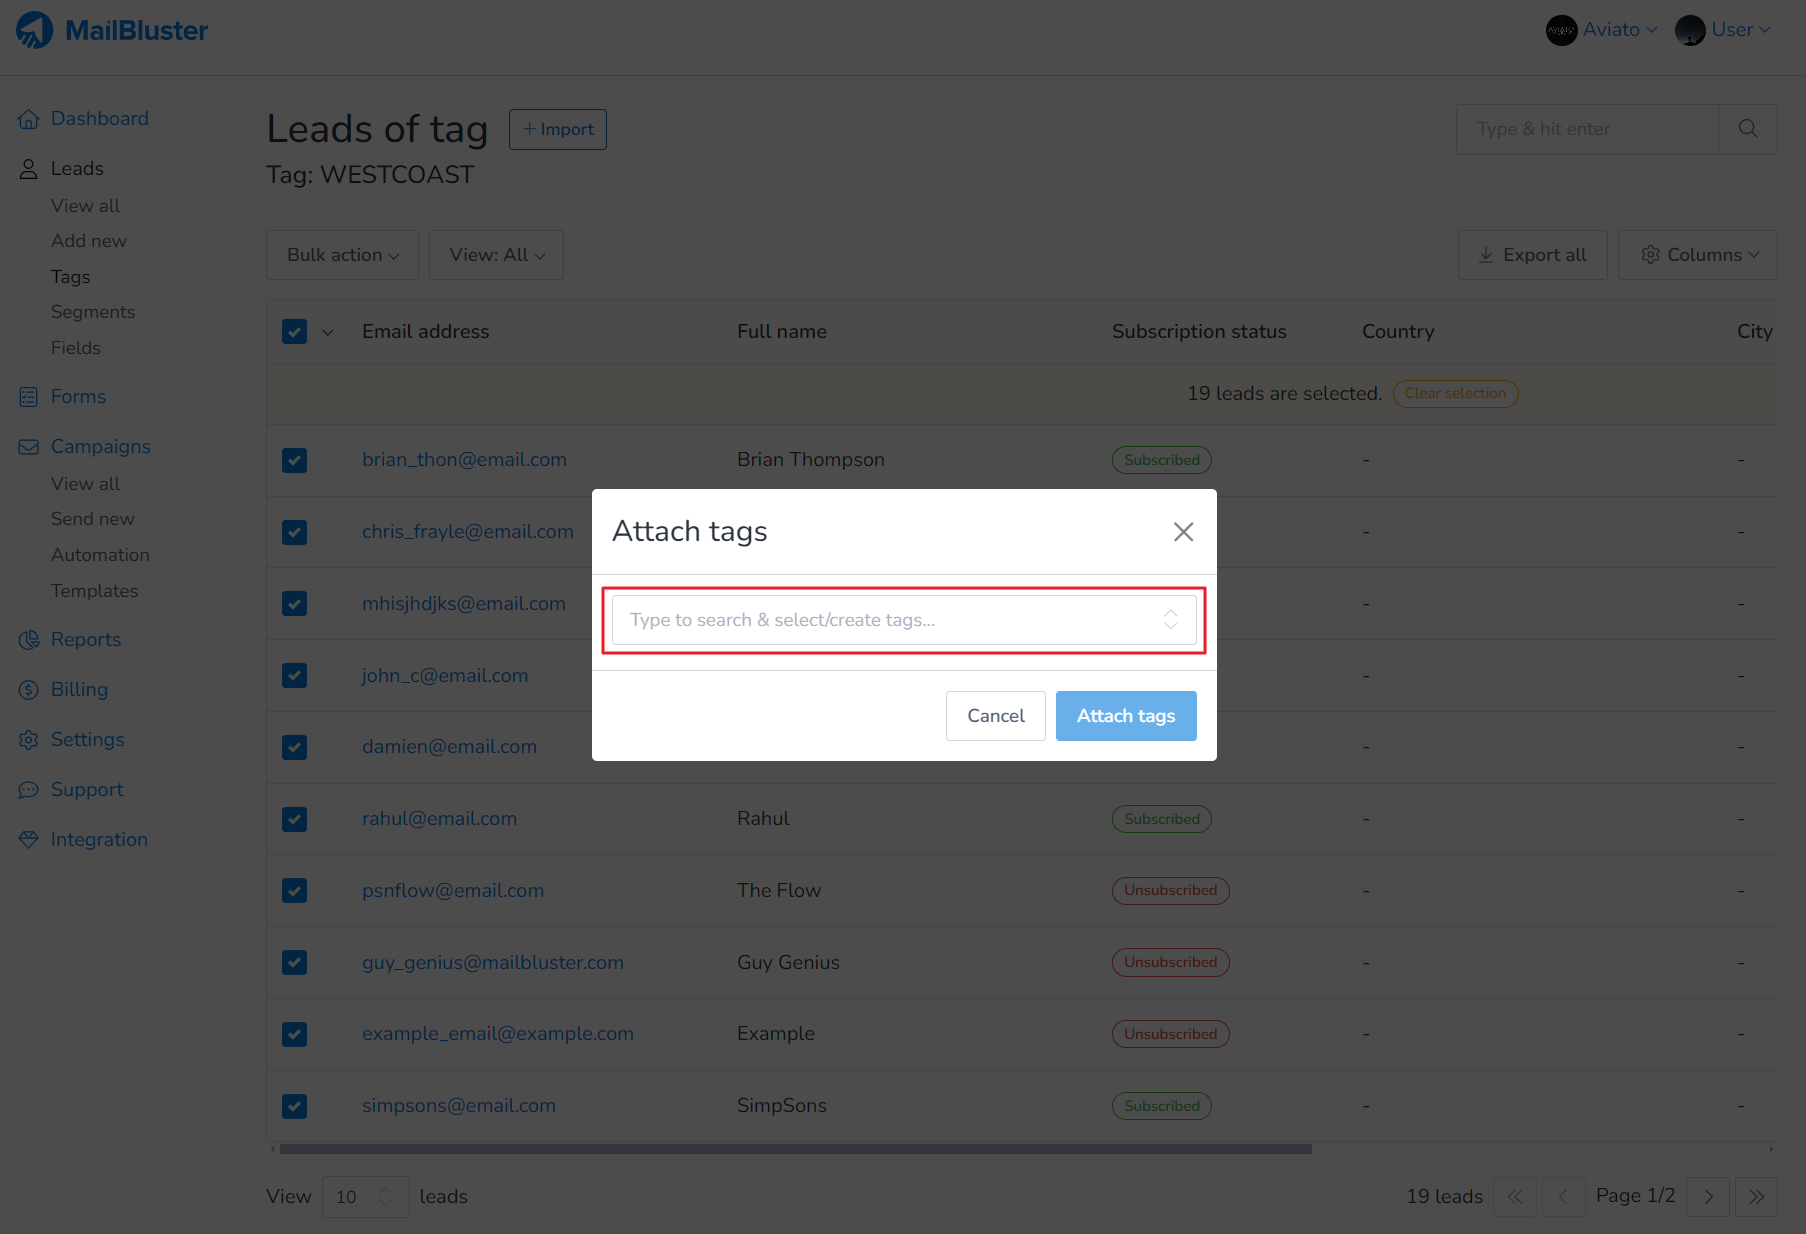
And, then click Attach tags.
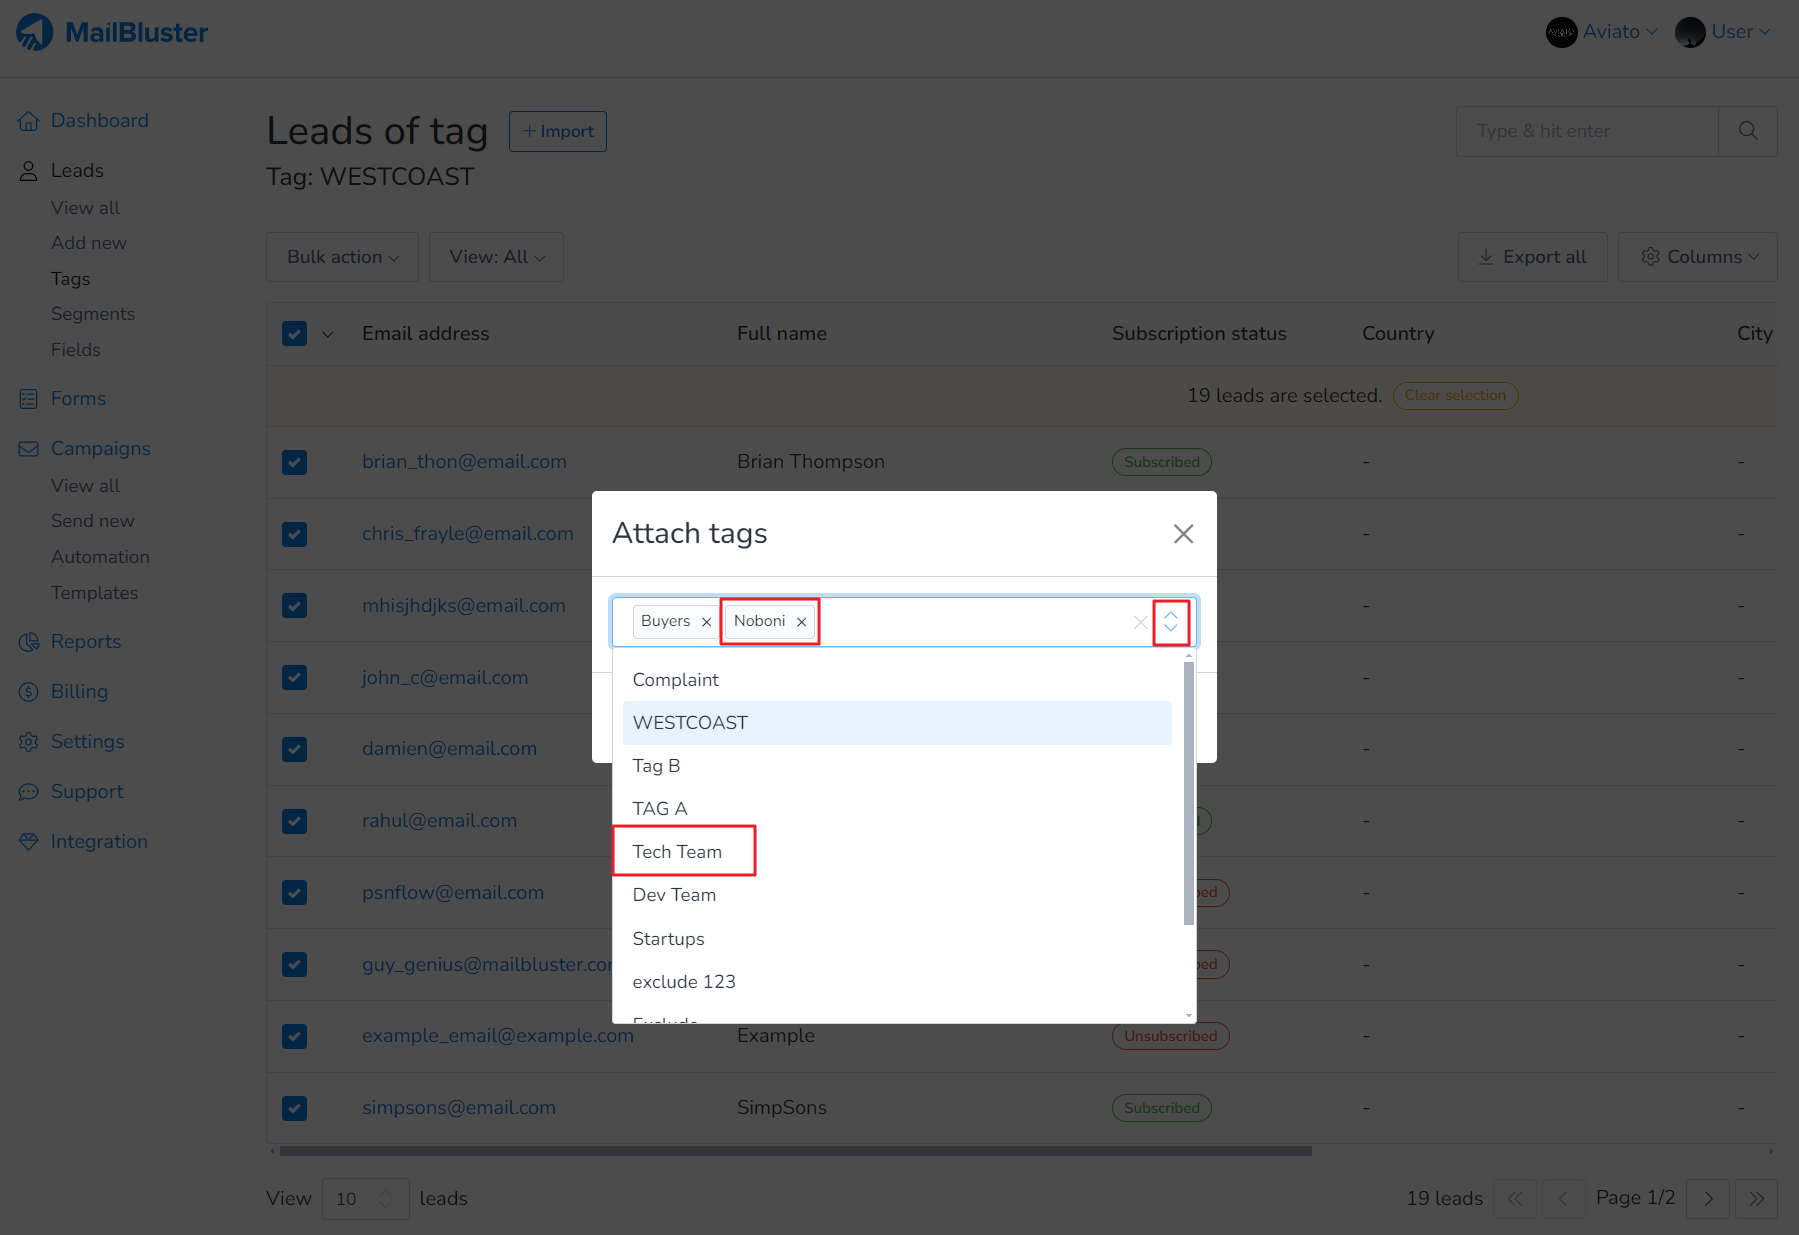
Attach tags popup window will appear.
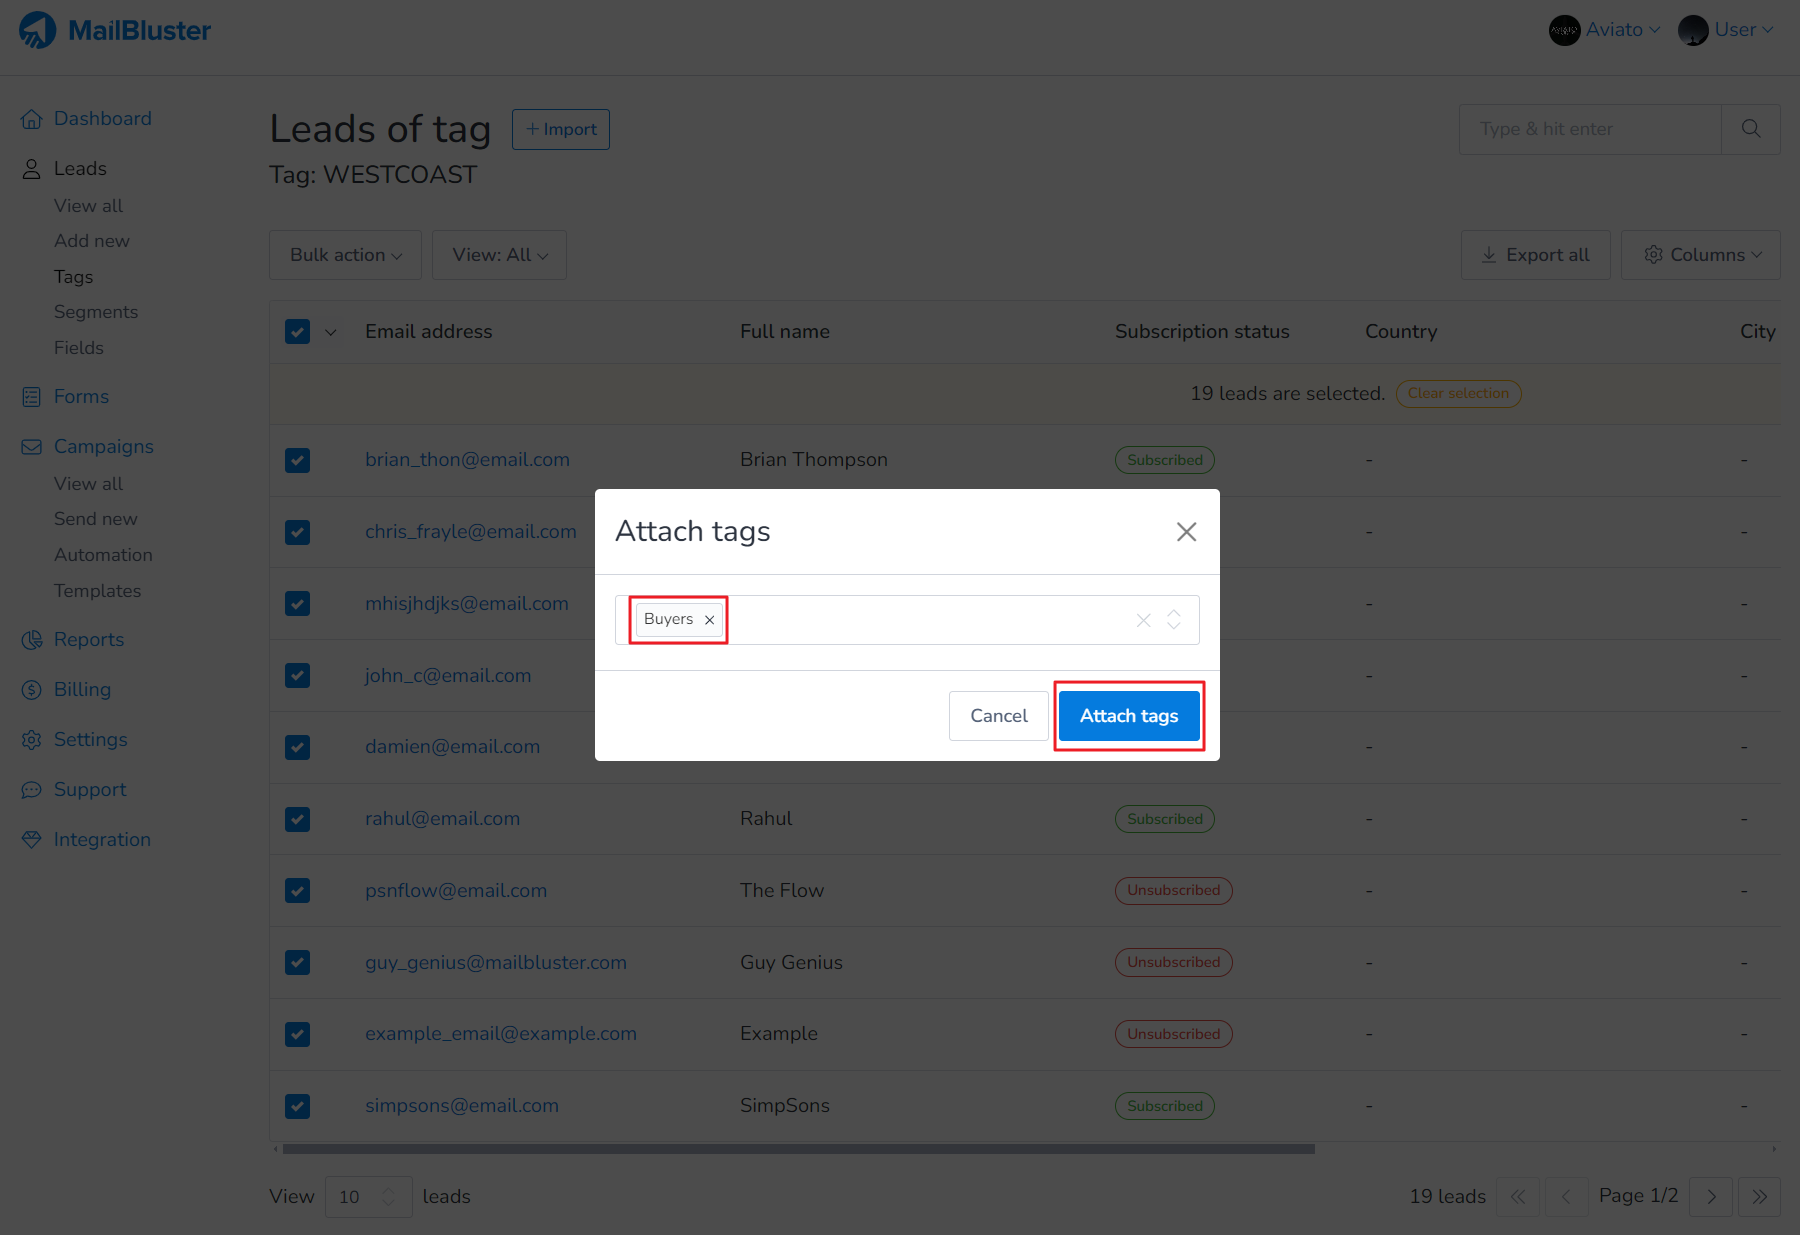
You can select an already created tag or create a new one. Here we selected a tag name “Buyers”. Then click on Attach tags.
You can select multiple tags as well as shown below. This will assign all the leads of this tag to the designated tags.
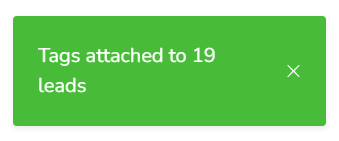
Notification like this will appear at the bottom left corner.
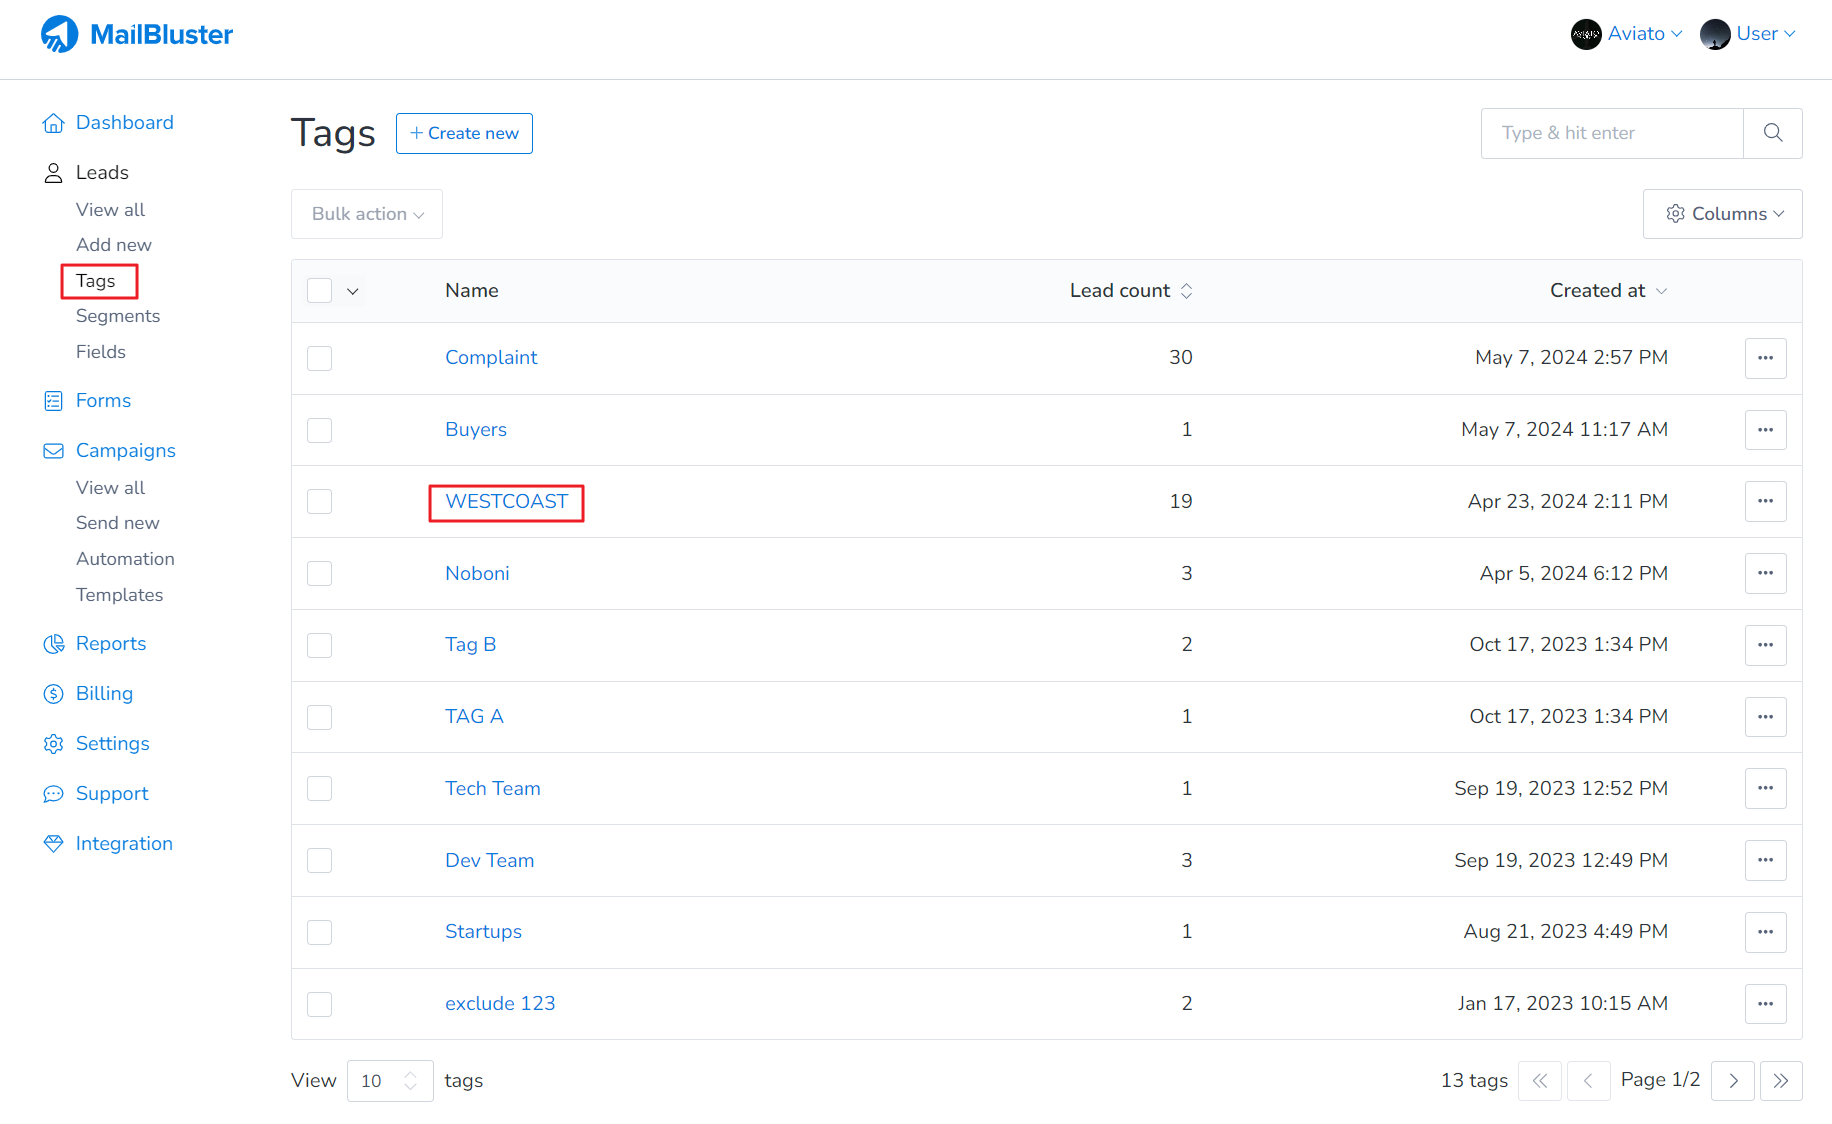
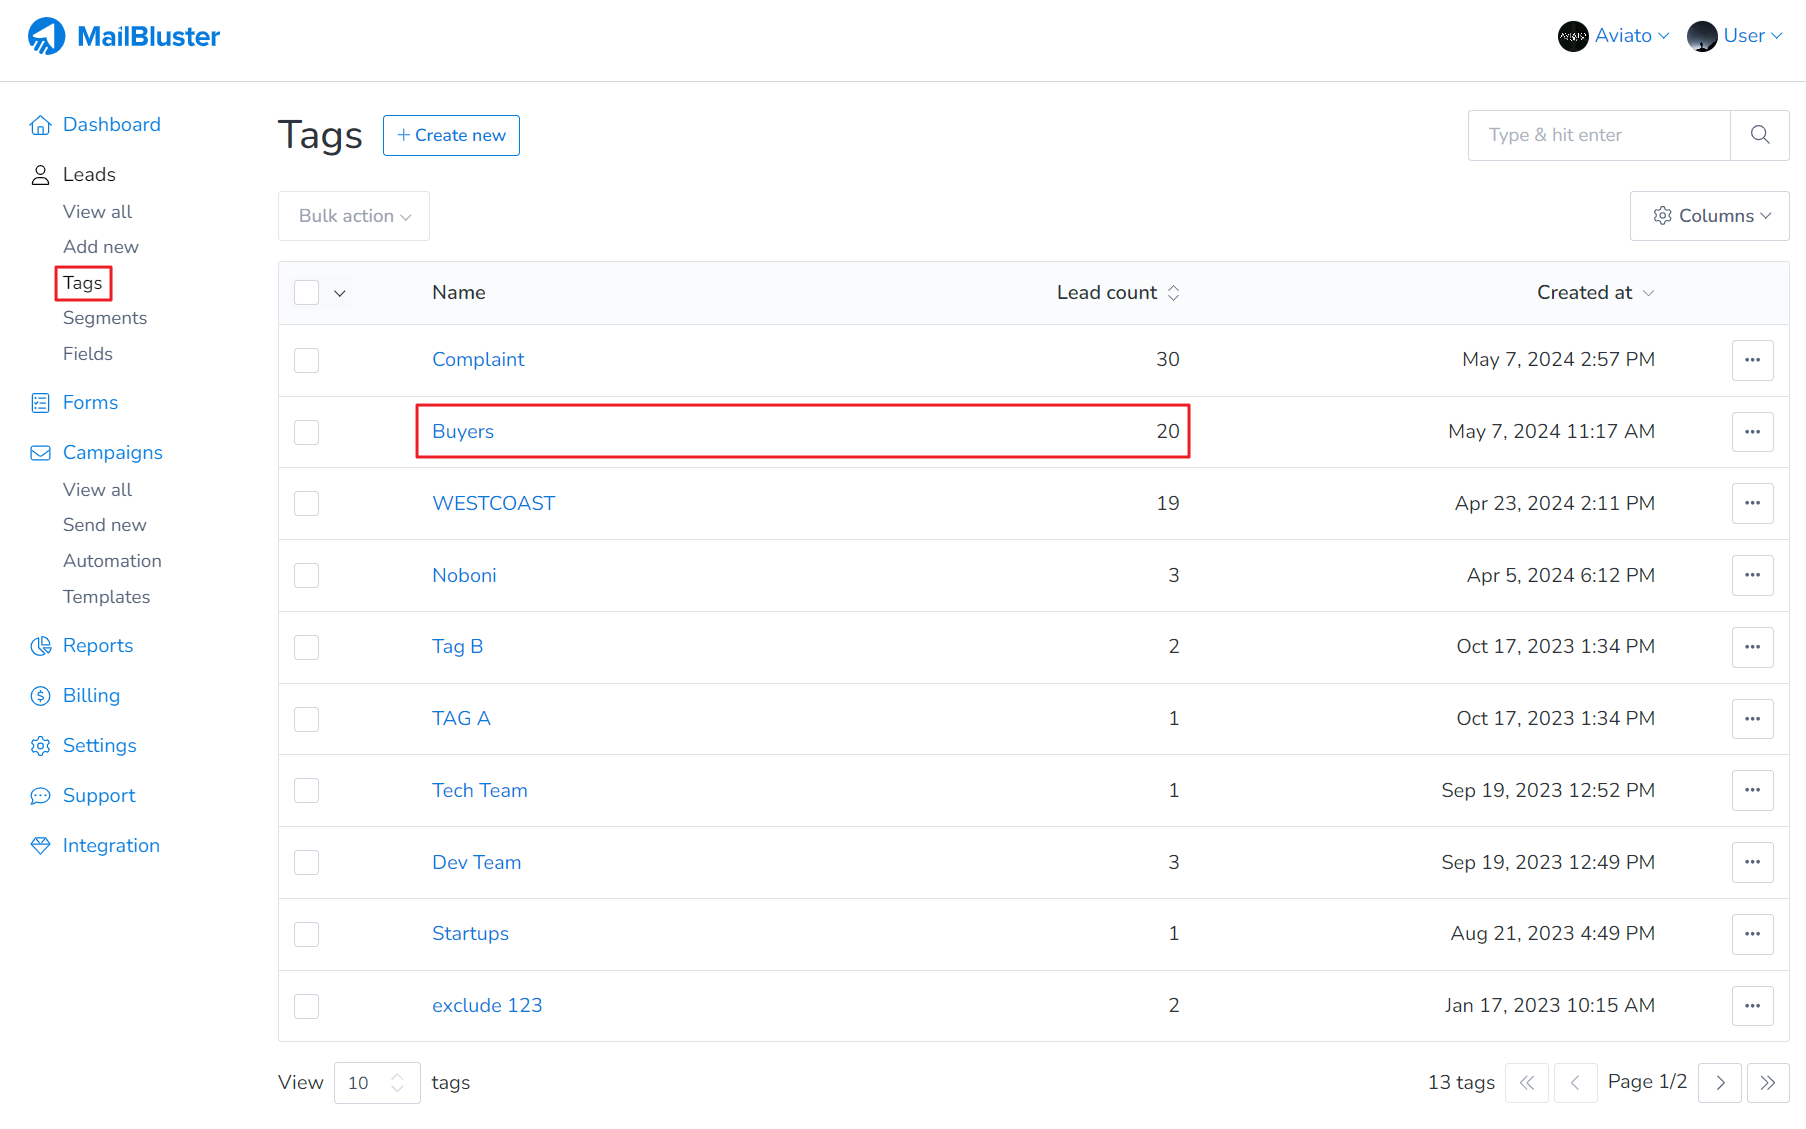
Now click on Tags and you will notice that the tag name “Buyers” is showing the total number of Lead count assigned to this tag. The leads have been successfully assigned to tag name “Buyers” from “WESTCOAST”.
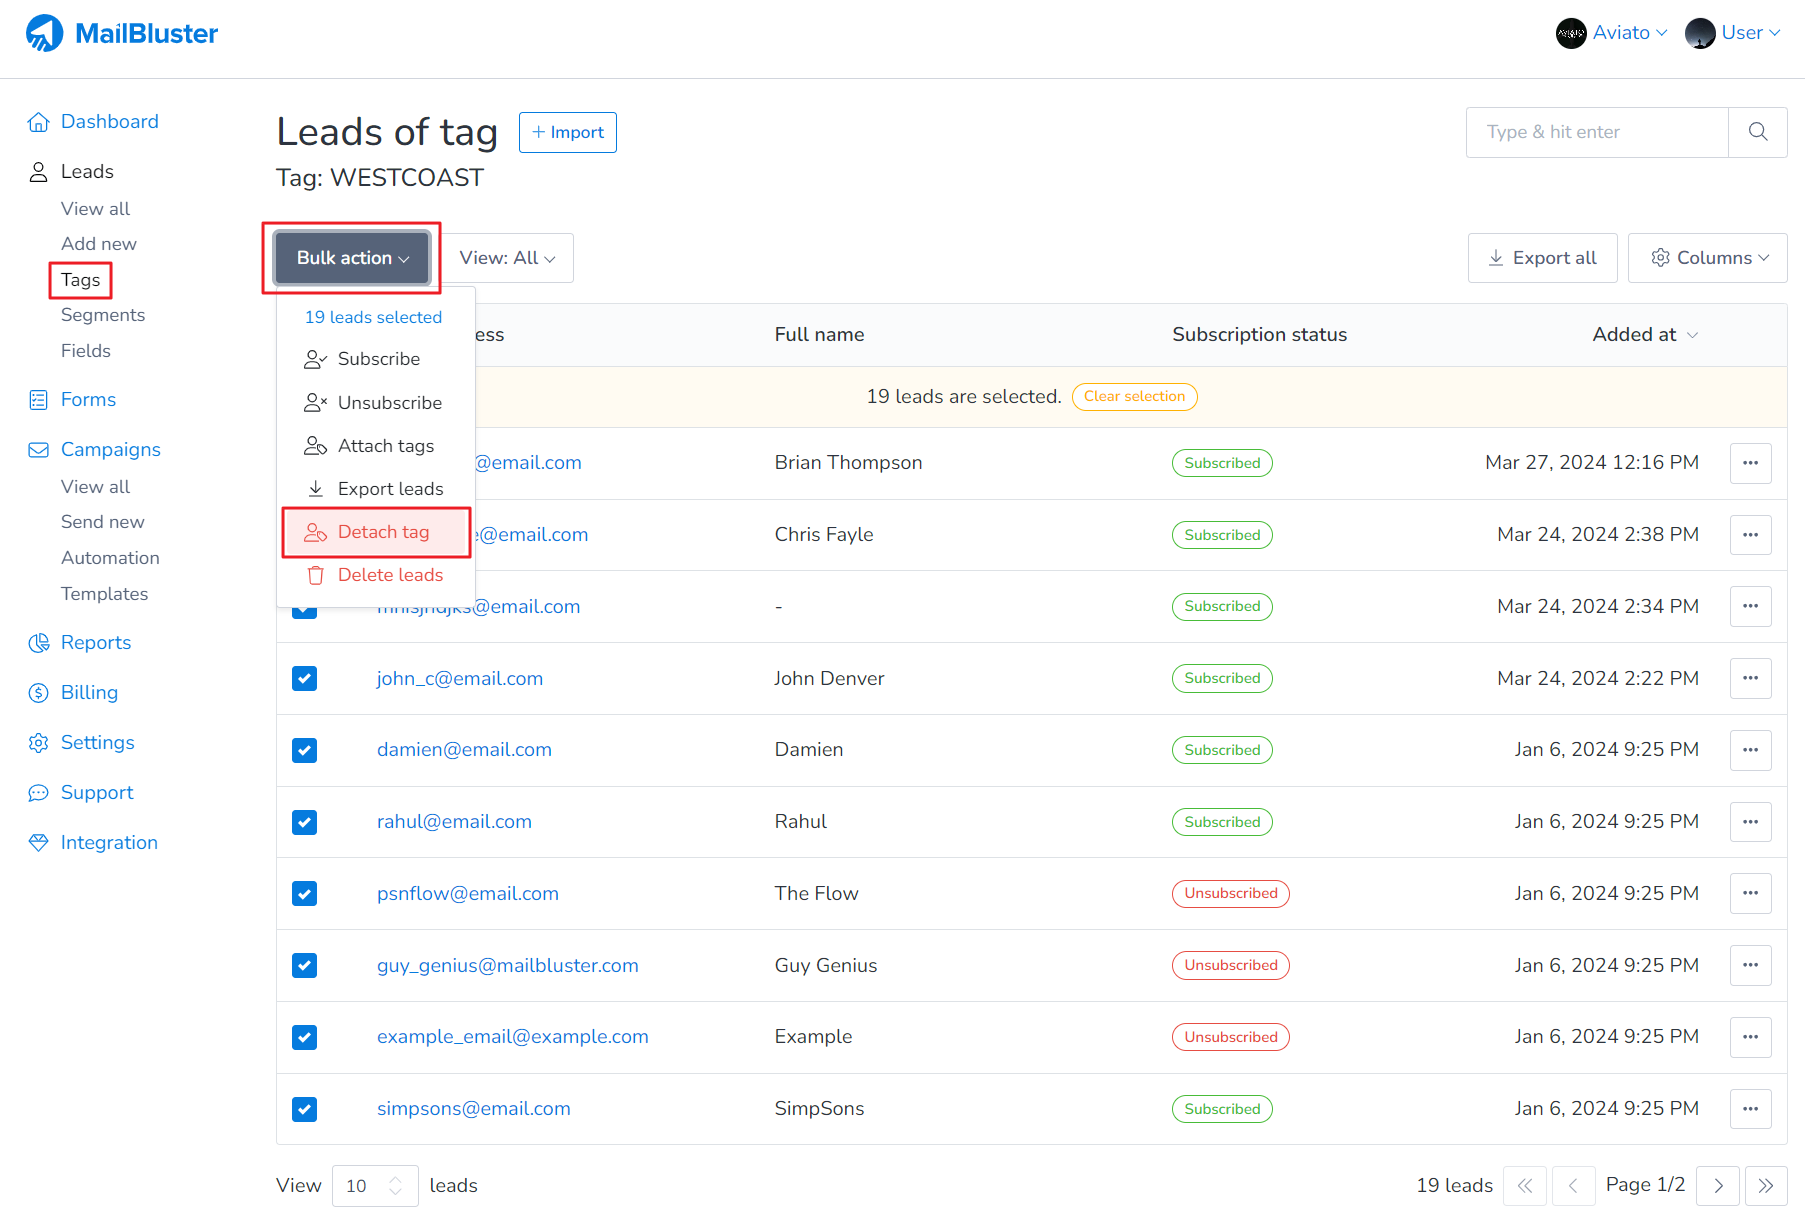
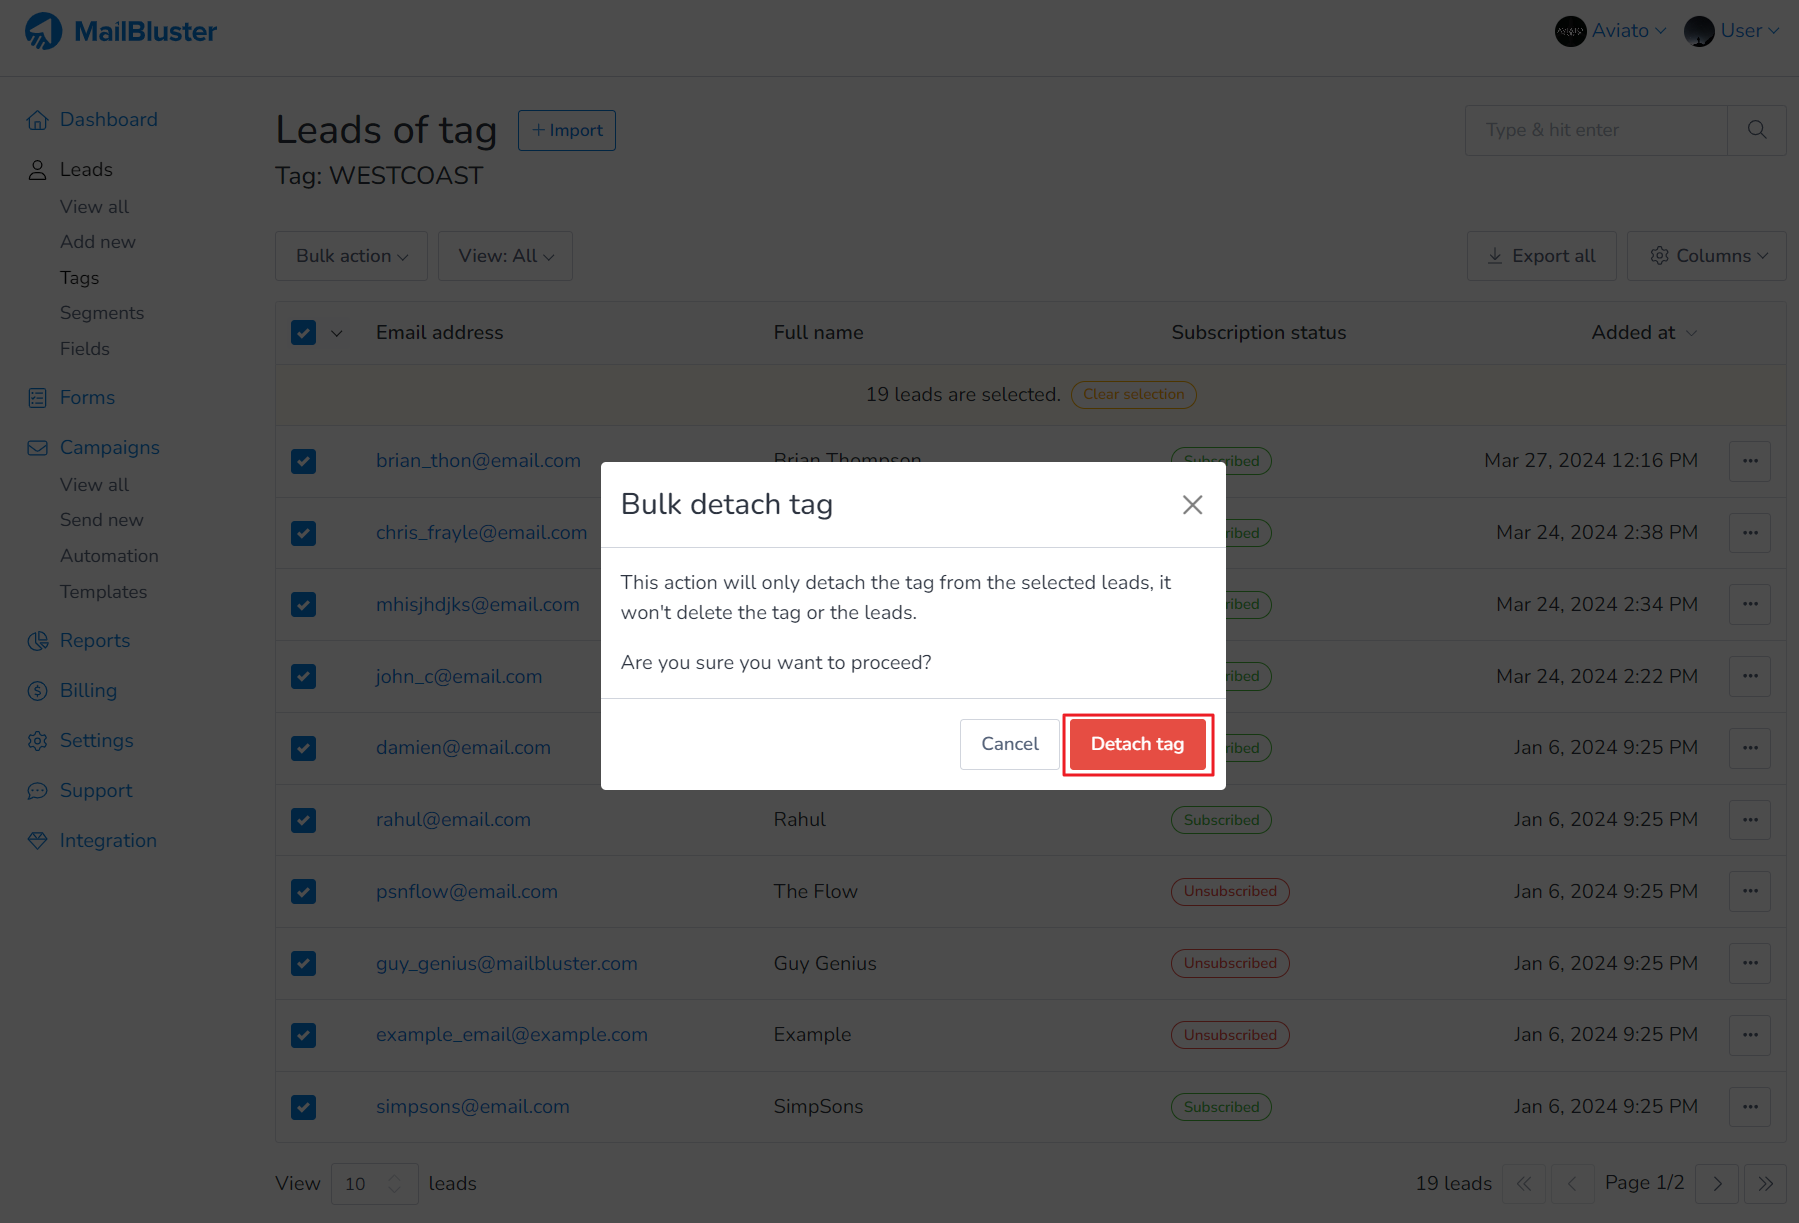
Now click on the tag “WESTCOAST” and then Bulk action > Detach tag.
Bulk Detach tag popup window will appear. You can click on Detach tag again and this will remove all leads from the tag “WESTCOAST”.
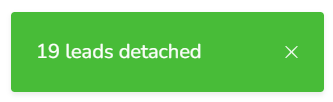
Notification like this will appear at the bottom left corner.
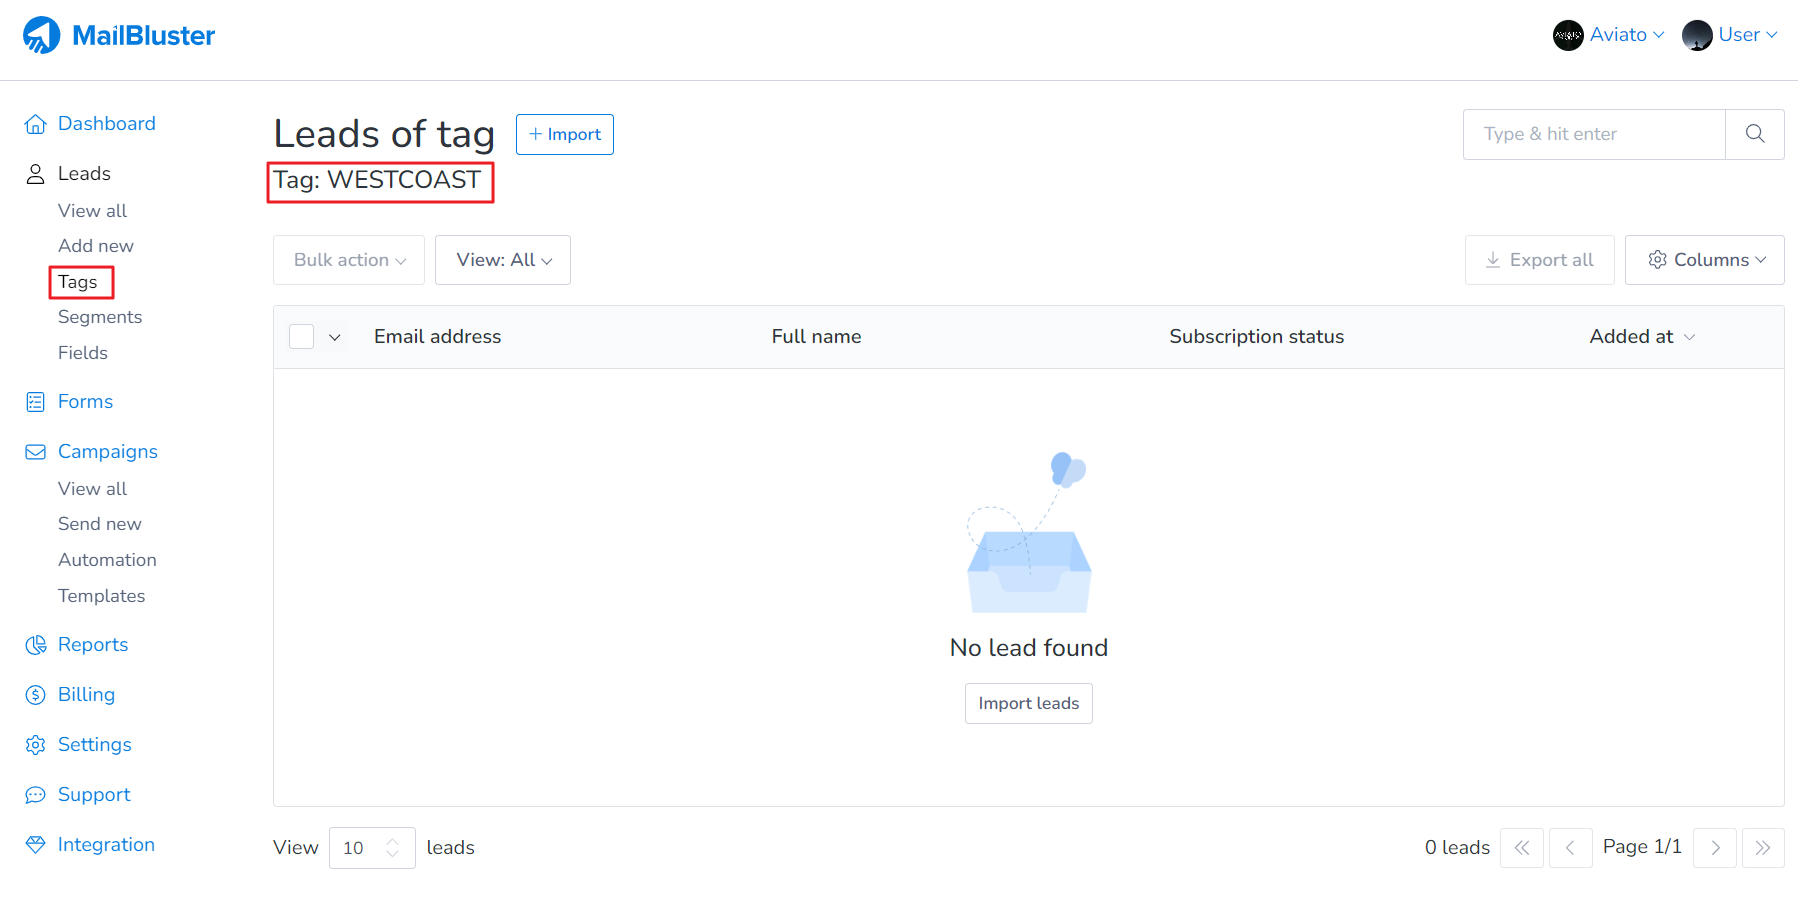
Now you will notice, 0 leads are present under the Tag “WESTCOAST”.
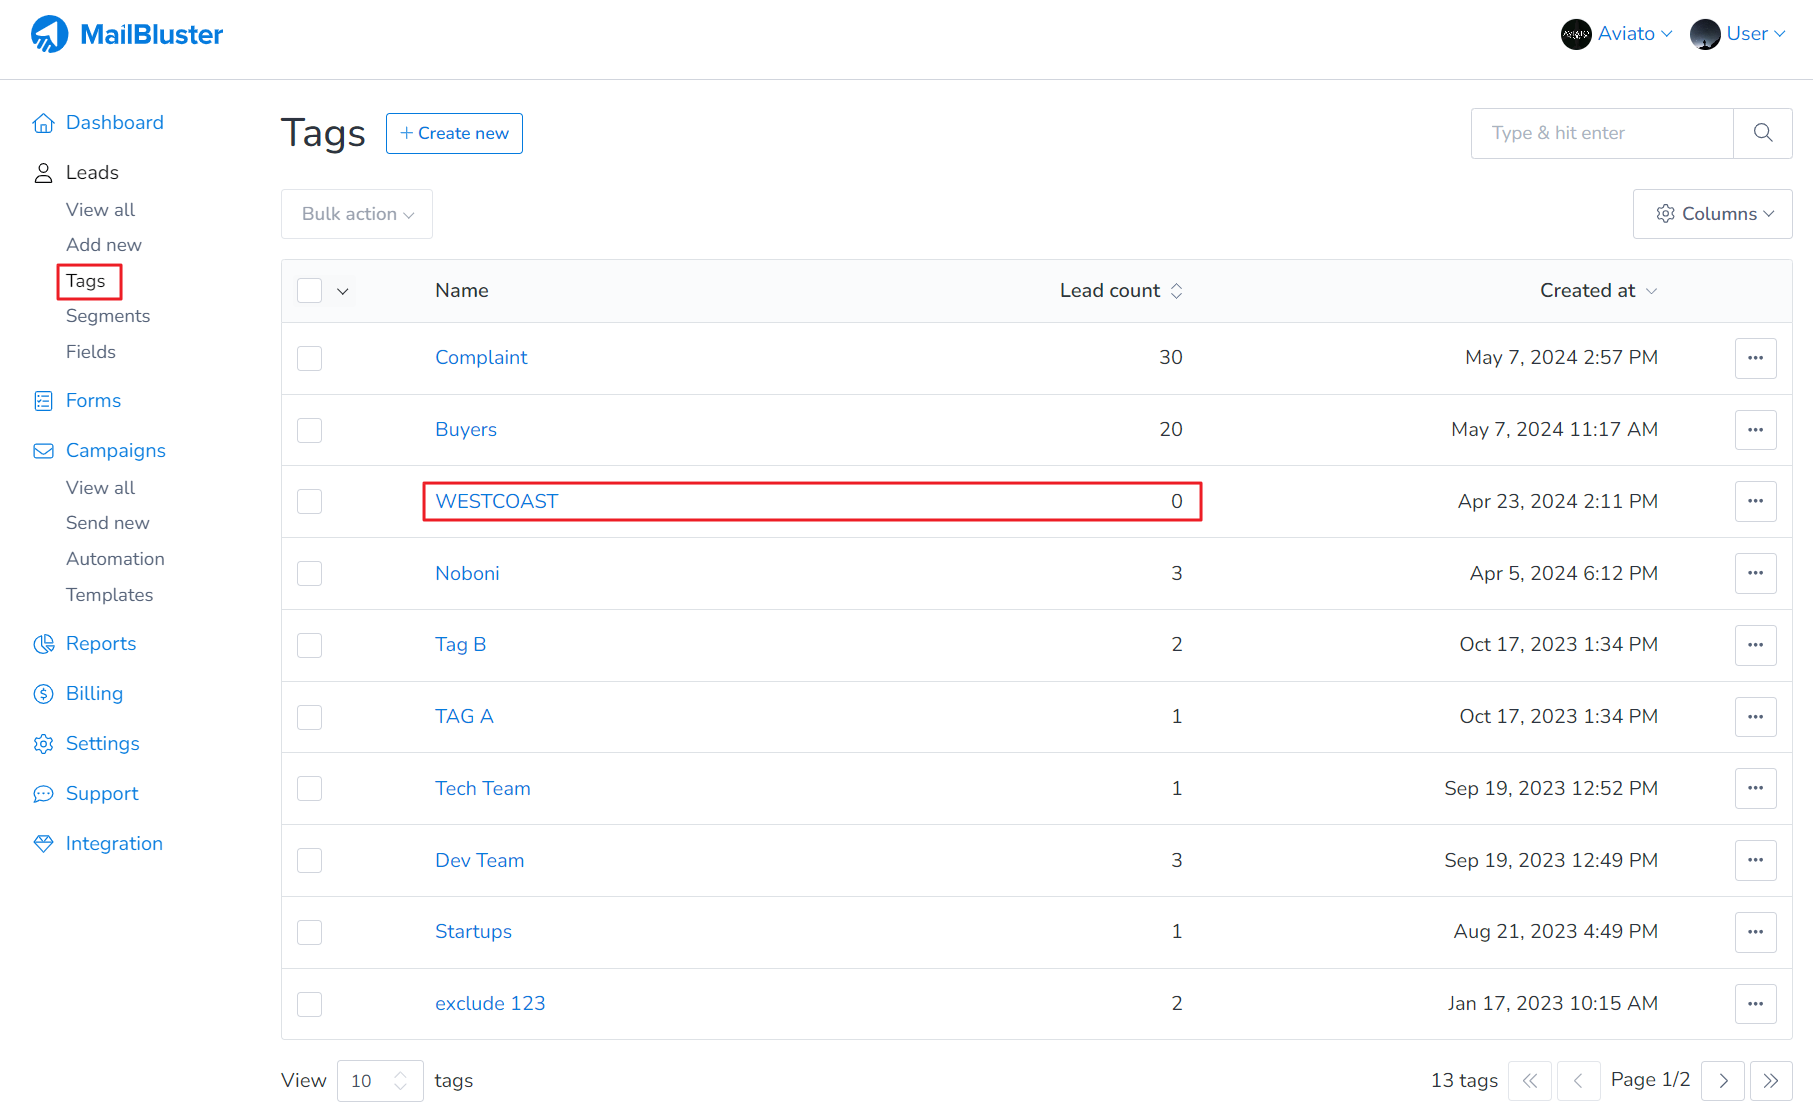
Also, if you click on Tags, you will notice the Lead count of tag “WESTCOAST” is showing 0.
Using tags in bulk helps you segment your audience more effectively. It allows for targeted campaigns, better engagement, and improved deliverability. Therefore, managing tags efficiently can save time and enhance your email marketing results.
The CSV file size limit is 10 MB, so you cannot upload a CSV file larger than 10 MB. However, you can work around this limitation by splitting the CSV file using any third-party application and then importing the smaller files to MailBluster Leads.
The MailBluster subscriber limit does not exist. You can store unlimited number of subscribers/contacts/email IDs/leads under any Brand in MailBluster. Also, there are no hidden cost or fees to store these leads. You can store unlimited leads or email IDs without any charges i.e. completely free of cost.
The following is a screenshare showing leads/email IDs stored in MailBluster Leads section.
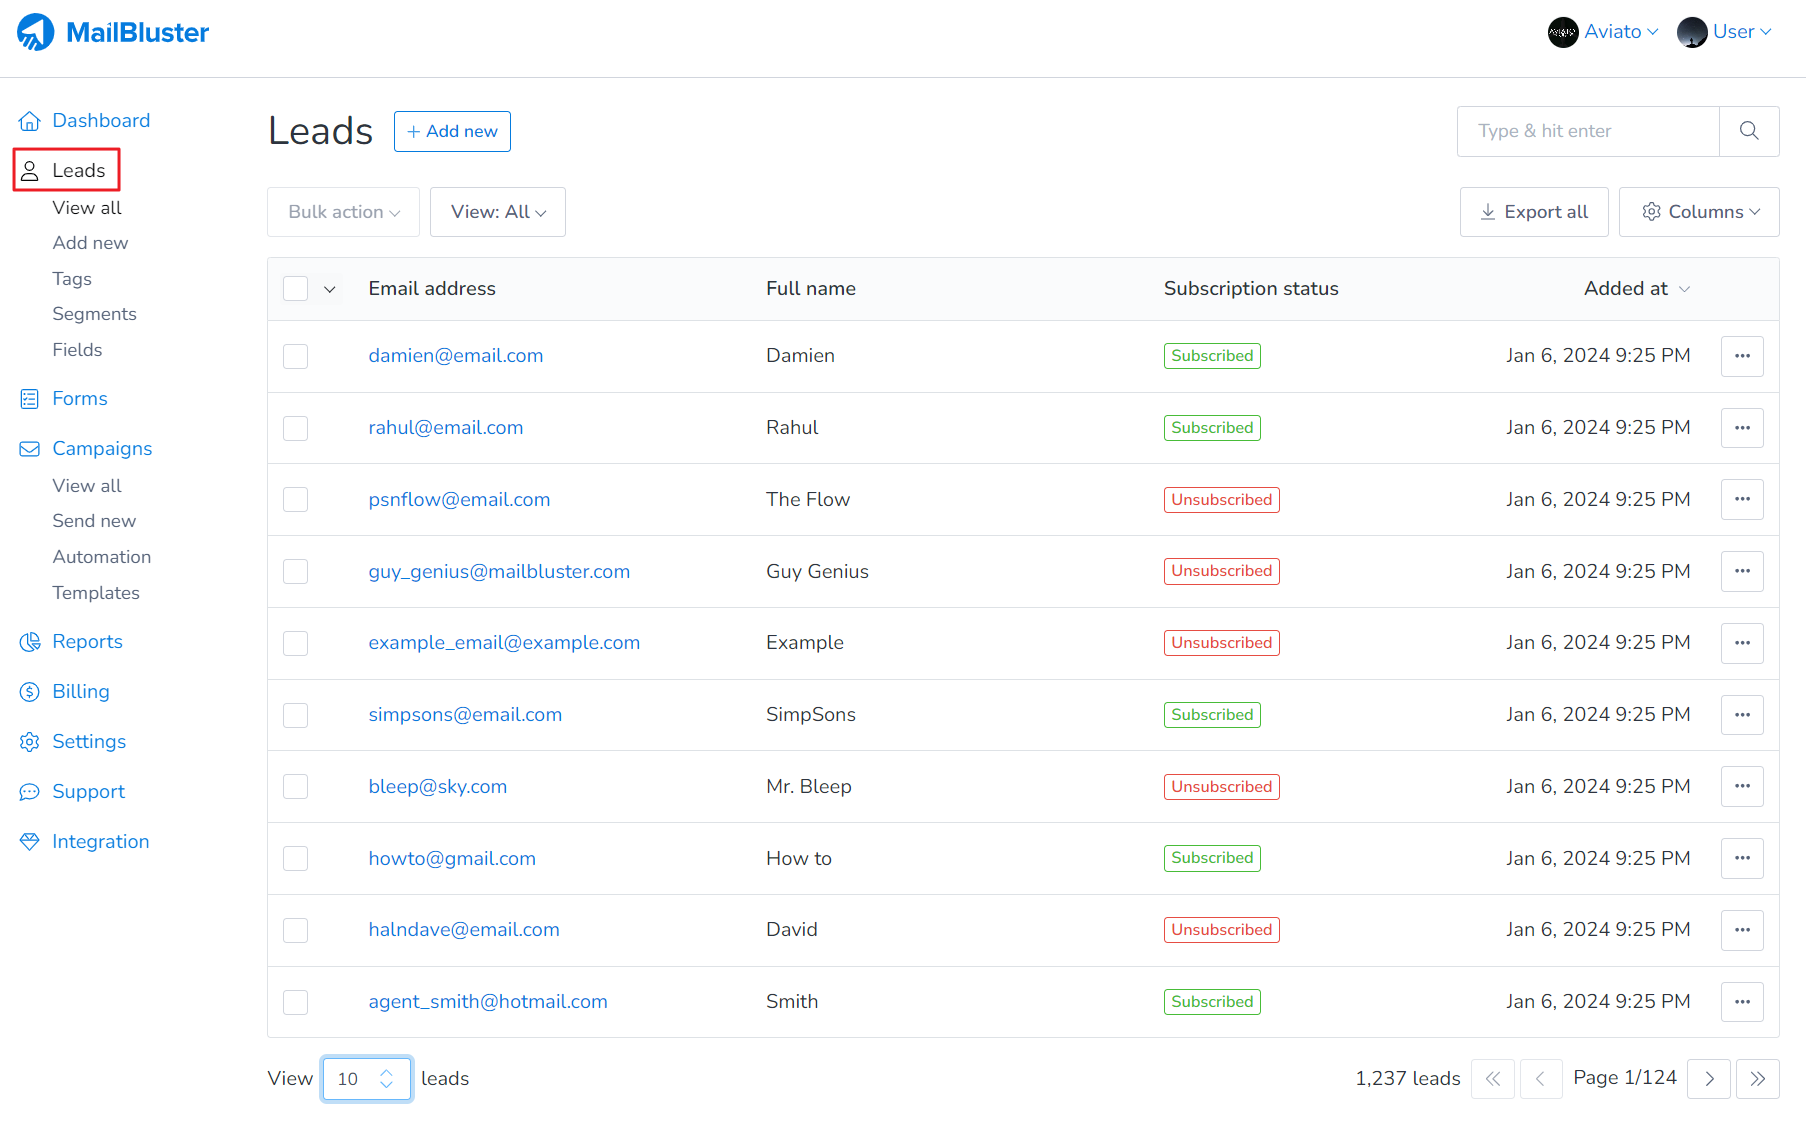
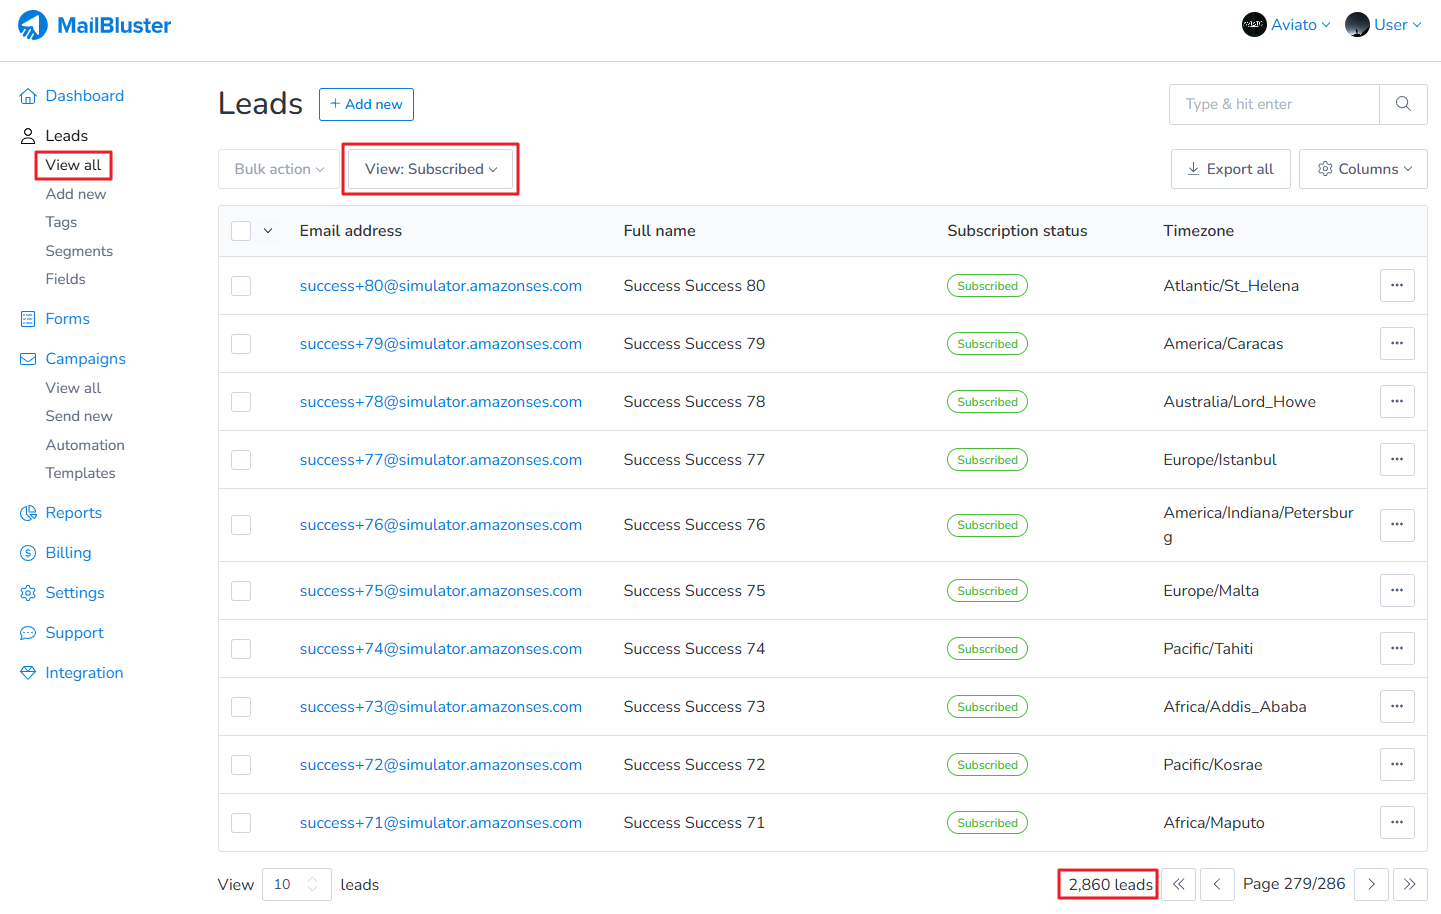
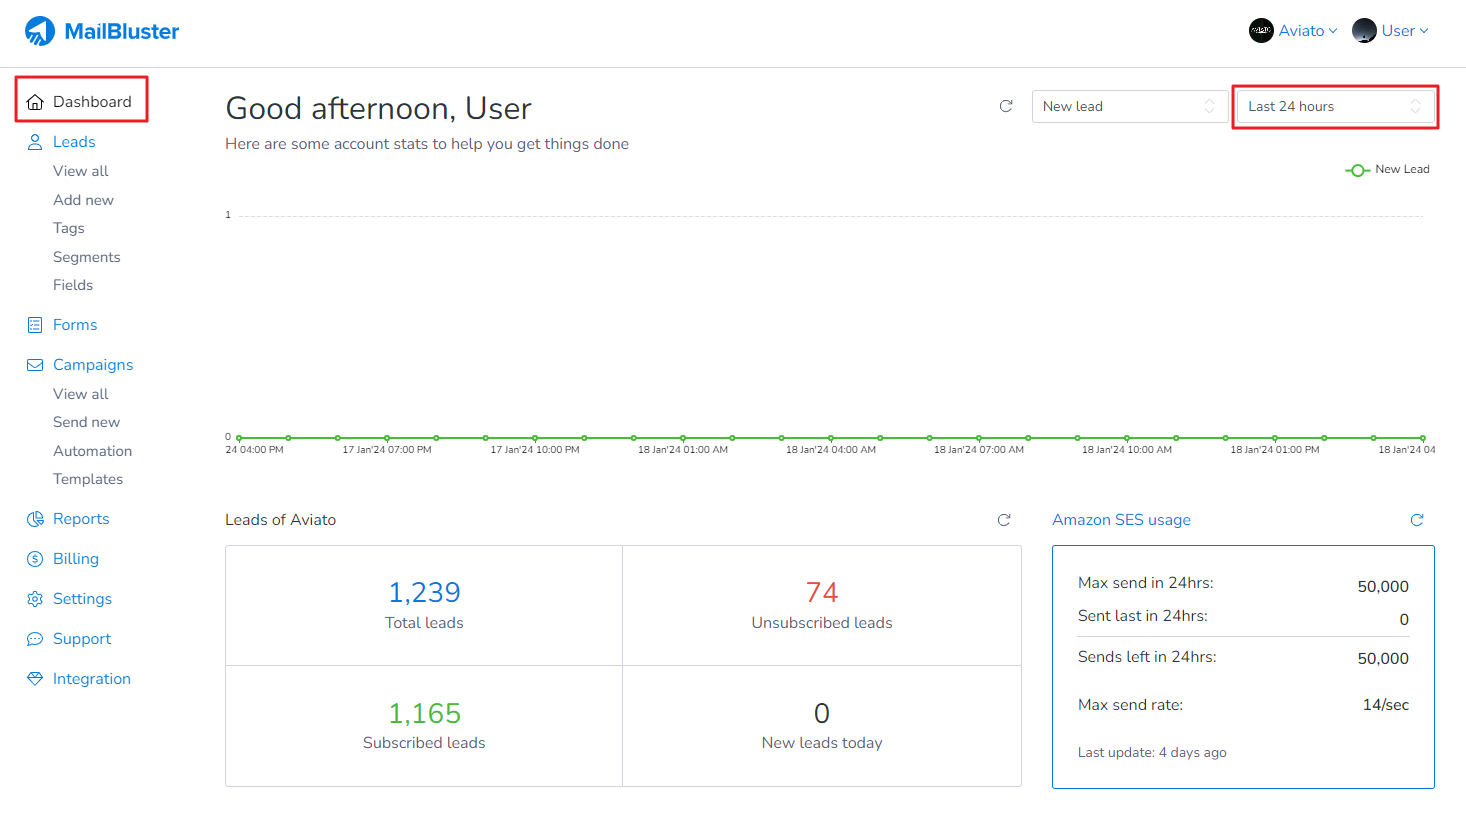
You can easily check the total subscriber count in MailBluster from your brand dashboard. To get the total subscriber count of leads, navigate to your Brand > Leads > View All.
Then, under ‘View All‘, select ‘Subscribed‘. You will notice the Total subscribers count (total number of leads who subscribed to your brand) which will be displayed at the bottom right corner as shown below.
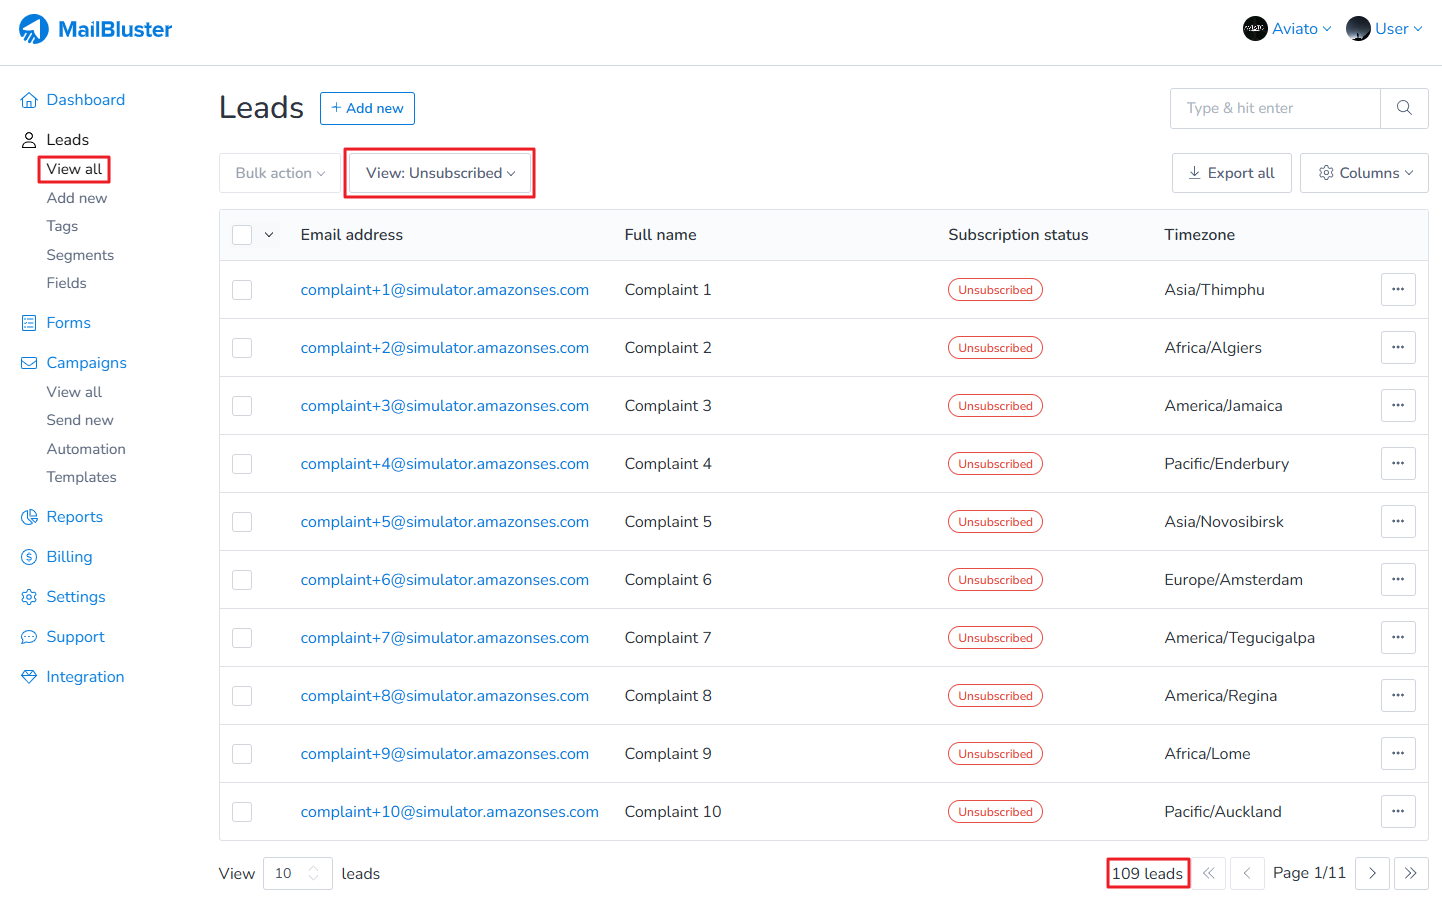
You can easily check the total unsubscriber count in MailBluster from your brand dashboard. To get the total unsubscriber count of leads, navigate to your Brand > Leads > View All. To get the unsubscriber count of leads in any brand, navigate to your Brand > Leads > View All.
Then, under ‘View All‘, select ‘Unsubscribed‘. You will notice the Total unsubscribers count (total number of leads who unsubscribed from your brand) which will be displayed at the bottom right corner as shown below.
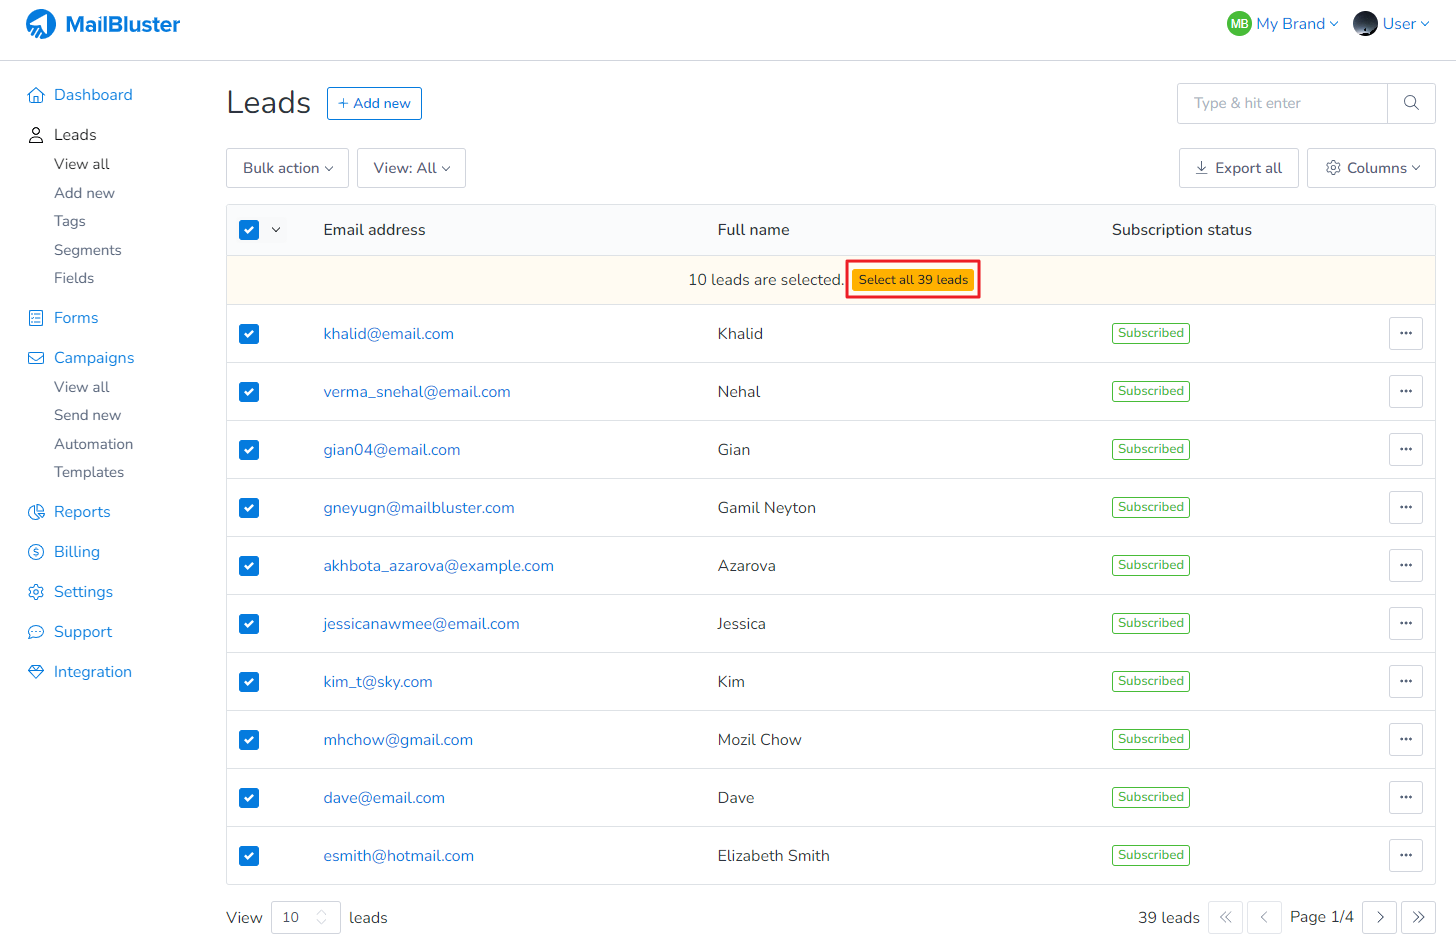
To unsubscribe leads in bulk, you need to go to Leads section first, then click on the highlighted checkbox.
After clicking the checkbox, leads on Page 1 will be selected. If you want to select all the leads stored in MailBluster, the click on Select all X leads where X is the total number of leads.
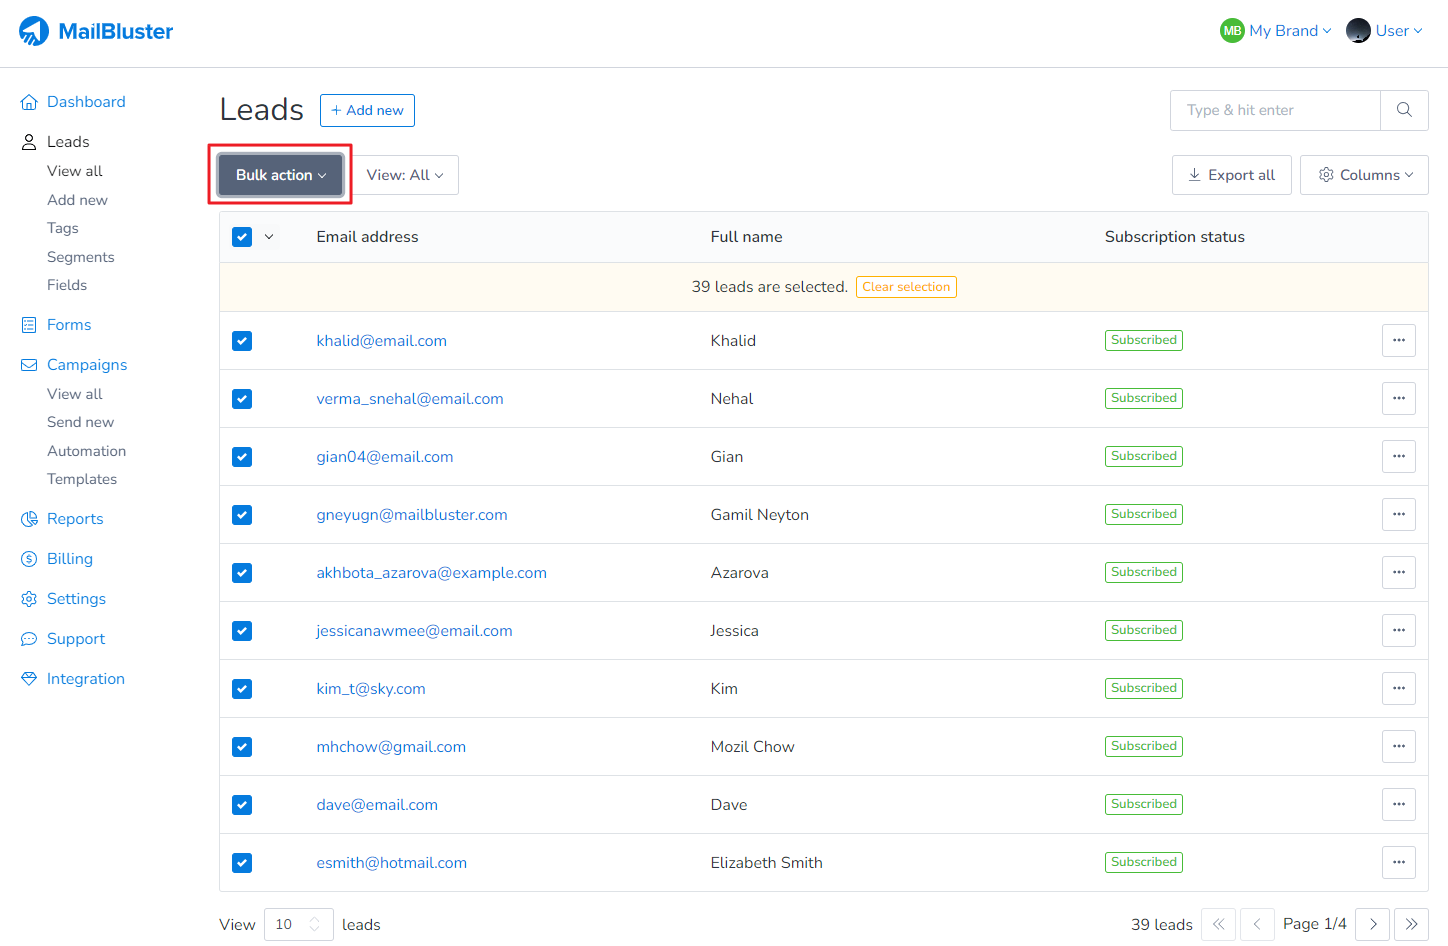
After selecting all the leads, click on Bulk action.
Then click on Unsubscribe.
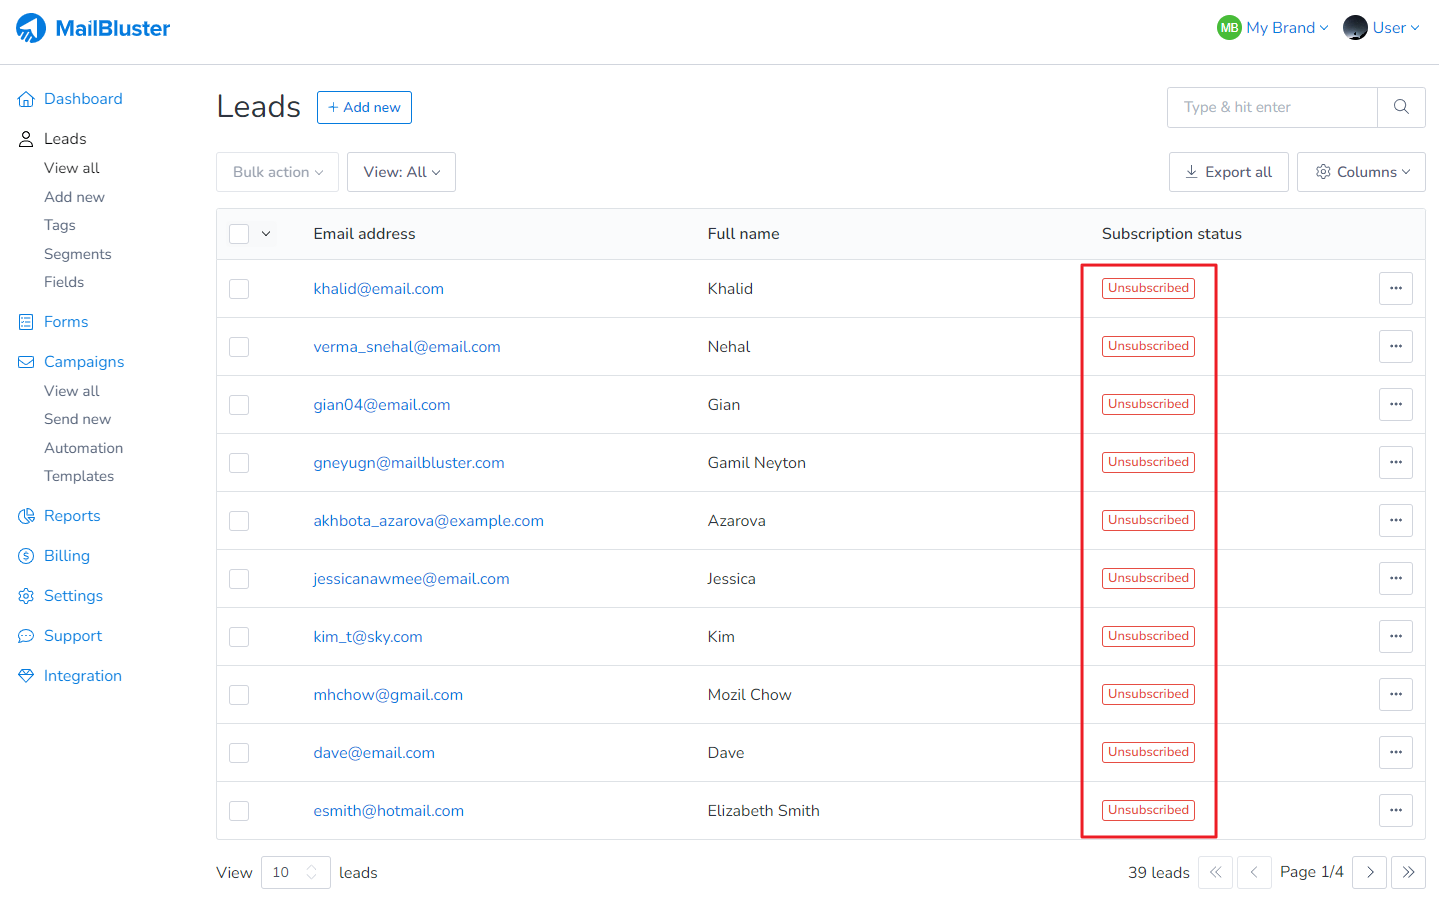
All the leads will then be set to Unsubscribed status.
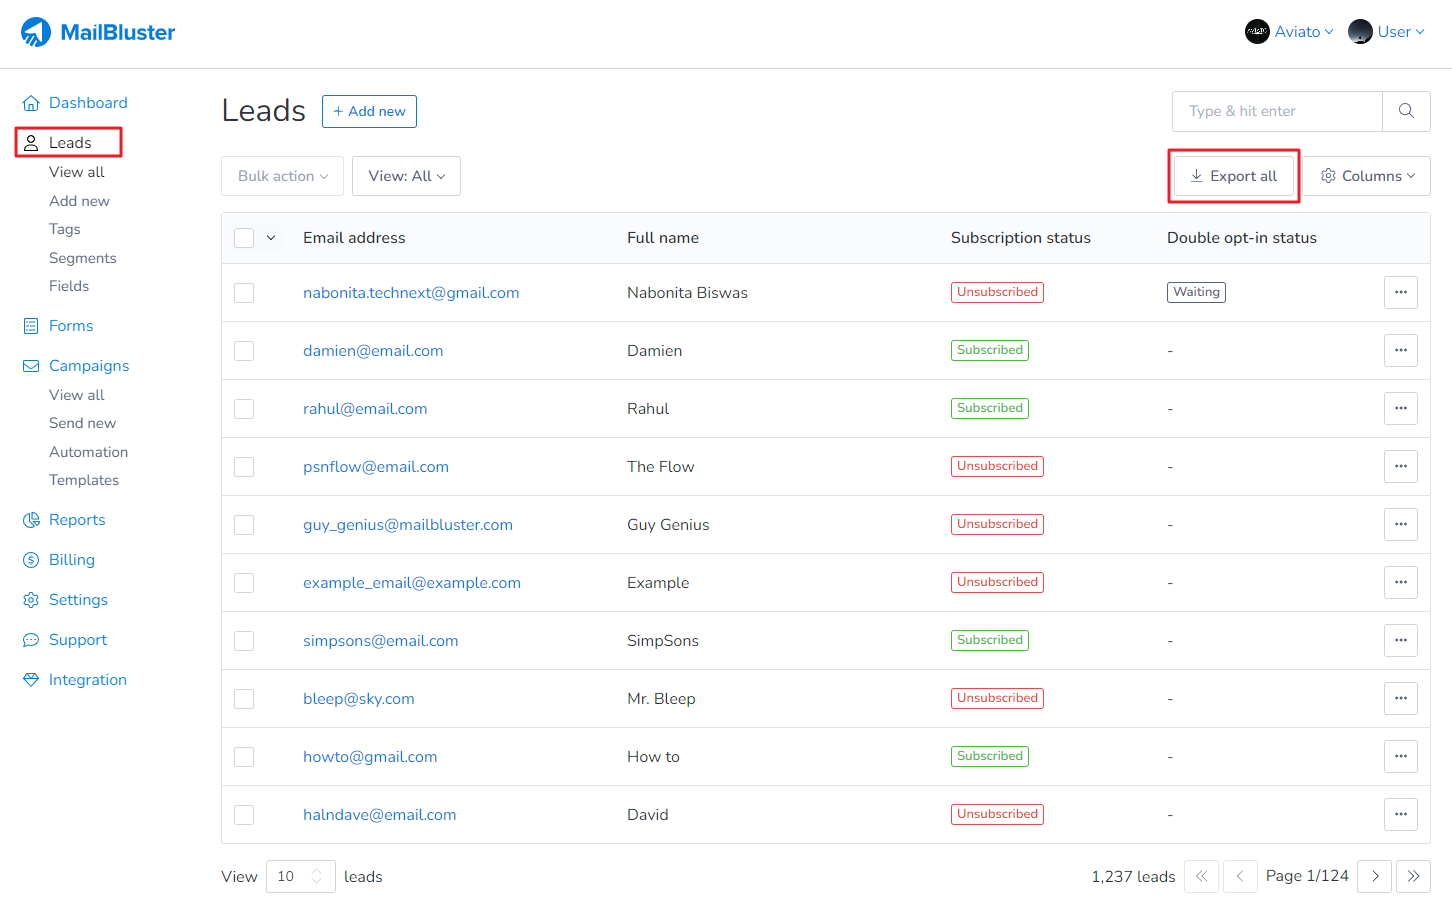
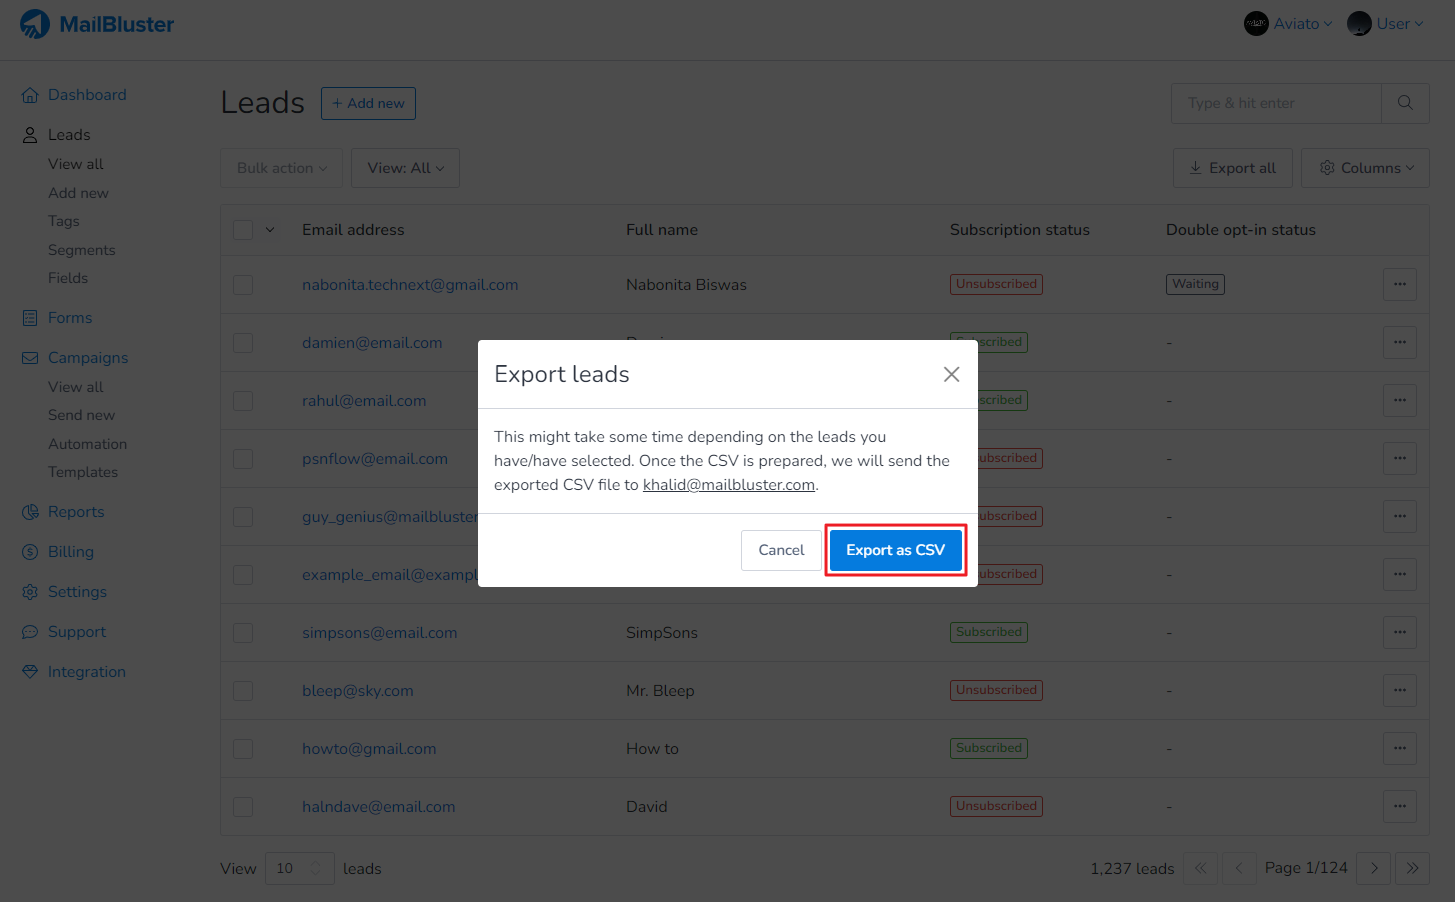
To export leads from MailBluster, you need to go to Leads section, and click Export all.
A popup dialog box will appear showing the email address of the User where the download link will be sent. Click on Export as CSV and you will receive an email on the mentioned email address with the download link.
Exporting leads allows you to back up your email lists or use them in other platforms. Using this feature ensures your subscriber data is accessible and organized for reporting or migration purposes.
You can delete leads in MailBluster individually or in bulk to manage your subscriber lists efficiently.
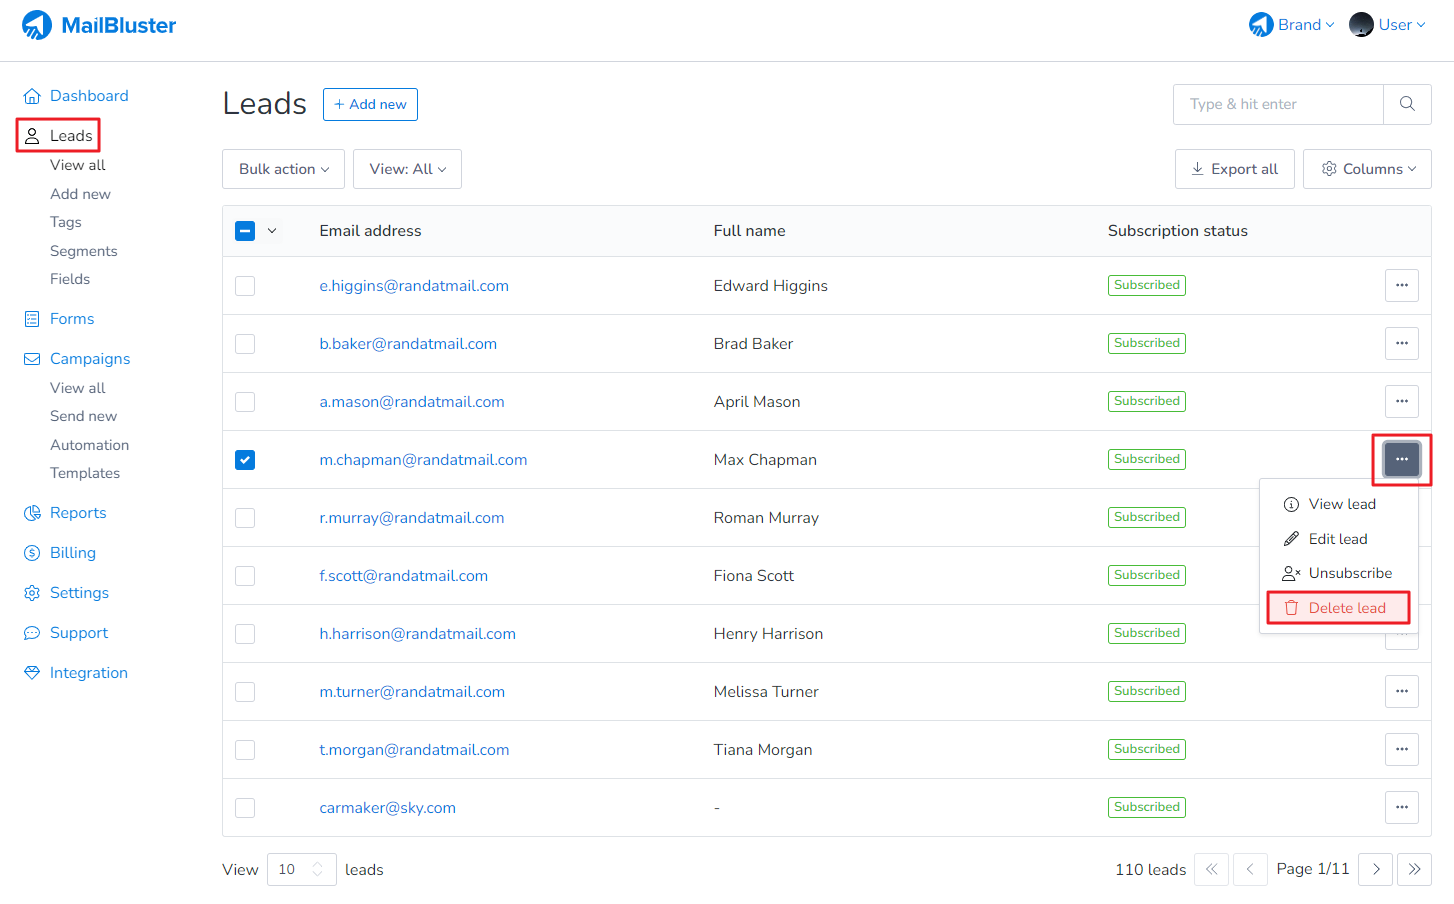
Deleting a Lead individually
To delete a single lead from MailBluster, go to Leads, then select any lead by ticking the checkbox. Then click on the … 3 dots ellipsis then click on Delete lead.
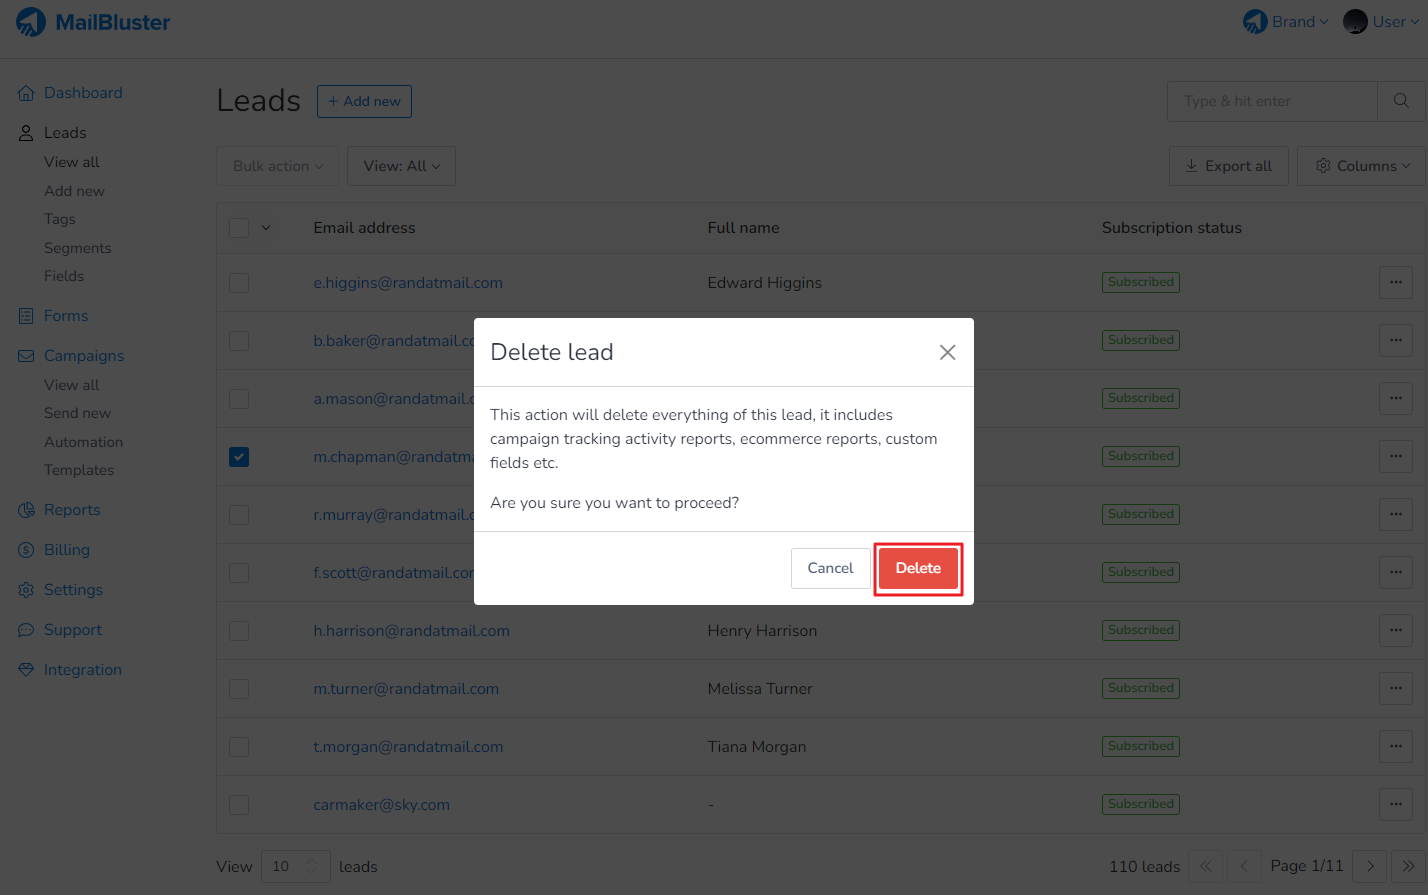
A popup dialog box will appear for confirmation, click Delete and the lead will be deleted instantly.
Deleting Selected Leads in Bulkfrom your Brand
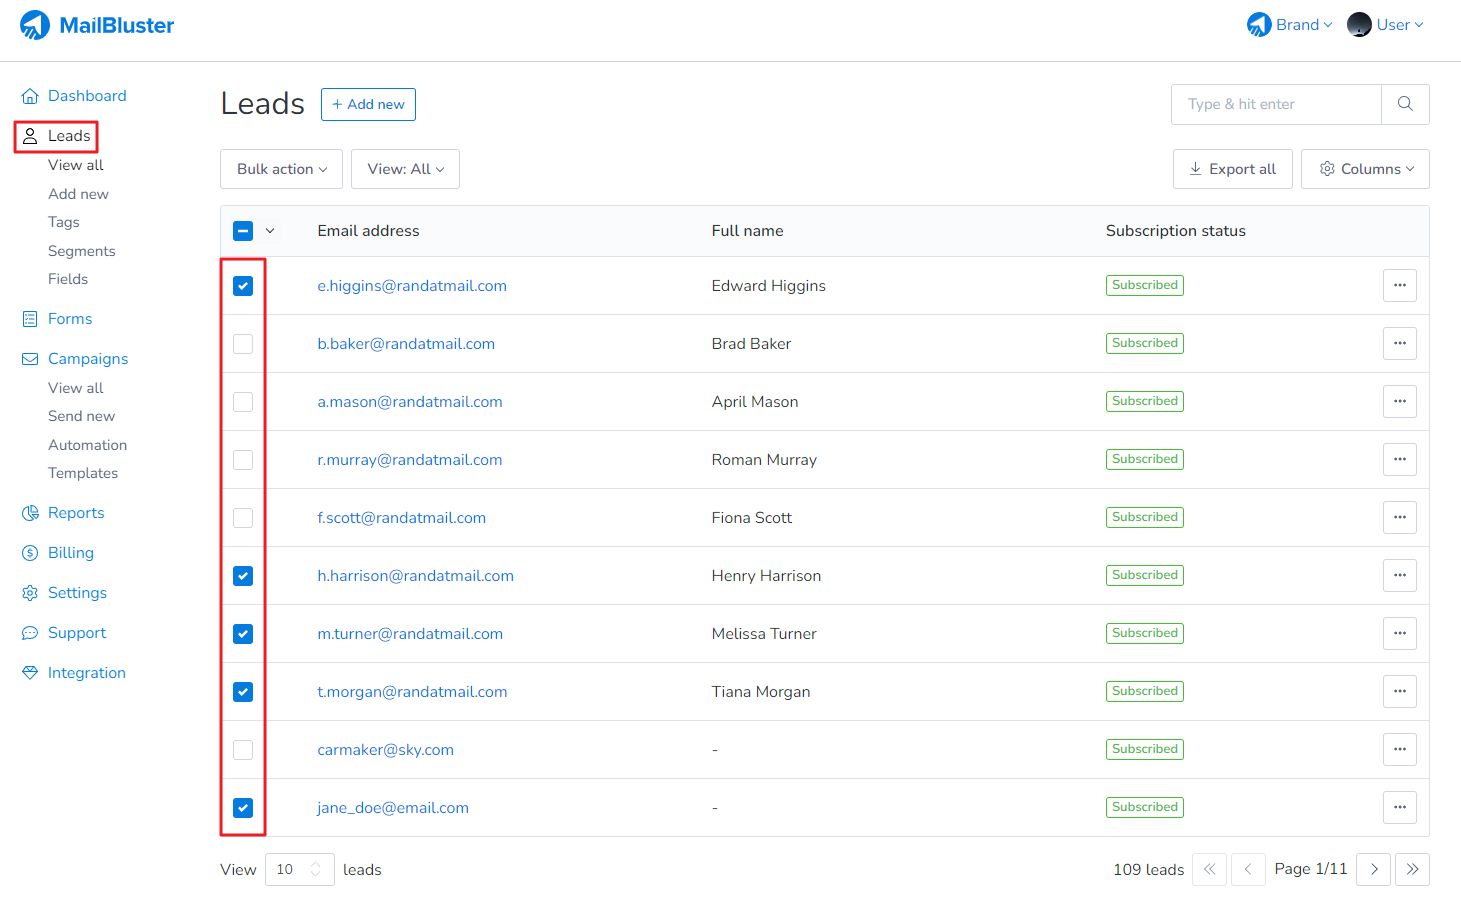
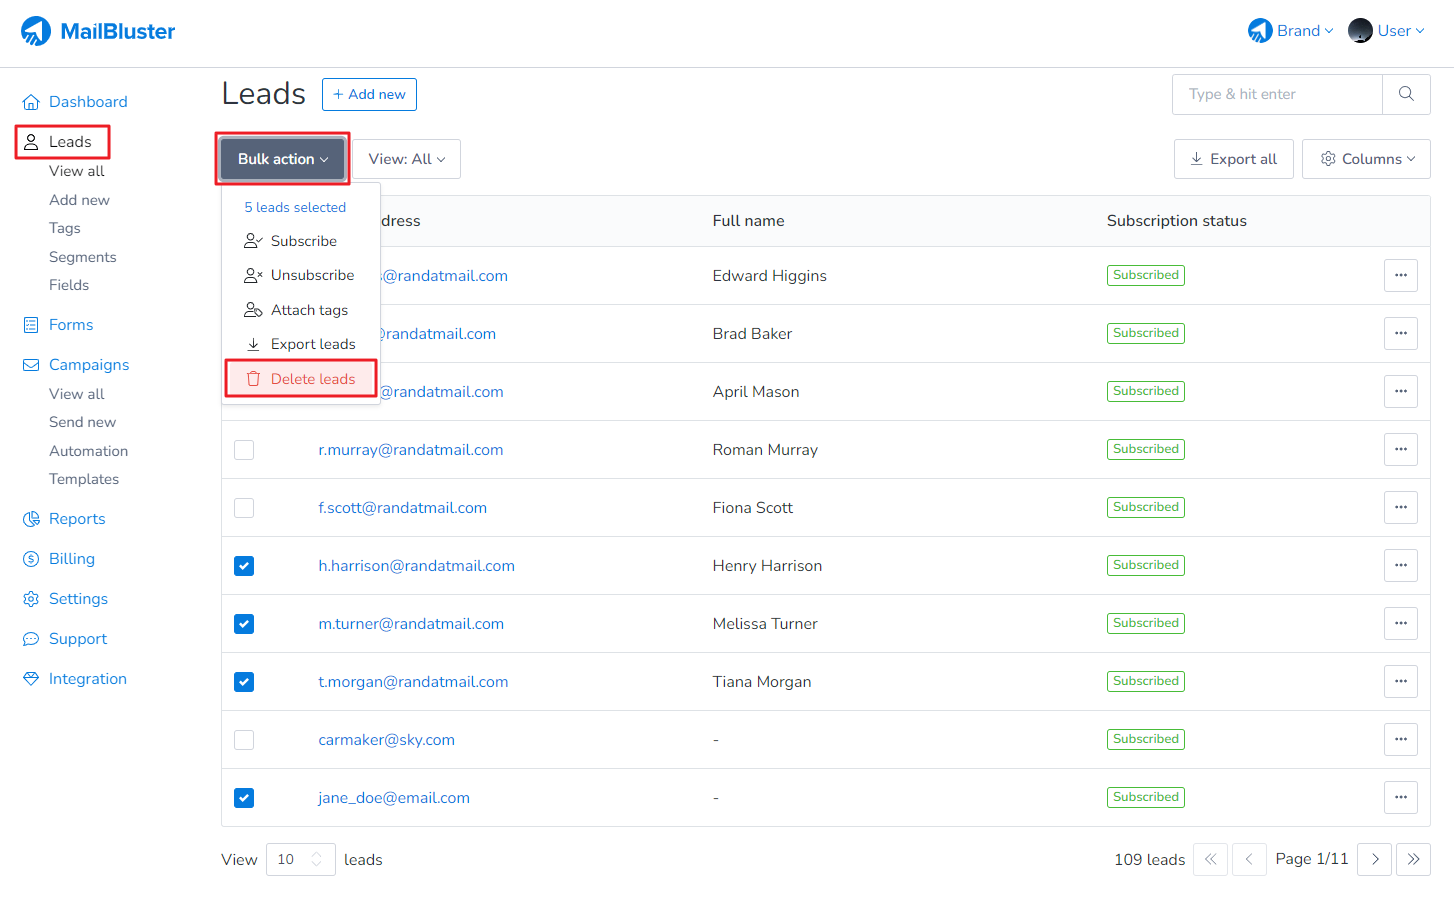
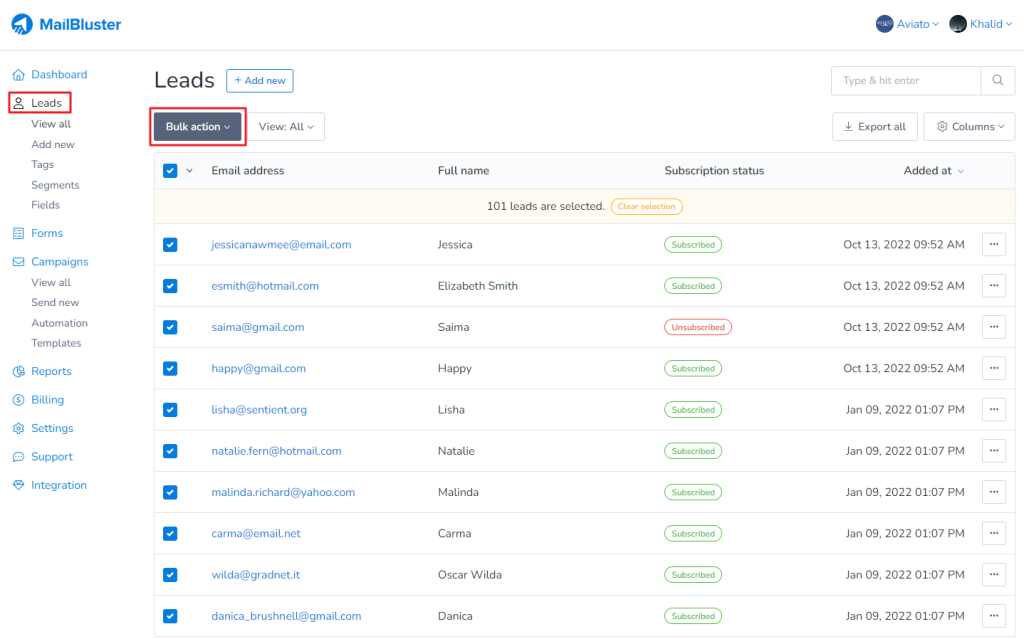
To delete selected leads in Bulk from MailBluster, go to Leads, then select leads by ticking the checkbox.
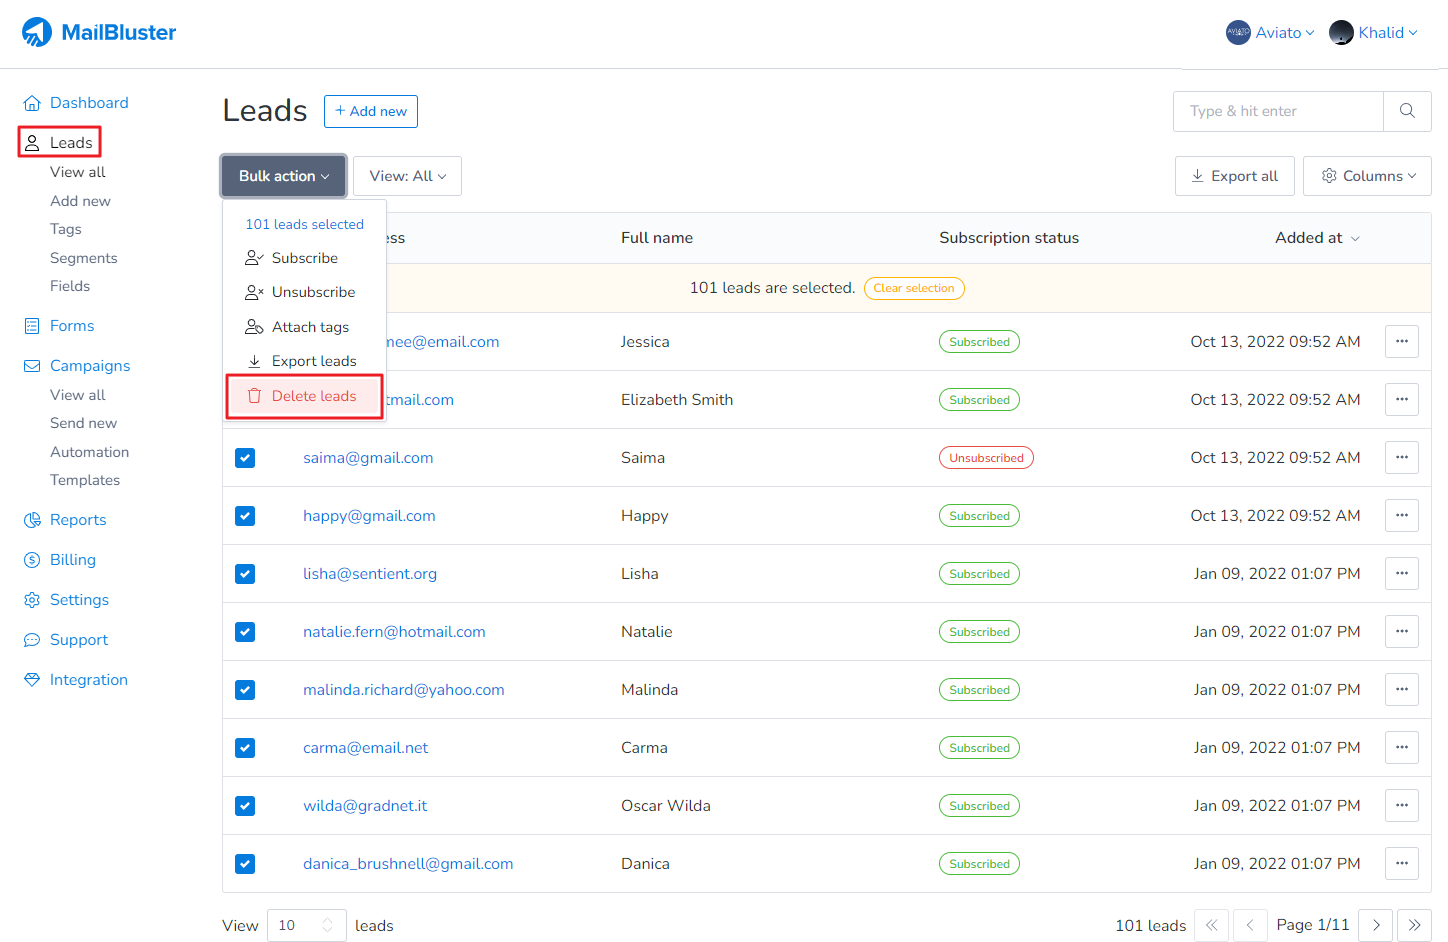
Then click on the Bulk action. Click on Delete leads.
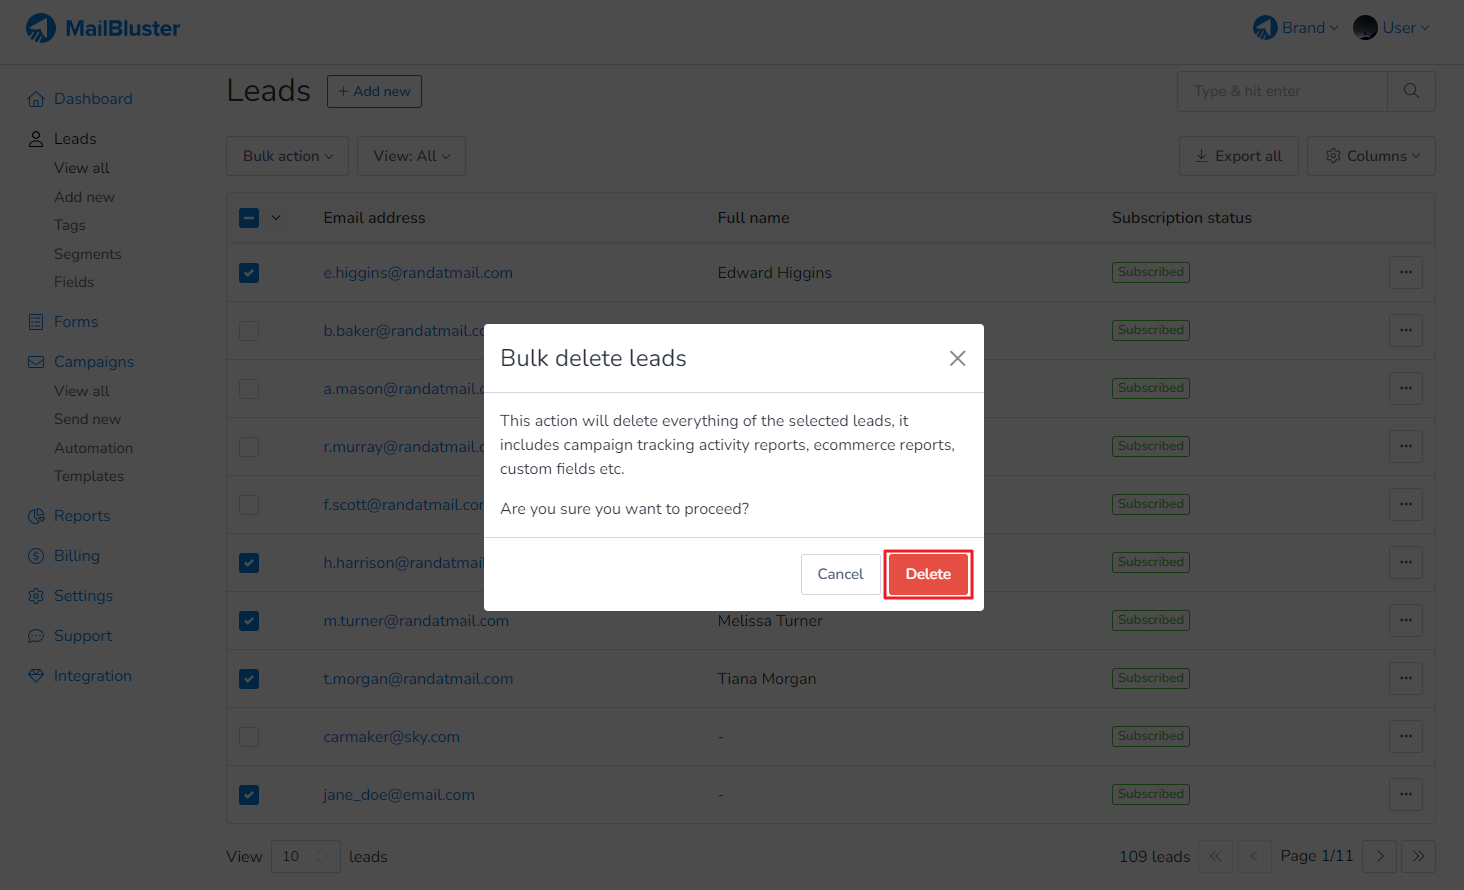
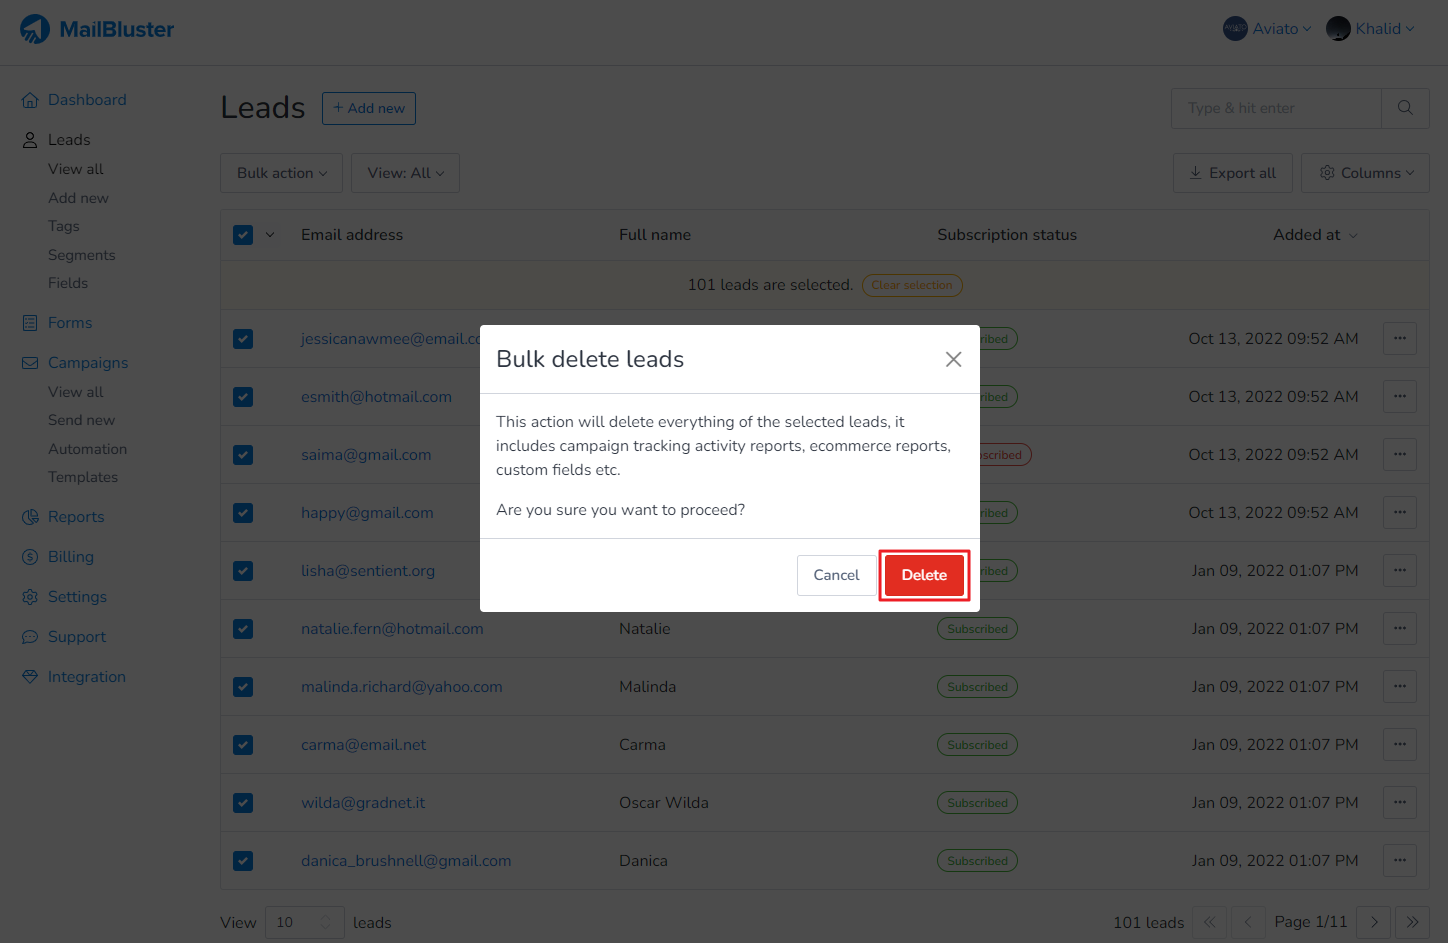
A popup dialog box will appear for confirmation, click Delete and the selected leads will be deleted instantly.
Deleting All Leads in Bulk from your Brand.
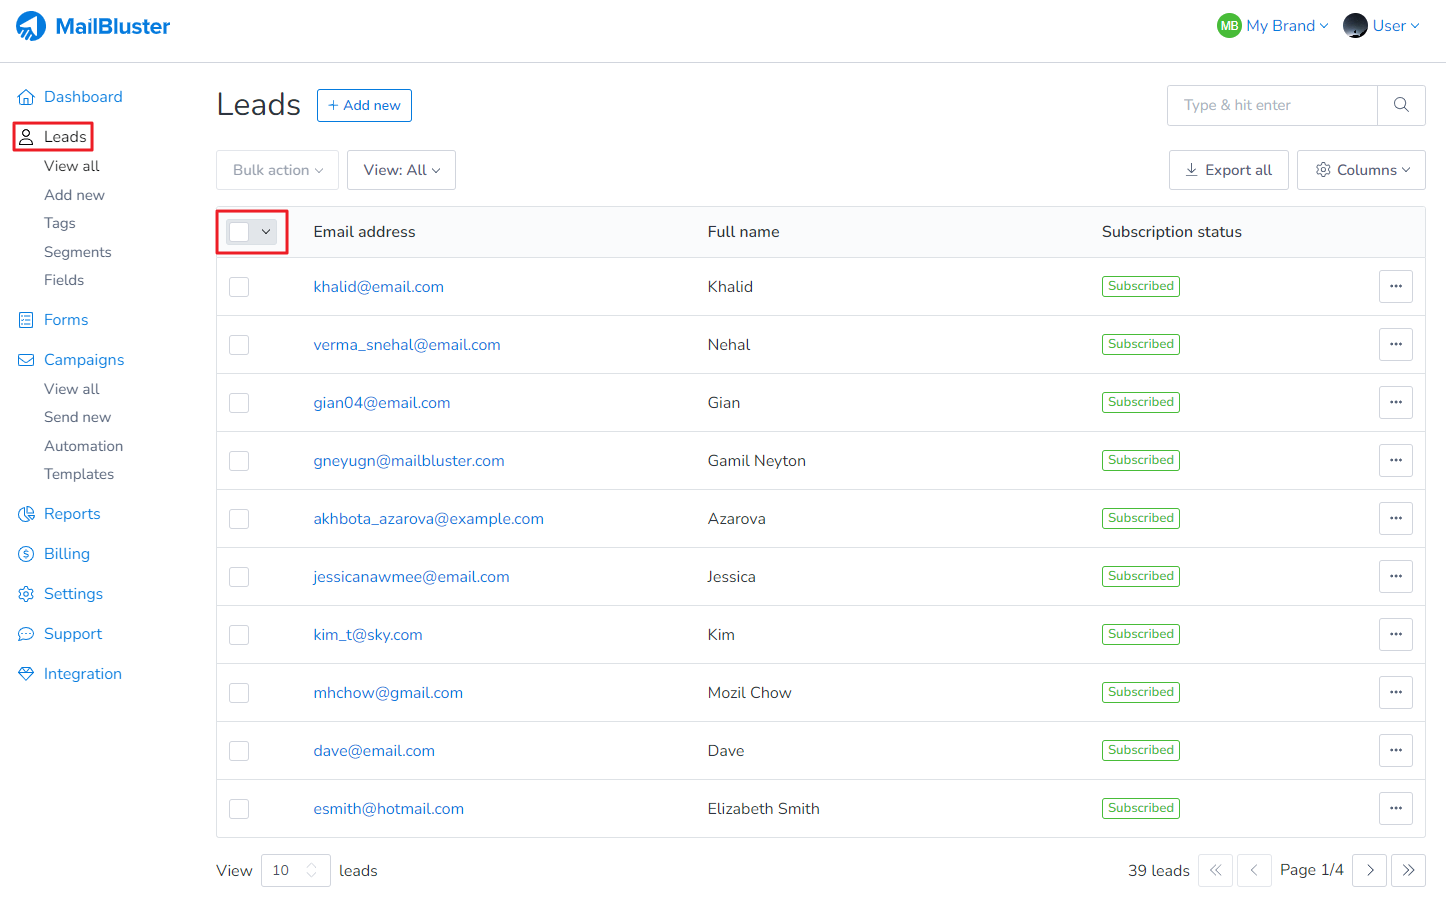
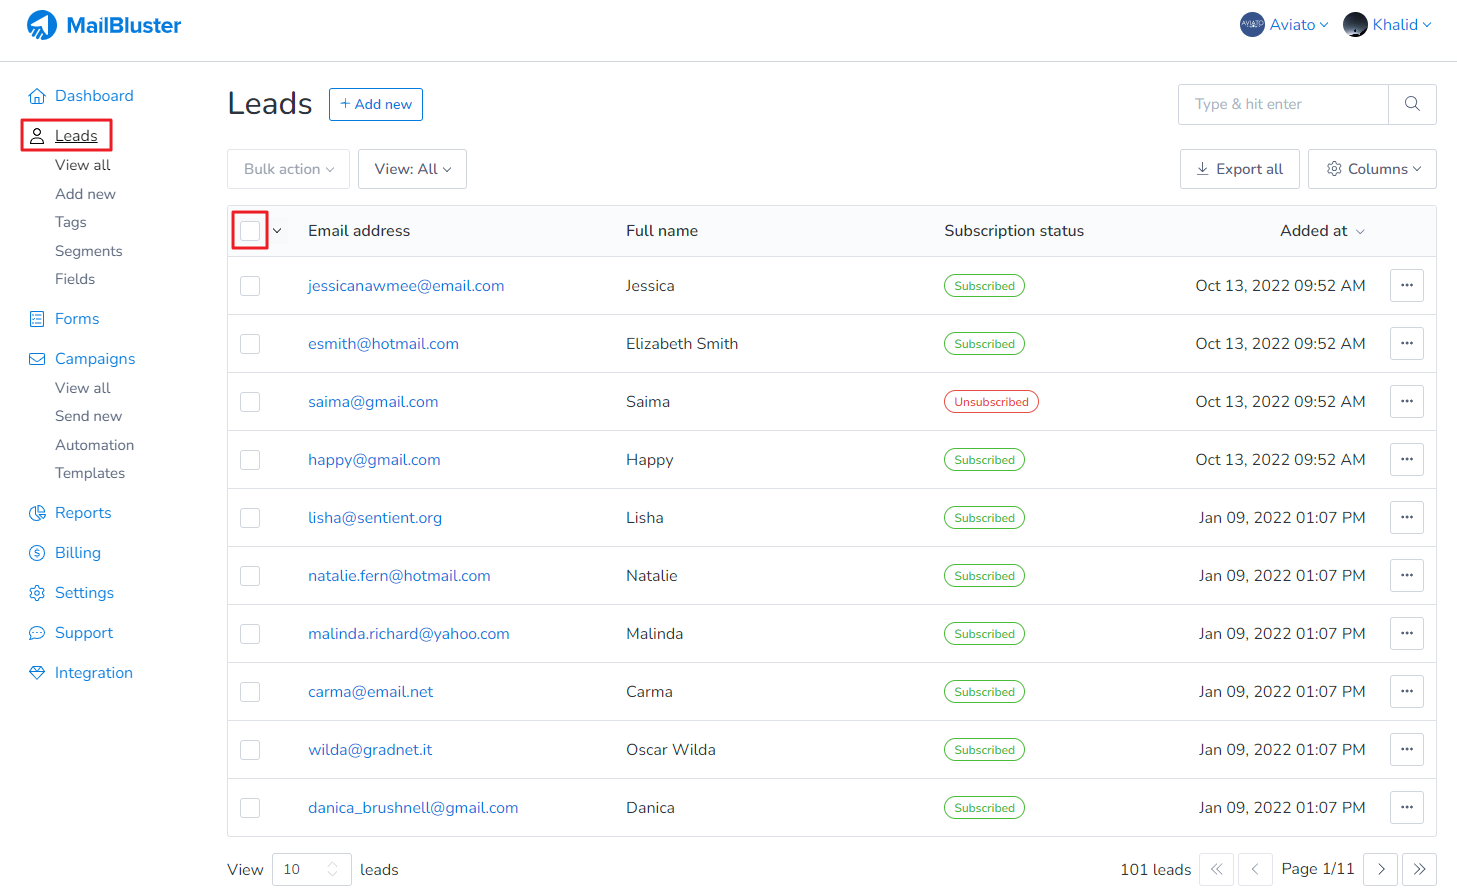
Go to Leads. Then click on the square checkbox shown below.
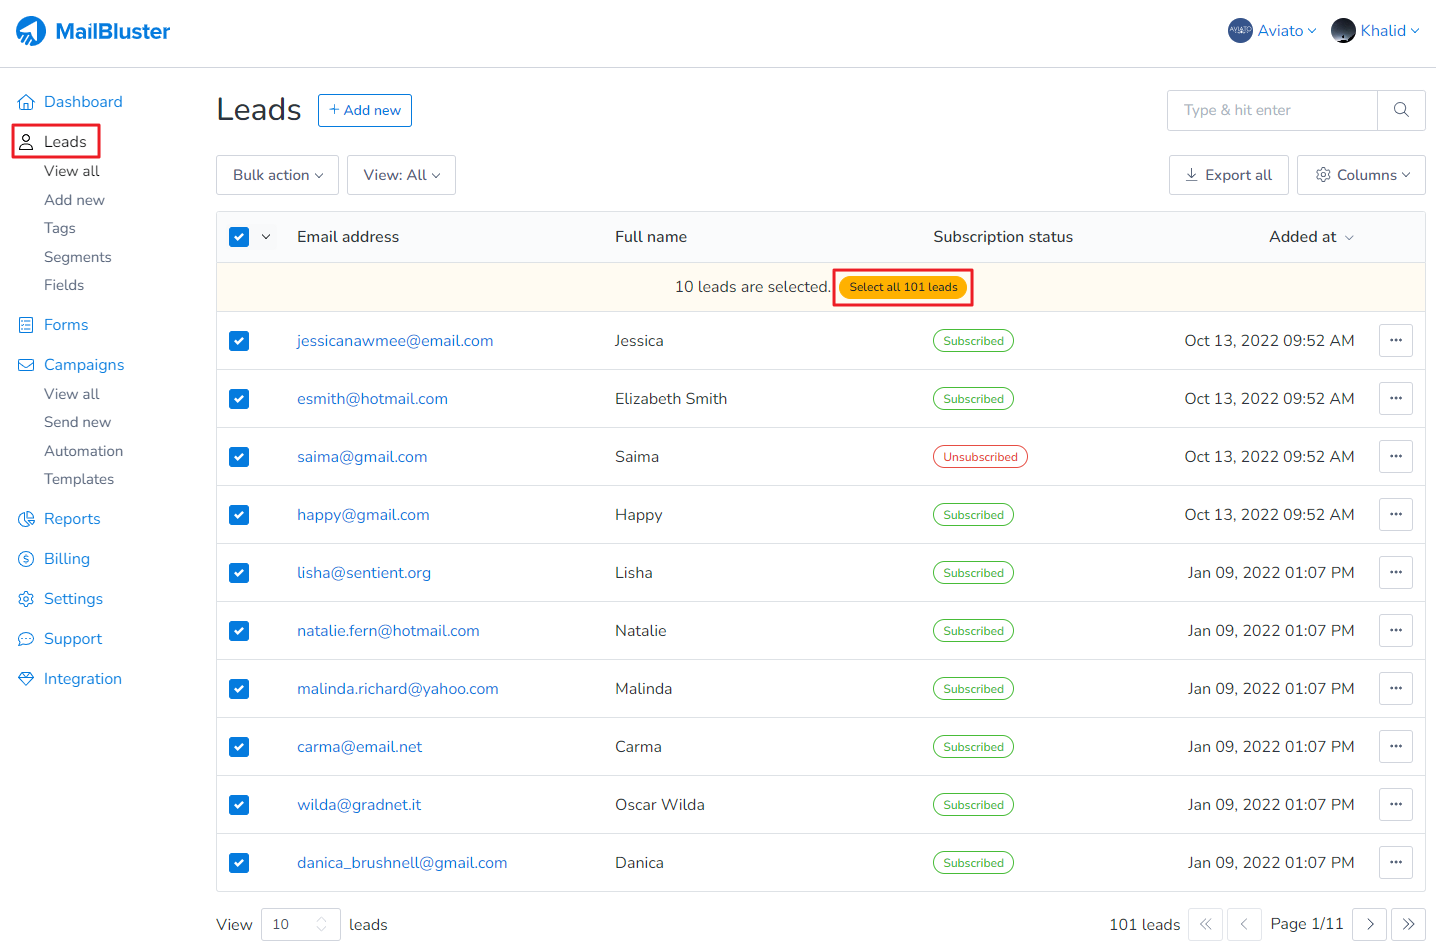
Once the checkbox is ticked, click on Select all ‘n number of’ leads button as shown to select all the leads inside the current brand.
Once all leads are selected, click on Bulk action.
Then click on Delete leads.
A popup dialog box will appear for confirmation, click Delete and all the leads from that brand will be deleted permanently.
Deleting leads individually helps keep your email lists clean and up-to-date. This ensures that your campaigns reach only active and relevant subscribers, improving deliverability and engagement rates.
MailBluster does not allow duplicate leads. If a duplicate lead is found, any existing lead information will be updated with the new details or skipped based on the preferences.
If you want to update the existing leads of your brand from Google Sheets, the best way is to import them to your brand. To do so: 1. Download the Sheet as CSV. MailBluster only supports CSV format. 2. Upload it from Leads > Add new > Import leads page. 3. Make sure to enable Update existing leads, otherwise MailBluster will skip importing existing leads. 4. Finally, Import.
Another approach is to use 3rd party applications like Make or Integrately. You can instruct them to read your Google Sheets file and create/update MailBluster leads from it.
Please note: These are 3rd party apps and may charge you for using it.
The last approach requires programming knowledge. Here you need to read the Google Sheets file programmatically and call using MailBluster Developer API to update the lead.
MailBluster does not allow sending emails to purchased lists and strongly discourages uploading or importing purchased lists from third parties. You can send marketing emails to subscribed lists and legally collected leads, but not to purchased lists. This is because recipients who don’t recognize your emails are likely to mark them as spam or file complaints, which can lead to your domain being blacklisted. Purchased lists typically have a high complaint rate, and Amazon will promptly block your AWS account as a result. MailBluster strictly adheres to the AWS Acceptable Use Policy, which prohibits using Amazon Simple Email Services (SES) for distributing, publishing, sending, or facilitating unsolicited mass emails, promotions, advertising, or spam.
Please note: MailBluster only supports sending marketing emails to genuine subscribers and subscribed lists. MailBluster does not provide any email addresses or subscriber lists.
If you choose to import and update leads with new tags in MailBluster, the existing leads will be updated with the new information. The new tag will be added to the leads, and the existing tags will remain intact. In other words, the new tag will be combined with the existing ones rather than replacing them.
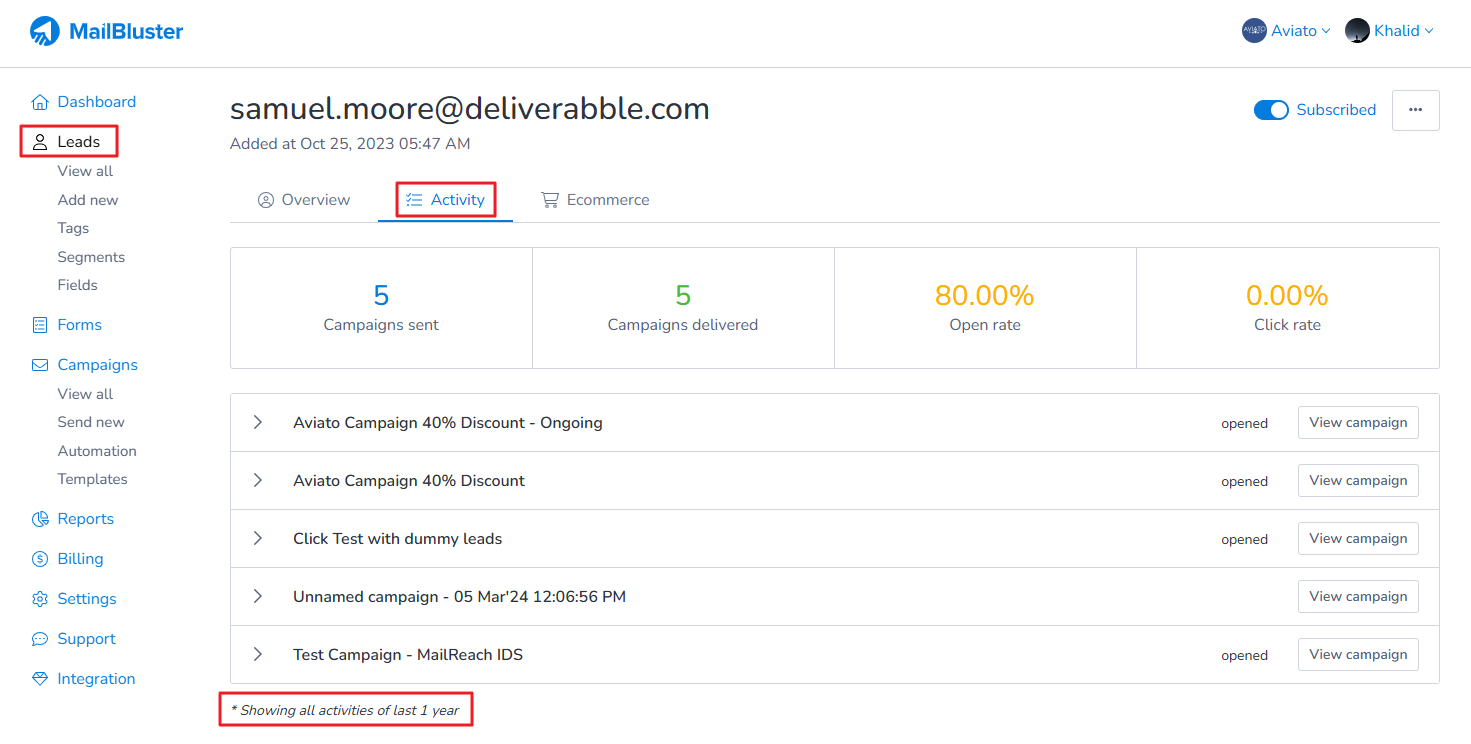
You can easily view lead activity in MailBluster to track subscriber interactions. First, go to Leads and search for or select the specific lead. Then, click on the Lead > Activity tab. This will open a tab displaying all the campaign activities for that lead over the last year, as shown below.
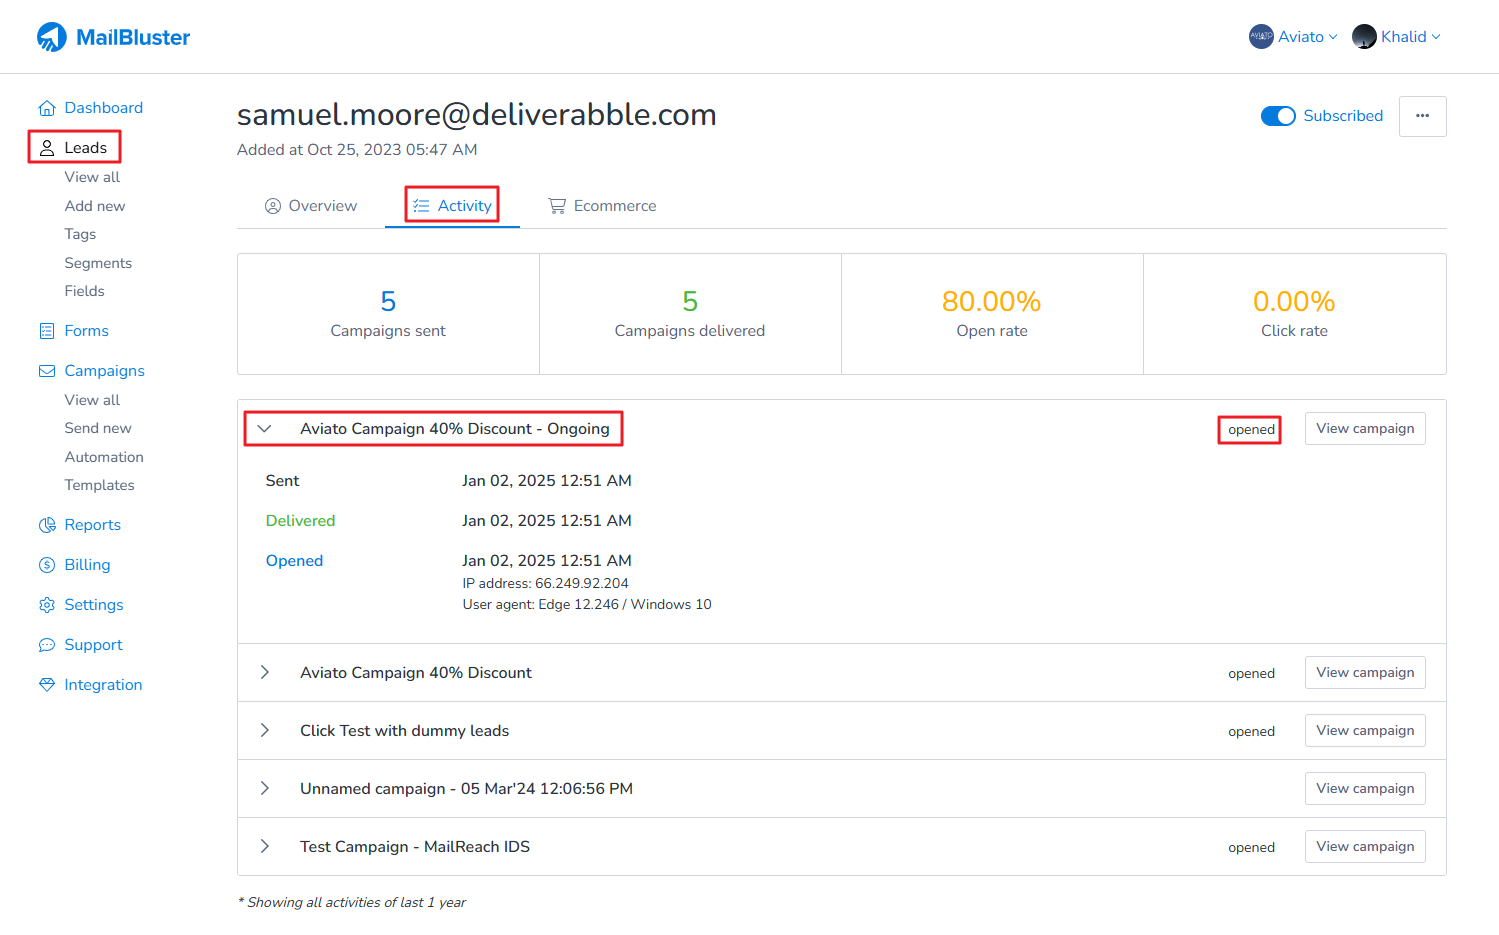
To see the lead’s activity within a specific campaign, click on the Campaign name.
The available activity data for individual leads covers the past 12 months.
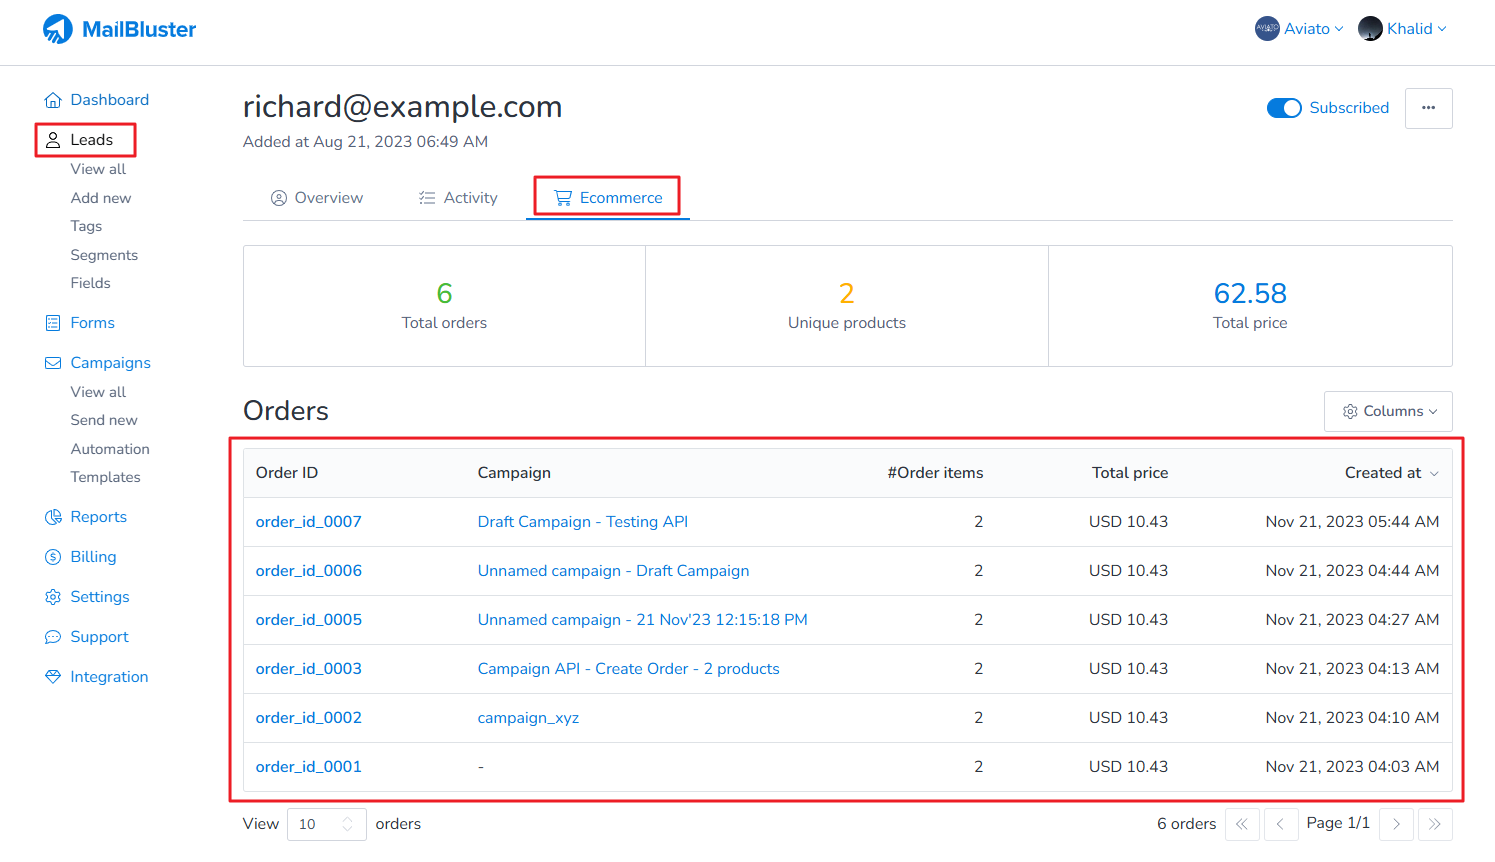
To check ecommerce activity of a lead, go to Leads section, then click on any lead. There is an ecommerce tab where it shows detailed information on how many orders have come from this lead or how many products have been purchased by this lead. All these information is displayed in detail in this ecommerce tab as shown below.
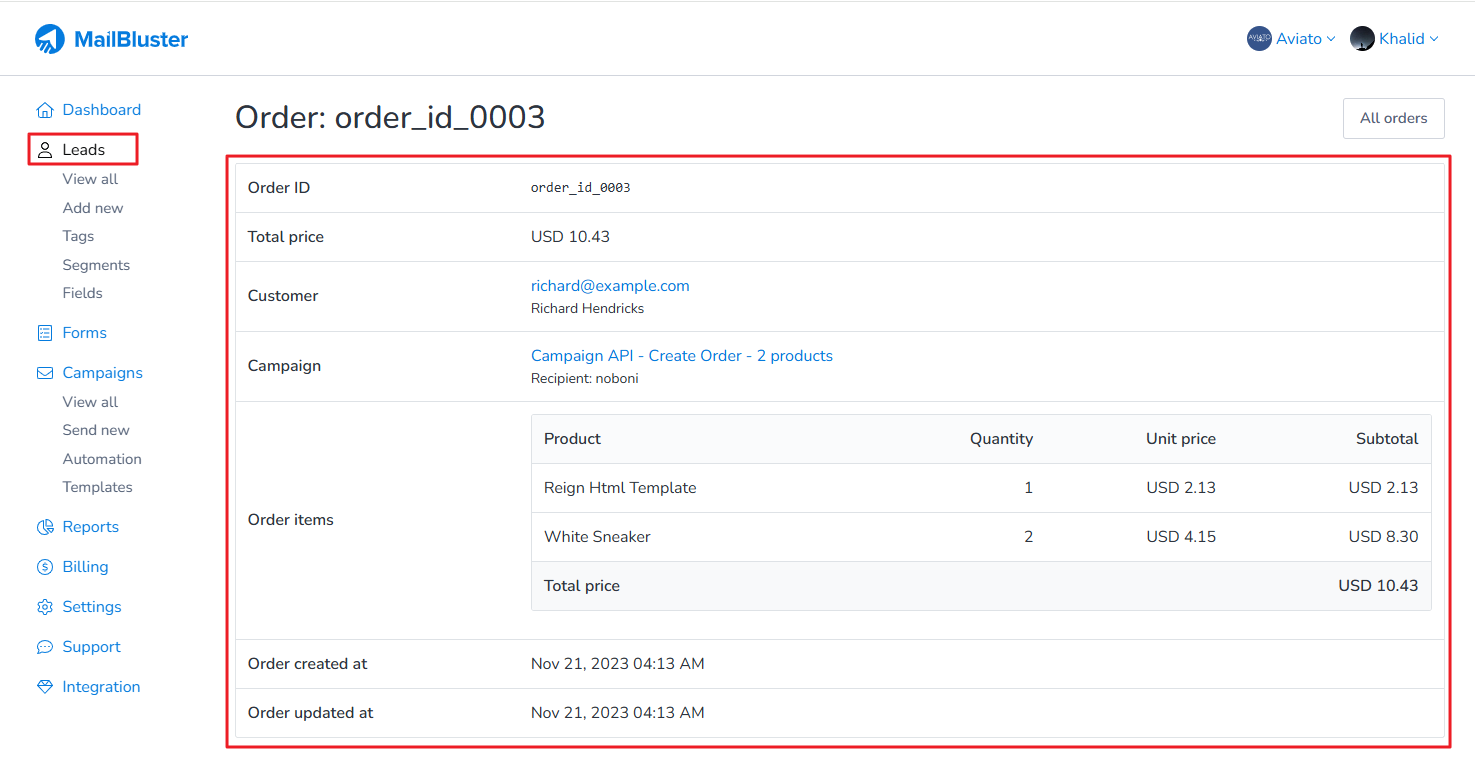
Clicking on any of the ‘order_id_xxxx‘ will let you see all the ecommerce activity details of that specific lead.
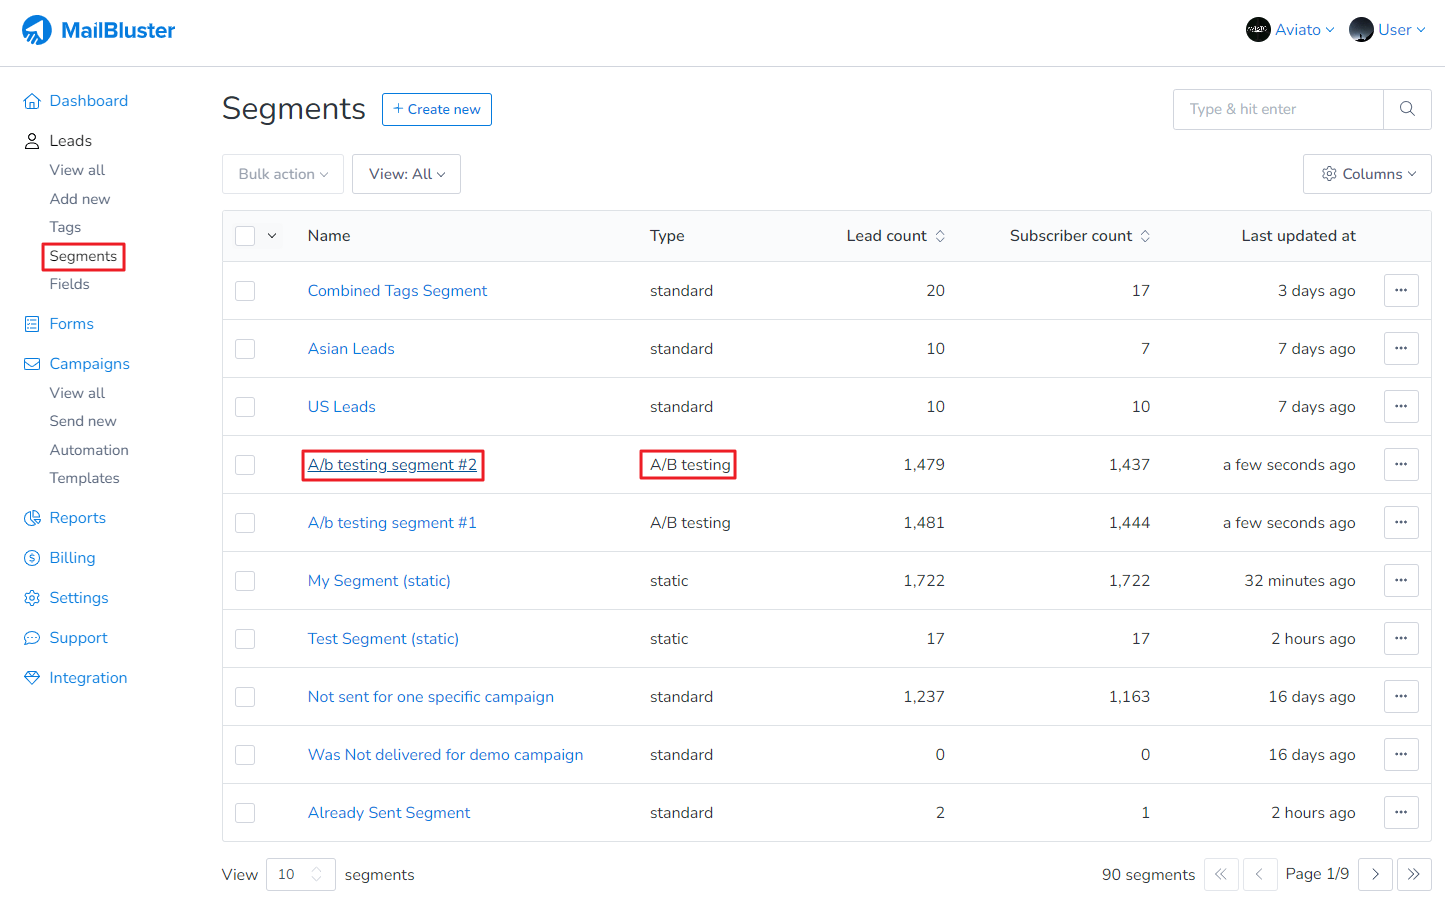
You can import leads to segments in MailBluster, but only into specific types. Standard segments do not allow imports. Instead, you can add leads to A/B testing segments and Static segments.
For A/B Testing Segment
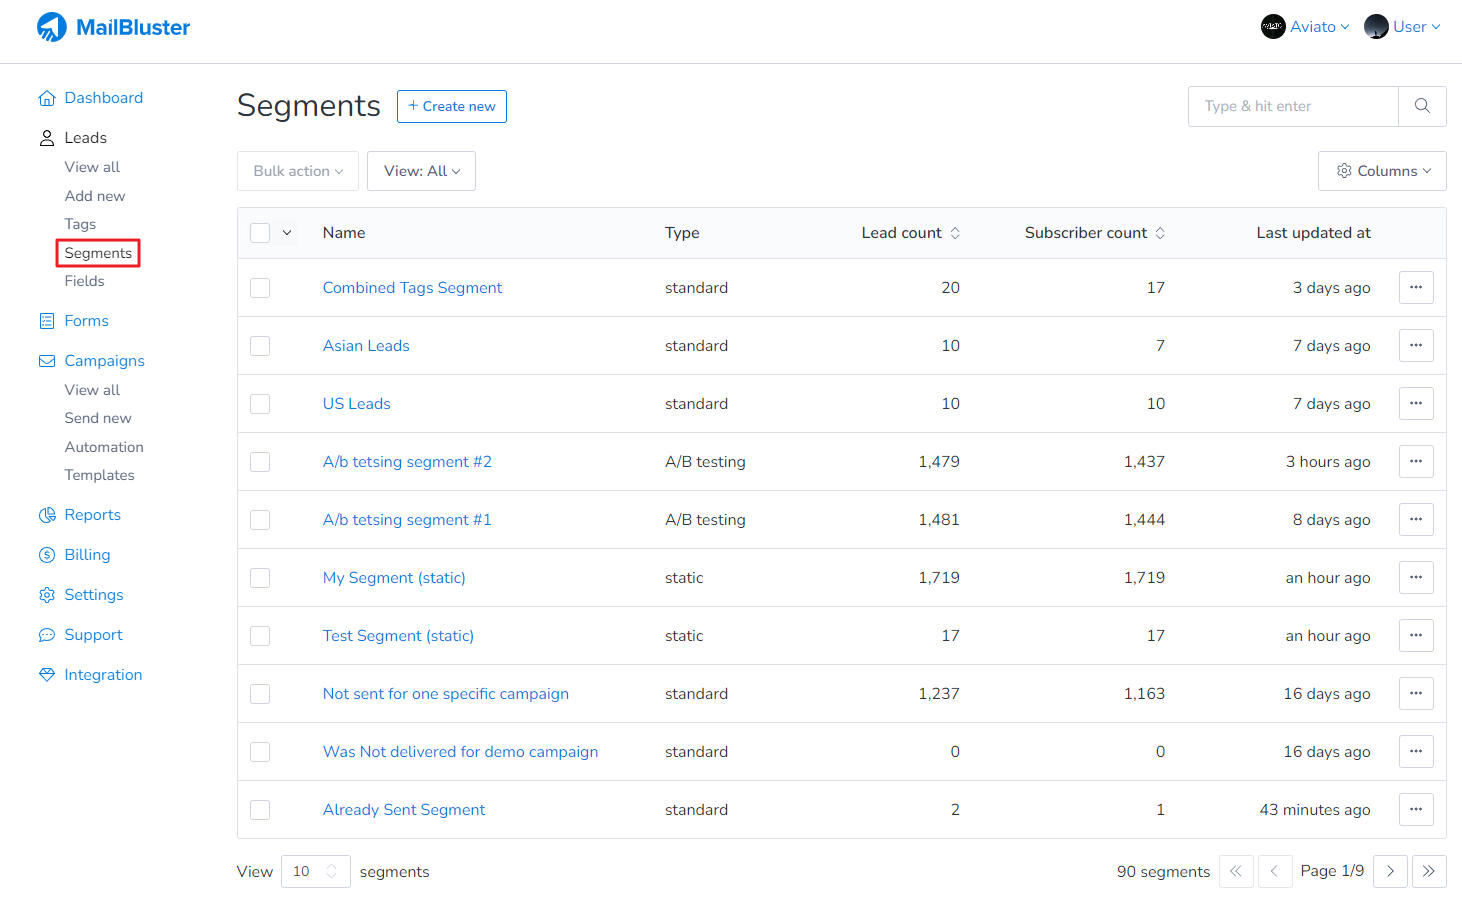
Go to you Brand > Segments and select any A/B testing segment. Notice the type of segment “A/B testing” and click on the segment which you want to import leads to.
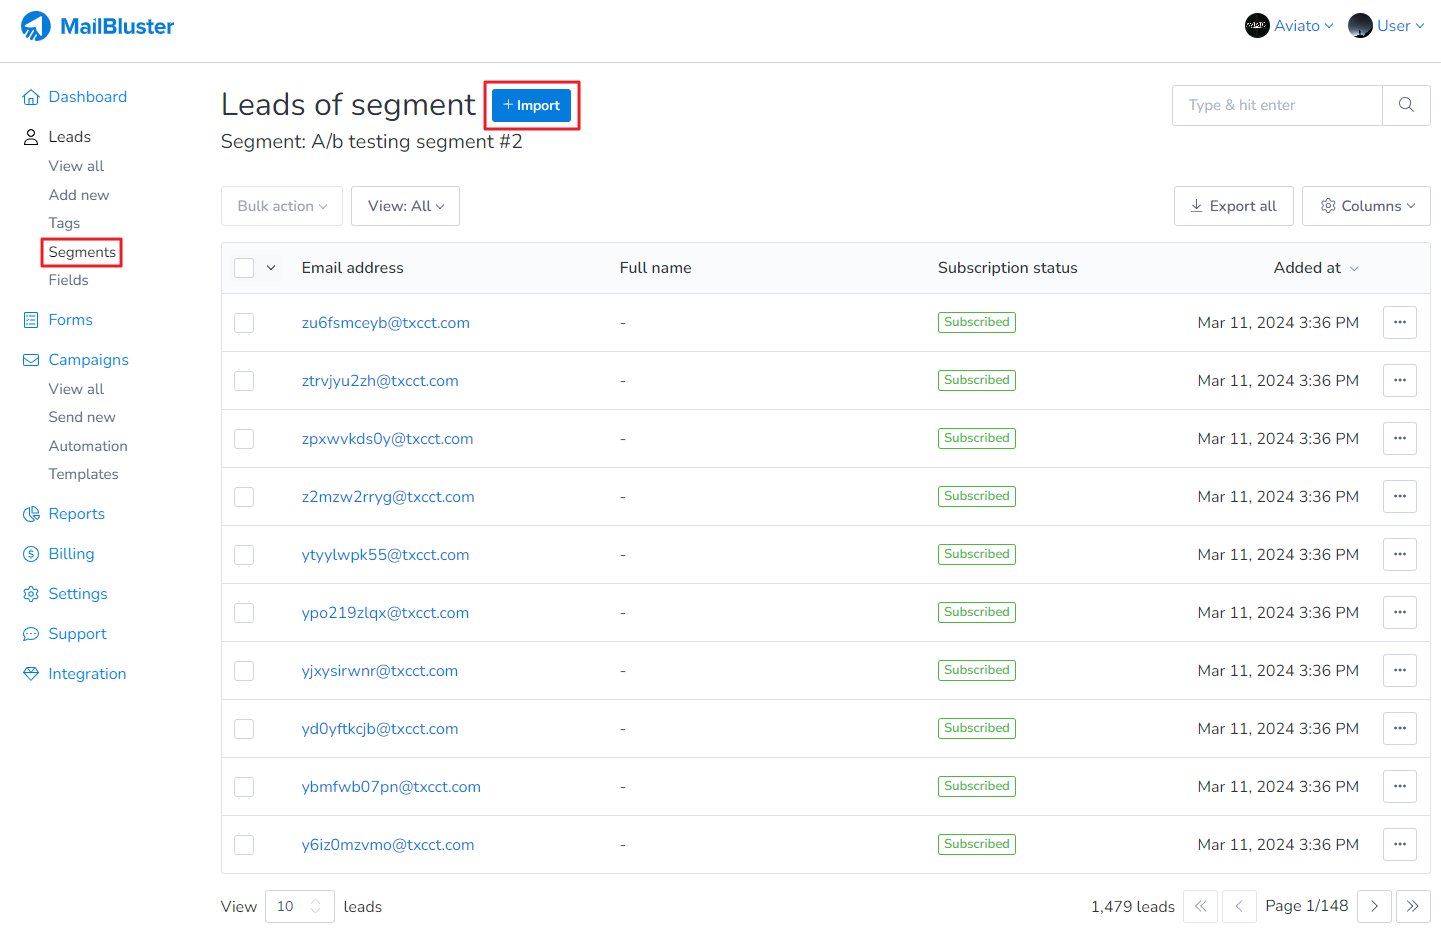
After entering the segment, click on Import.
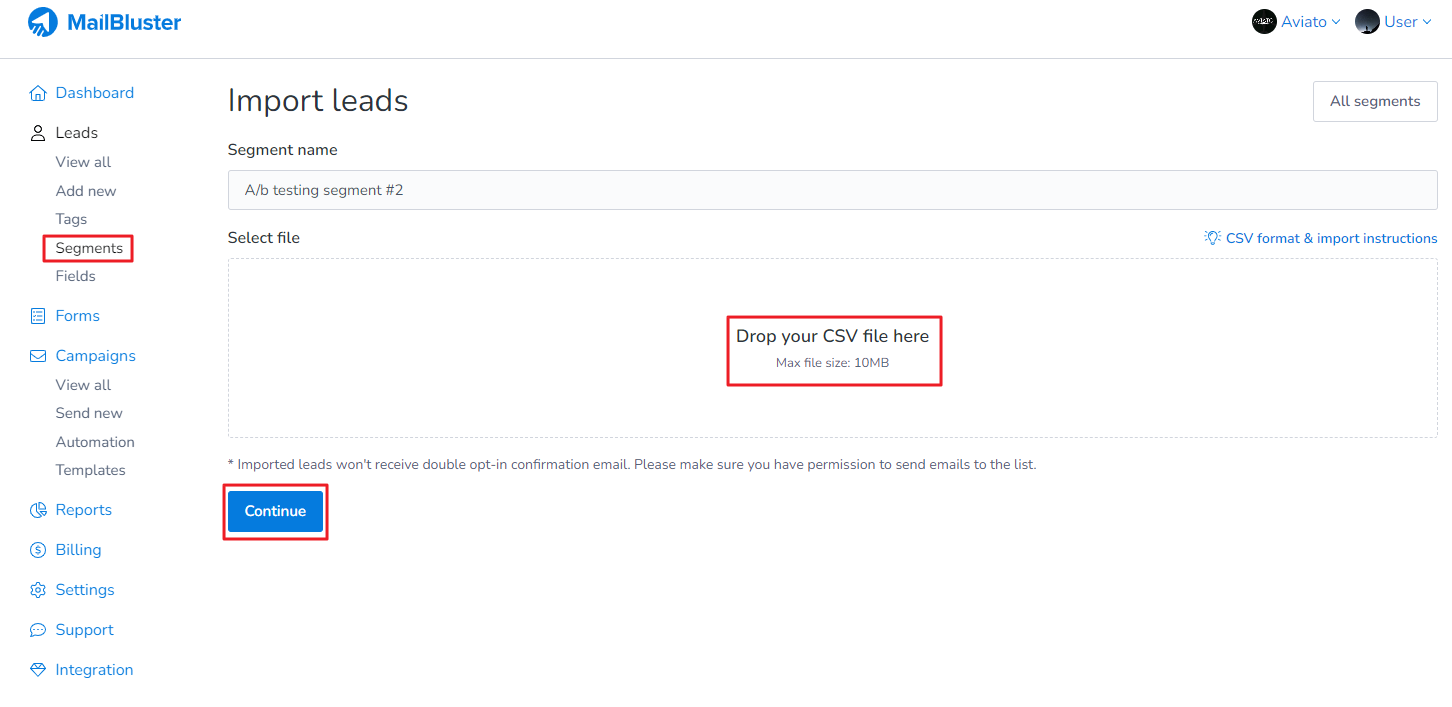
Select a CSV File with First Name, Last Name, Email address and Subscribed status. Click Continue.
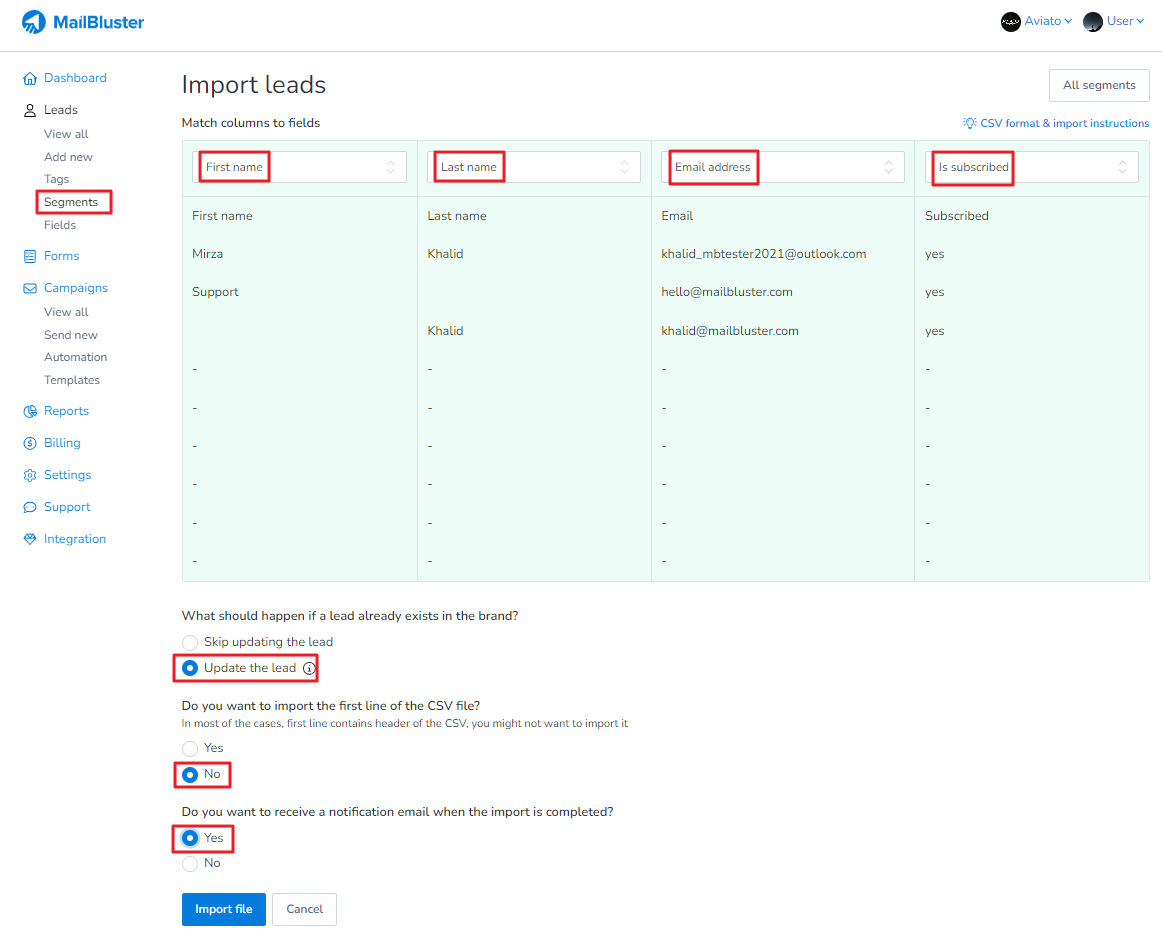
Match the First name, Last name, Email Address and Is subscribed with CSV File information as shown below. Then select the following configurations. Finally click Import file button.
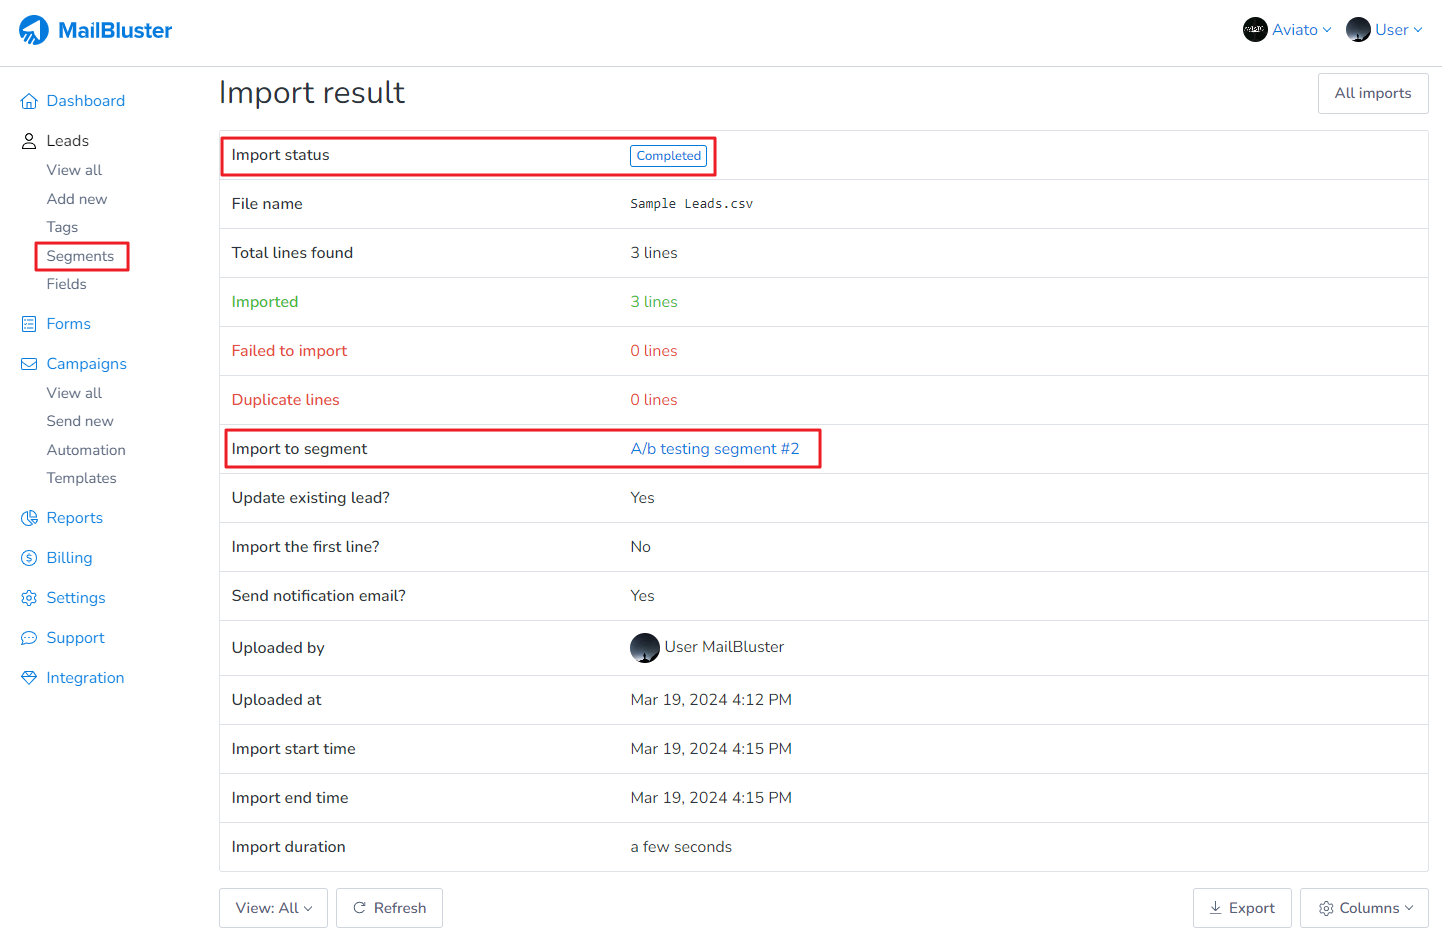
The CSV file containing the leads will be imported successfully as shown below.
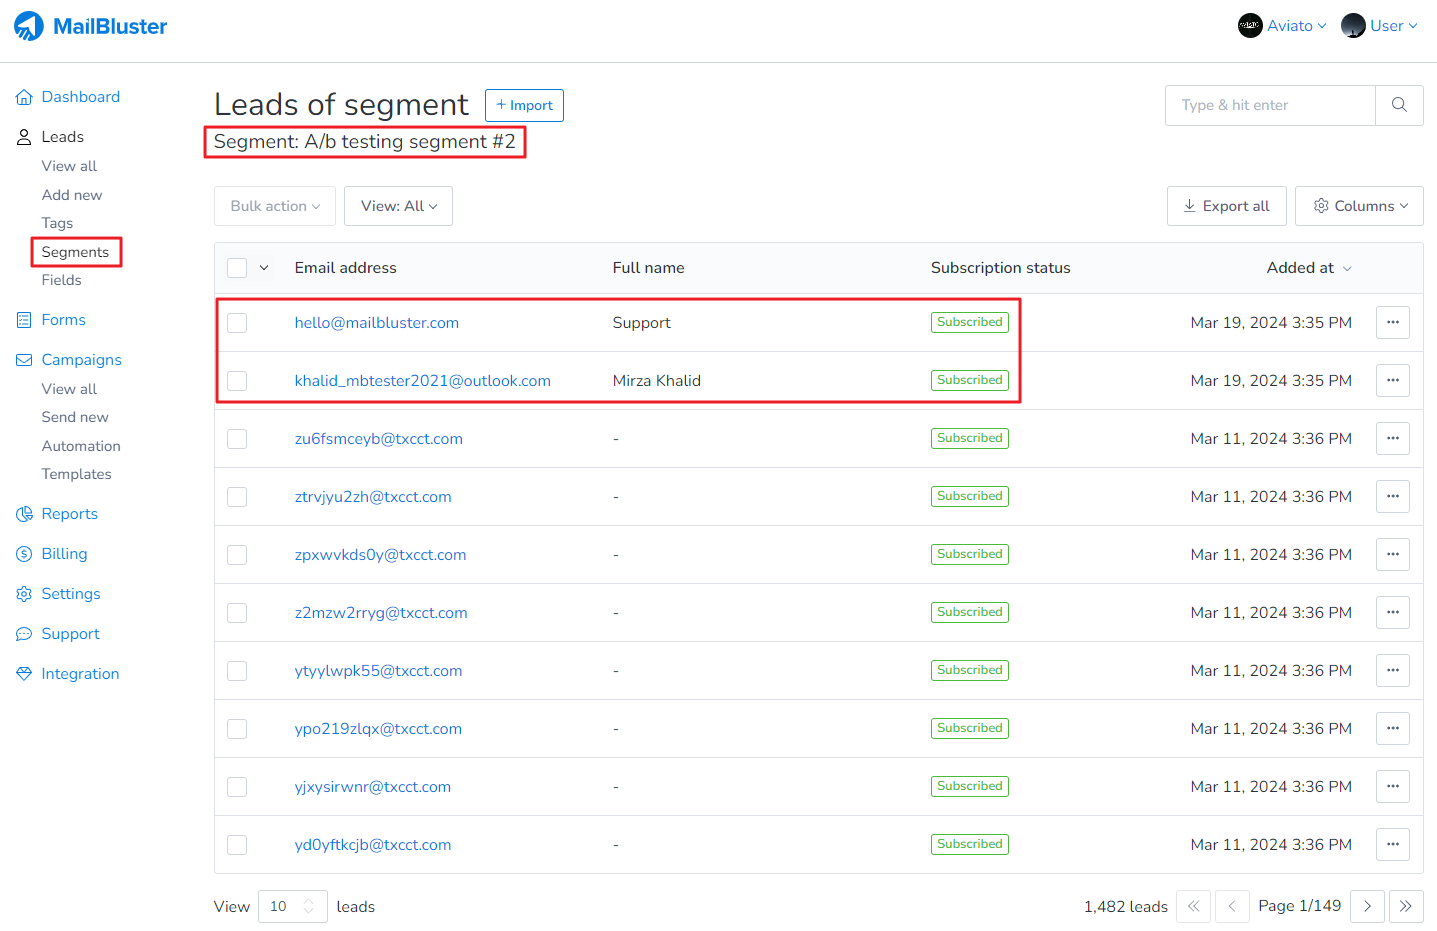
Now go to the A/B testing segment and you will see that your leads are added to that segment.
For Static Segment
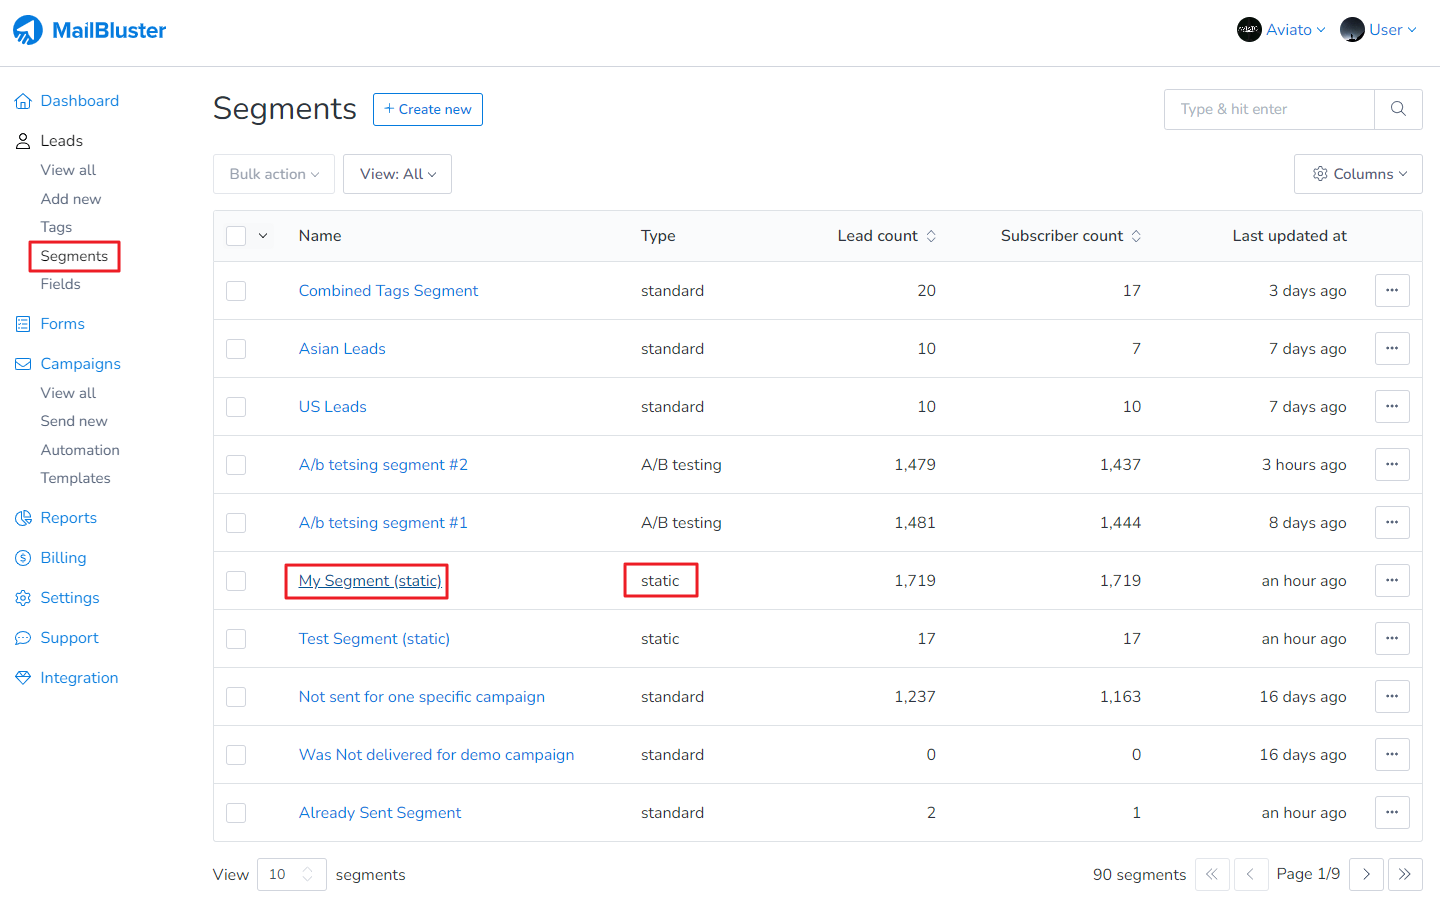
Go to you Brand > Segments and select any static segment.
Notice the type of segment “static” and click on the segment which you want to import leads to.
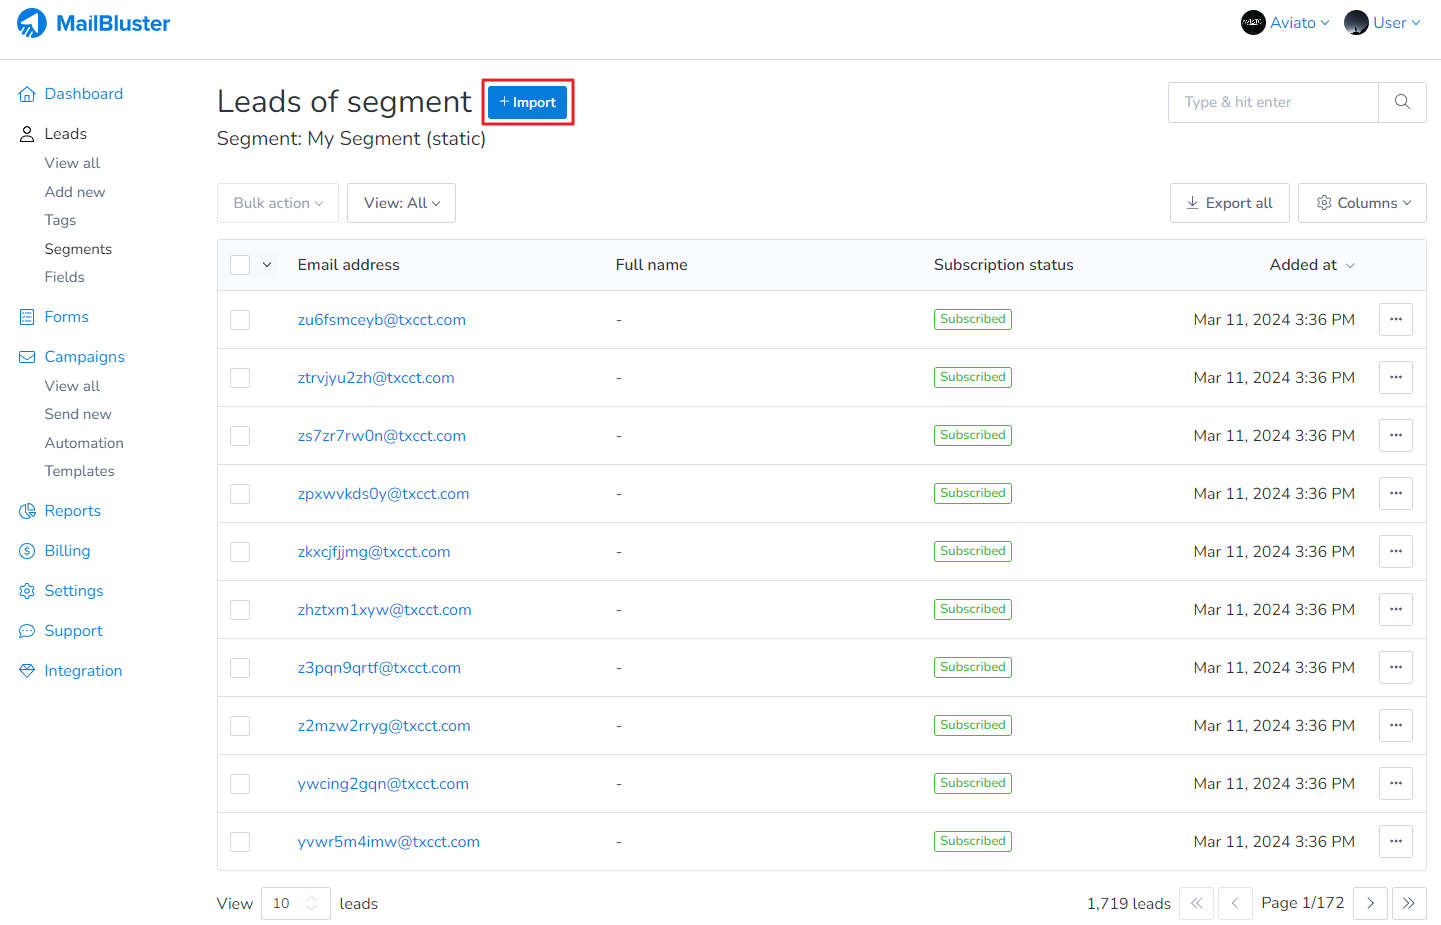
After entering the segment, click on Import button.
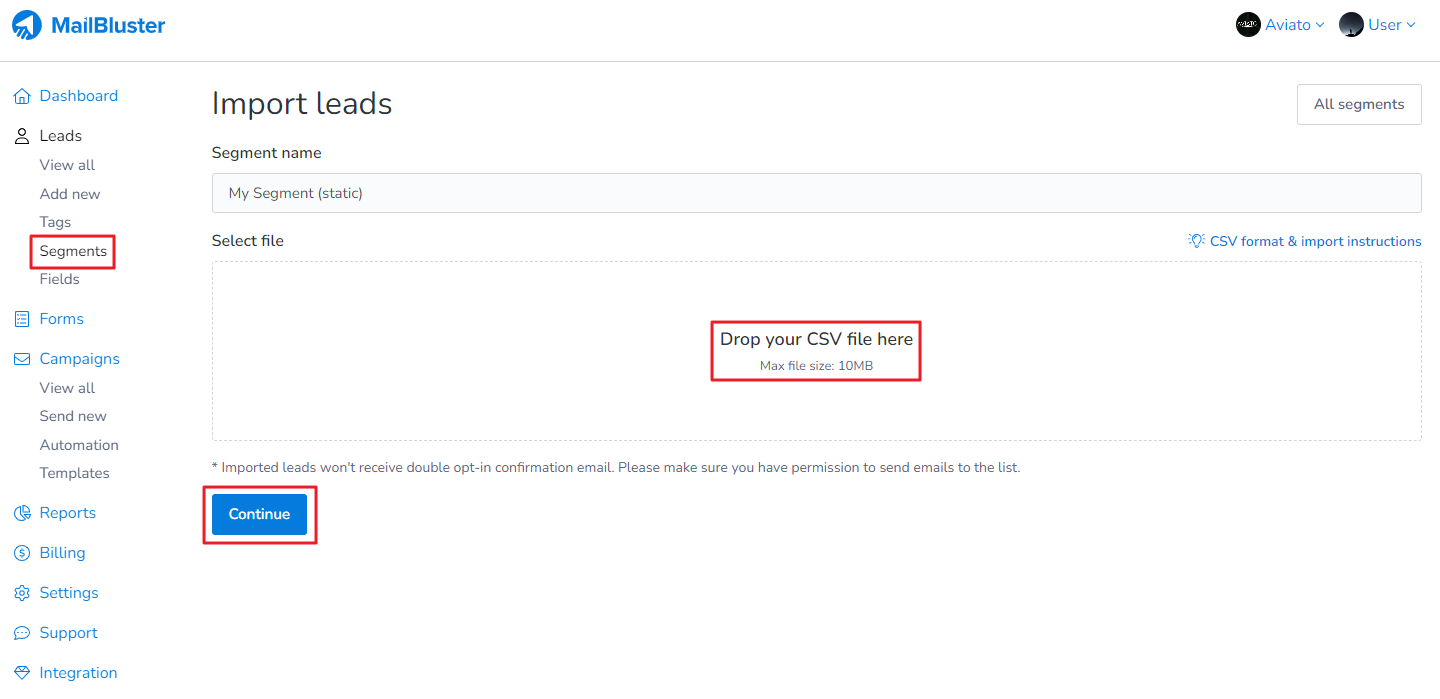
Select a CSV File with First Name, Last Name, Email address and Subscribed status. Click Continue.
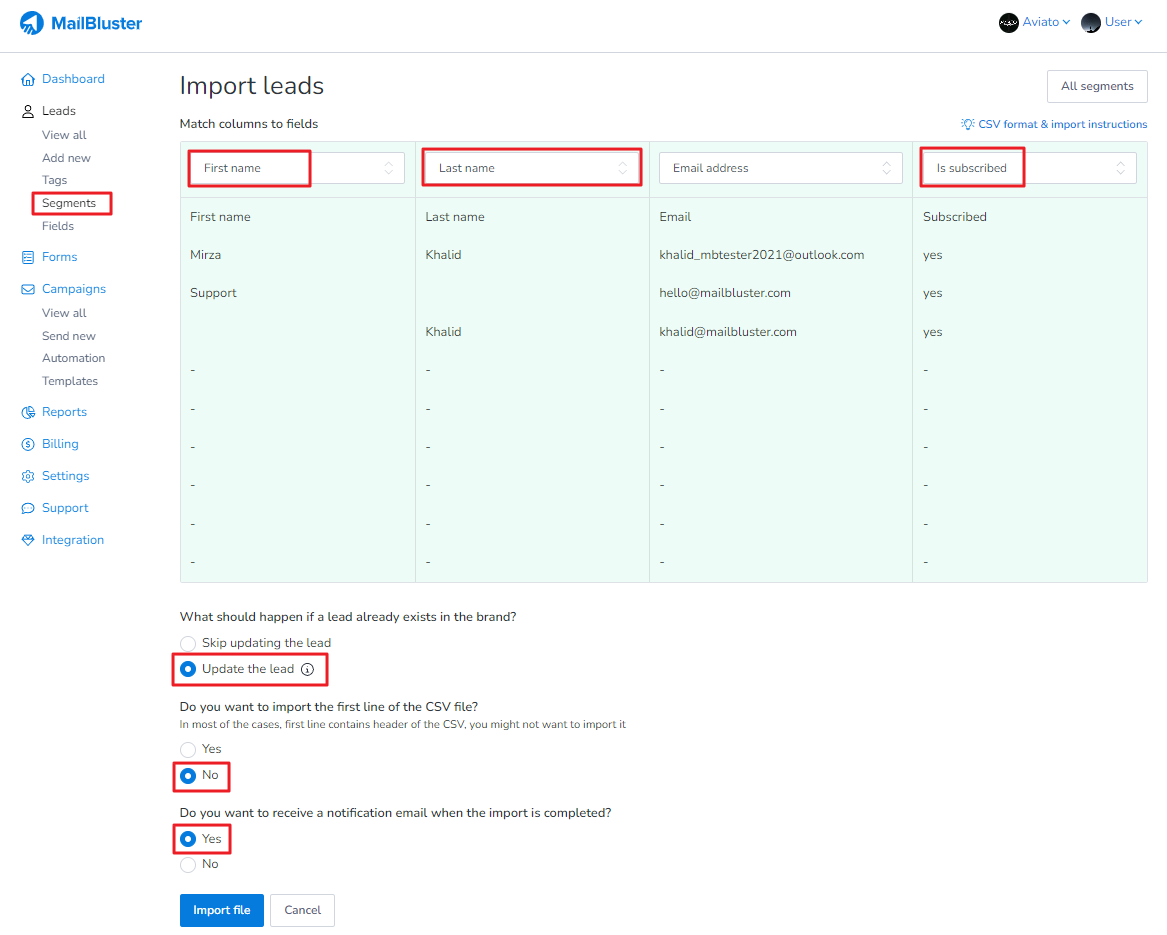
Match the First name, Last name, Email Address and Is subscribed with CSV File information as shown below. Then select the following configurations. Finally click Import file button.
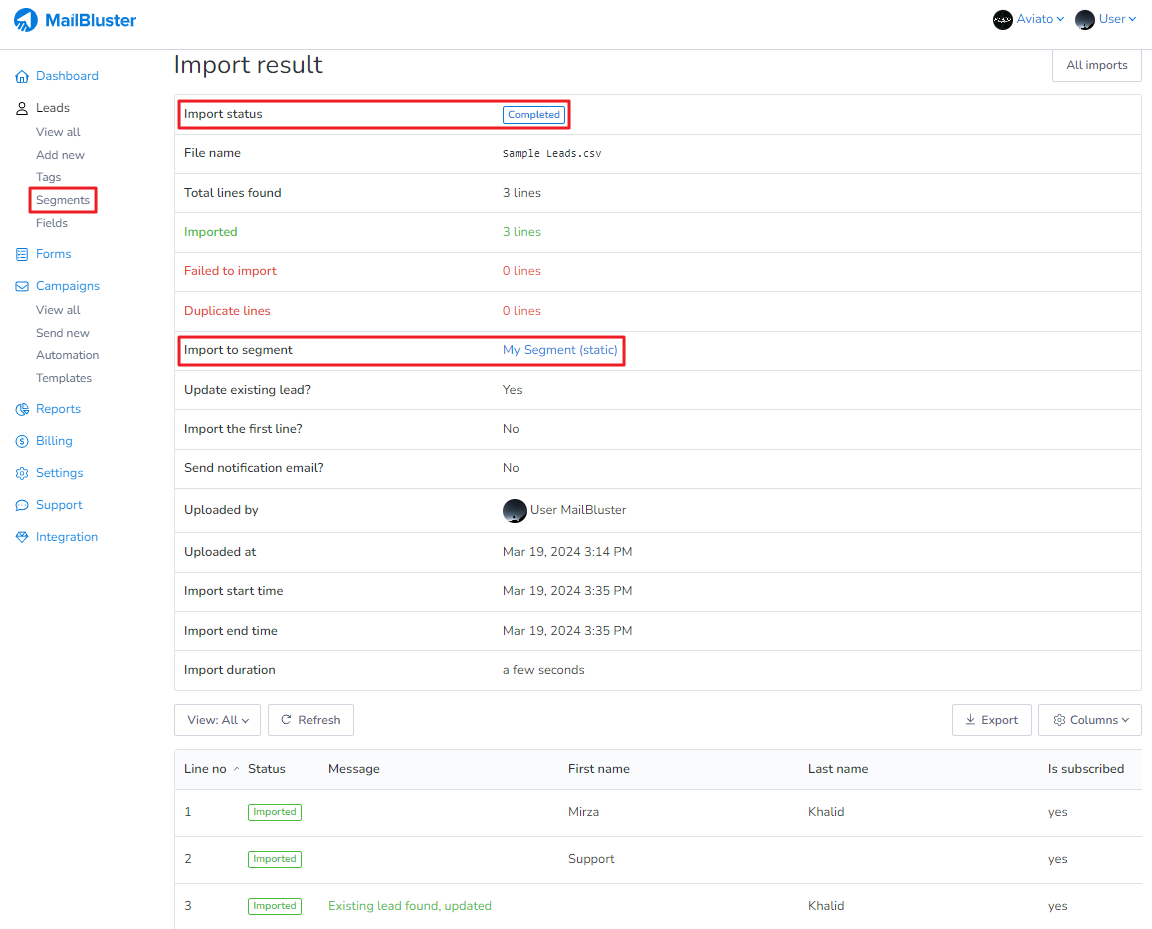
The CSV file containing the leads will be imported successfully as shown below.
Now go to the static segment and you will see that your leads are added to that segment.
Standard segments are dynamic and update automatically based on conditions you set, so you cannot import leads into them.
By using A/B testing and static segments, you can organize your leads better, target your audience more precisely, and achieve reliable campaign results.
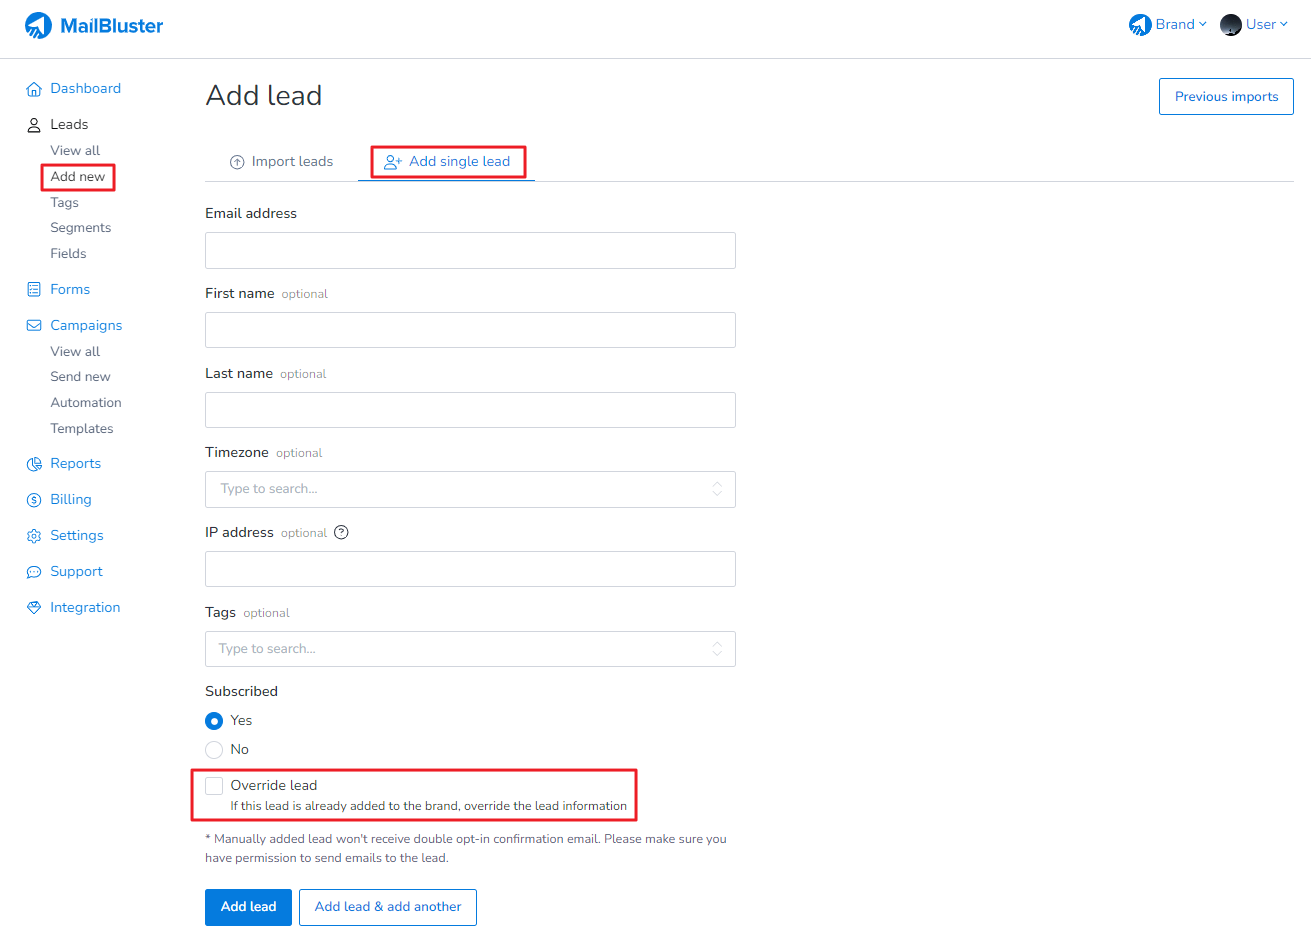
The “override lead” feature in MailBluster updates an existing lead with new details when you add it to your brand. This keeps your leads database accurate and up to date.
This information can be found from Your Brand > Add new > Add single lead
In MailBluster, Deprecated text means that in future versions, we may remove this information. This information cannot be used in MailBluster; we only store it. Since we have released the complete lead custom field feature, storing this information is no longer necessary.
In MailBluster, you can personalize email campaigns with Fields and Custom Fields. Fields add default values like a lead’s name or email address. Custom Fields let you define your own tags for storing extra data. You can use both in subject lines, email content, and lead details.
Field
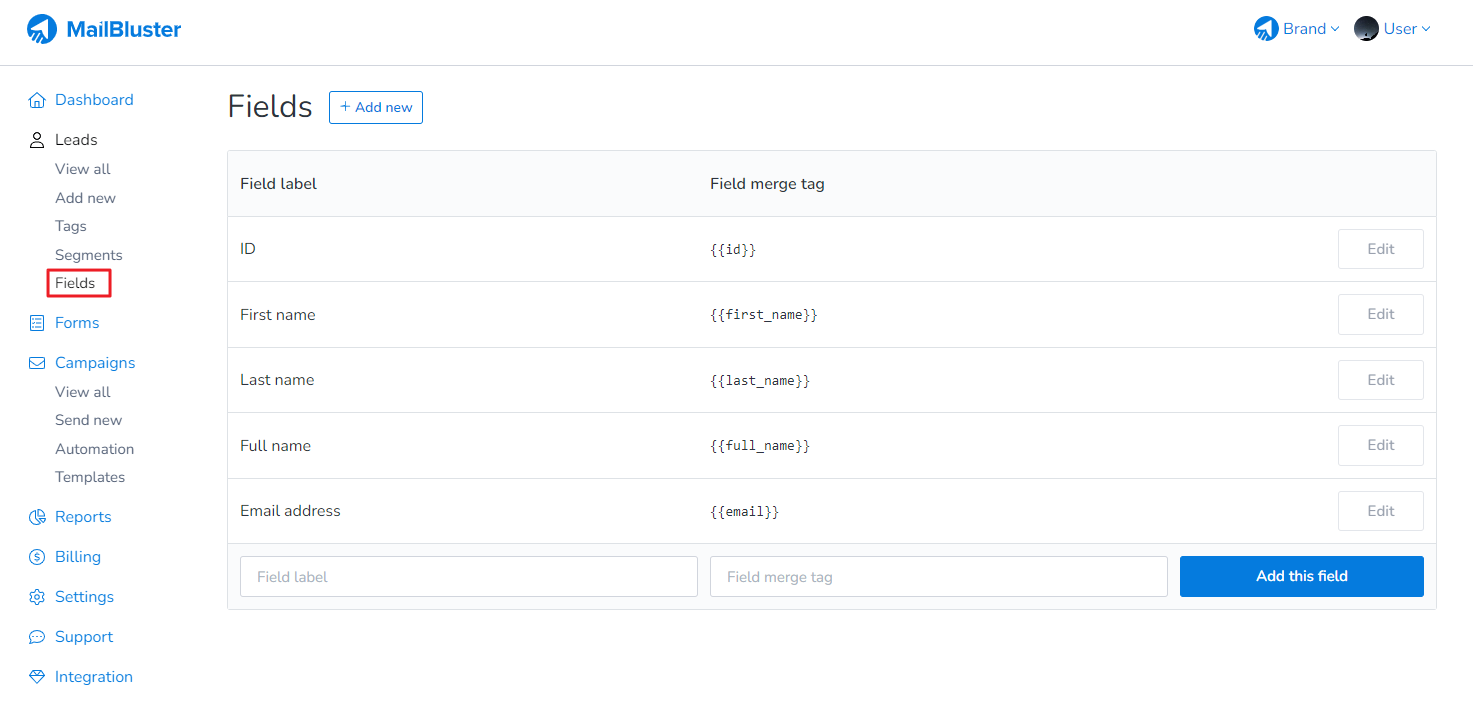
A field is a feature in MailBluster (under MailBluster > Fields) that lets you insert merge tags such as ID, First name, Last name, Full name, and Email address. You can place them in the subject line, body content, and lead information.
The following shows the Fields containing only the default merge tags.
Custom Field
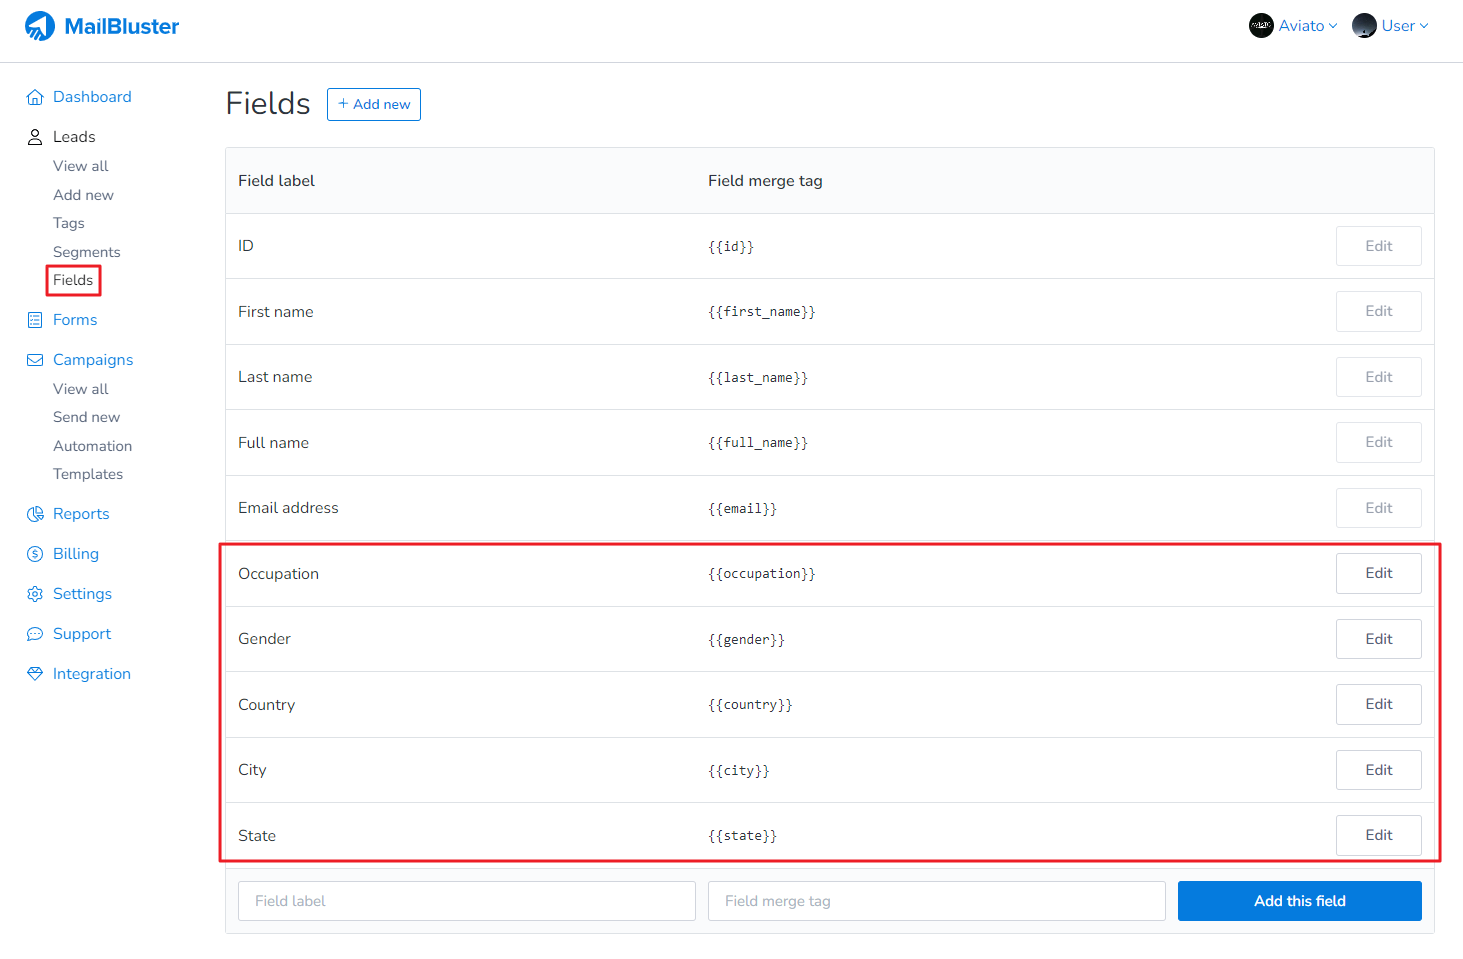
A custom field is a feature in MailBluster (under MailBluster > Fields) that allows users to define specific data fields to their unique needs or requirements. These fields are not predefined by the system but are created by users based on their specific use case or context. Custom fields enable users to capture and store additional information beyond the standard or default set of fields provided by MailBluster. It can be used inside subject, email content (email body) and inside every lead information.
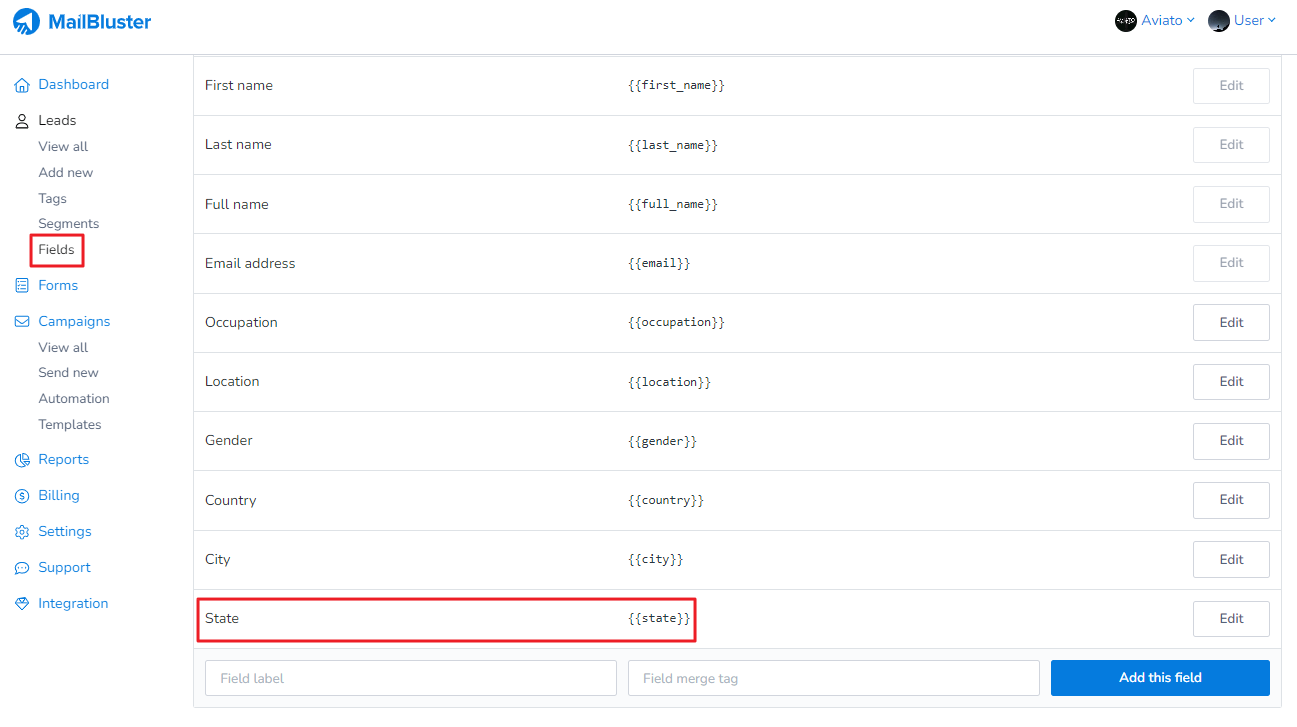
The following shows the Custom Fields containing the user defined field tags or custom merge tags.
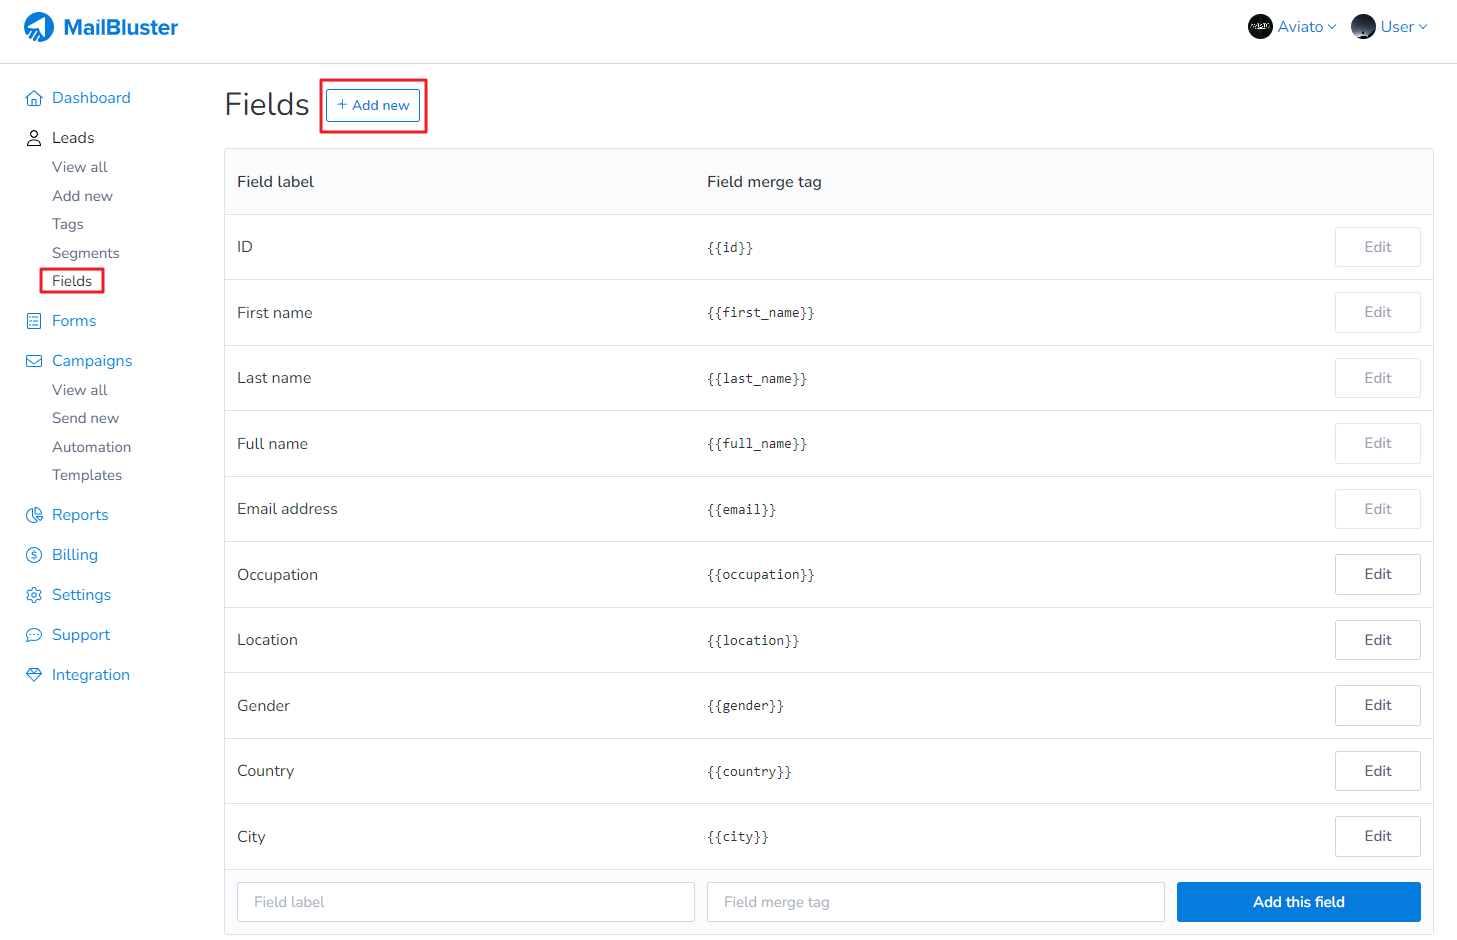
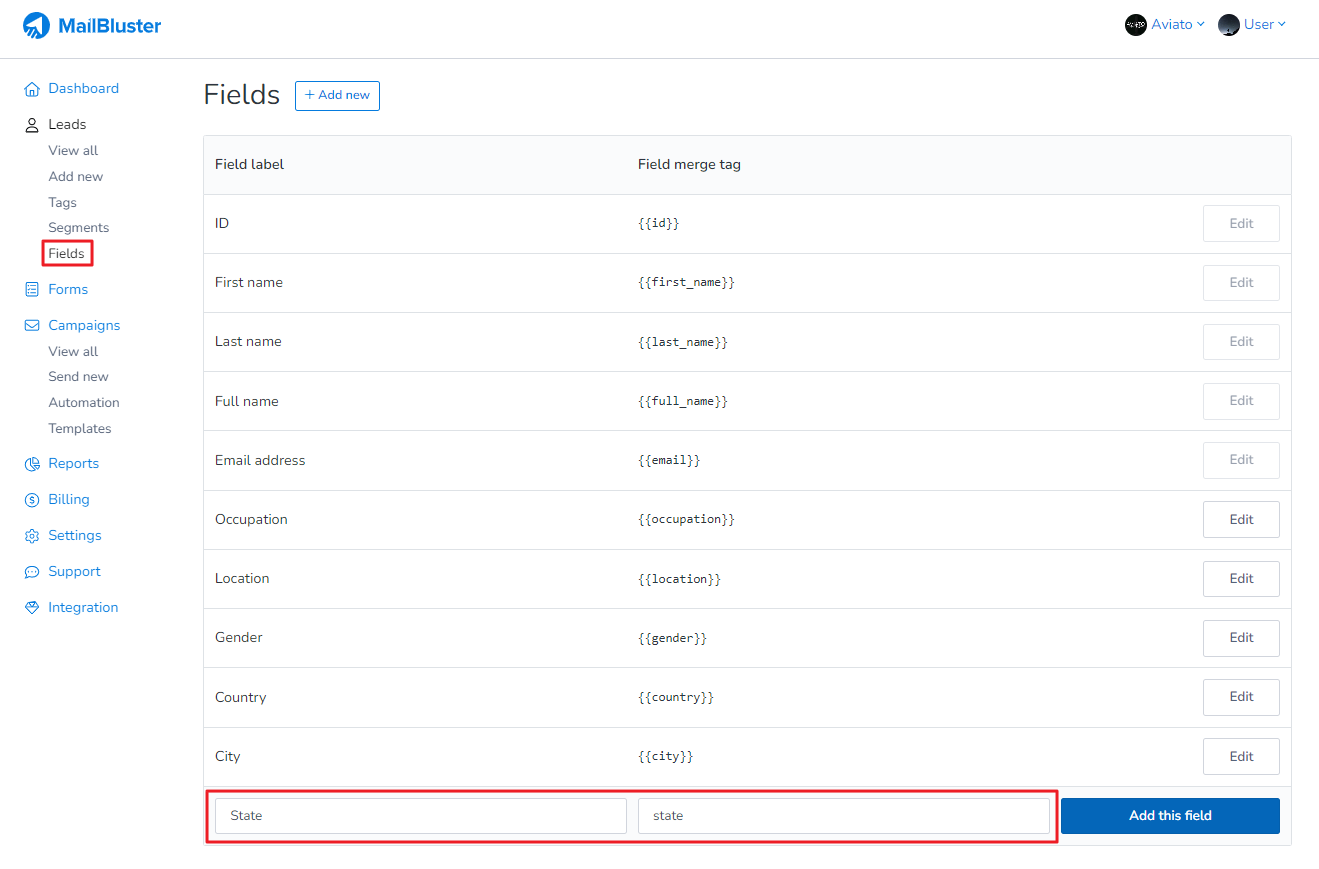
To create a Custom Field in MailBluster, go to Fields section and then click on Add new.
Enter Field label and then Field merge tag will be auto generated.
Here we used the Field label “State” and Field merge tag “state” is auto generated instantly.
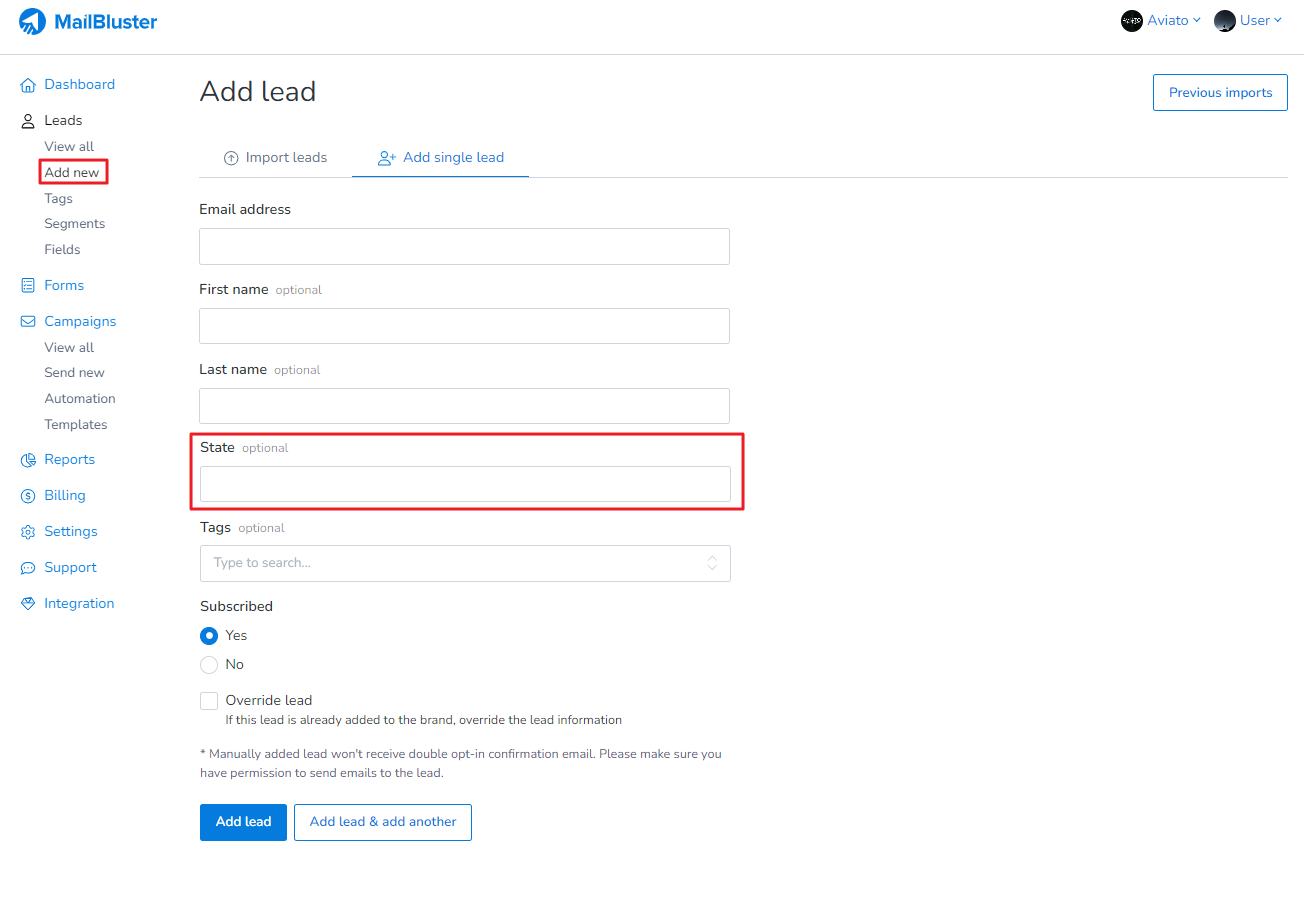
Now we can use this custom field “State” in Leads, StandardSegment, Forms and Campaigns quite easily. Here are some examples:
In Add Lead:
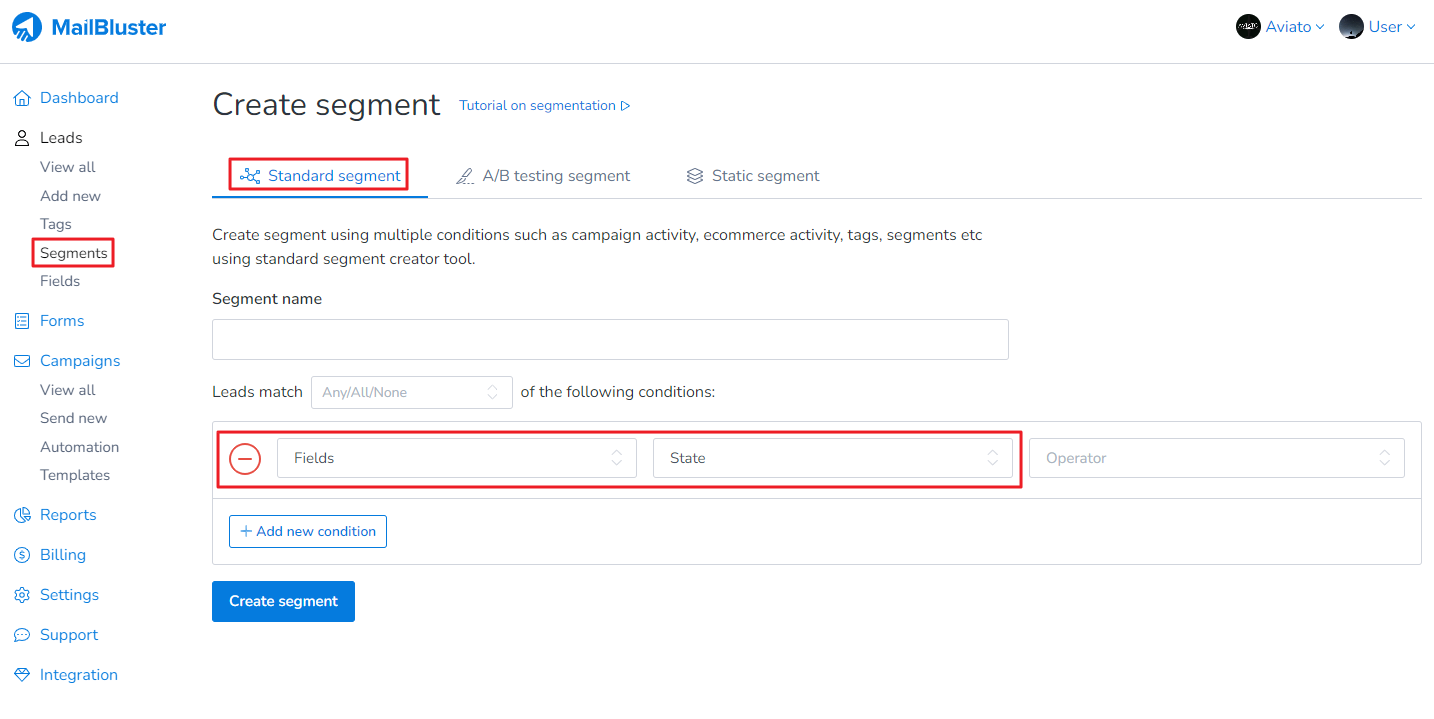
In Standard Segment:
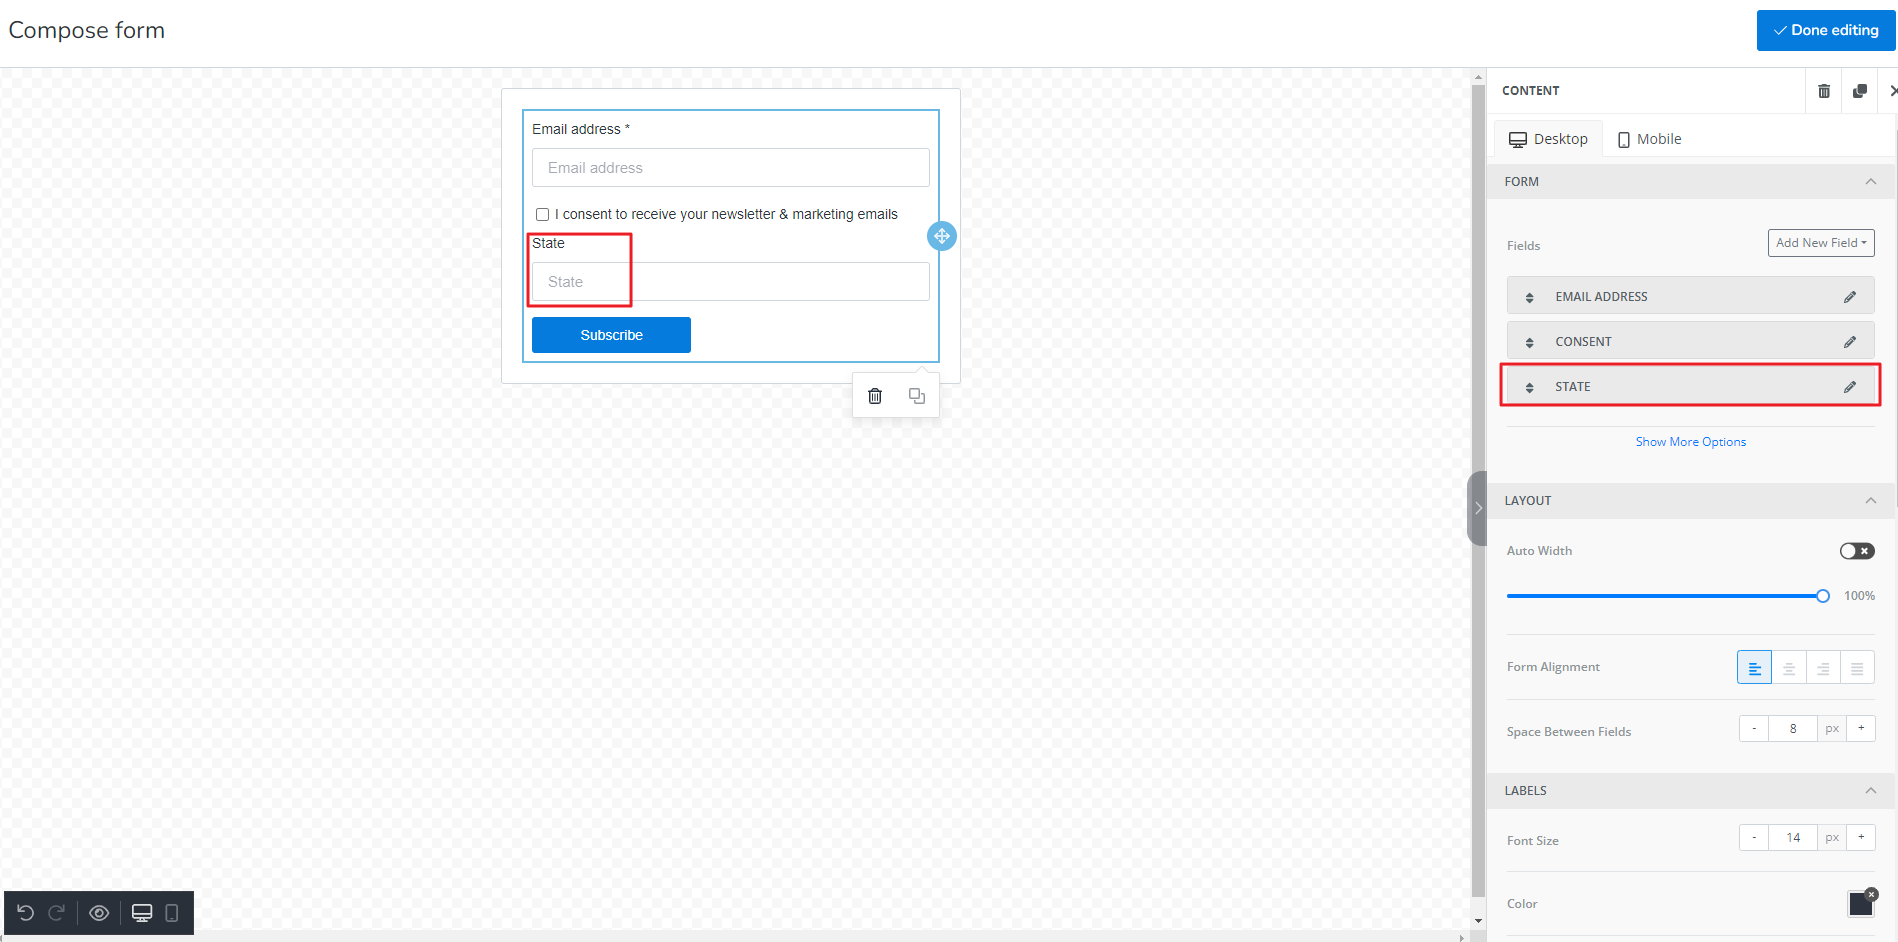
In Forms:
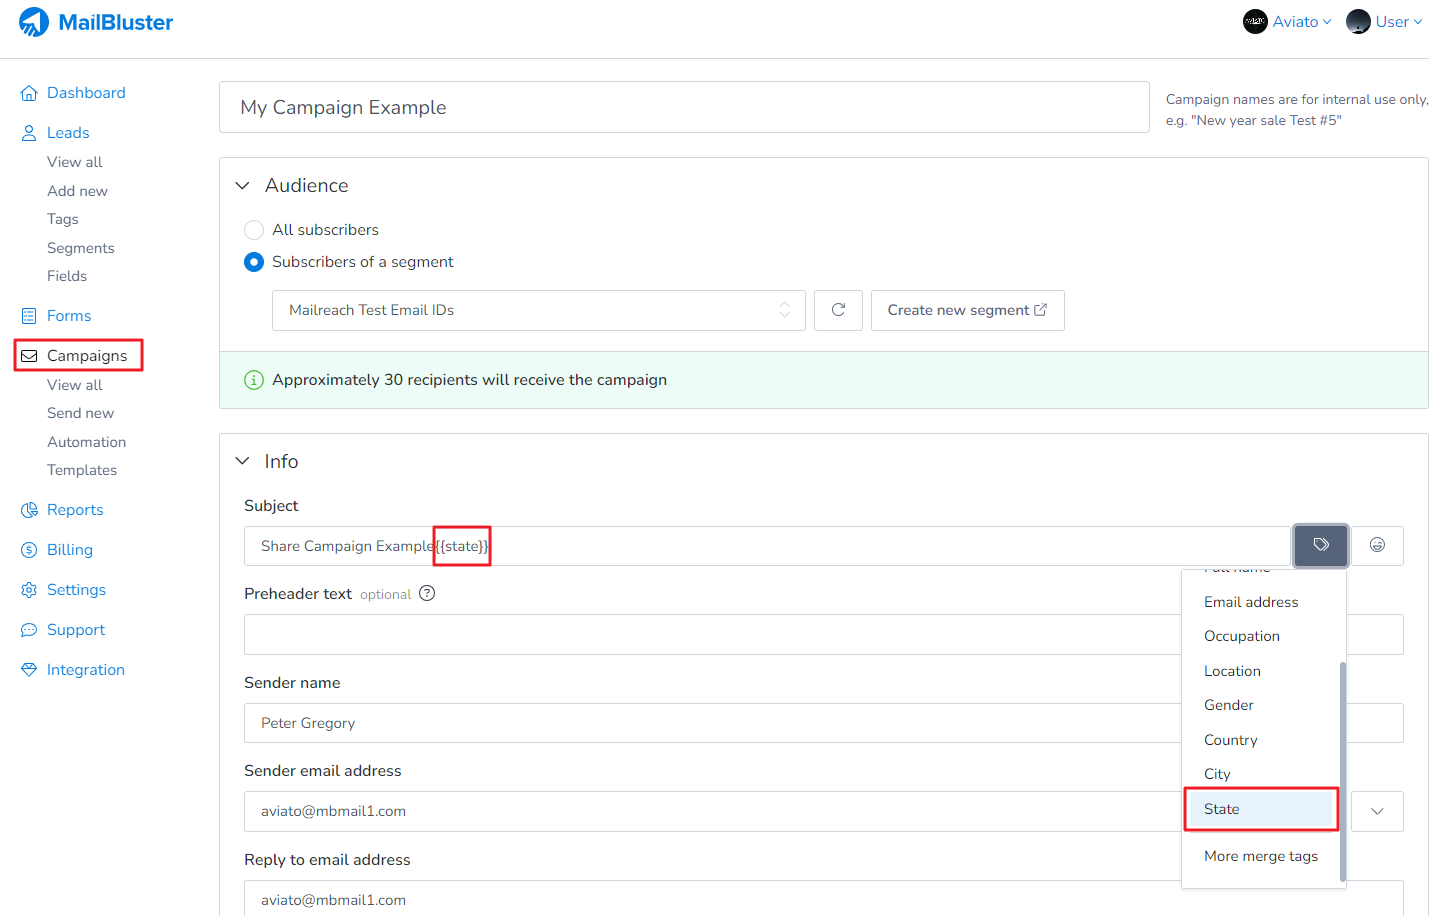
In Subject of Campaigns:
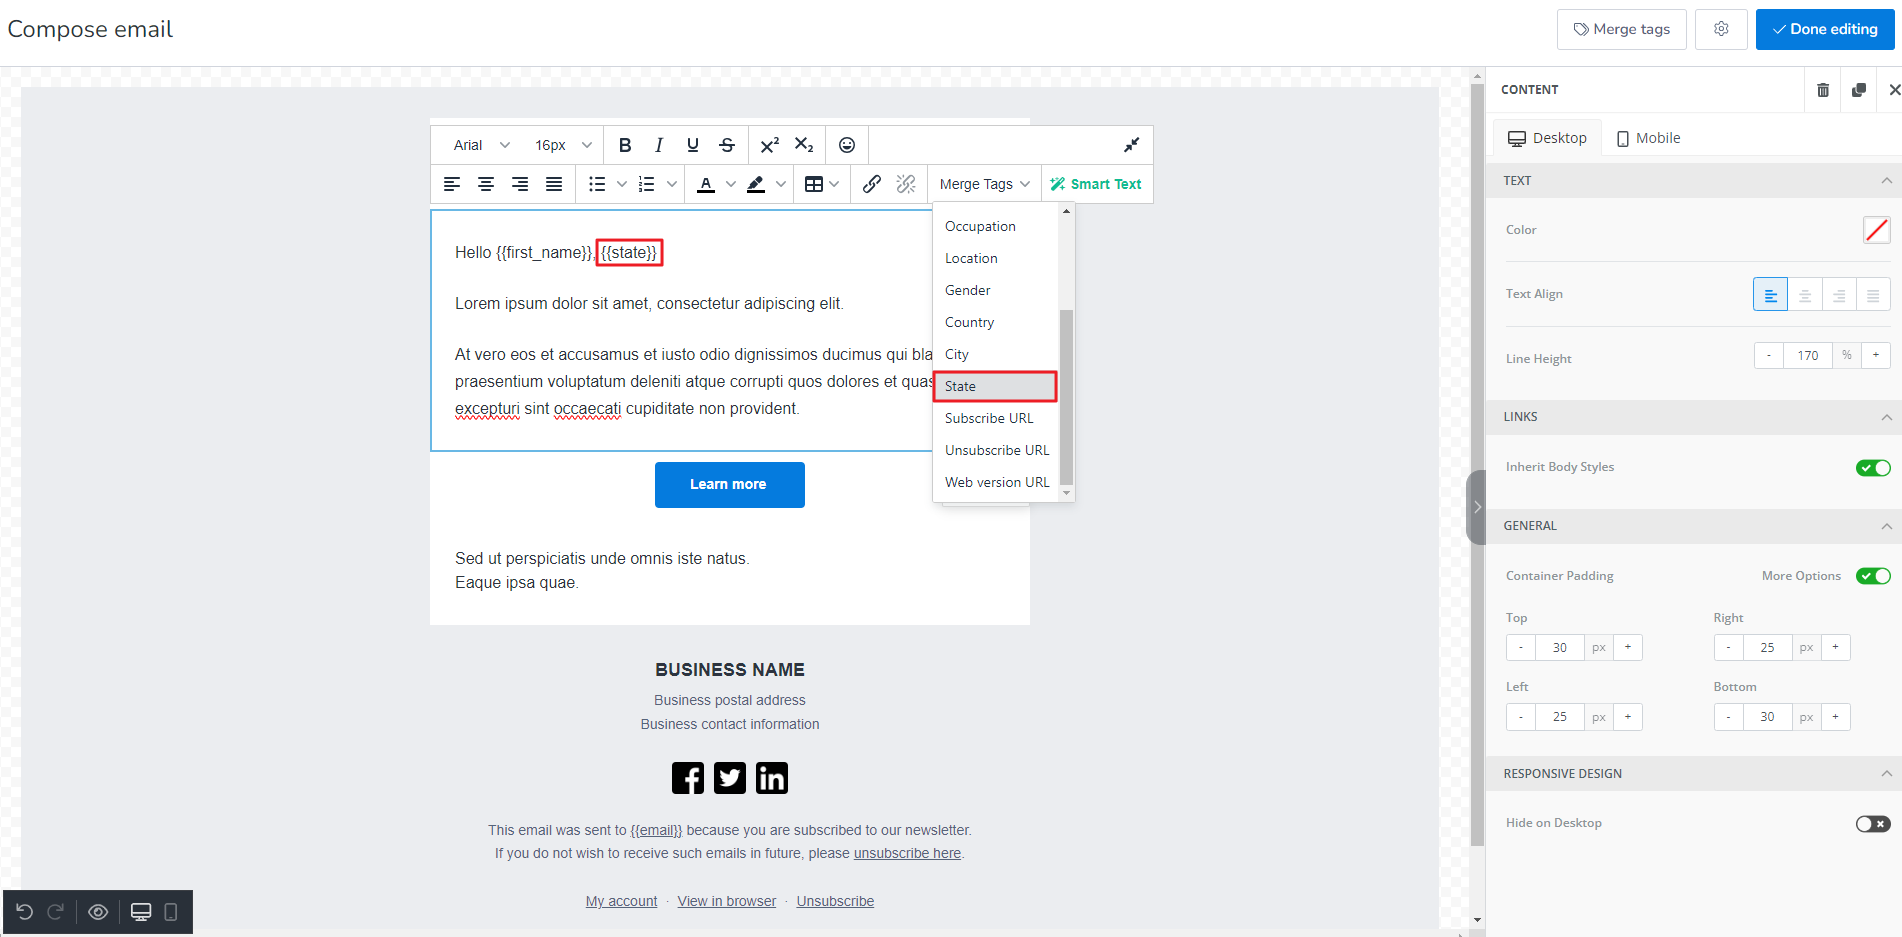
In Edit Content>Compose email under Campaigns:
Using custom fields helps you organize subscriber data beyond basic information like name and email. It also allows you to tailor content based on preferences, locations, or other unique attributes.
The maximum character limit for the lead field is 50 characters.
Custom fields can also be a maximum of 50 characters long. If you change the value to within 50 characters, it will be saved. However, it will not accept values exceeding 50 characters.
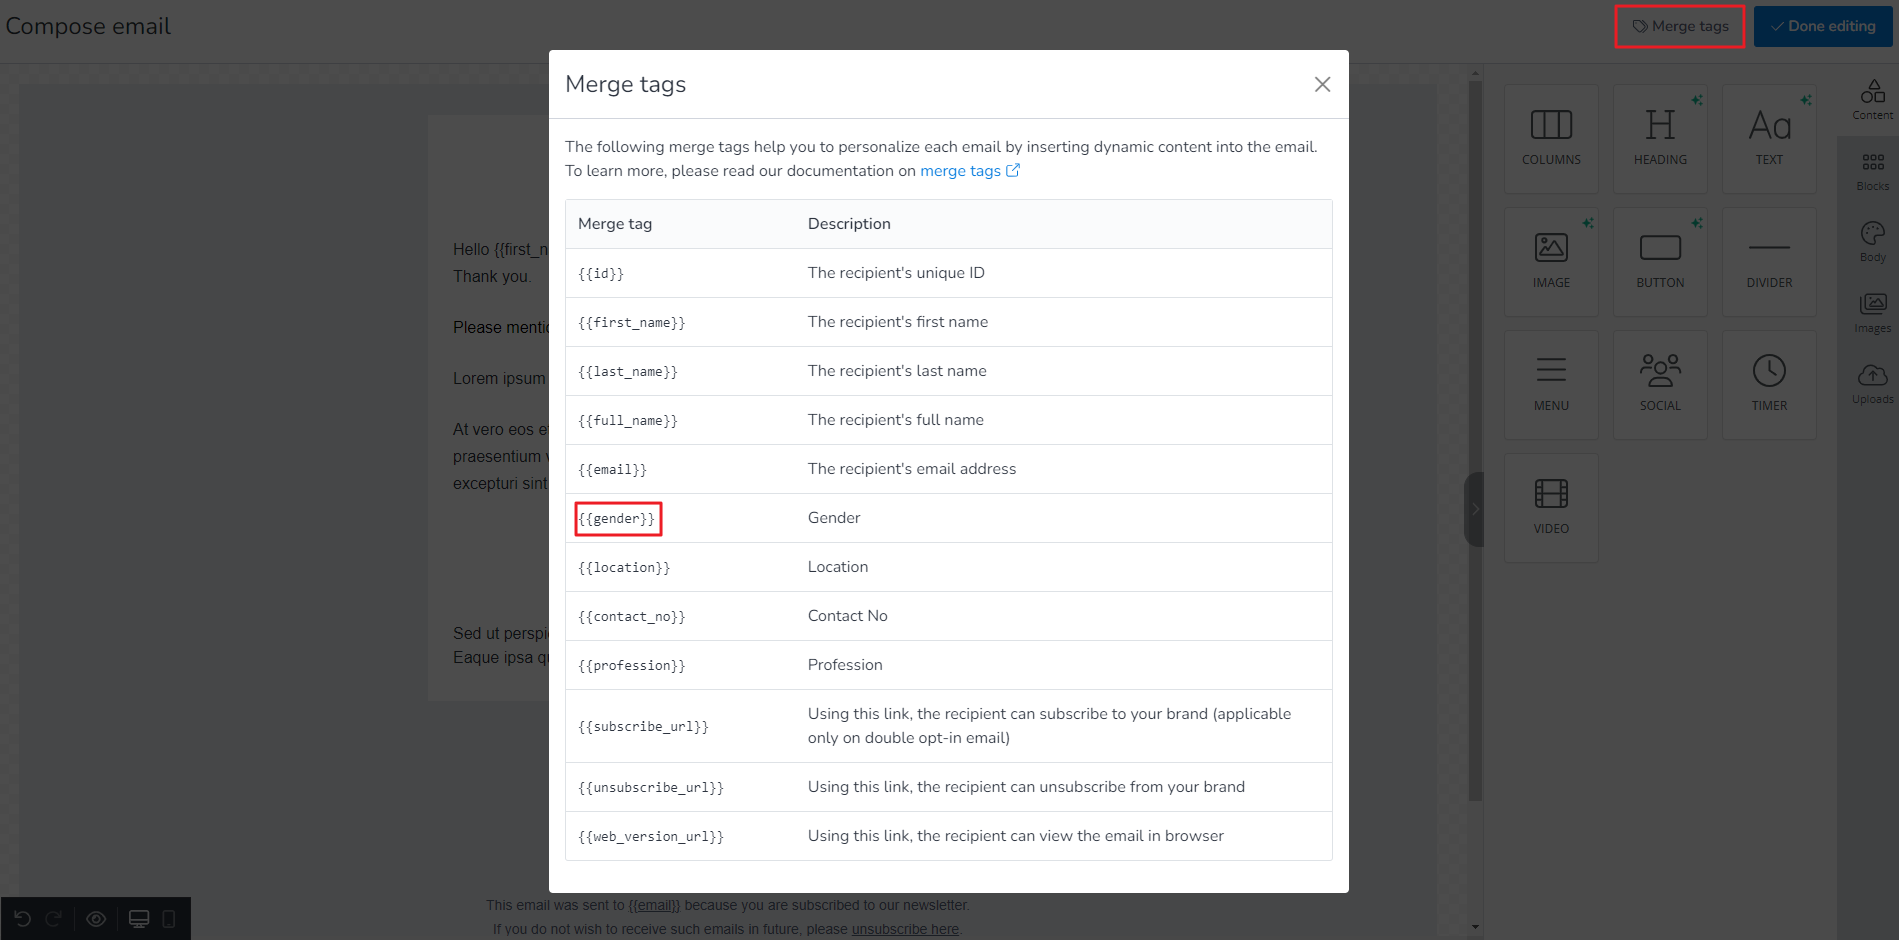
MailBluster allows you to create and use custom merge tags in addition to the default ones. These tags can be used in Leads, Email Subject as well as Email Body.
Now with new custom field functionalities, you can import leads, add/update lead, export leads and view leads with custom fields.
You can go to your Brand > Fields and set your own custom field which you can use in you Email Subject and Body.
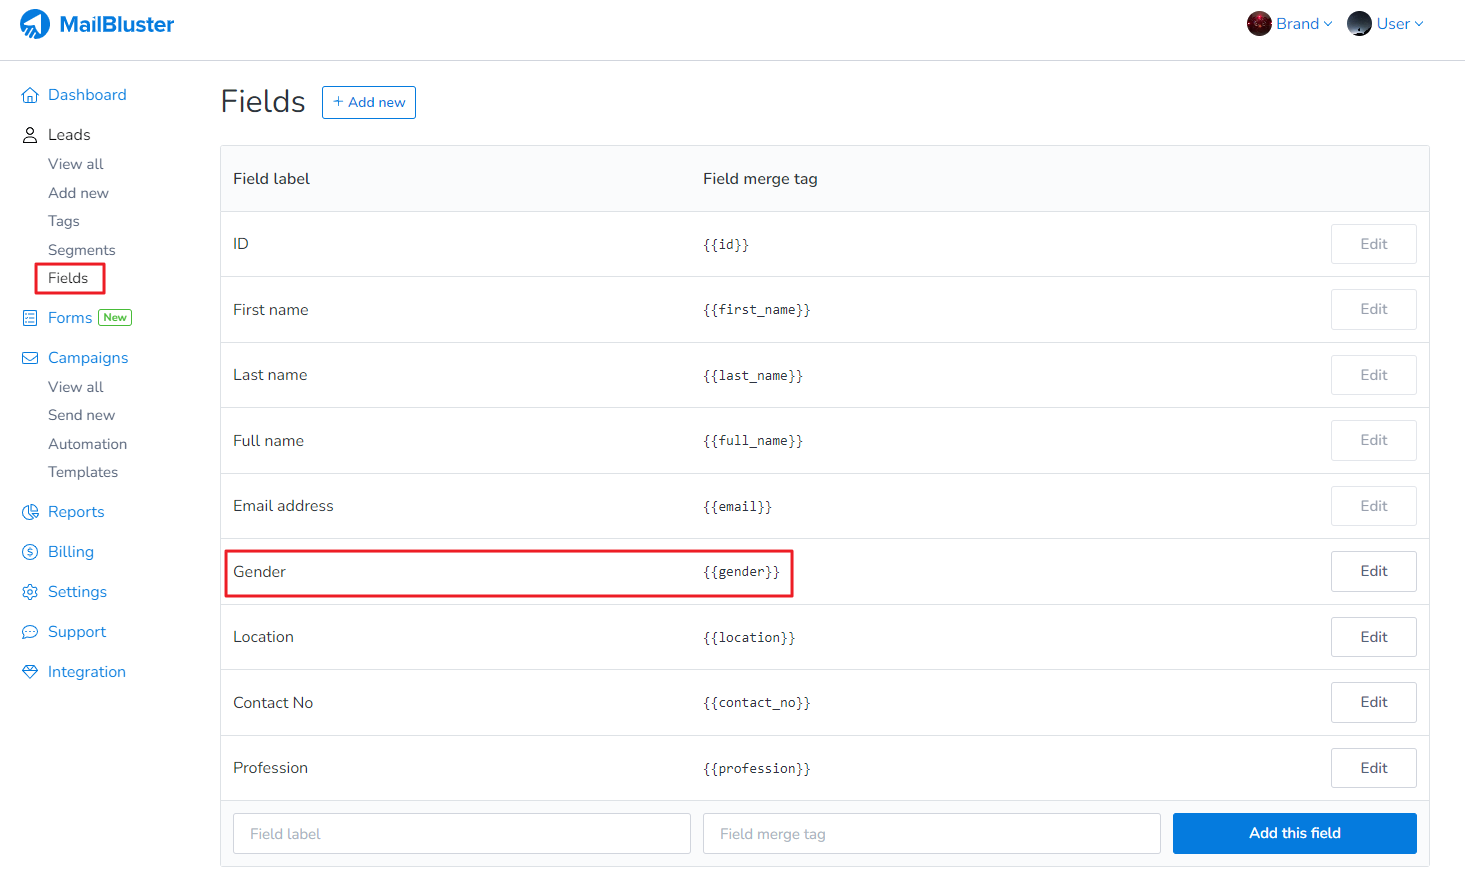
Here we added a custom field or merge tag named “Gender.”
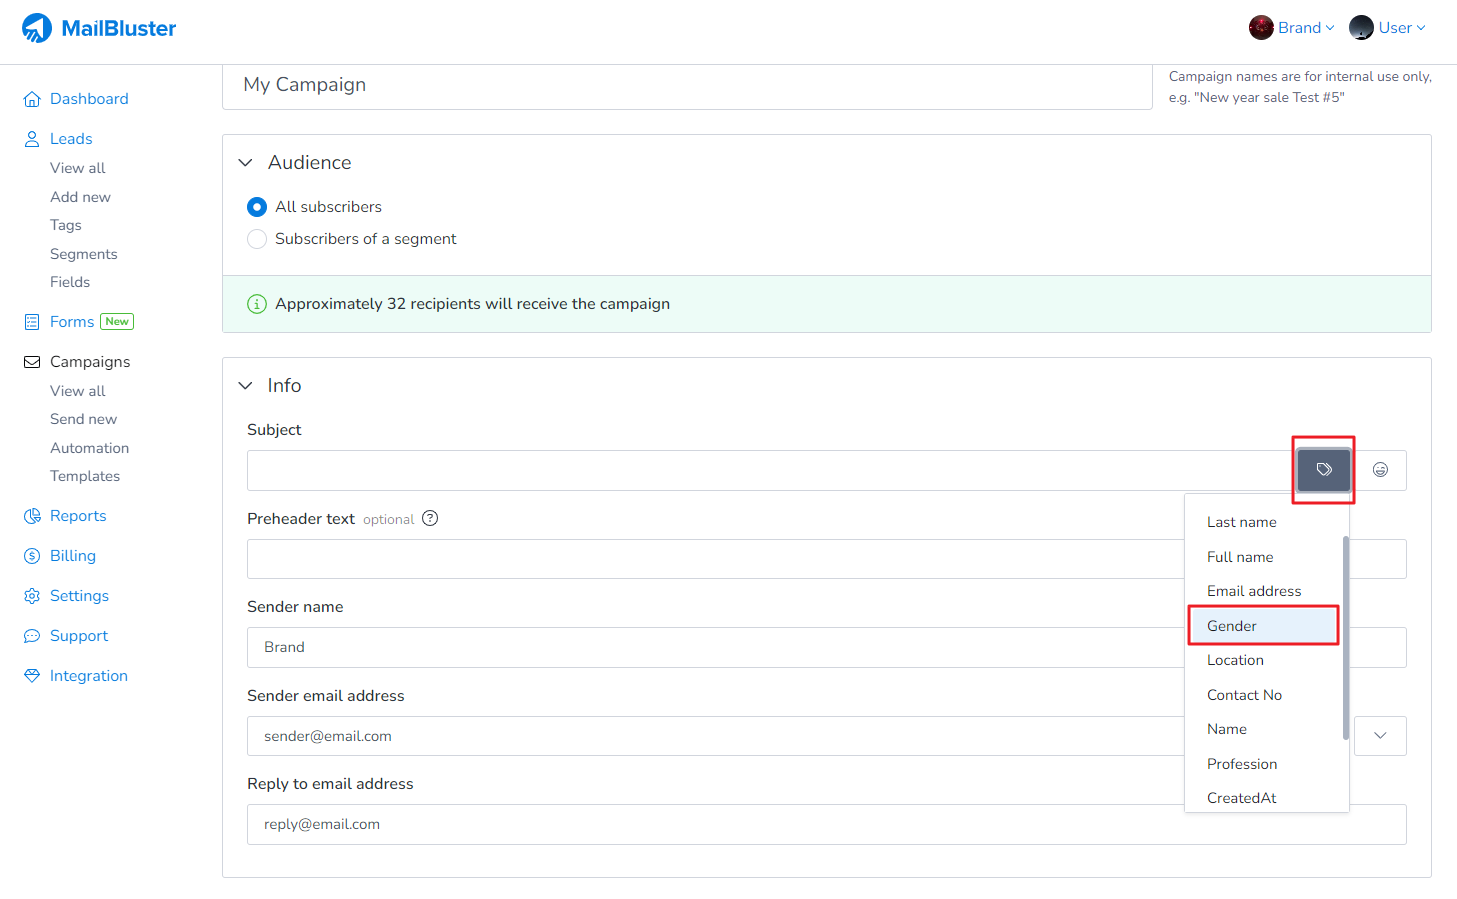
Merge tags can be applied to Subject of the email campaign.
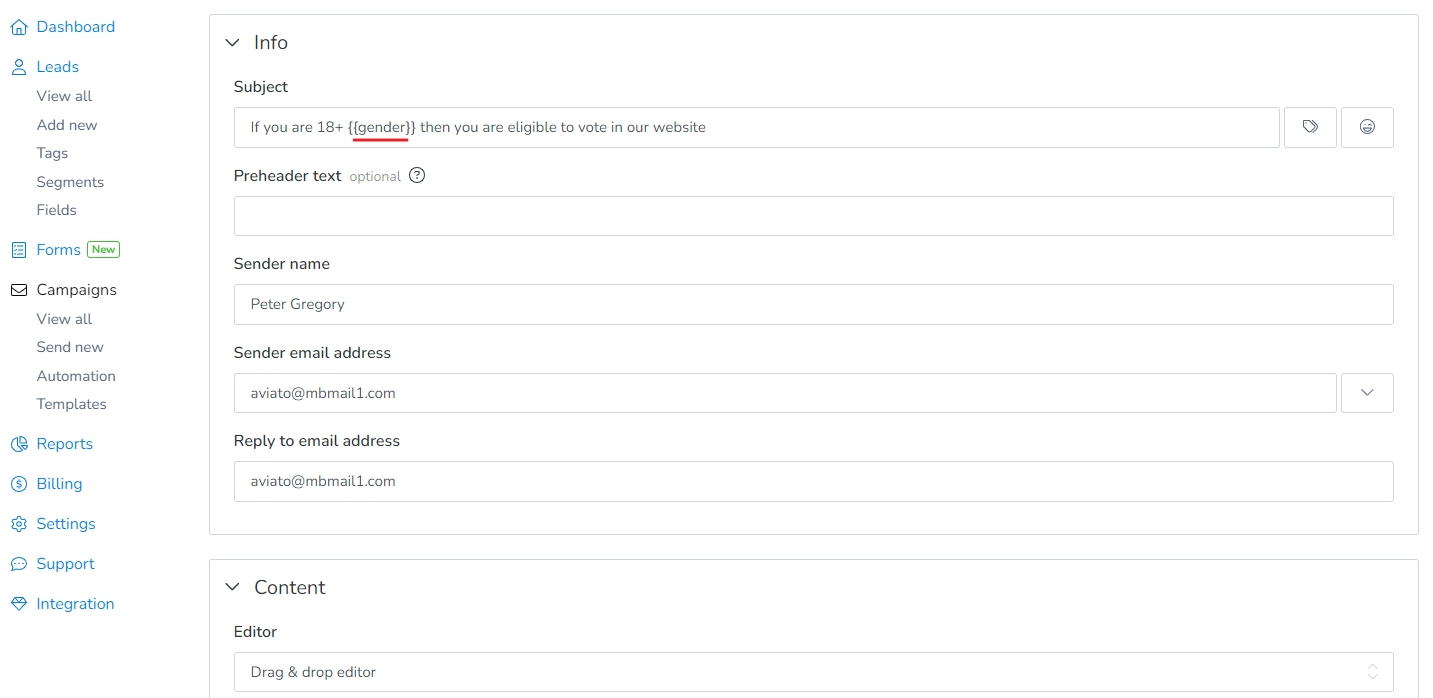
After selecting the merge tag ‘Gender’, it will display like this in the subject line.
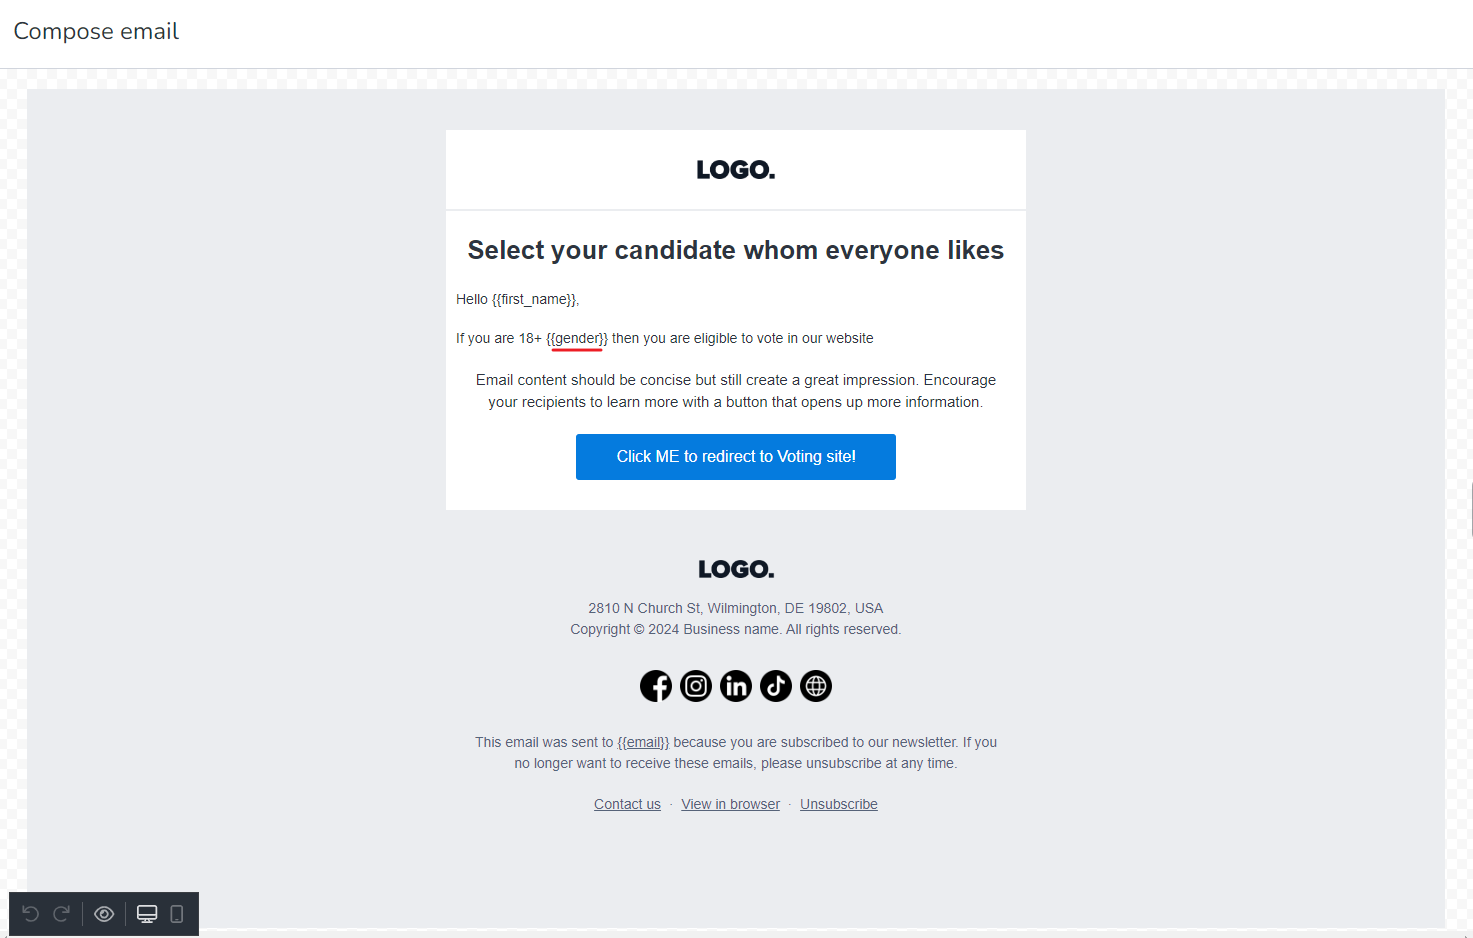
And, and also inside the Body of the email campaign.
The more custom merge tags you added from Brand > Fields, the more tags will be added here in Merge tags for example: Gender which was added later.
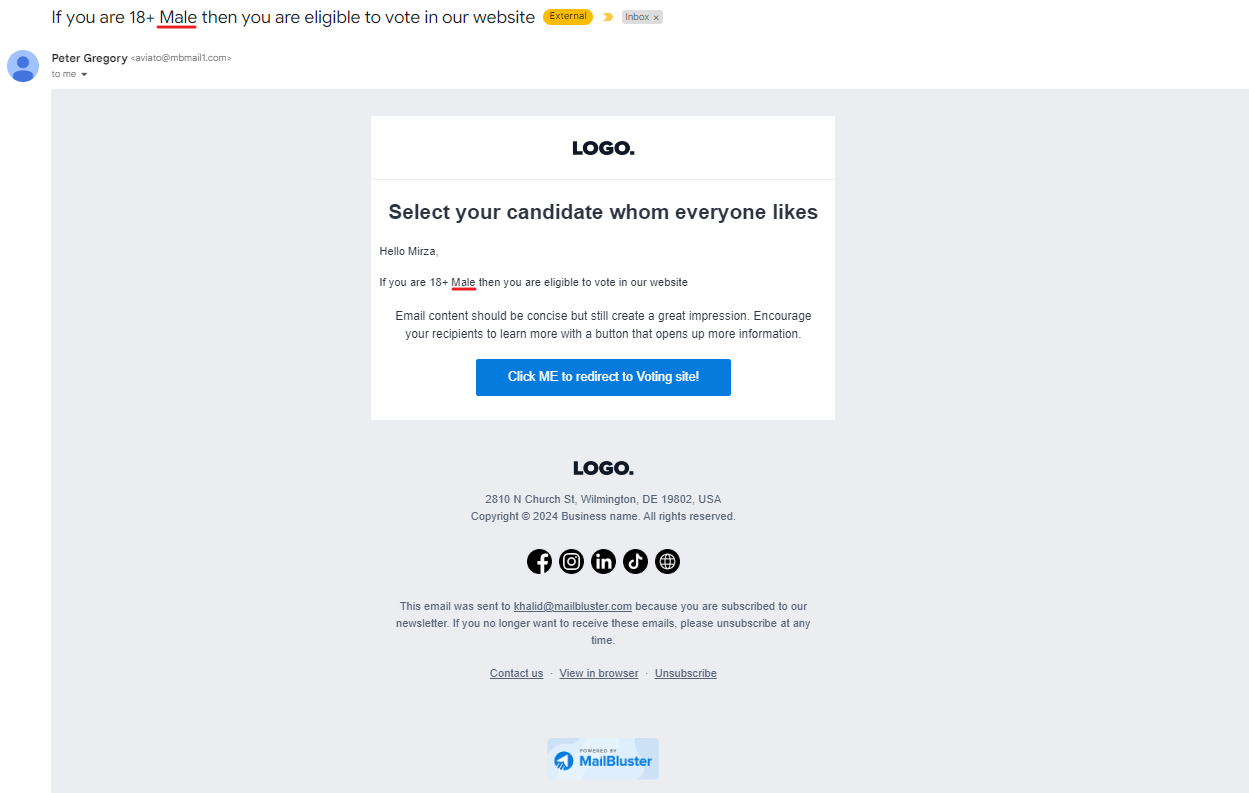
The sent email received by the subscriber will be like this:
When a lead’s Subscription status is ‘Unsubscribed” but their Double Opt-In status is ‘Confirmed’, that means that the lead initially subscribed and confirmed their email address but later chose to unsubscribe from your emails.
1. Increase in Email List Size: Have you experienced a significant growth in your email list? If so, be mindful that privacy features implemented by Email Service Providers (ESPs) might inaccurately track open rates, potentially inflating them. Despite efforts by ESPs to address this, it may still impact your open rate metrics.
2. New Lead Generation Channels: Have you recently introduced new methods for generating leads? If yes, it’s plausible that the quality of leads being generated is lower, thereby contributing to a decline in your click rate.
3. Changes in Subject Lines or Email Copy: Have there been modifications to your subject lines or email content? Such alterations could be influencing your click rate.
By addressing these aspects, you can better understand why engagement metrics are not translating into leads and make informed adjustments to your campaign strategy.
MailBluster does not allow duplicate email IDs or leads. If a duplicate email ID is found, the lead information is either updated or skipped based on your preferences.