A brand refers to the name of your organization, company, or product that you need to define after creating a MailBluster account. MailBluster allows you to create multiple brands under a single account without restrictions.
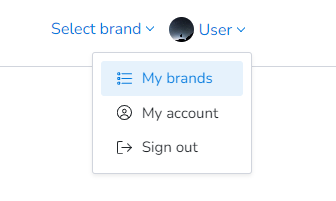
To create brand in MailBluster, begin by navigating to the Brands section within the platform. Creating a brand in MailBluster helps define the sender’s identity and ensures consistency across all email campaigns. Please navigate to your username > My brands.
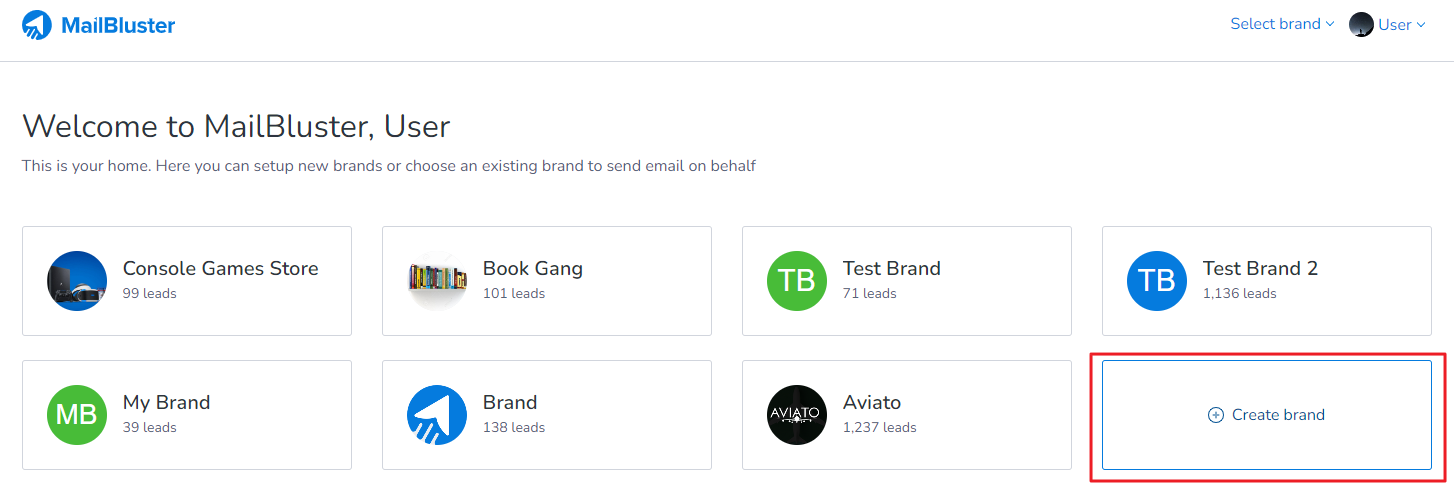
Then click on Create Brand
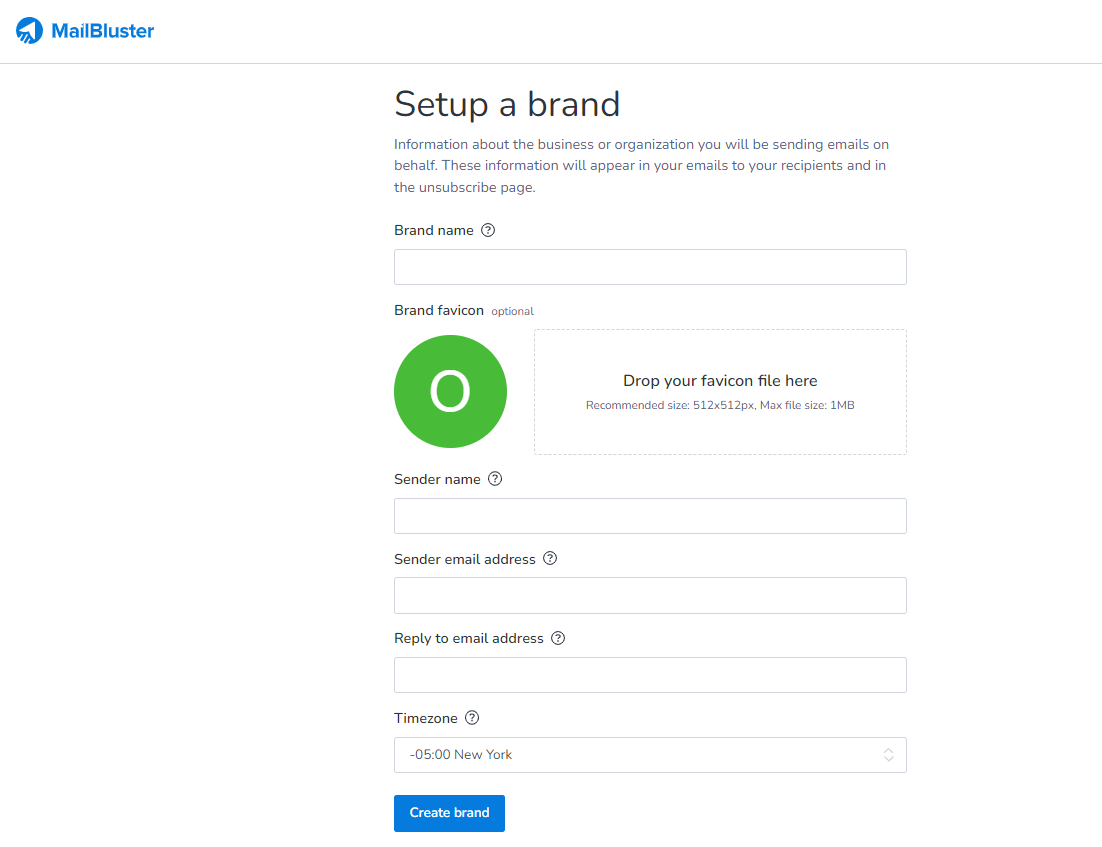
And, fill up the details of the new Brand.
Brand name can be the name of your organization or a name of a company or a product brand.
Brand favicon is simply a logo which you can set for your brand. Recommended size for the favicon is 512 pixels (both Length x Width).
Sender name is the name that will show on the email.
Sender email address is the email address that will show in ‘Send from: ’ on the email when recipient receives. This sender email address is also the email address which needs to be verified in Amazon SES first.
Reply to email address is the Email address you have set so that your customers will be able to send reply to this address. Reply to email address is the Email address you have set so that your customers will be able to send reply to this address.
Time Zone needs to be set according to your current location time zone.
Finally click Create brand and your brand will be created.
If you want to remove or delete your MailBluster Brand, contact our Support Center. Tell us the Brand name or Brand domain (if you have duplicate brands) you want to delete from your MailBluster account. Do remember, deleting it means everything linked to that brand—like leads, campaigns, reports, invoices, cards, and AWS credentials—will also be gone. Once it’s deleted, we can’t bring back the Brand’s data.
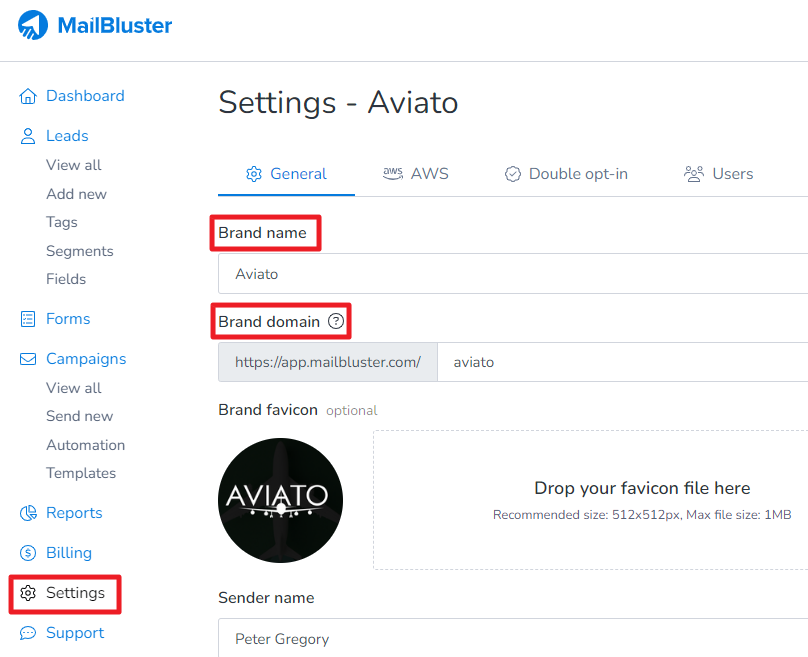
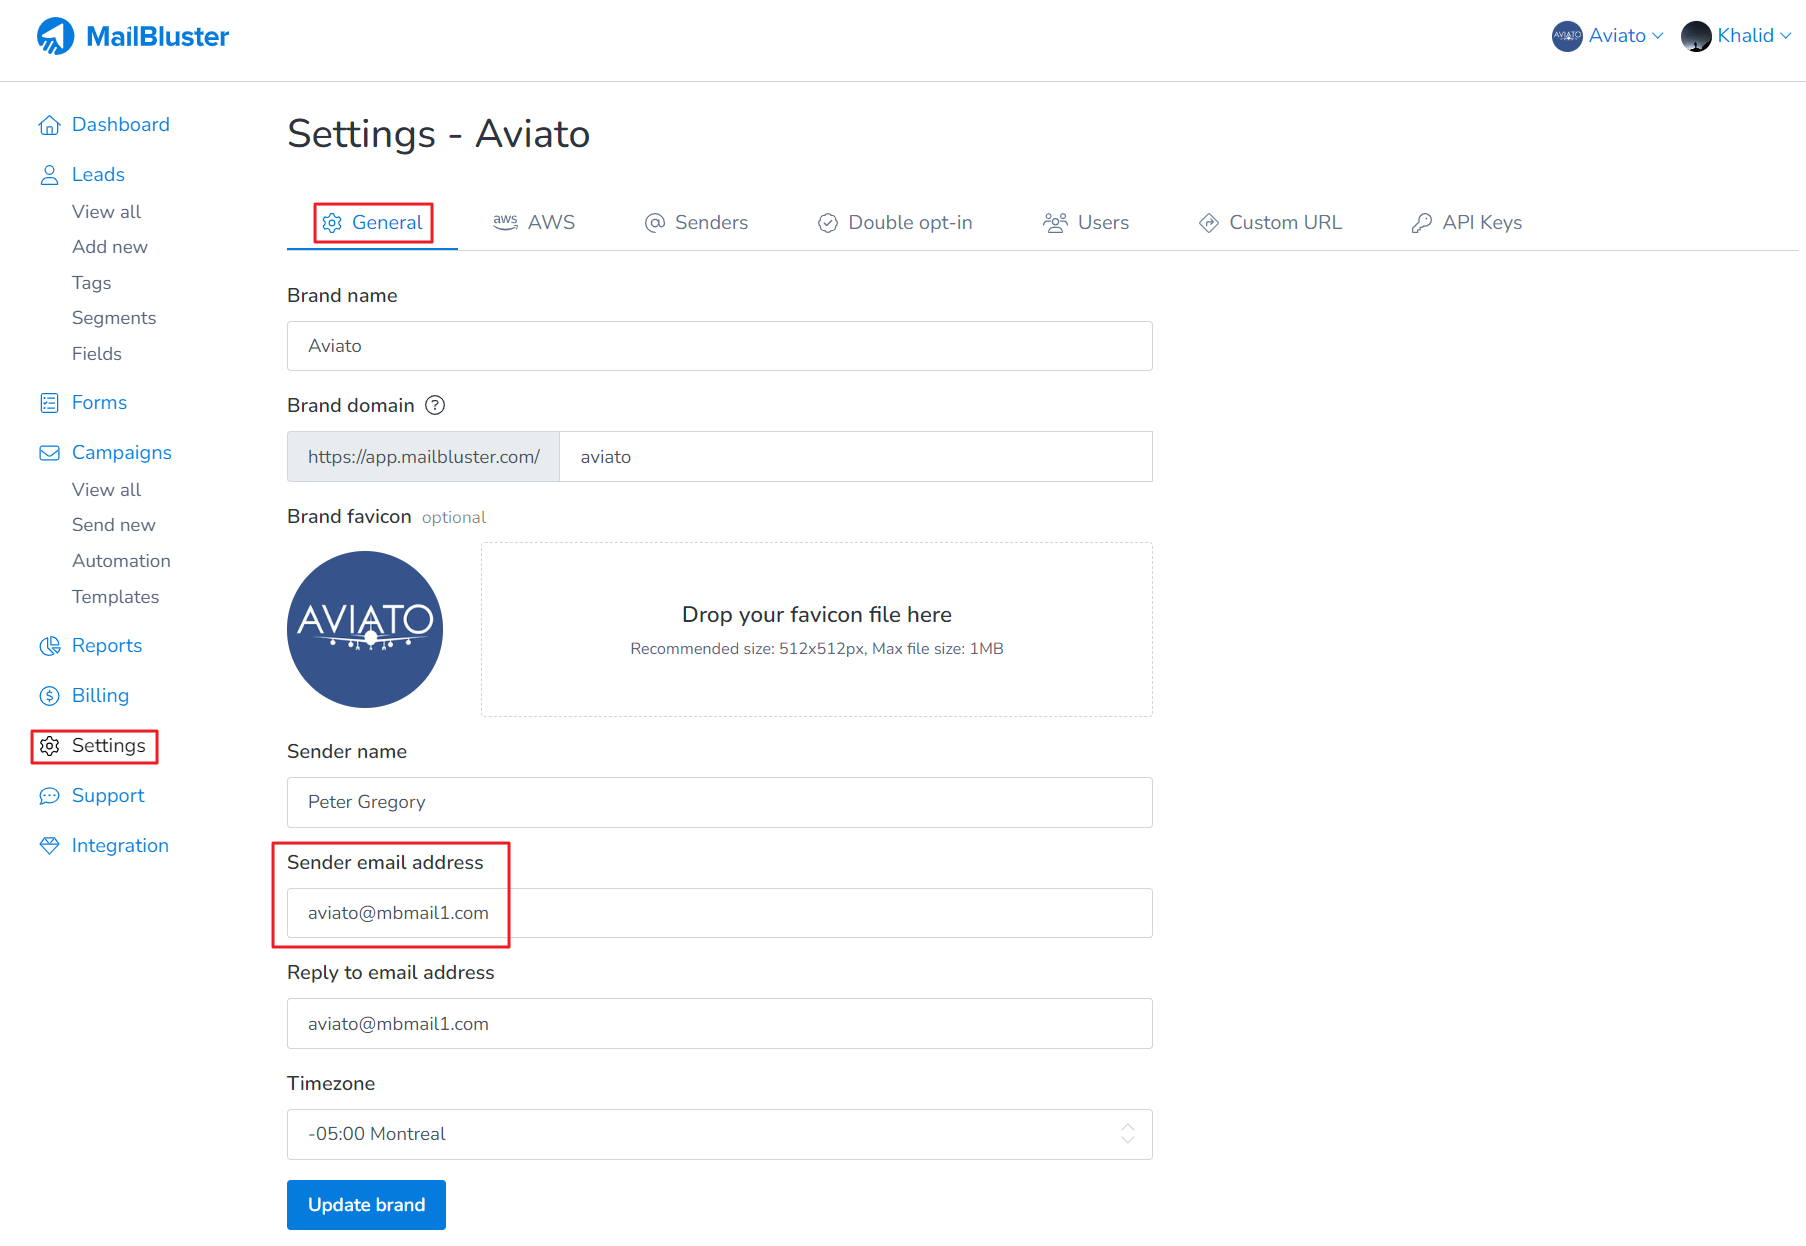
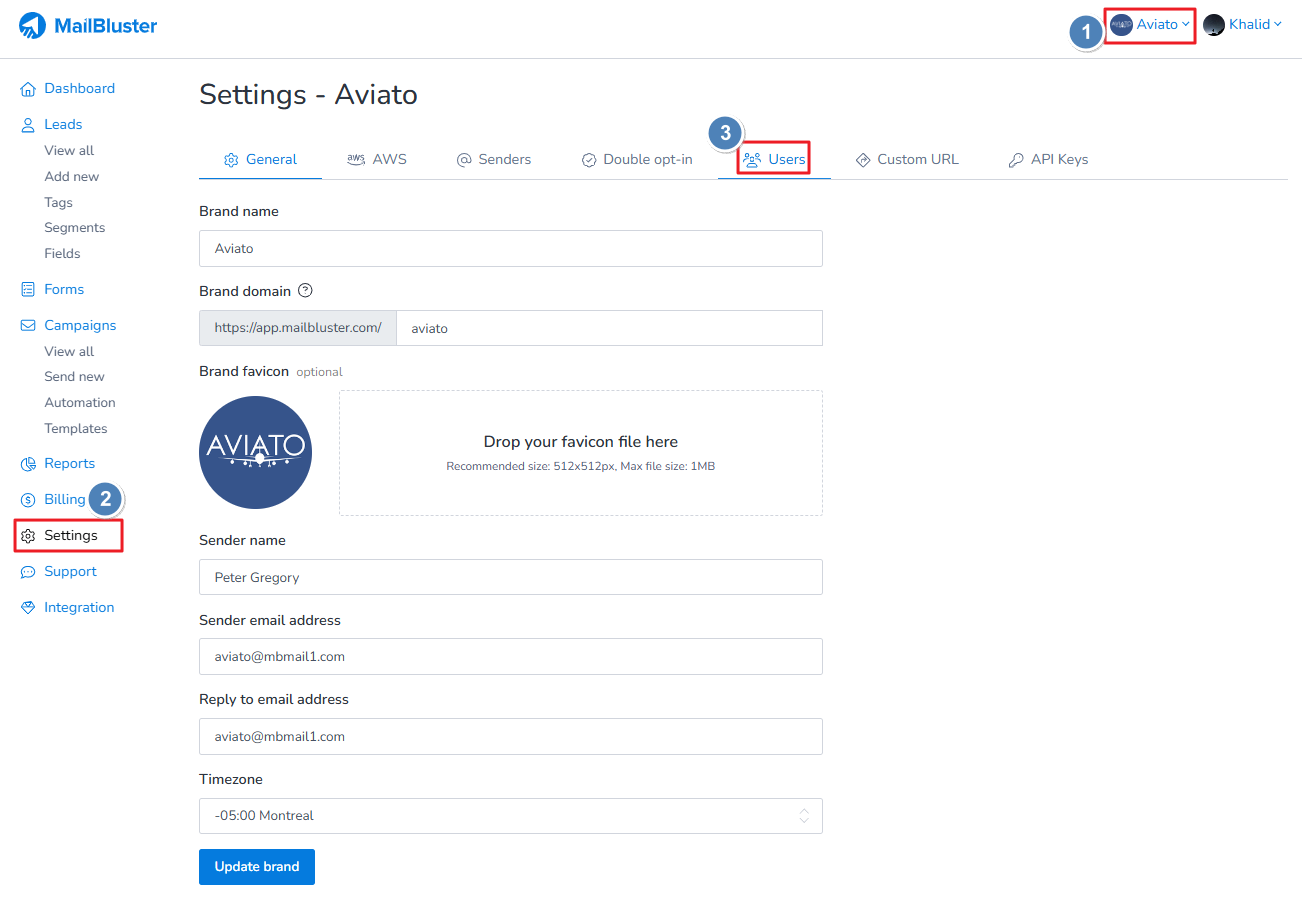
You can obtain Brand name and domain from your MailBluster settings as shown below:
To change your brand email address (also known as the ‘sender email address’) in MailBluster, go to Brand > Settings > General and add your verified email address to set it as your brand email address. Ensure the email address is first verified and approved by Amazon SES.
You can create unlimited number of Brands under one MailBluster Account free of any charges. There are no restrictions and you can connect multiple Brands to just one or multiple SMTP providers.
The following is a screenshare showing multiple Brands connected to one AWS Account.
MailBluster allows users to invite others to use your brand by assigning predefined roles: admin, manager, and viewer. You can assign users to one of these roles. But you can’t change the role’s permissions or create a new role.
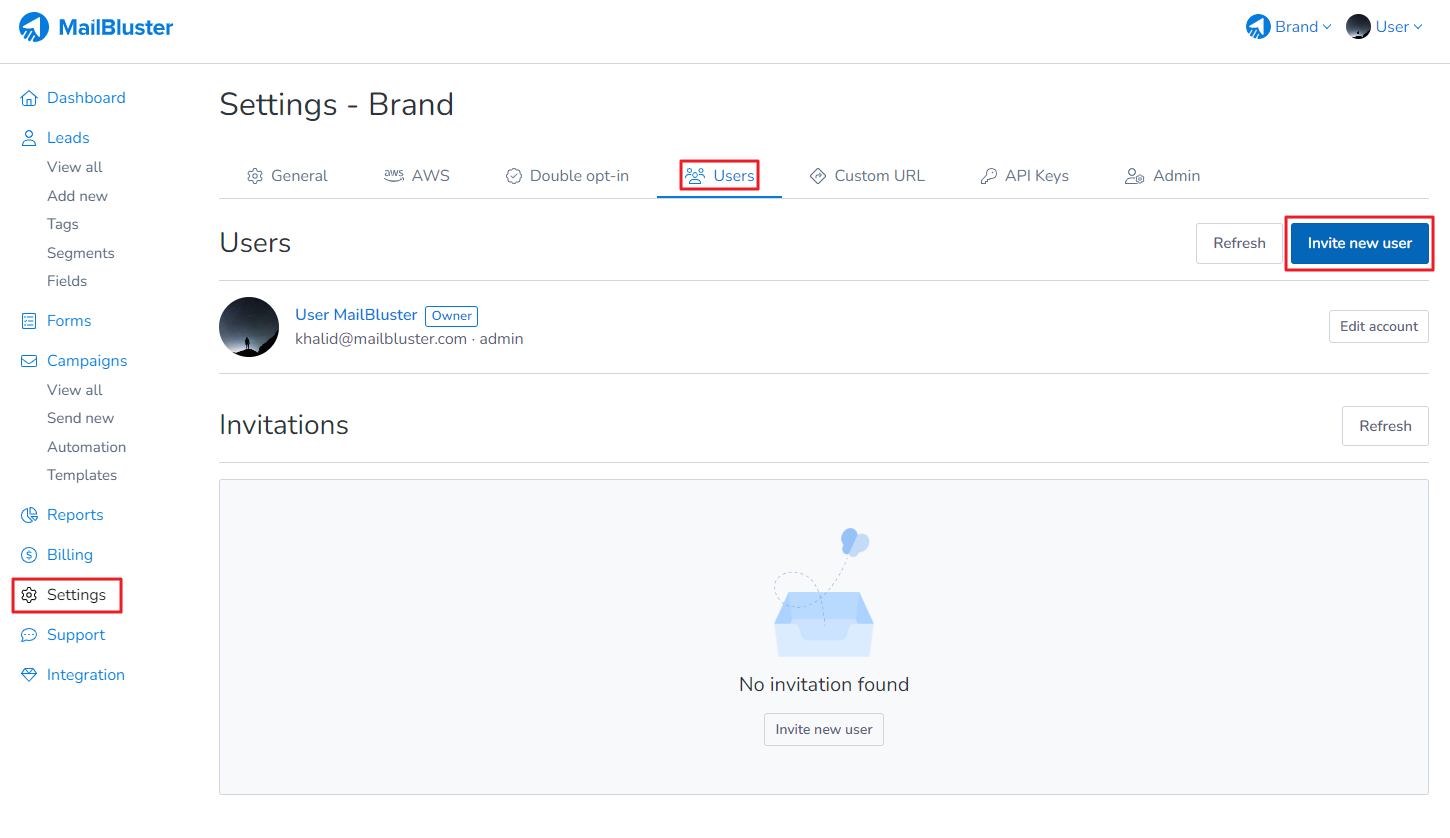
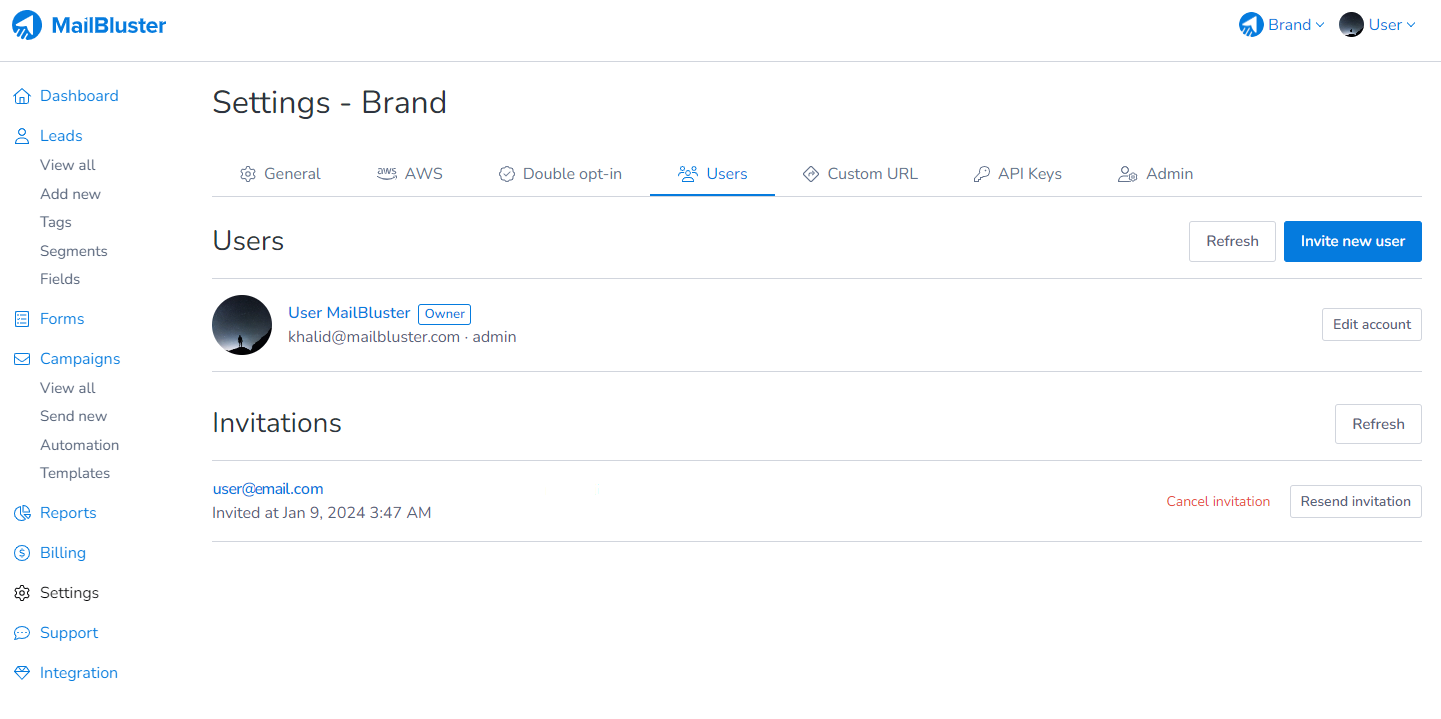
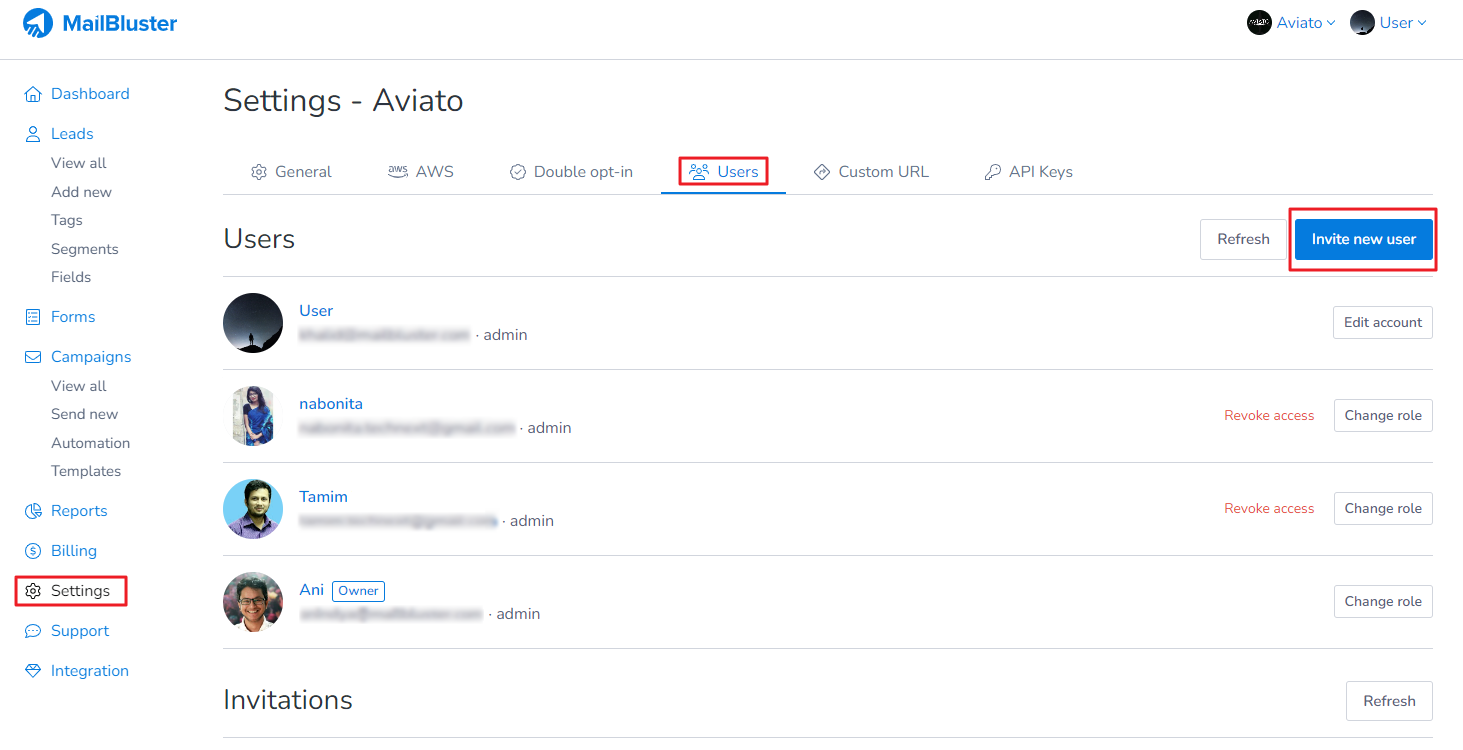
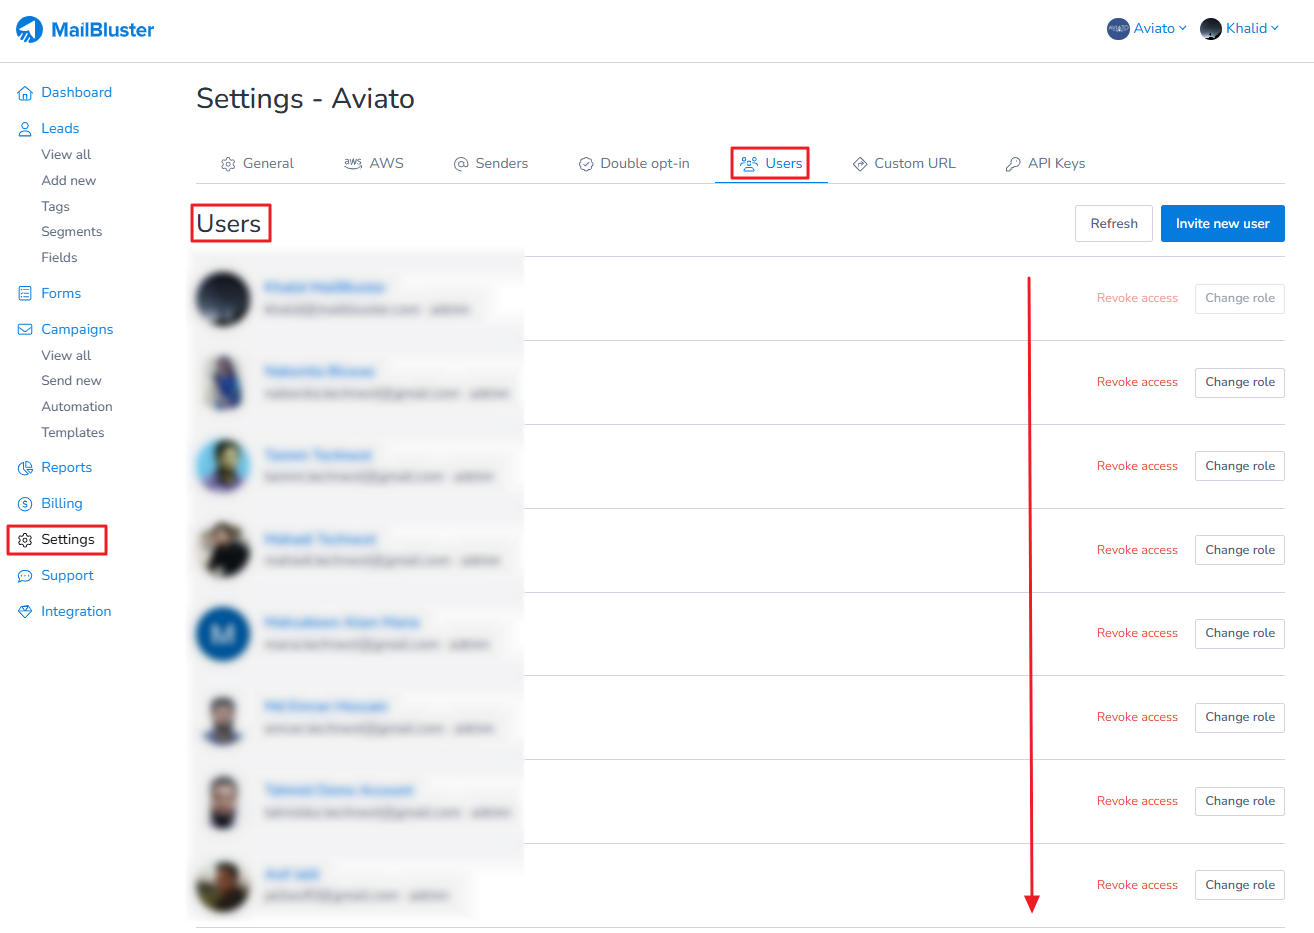
To invite a new user to your brand, go to your Brand > Settings > Users and click Invite New User.
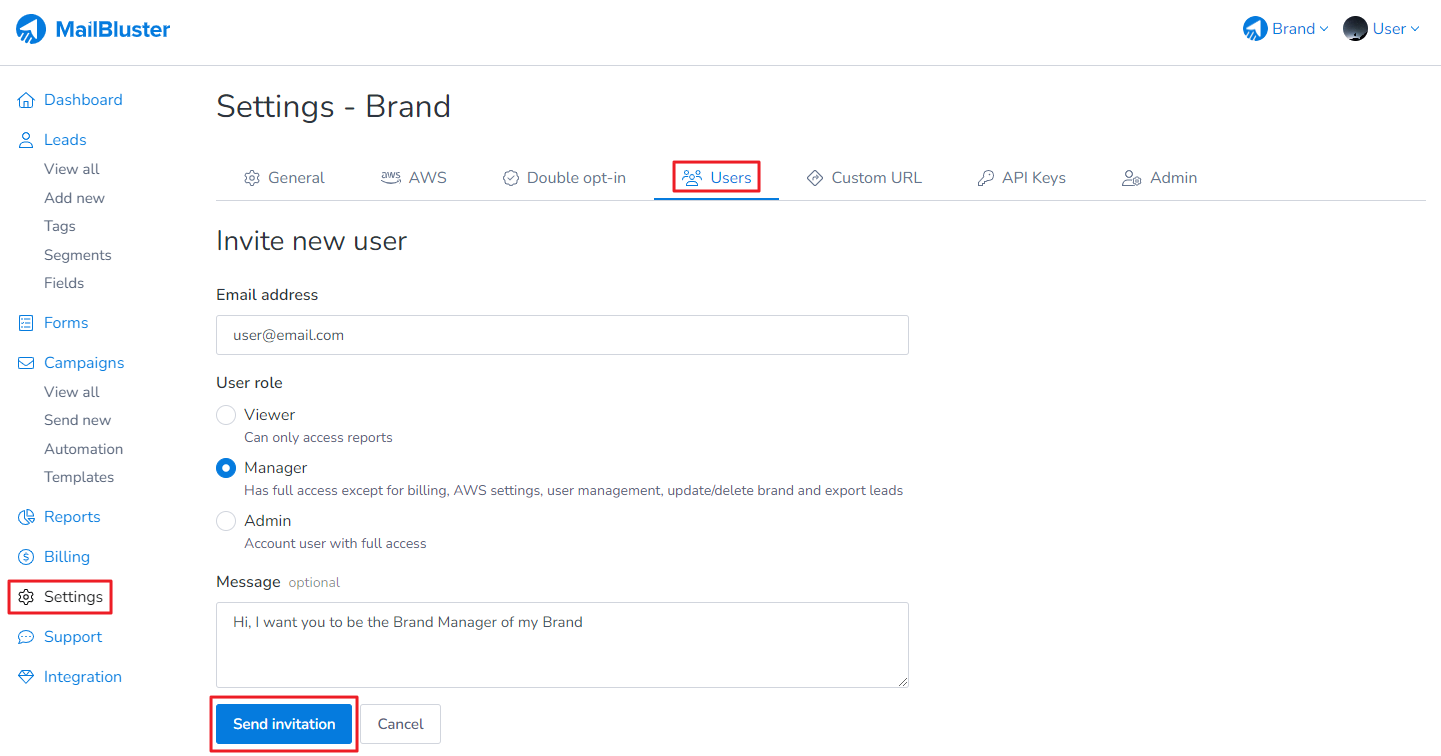
Enter the Email address, set the User role, and your Message (optional). Then click Send invitation.
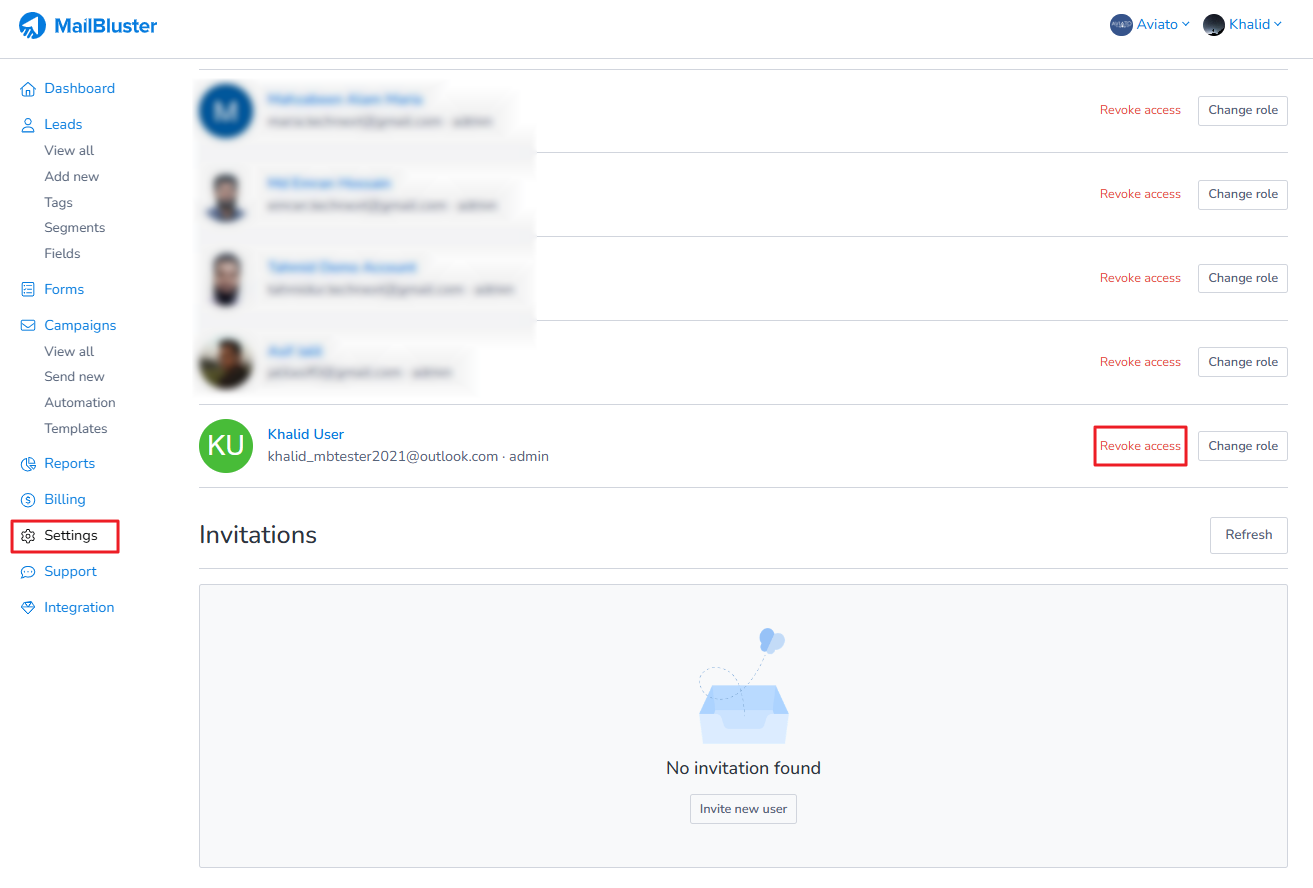
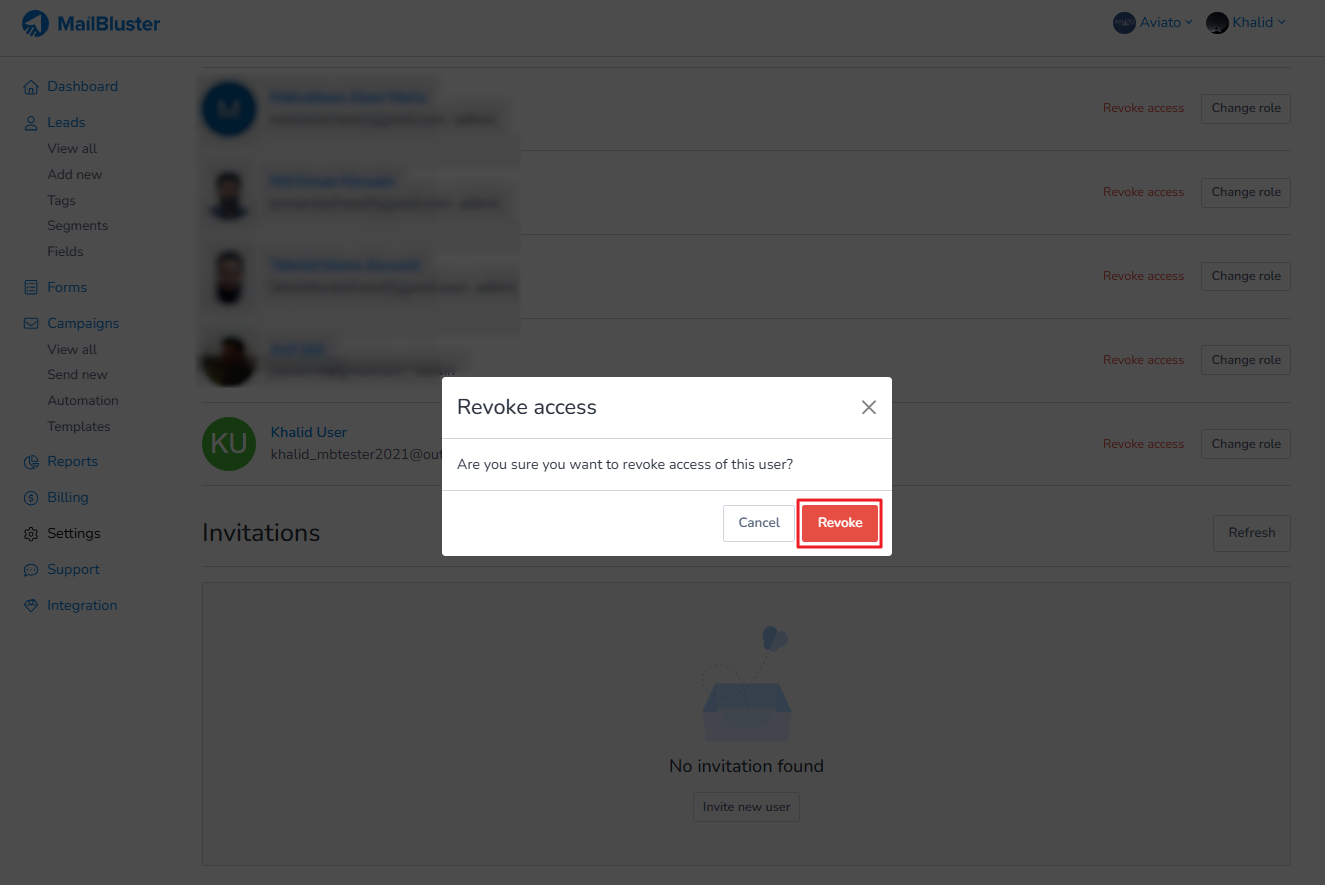
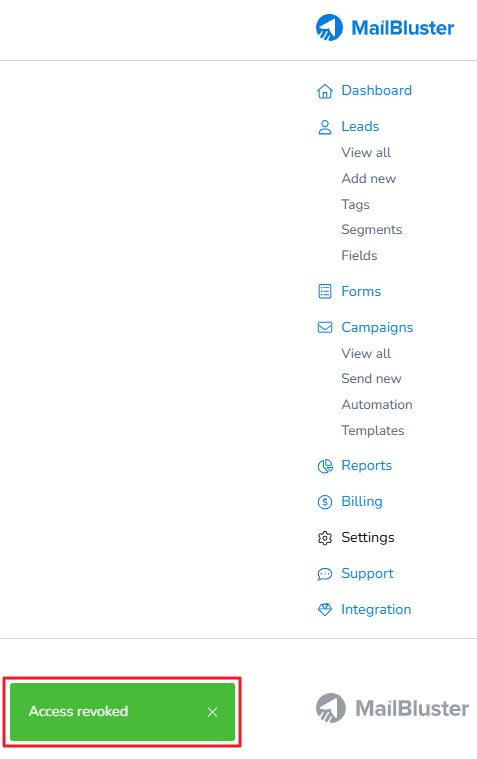
An invitation email will be sent to the user. You can also Cancel invitation of the user or Resend invitation to the user again.
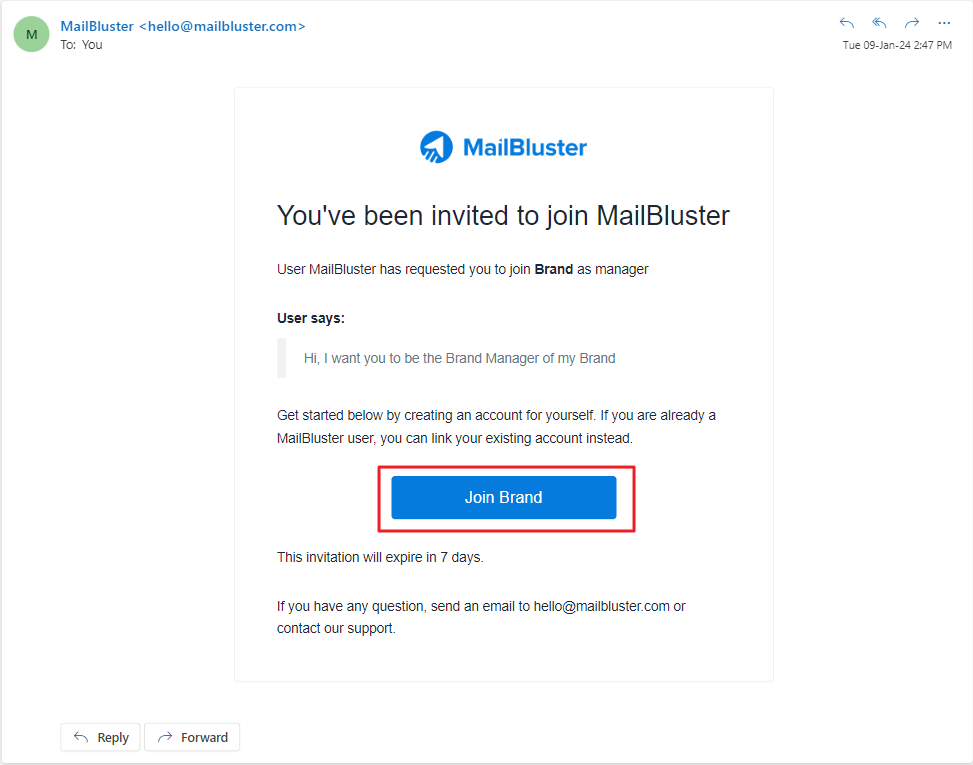
From user end, they will receive an email like this. They need to click Join Brand.
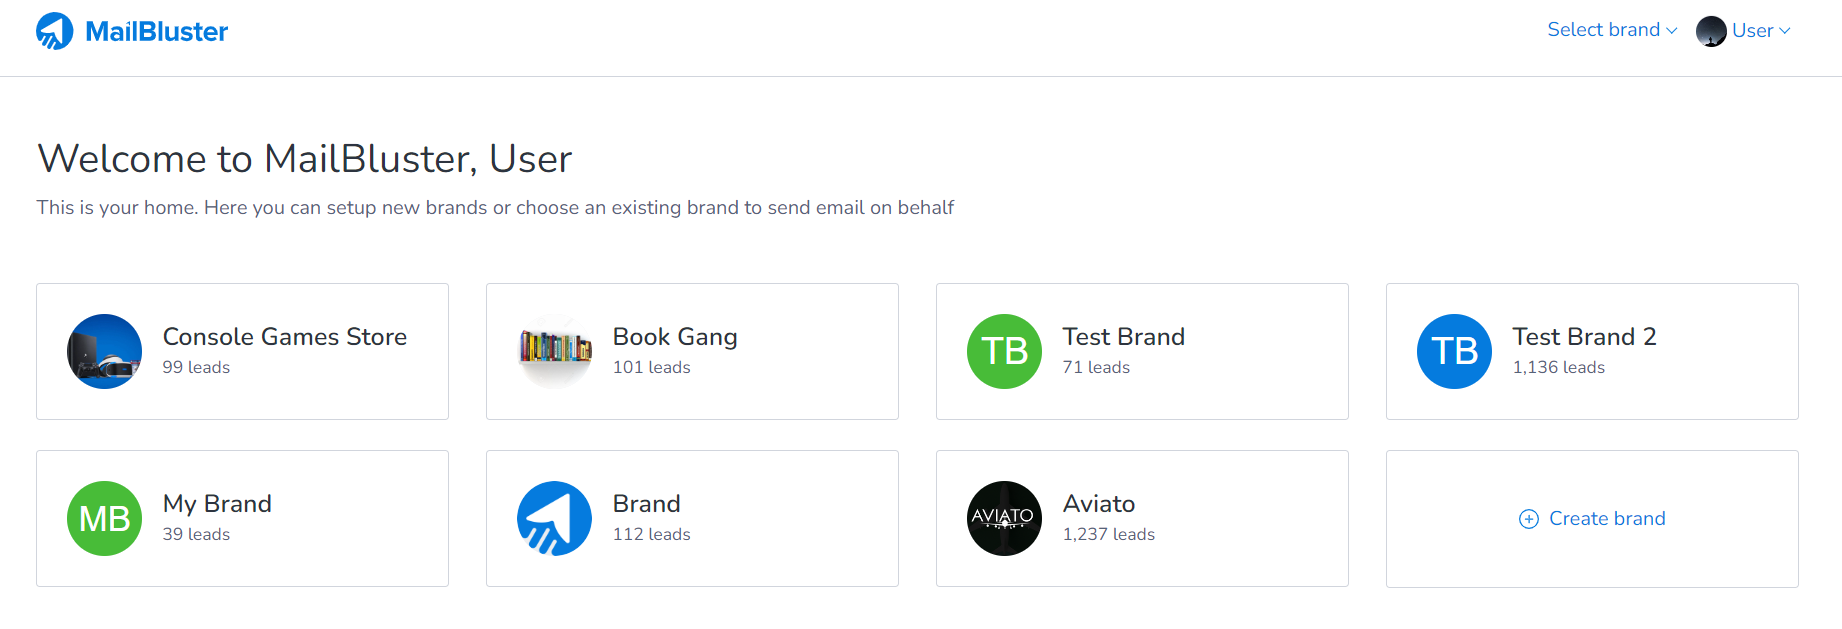
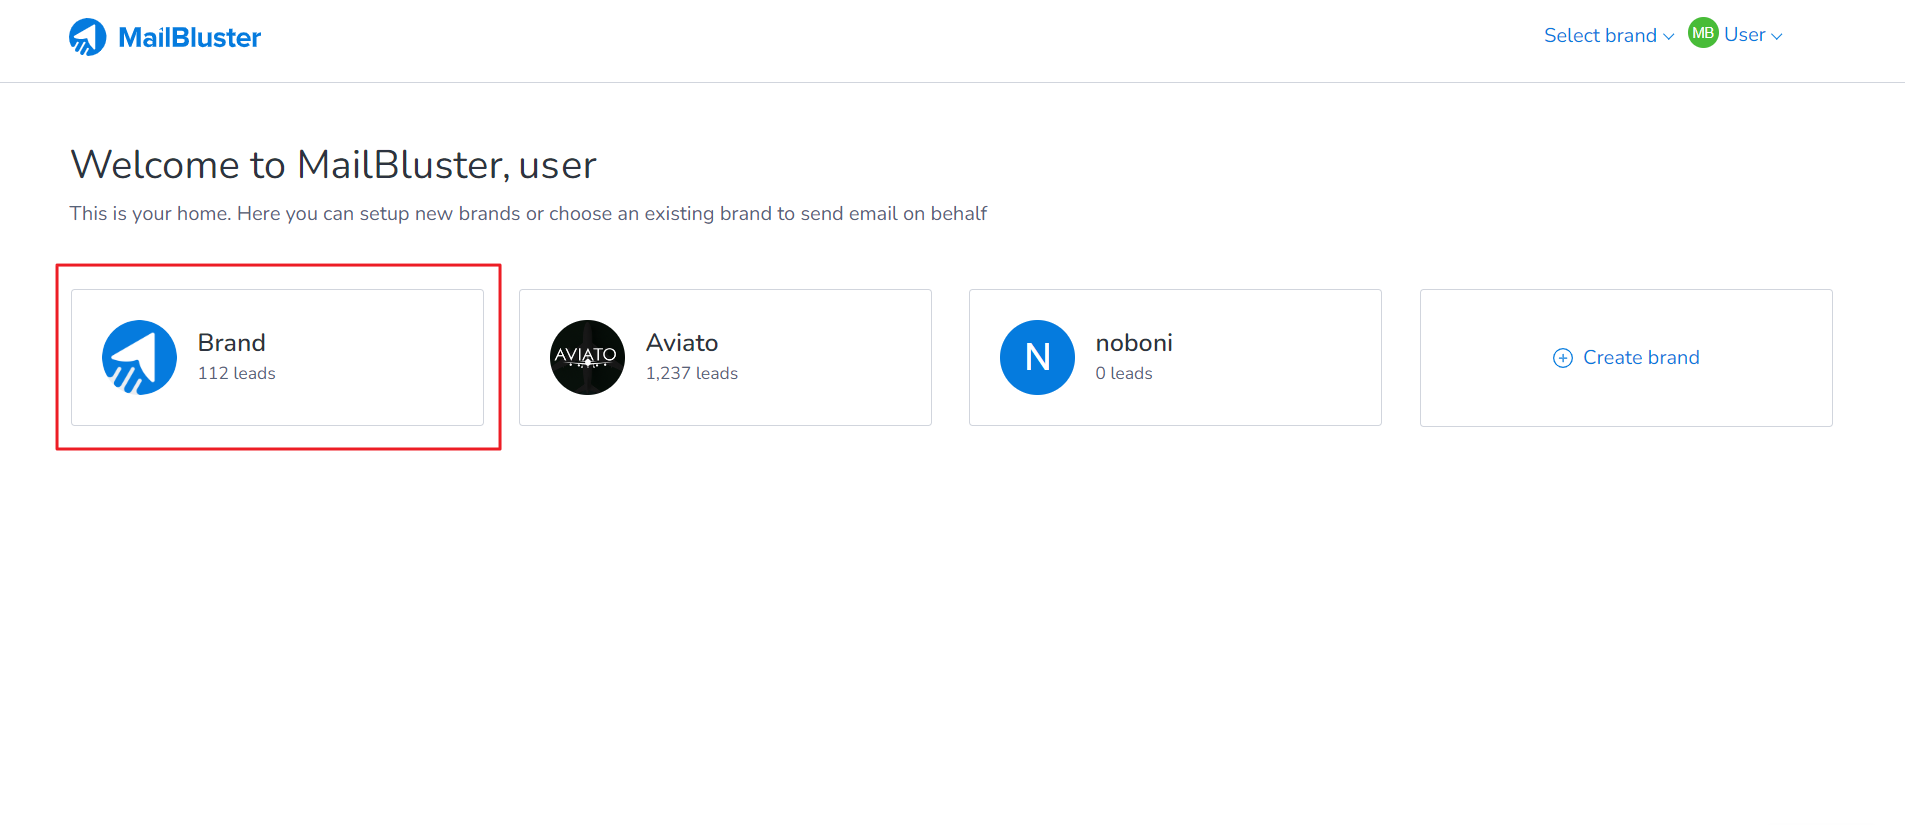
Once clicked, they will forwarded to the Brand selection menu as shown below. They need to click on the Brand from which they were invited. After clicking the brand they will be able to access the Brand and its features.
To add different user types in brand, MailBluster provides three predefined roles: Viewer, Manager and Admin. You can assign any user to one of these roles by inviting them to use your Brand.
Viewer: This type of user can only view reports
Manager: This type of user has full access. But they will not be able to view Billing, AWS Settings, User Management, Update/Delete Brand and Export Leads from MailBluster.
Admin: This type of user has full privileges
Please note: an invited user cannot change permissions of their roles if they are not the owner of the Brand
Each Brand in MailBluster represents a unique business or organization. So, if you have multiple brands in MailBluster and want to store the same leads in each brand, then you can do that. It will not be considered a duplicate. Duplicate leads is only considered when you try to save same lead (email id) twice in each brand.
You can use the same AWS account for multiple brands in MailBluster, but only if all brands belong to the same MailBluster account. If Brand A and Brand B have different owners, you cannot connect the same AWS account to both.
To resolve this, contact the MailBluster Support Team to transfer brand ownership. Once both brands are under your account, you can easily use the same AWS account for multiple brands.
MailBluster allows one AWS account to manage multiple brands, which simplifies sending emails and managing settings. Make sure all brands are under your account before connecting the AWS account.
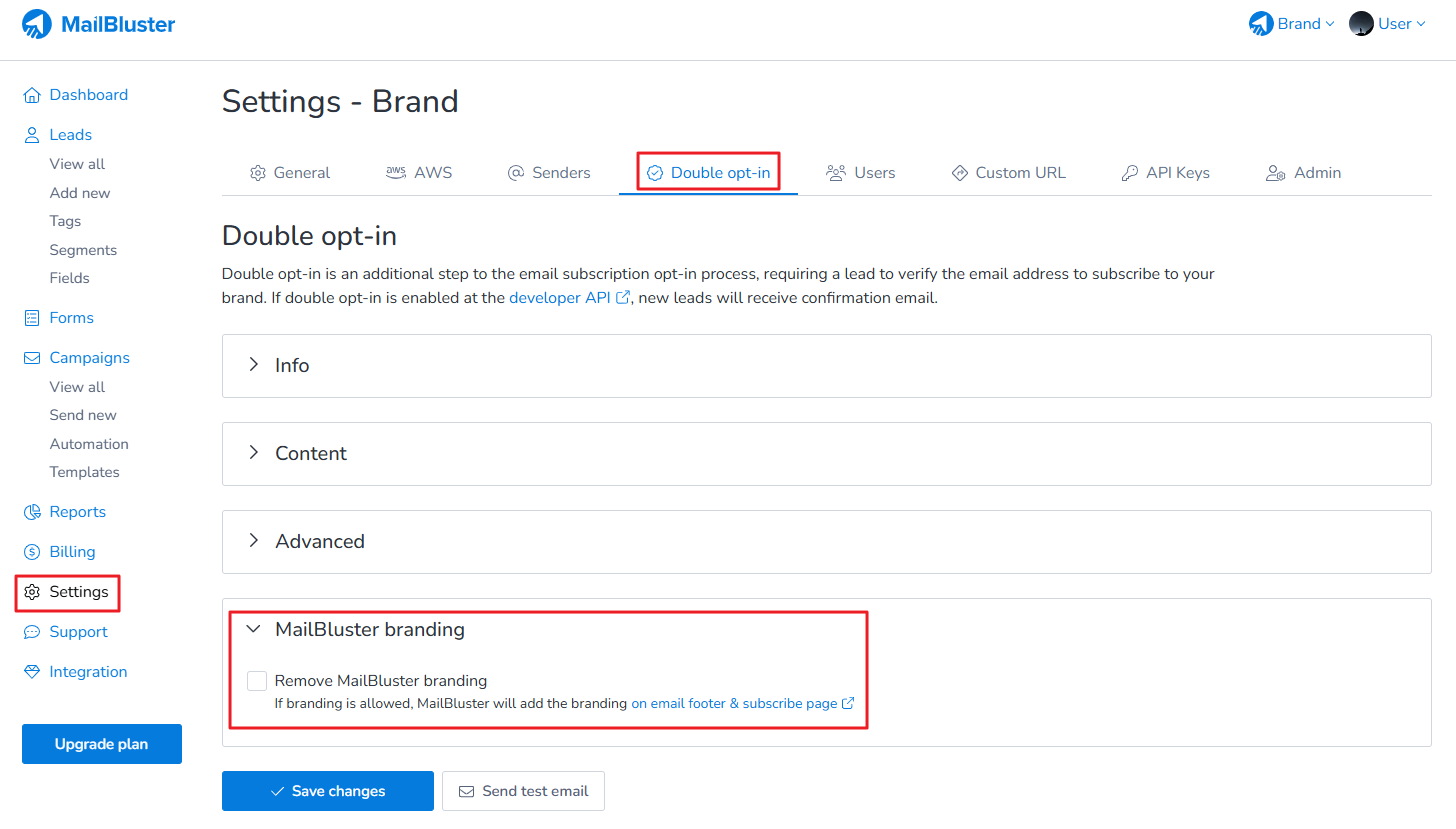
It is only possible to remove MailBluster branding from Double Opt-in emails if you use the Pro Plan. The Pro Plan offers more advanced features, including the ability to customize and remove branding, which is not available in the Starter plan. If you need to remove the MailBluster branding from your emails, upgrading to the Pro Plan would be necessary.
Mailbluster use it’s default base URL for your subscribe, unsubscribe and web version page.
If you want to change the default URL with your own, you need to set up an Action URL. You can set it using a subdomain of your sender domain.
For example, you can set it to https://subdomain.domain.com, and MailBluster will use this URL as the Action URL for your subscribe, unsubscribe and web version page.
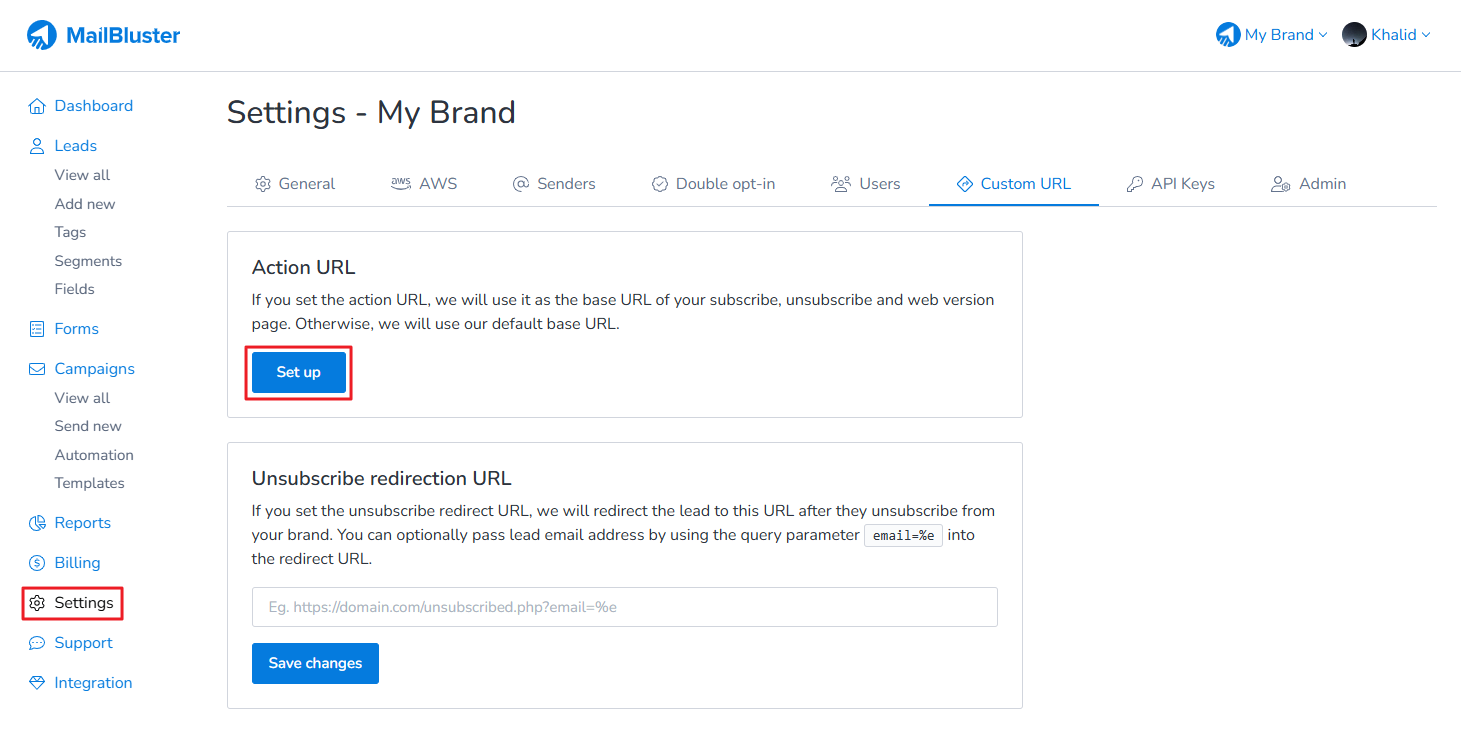
You can configure this from the Brand > Settings > Custom URL tab in MailBluster. Just click on the Set up button.
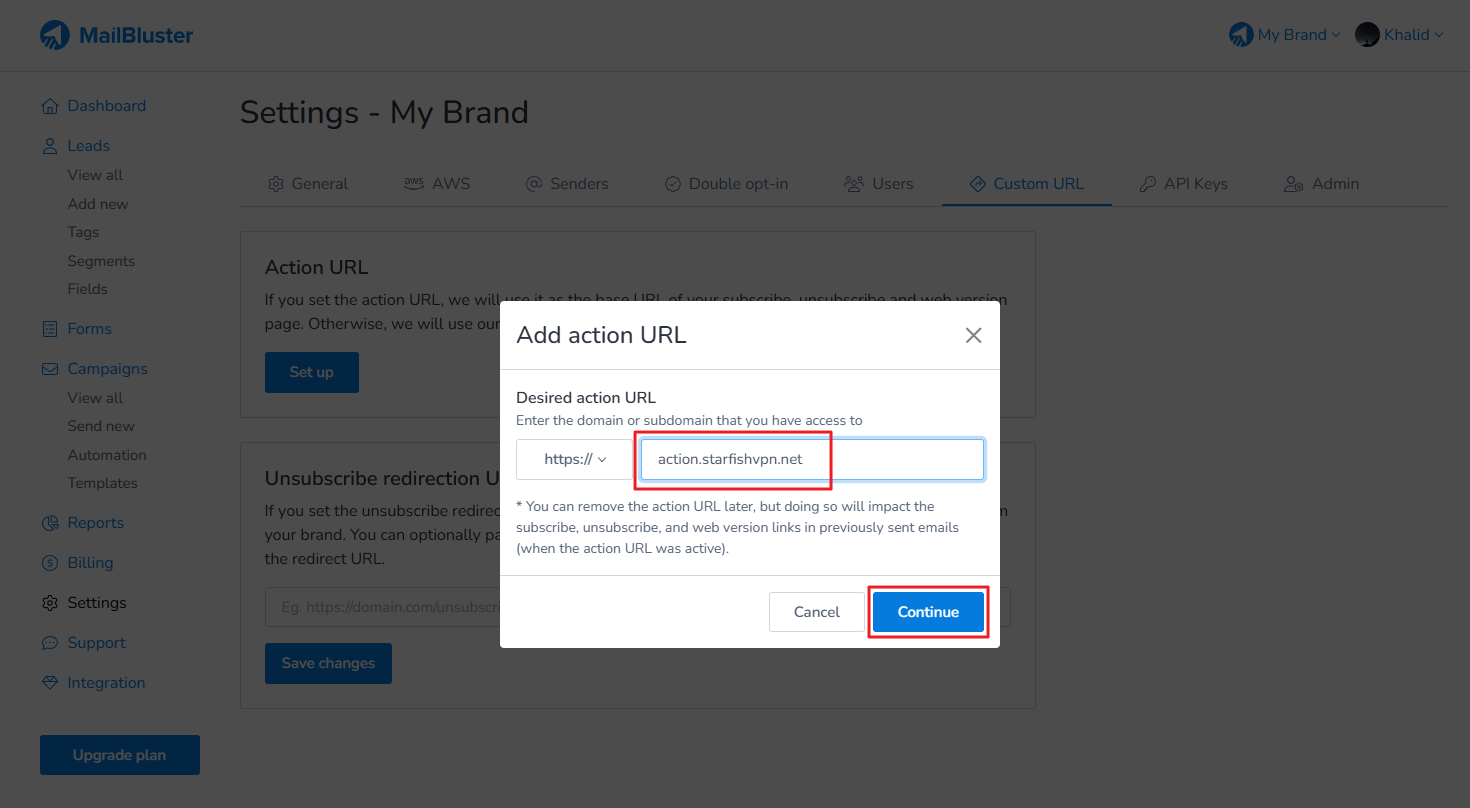
Enter the subdomain along with the domain of your website. Then click Continue button.
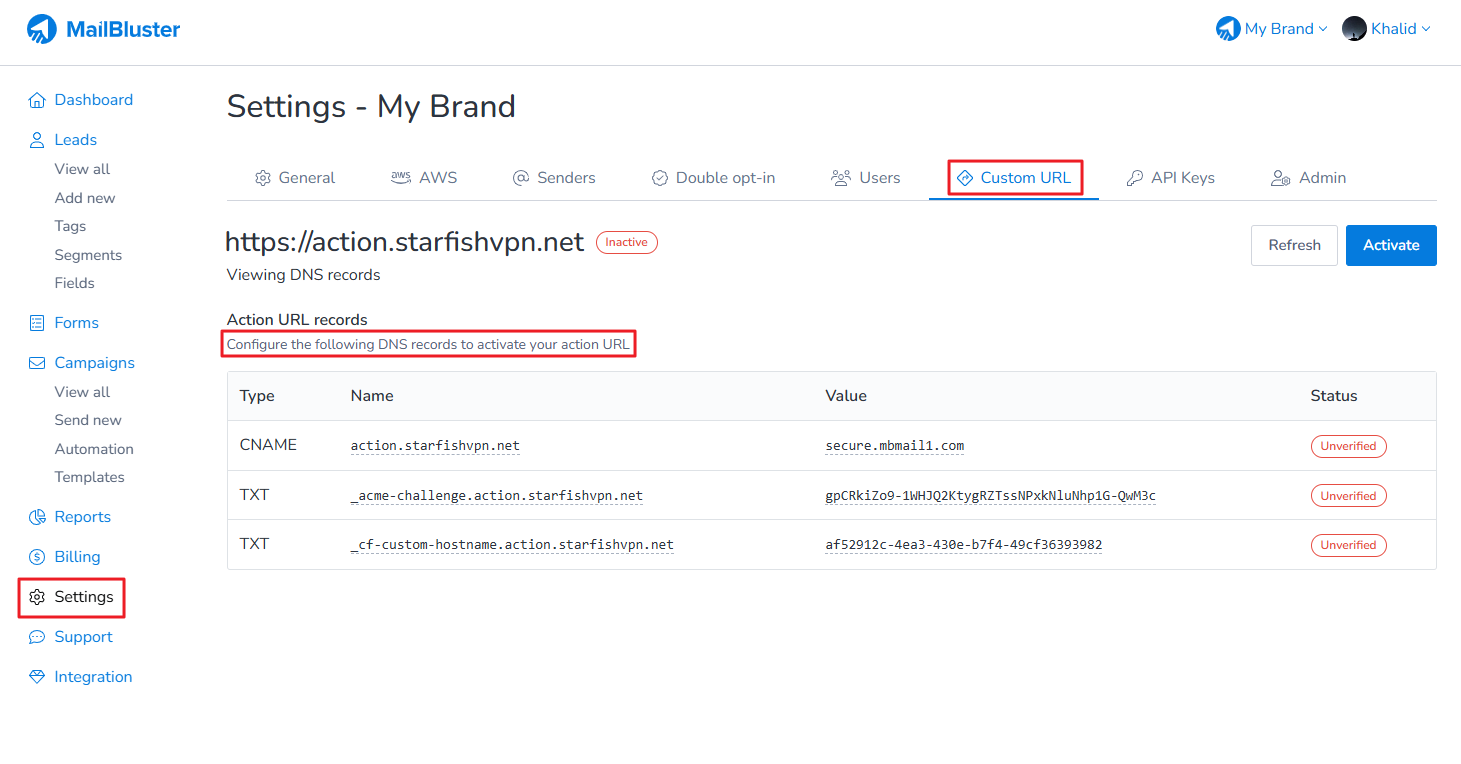
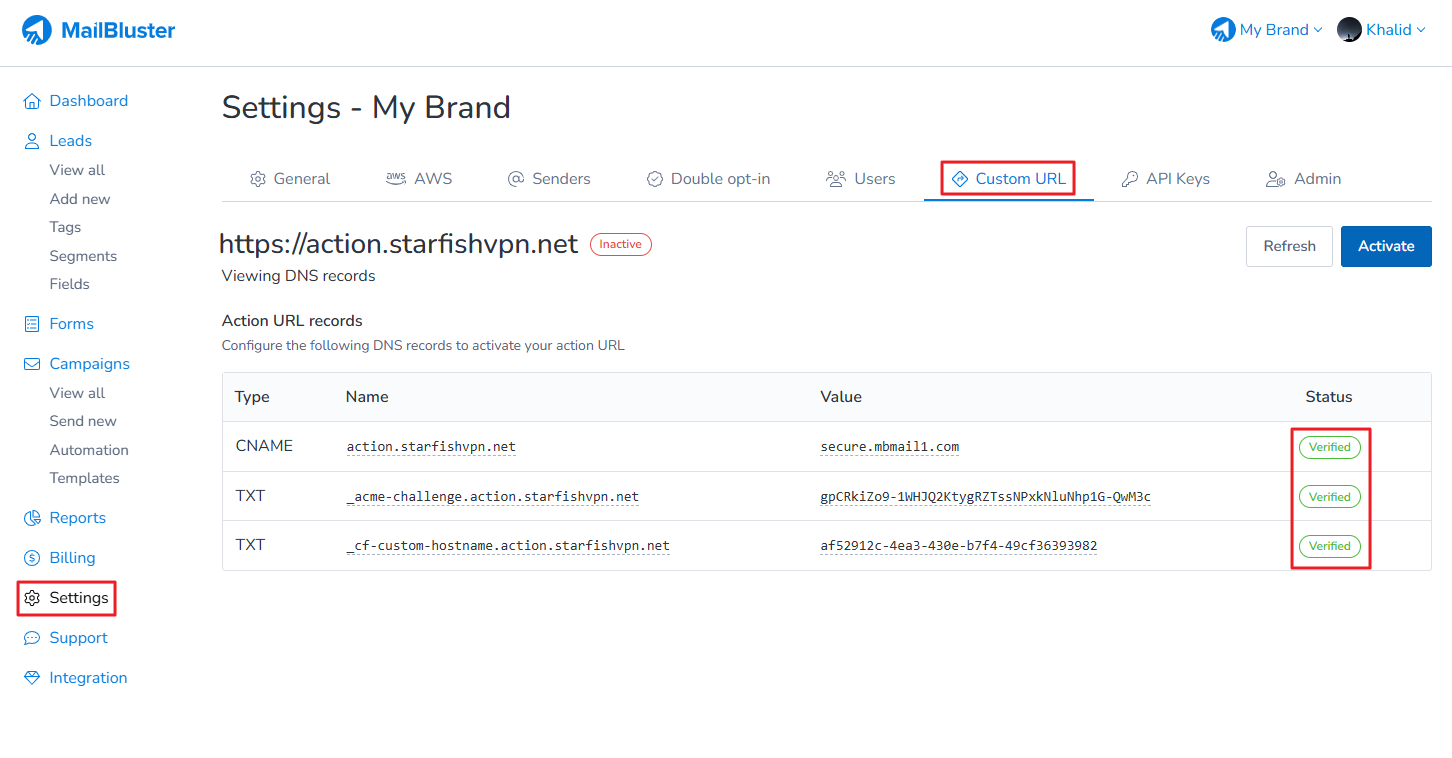
Configure the following DNS records in your domain cPanel. You need to add the CNAME record in your sender domain’s DNS record list that points to MailBluster’s domain secure.mbmail1.com. You also need to add these two TXT records as well.
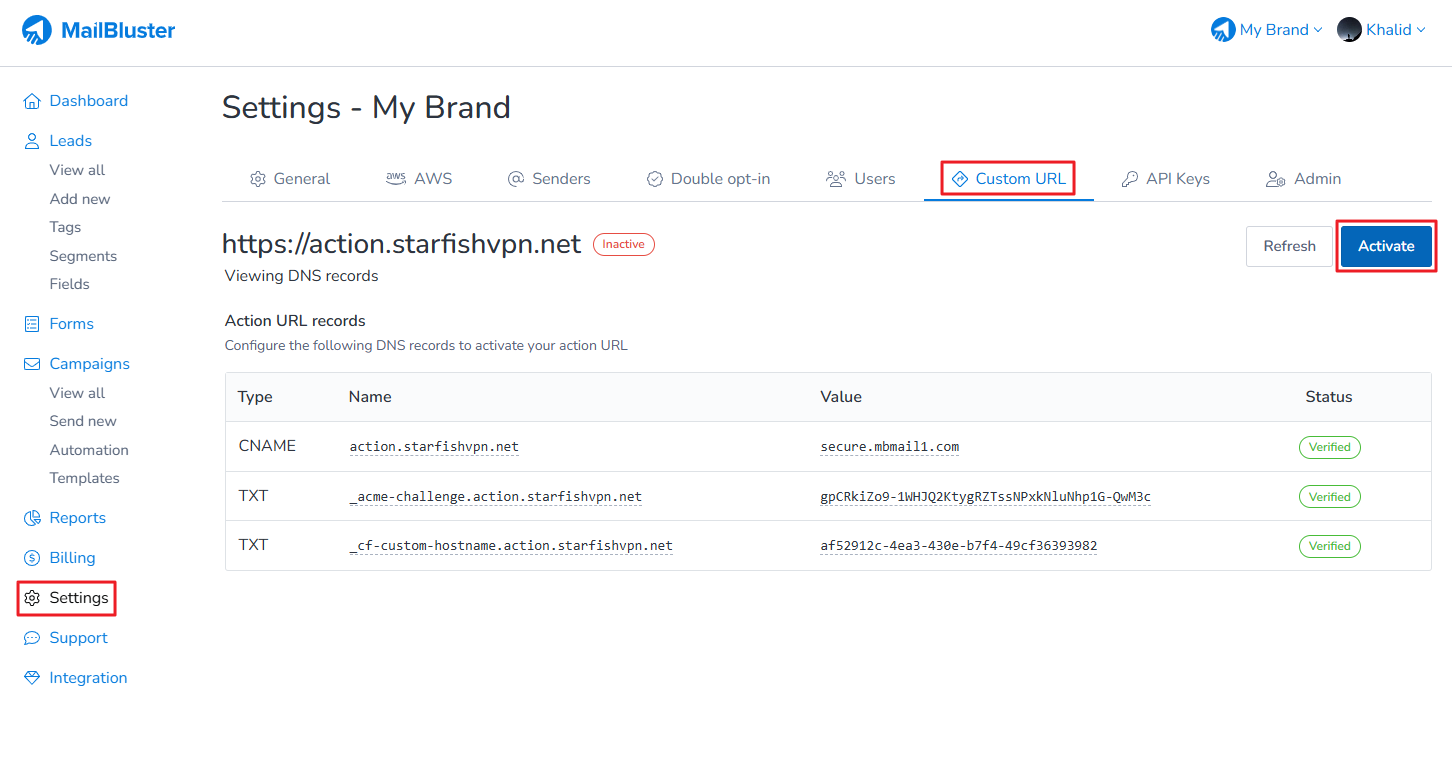
Once the DNS records are propagated (maximum 48 hours), you will see the Status of the DNS records as Verified.
Click on the Activate button to activate the Action URL.
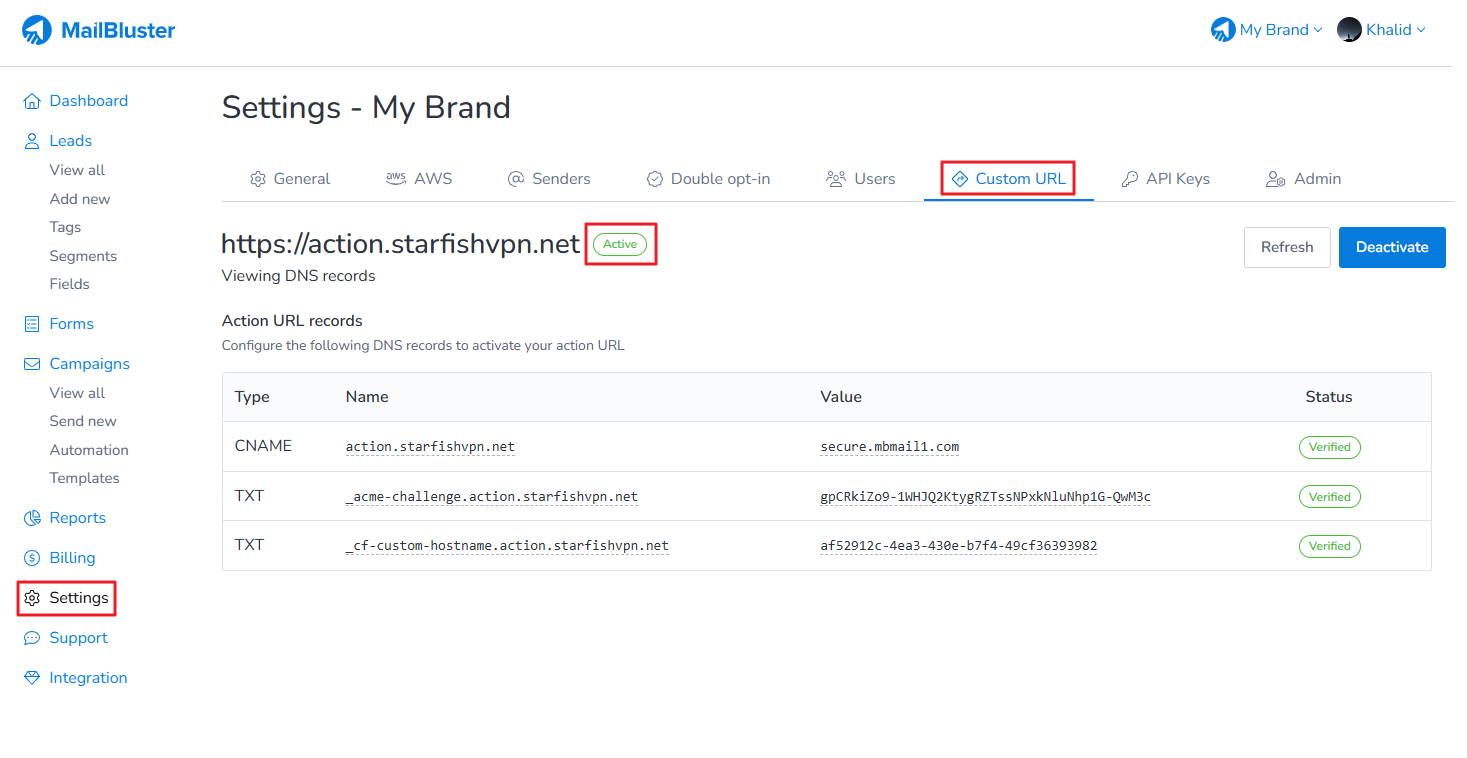
Once the Action URL is Activated, it will show as ‘Active.’
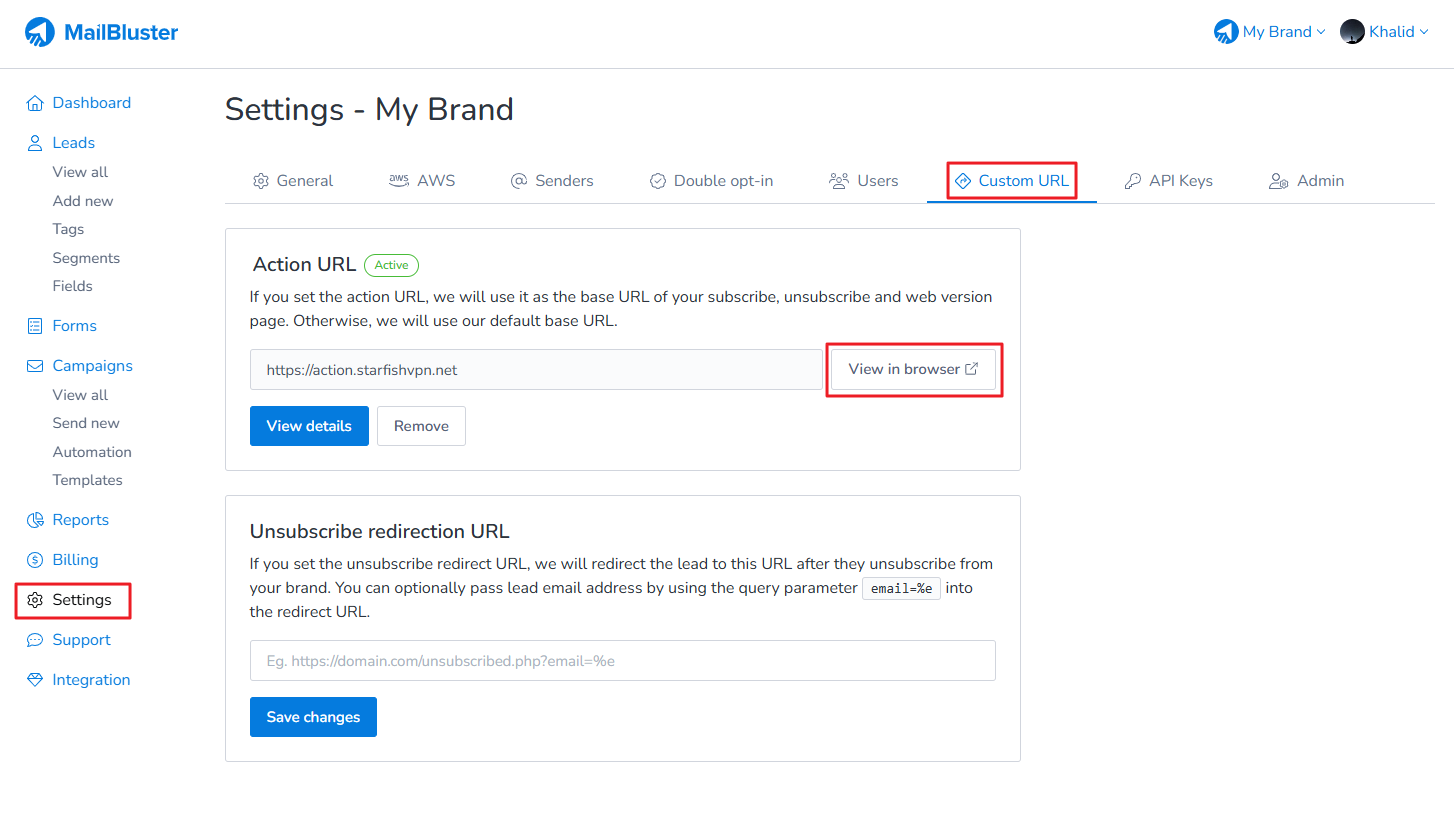
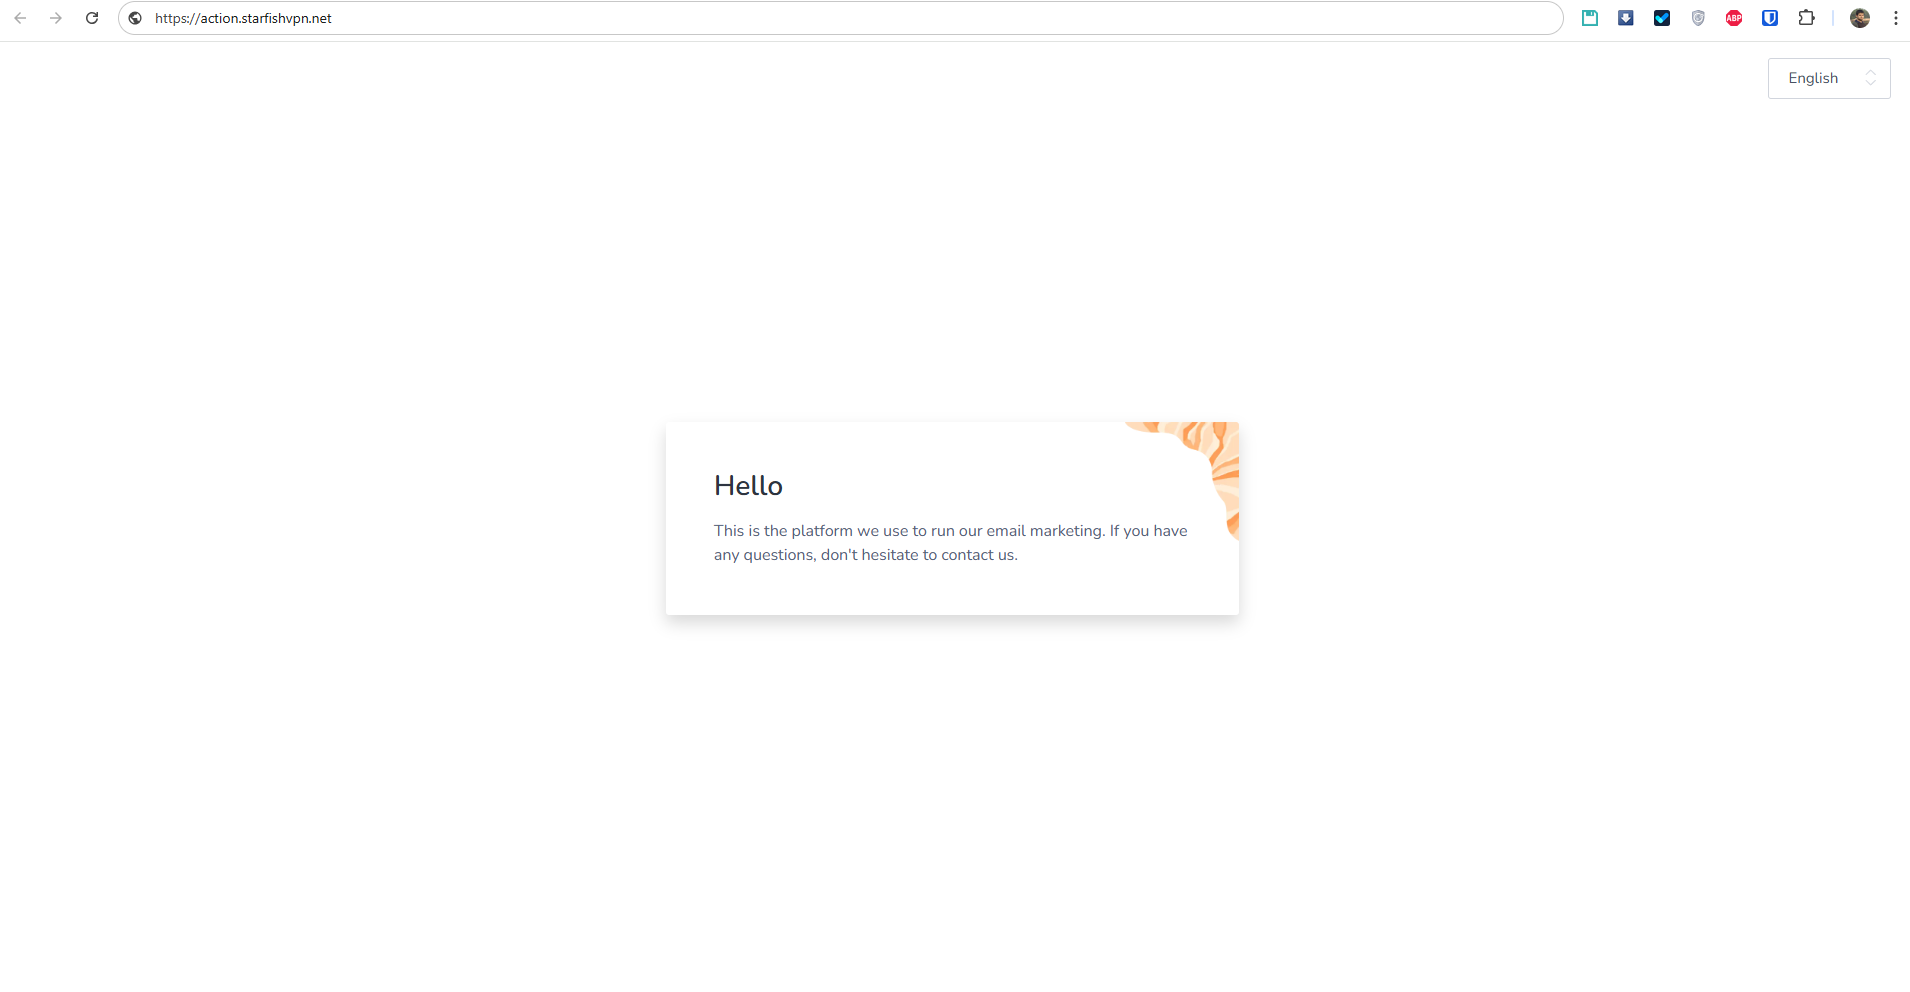
Now, click on Custom URL and then click on View in browser.
It will redirect you to the web page of your preferred Action URL you have just set.
After setting the Action URL, you can test the behavior by sending test emails to yourself. Once you set the Action URL, please make sure it’s working before sending your next campaign. You can test this by simply sending a test email campaign to yourself and check the behavior.
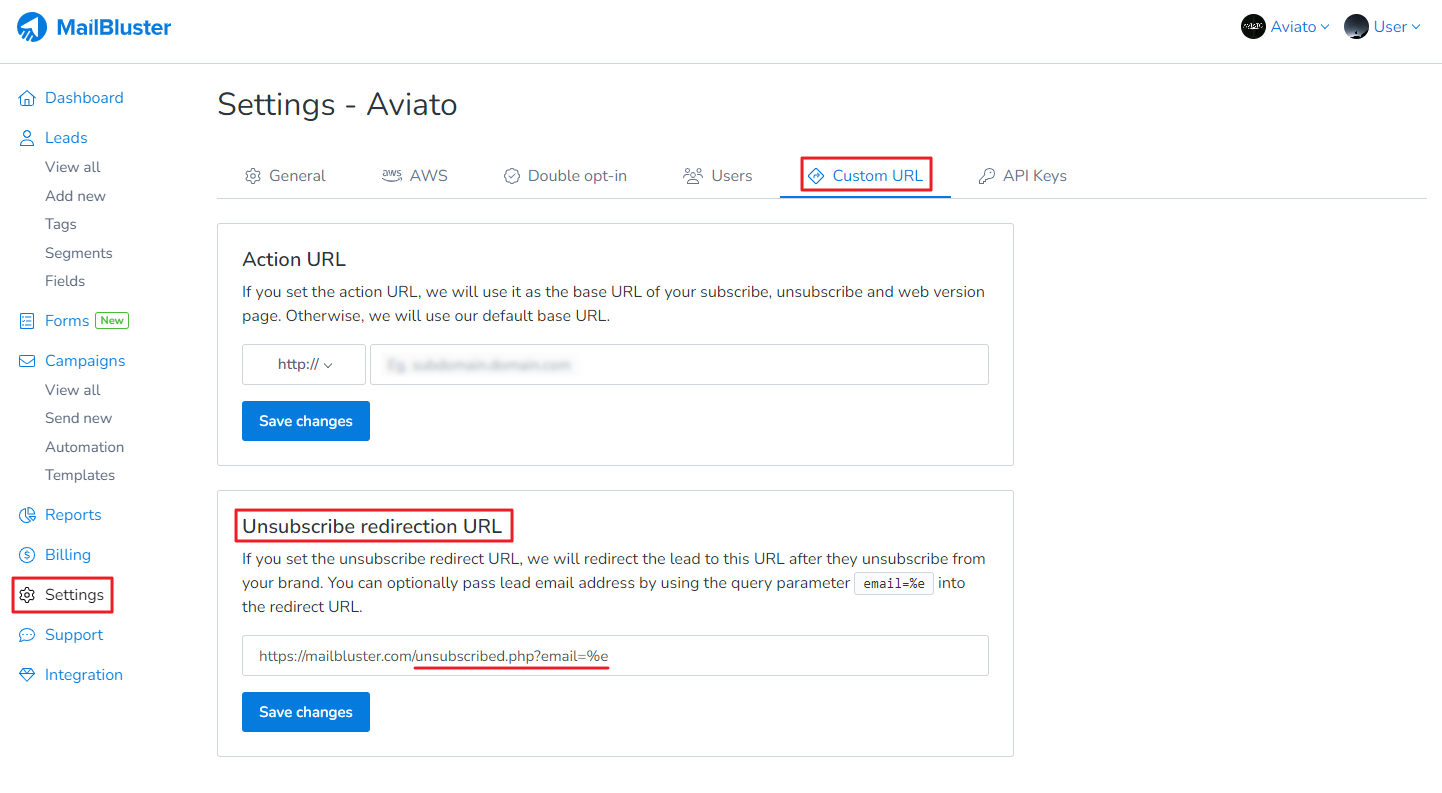
When you set the Unsubscribe redirection URL from Settings > Custom URL, it will redirect the receiver to MailBluster default domain after clicking the unsubscribe from your email content, and then after confirming the Yes, unsubscribe button, it redirects you to the domain you set for Unsubscribe Redirection URL. Here is an example on how to set up an unsubscribe redirection URL for your brand:
Here is an example of an Unsubscribe Redirection URL: https://mailbluster.com/unsubscribed.php?email=%e
Here the Lead email address is passed by using the query parameter email=%e
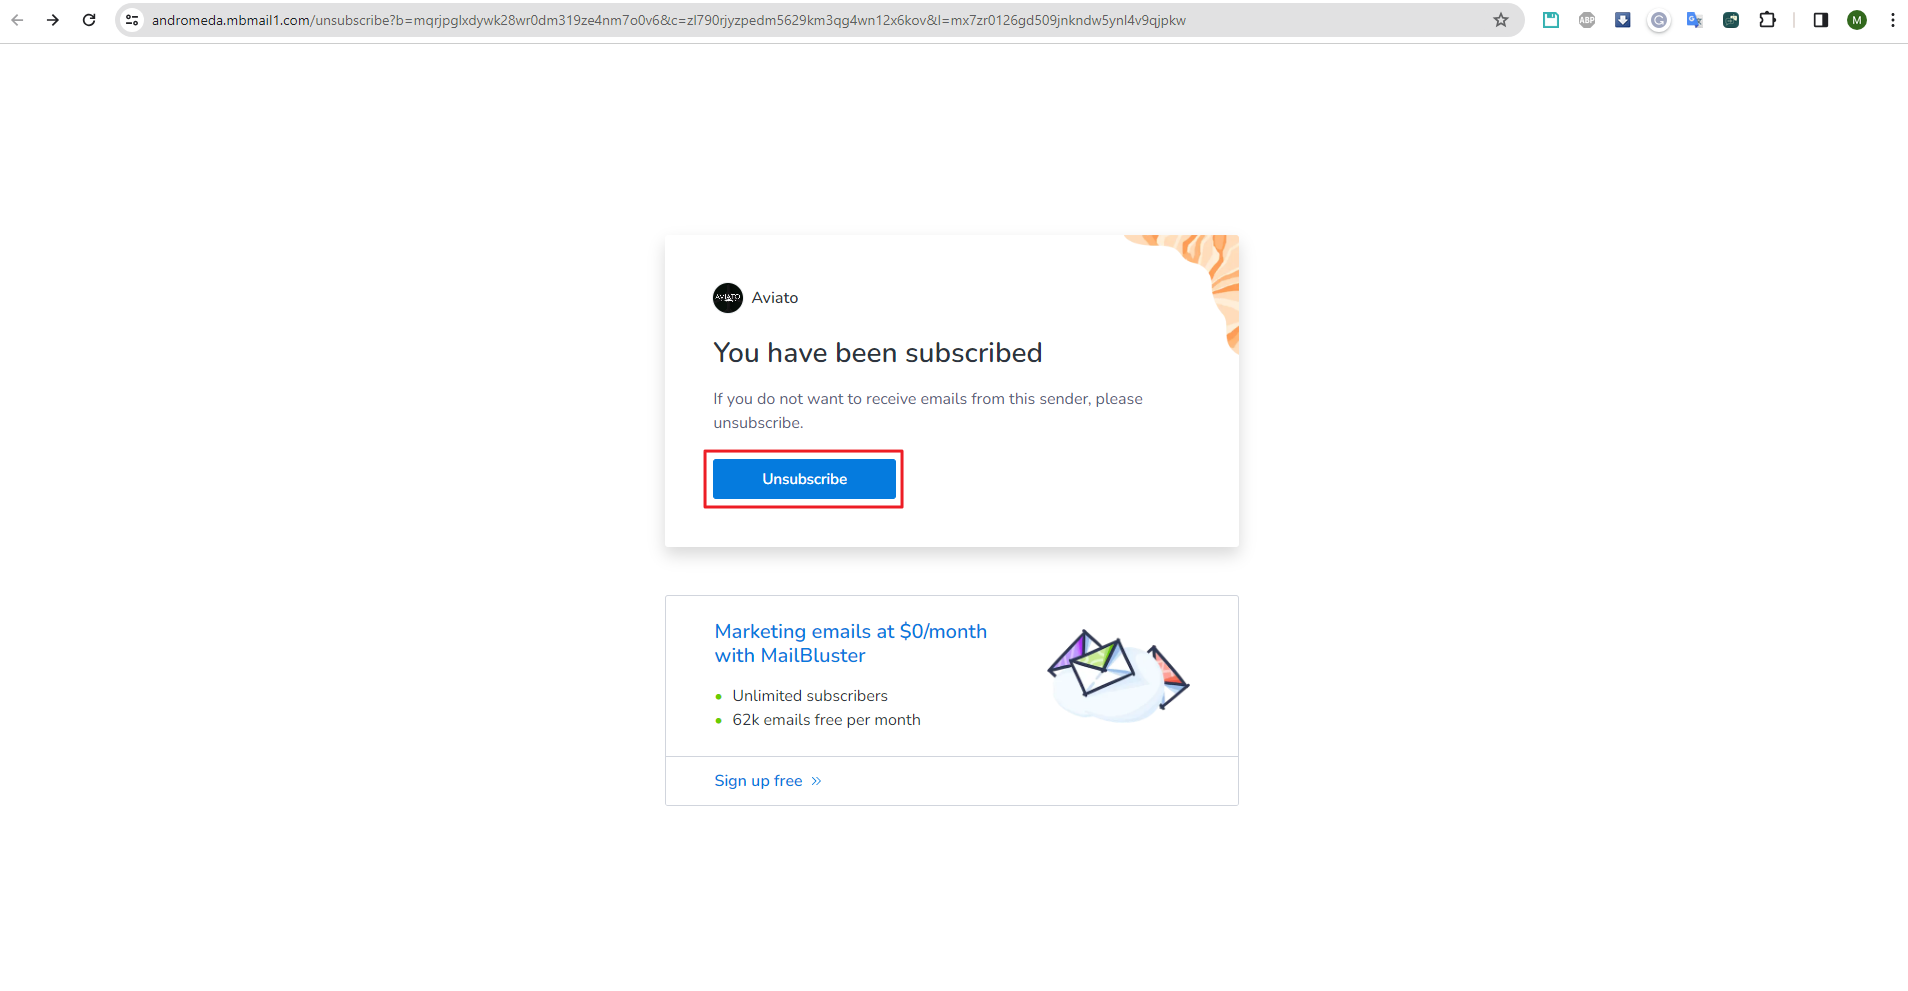
So, when the user clicks Unsubscribe as shown here:
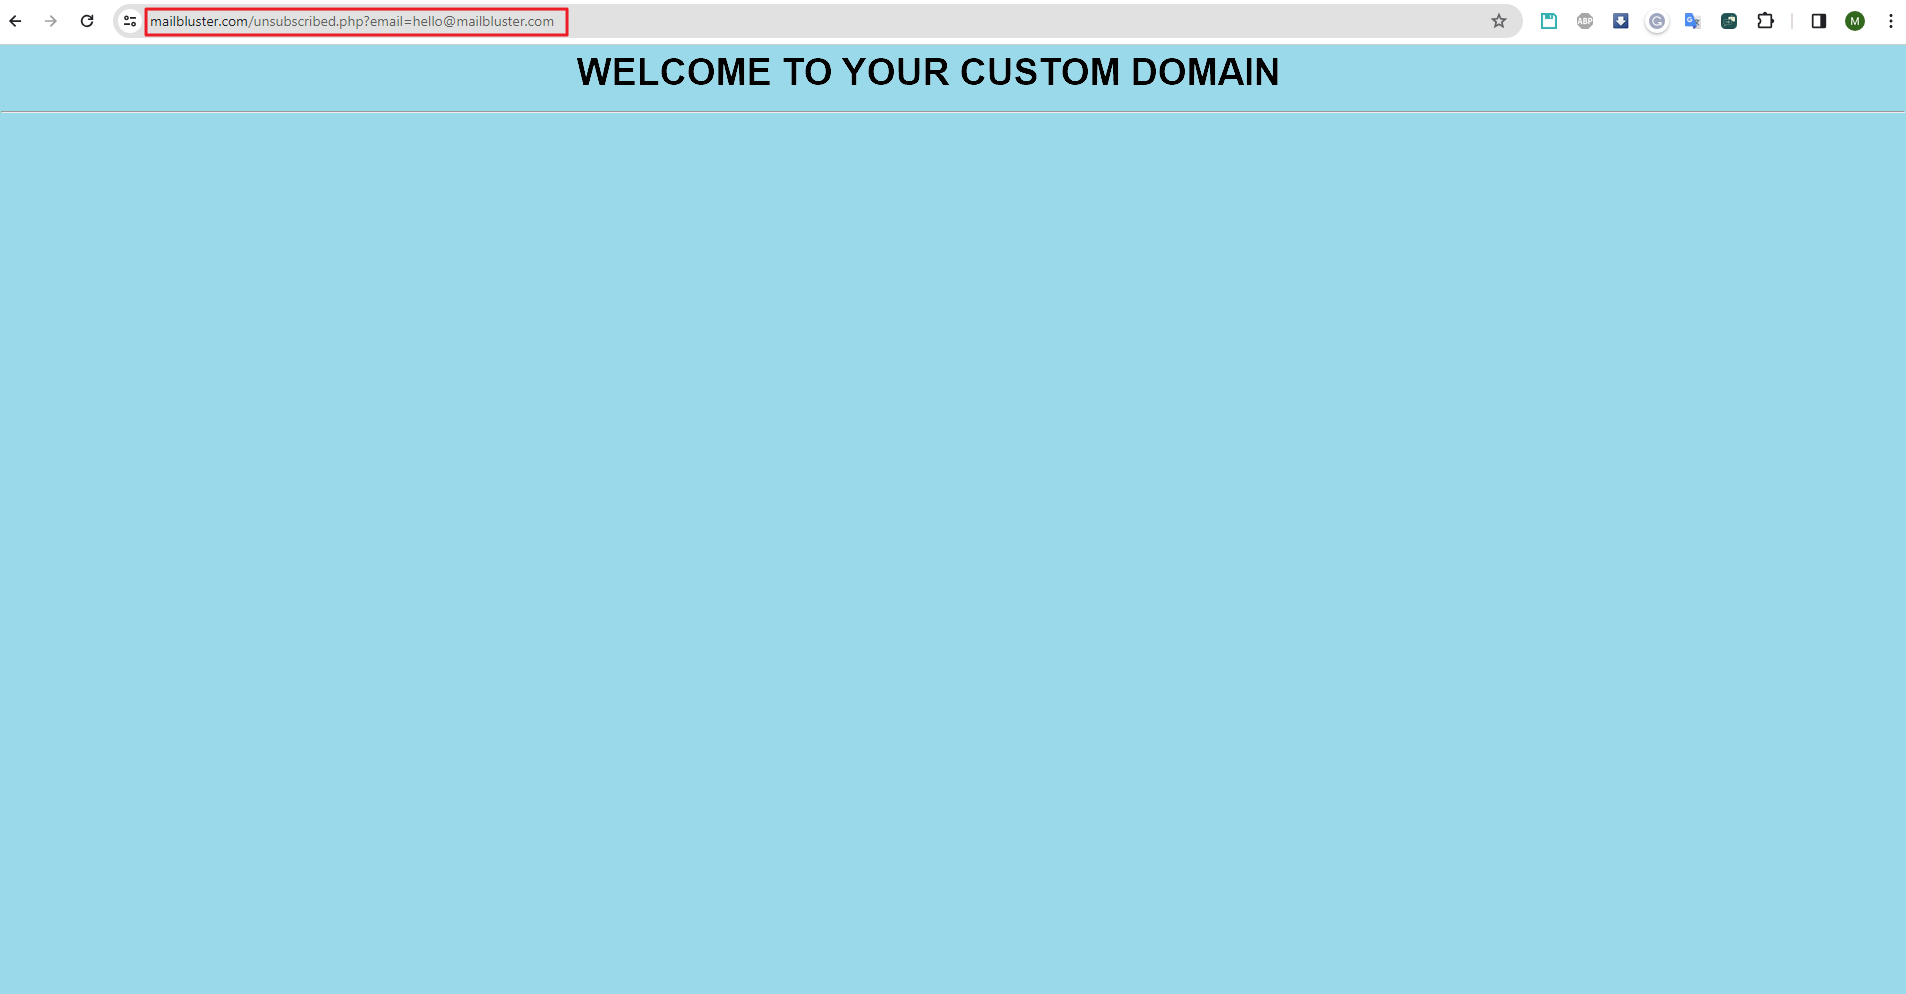
It will redirect to the page you have set earlier with the email address as shown below:
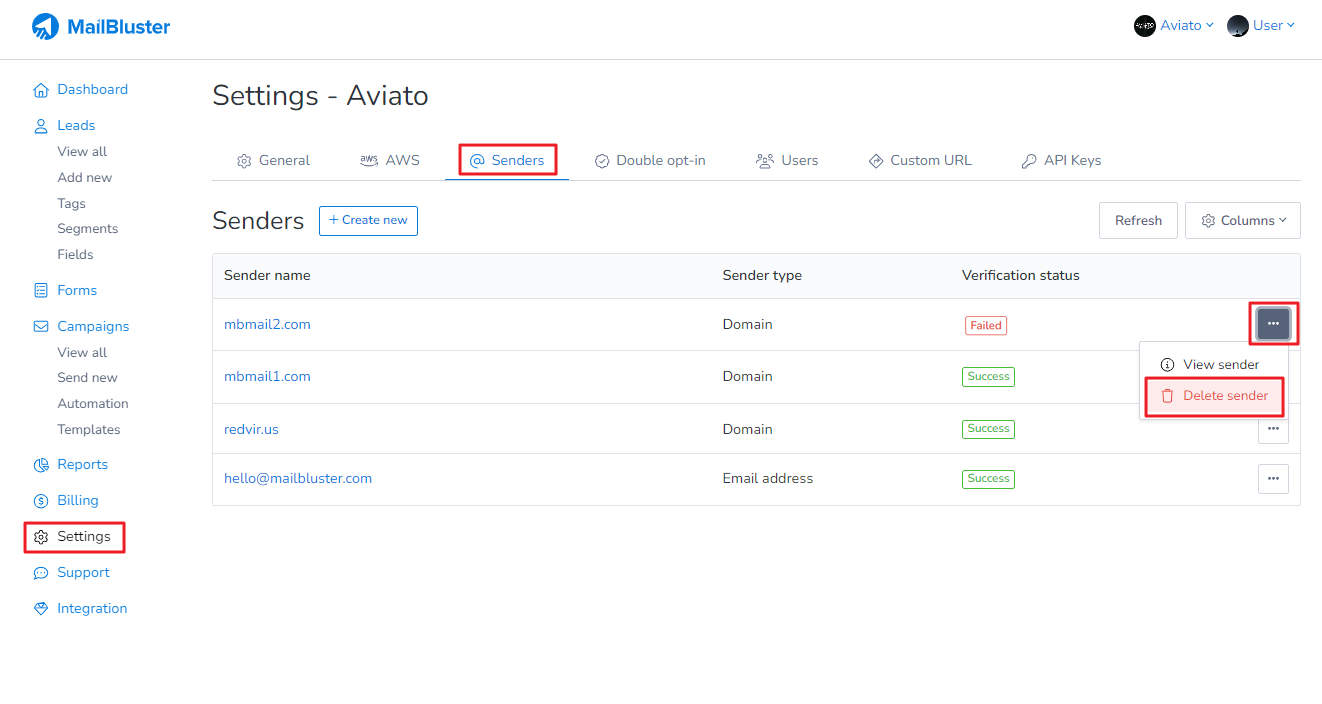
If you’re looking for how to fix Domain Verification status failure in MailBluster, this step-by-step guide will help you troubleshoot common issues and successfully verify your domain for smooth email sending. If the Domain Verification Status fails, then setting up DNS record after that will have no impact because Amazon SES does not check the records. You need to delete the domain from @Senders and then add the domain again, then it will retry.
After deleting the sender domain, add the sender domain again by following this guide:
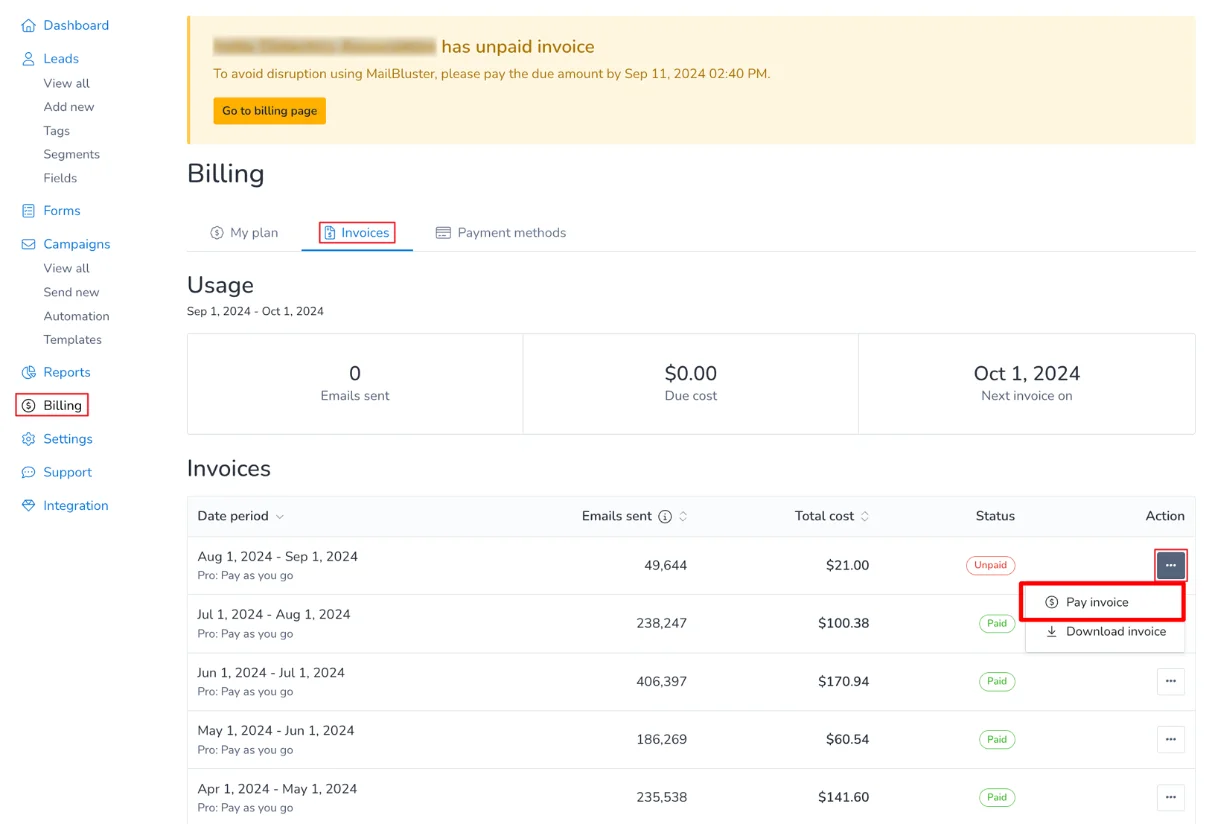
You don’t need to request a payment link each time. You can pay your invoice directly by clicking the ‘Pay Invoice’ button under MailBluster > Brand > Billing > Invoices.
Please refer to the screenshot below.
This way, you won’t need to request a payment link from the MailBluster Support team every month. Please ensure that your billing card is an international credit card and is supported by Stripe.