A campaign is like a special email you send to a bunch of people. You get to make it look nice, pick when it goes out, and decide who gets it. After it’s sent, you get a report telling you how well it did. Campaigns are usually send in bulk in MailBluster. The receivers are mainly your subscribers.
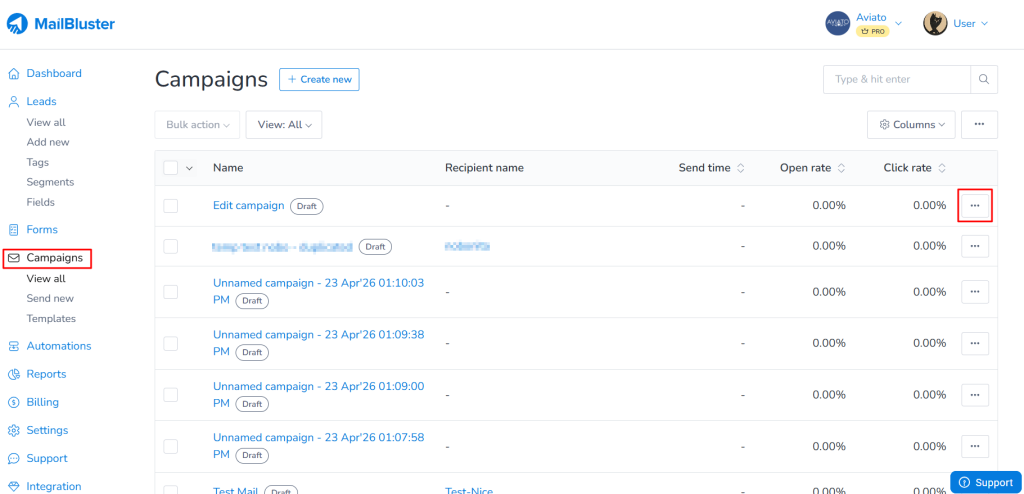
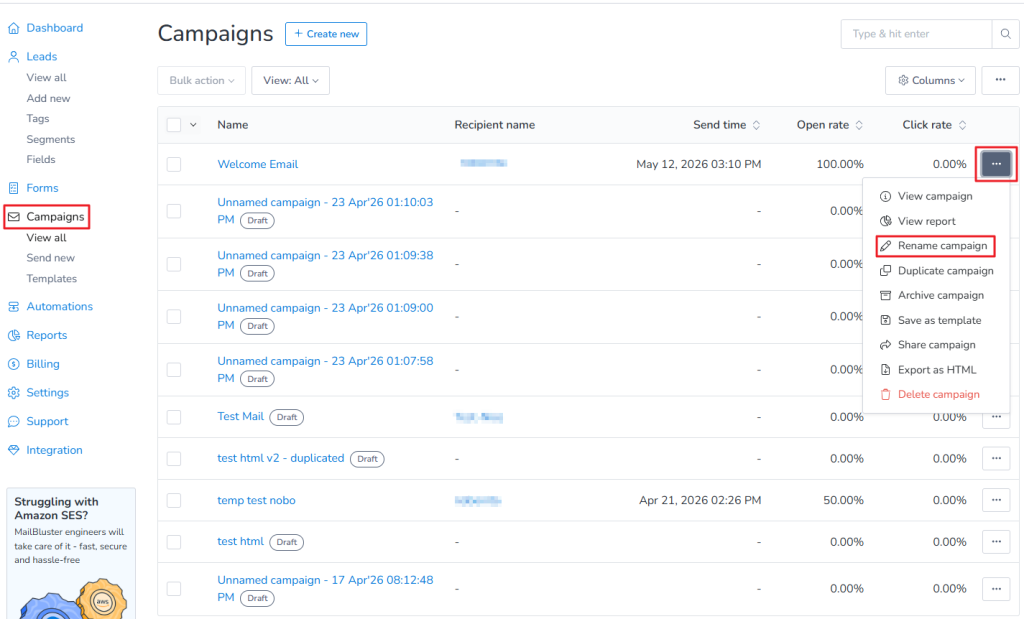
You can rename campaign (sent, cancelled, failed) in MailBluster. First go to Campaigns. Then click on 3 dots (…) ellipsis. In the drop down list, click on Rename campaign.
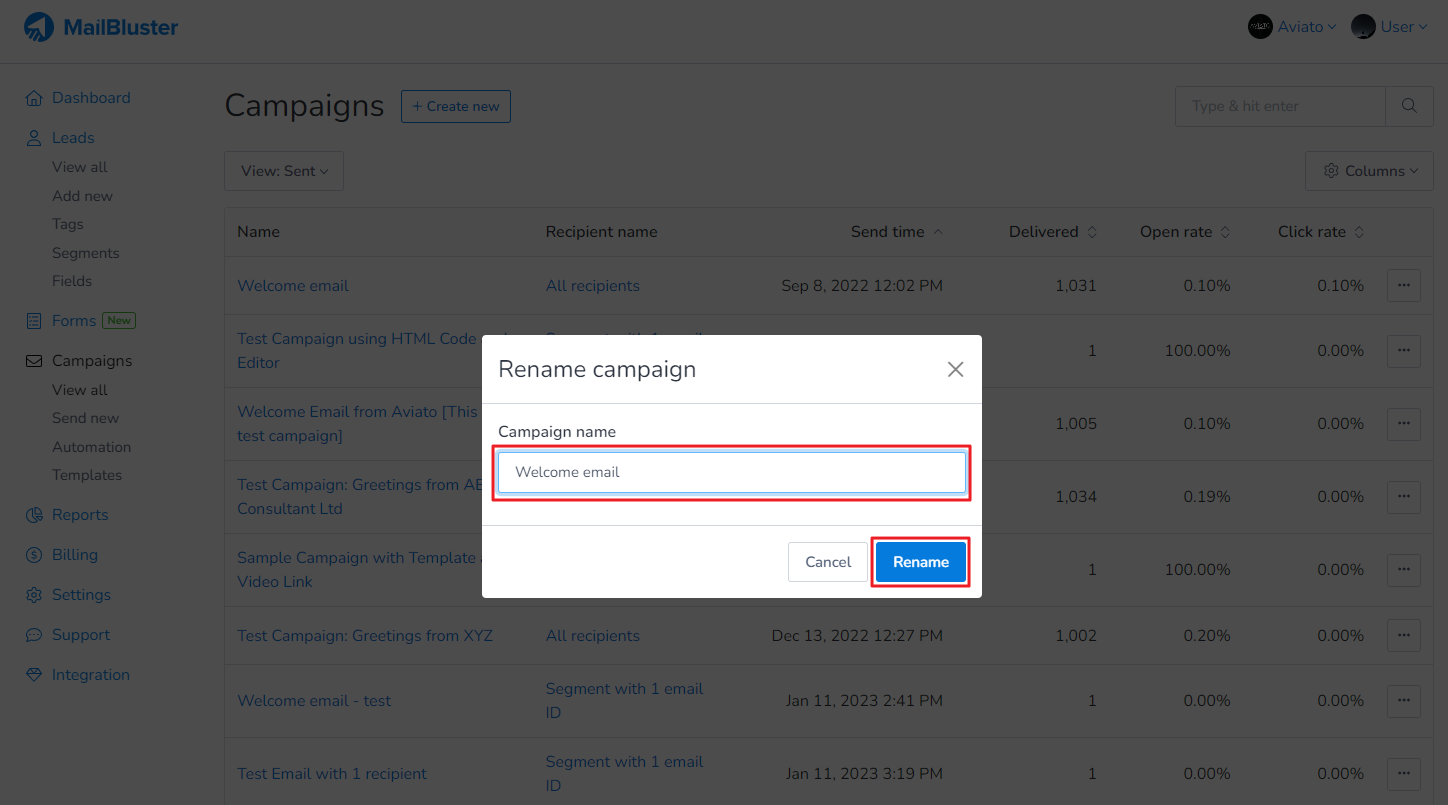
When you click Rename campaign, a popup dialogue box will appear from which you can change the Campaign name of the selected campaign.
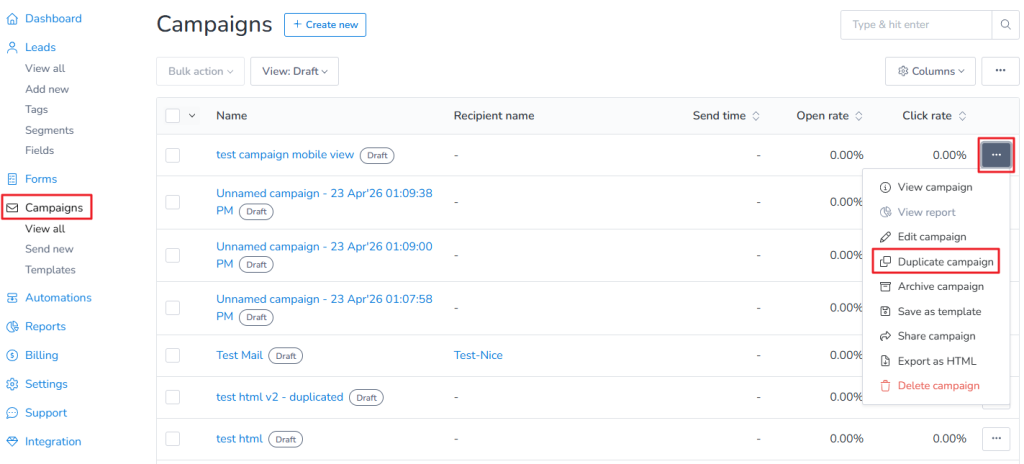
You can easily duplicate campaigns within the same Brand or across different Brands under the same account.
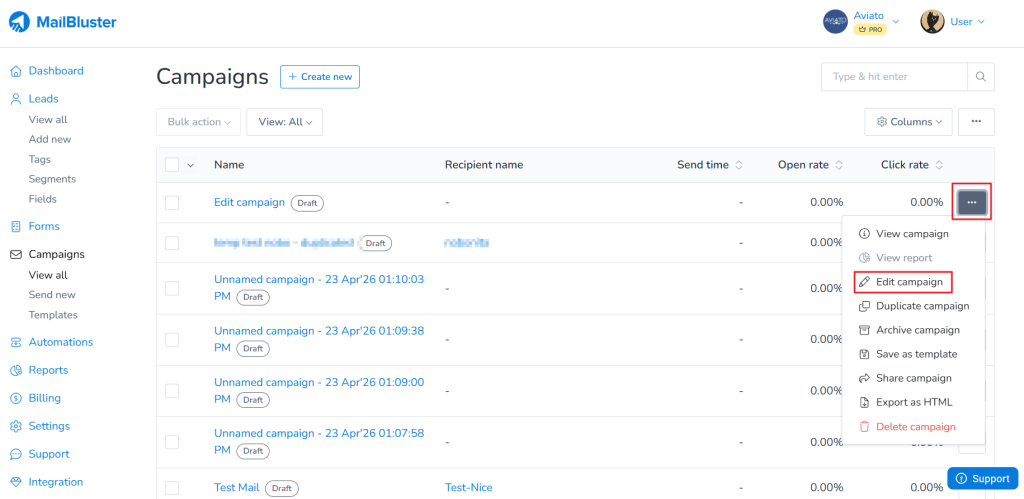
To duplicate a campaign, first navigate to your Brand, then go to Campaigns. Next, select the campaign you want to duplicate by clicking on the three dots (…) ellipsis next to it, and then click Duplicate campaign.
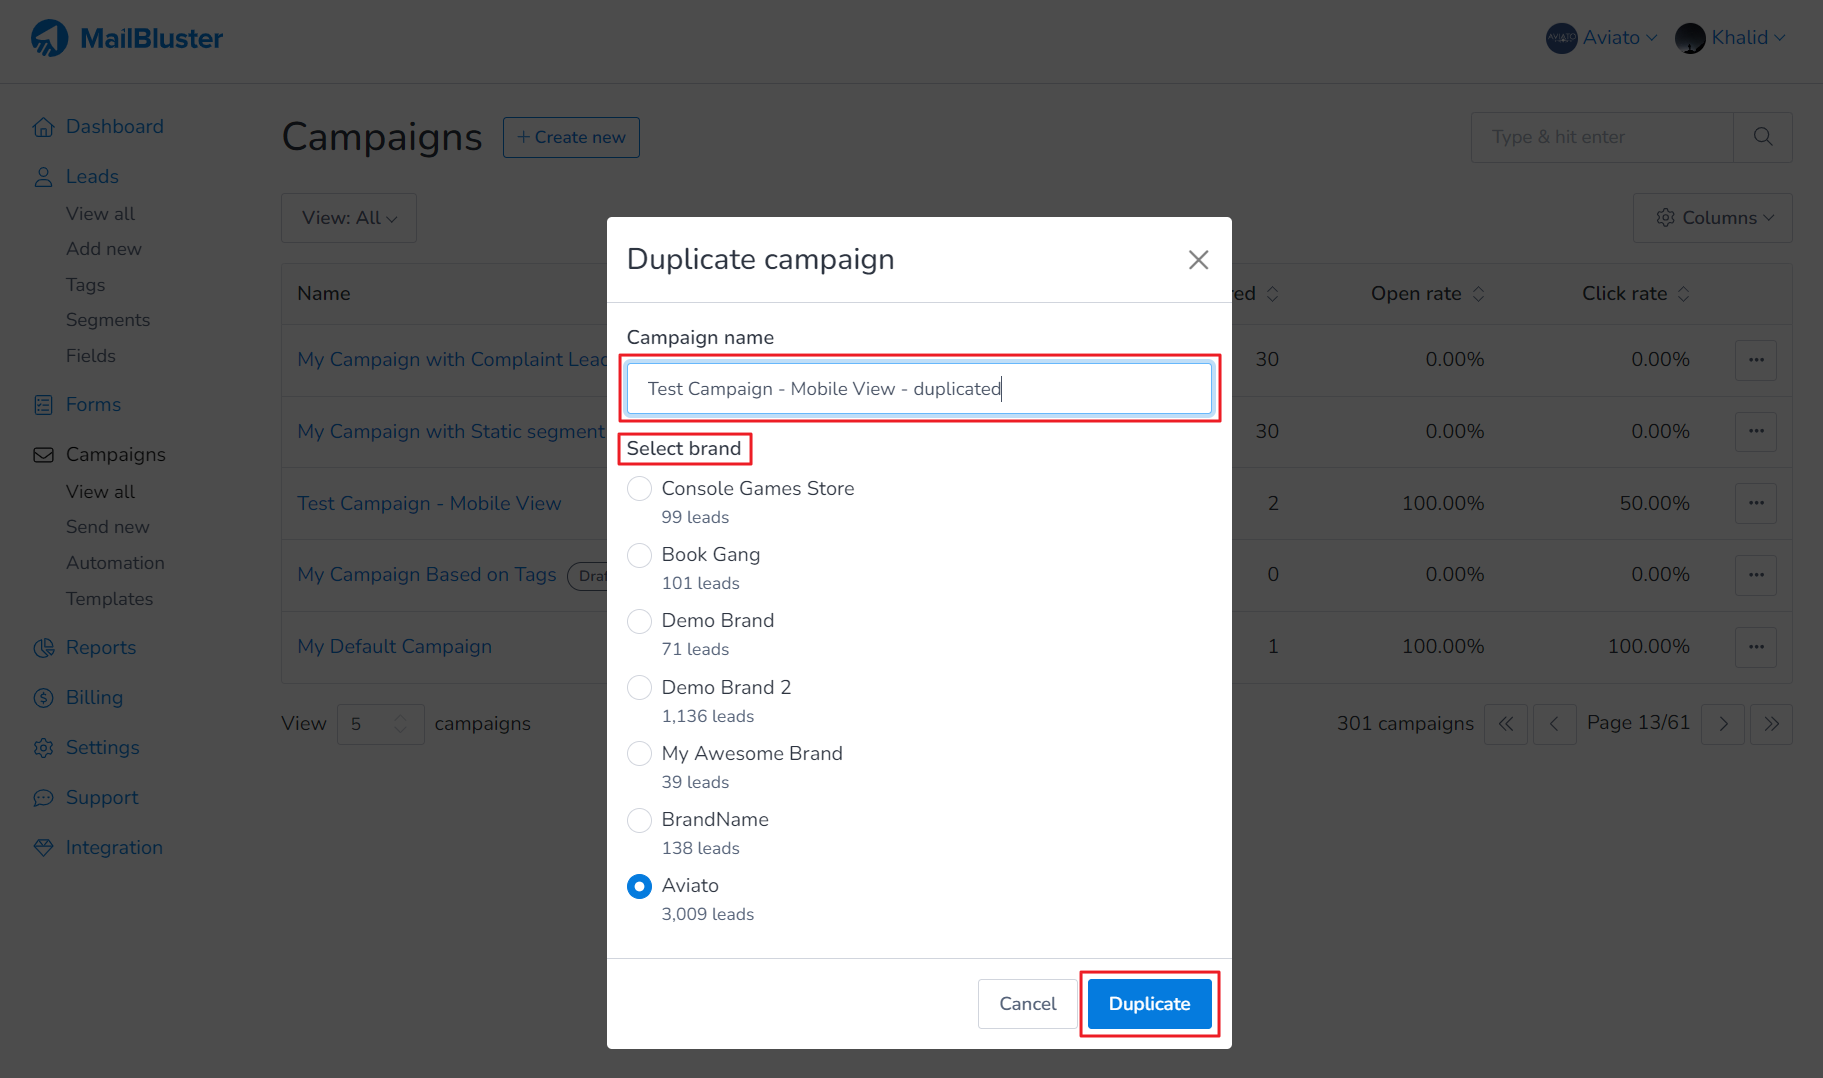
A Duplicate Campaign dialog box will appear, allowing you to customize the campaign name and the brand where you want to duplicate it. Click on the Duplicate button to proceed.
The campaign will then be duplicated within the selected brand.
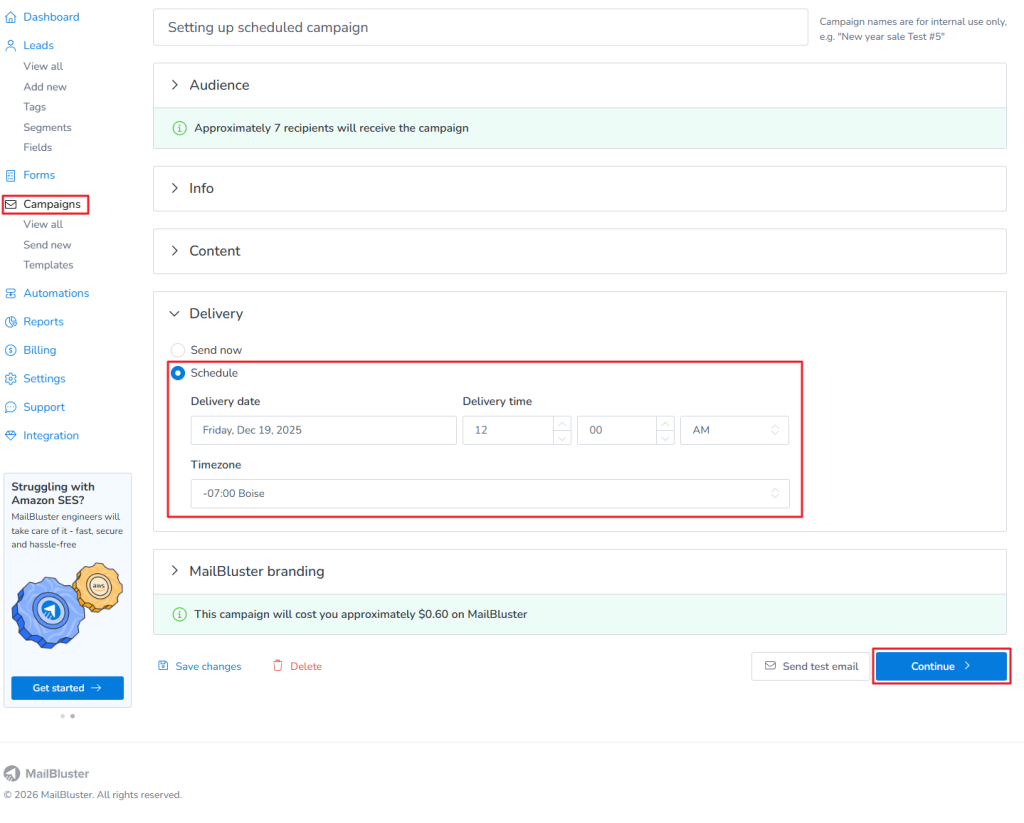
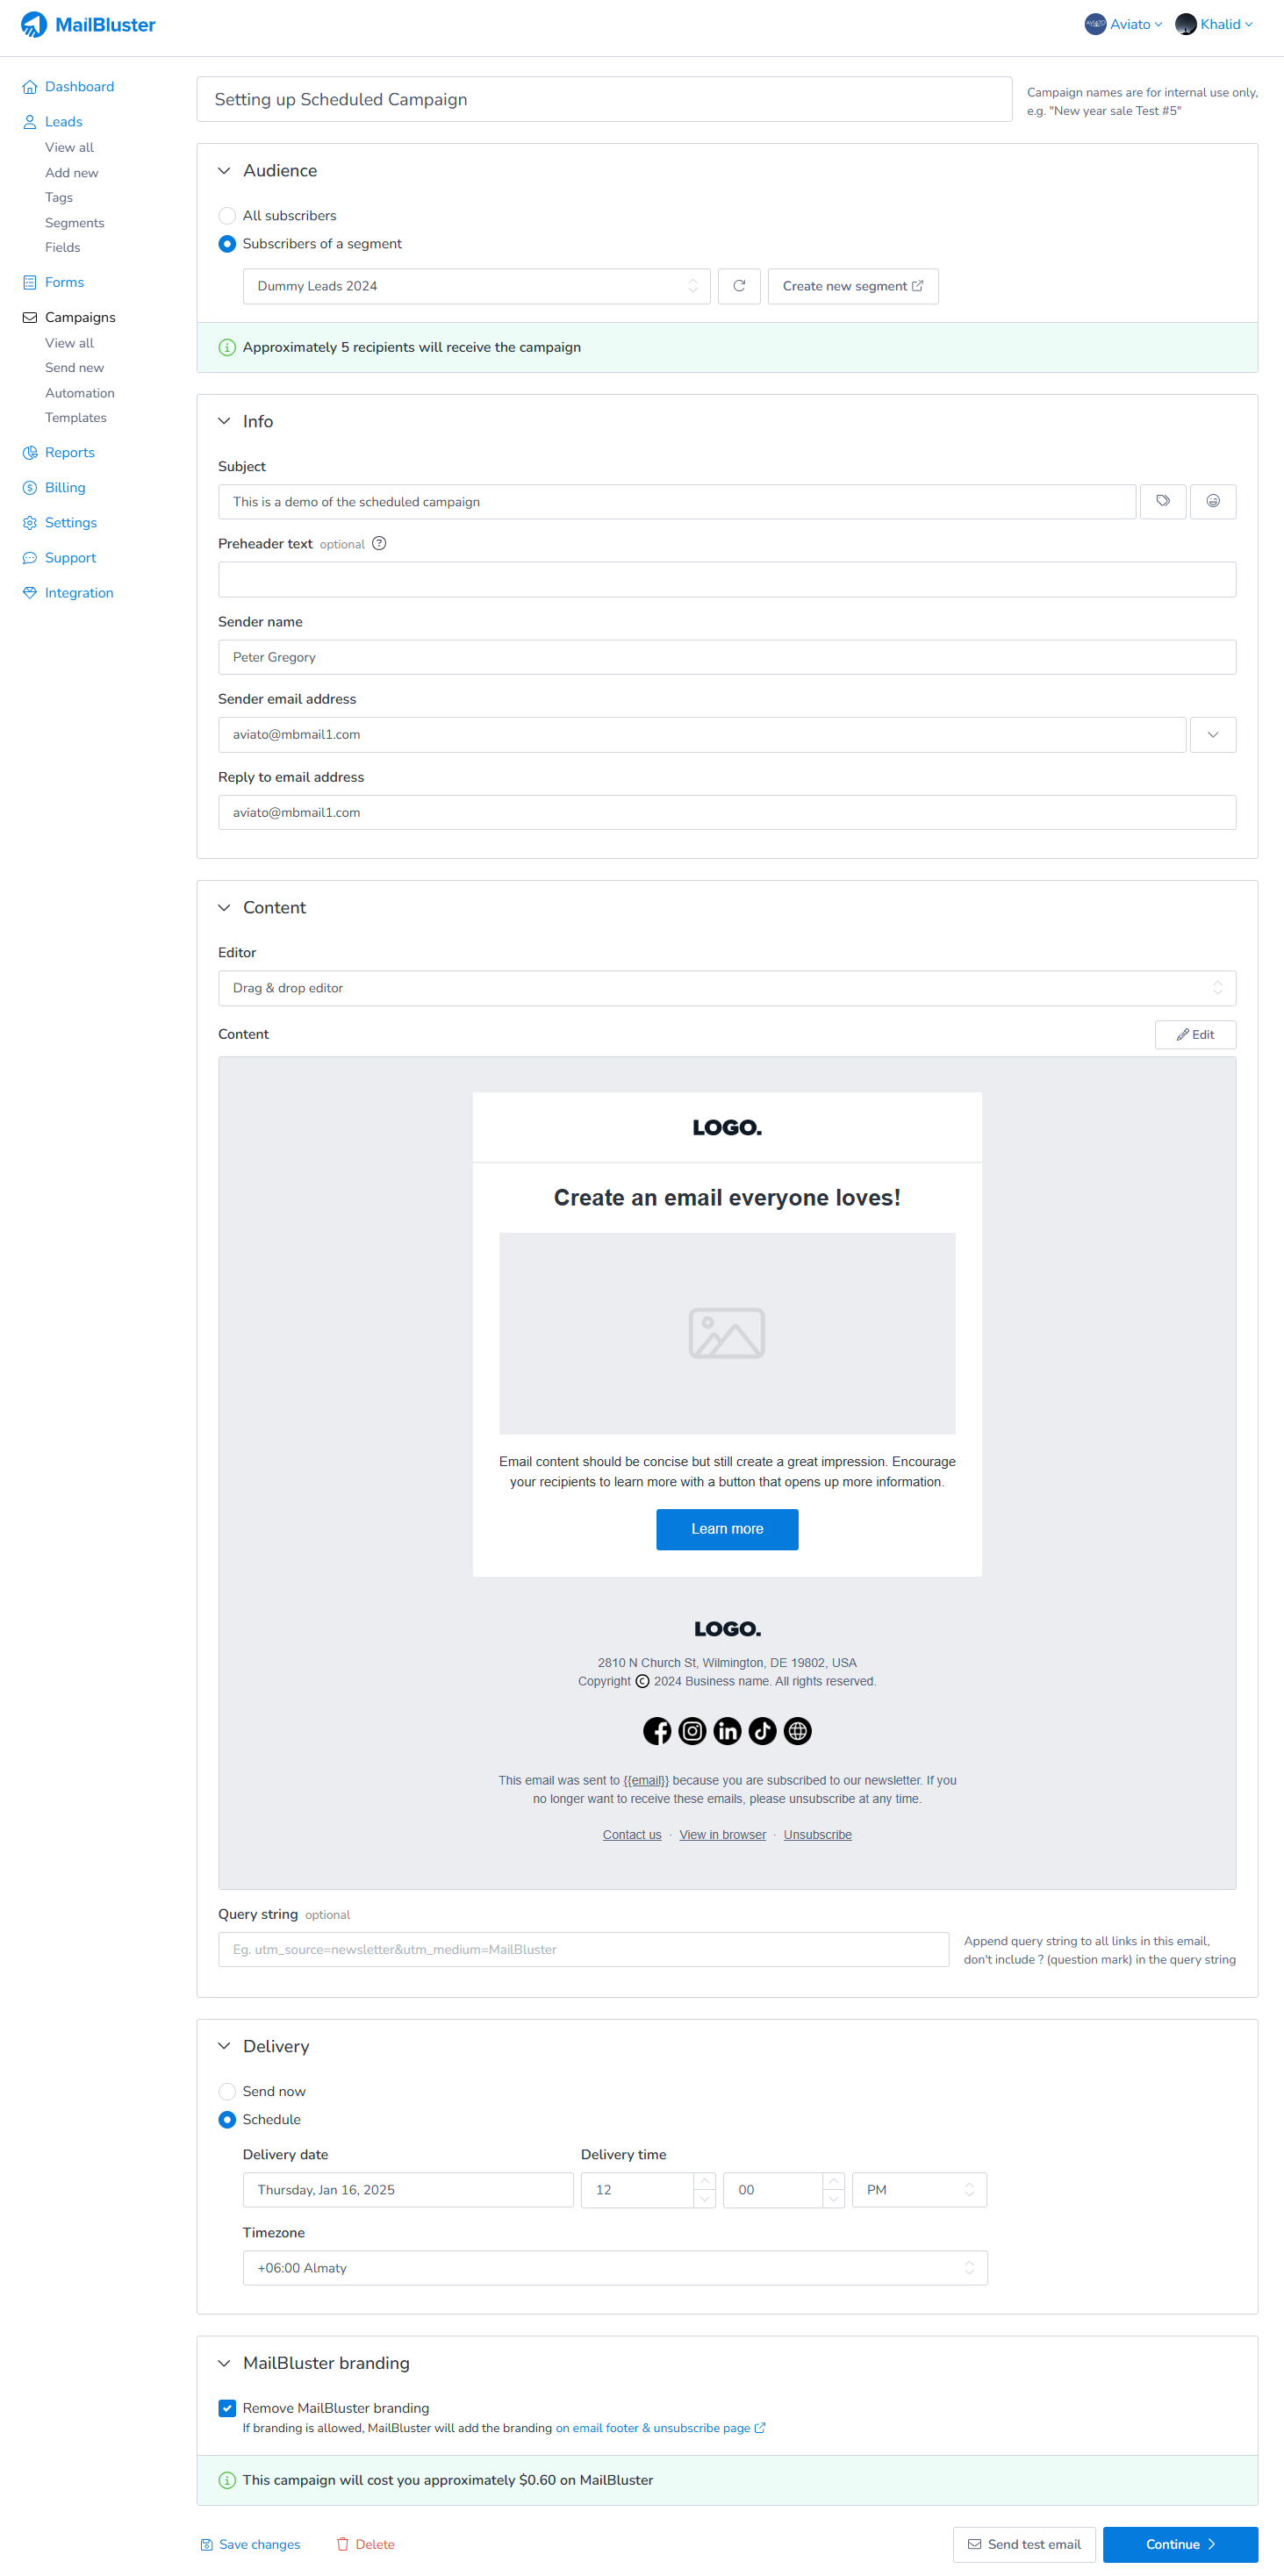
You can easily schedule a campaign in MailBluster once your email design and settings are ready. Let’s assume that you’ve completed all of the prerequisite steps before sending email campaign from MailBluster and have already designed your email campaign and now, you are ready to send your campaign.
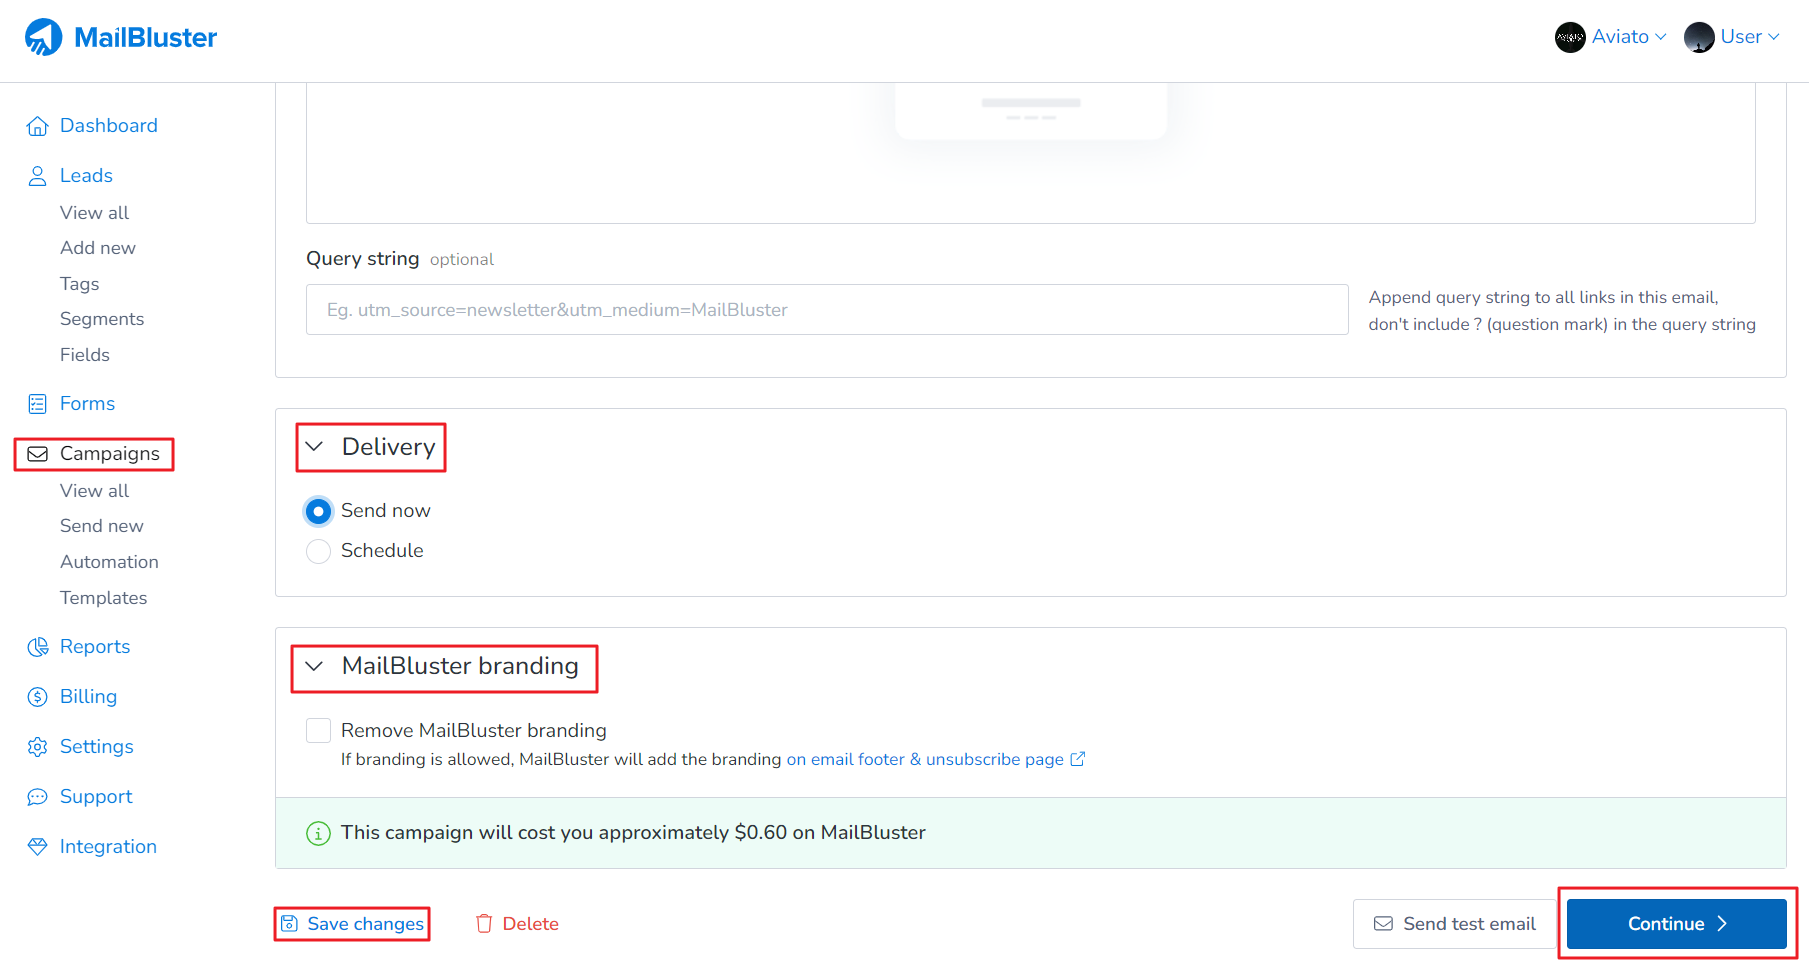
Now what you need to do is scroll down to the bottom of your campaign page and look for the Delivery section, where you need to select the Schedule option and enter your preferred Delivery date, Deliverytime, and timezone. Then click Continue to proceed.
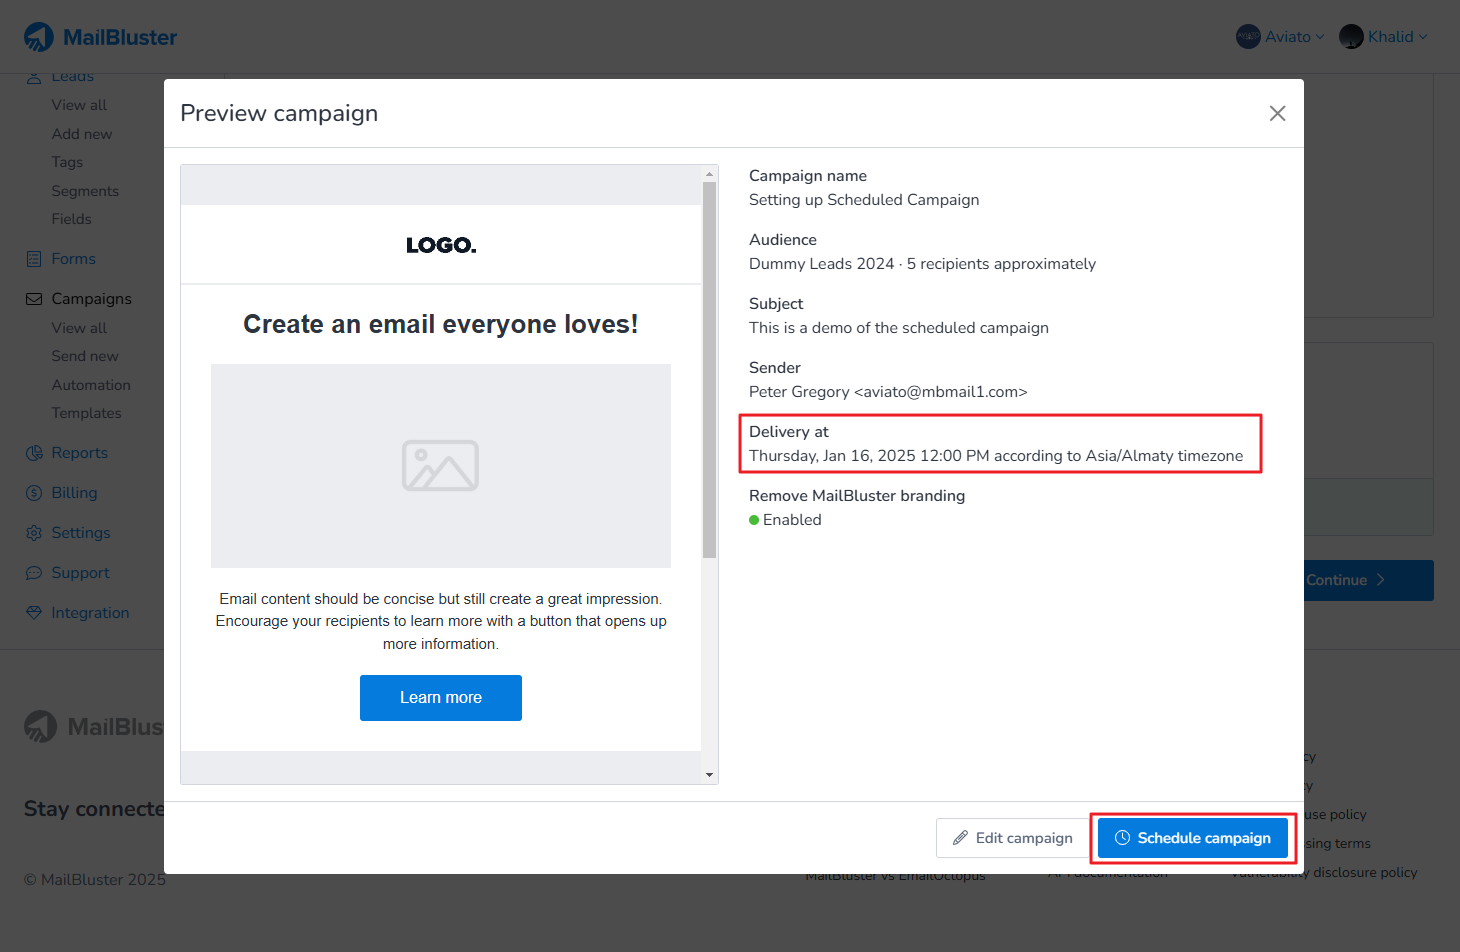
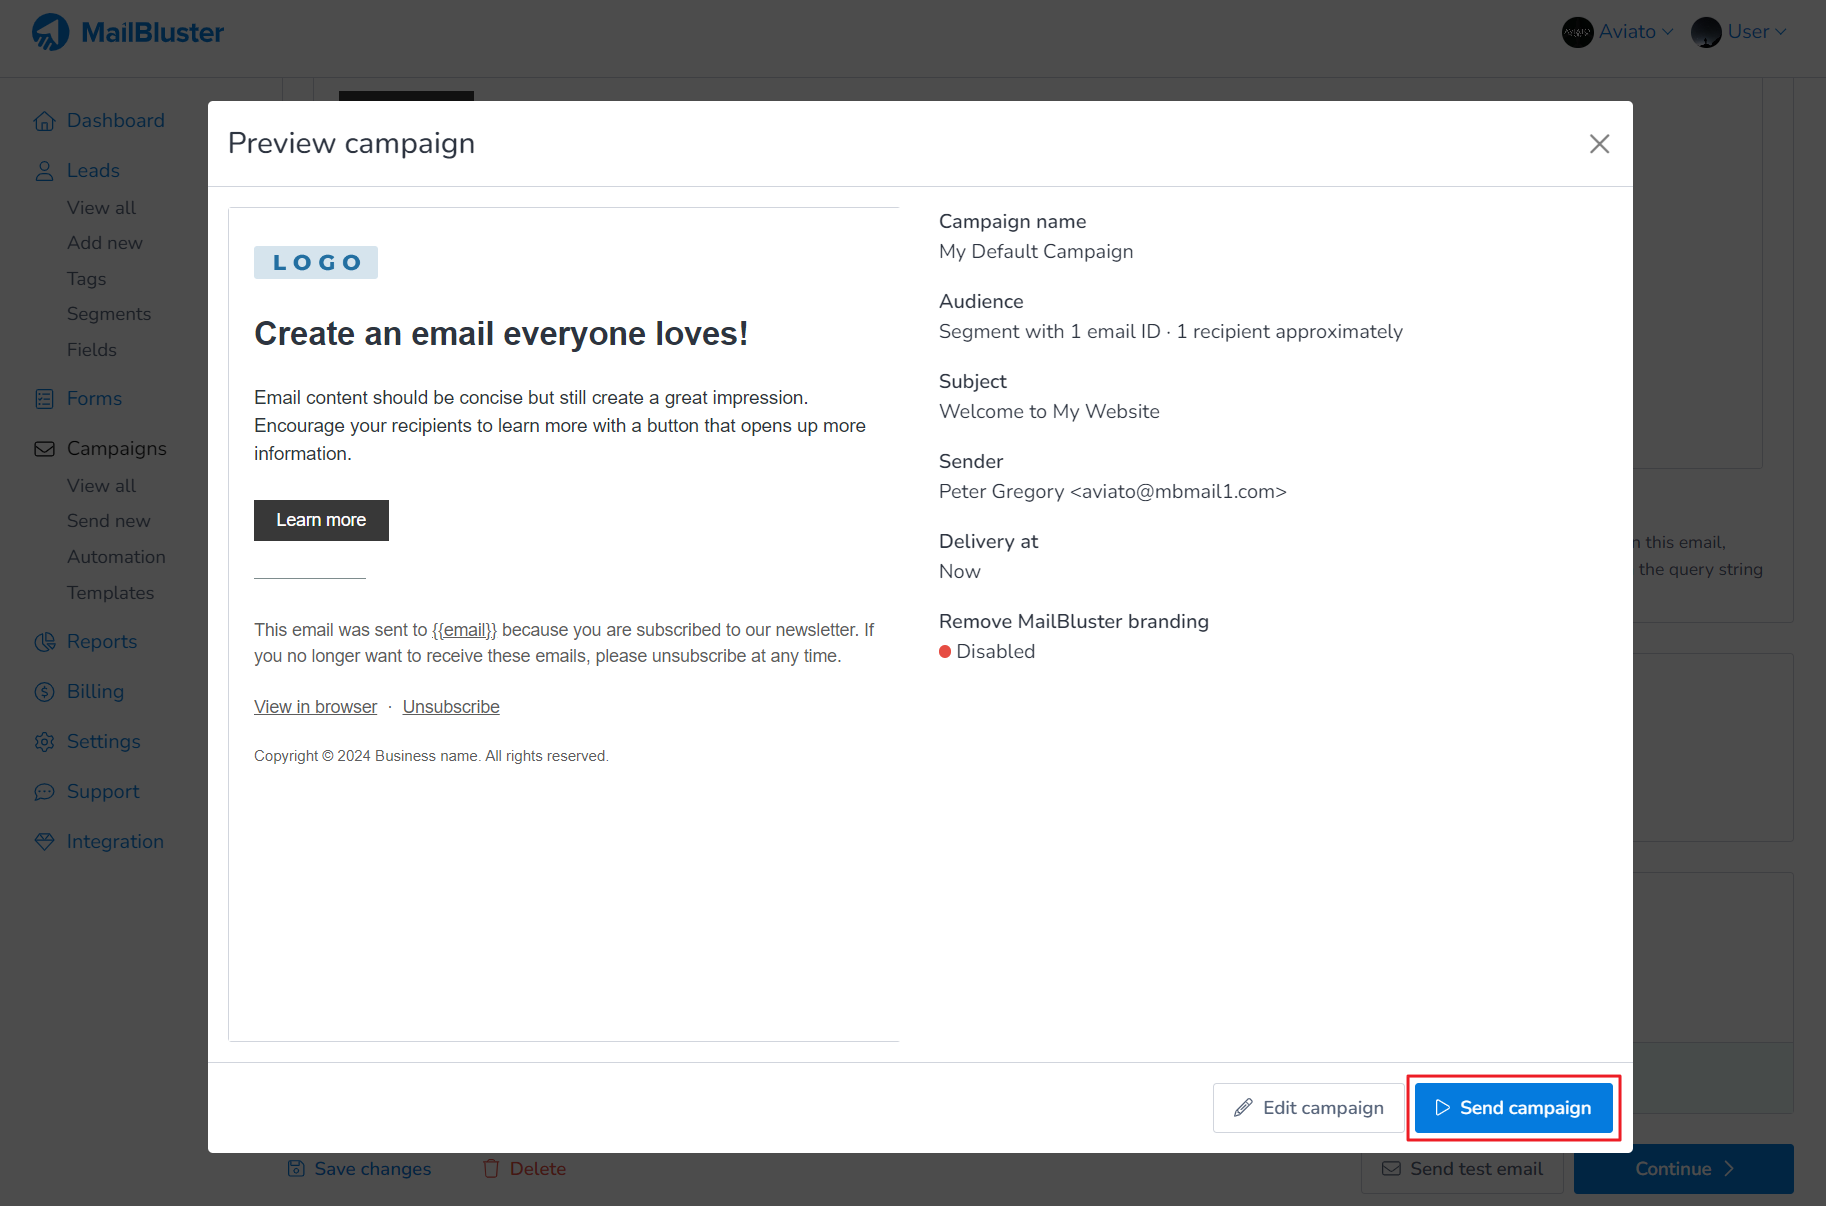
When the Preview Campaign window pops up, check the scheduled time under ‘Delivery At.’ After clicking ‘Schedule Campaign button,’ your campaign will be ready to send to the recipients at the specified time you set.
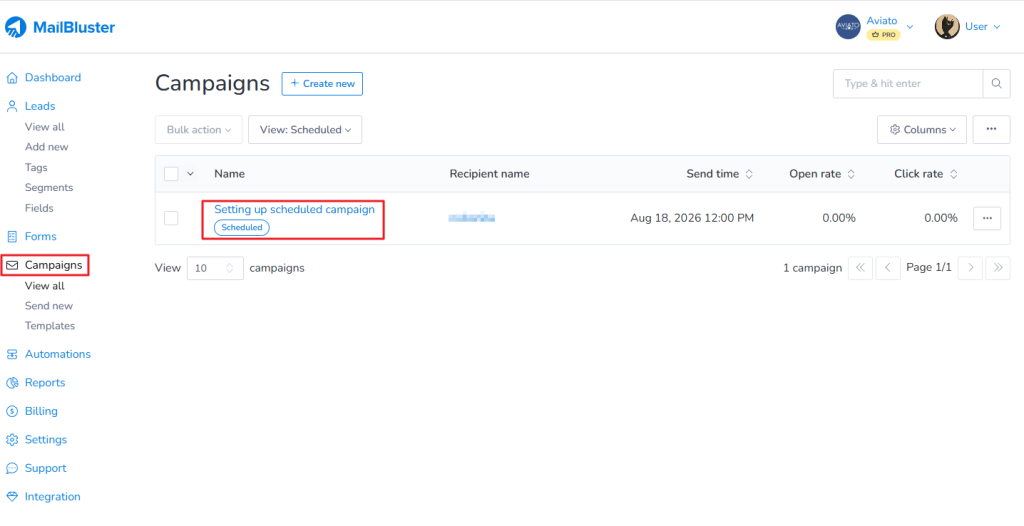
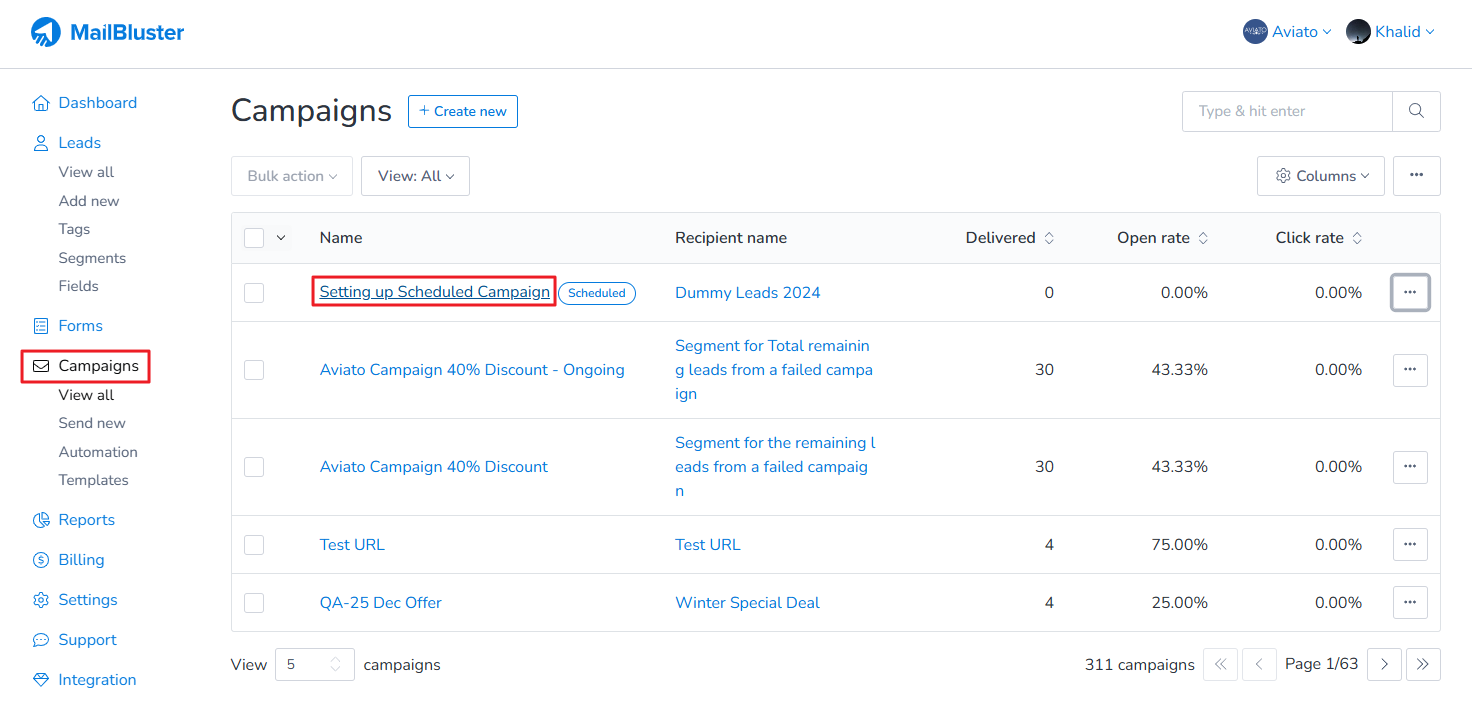
It will be marked as ‘Scheduled‘ in the Campaigns section as shown below.
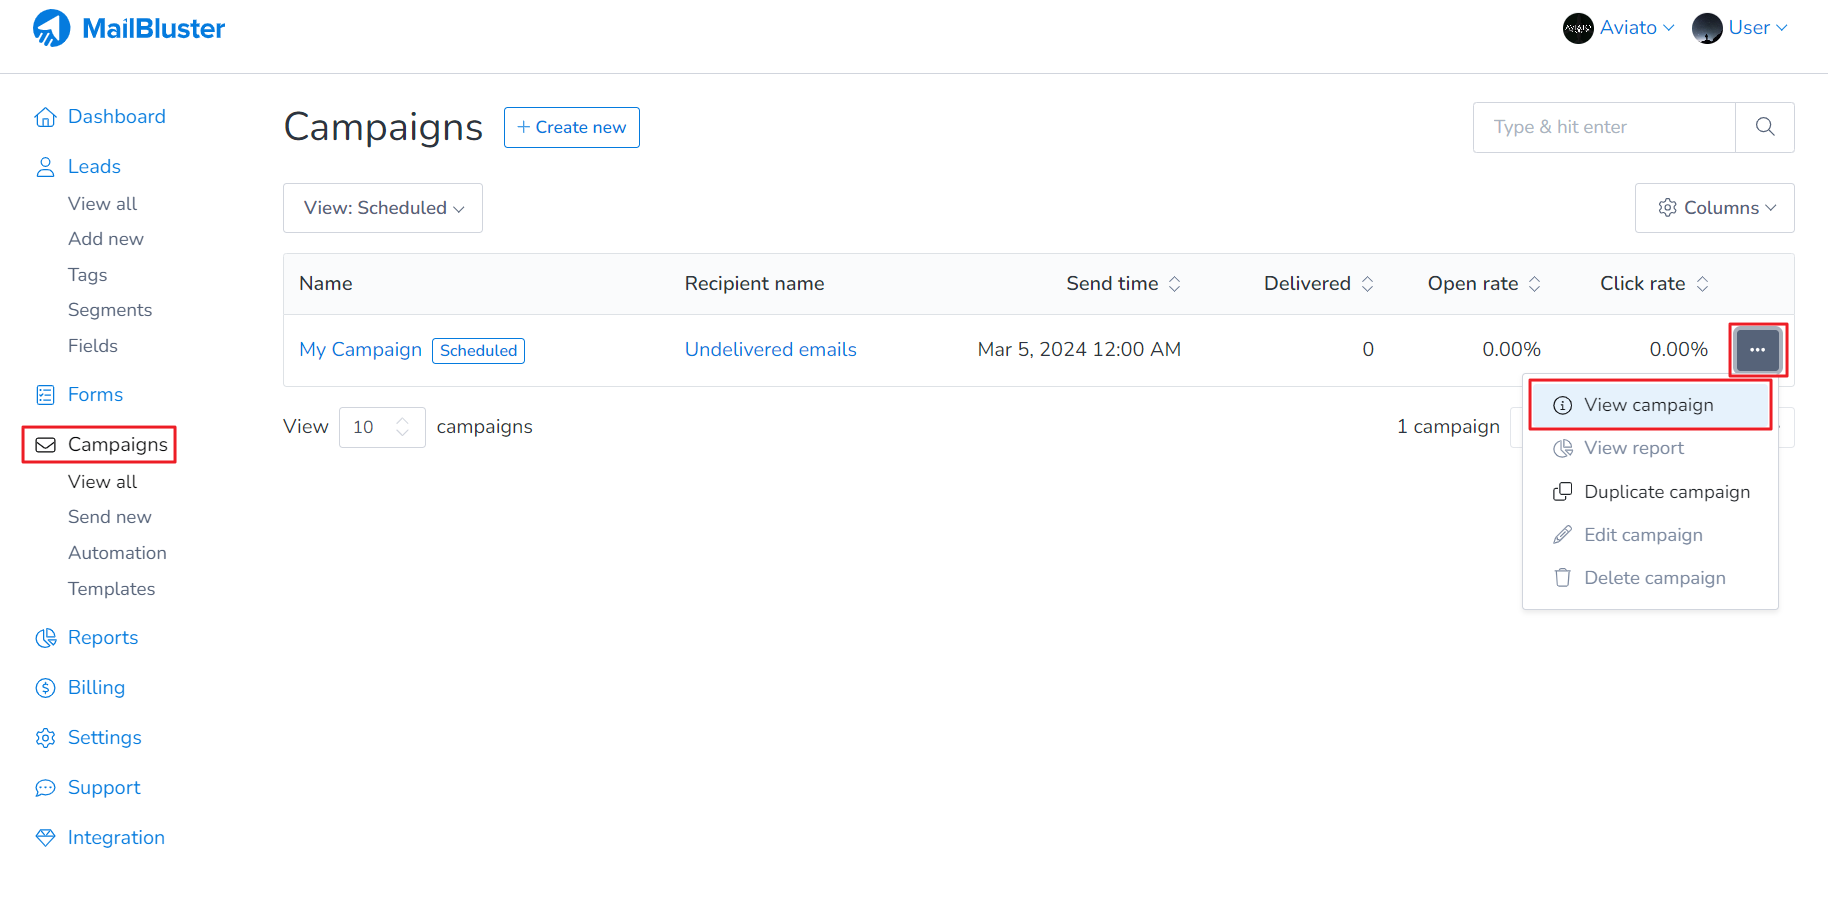
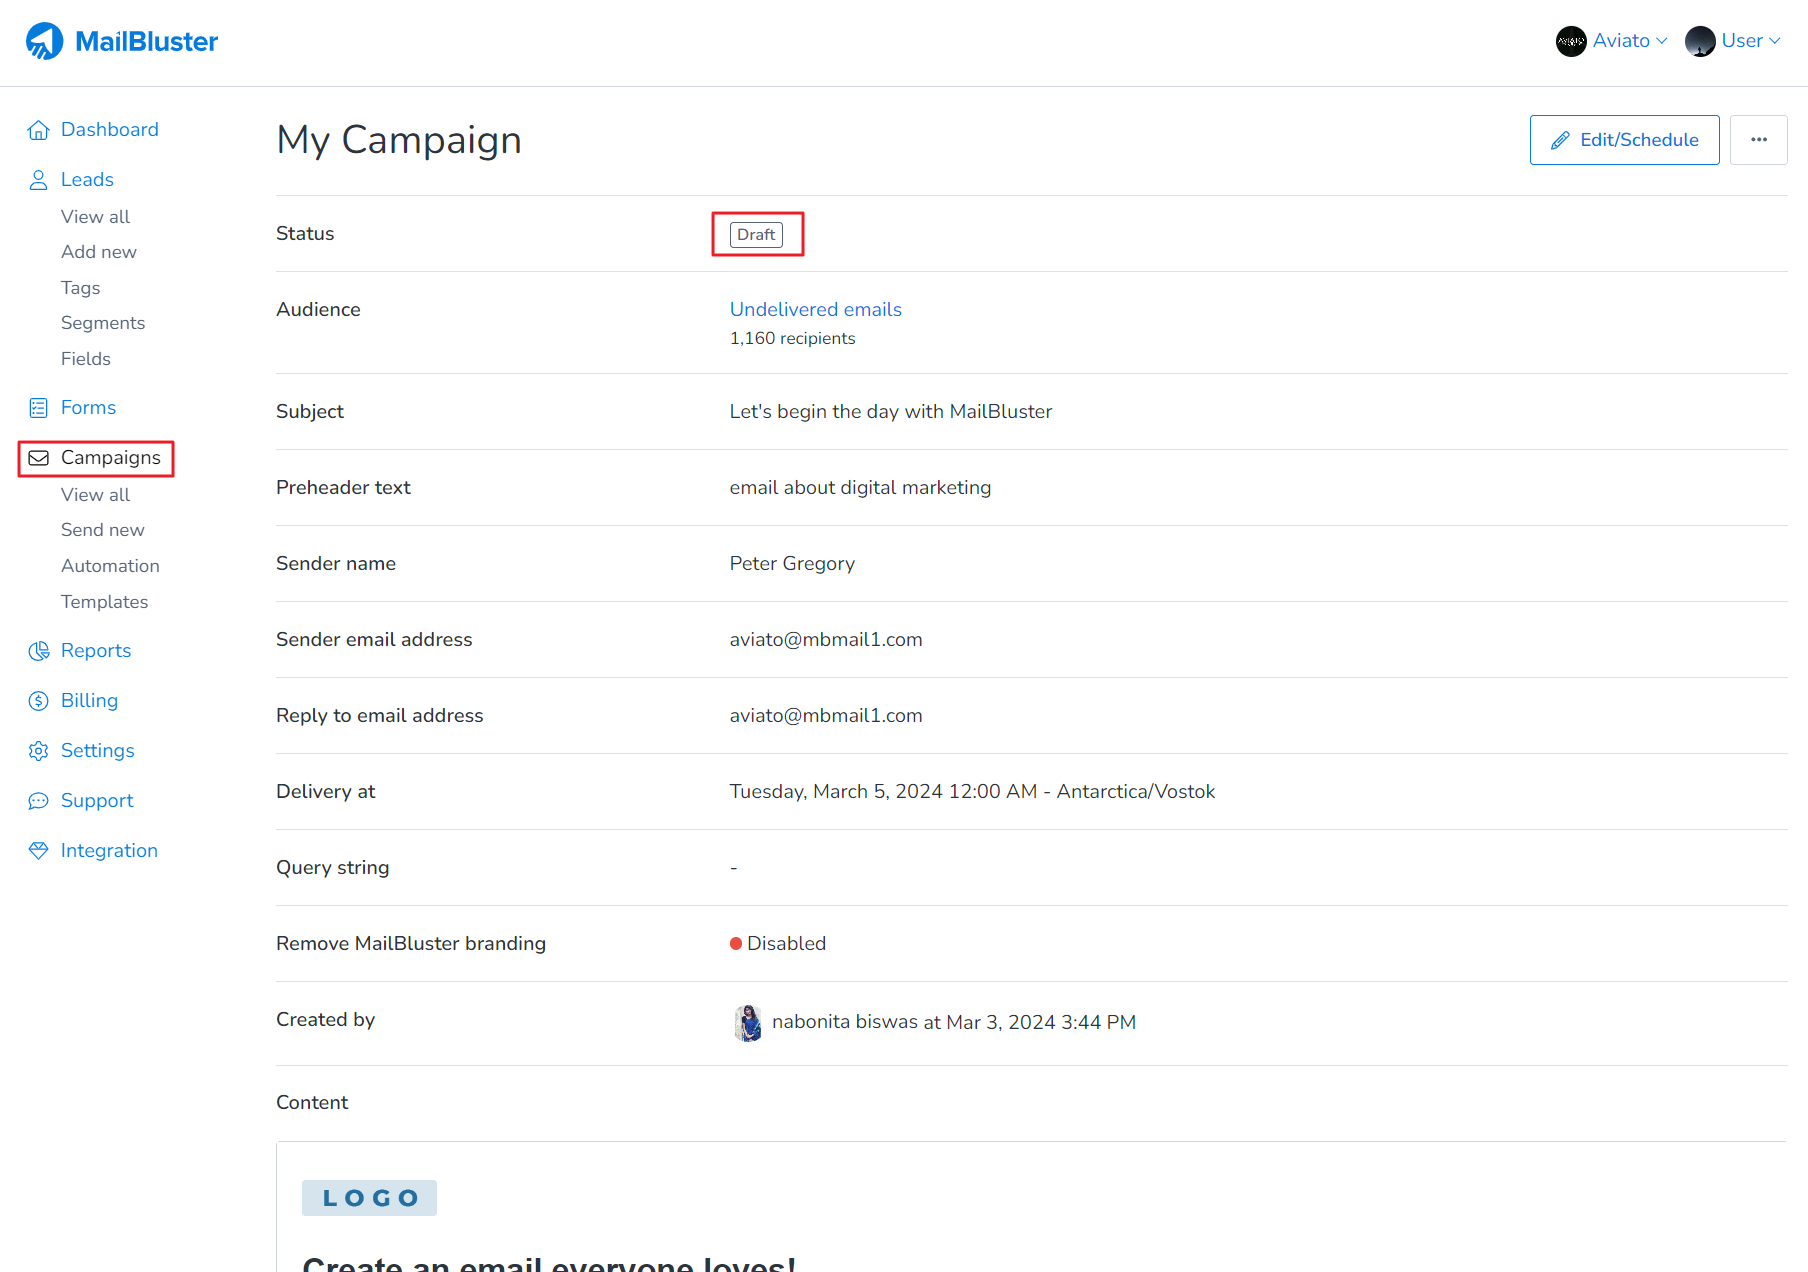
To cancel a scheduled campaign, first make sure that your campaign is in Scheduled state as shown below. Click on the 3 dot ellipsis. Then click on View campaign.
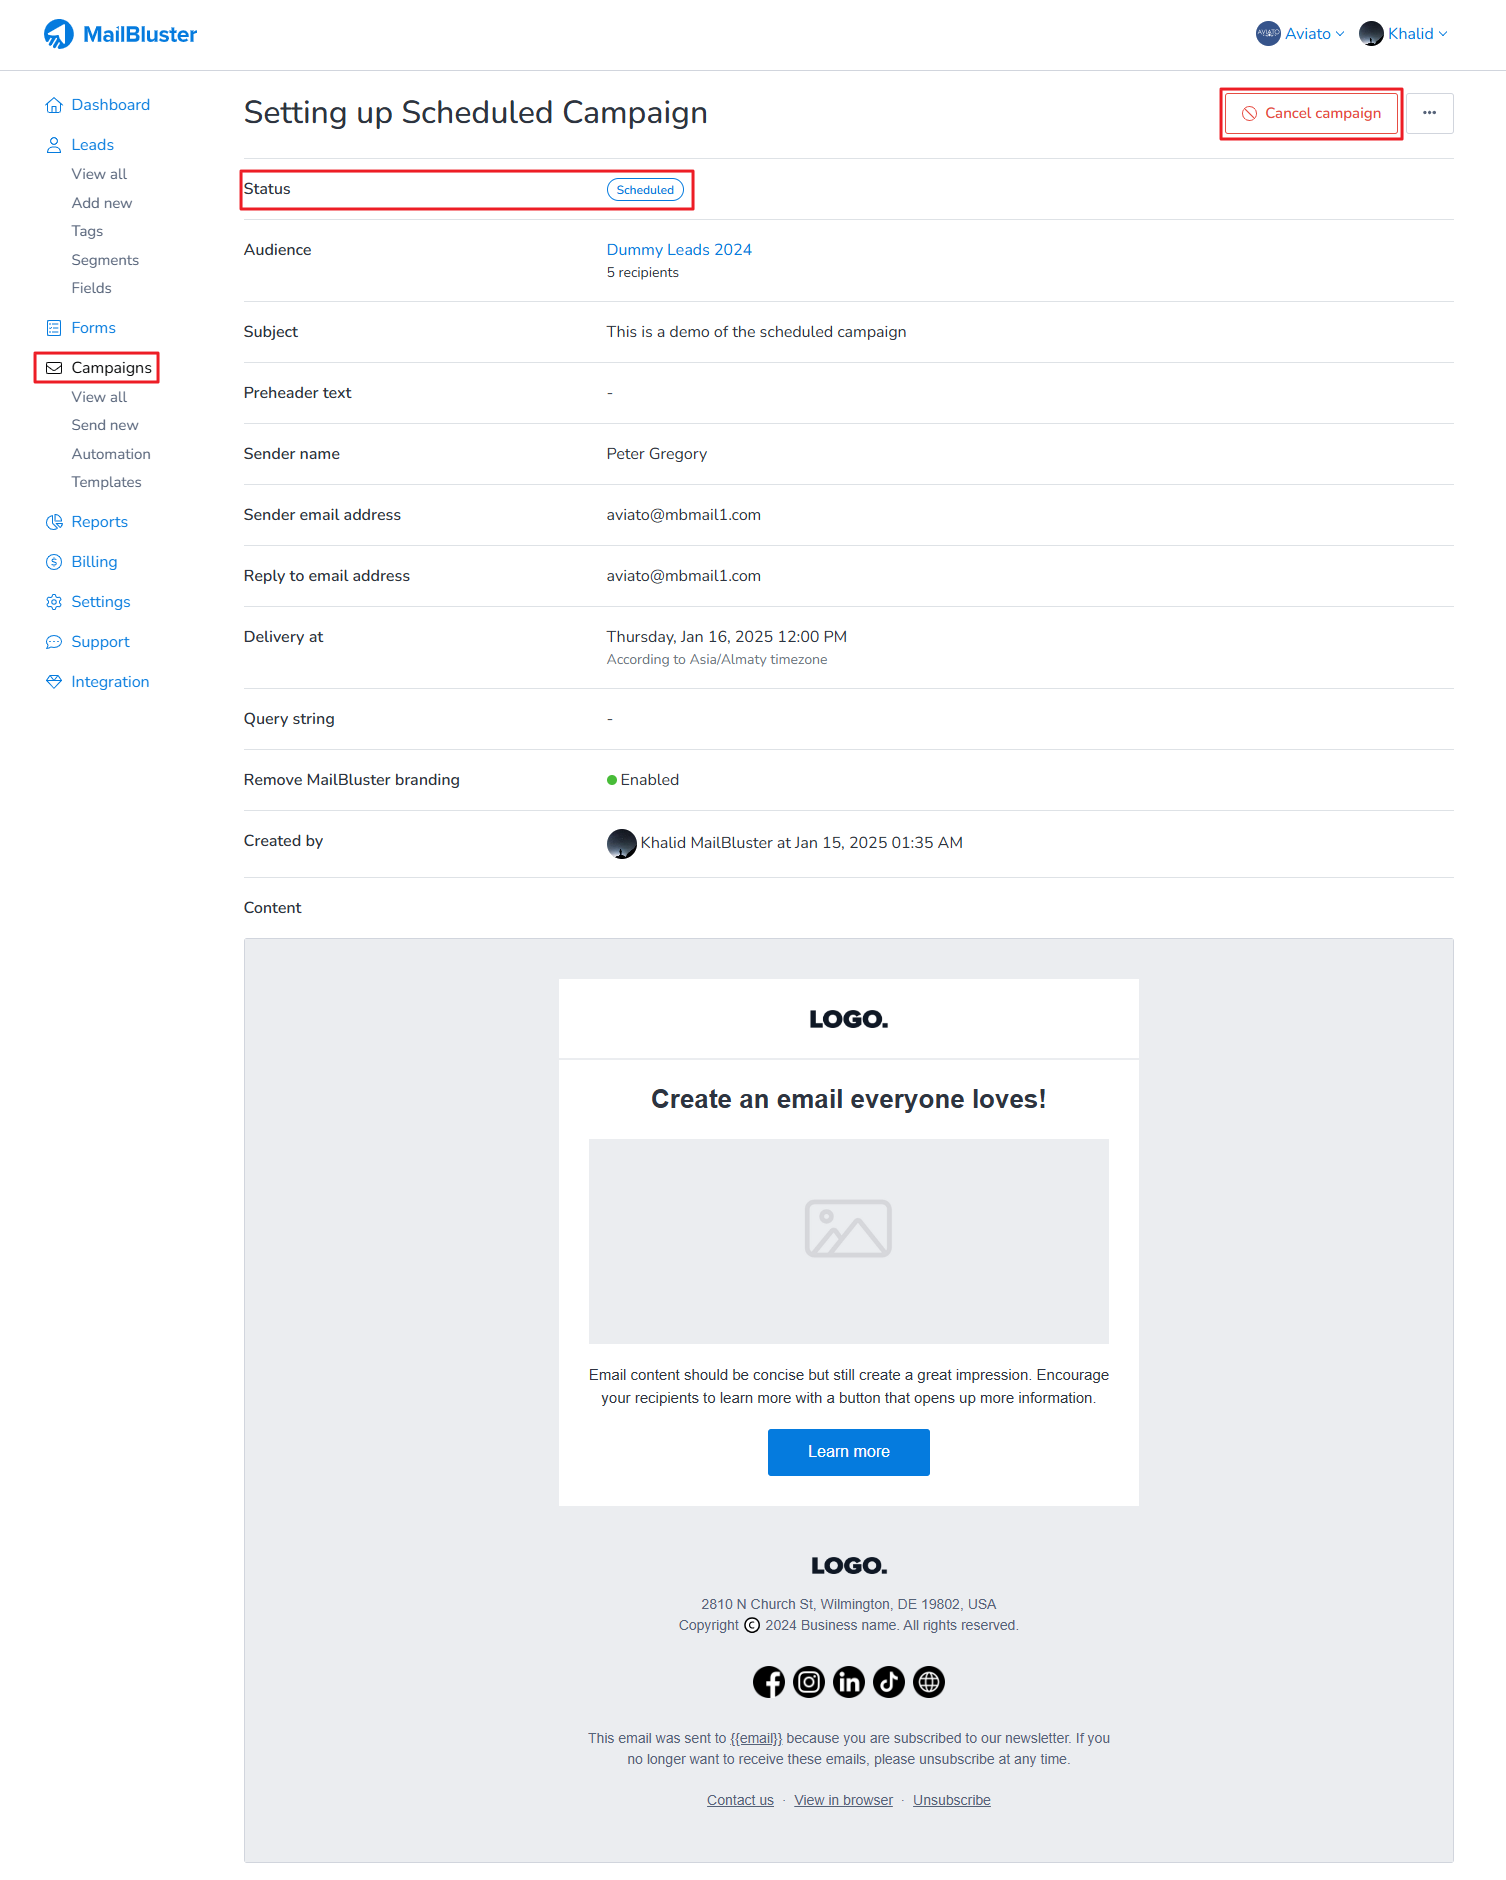
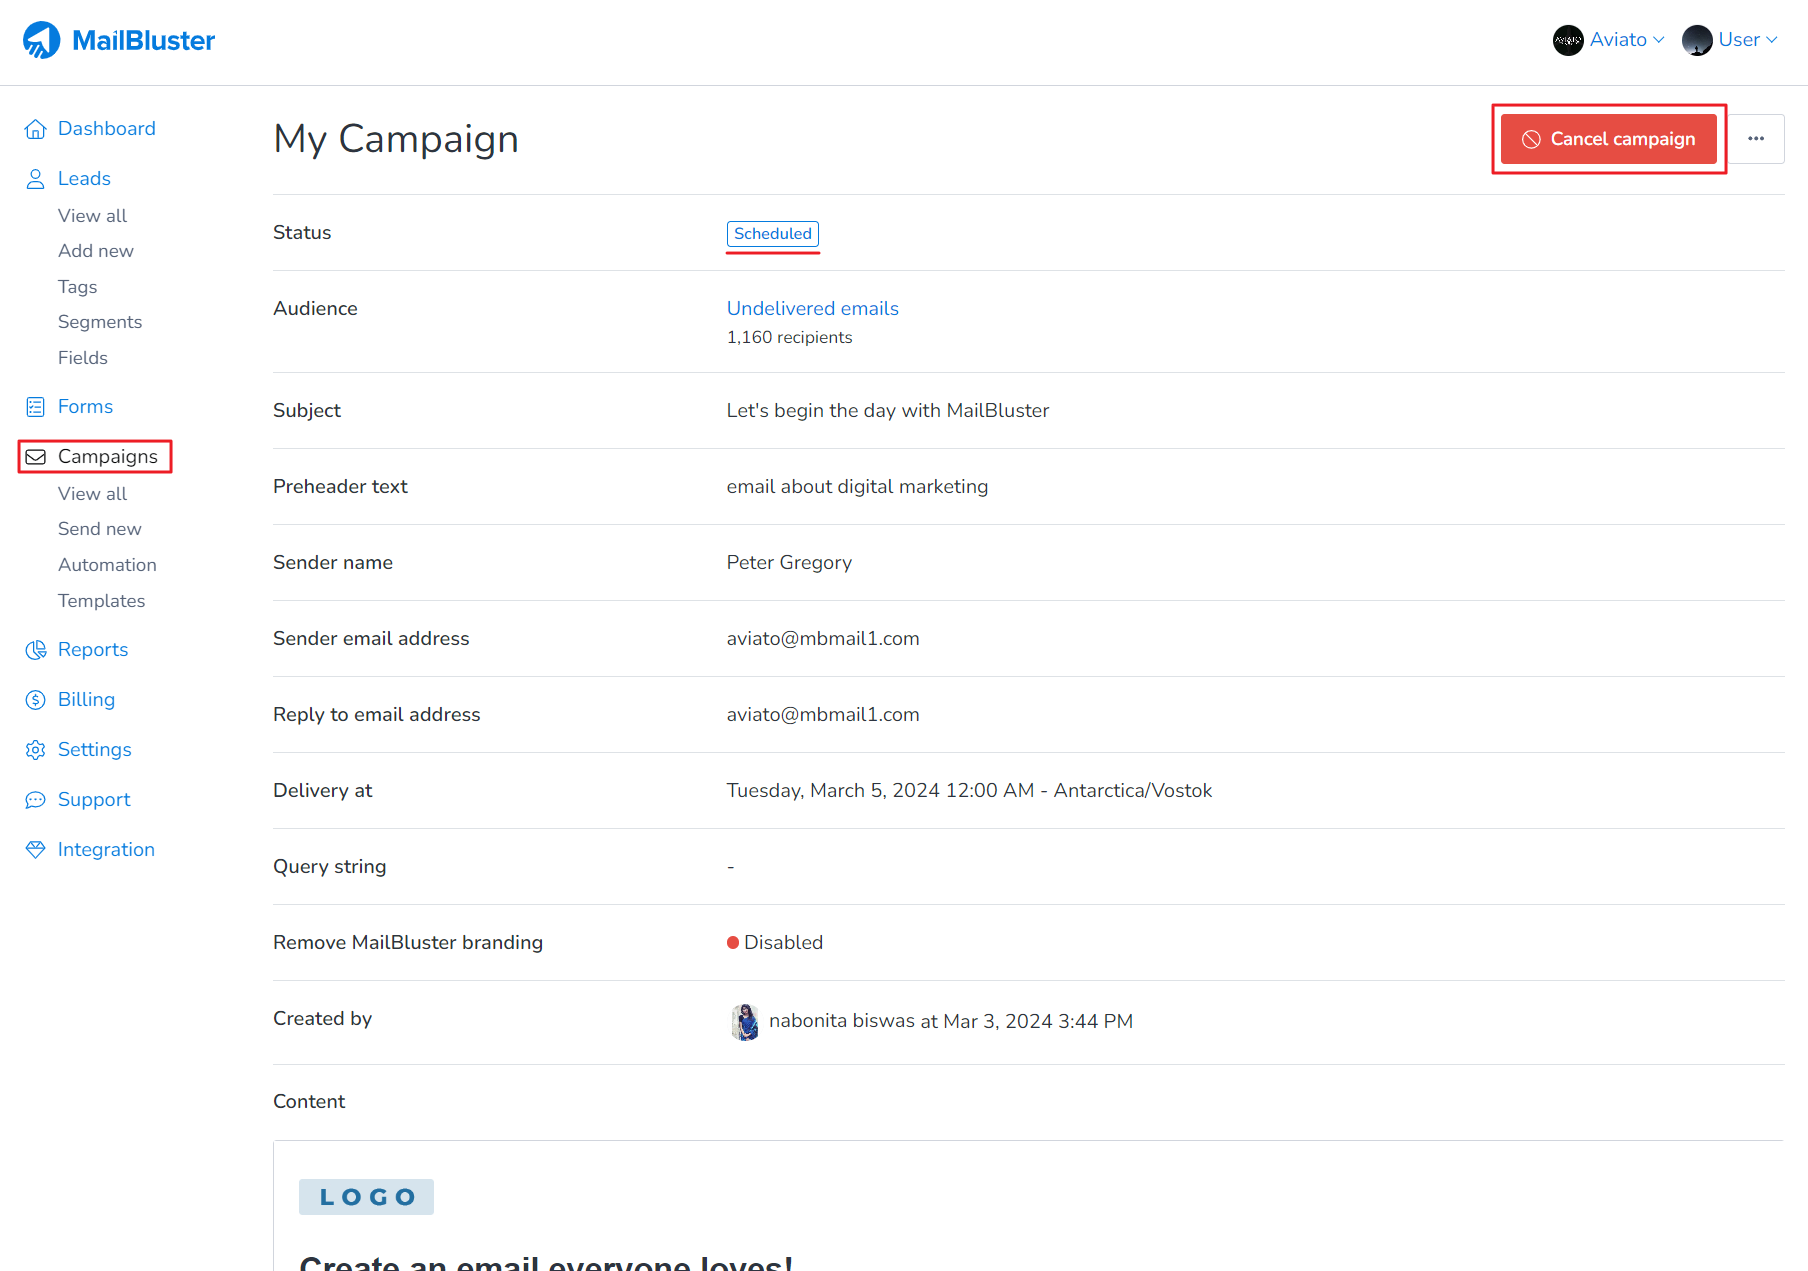
Once you are on the View campaign screen, you will notice that you campaign status is set to Scheduled. Just click on the Cancel campaign button.
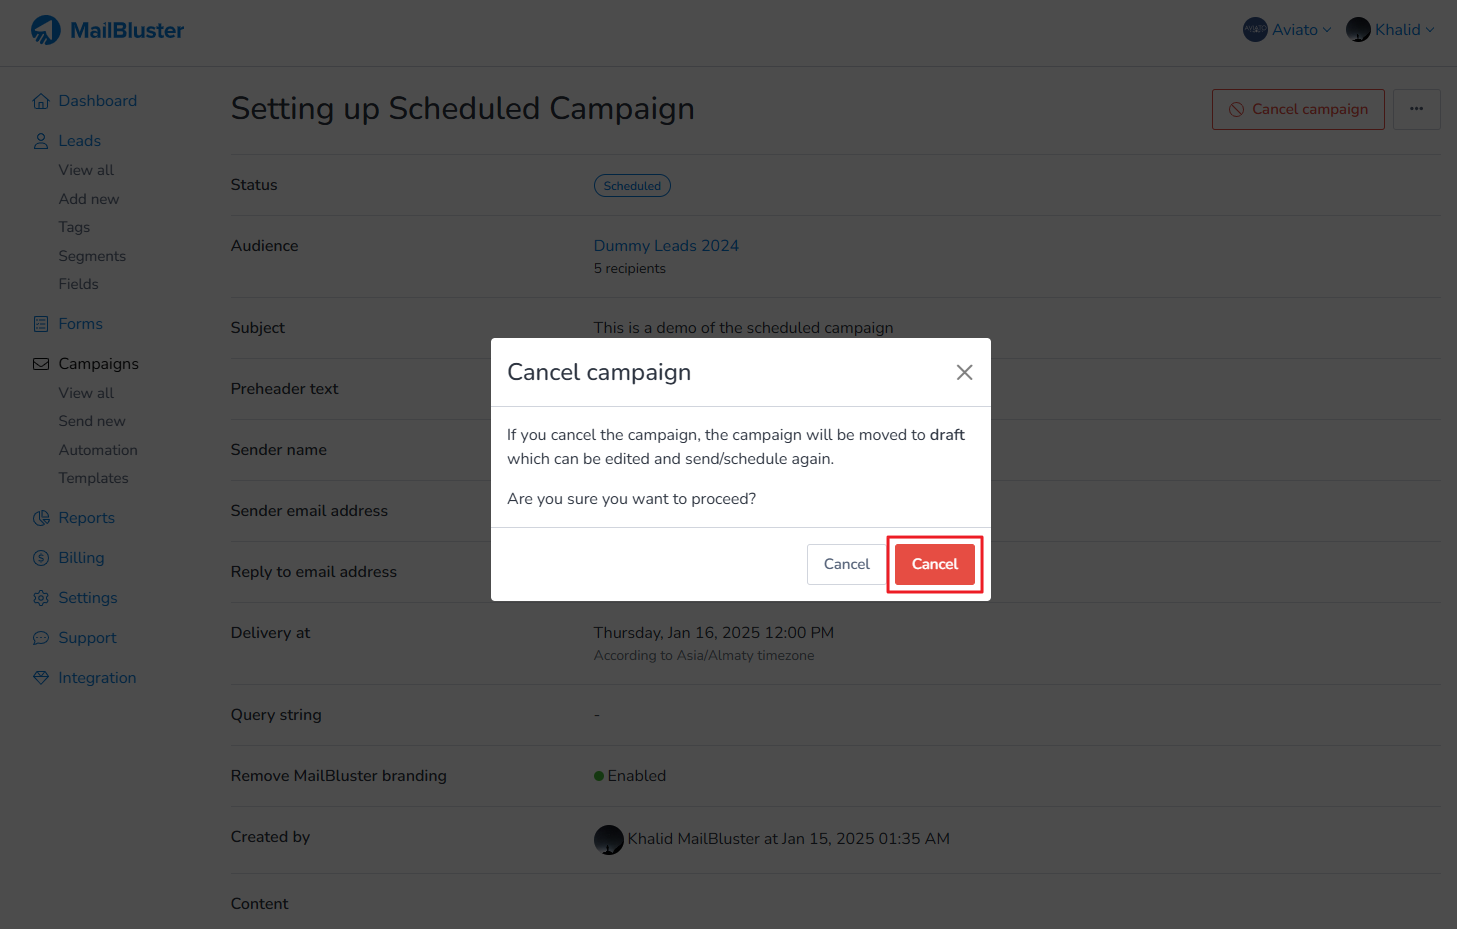
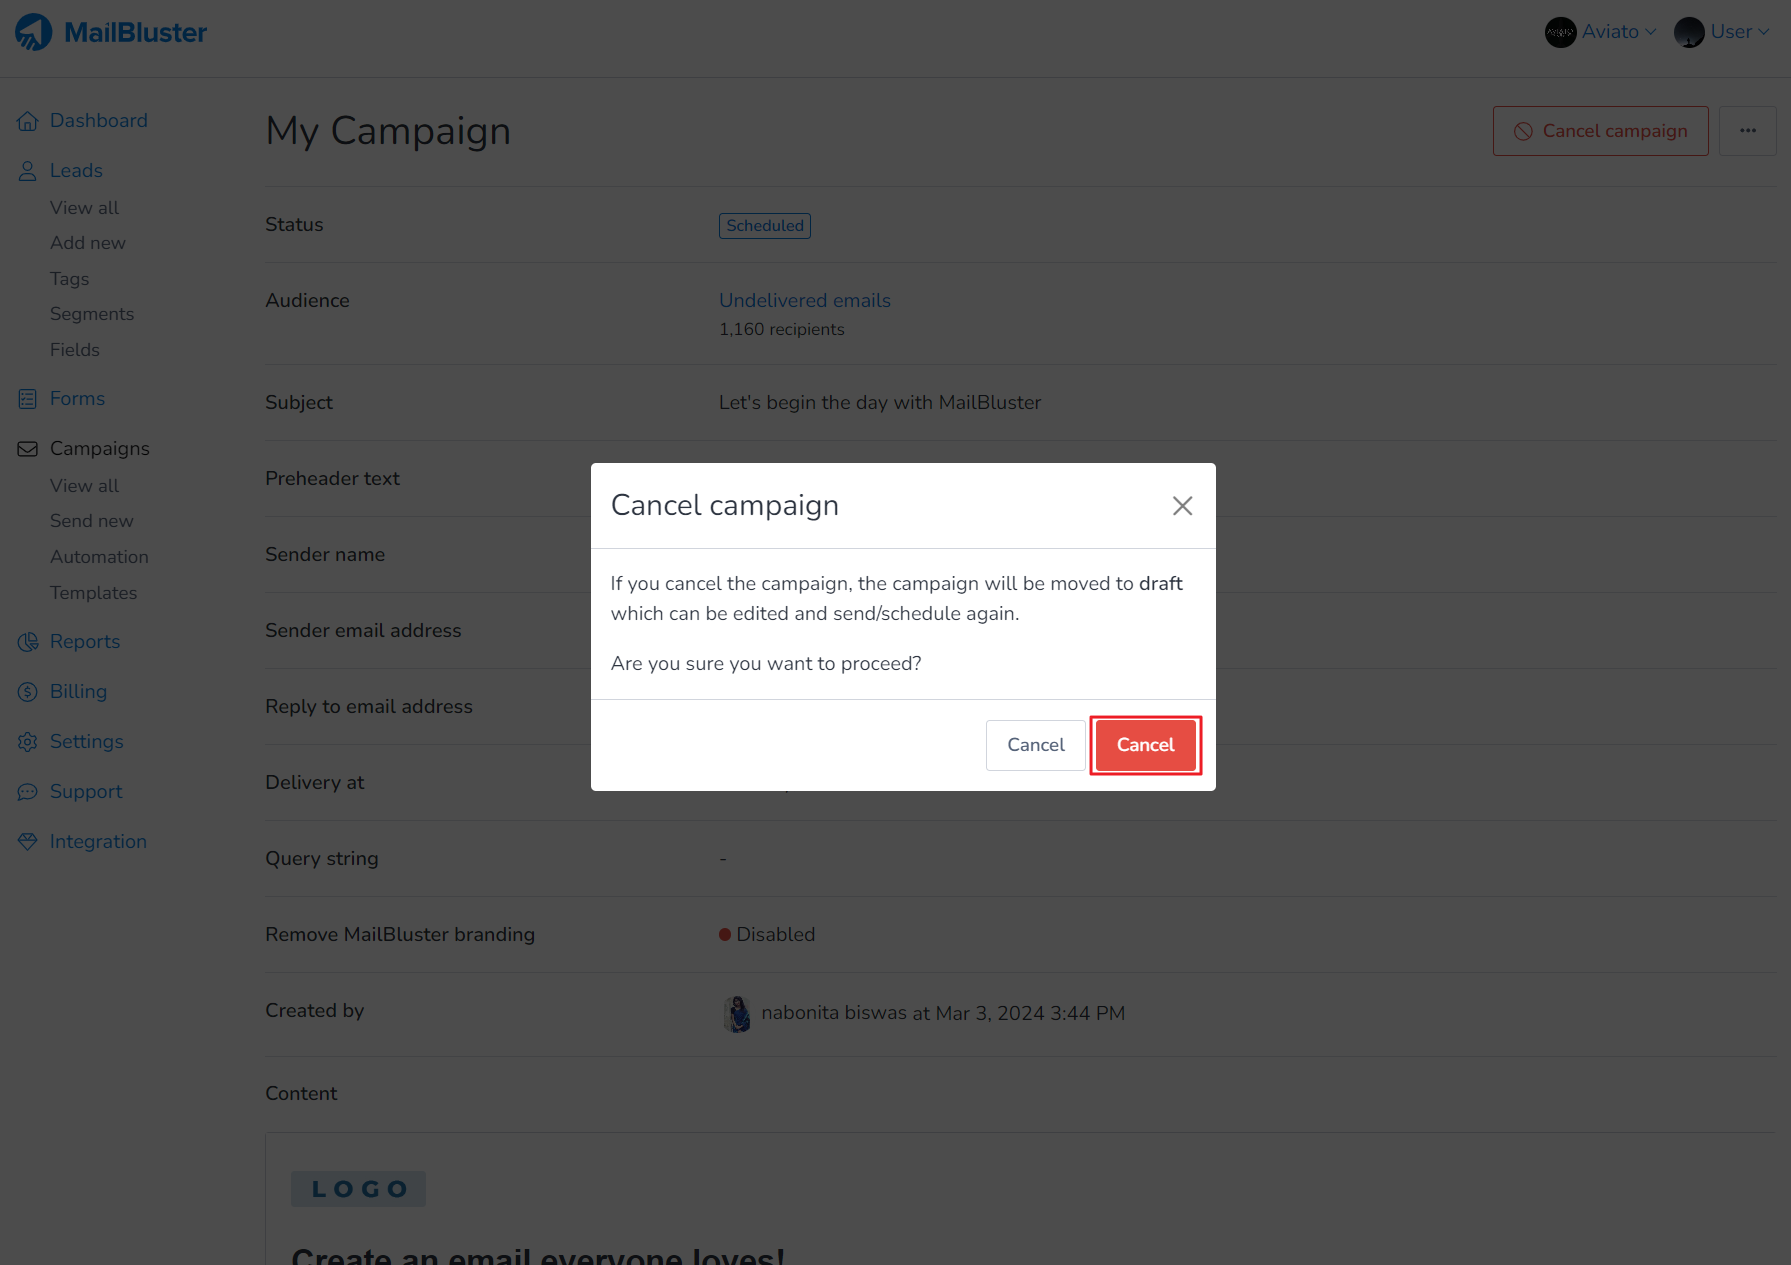
A confirmation dialogue box named Cancel campaign appears. Click on Cancel button.
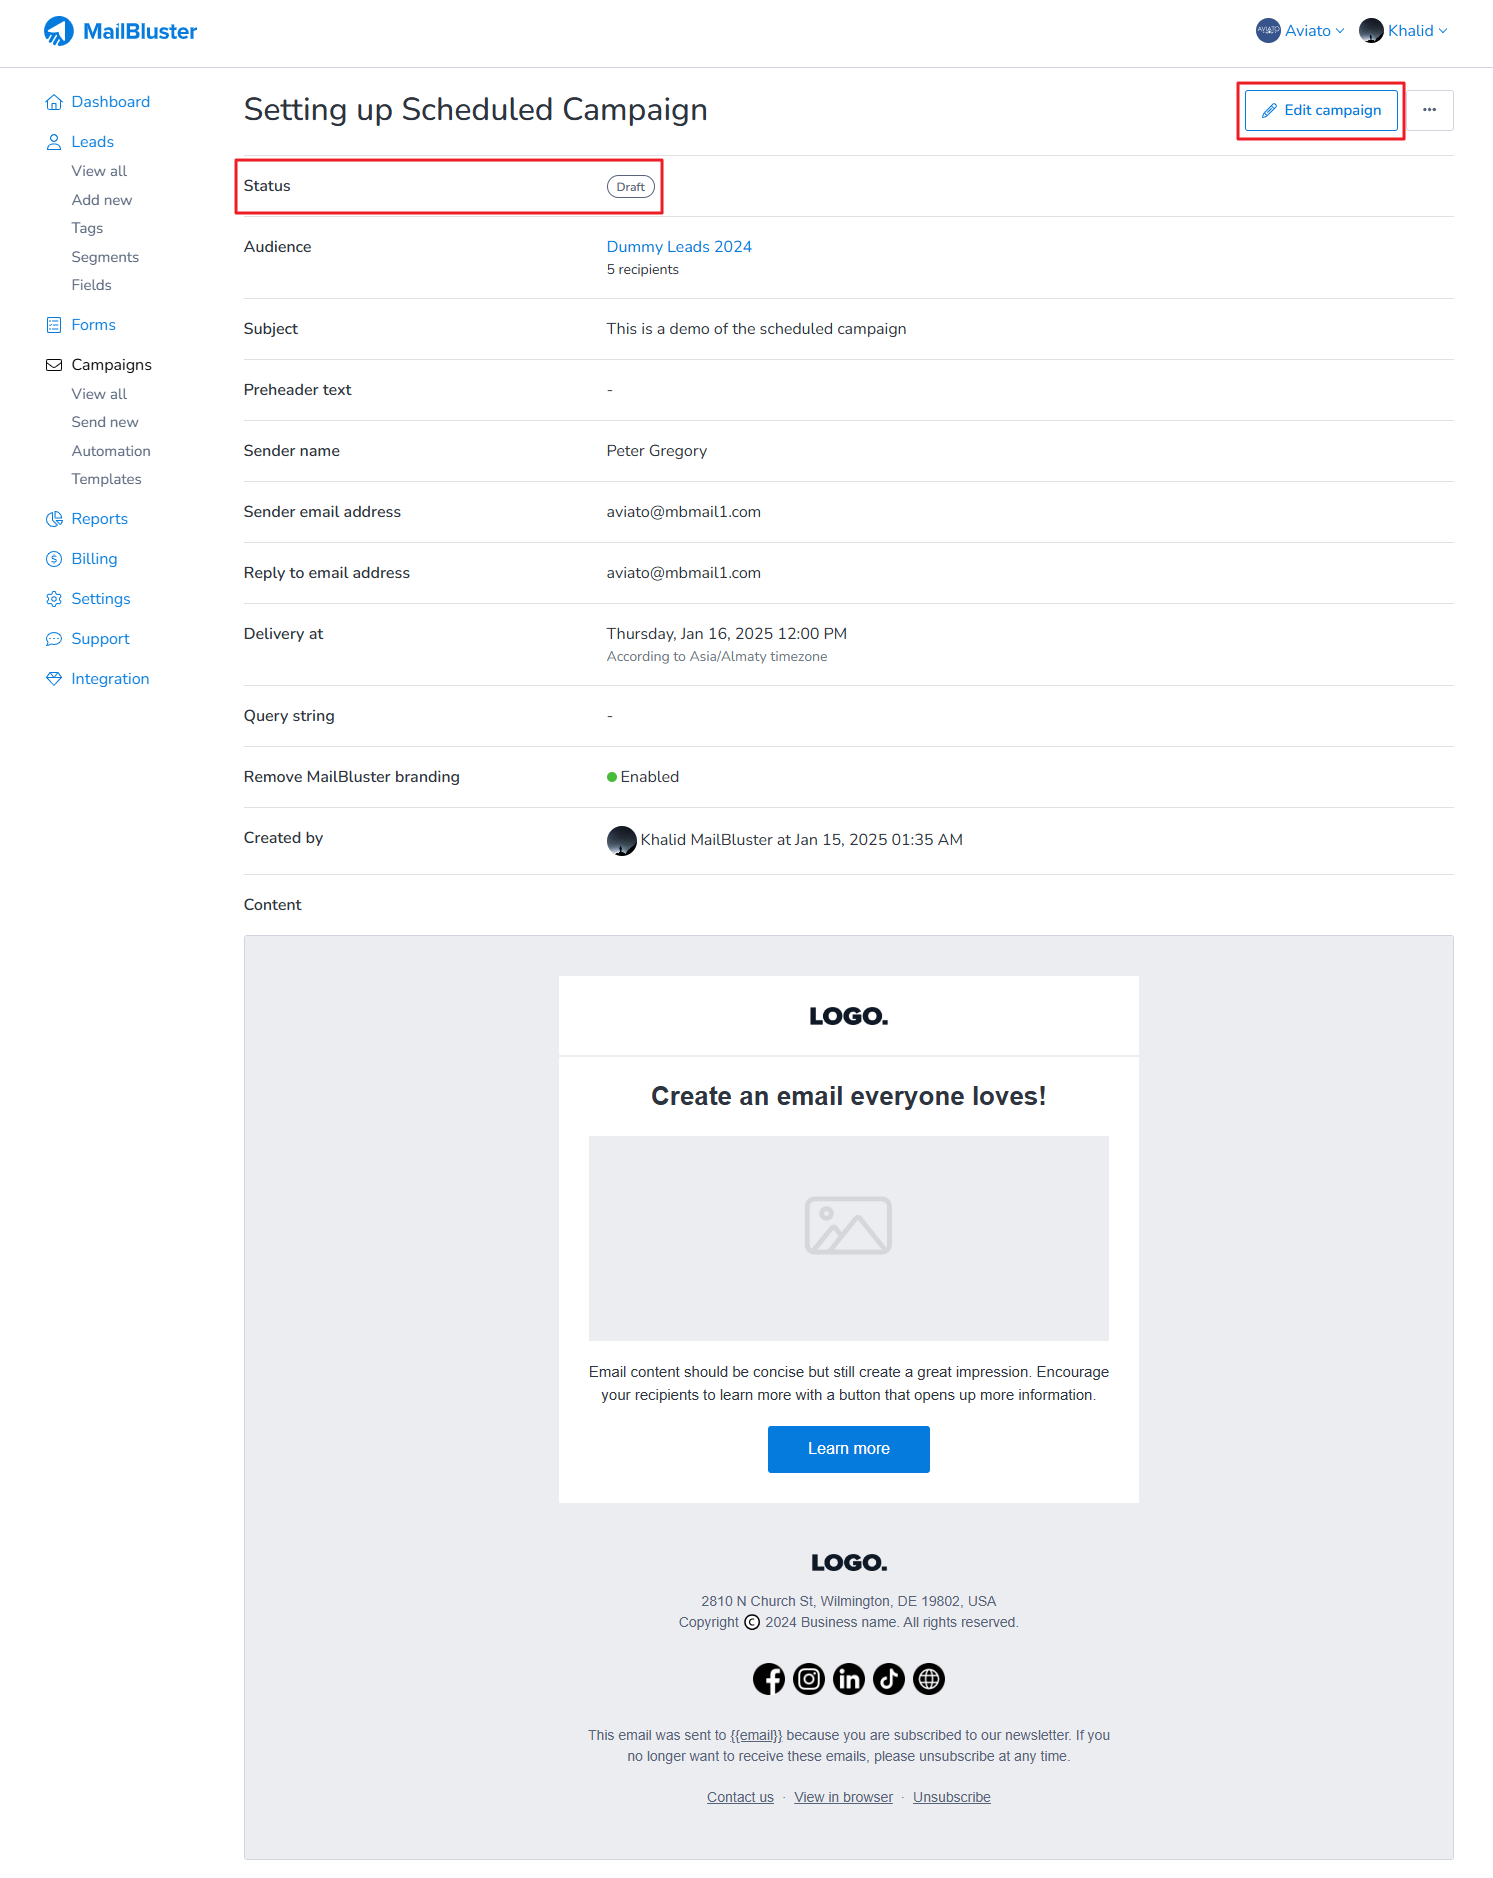
Your campaign will then stopped immediately and the status will be set to Draft. You can now edit your campaign or reschedule it to any other time.
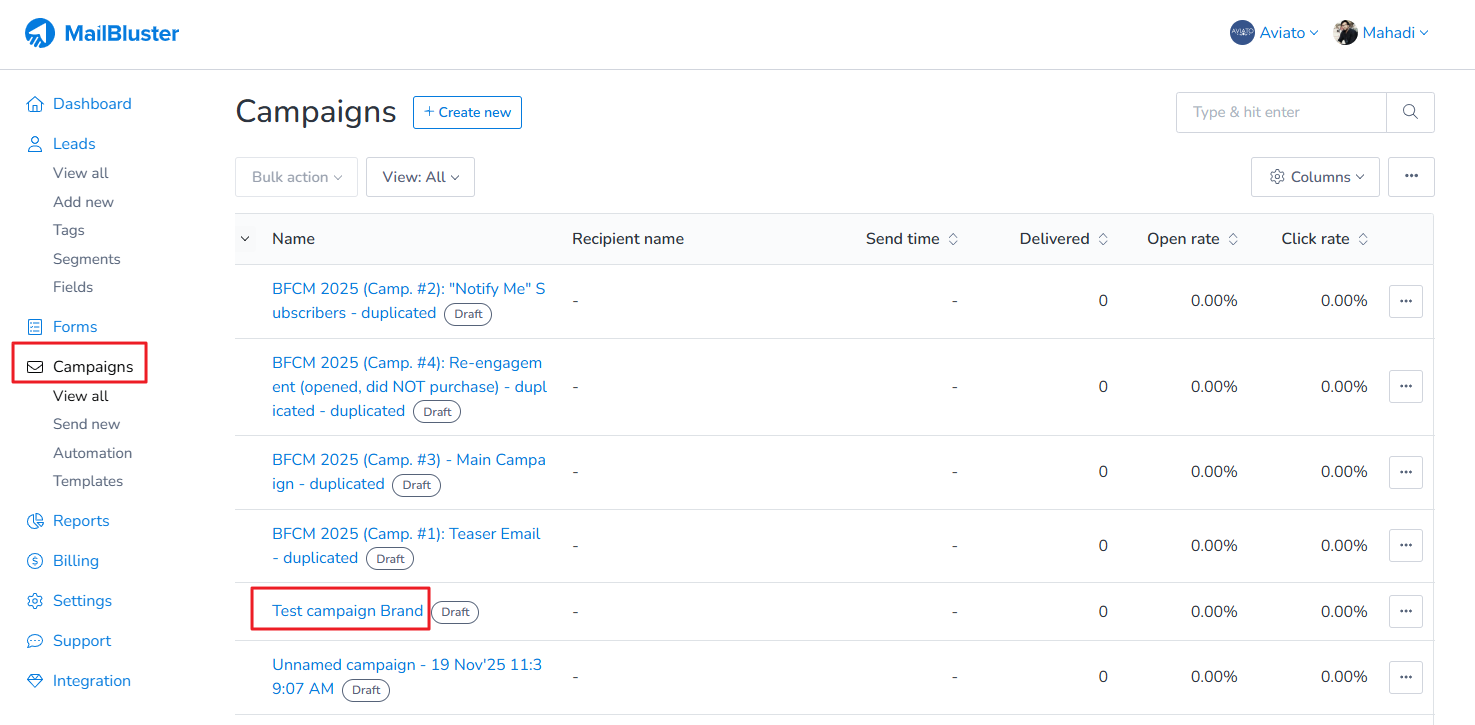
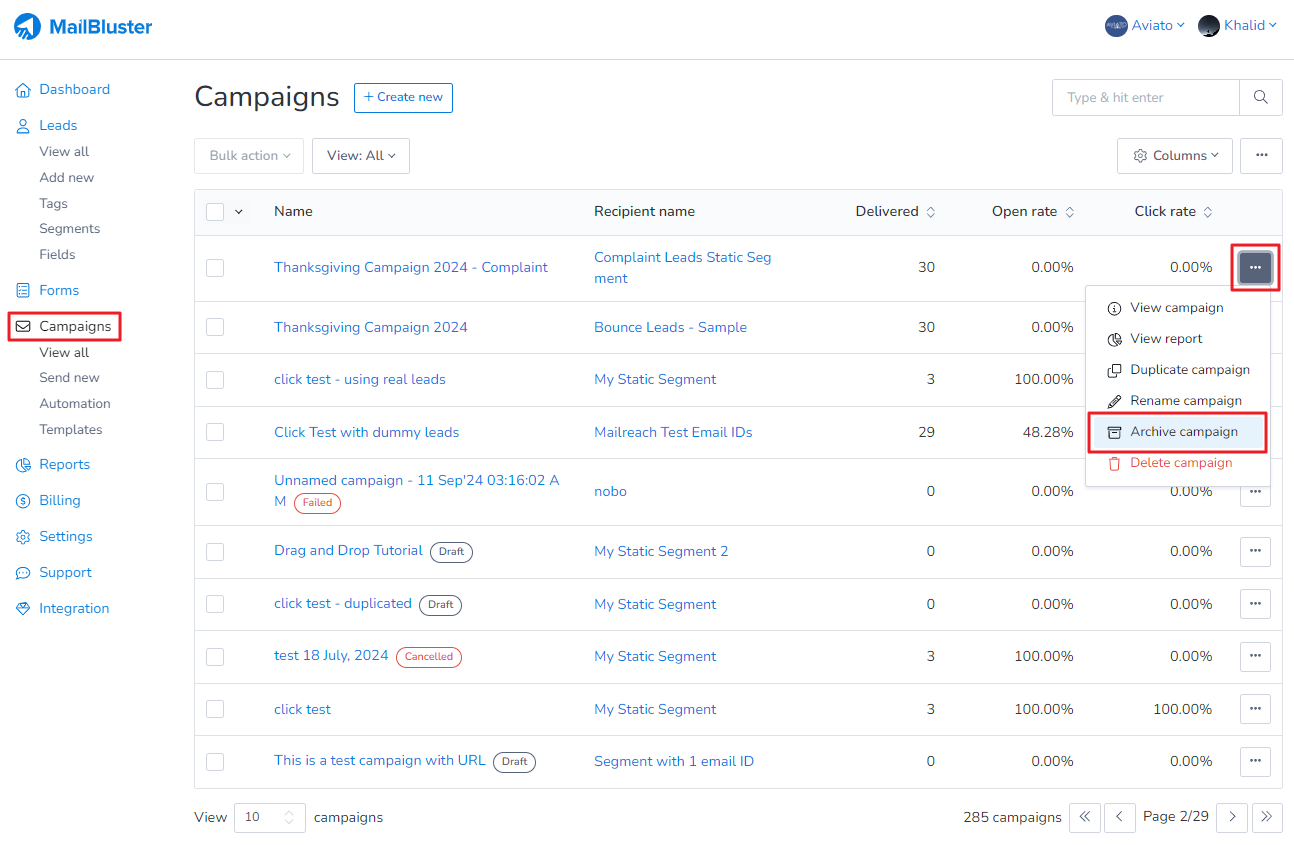
Archive unarchive campaigns in MailBluster is a simple way to manage and organize your email campaigns. By archiving campaigns you no longer need in your active list, you keep your dashboard clean while still having the option to bring them back anytime. To archive a campaign, simply click on the three-dot ellipses next to your desired campaign in the Campaigns list. Then, click on Archive campaign and your campaign will be archived.
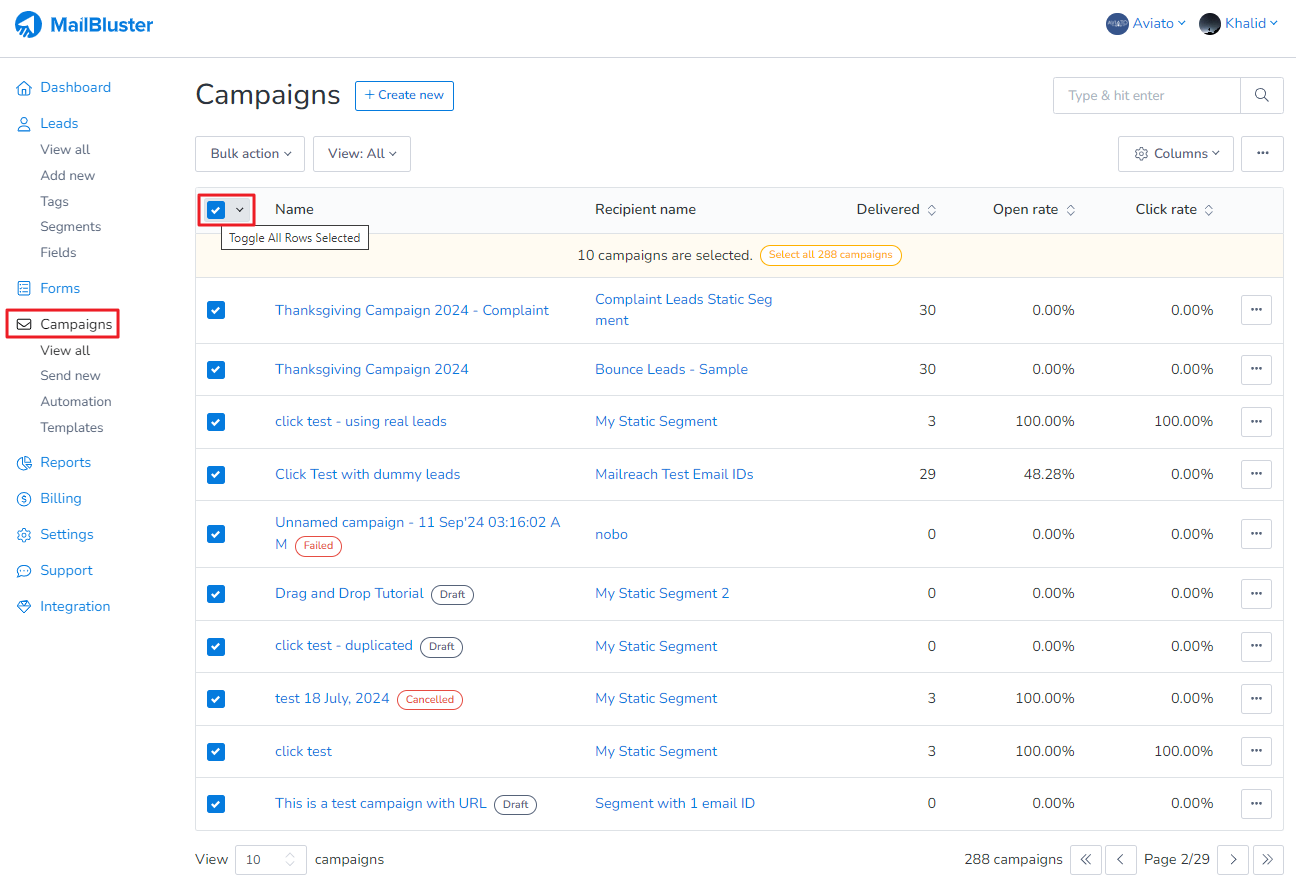
Alternatively, you can bulk archive campaigns by clicking on the checkboxes as shown below.
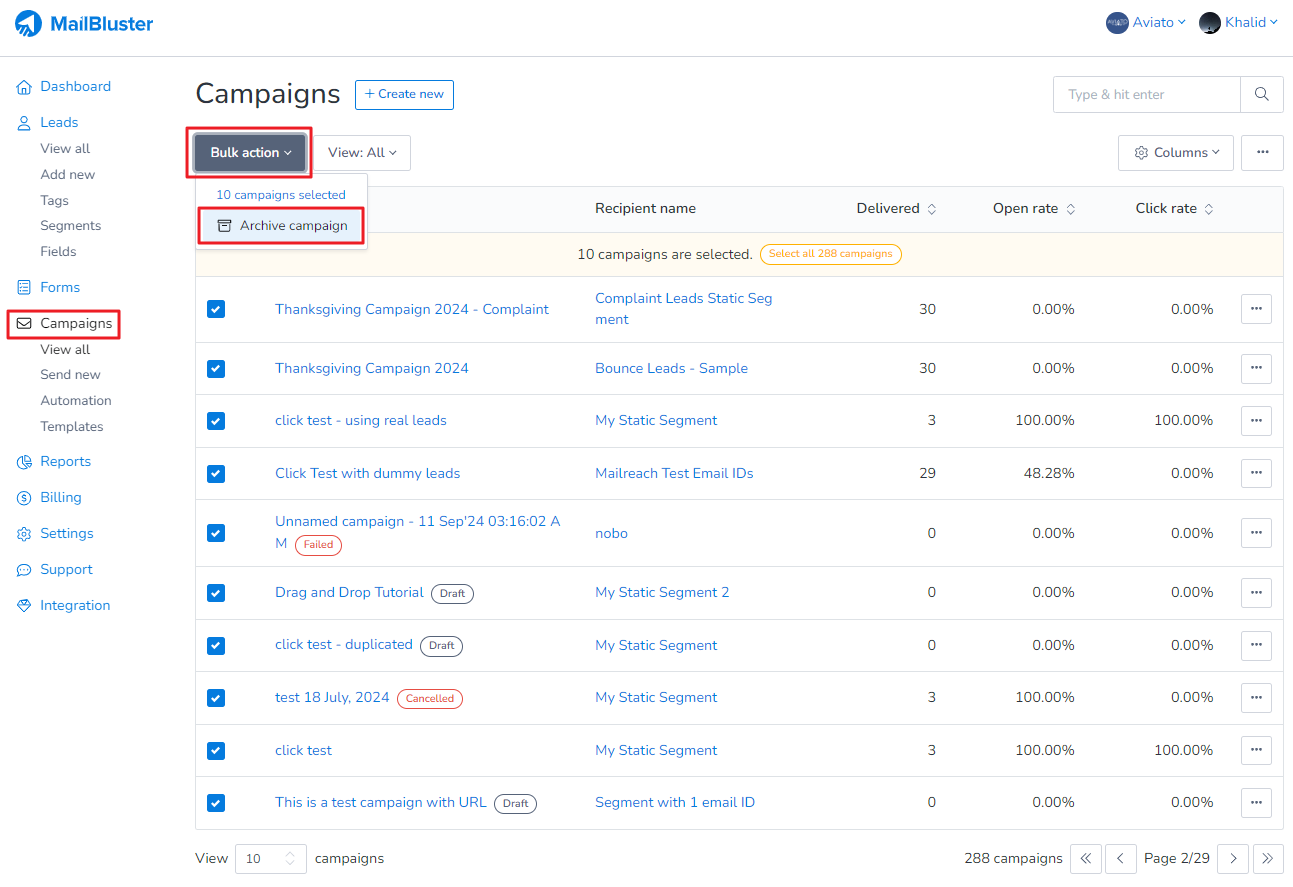
Then click on Bulk action > Archive campaign.
Your selected campaigns will be archived, and a notification will appear as shown below.
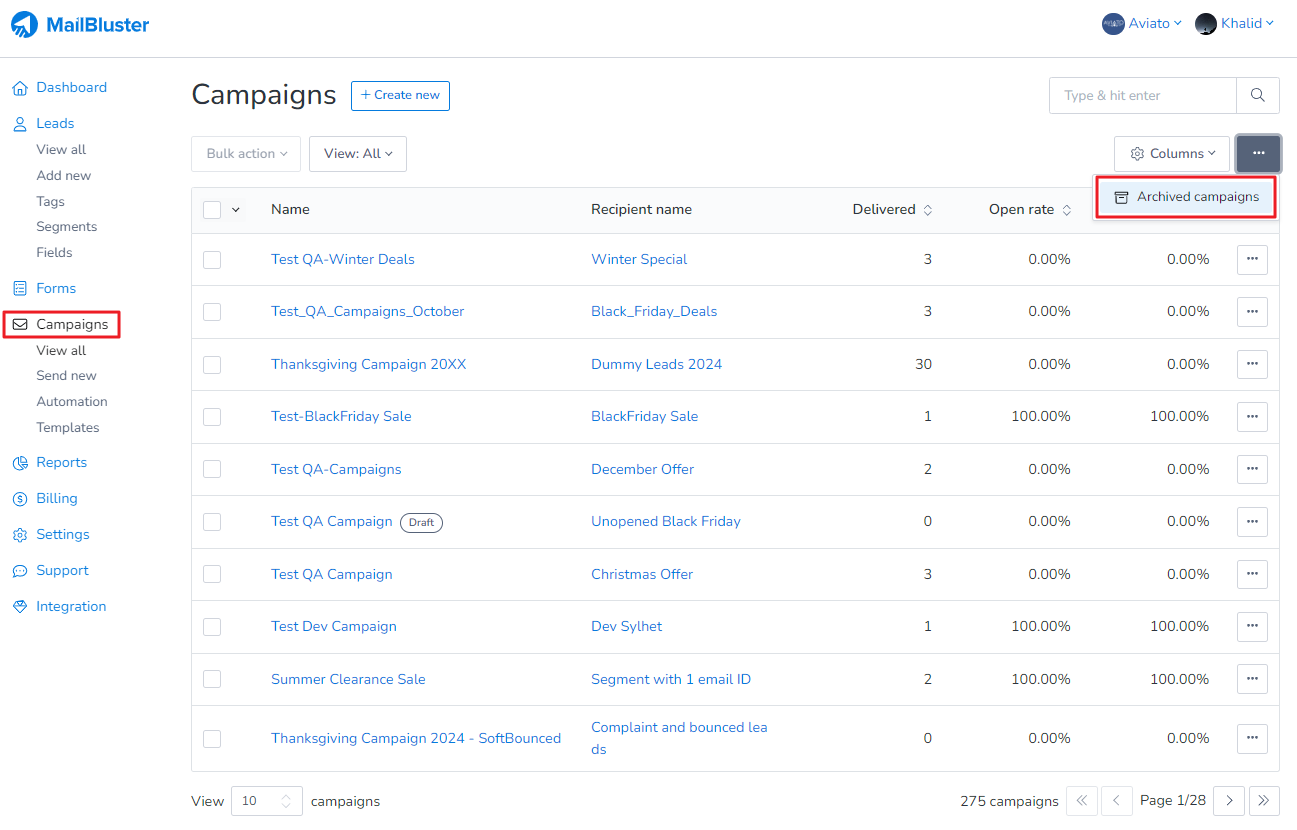
If you want to check the list of archived campaigns, then click on the three-dot ellipses from Campaigns list and click on Archived campaigns.
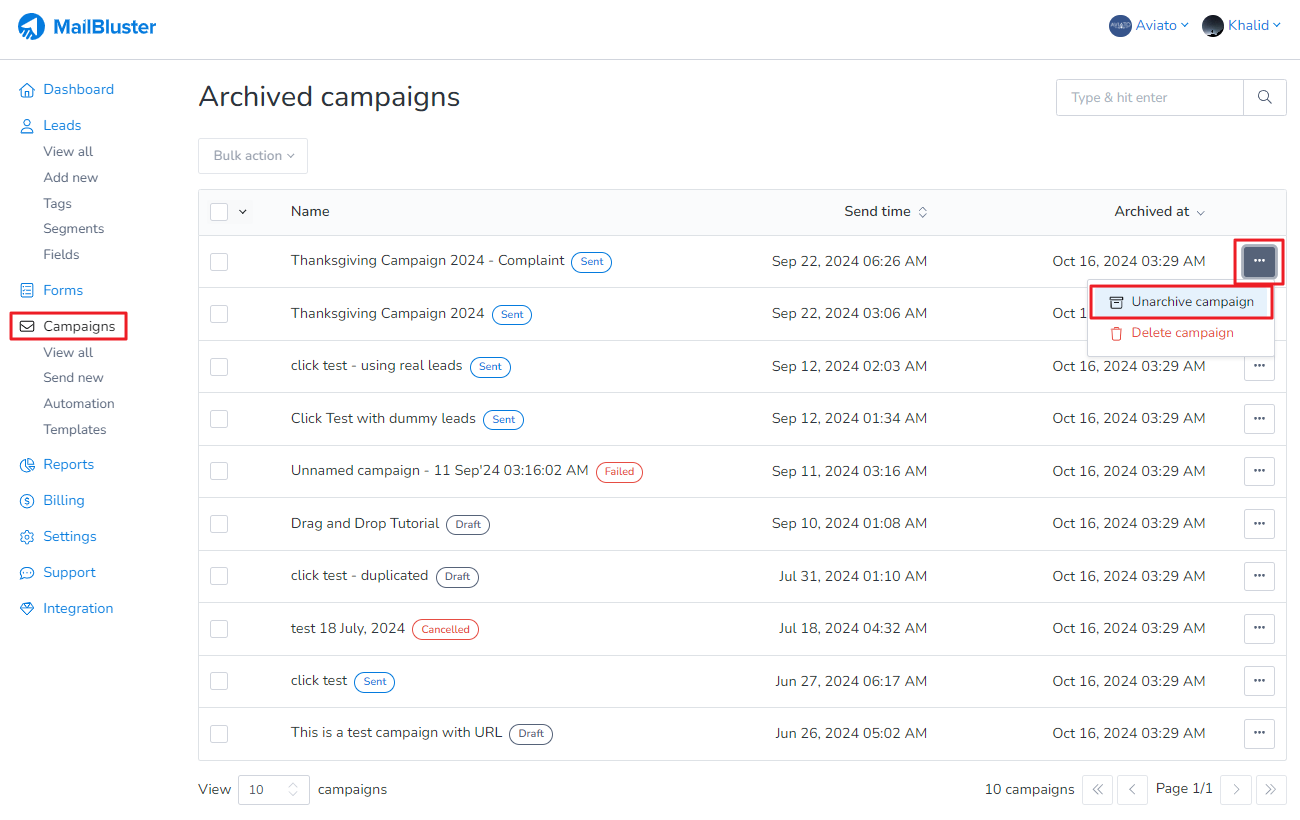
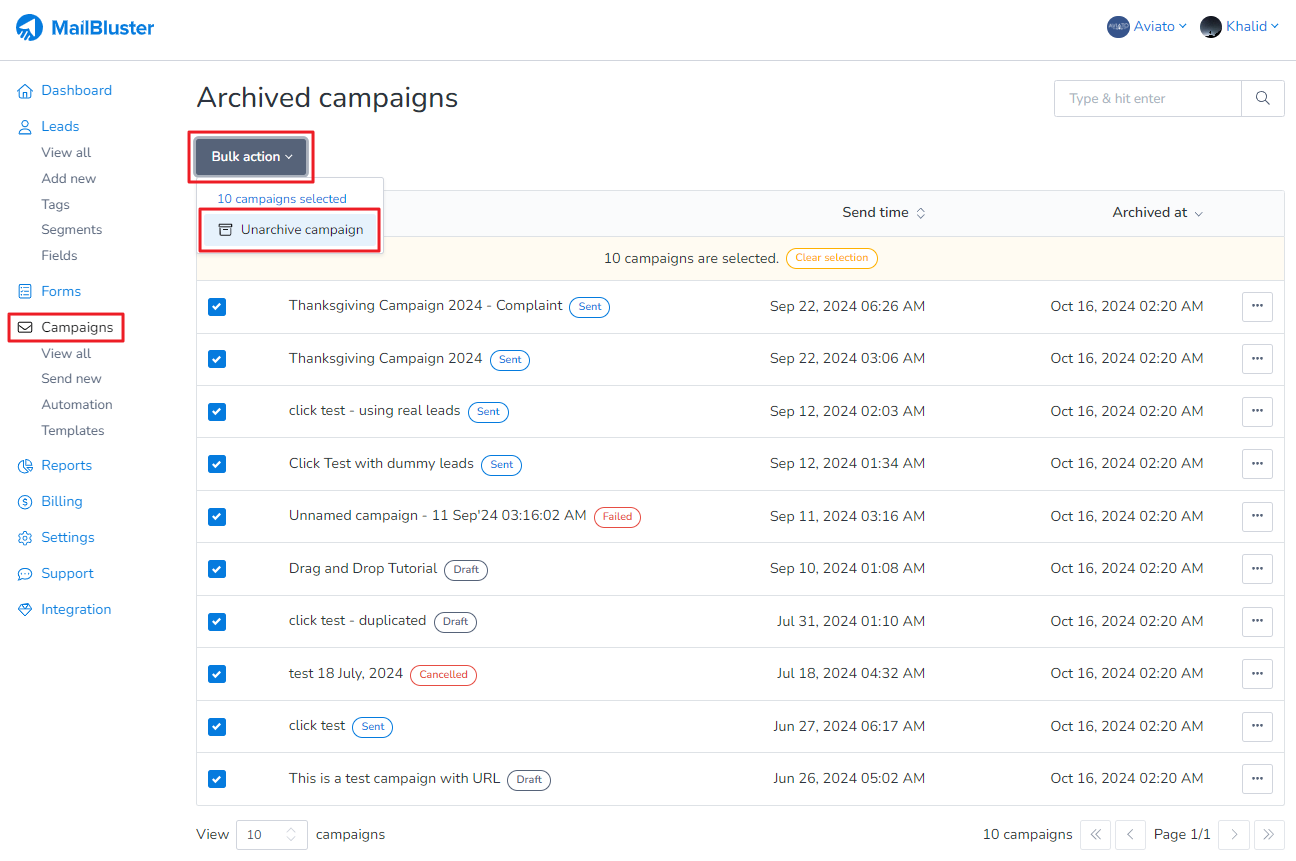
It will take you to the list of Archived campaigns. Click on the three-dot ellipses of your desired campaign from the Campaigns list, then click on Unarchive campaign. Your selected campaign will be restored from the archived list.
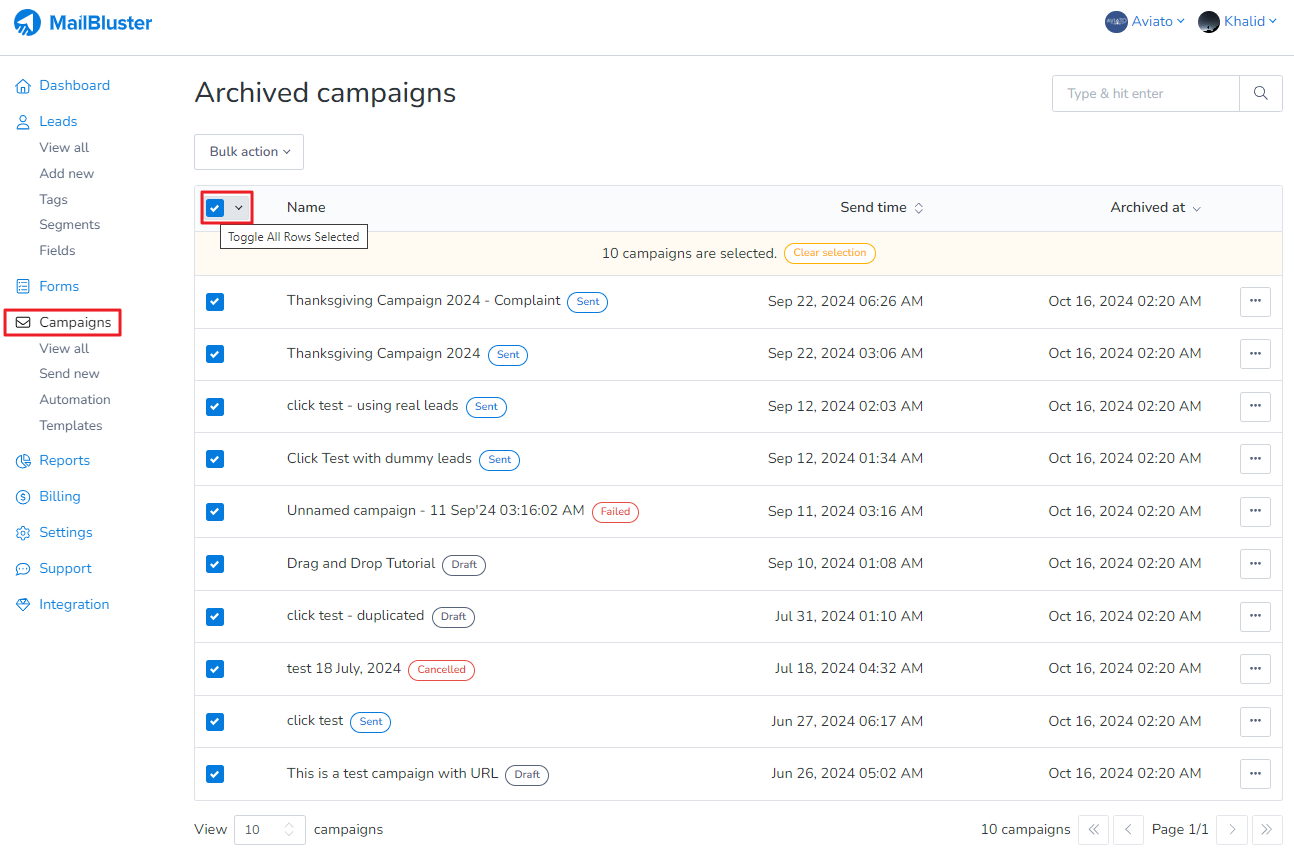
You can also unarchive selected campaigns by clicking on the checkbox as shown below.
Then click on Bulk action > Unarchive campaign. A notification stating ‘n number of campaigns unarchived’ will confirm the action. You will then find these campaigns restored to their respective order.”
With the Archive Unarchive Campaigns feature, you can better organize your email marketing efforts, reduce clutter, and still access older campaigns when needed.
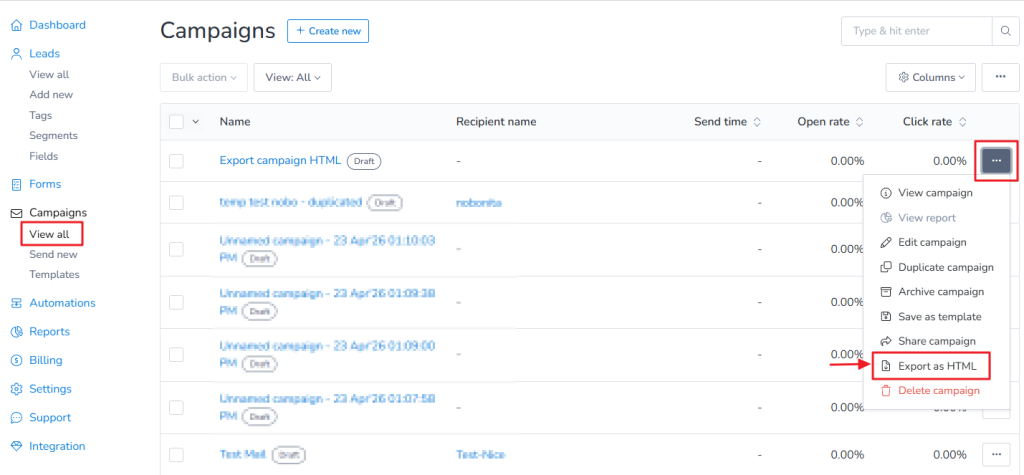
You can easily export the HTML of any campaign for backup, editing, or reuse. To export HTML of a campaign, first navigate to your Brand, then go to Campaigns. Next, select the campaign you want to duplicate by clicking on the three dots (…) ellipsis next to it, and then click Export as HTML
An HTML file of your campaign will be automatically downloaded to your device. This allows you to edit the code, reuse the design, or use it outside the platform as needed.
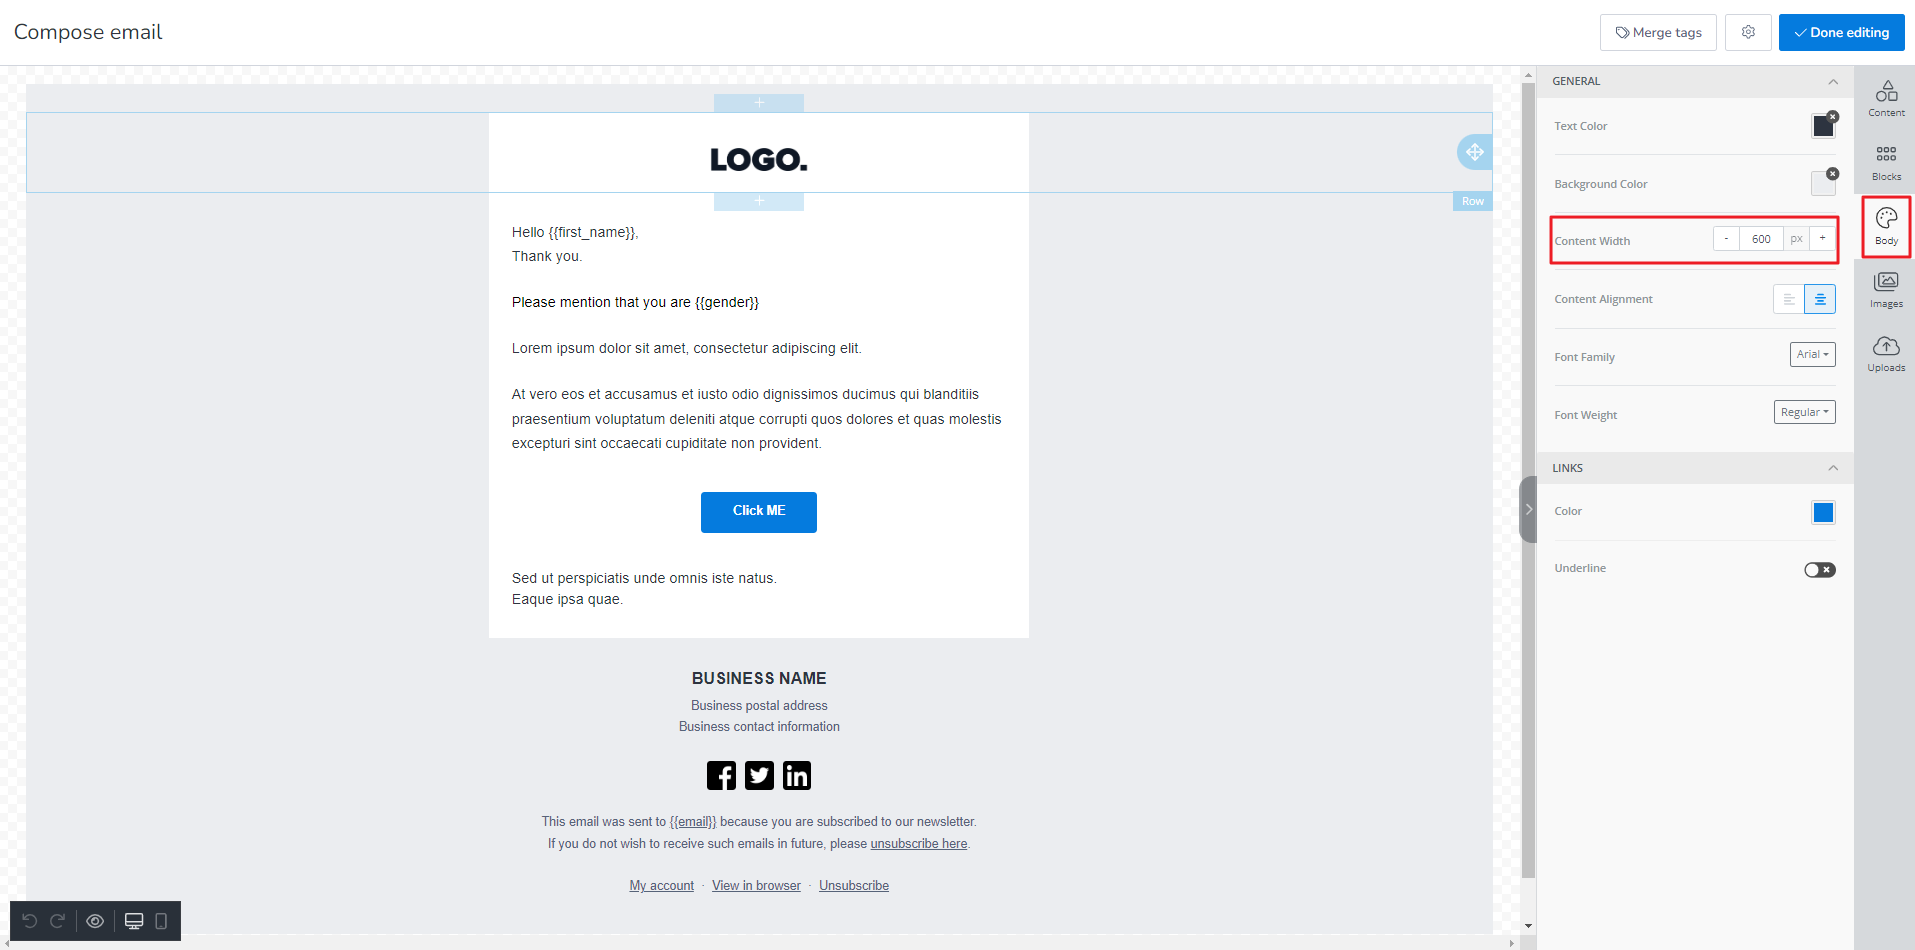
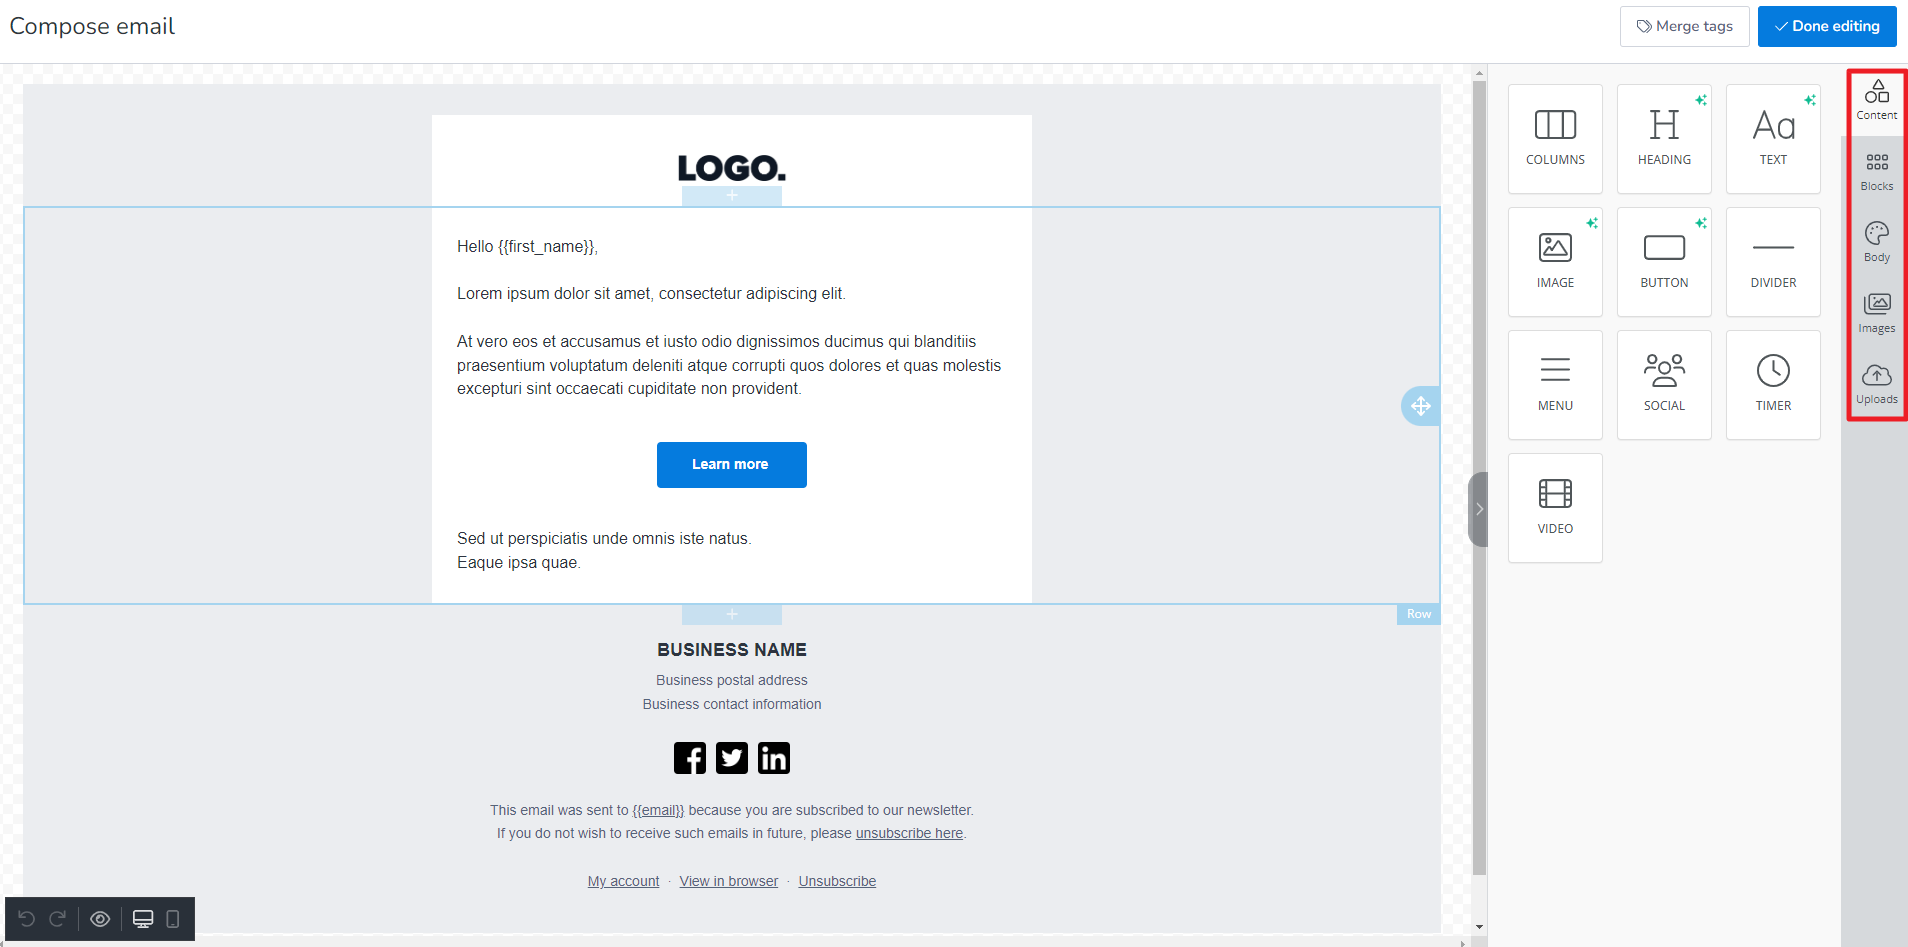
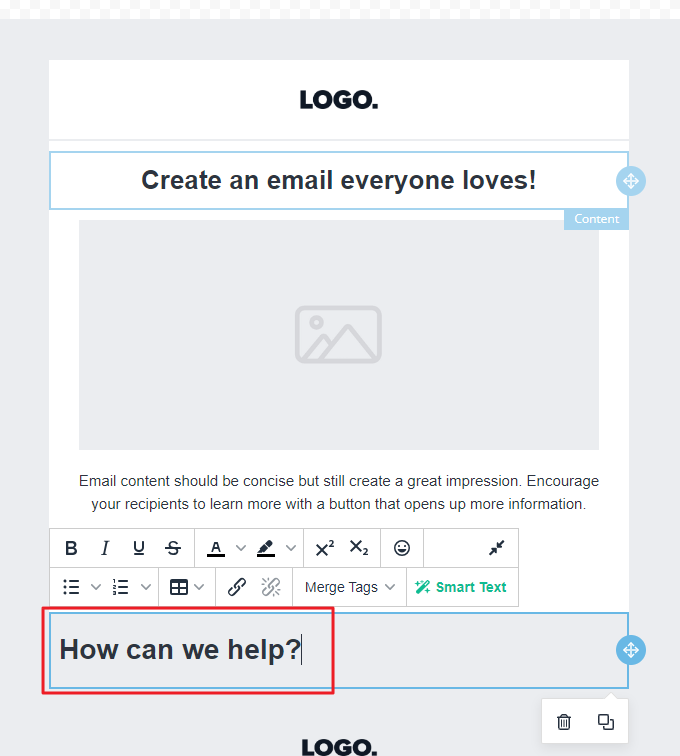
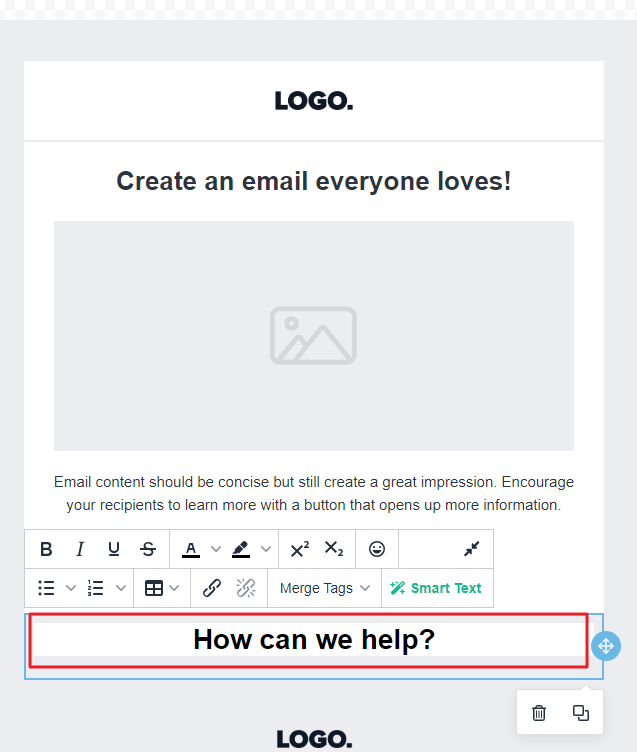
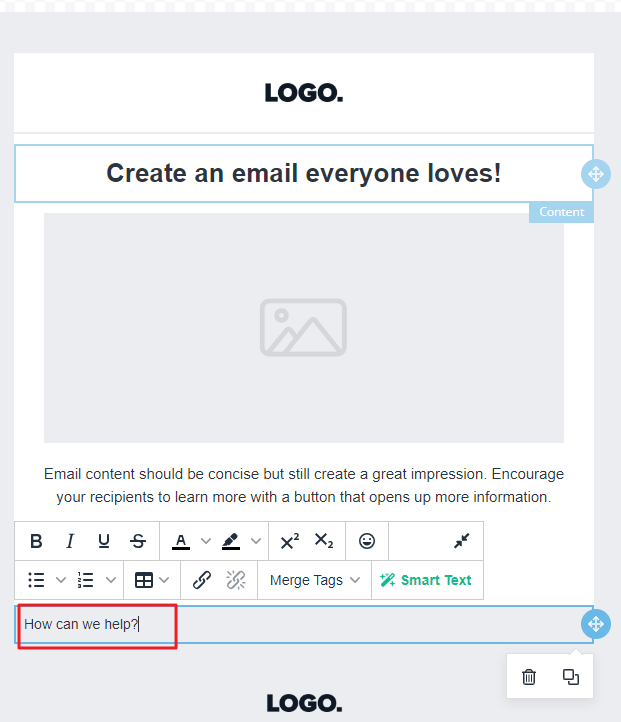
Changing the width of campaign email in MailBluster is simple. If you want to change the width of your email campaign, then open the campaign first. Then edit the campaign using Drag and drop Editor. Inside the Compose email, go to Compose email window > Content > Body> Content Width. Using this option, you can change the width of your email campaign. The following screenshot will let you clarify it further:
The maximum content size limit of an email campaign is 120KB. Exceeding this limit will cause errors. To ensure optimal performance, keep your email content below this threshold.
The reason of emails being clicked automatically is often linked to security measures used by certain email providers. It can happen with subscribers who have strict security settings, especially those using .edu or .gov domains. These domains preload links and images in your emails to check safety, which triggers automatic clicks.
You can test this by adding a hidden link in your email and checking if it registers clicks.
If many subscribers use strict domains, ask them to provide personal email addresses. For online forms, include a note advising users to use personal emails instead of work or government addresses. This helps track clicks accurately and avoids inflated click data.
Understanding the reason of emails being clicked automatically is essential for accurate reporting. Without this knowledge, you may misinterpret inflated metrics and make poor decisions based on misleading data. By encouraging personal email use and identifying automated click patterns, you can track performance more reliably and measure true subscriber engagement.
Using query string in campaign emails lets you pass information from one page to another via URLs. A query string is the part of a URL that comes after the question mark (?).
To understand query strings, let’s first take a closer look at a sample URL that uses one:
The first section of a URL is called a protocol (https). It is followed by the domain name of the website, or the hostname (here https://example.com ). And the next part (after the forward slash) is the path (product/shirt/?).
Everything that follows the path after the question mark (?) is the tail of the URL, also known as the query string (utm_source=newsletter&utm_medium=email&utm_campaign=winter).
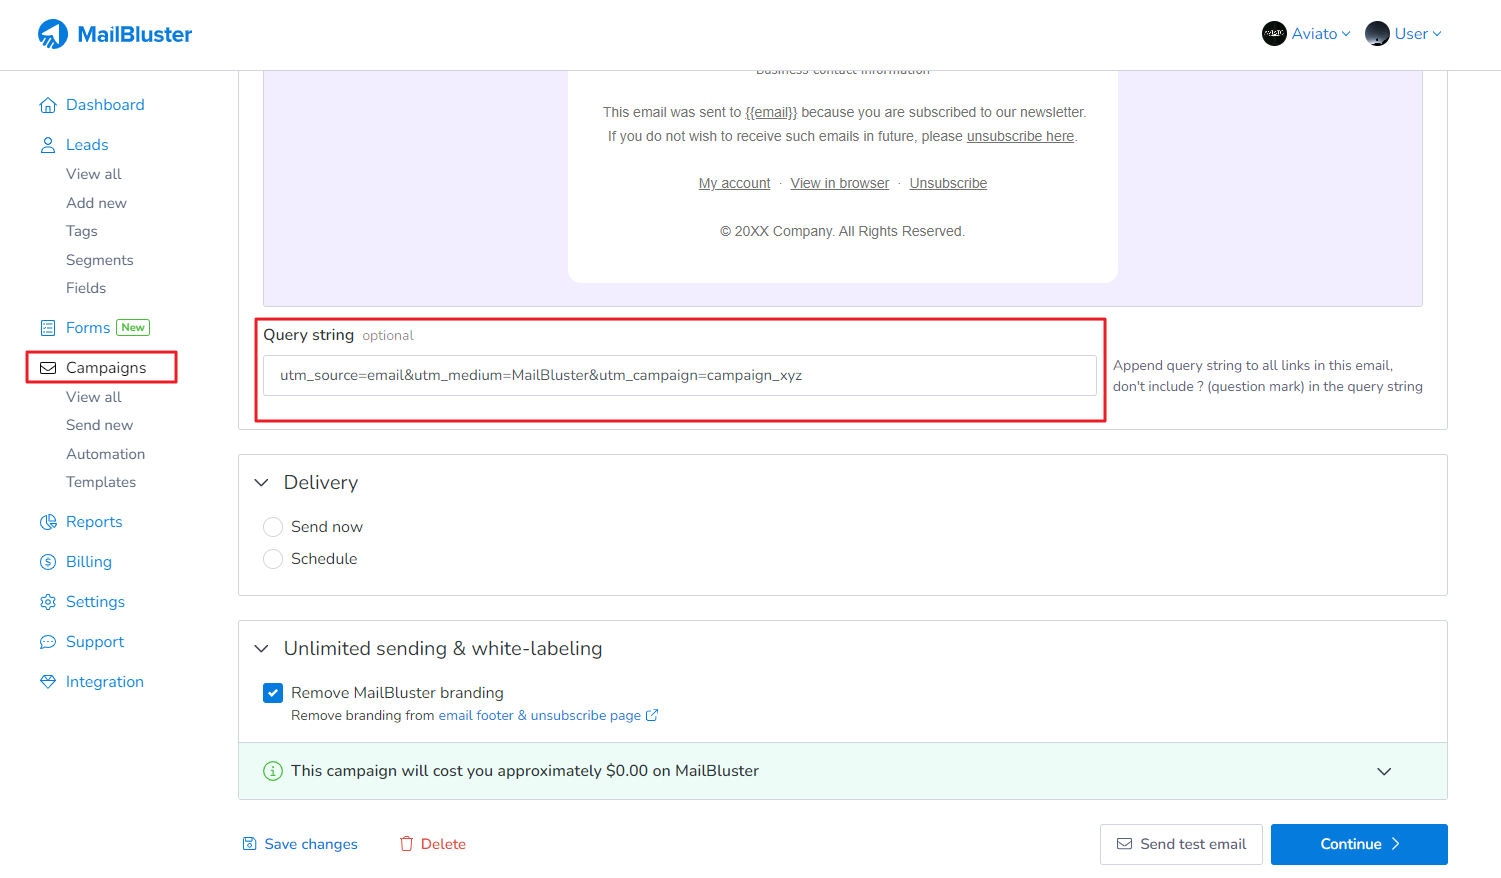
MailBluster has the option to put a query string in your campaign email, which you will find under Campaigns > Content > Query String section:
If you set query string in your campaign like this:
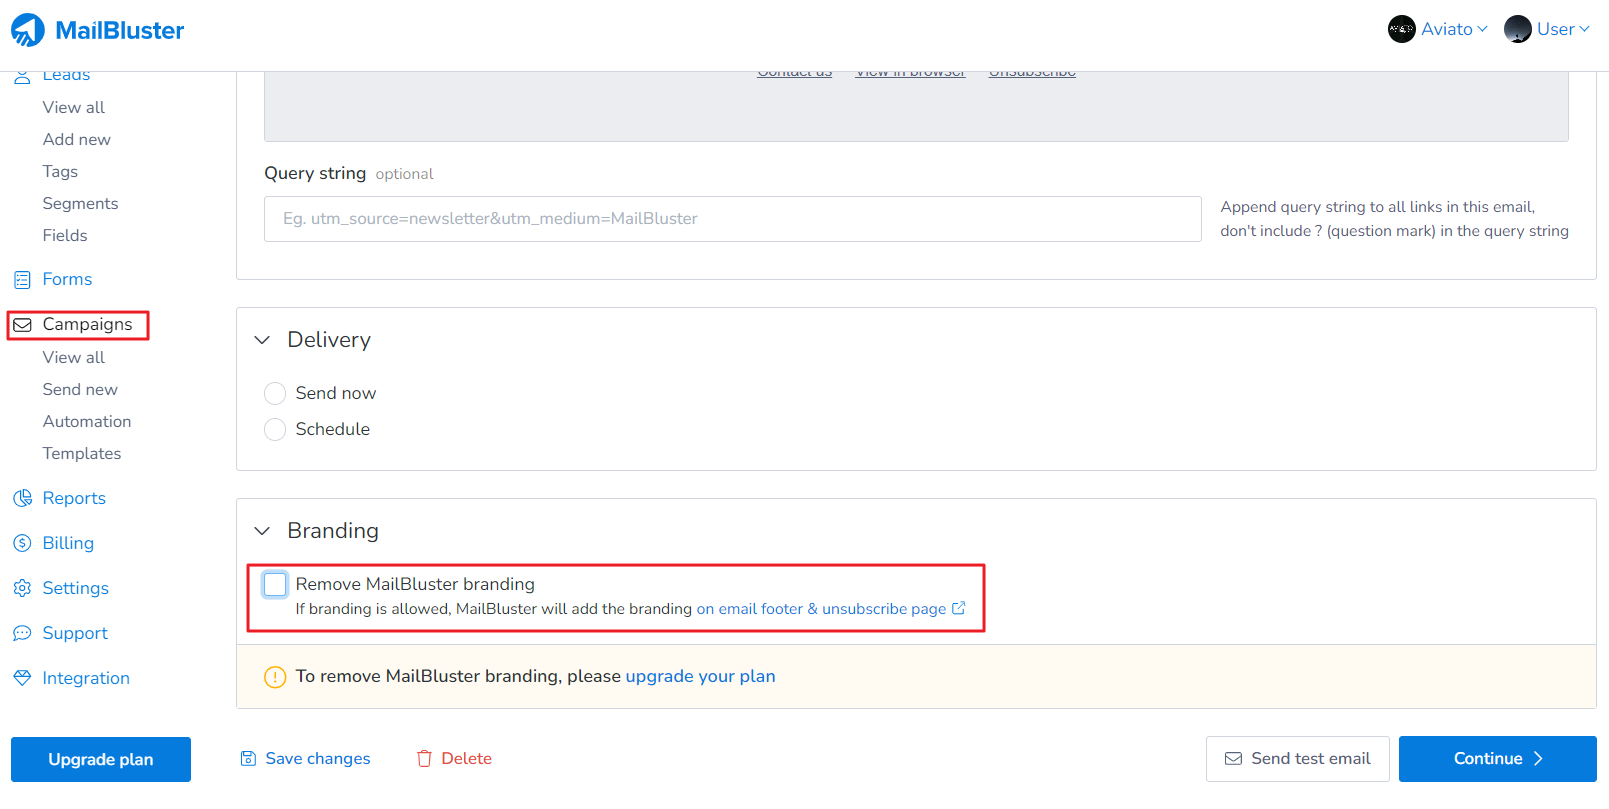
MailBluster branding appears by default in all campaign emails if you are on the Starter plan. You will see the branding in the email footer and on the unsubscribe page. Once you choose your Pro Plan and add your Billing card, you will be able to remove MailBluster branding from the email footer and unsubscribe page of your campaign email:
You can check out the differences in the email footer and unsubscribe page after removing MailBluster Branding from here.
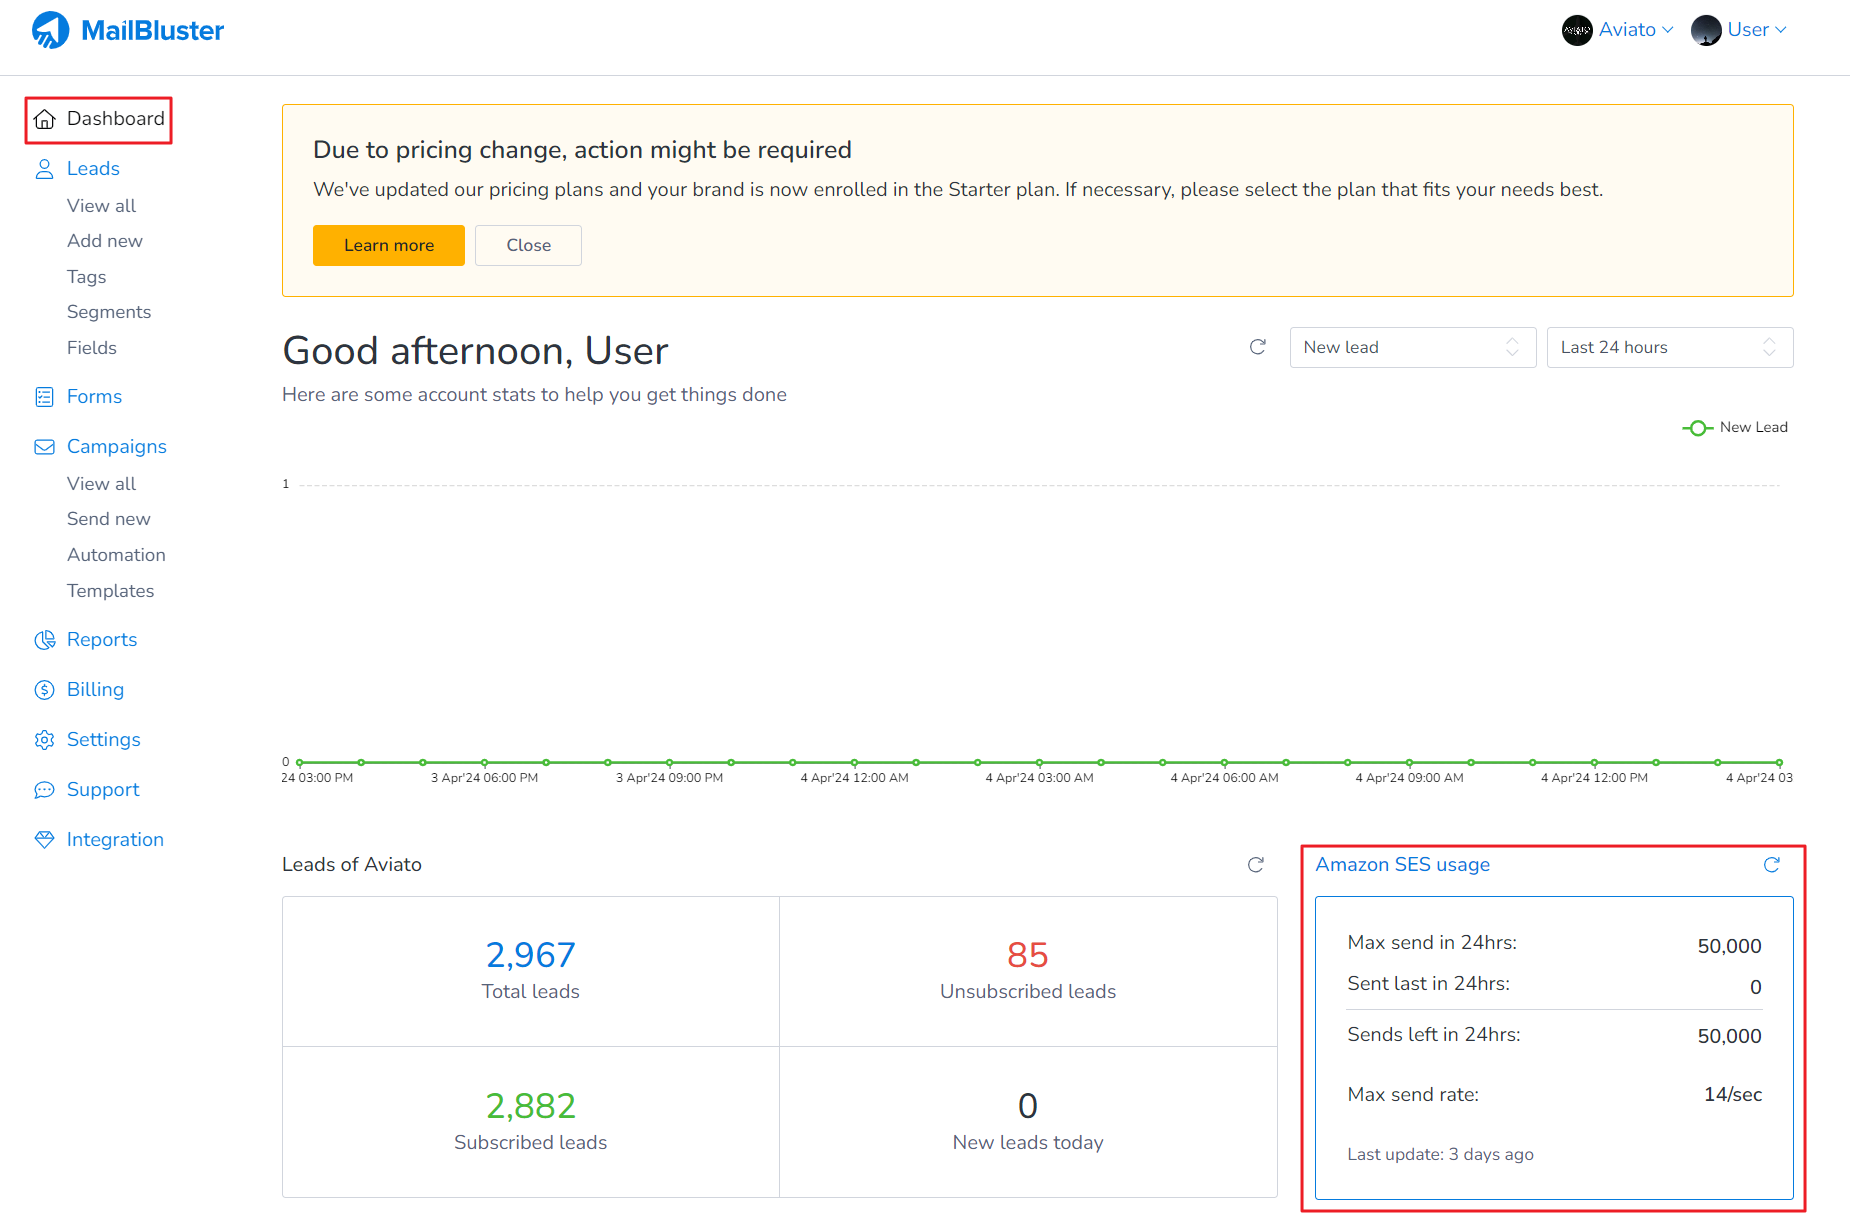
If your Amazon SES send rate is 14 emails/sec and by default, MailBluster operates at 90% of the send rate, which is 14 X 90% = 12.6 emails/sec, rounded down to 12 emails/sec. In summary, it means that MailBluster can send approximately 12 emails per second.
However, there might be other factors causing the delay:
If you send any other email/campaign at the same time from Amazon SES, we might not be able to send emails at the above-mentioned rate.
MailBluster sends only one campaign at a time. So, if you send multiple campaigns simultaneously, there might be some delay.
MailBluster takes some time to prepare your campaign.
MailBluster tries to send the campaign within one minute of your exact scheduled time. During this minute, there is a buffering time in case the sender wants to cancel the campaign.
Double opt-in is a process where, after you subscribe for an email or newsletter, you receive an email asking you to confirm that you really want to join. It’s more like a “Are you sure?” step to make sure you’re not accidentally added or signed up by someone else. You need to click a link or take an action in that confirmation email to complete the sign-up process. This helps prevent spam and ensures that people on the list actually want to be there.
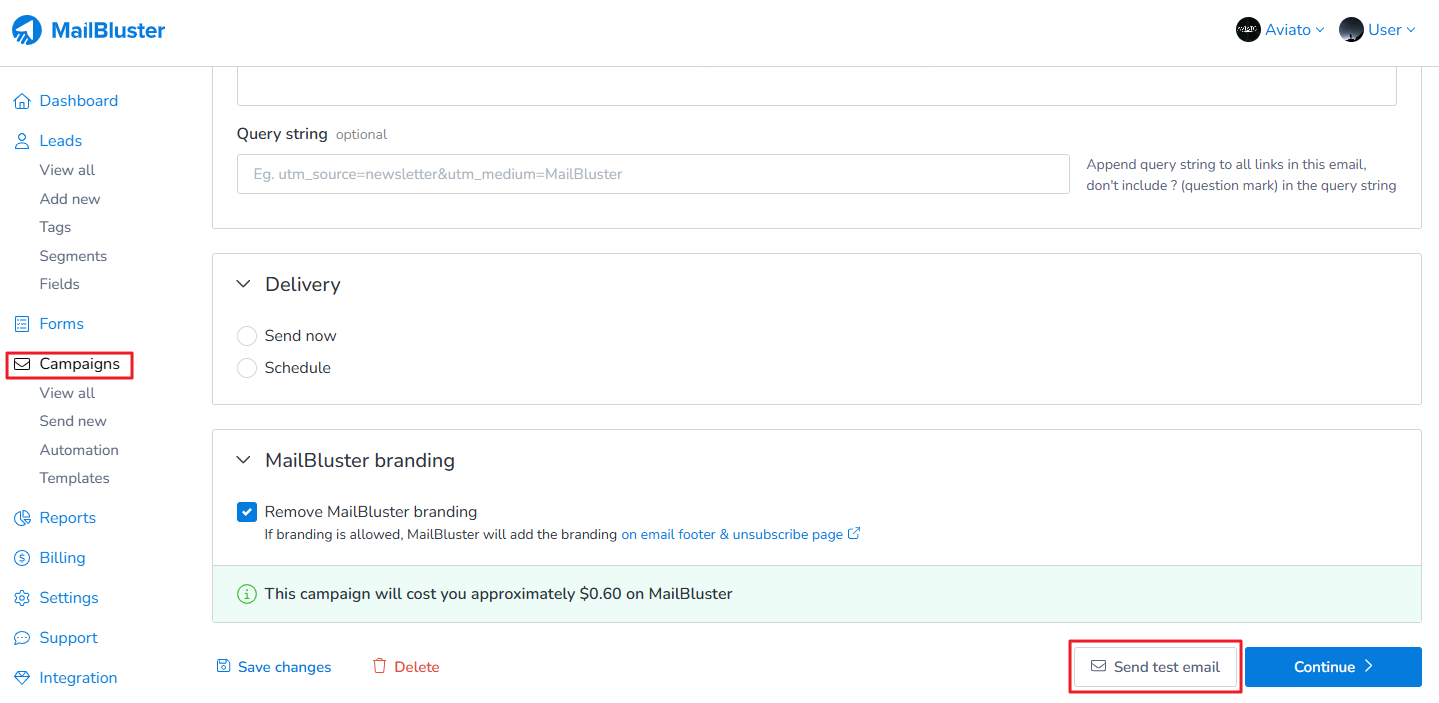
Yes, you can send quick test email before campaigns to all subscribers in MailBluster. This feature lets you check the email design, links, and personalization before the final send. MailBluster has the ability to send test emails before sending email campaigns to bulk leads.
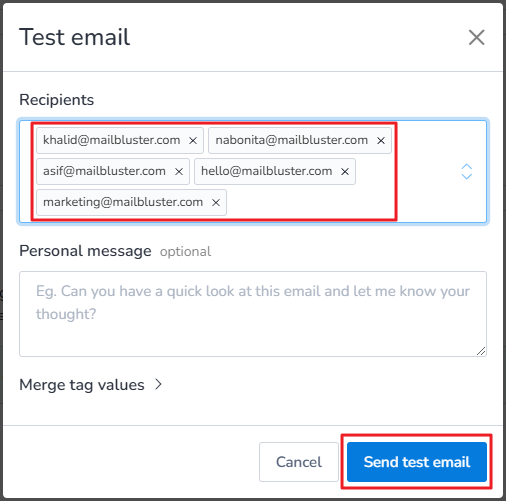
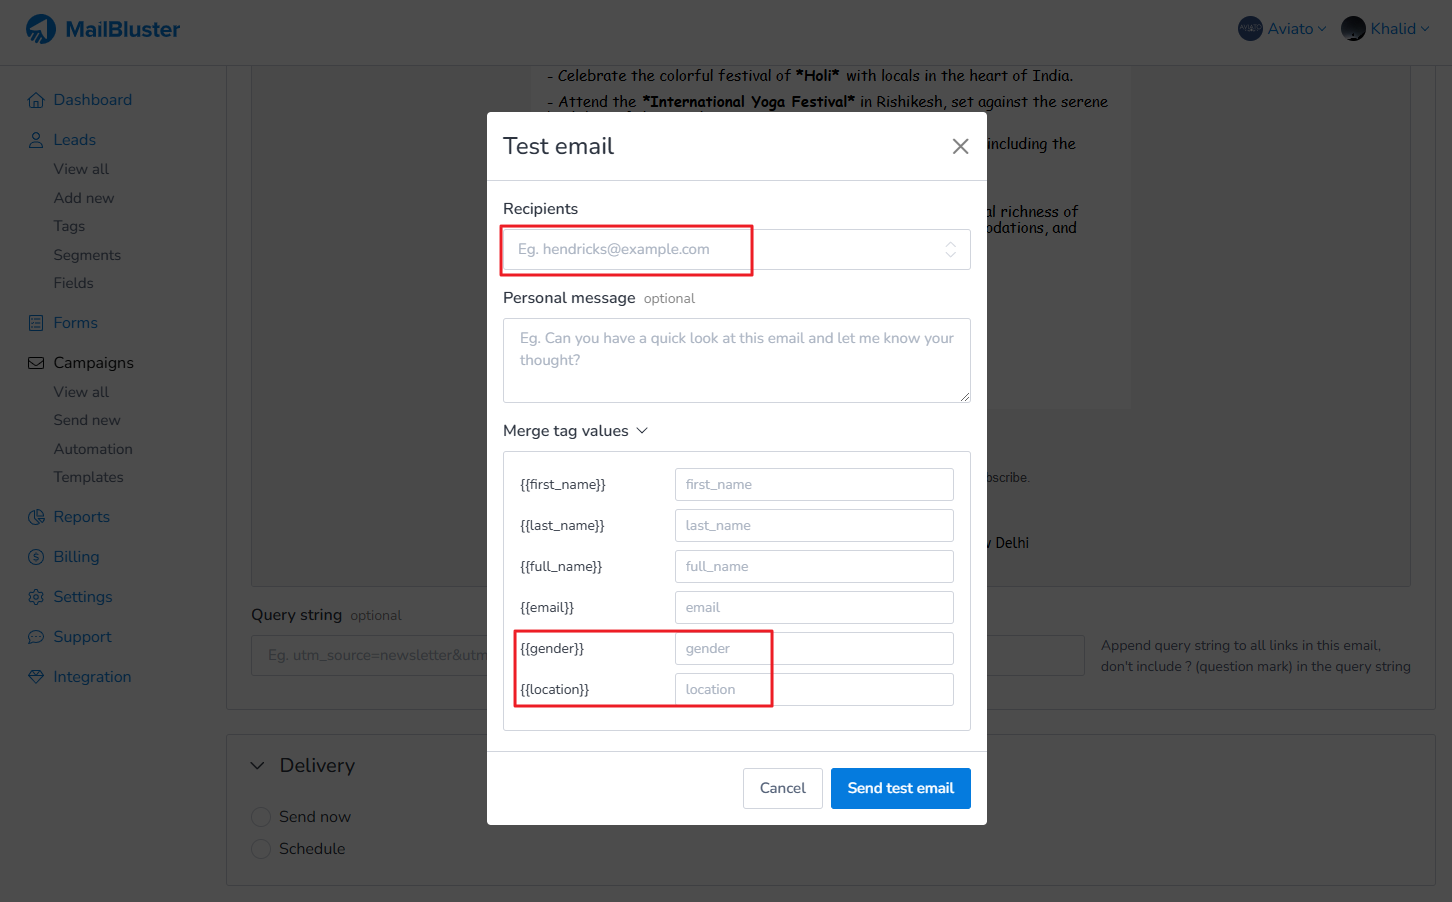
You can send a test email to a maximum of 5 recipients before sending it out to your whole list or segment, as shown in the screenshot below:
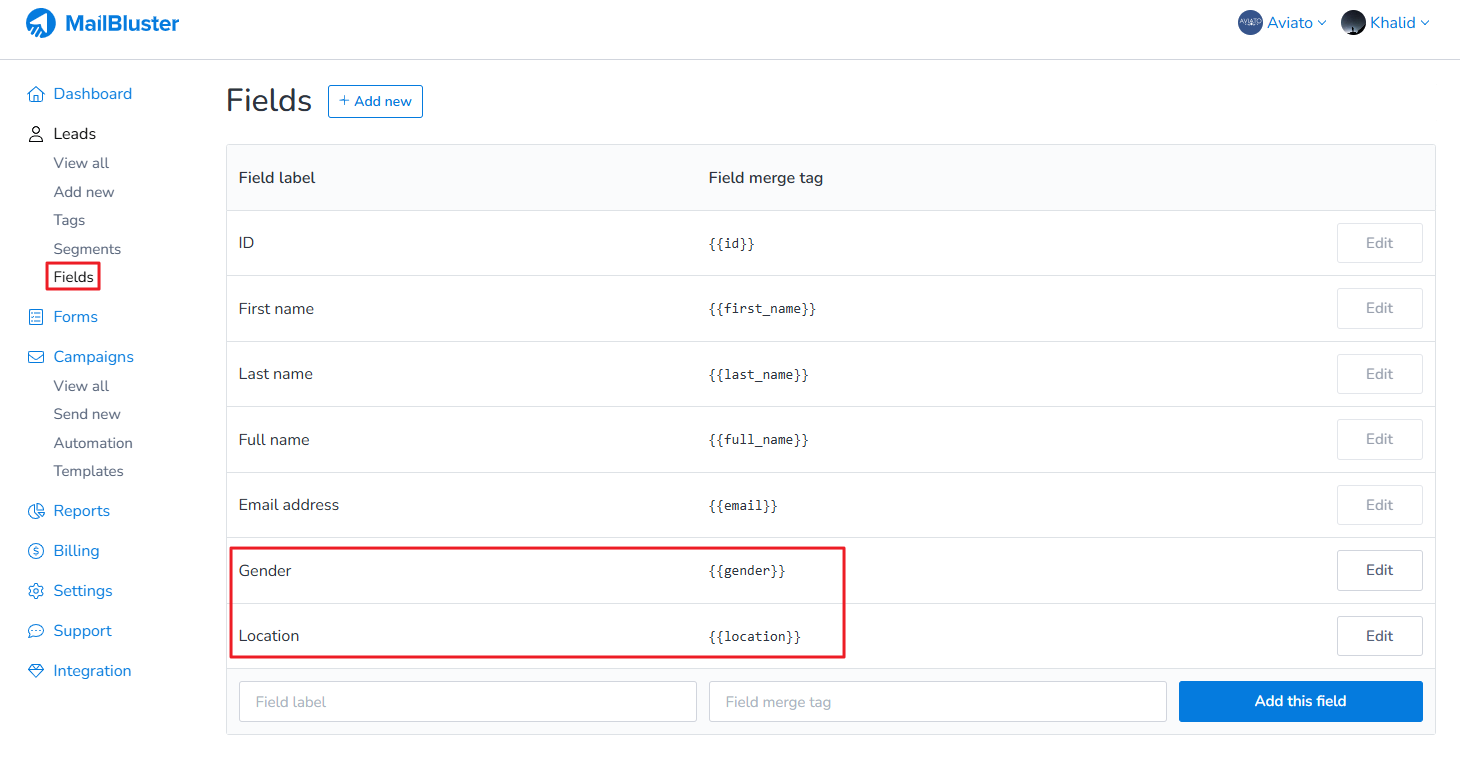
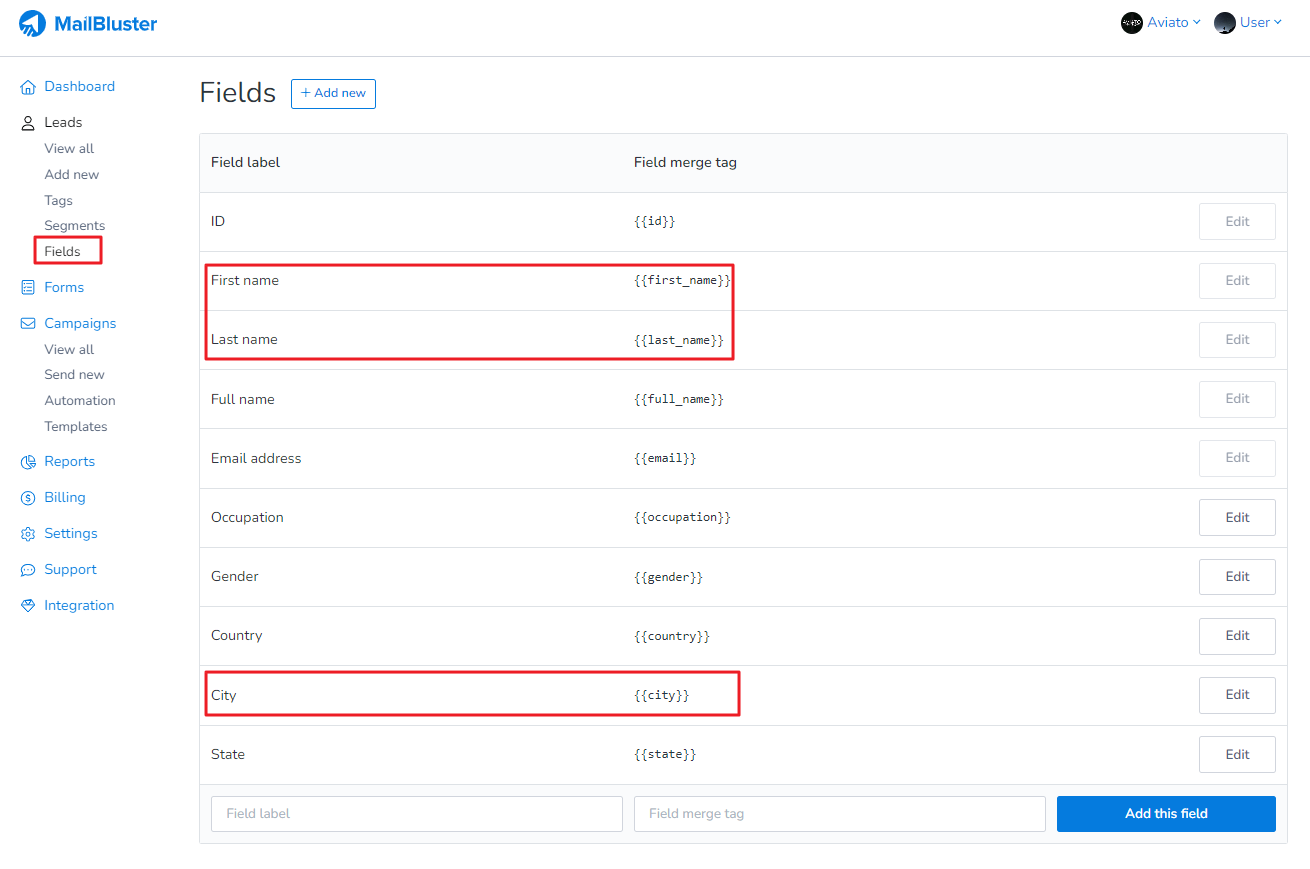
To send test email using merge tags from your Brand, first go to Fields. Then create two custom merge tags as shown below.
Now, go to Campaigns, scroll down, and click on Send test email. Enter the recipient’s email addresses (up to 5), then click on Merge tag values. Enter the values for the merge tag fields, and finally, click Send test email.
MailBluster utilizes a double opt-in mechanism to validate subscriber consent. This process ensures that subscribers not only subscribe but also confirm their subscription via a verification email. By employing this method, MailBluster aims to maintain a high standard of compliance and deliverability.
Here is how double opt-in works in MailBluster:
Double opt-in is an additional step to the email subscription opt-in process, which requires a lead to verify the email address to subscribe to your brand. You can enable double opt-in using the MailBluster developer API or through enabling Double Opt-In option in Forms and then new subscribed leads will receive a confirmation email.
Configuring Double Opt-in MailBluster:
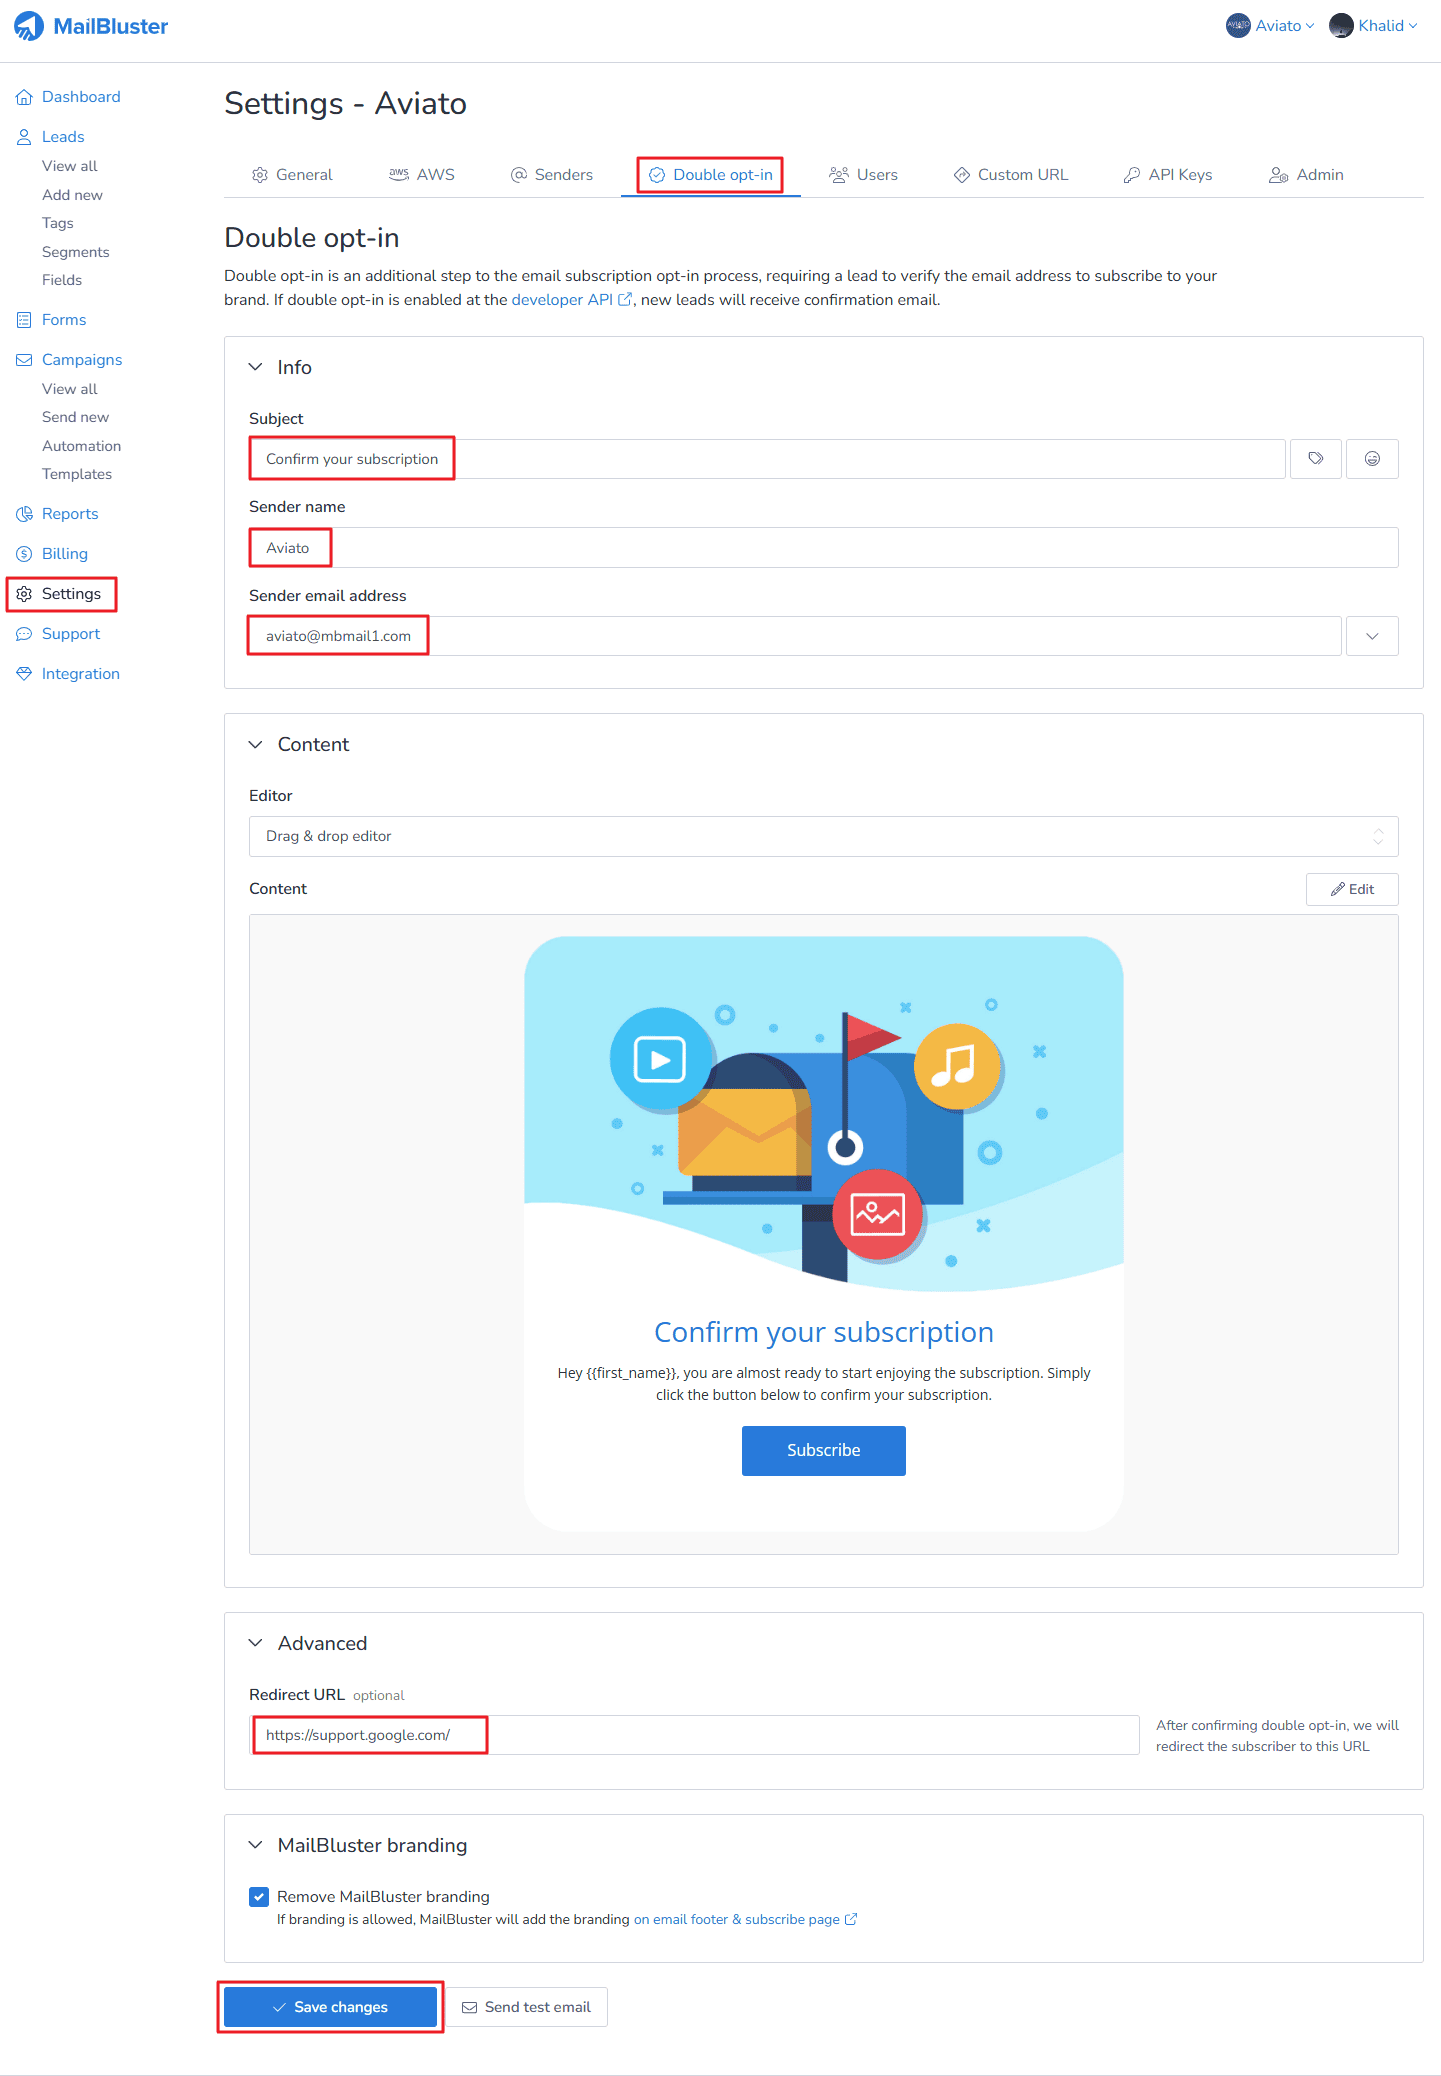
To configure Double opt-in in MailBluster, first go to your Brand >Settings > Double Opt-in. Insert suitable Subject and your Sender name. Then write down your verified Sender email address. Finally, select the appropriate Editor and prepare your email content. Once completed, set a Redirect URL (optional) and click Save changes.
There are two ways where you can enable Double opt-in.
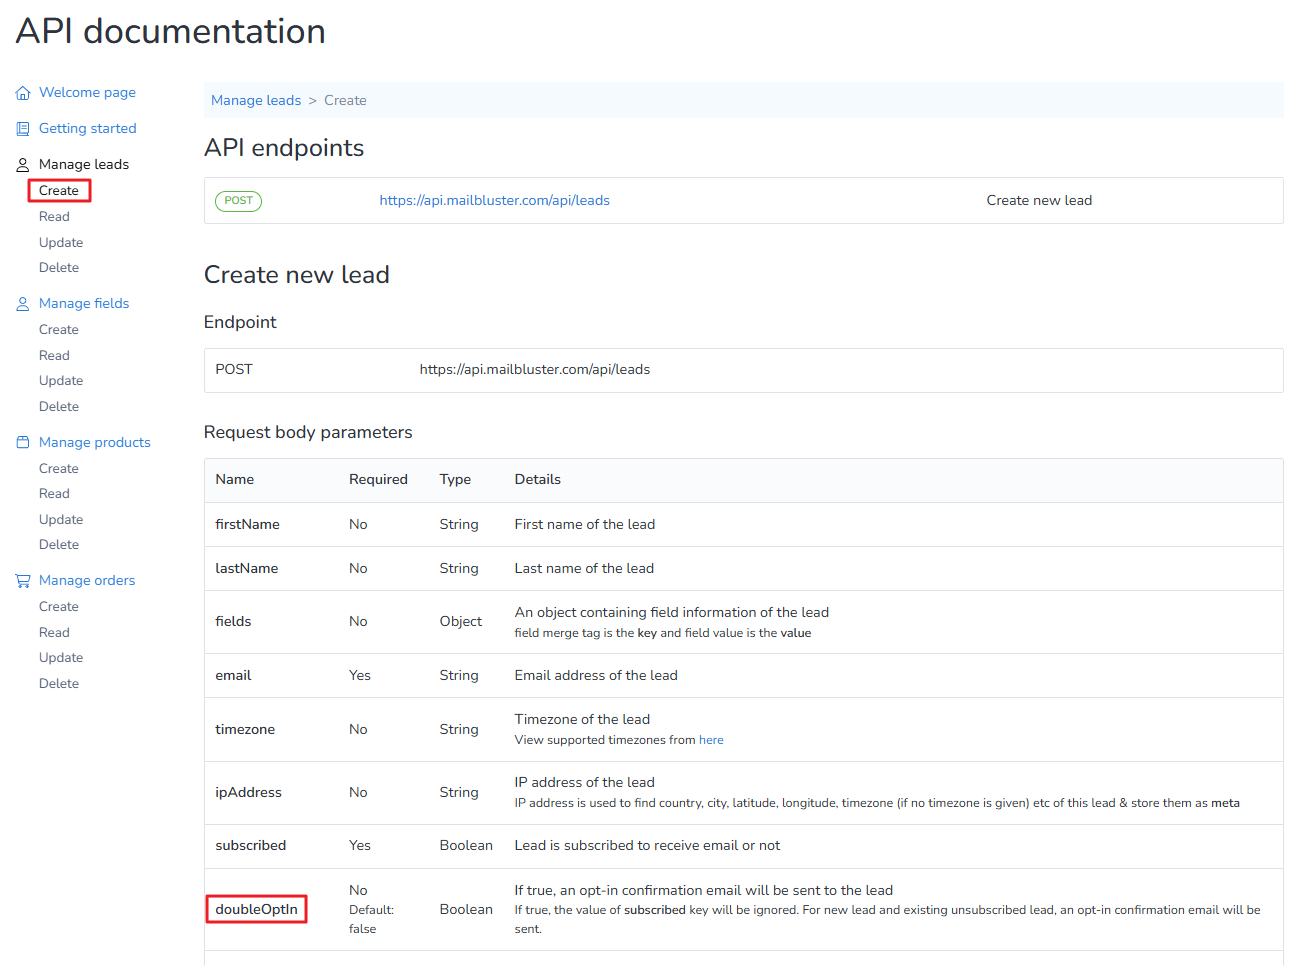
1. Through API endpoints from MailBluster Developer API.
Using the API endpoints from theMailBluster Developer API and integrate them into your website. By default, the double opt-in feature is set to false. To receive new leads via the double opt-in email, you need to set the double opt-in value to true.
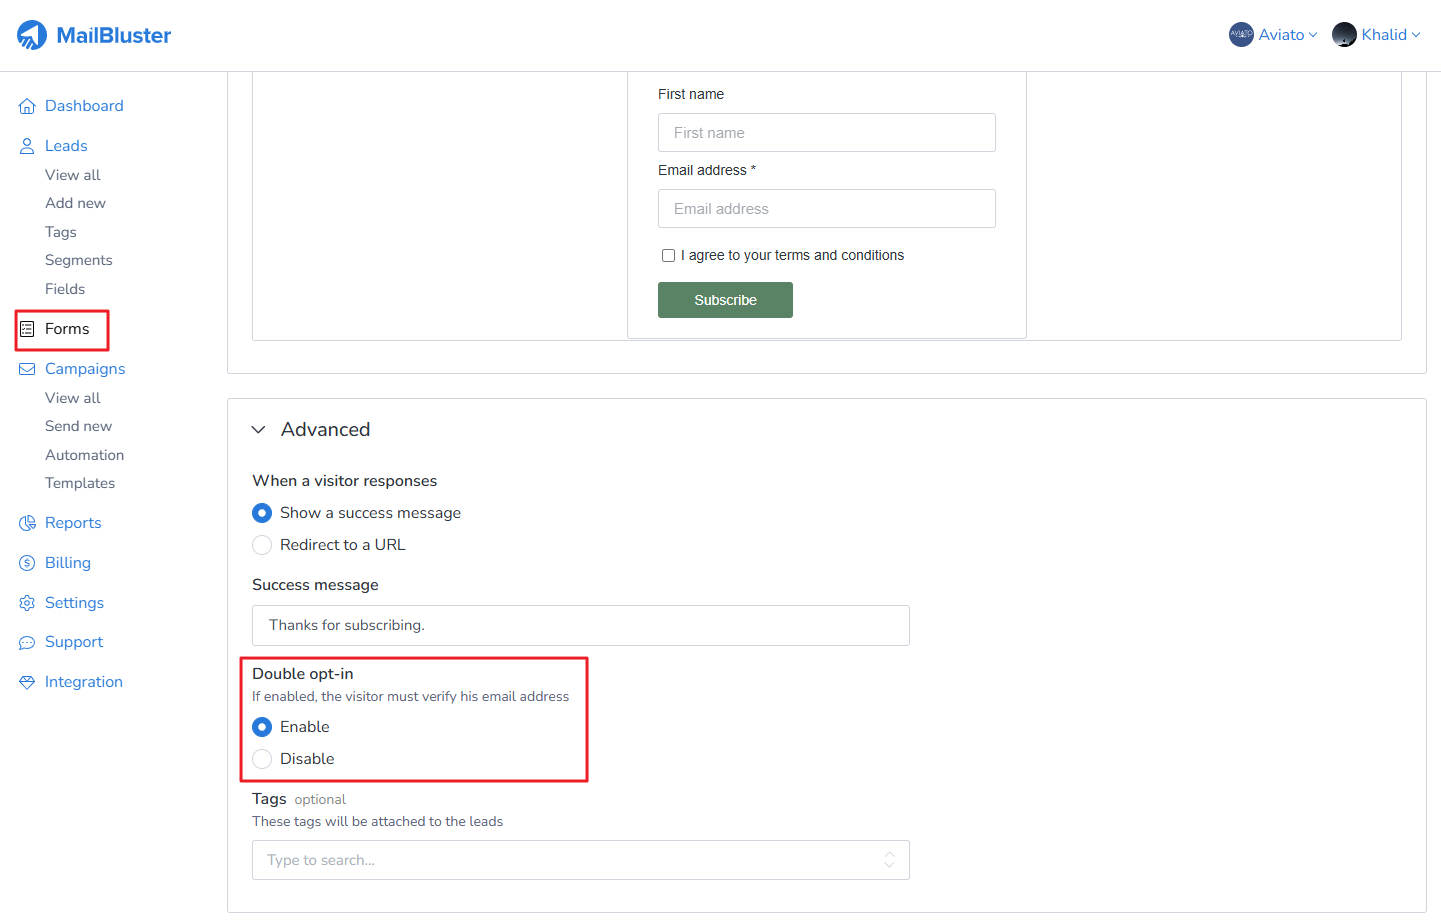
2. Through MailBluster Forms – Inline Form or Popup Form
You need to enableDouble opt-in in your MailBluster forms.
If you try to manually add or import leads to MailBluster, then those leads won’t receive your double opt-in confirmation email. So keep that in mind.
The difference between standard campaigns and automation campaigns in MailBluster defines how emails are structured, triggered, and delivered in both campaigns. The standard campaign allows you to send individual campaign straight forward without any kinds of conditional triggers or delays. But for automation campaigns, you need to design a workflow with conditional triggers. You can also assign multiple campaigns to a single workflow with delay and trigger conditions in Automation.
The following are sample screenshots to show the differences between normal campaign and an automation campaign.
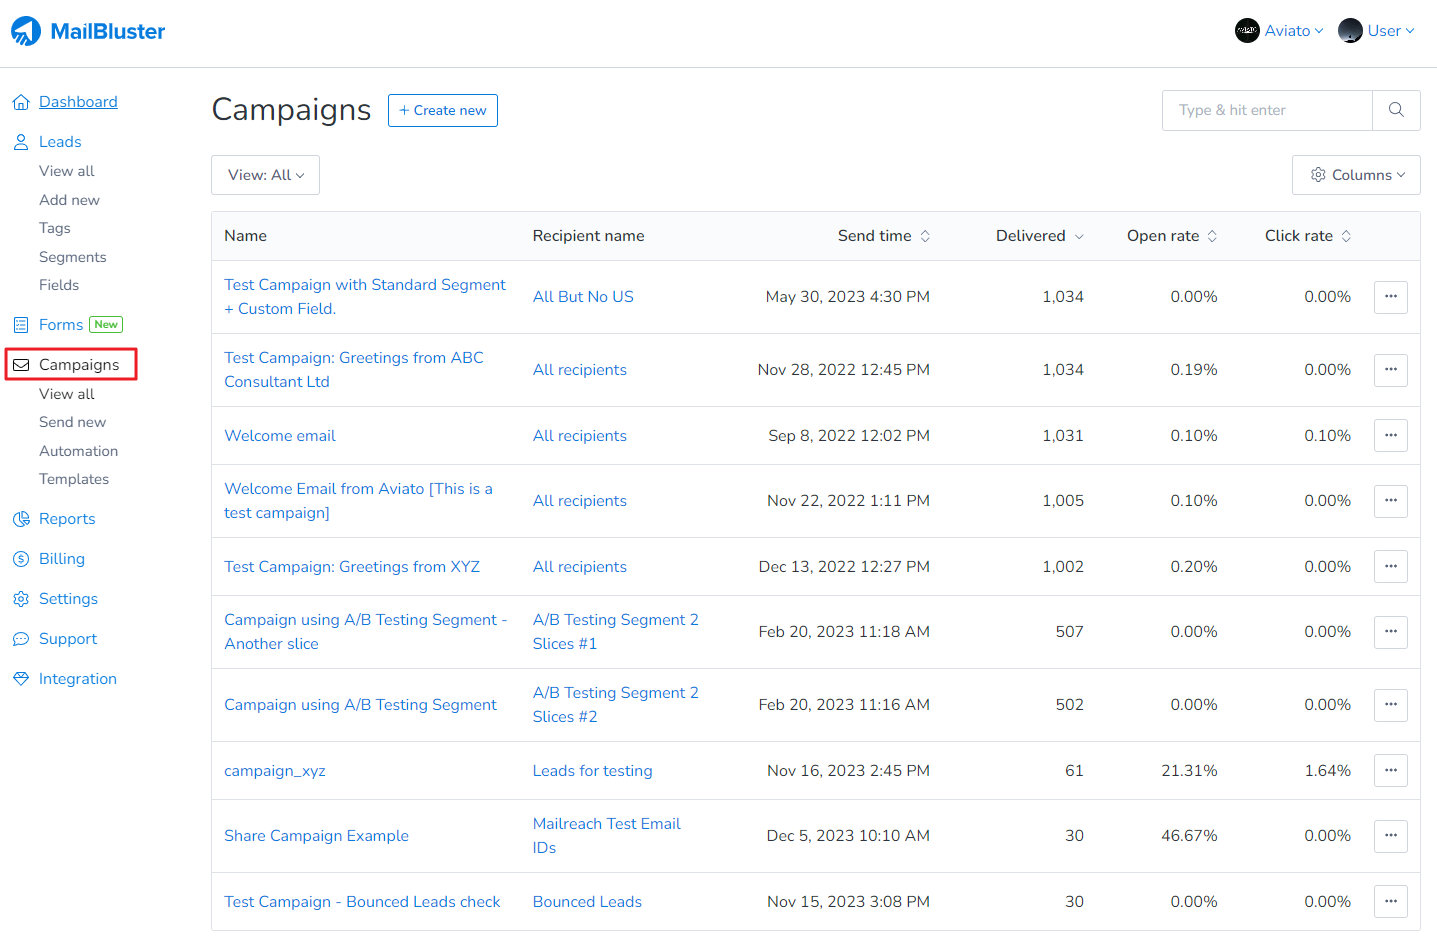
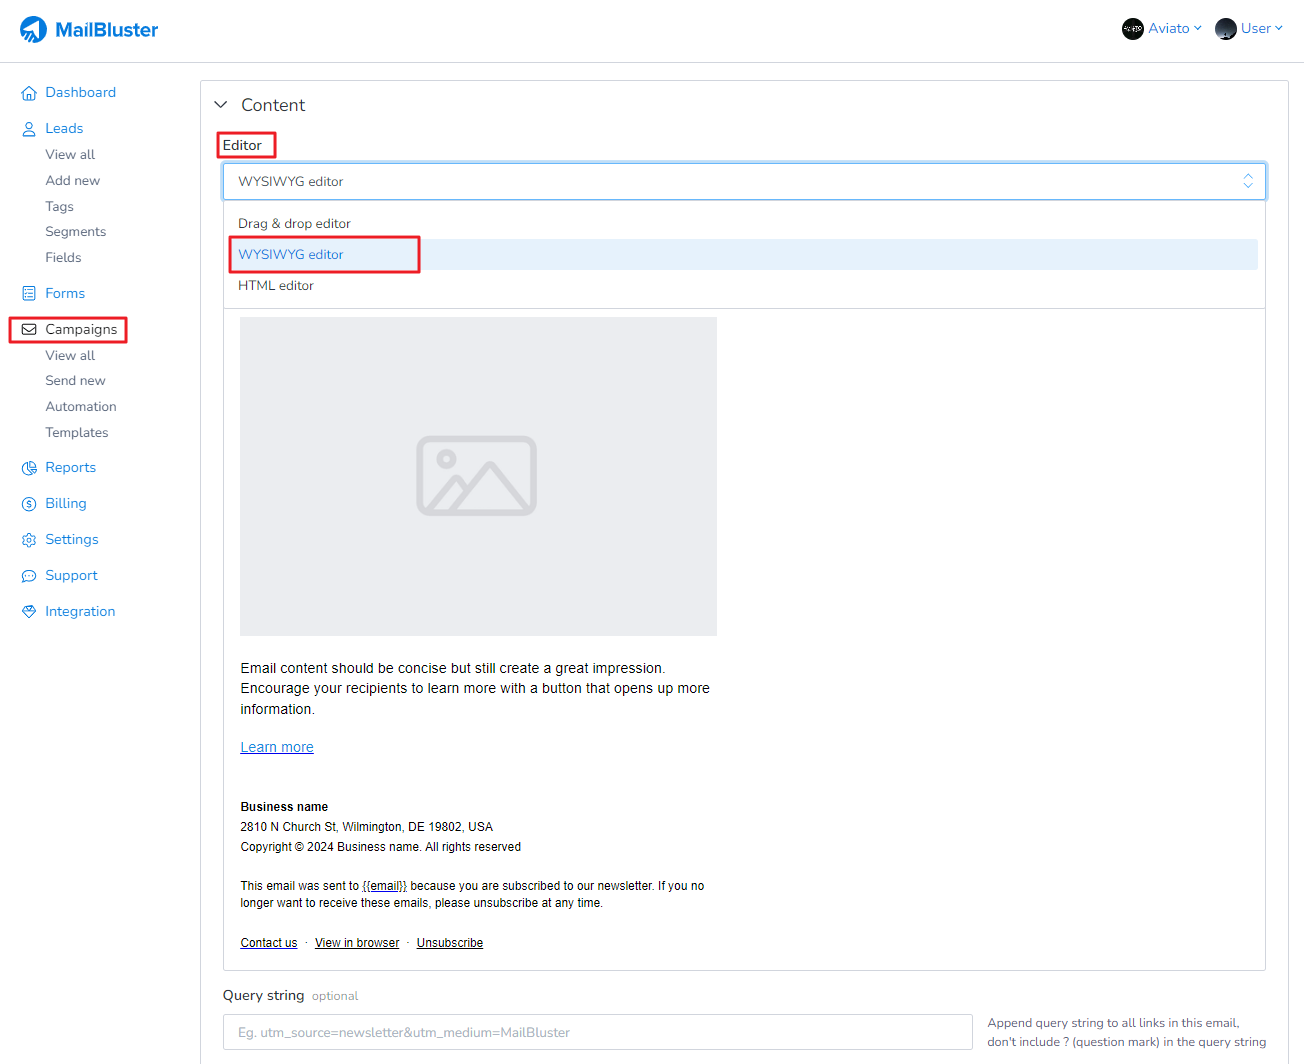
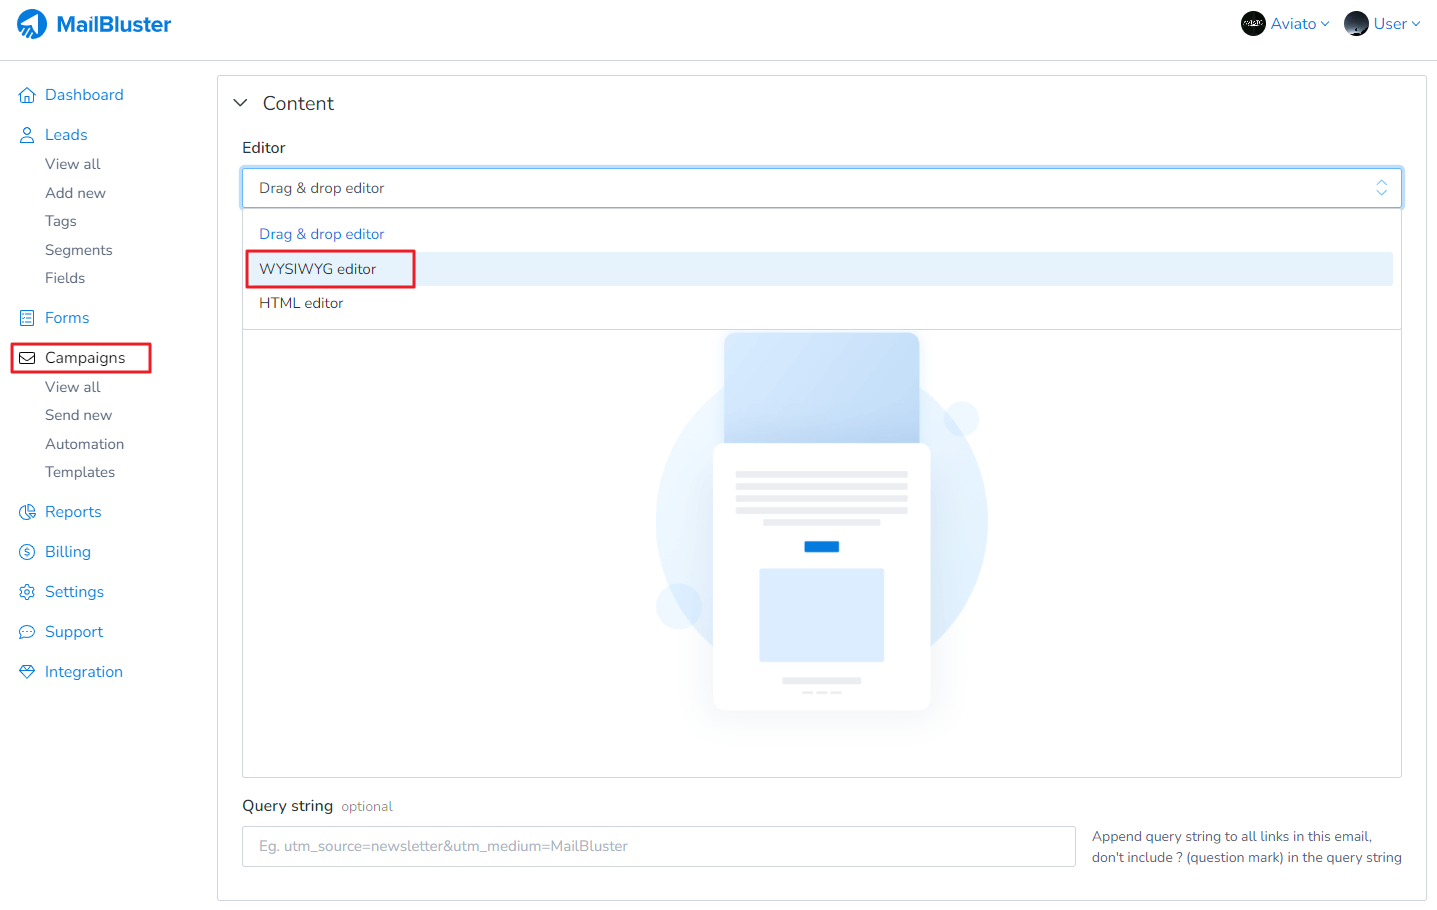
You can send campaign in plain text in MailBluster by using the WYSIWYG editor. This option allows you to send simple plain text emails, and you can even include emojis if you prefer.
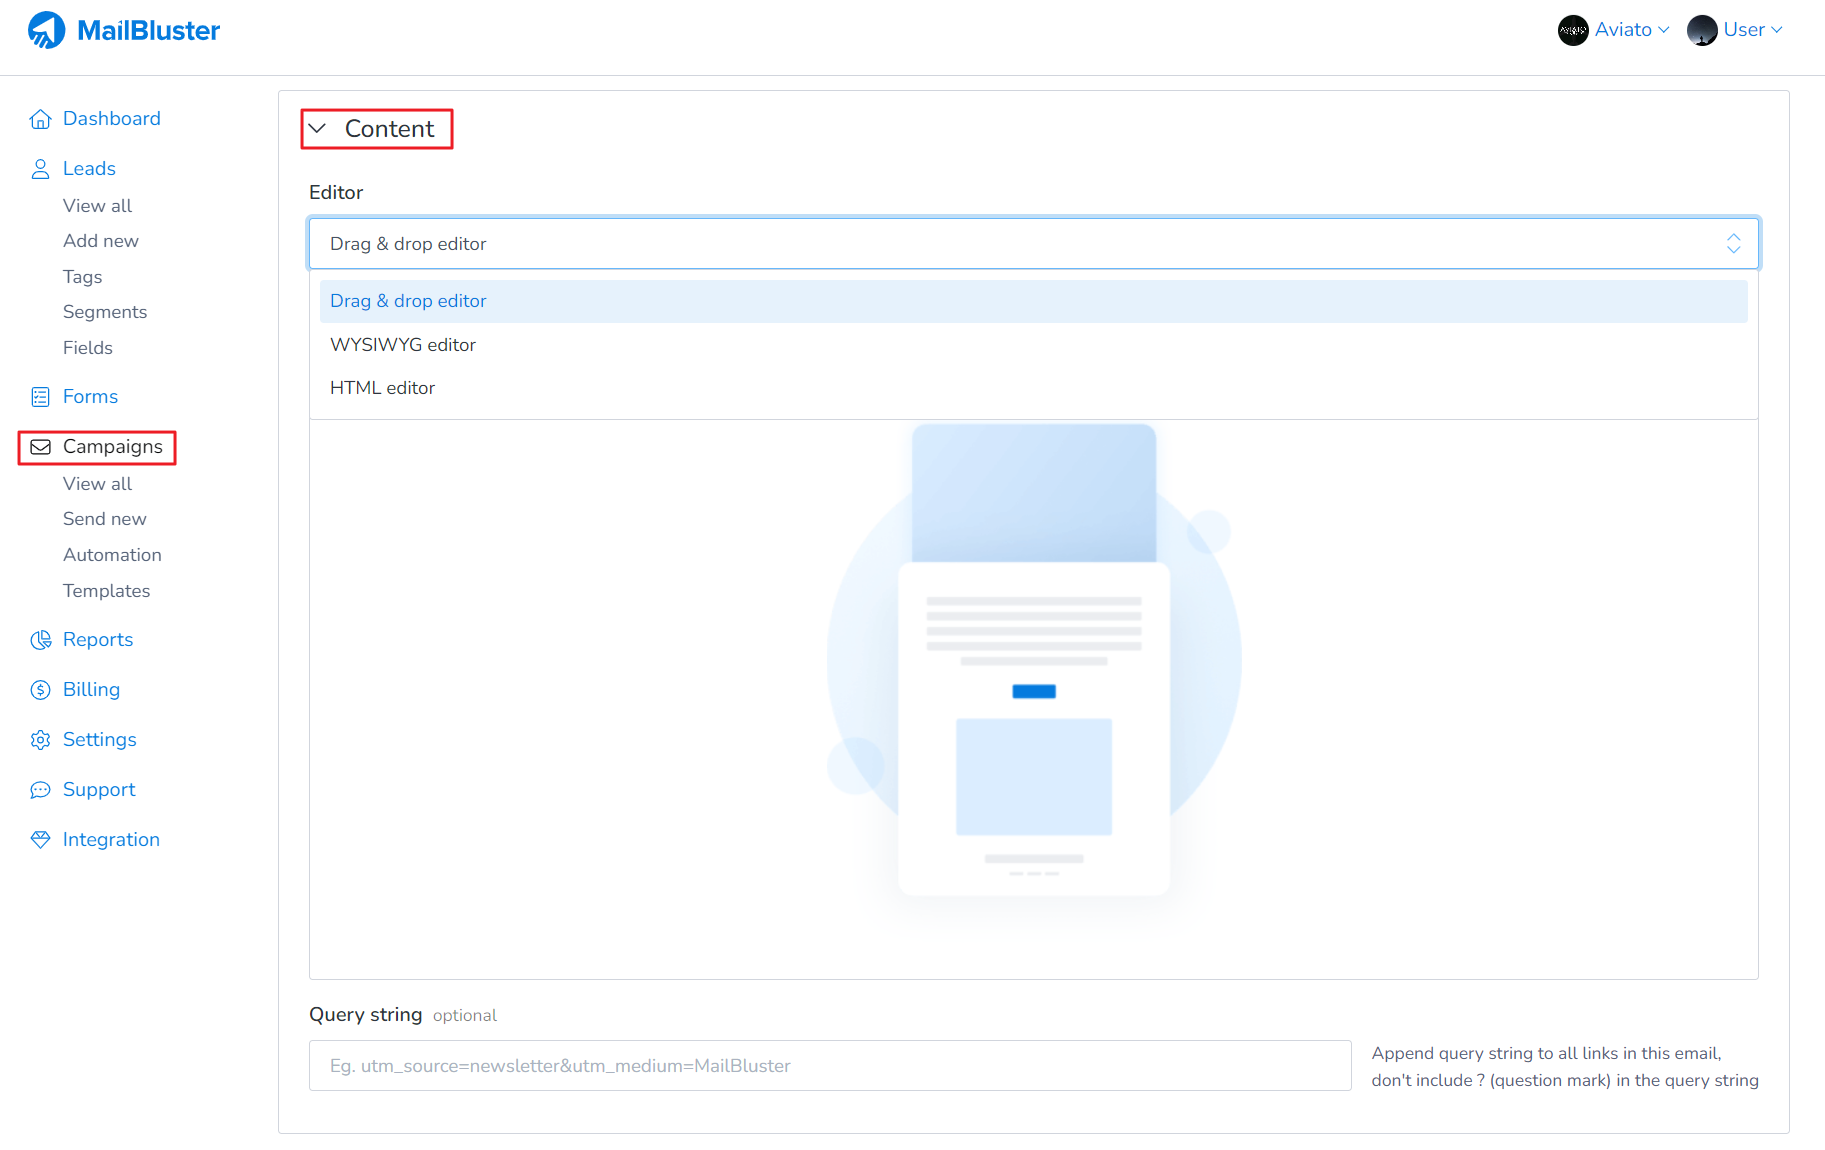
To do this, go to your Campaign, and then select WYSIWYG editor from Content > Editor selection
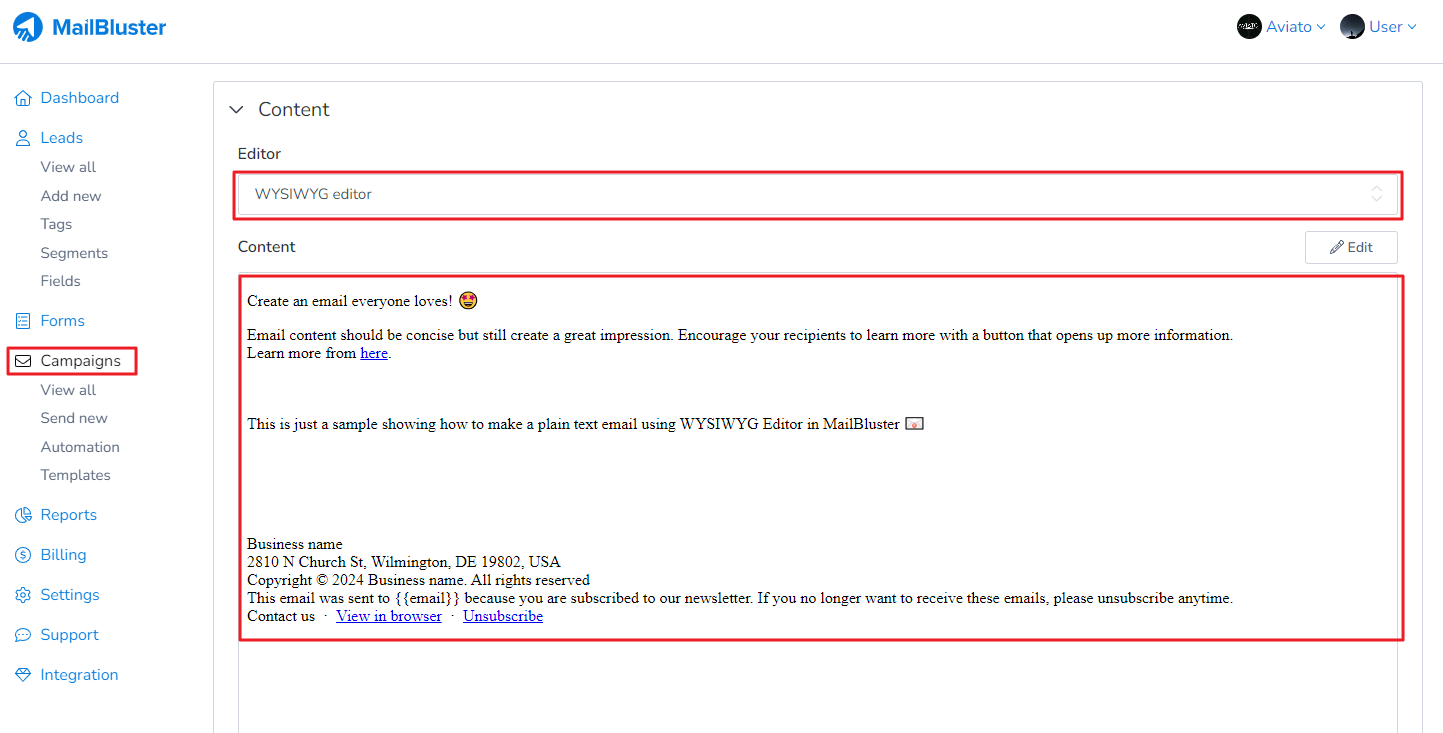
Here is a sample of Plain text email created using WYSIWYG editor from MailBluster.
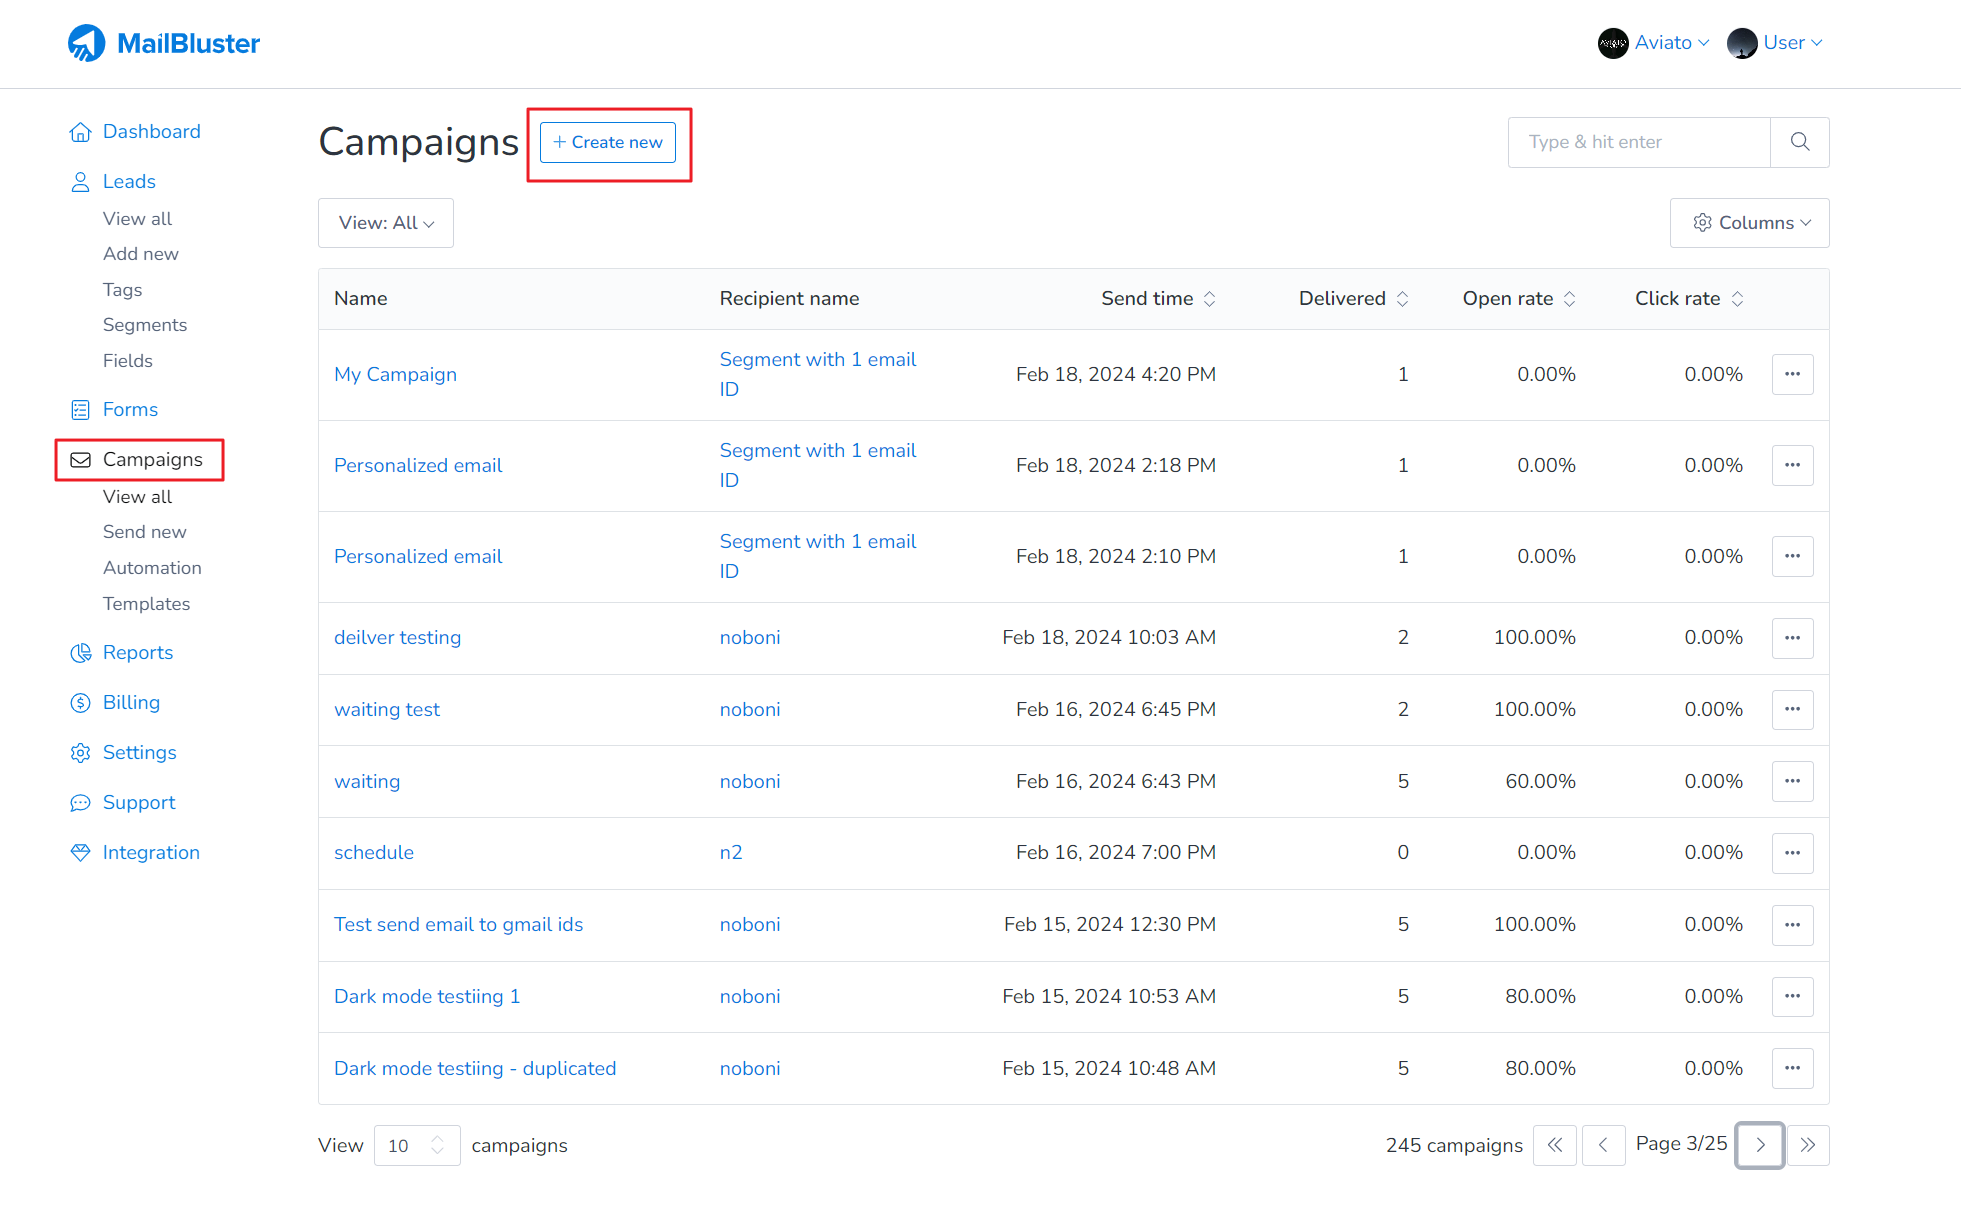
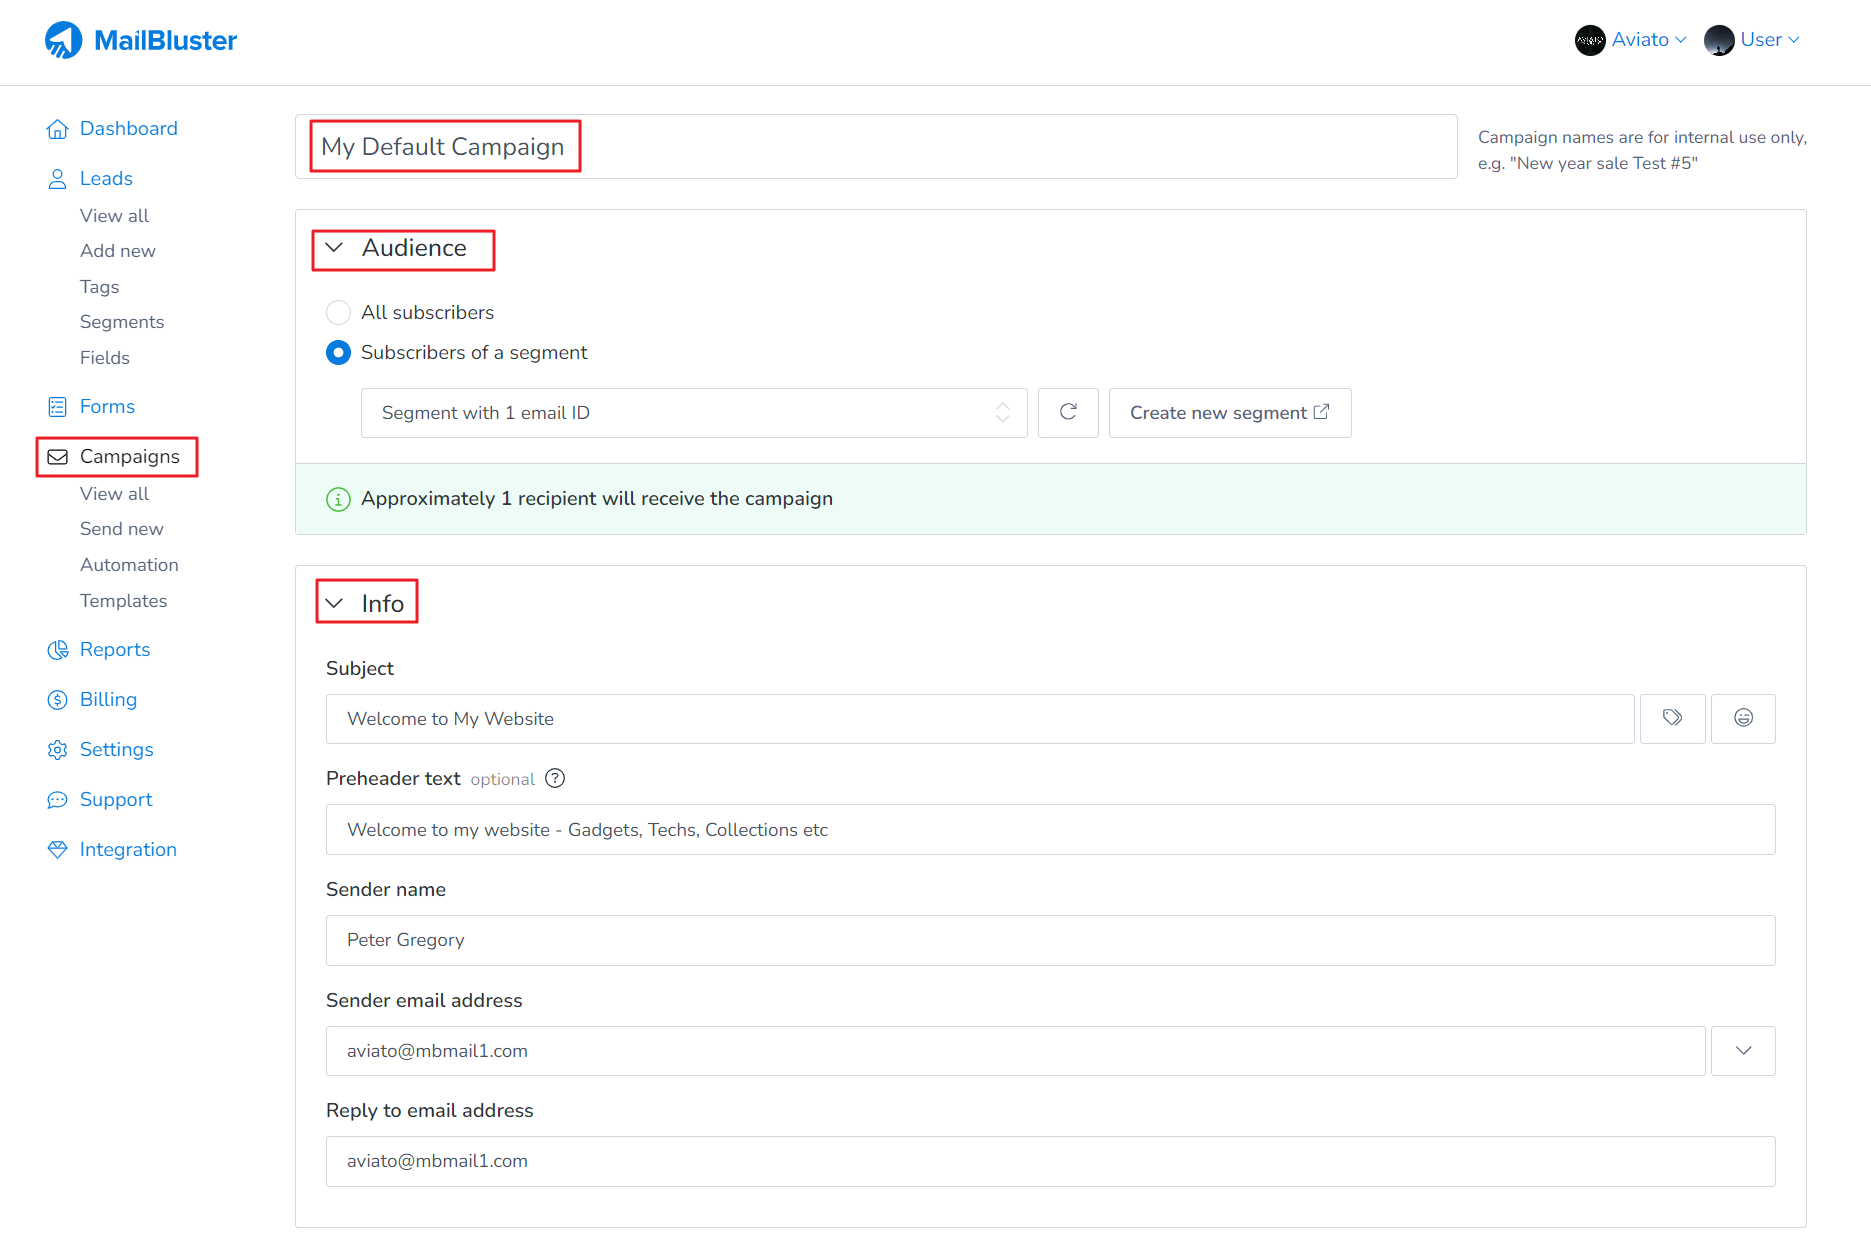
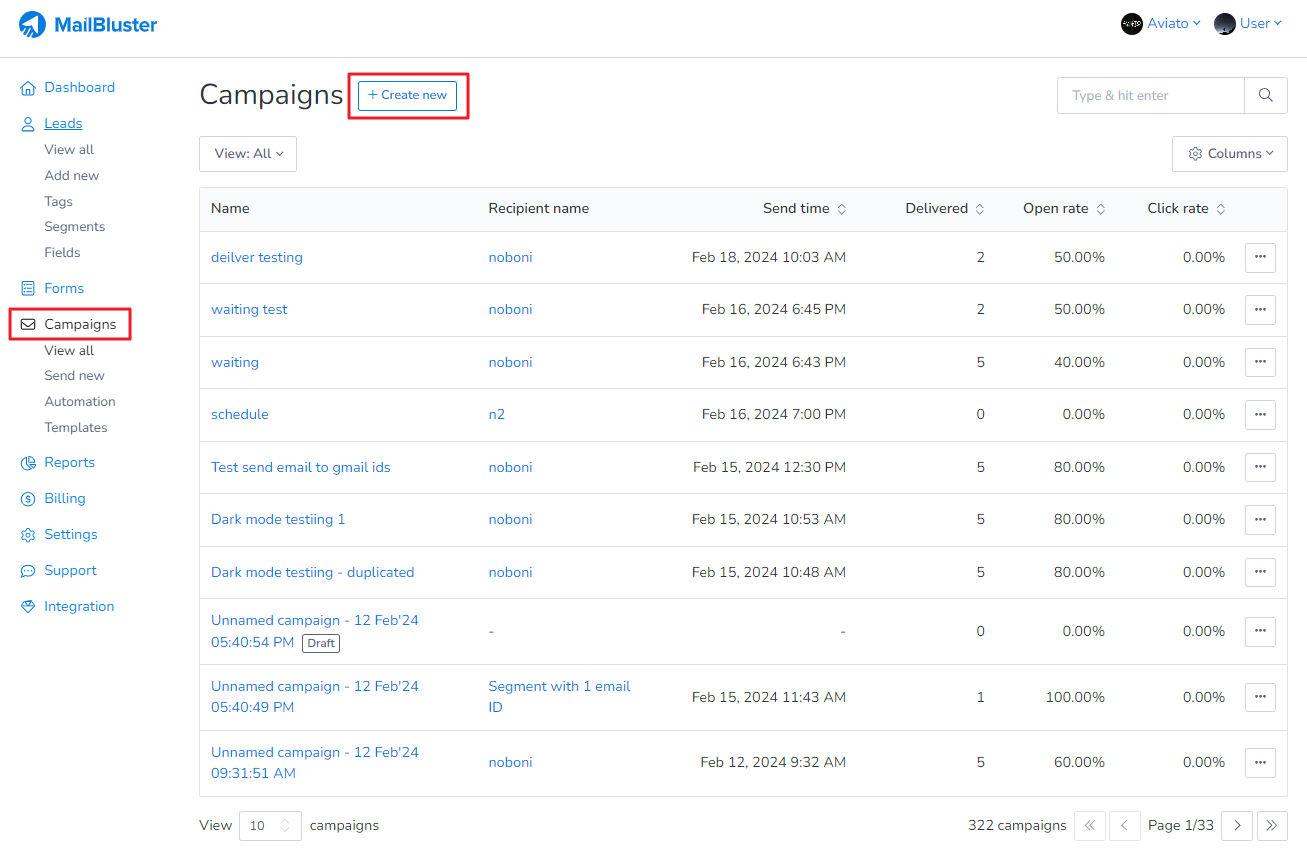
You can easily create and send an email campaign in MailBluster by following a few simple steps. First, go to your Brand > Campaigns and the click on Create new.
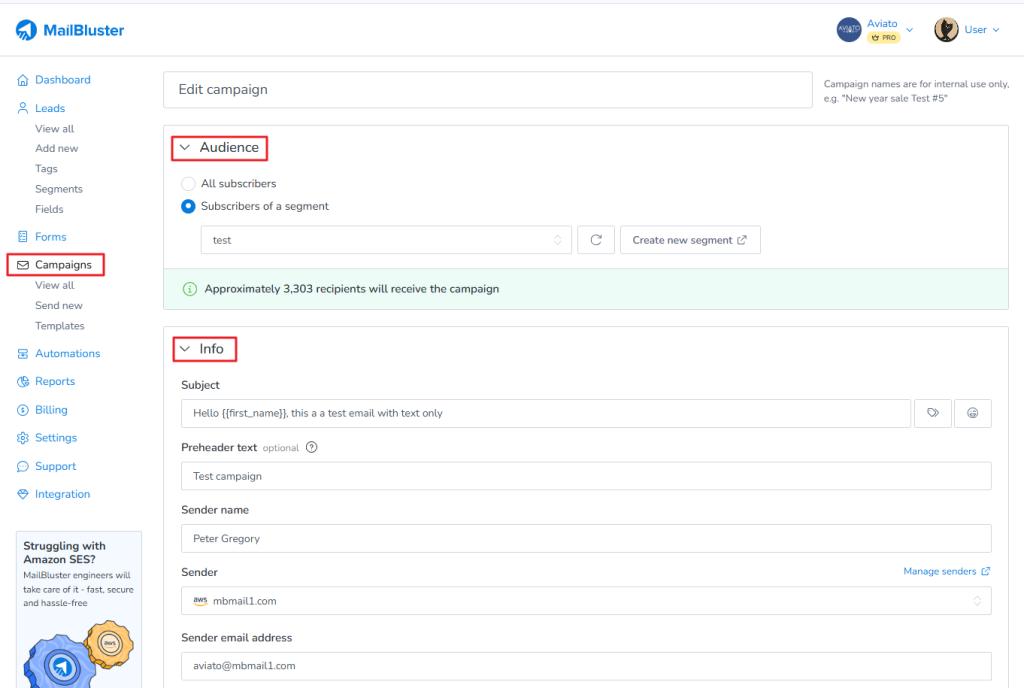
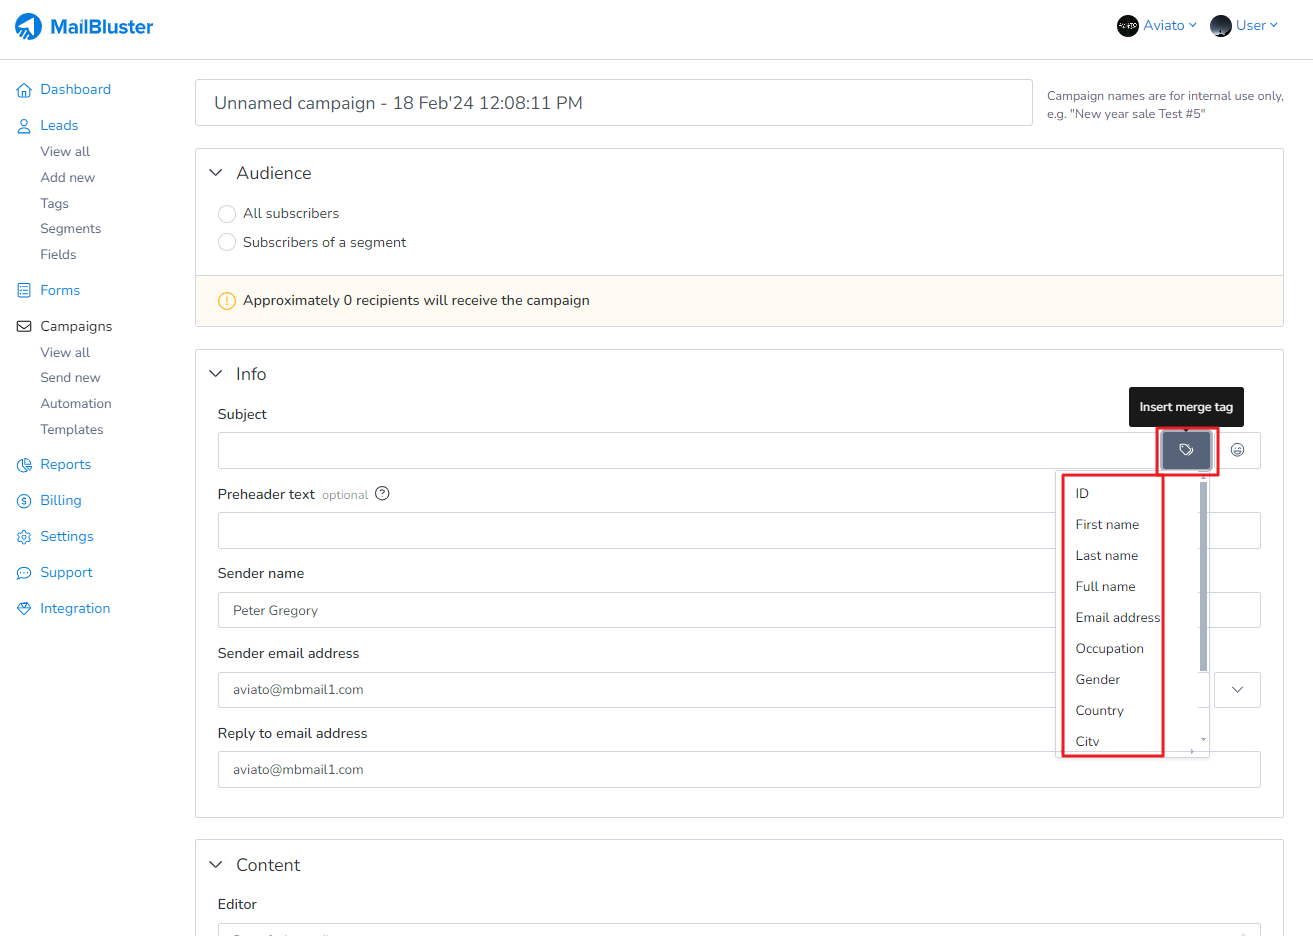
A new campaign window will appear and here you will need to set the Campaign name, select the appropriate Audience (senders from the Leads) and fill in the details in the Info section as highlighted below.
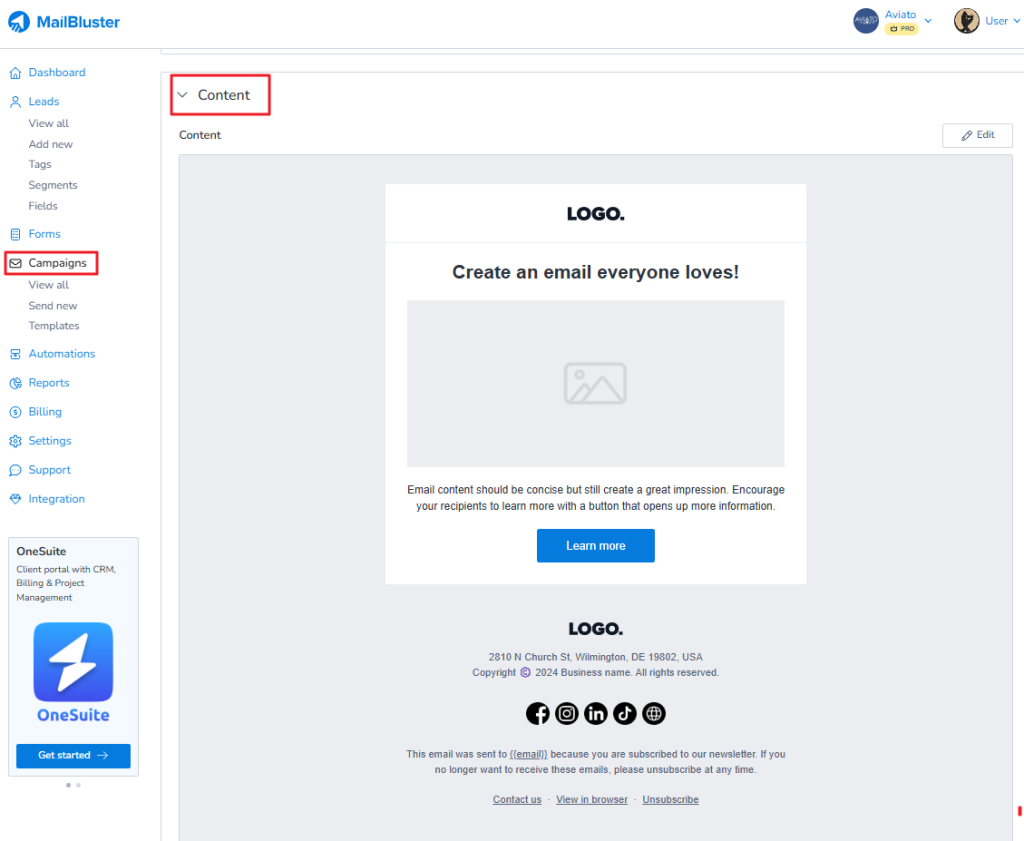
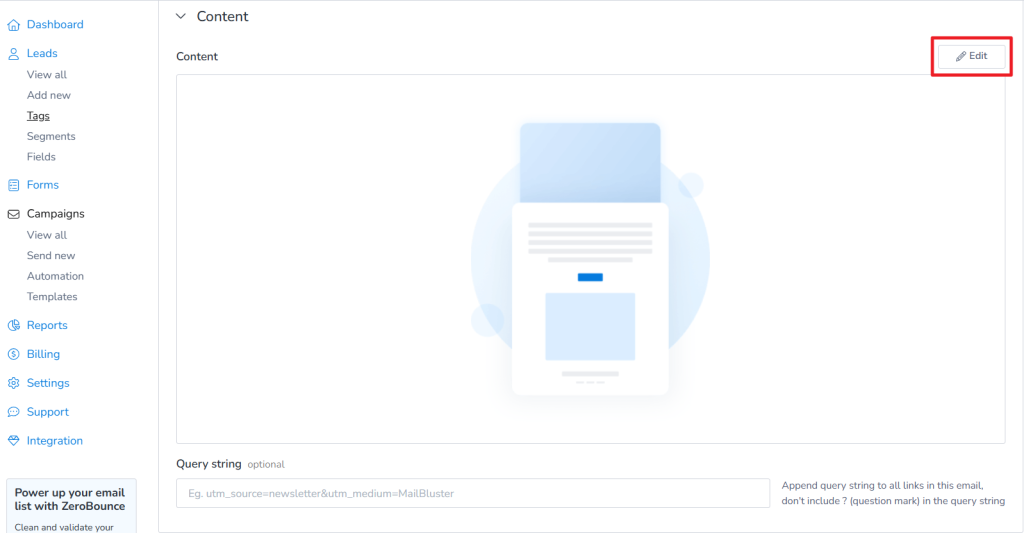
You also need to select the appropriate editor for your email Content. Then click Edit button.
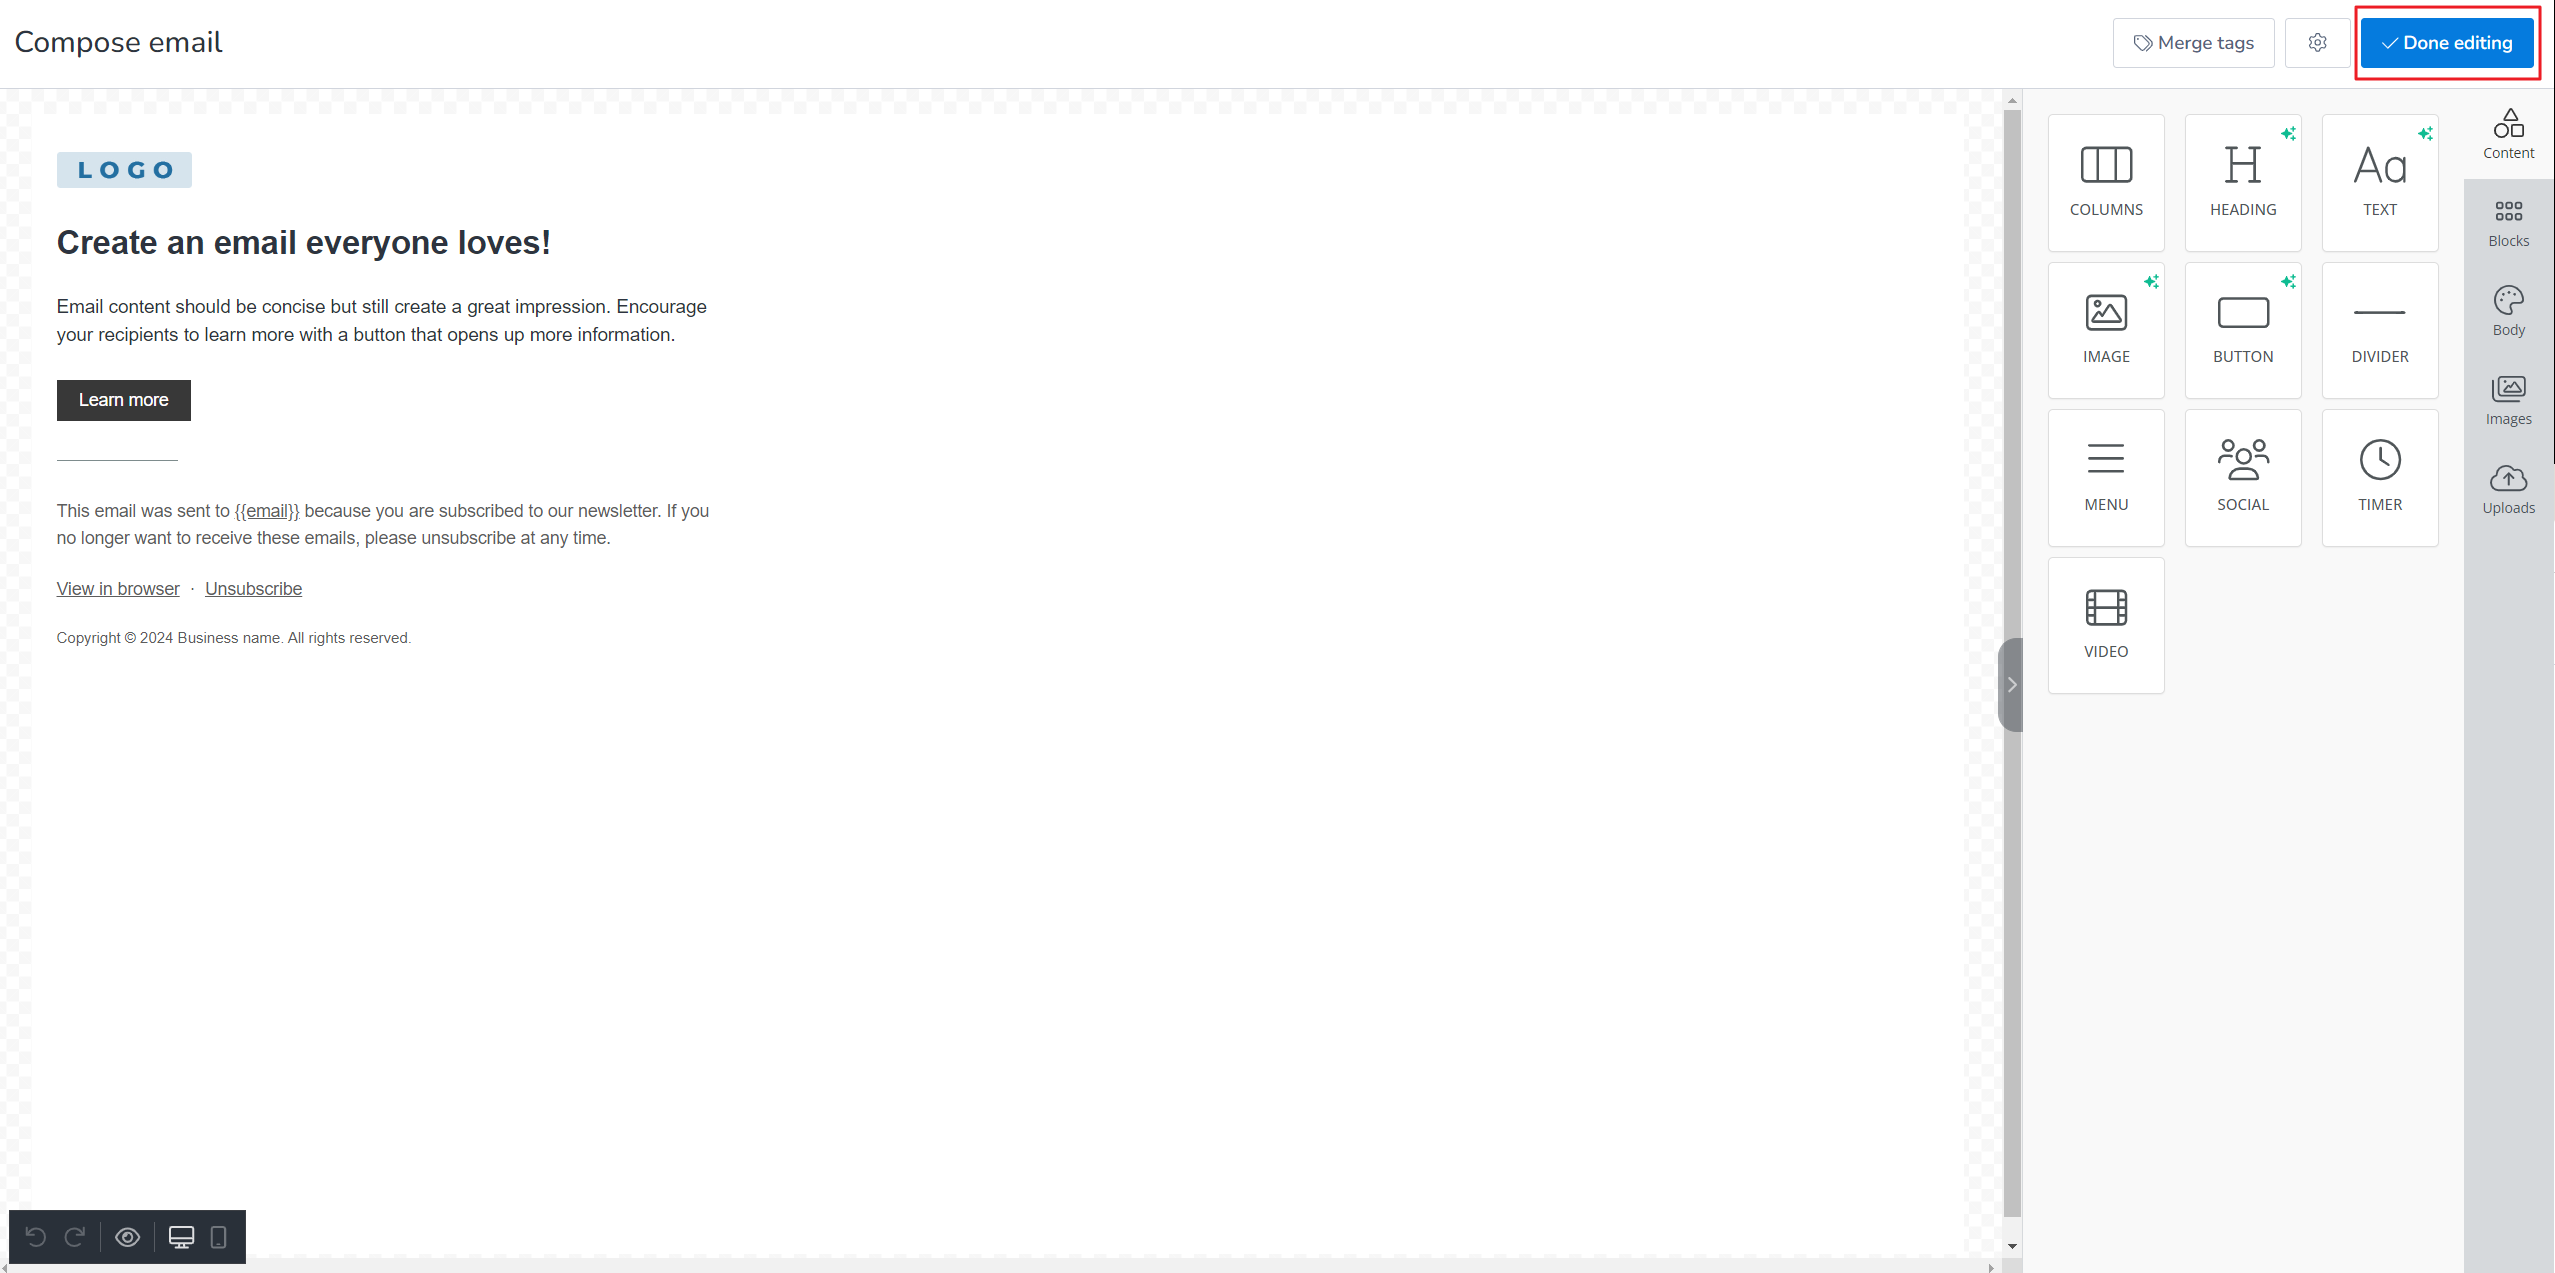
Here we used Drag and drop editor to compose email campaign very easily.
Select the Delivery option, MailBluster branding (click the Remove option if you are under Pro plan) and then click Save changes. Now click Continue.
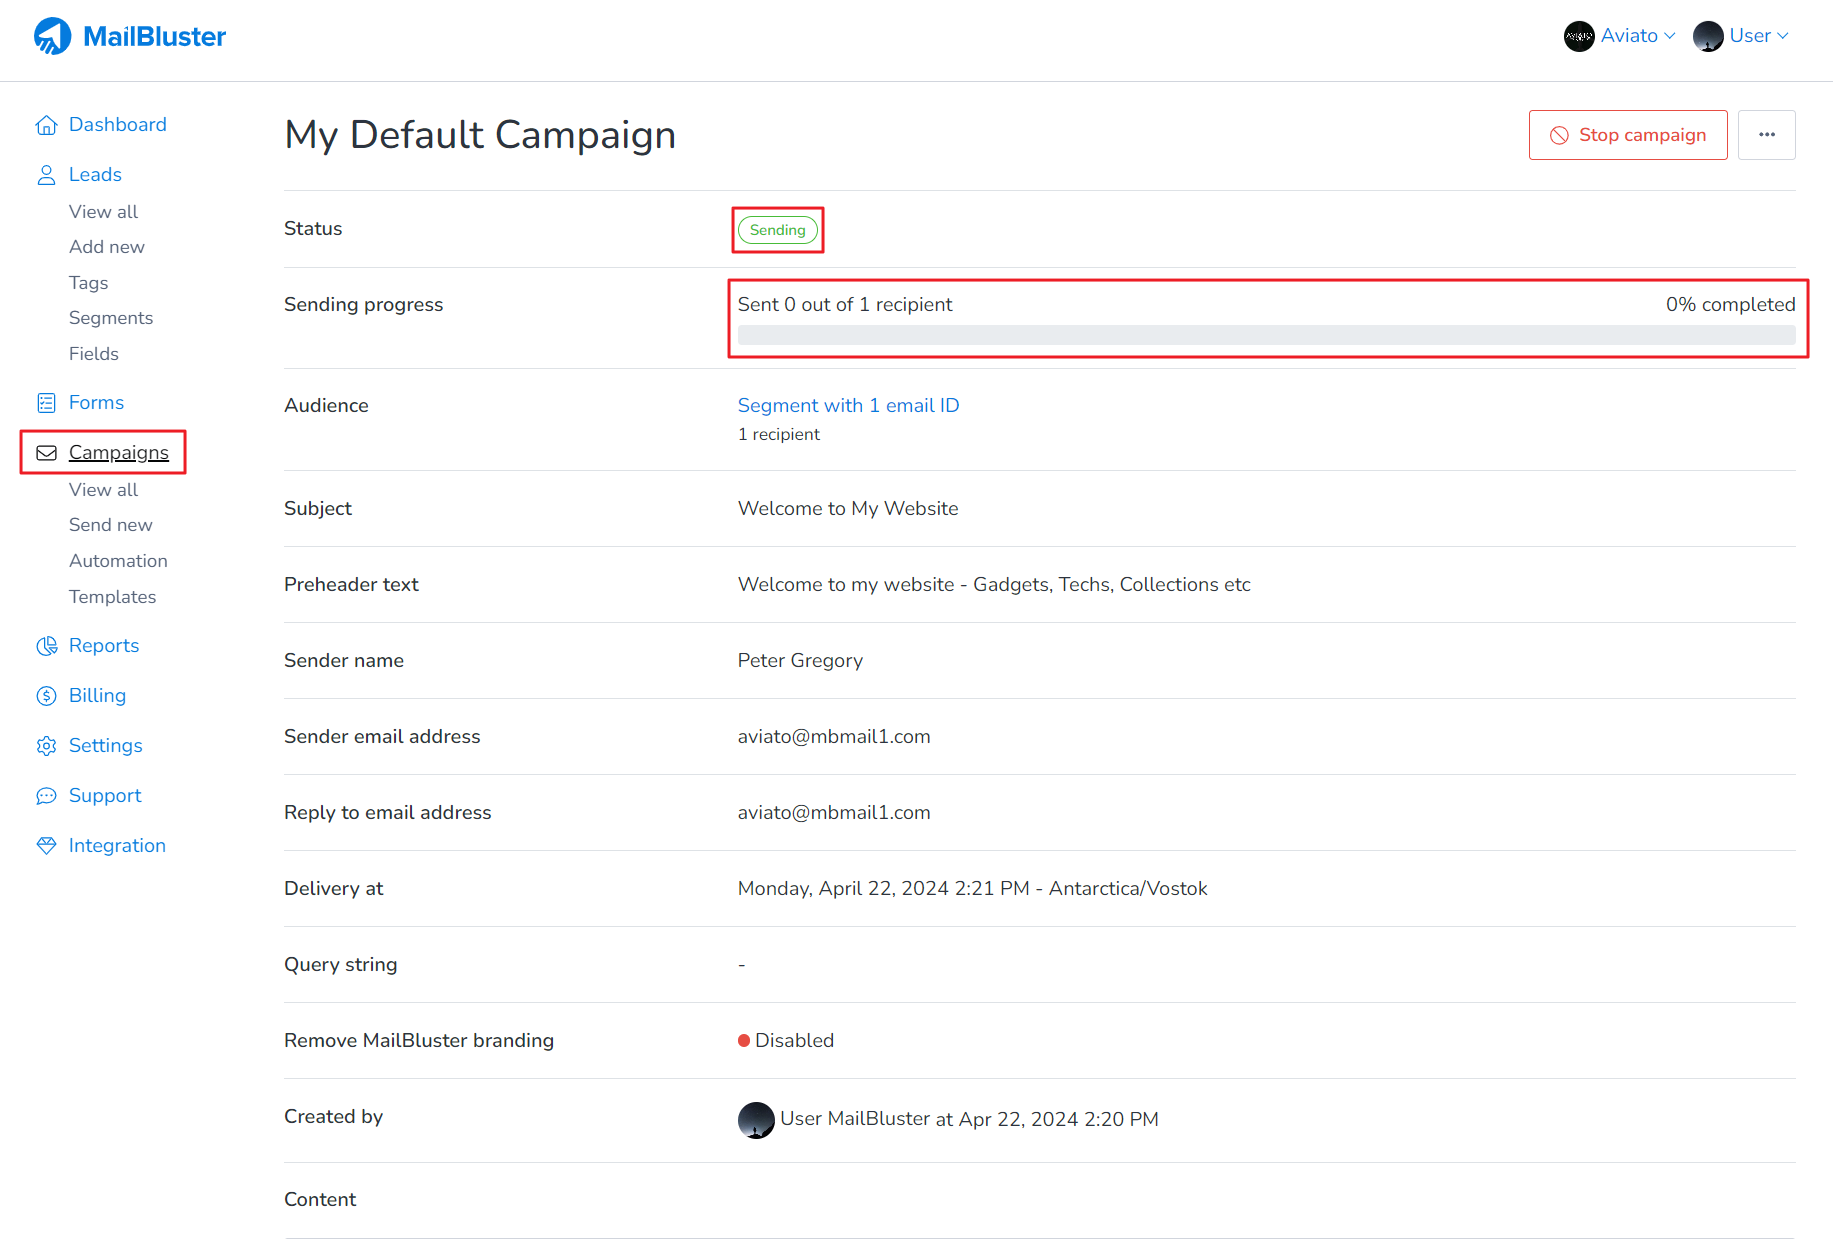
The campaign is being sent to the appropriate sender. Status will change from “Sending” to “Sent”.
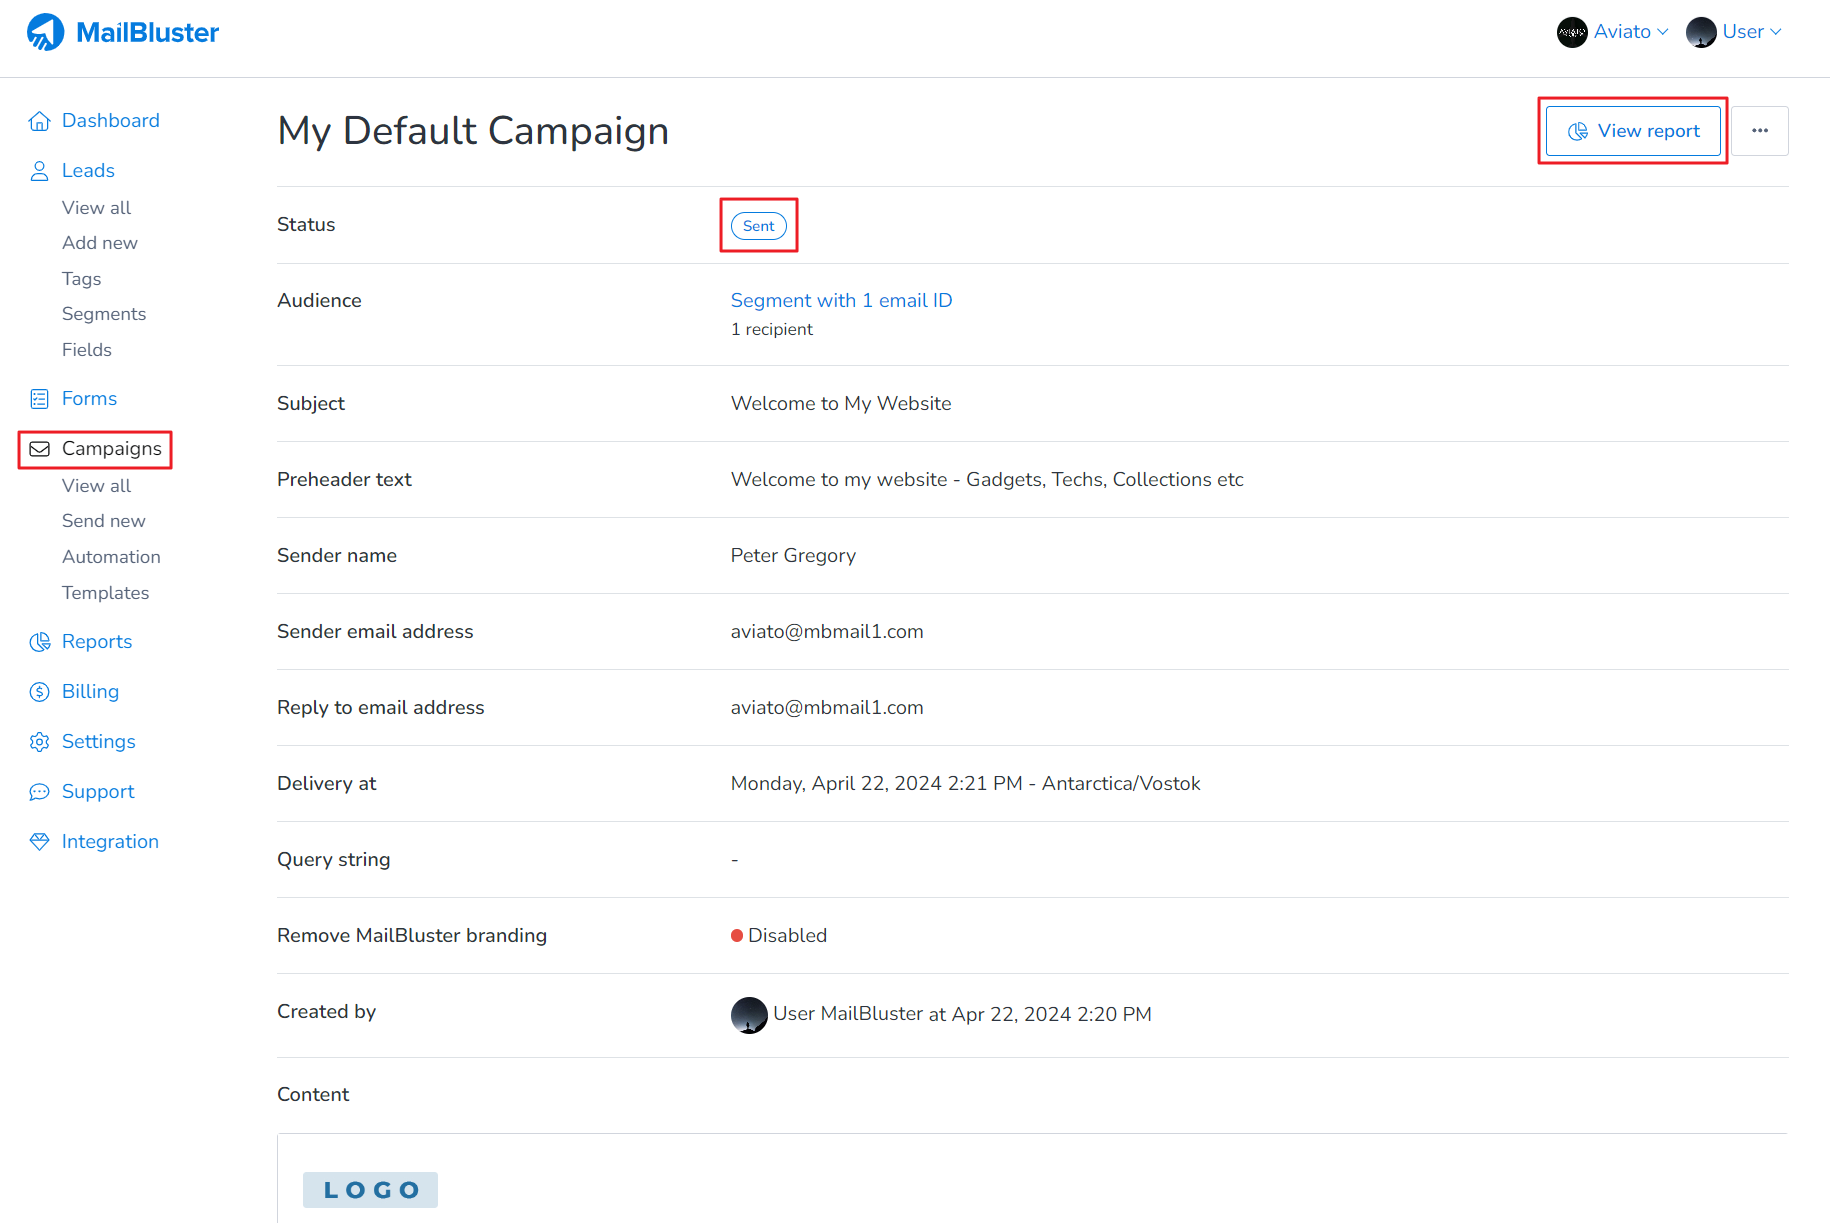
Once the campaign is sent, MailBluster provides detailed reports, including metrics like deliveries, opens, clicks, and unsubscribes. These insights help you improve performance for your future campaigns. Click on the View report.
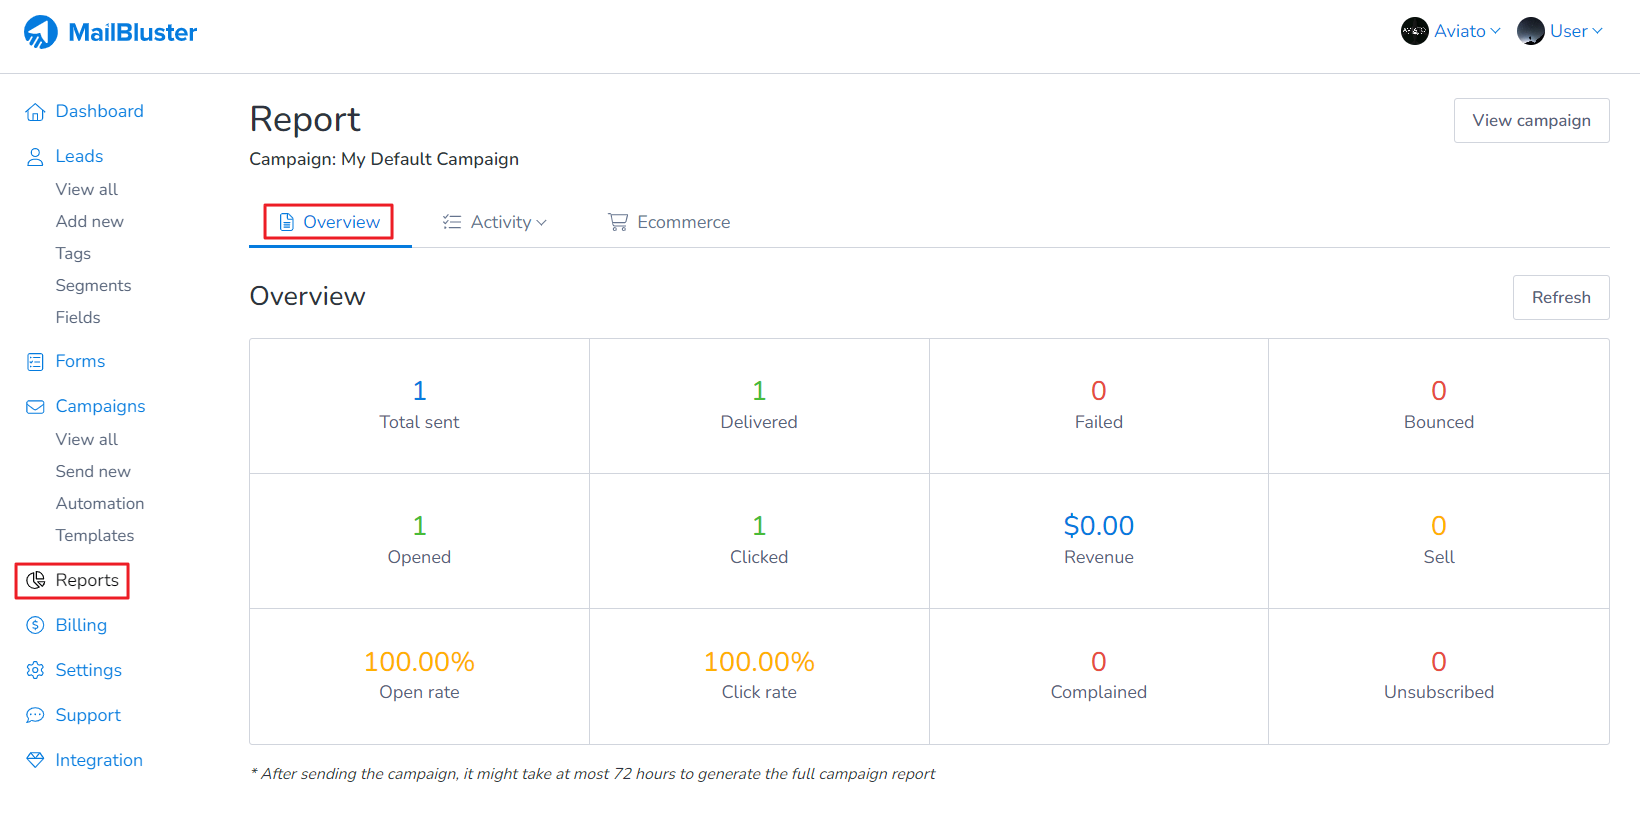
The Report will show the metrics of the current campaign that was being sent.
You can send personalized email from MailBluster to make your campaigns more effective. Personalized messages feel more relevant and unique to subscribers, which increases open and click rates.
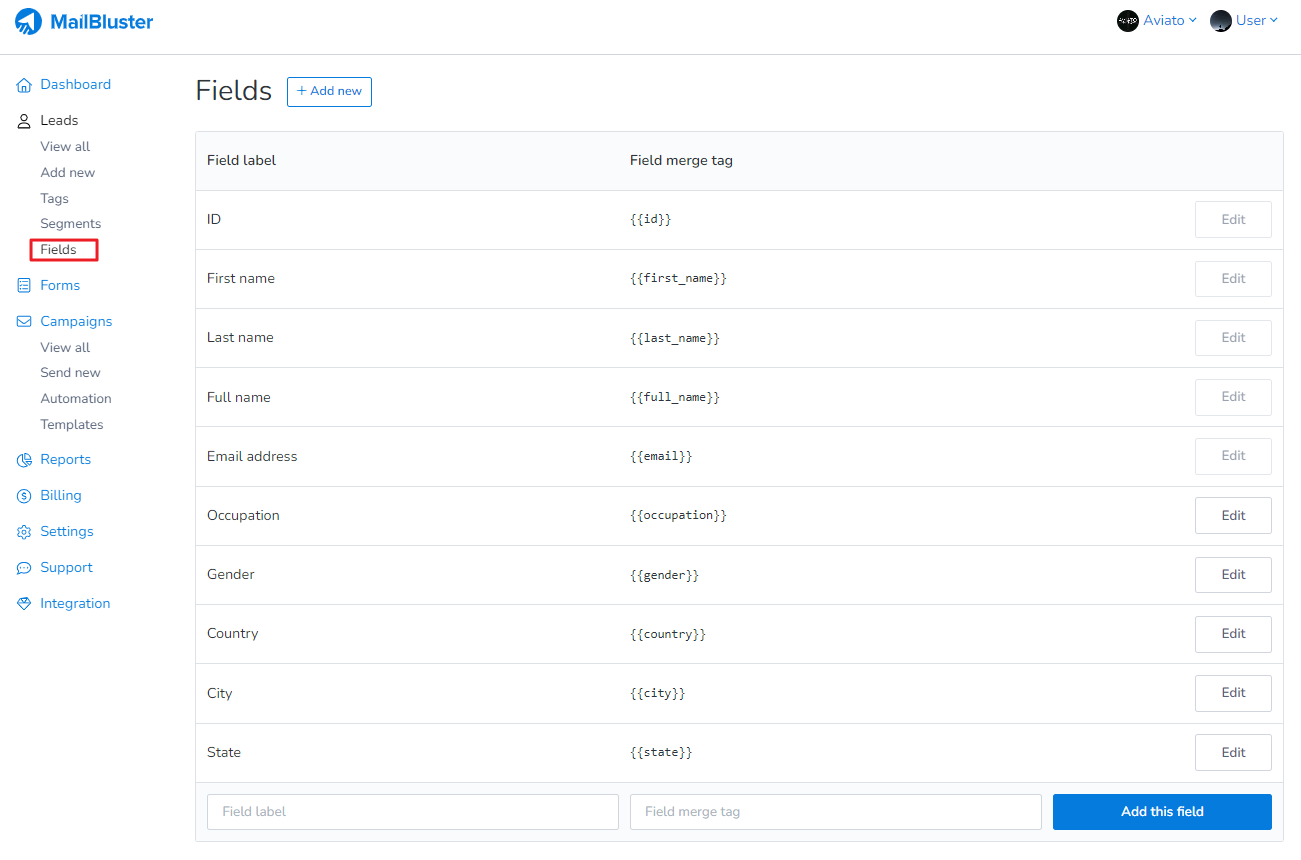
To send personalized email from MailBluster, first go to Fields then either select Add new > Add this field to define your desired custom Fields
Or, select the predefined Fields from the list copying their merge tags
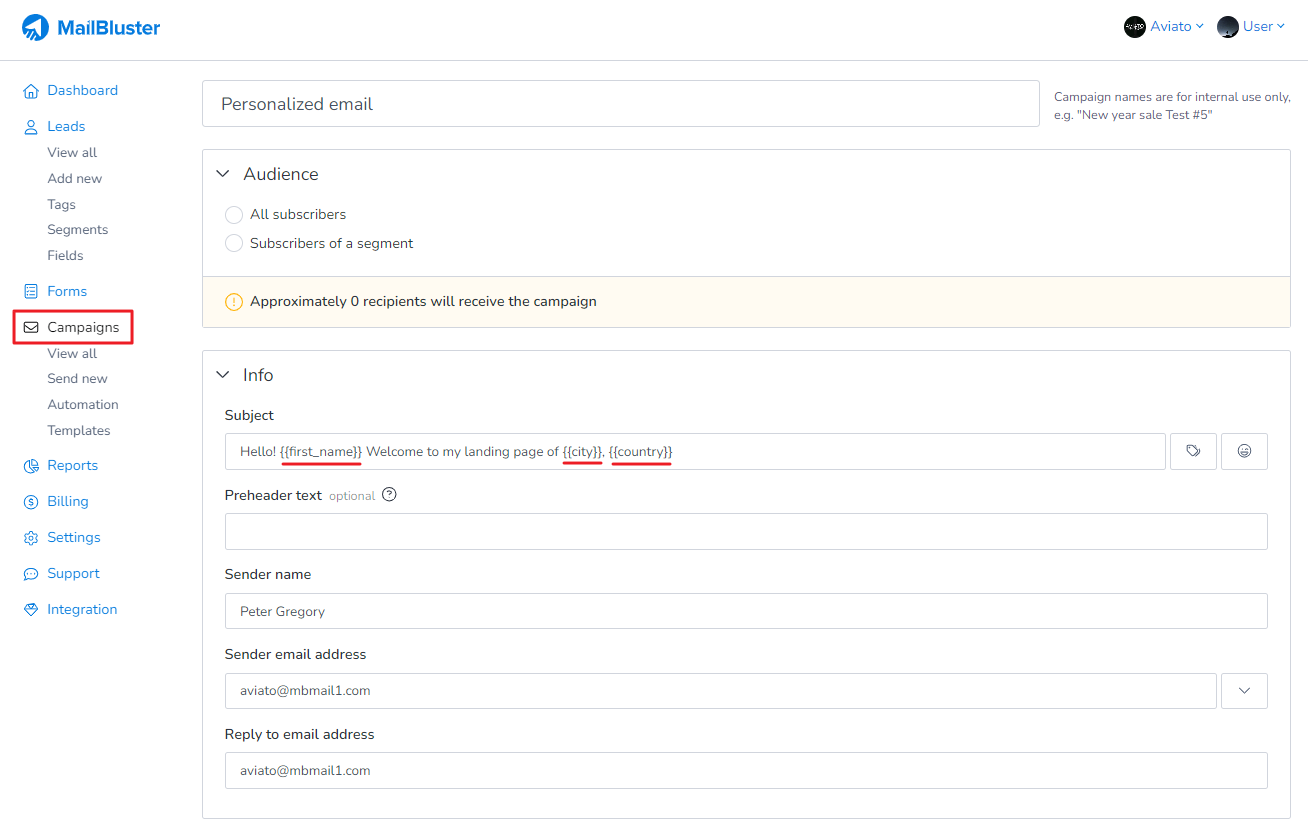
Now go to Campaigns > Create new
Enter the campaign name, select the Audience and then go to Subject. Click on Insert merge tag icon and the list of merge tags will appear. Select your desired Merge tags for your email subject
The merge tags will appear like this as shown below
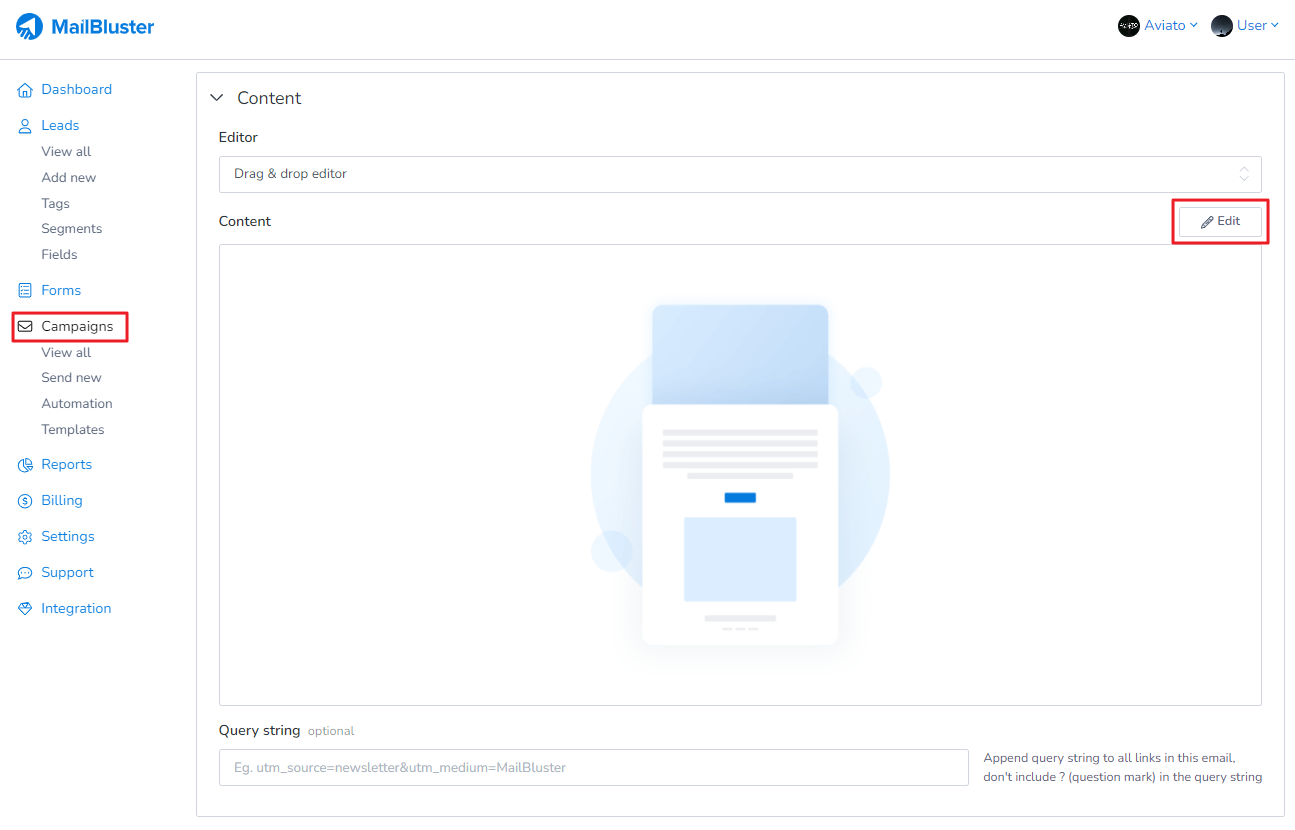
Now go to Content and click Edit
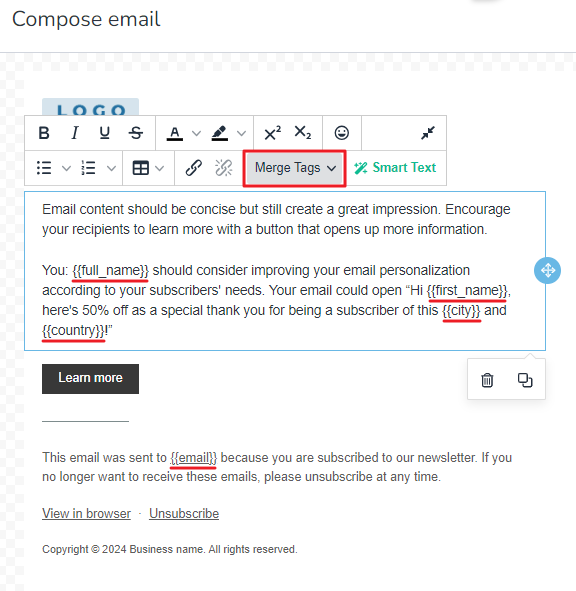
Personalize your email content by adding any additional merge tags as shown here
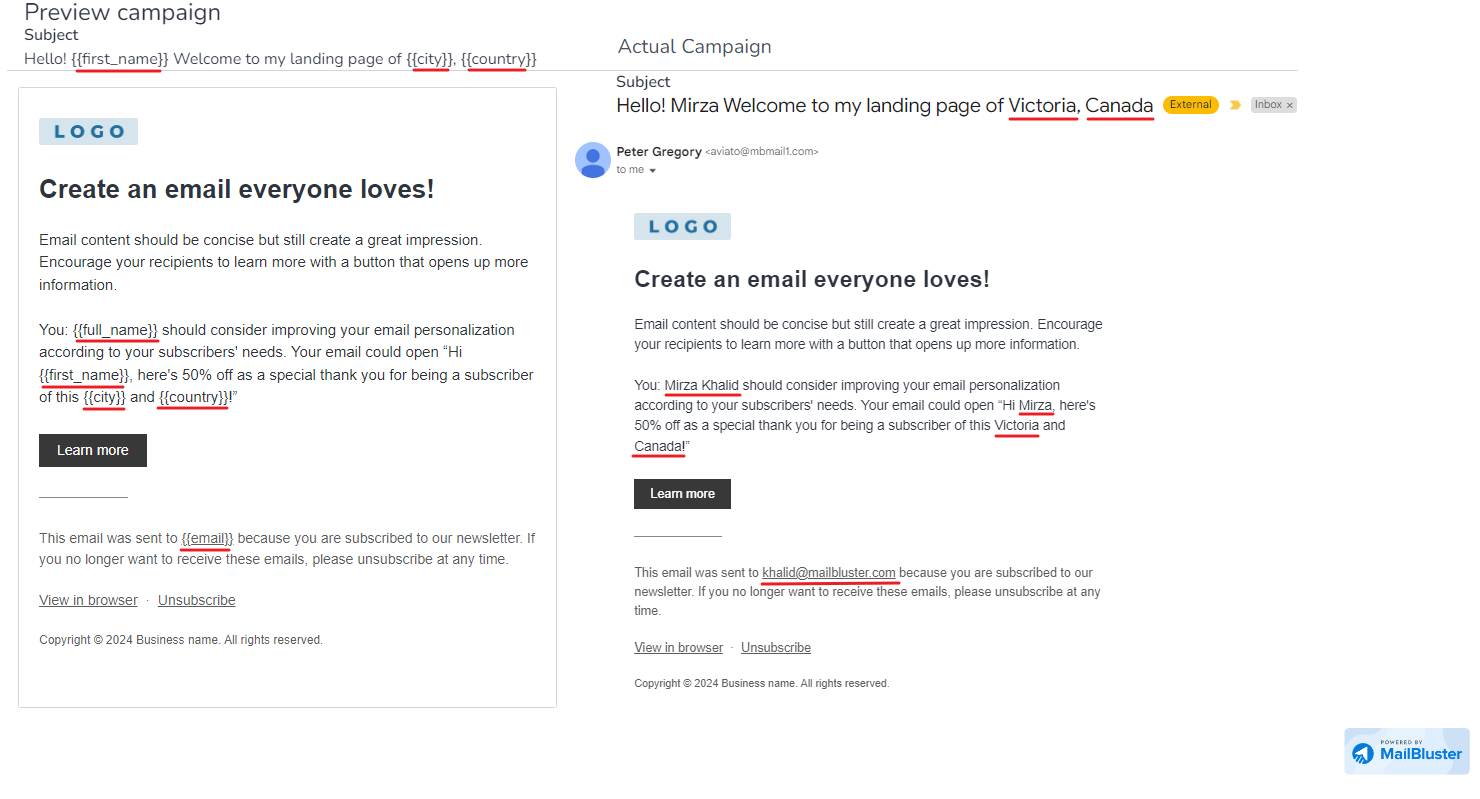
Once you completed personalizing your Email content, click Done editing and your marketing email is ready for send out. Here is an example of Personalized email side by side. The left one is before sending and the right one is after subscriber receives the personalized email.
By sending personalized emails with MailBluster, you can improve relevance, build stronger connections, and boost results.
You can easily compose email using Drag and drop editor in MailBluster, which is one of the three available in MailBluster. MailBluster has three types of email editors which you can use to compose your email campaign:
1. Drag and drop editor
2. WYSIWYG Editor
3. HTML editor
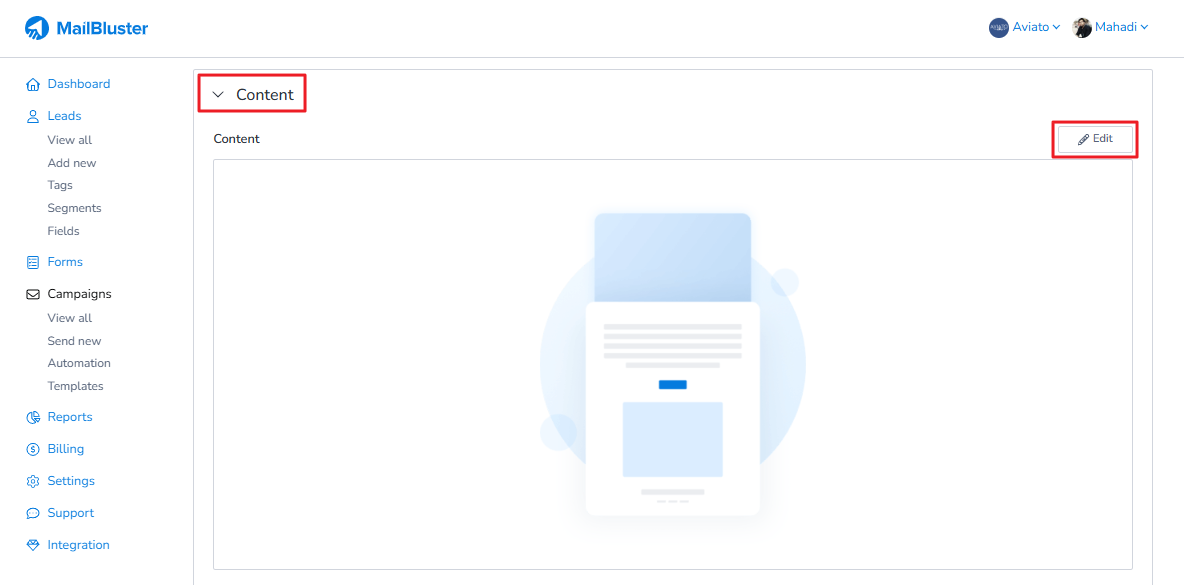
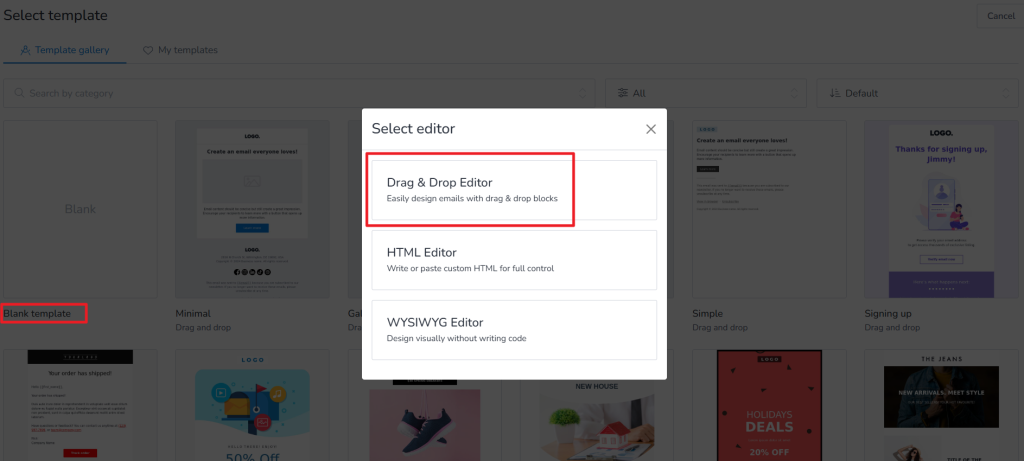
The most common and easy-to-use editor is the Drag and drop editor. Emails composed with this editor are responsive and do not require programming or coding knowledge. To use Drag and drop editor, first you need to go to the campaigns. Then select the Edit option under Content.
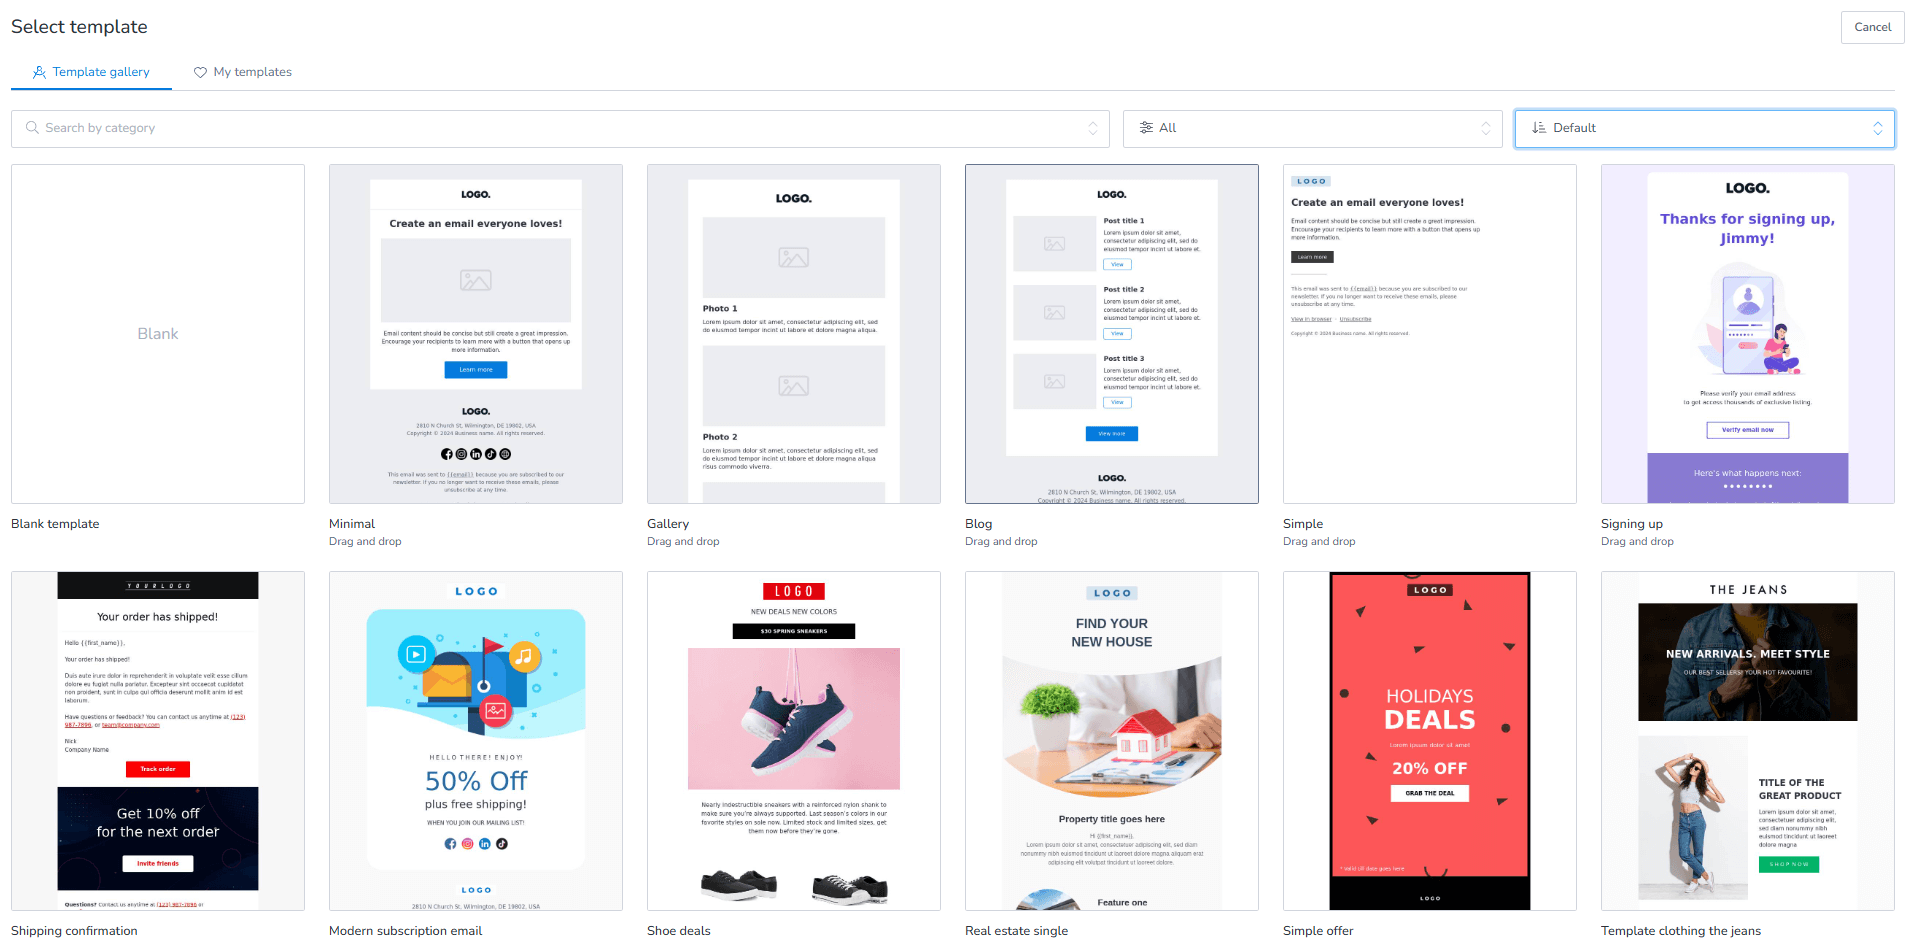
Then after selecting the blank template, a popup will appears. Click on the Drag and Drop Editor on the edit campaign page.
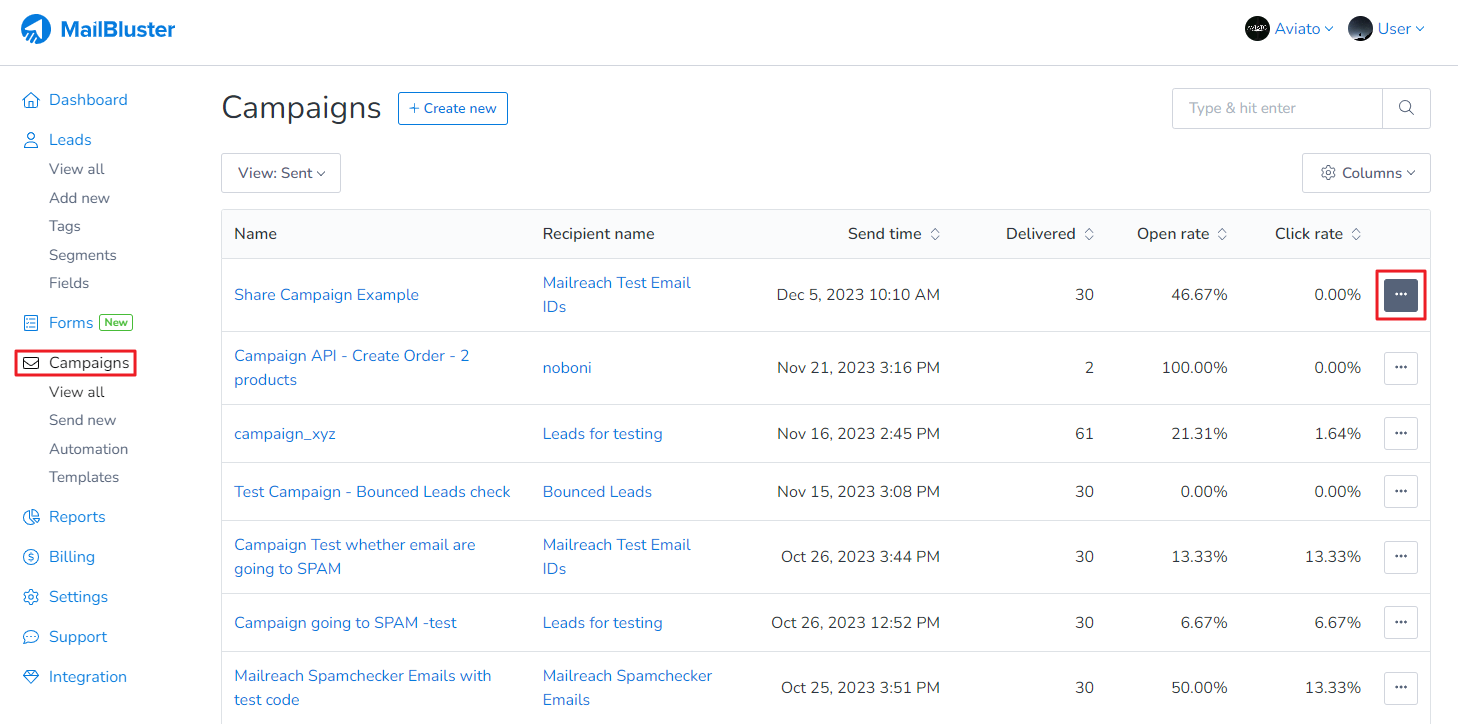
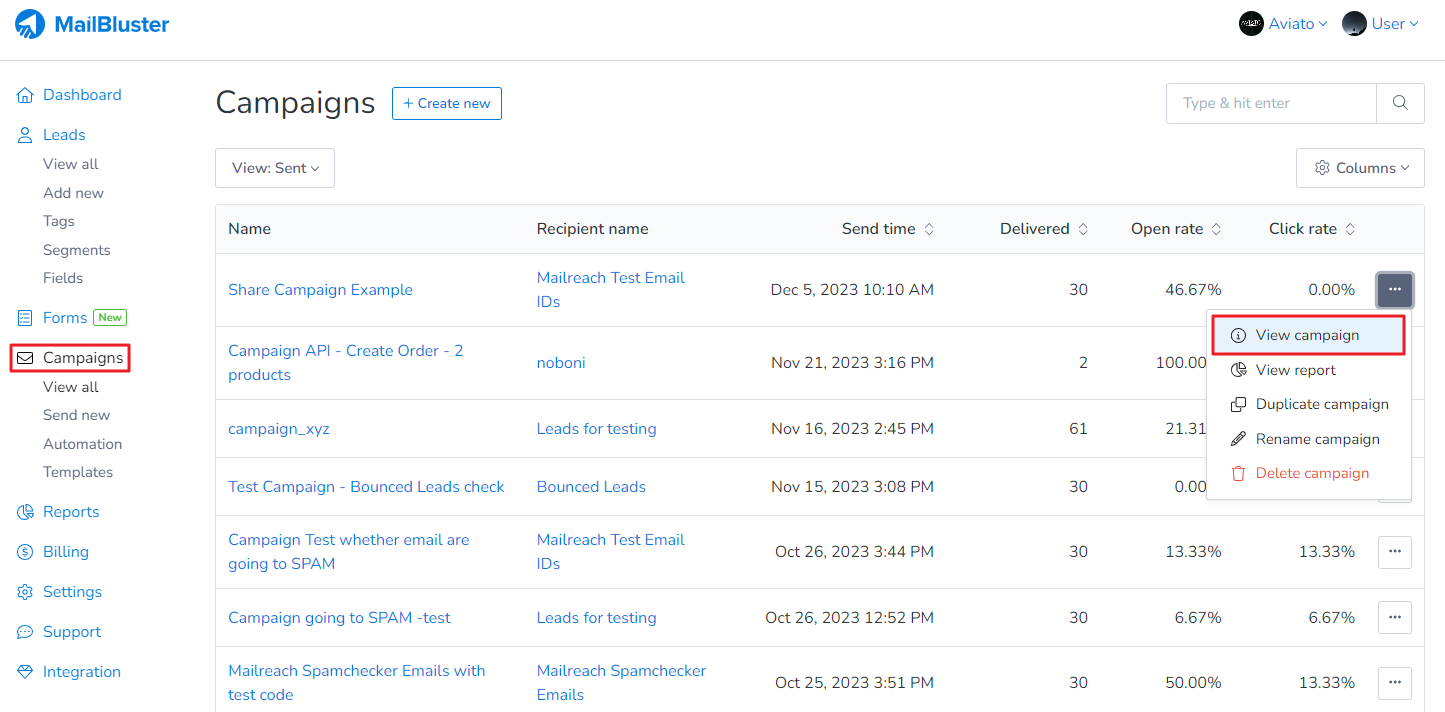
You can share email campaign from MailBluster very easily with anyone using MailBluster share campaign feature and view it in browser, social media etc. First go to your Brand > Campaigns.
Here we selected a sample campaign. Click on the 3 dots as shown here:
A dropdown list will appear. Click View campaign
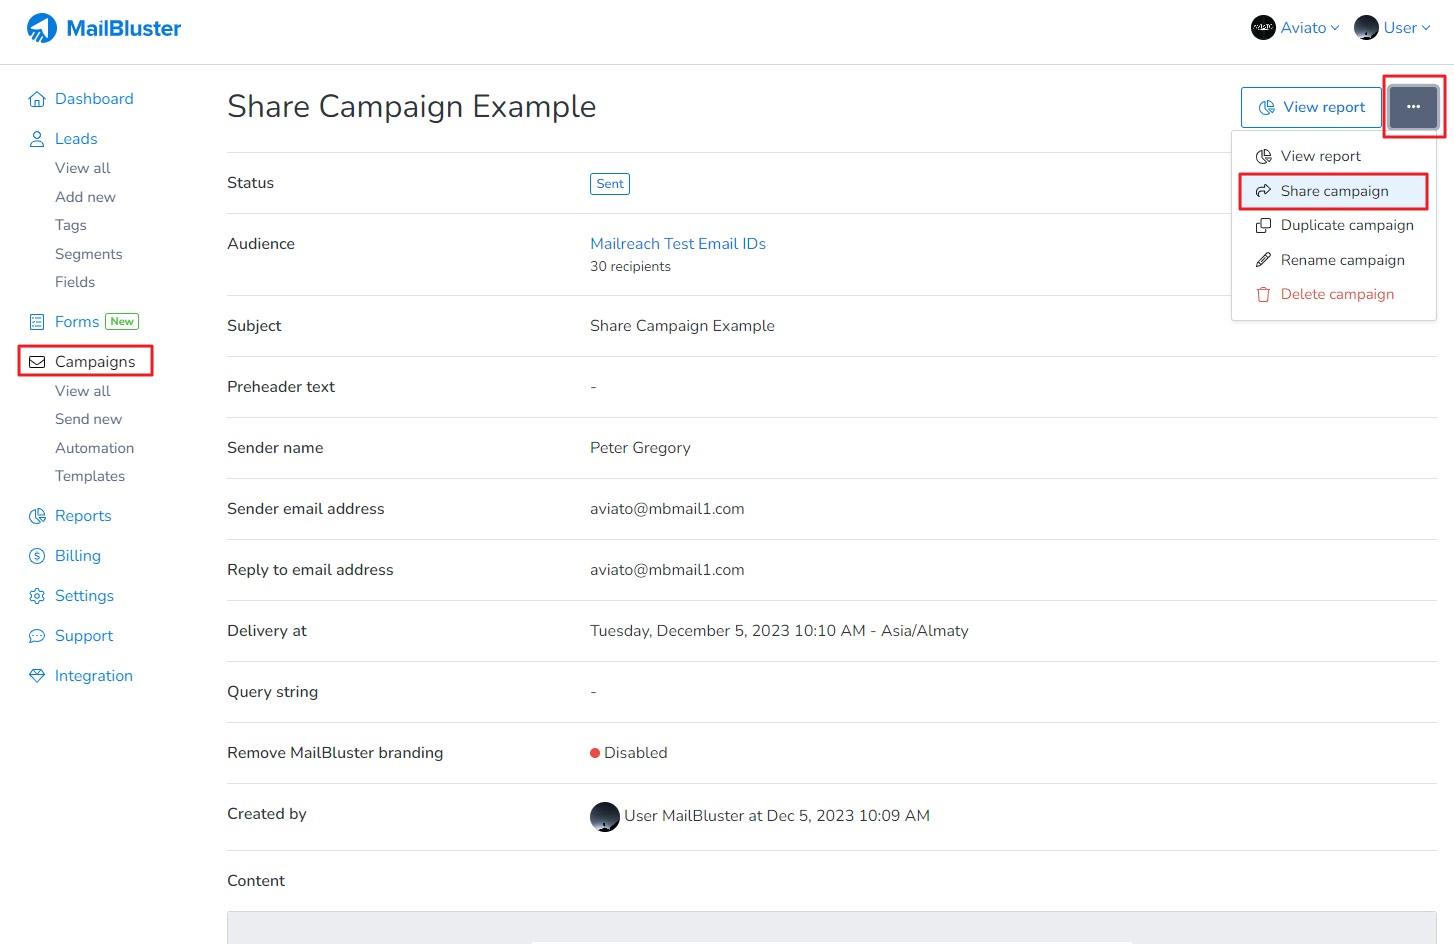
When the sent campaign is shown, click on the 3 dots beside View Report and a dropdown list option will appear. Click on Share campaign.
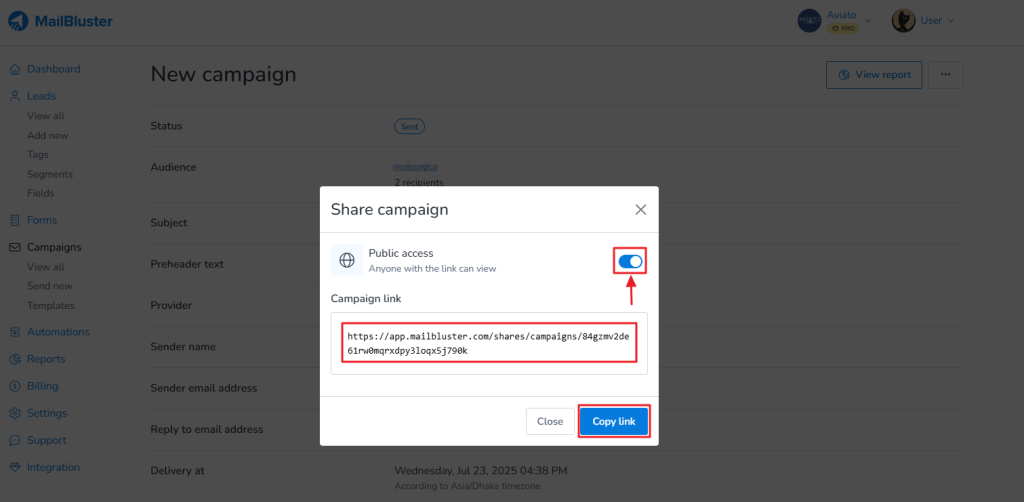
Now will see a popup window. You need to click enable the public access which will generate a campaign link. You need to click on the Copy link.
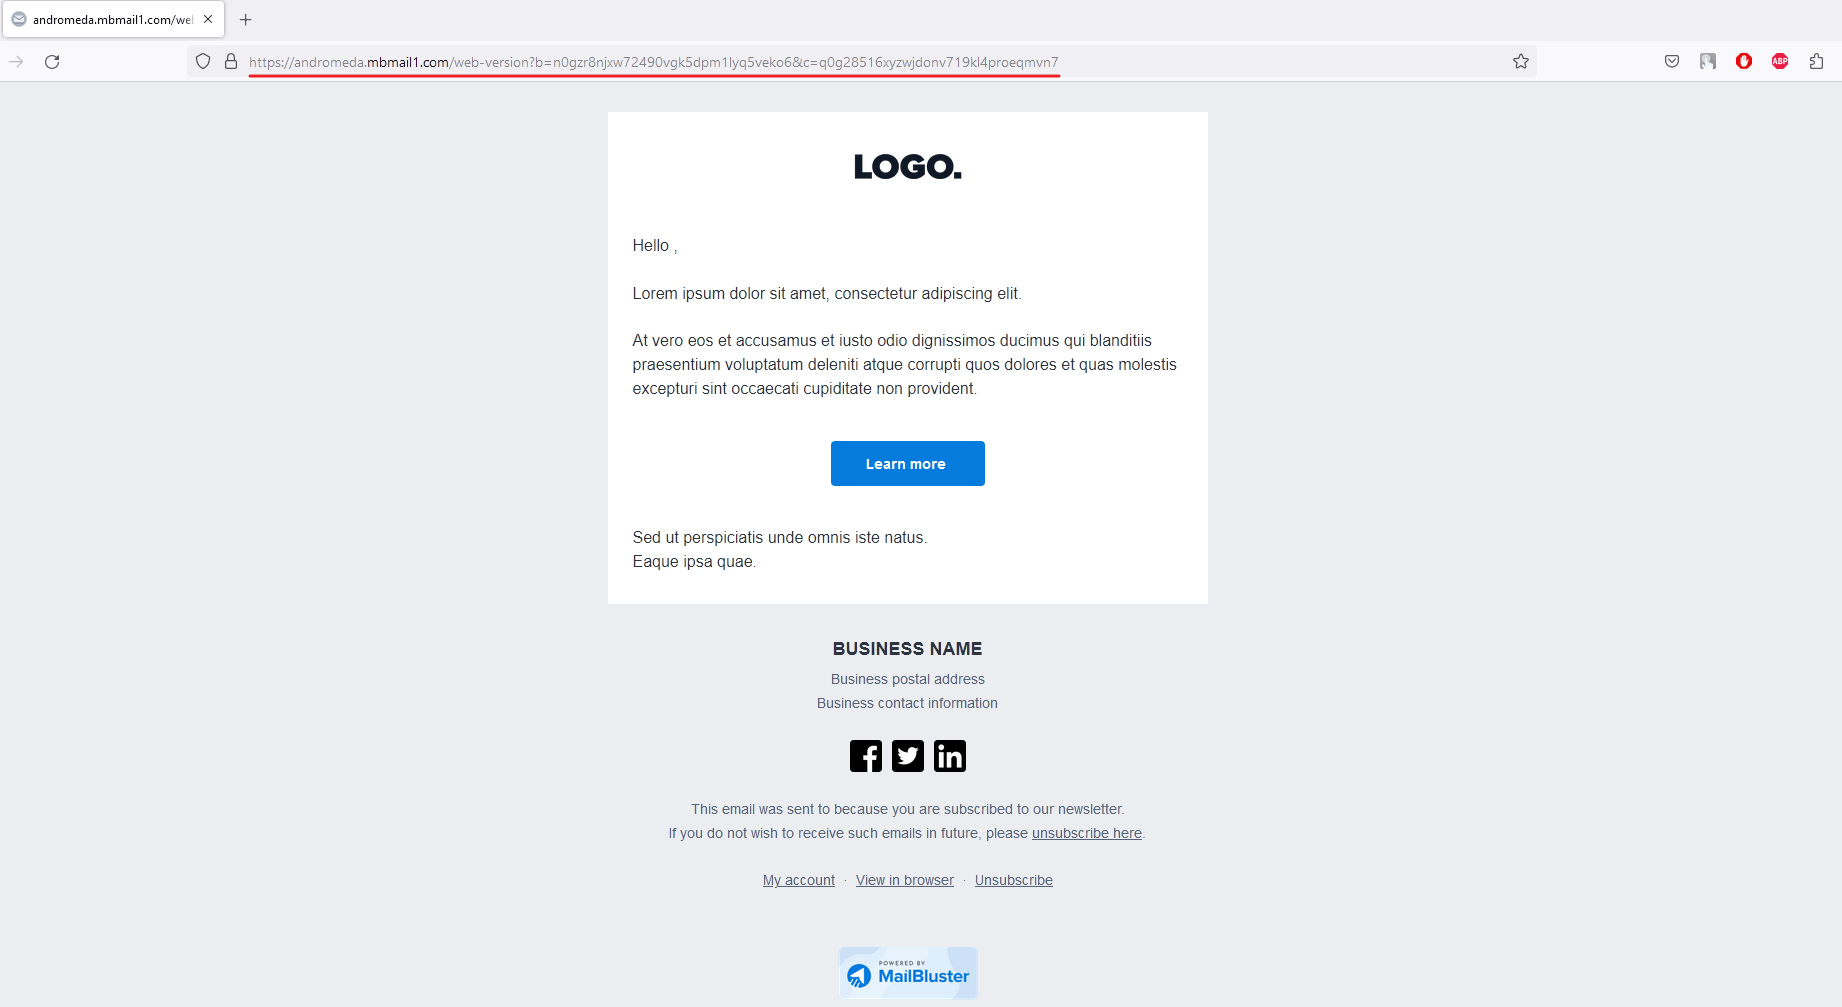
Paste it in a web browser and you will be able to see the entire campaign.
With this feature, you can share email campaign from MailBluster publicly, showcase it on social media, or simply send the link to others. It’s a quick way to promote your campaigns beyond your subscriber list.
To add unsubscribe link using Drag and drop editor in your email campaign, first you need to go to your draft campaign/new campaign and click Edit to compose your campaign email.
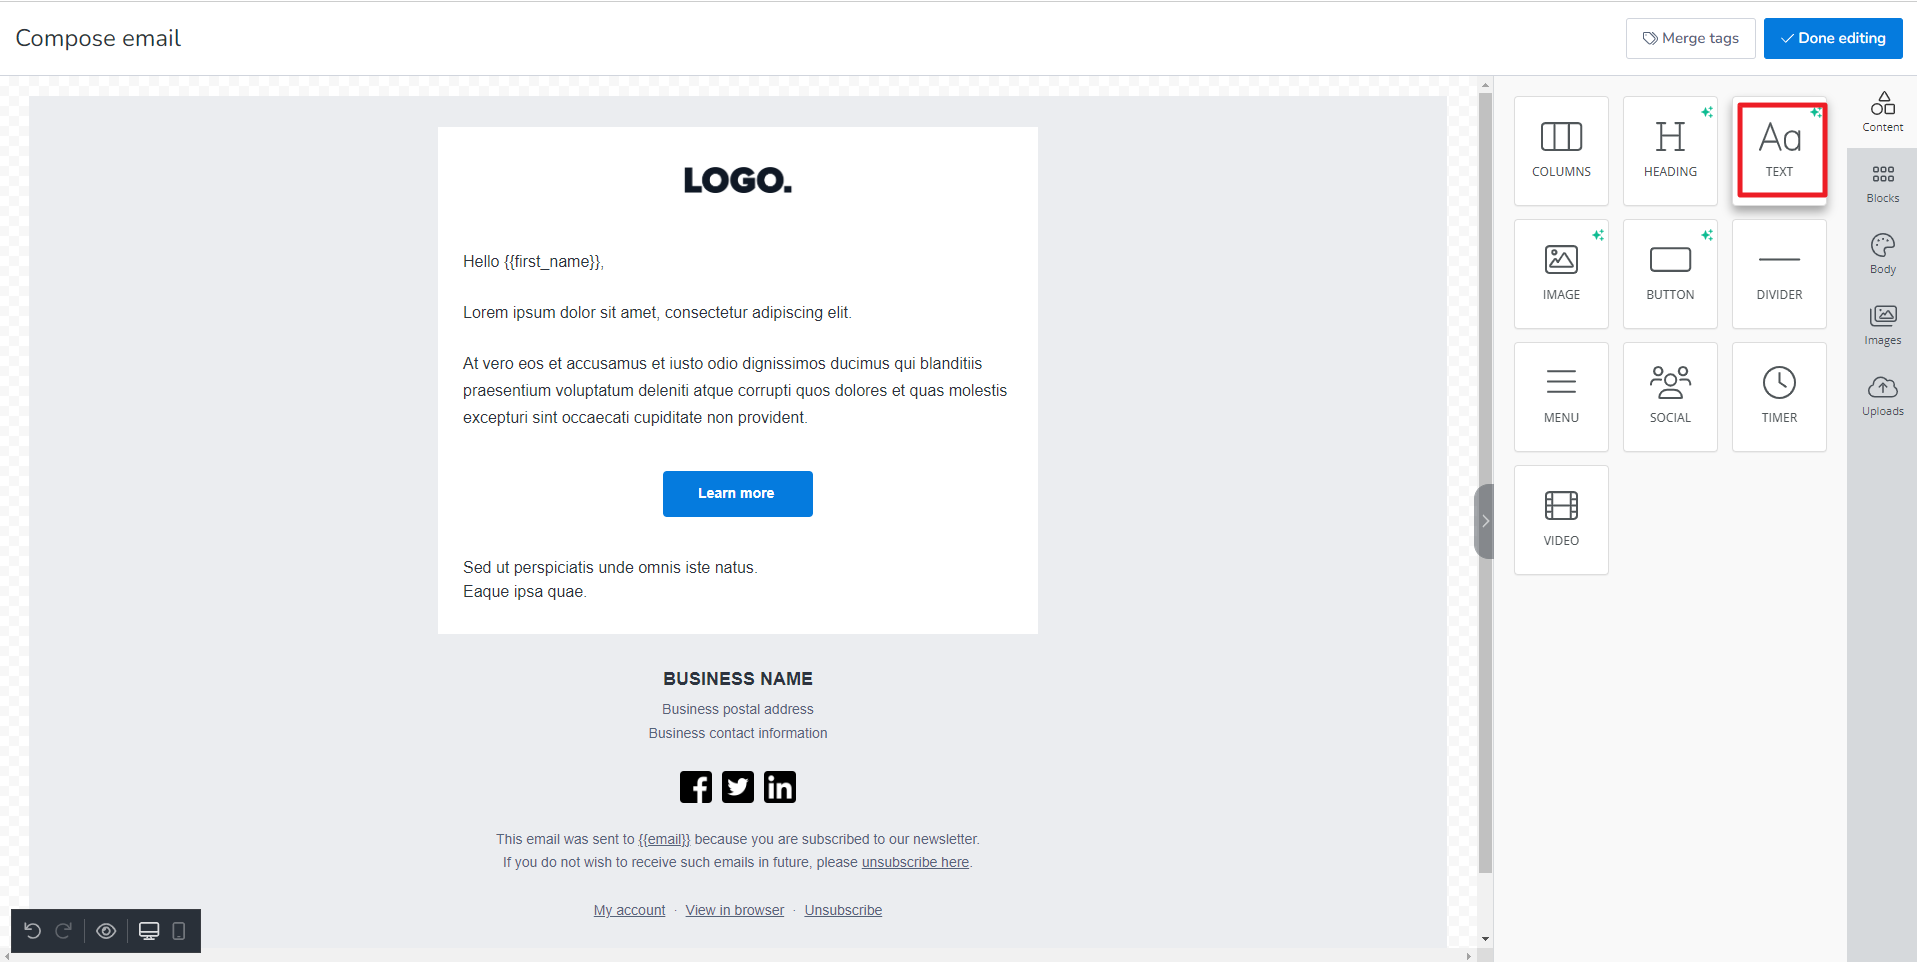
1. On the right corner select the Content section, click TEXT box and drag and drop on the compose email area.
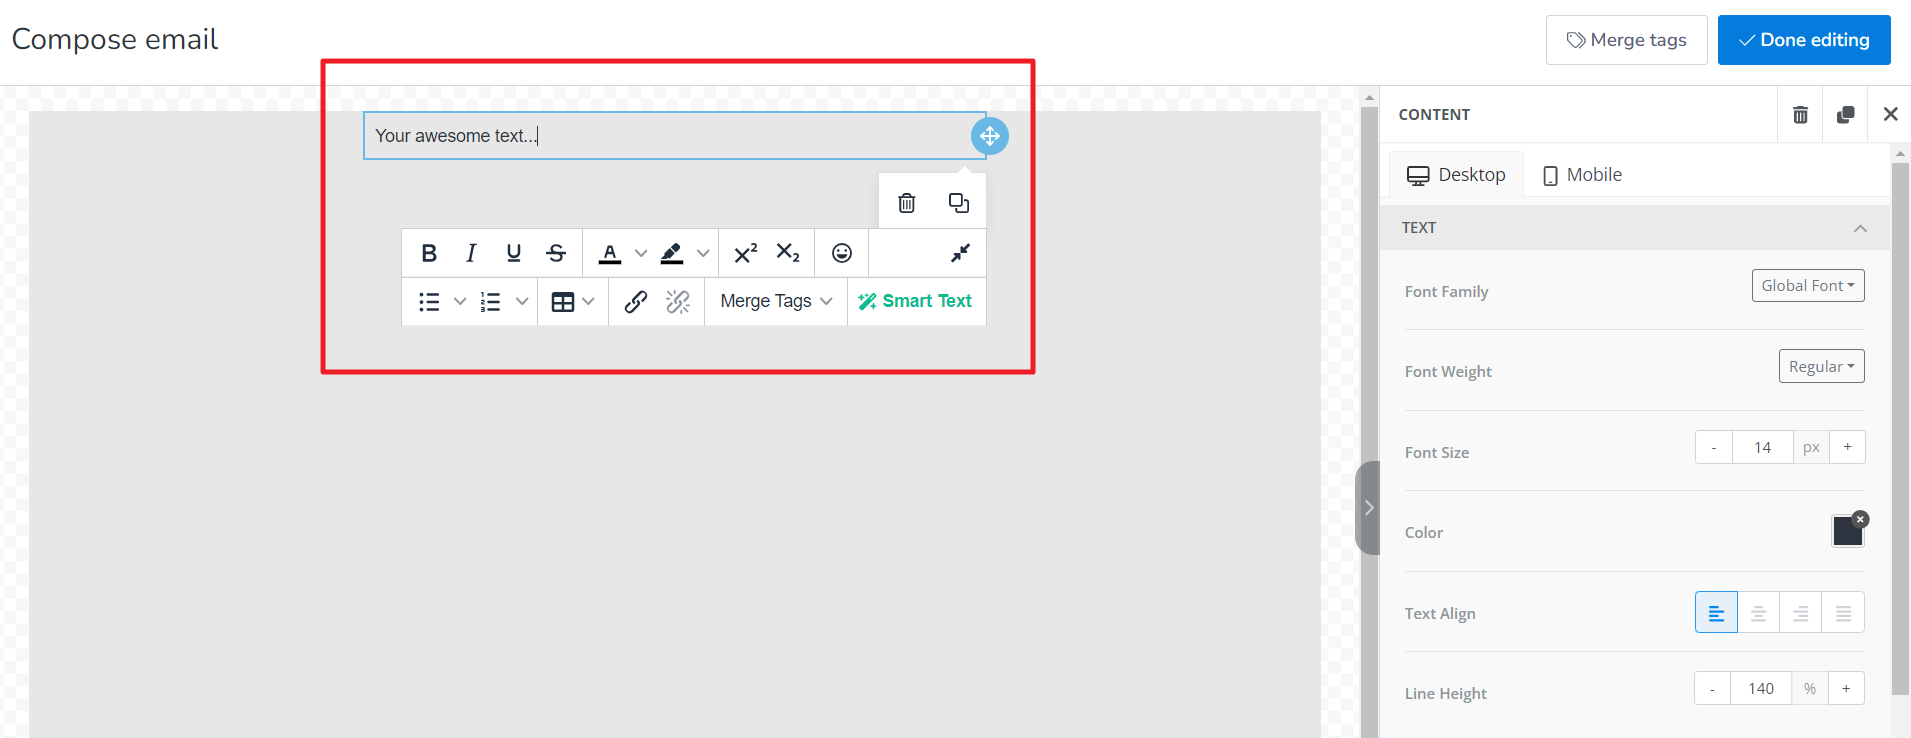
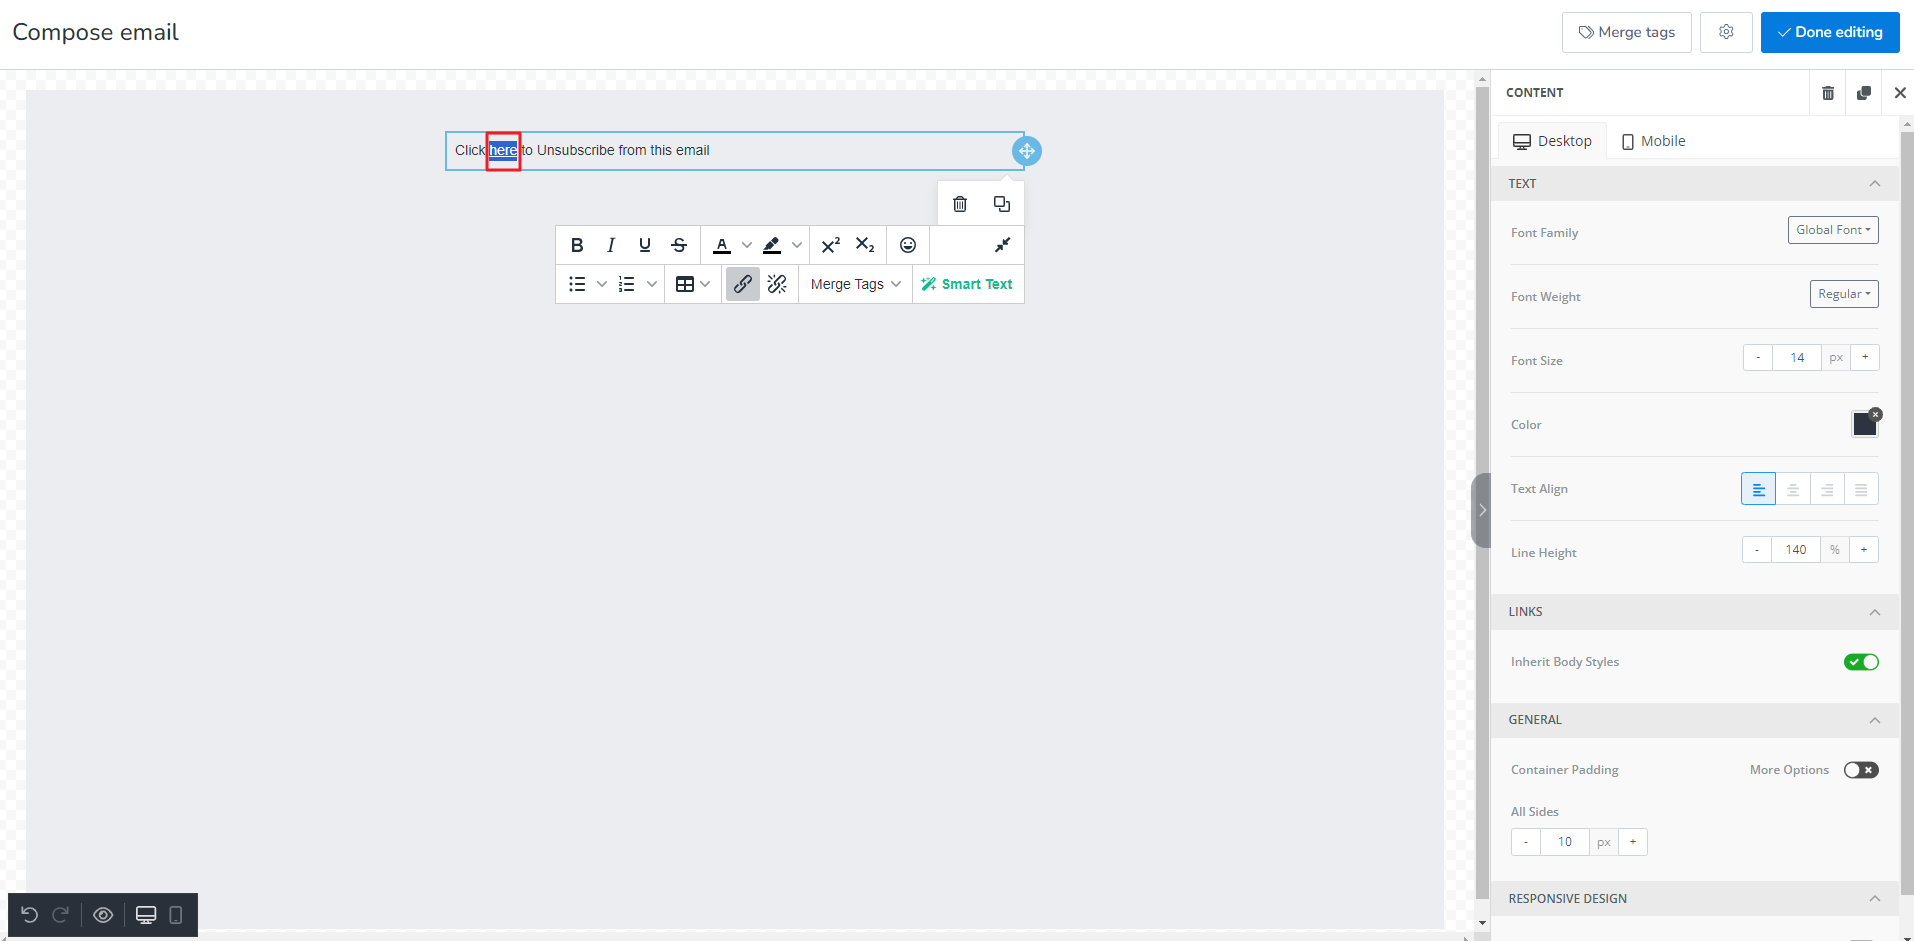
2. Some text will appear with text editing toolbar
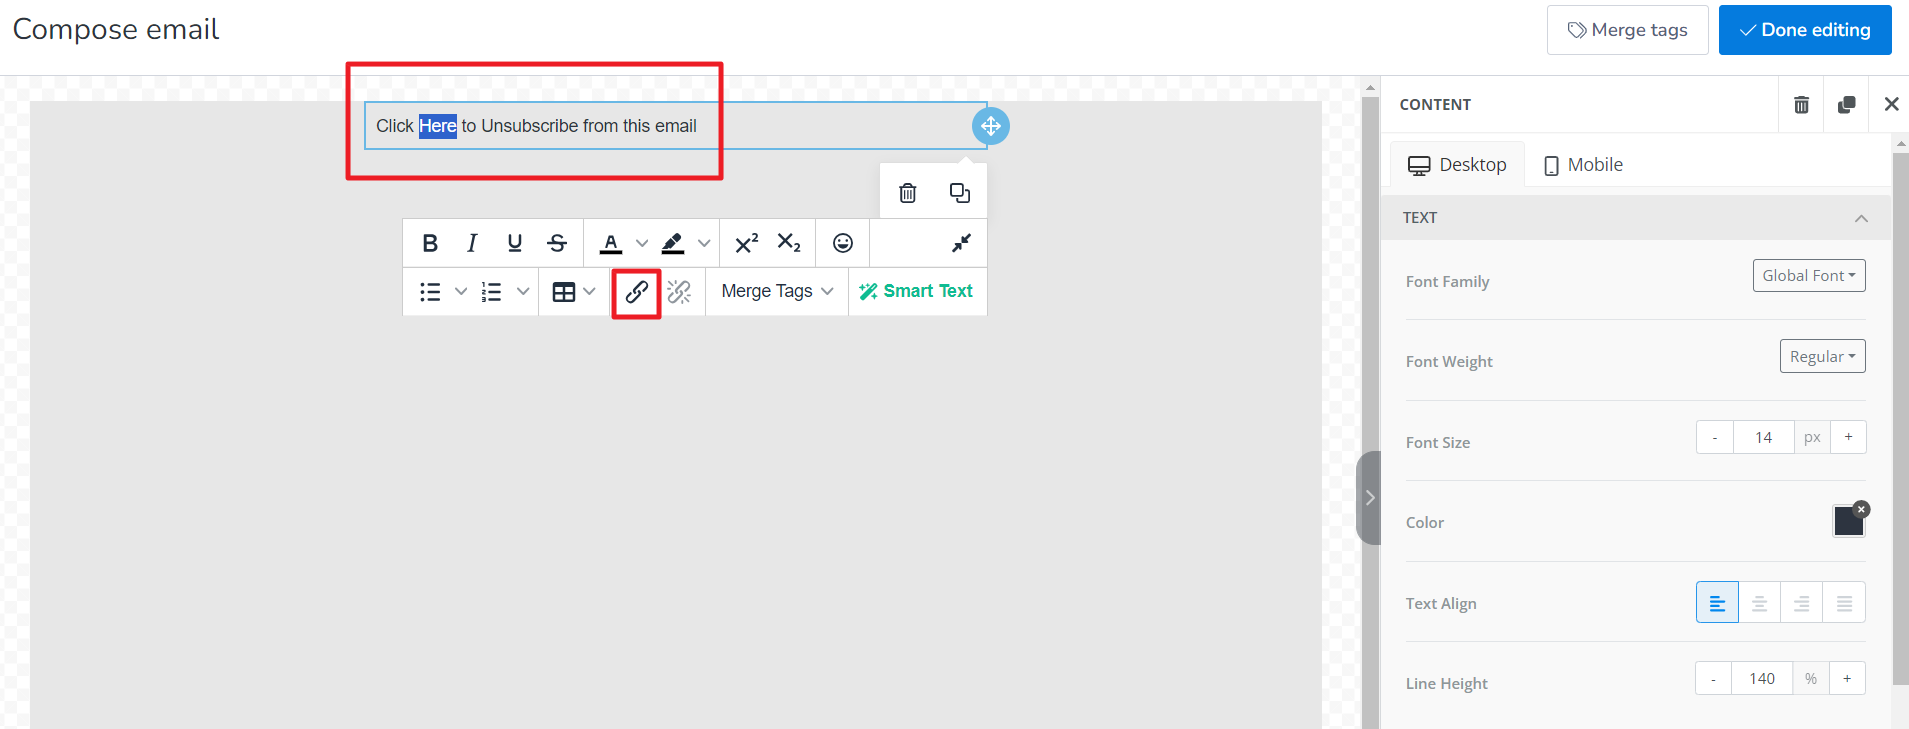
3. Write a text like “Click here to Unsubscribe from this email“. Highlight “Here” and click on Insert/edit link.
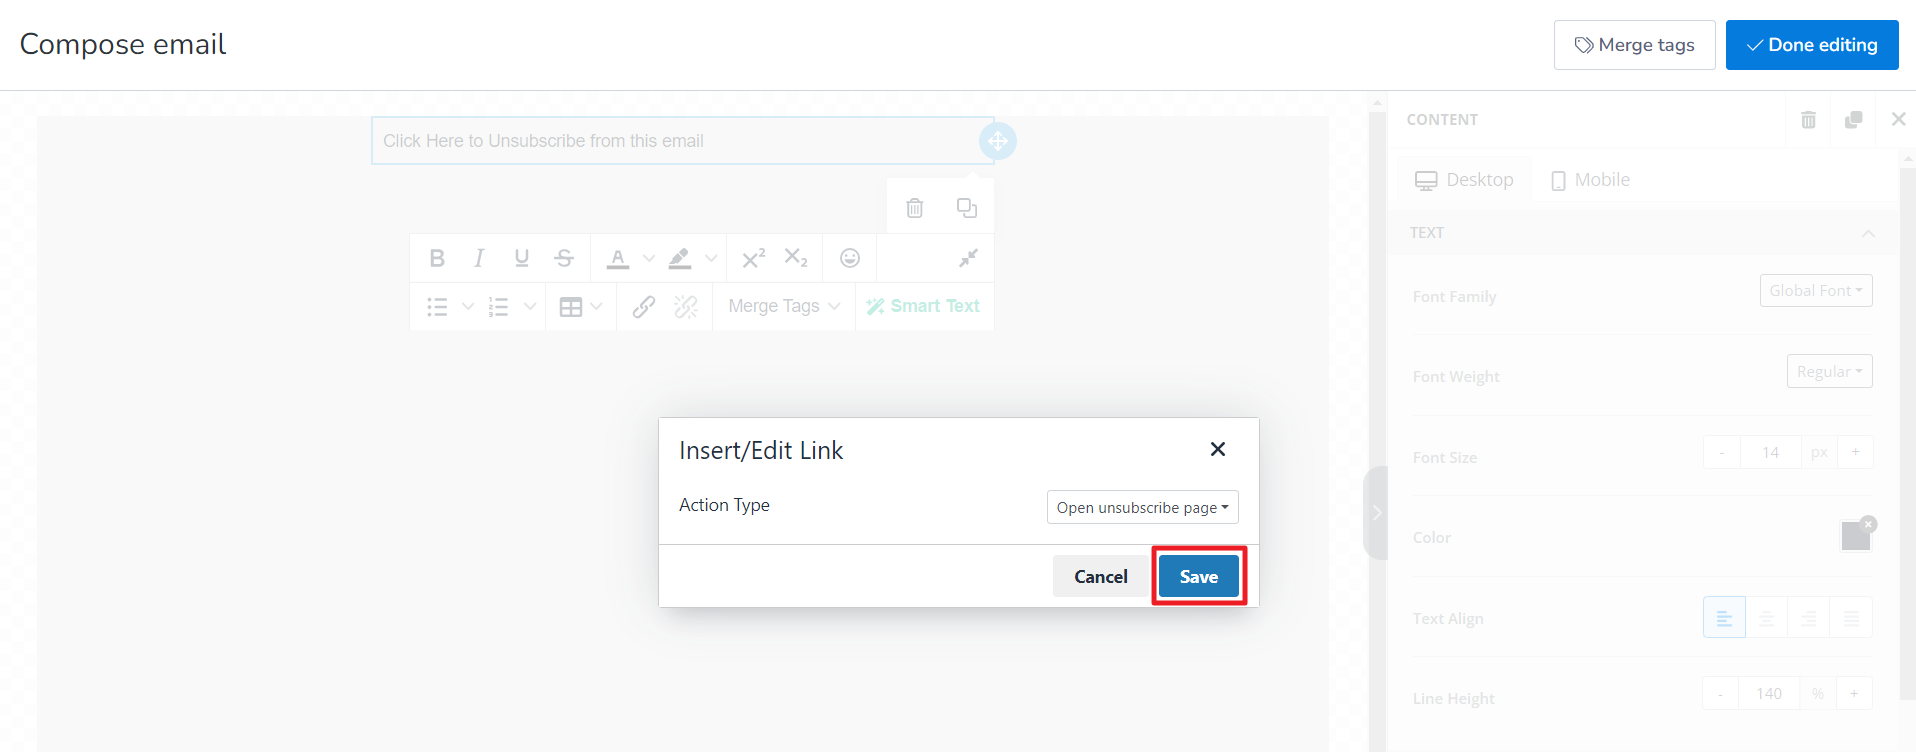
4. Select Action Type: Open unsubscribe page.
5. Click Save and the unsubscribe link is set on your email campaign.
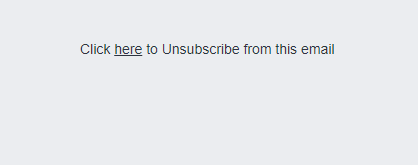
6. Now the unsubscribe link has been added to the highlighted text.
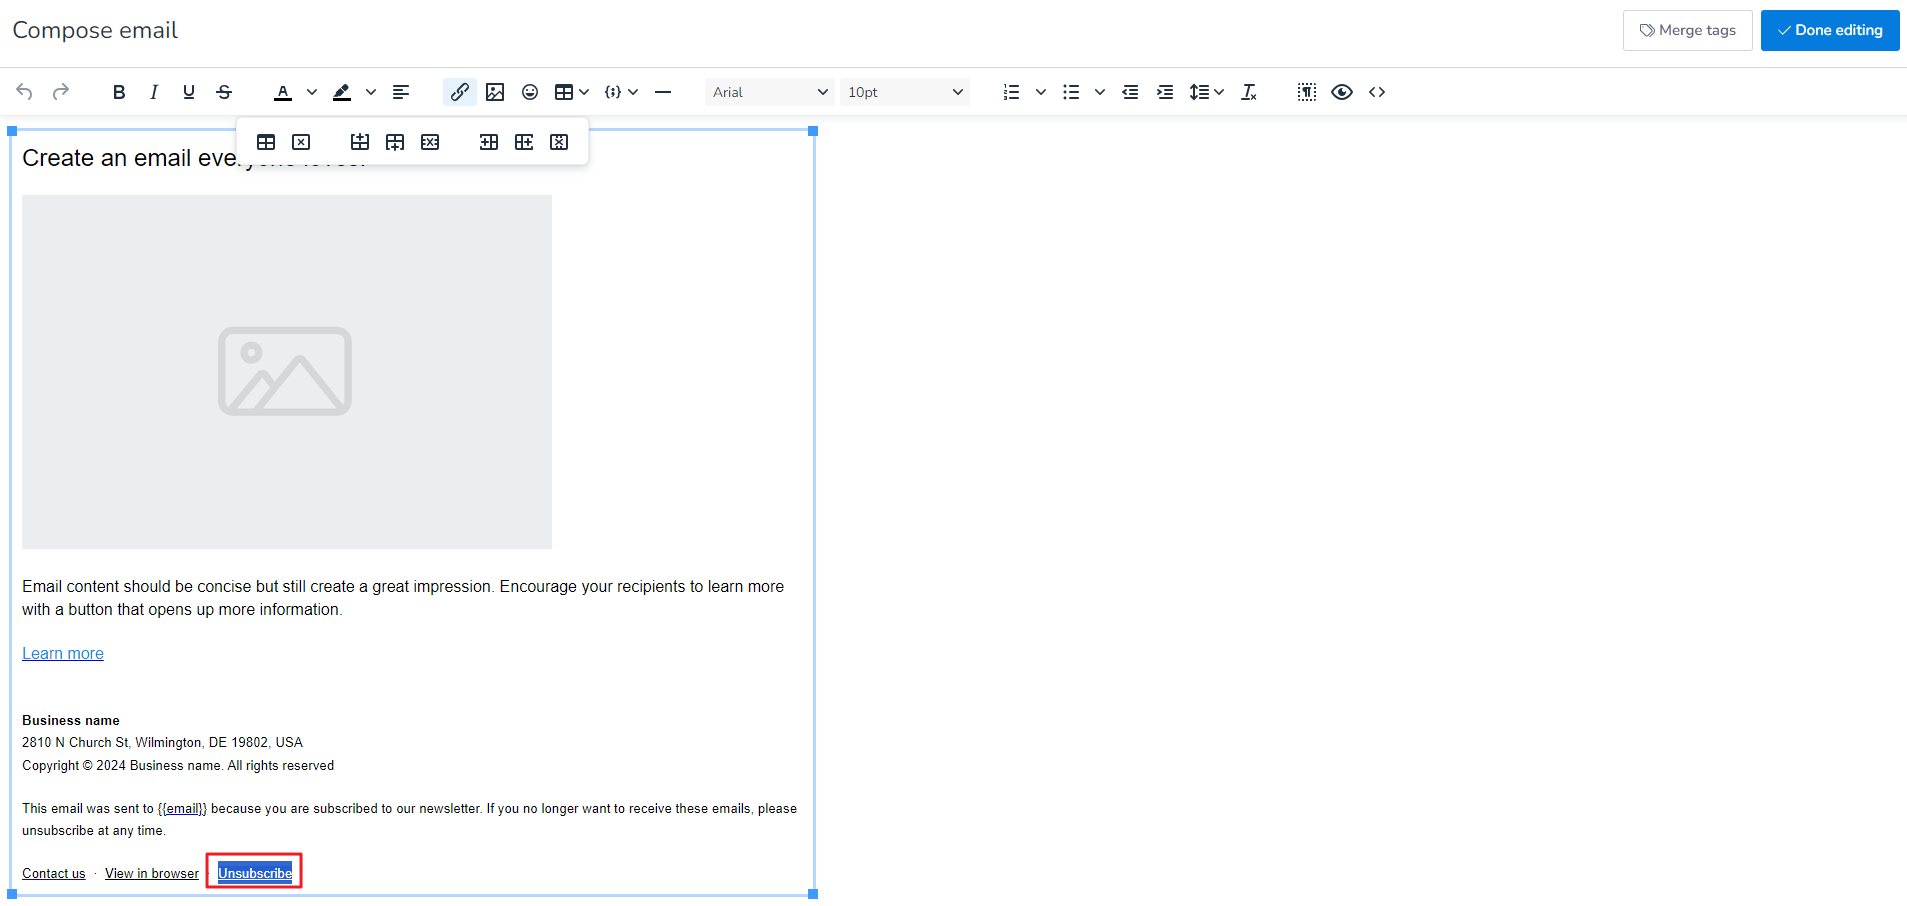
7. Once viewed the email in inbox, it will show like this as shown below. If clicked it will take you to MailBluster’s default unsubscribe page.
Adding unsubscribe link using the Drag and Drop editor ensures your campaigns comply with email regulations and improves deliverability.
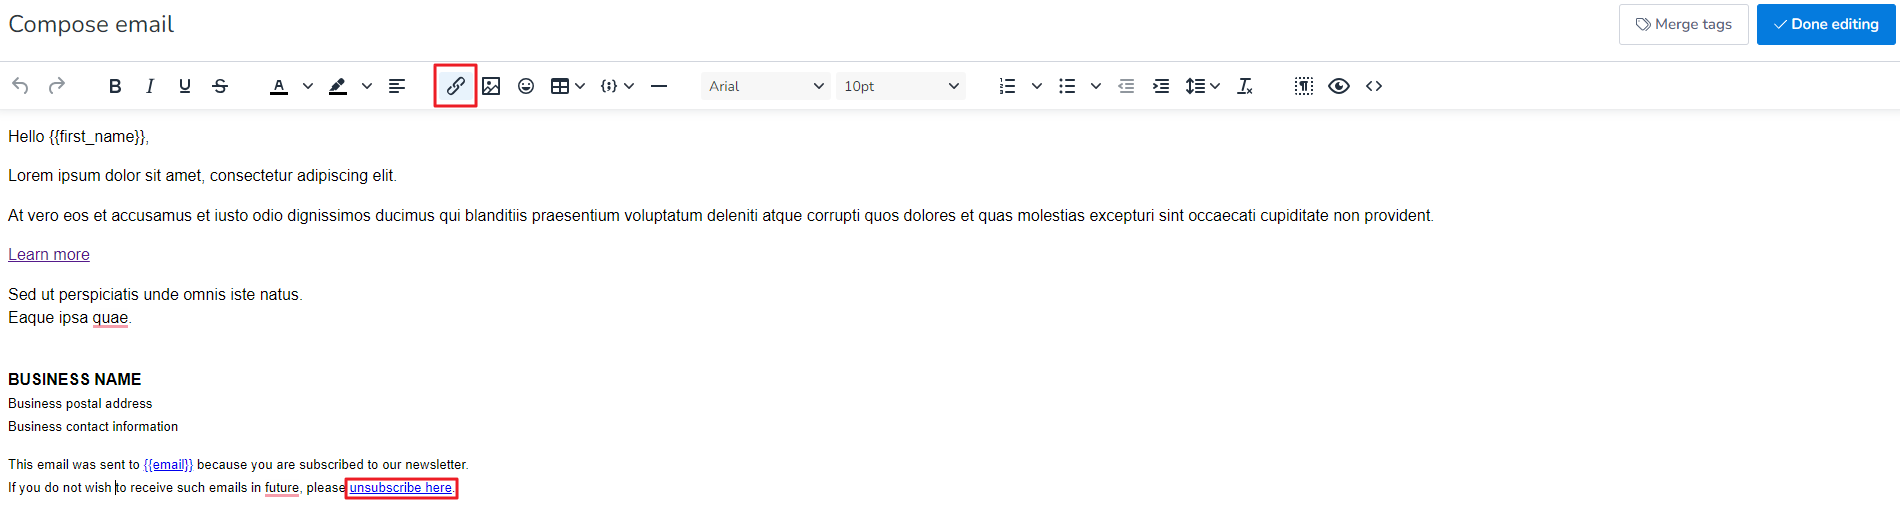
To add unsubscribe link using WYSIWYG Editor, first select your WYSIWYG Editor from Campaign > Content.
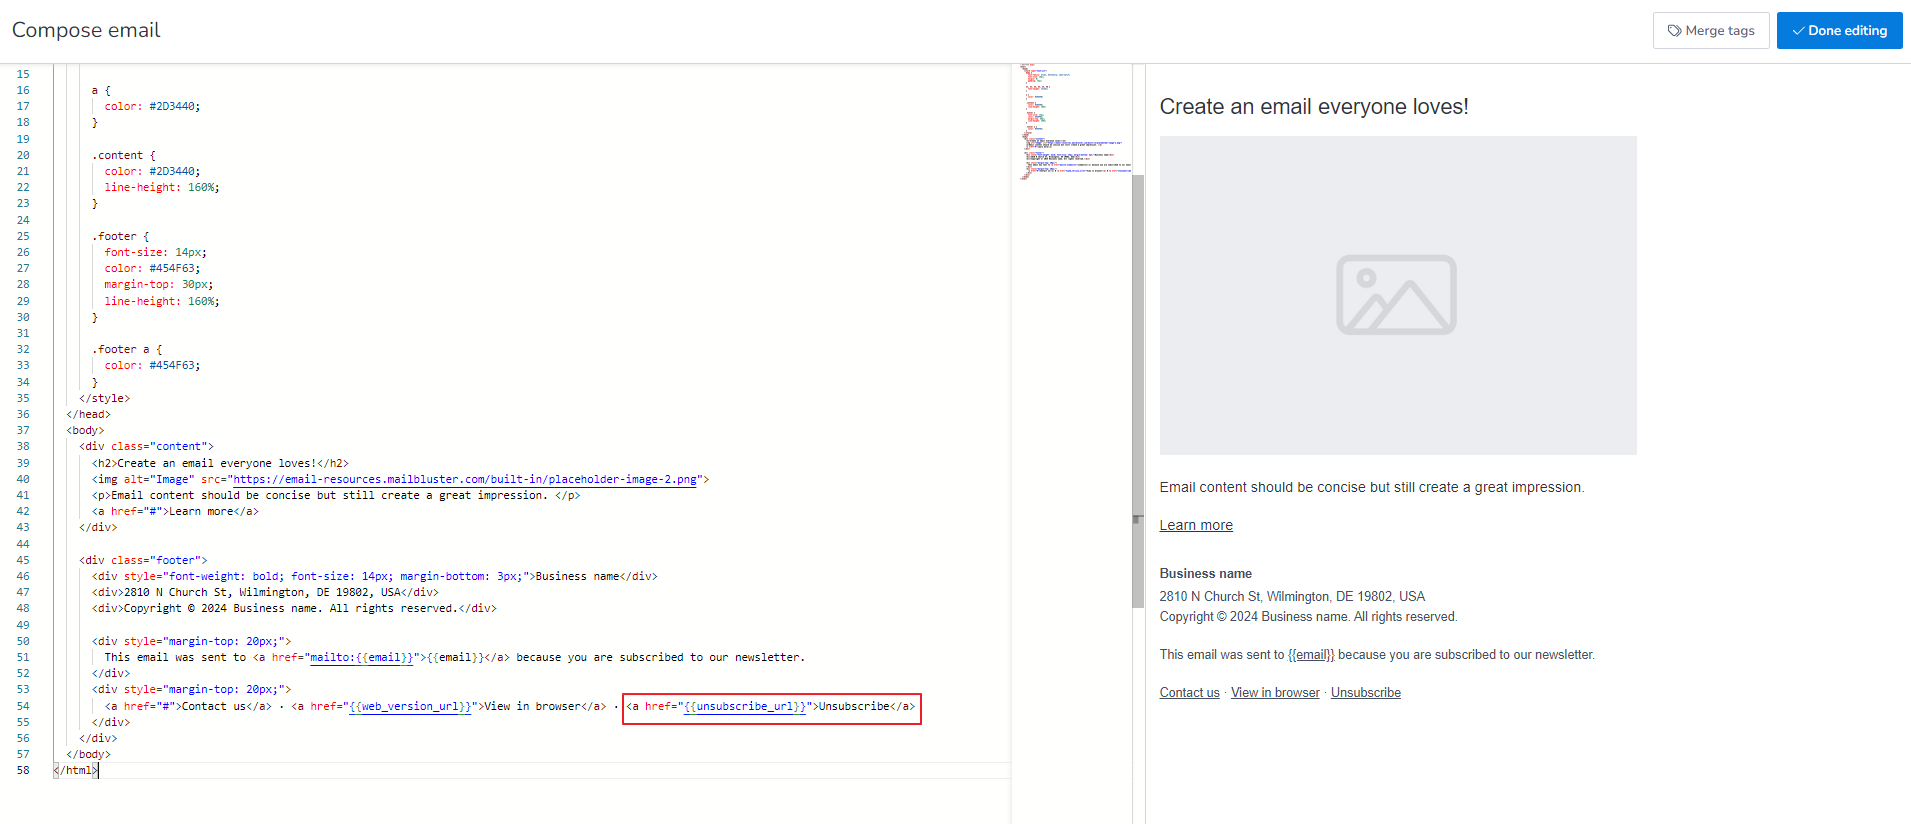
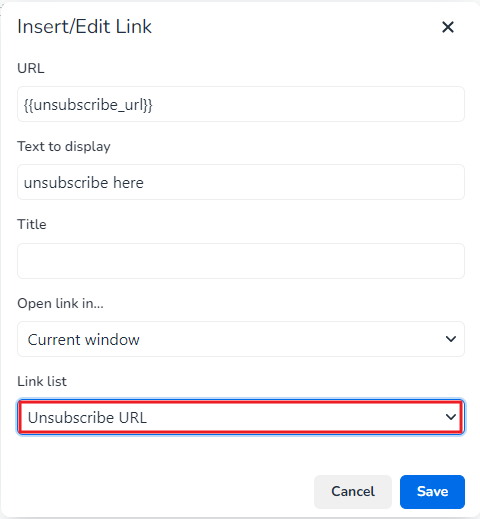
Once the editor opens, select any text and the highlight it. Once highlighted, click on Insert/Edit link and enter the merge tag “{{unsubscribe_url}}” in the URL field of the Insert/Edit Link popup box.
Select Unsubscribe URL from Link list and then click Save.
Click Done editing and exit from the editor. Now your Unsubscribe URL is ready.
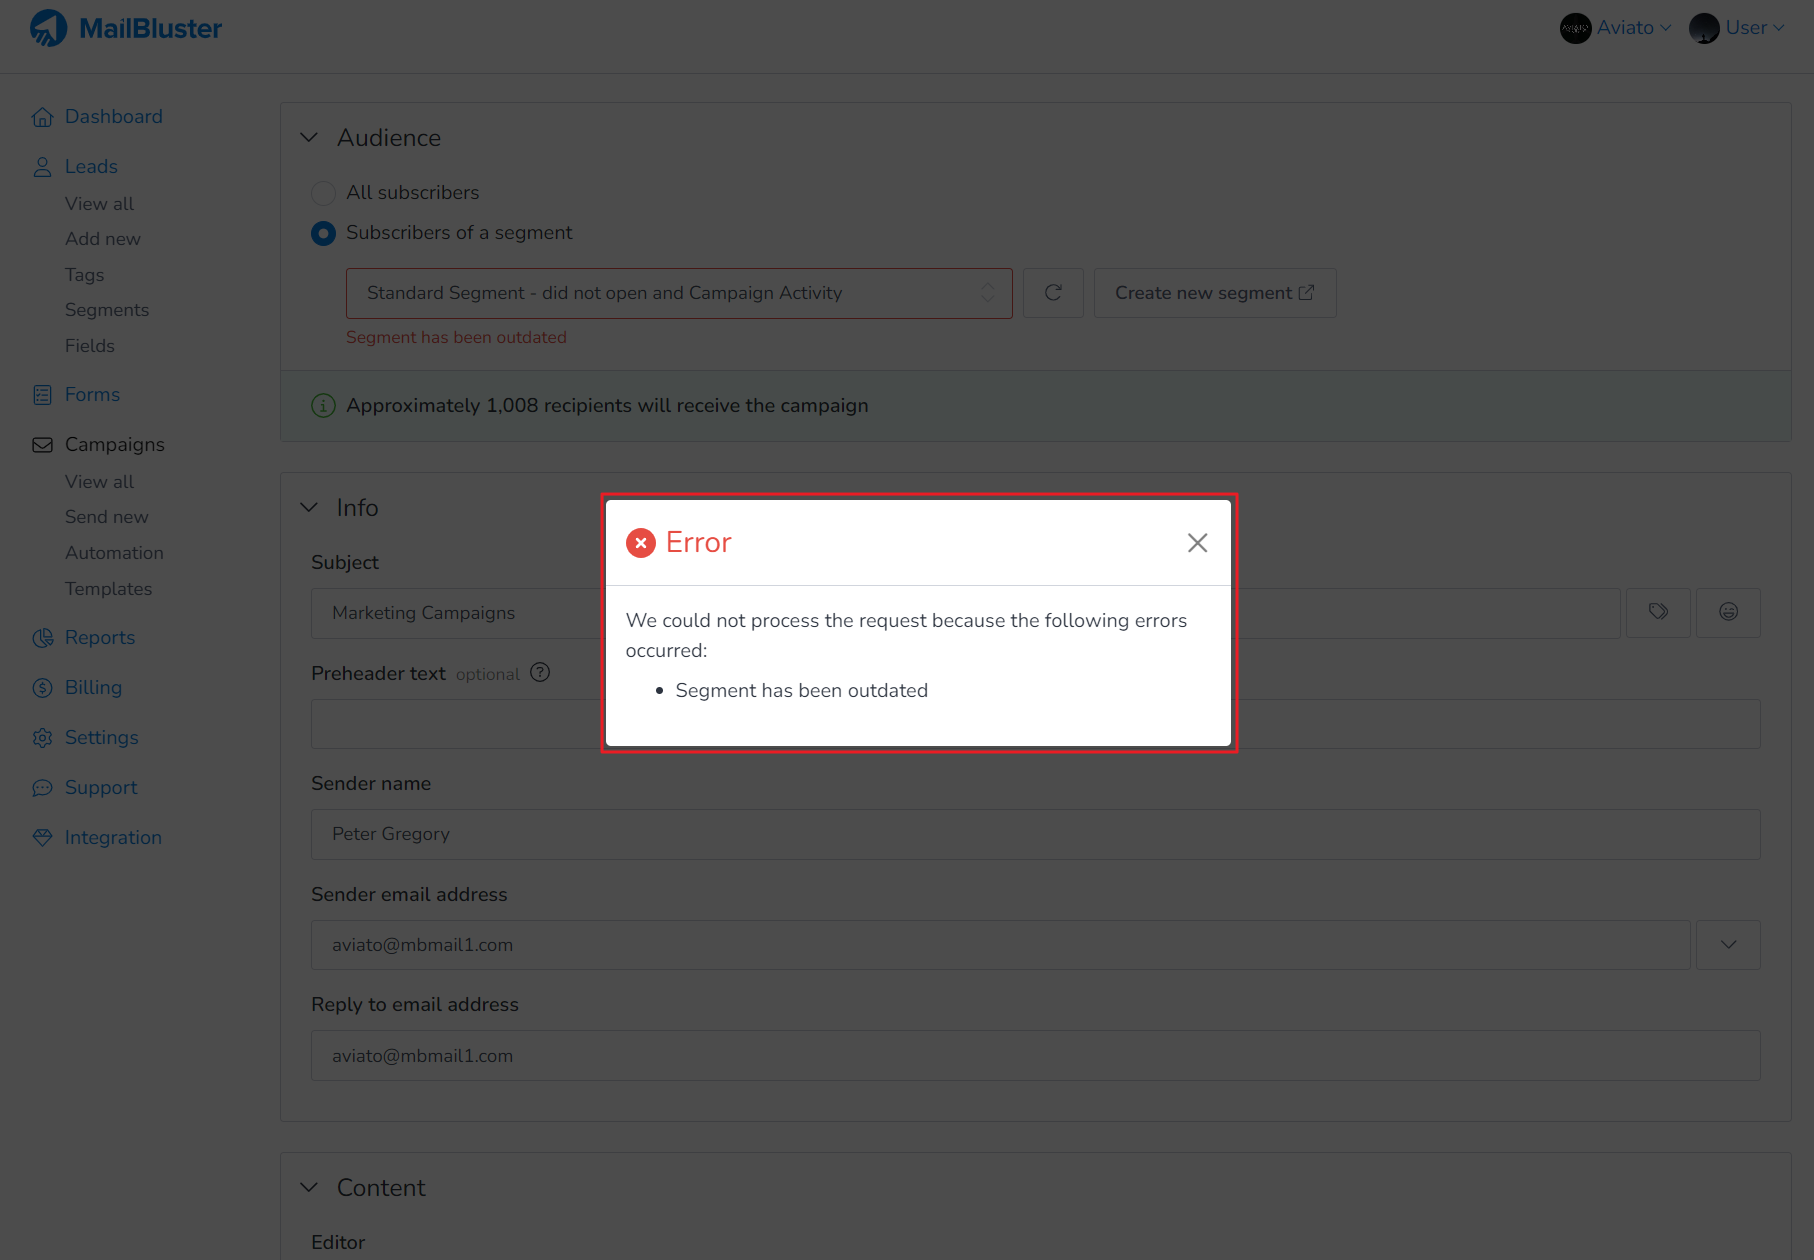
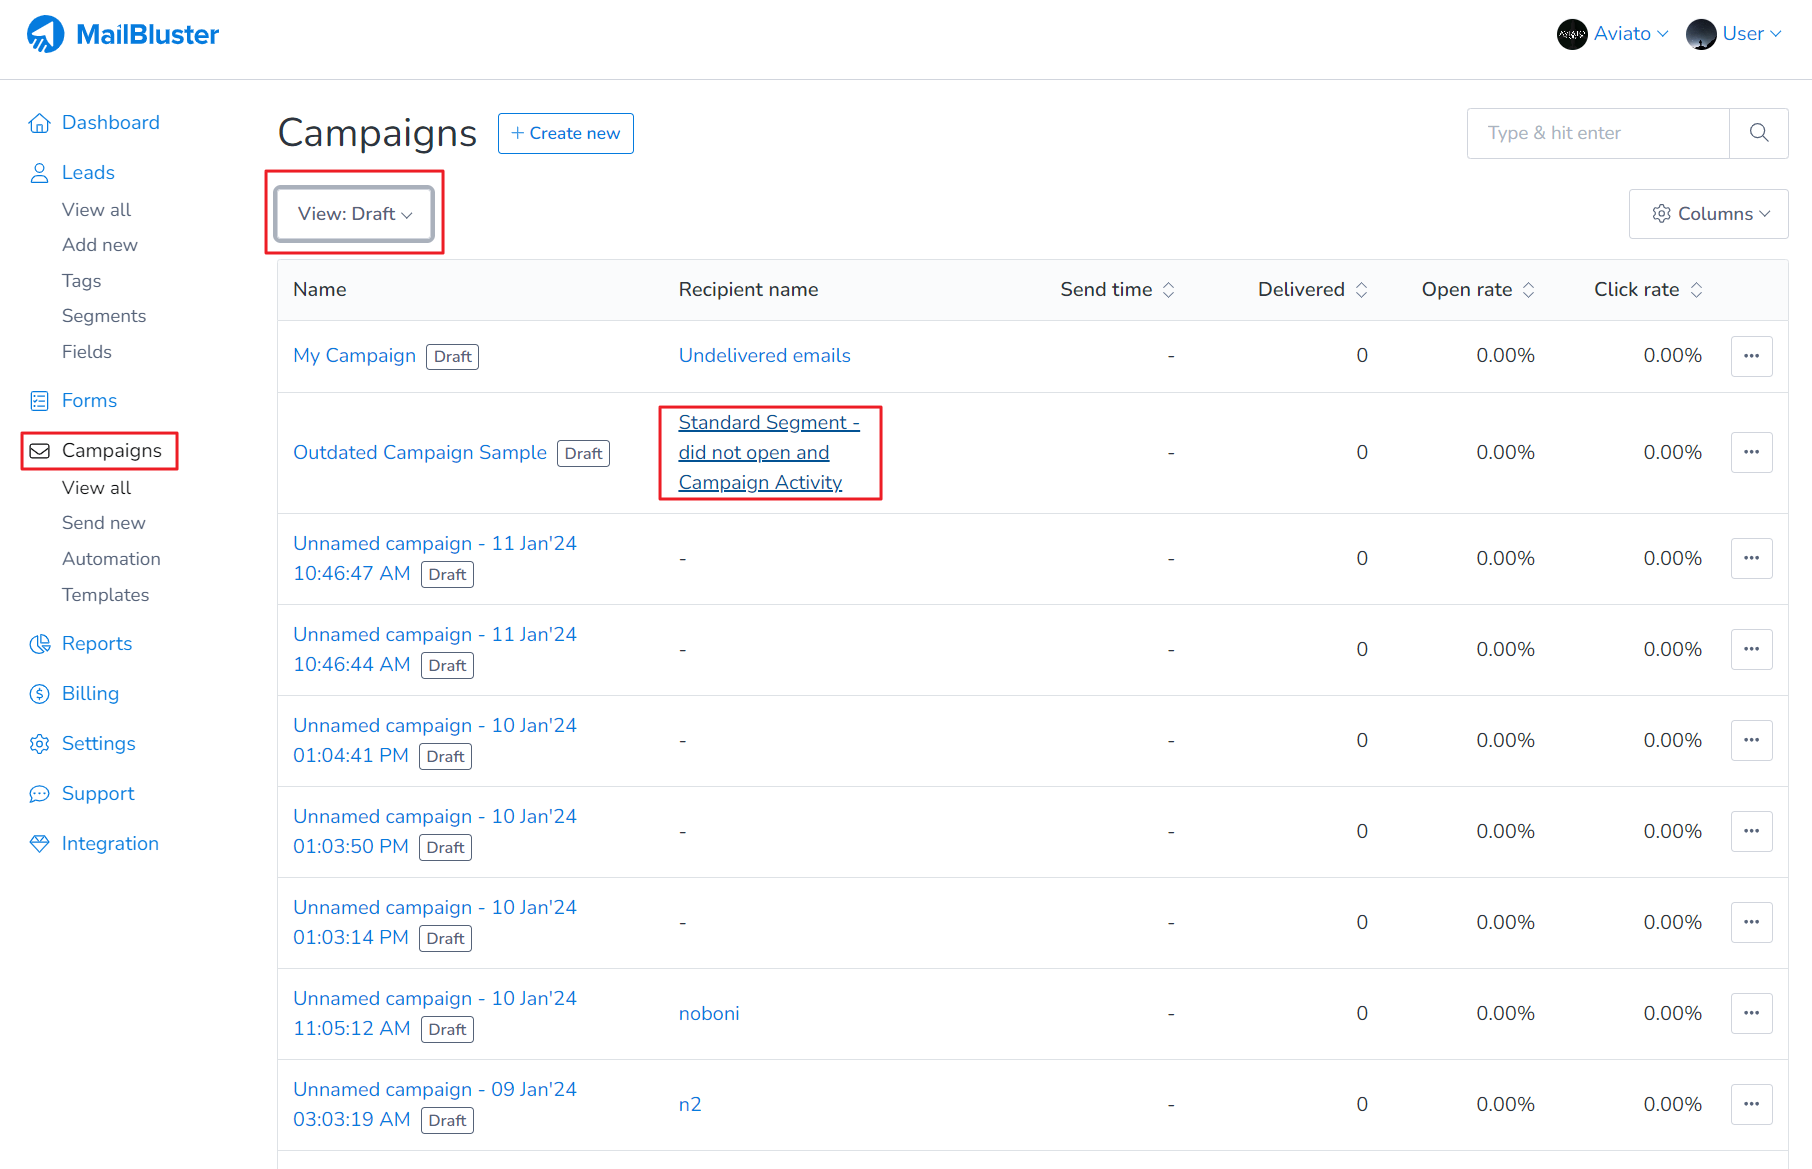
If your email campaign is showing outdated, it usually happens after creating the campaign, selecting a segment, and clicking the Send Campaign button.
This error occurs because the segment you are using is outdated. This means the segment you selected is using conditions such as leads with campaign activity older than 1 year. MailBluster highlights this error, marking the selected segment in red and showing ‘Segment has been outdated‘.
To resolve the issue, navigate to your campaign and inspect it further. Open your Draft campaign and click on the Standard Segment you selected for this Draft campaign.
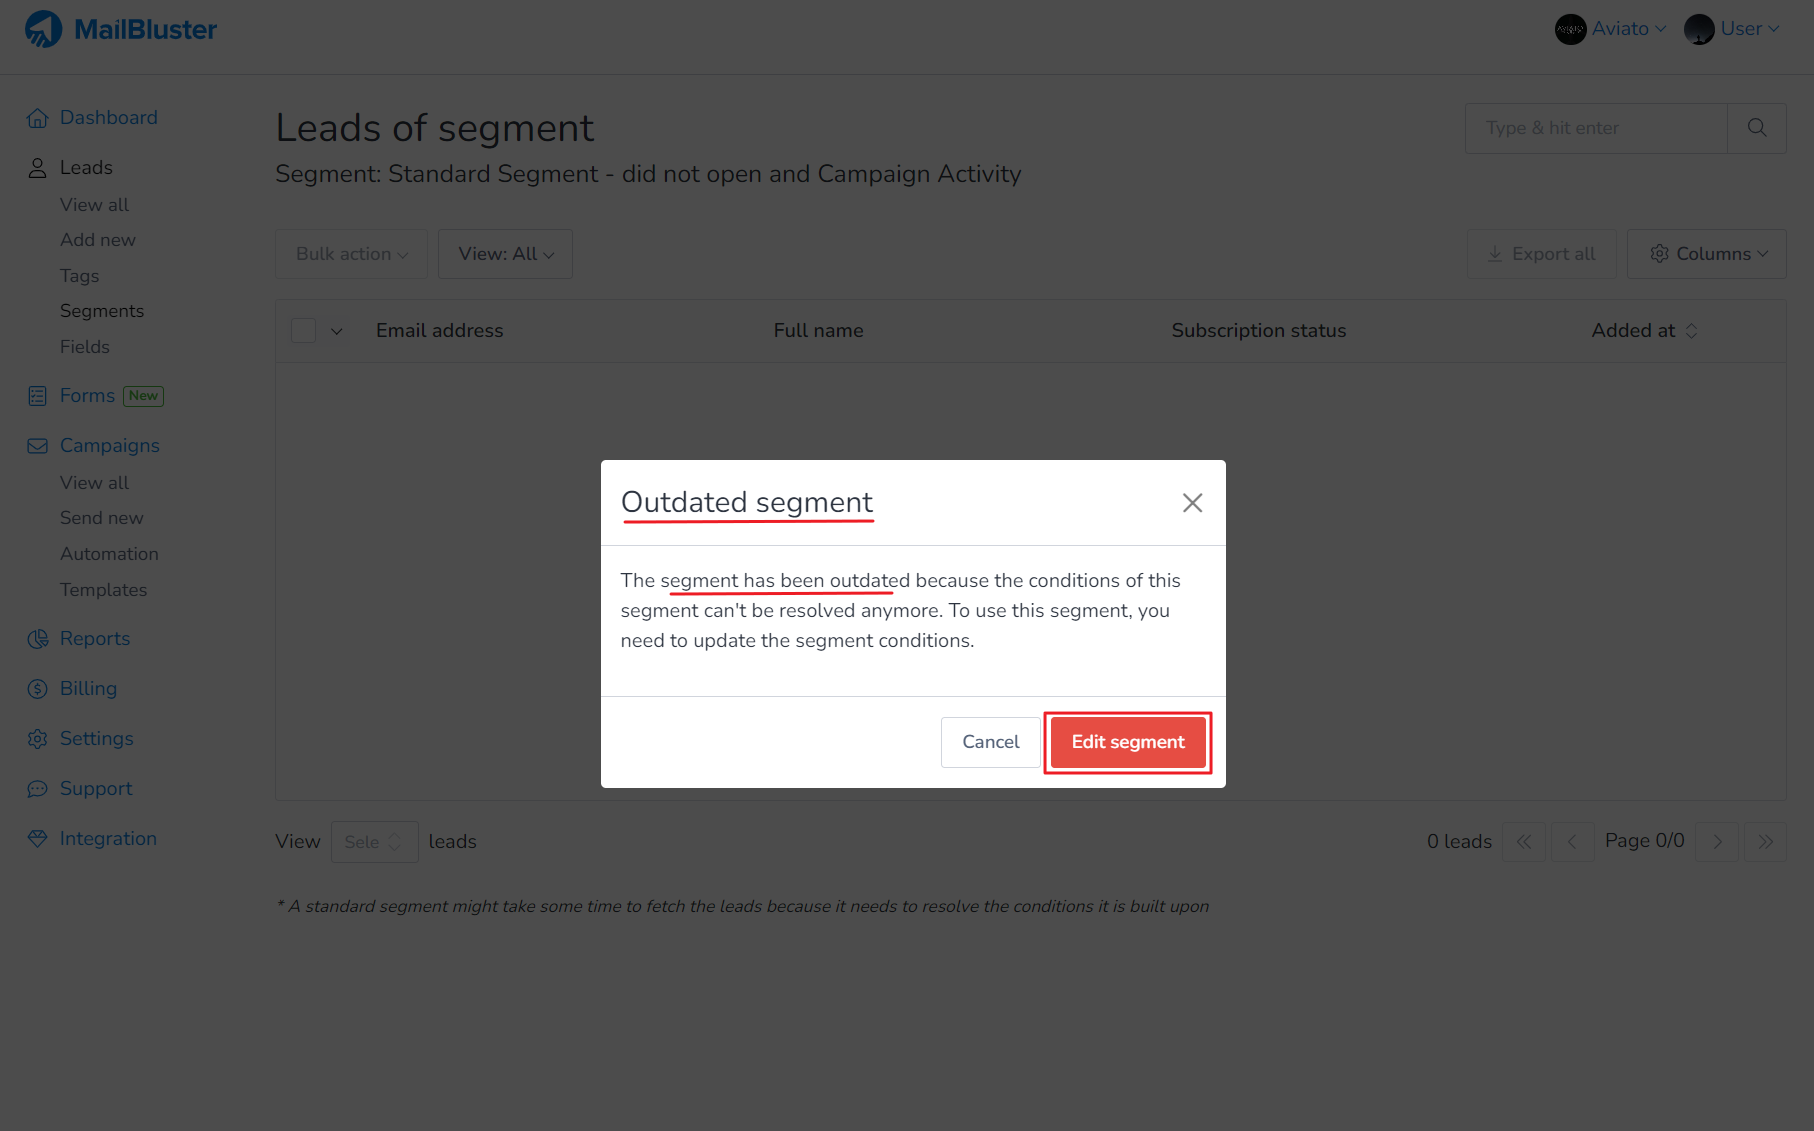
As you will notice, the segment will show a pop-up message showing that your segment is Outdated. Click on the Edit segment.
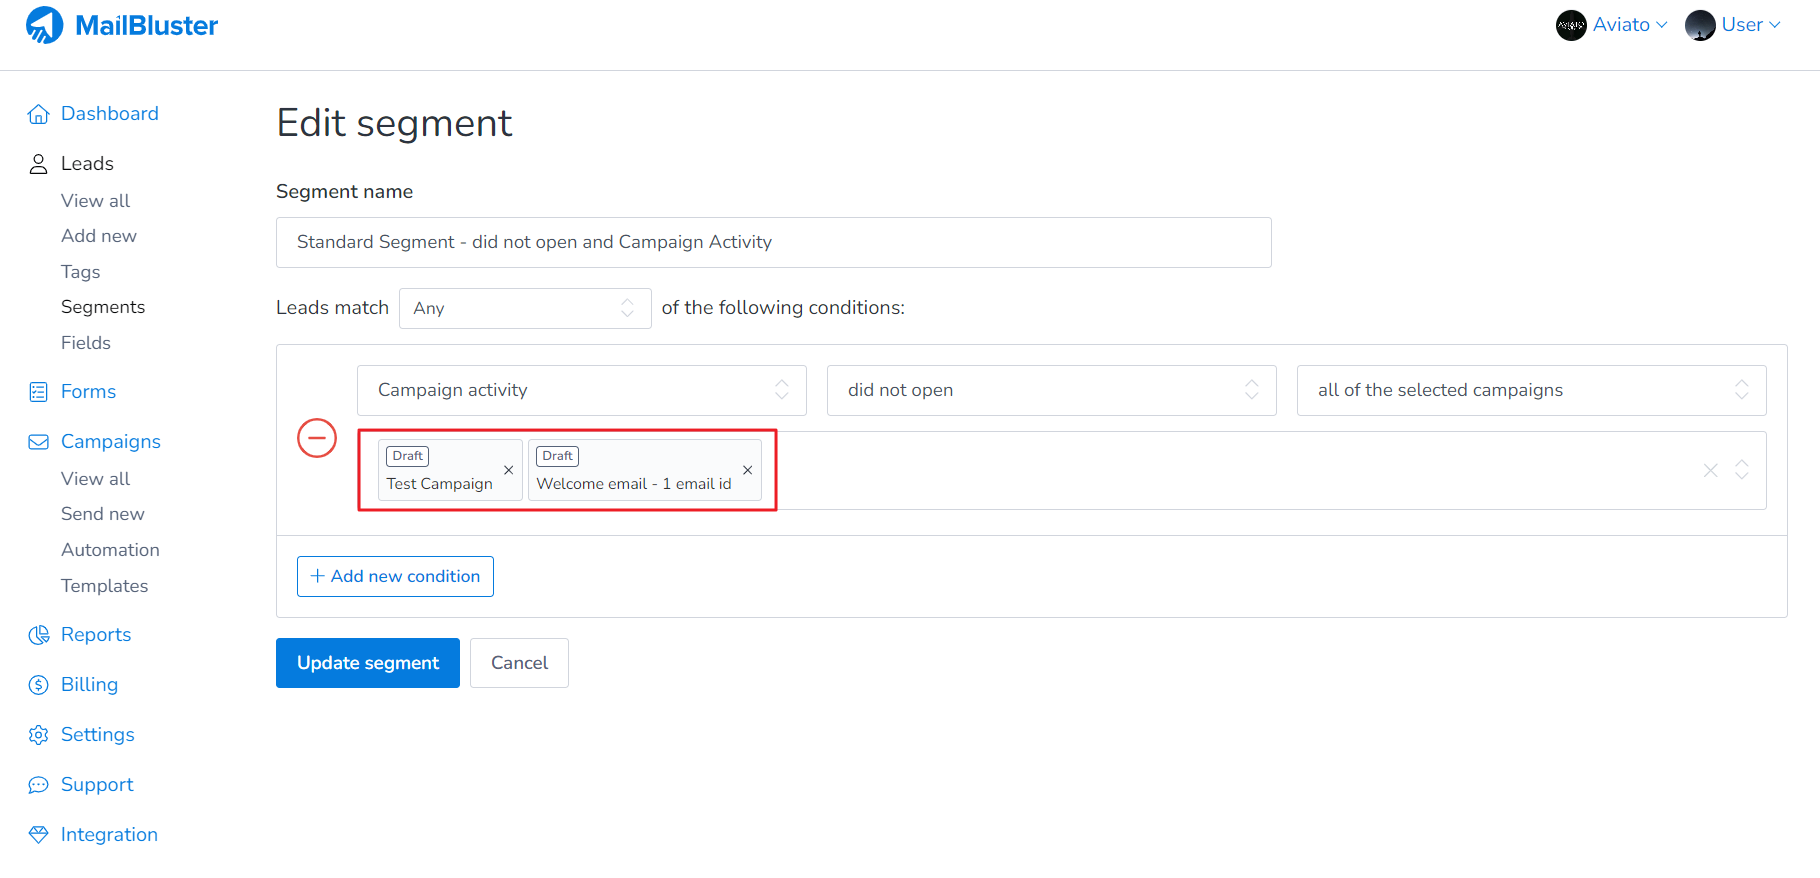
After clicking on ‘Edit Segment,’ you will notice that the campaigns selected for this segment’s conditions (in this case, ‘Campaign activity: did not open‘) are more than 12 months old. Keep in mind that you should avoid using campaigns or segments older than one year, as MailBluster now retains campaign activities for only the past 12 months.
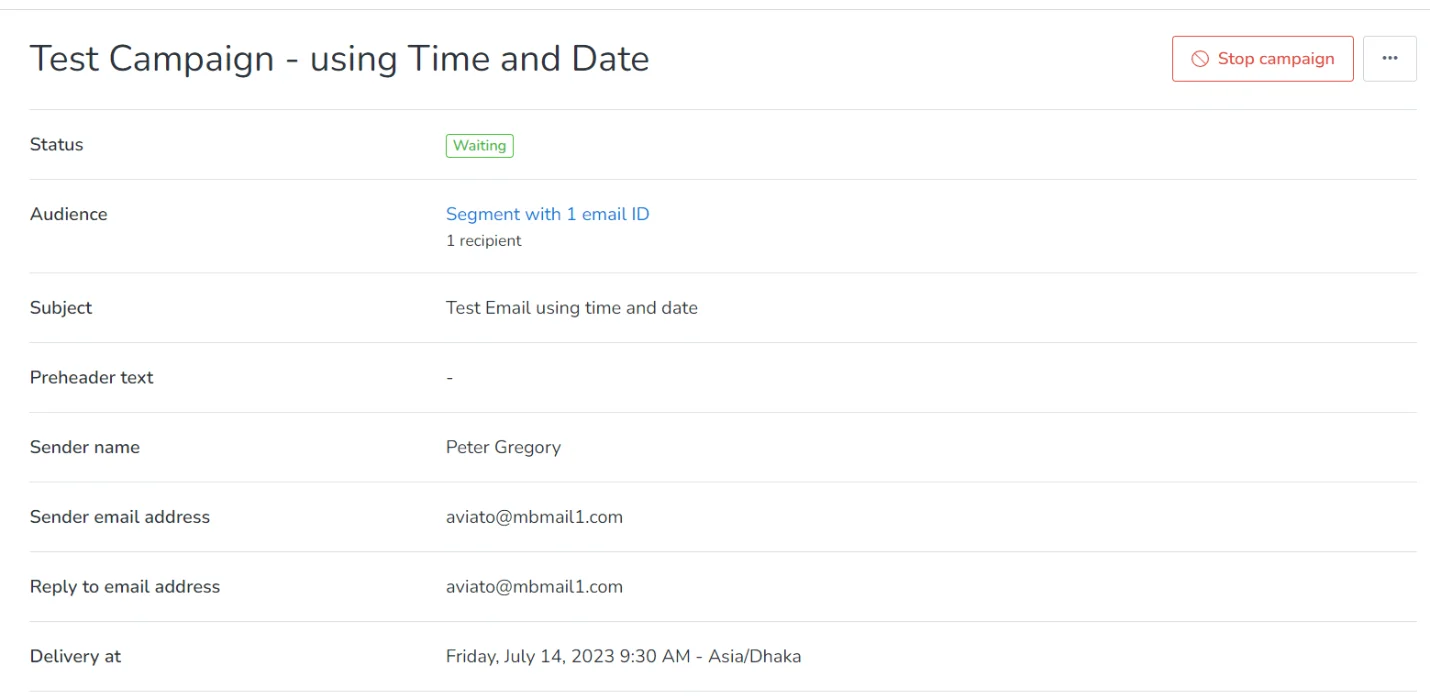
MailBluster sends only one campaign at a time. If your campaign is in the “waiting” status, it means another campaign from your brand is currently in the sending status. Once that campaign is fully sent, MailBluster will automatically start sending the waiting campaigns one by one. This ensures that campaigns are sent sequentially without overloading the sending system, maintaining deliverability and tracking accuracy for each campaign.
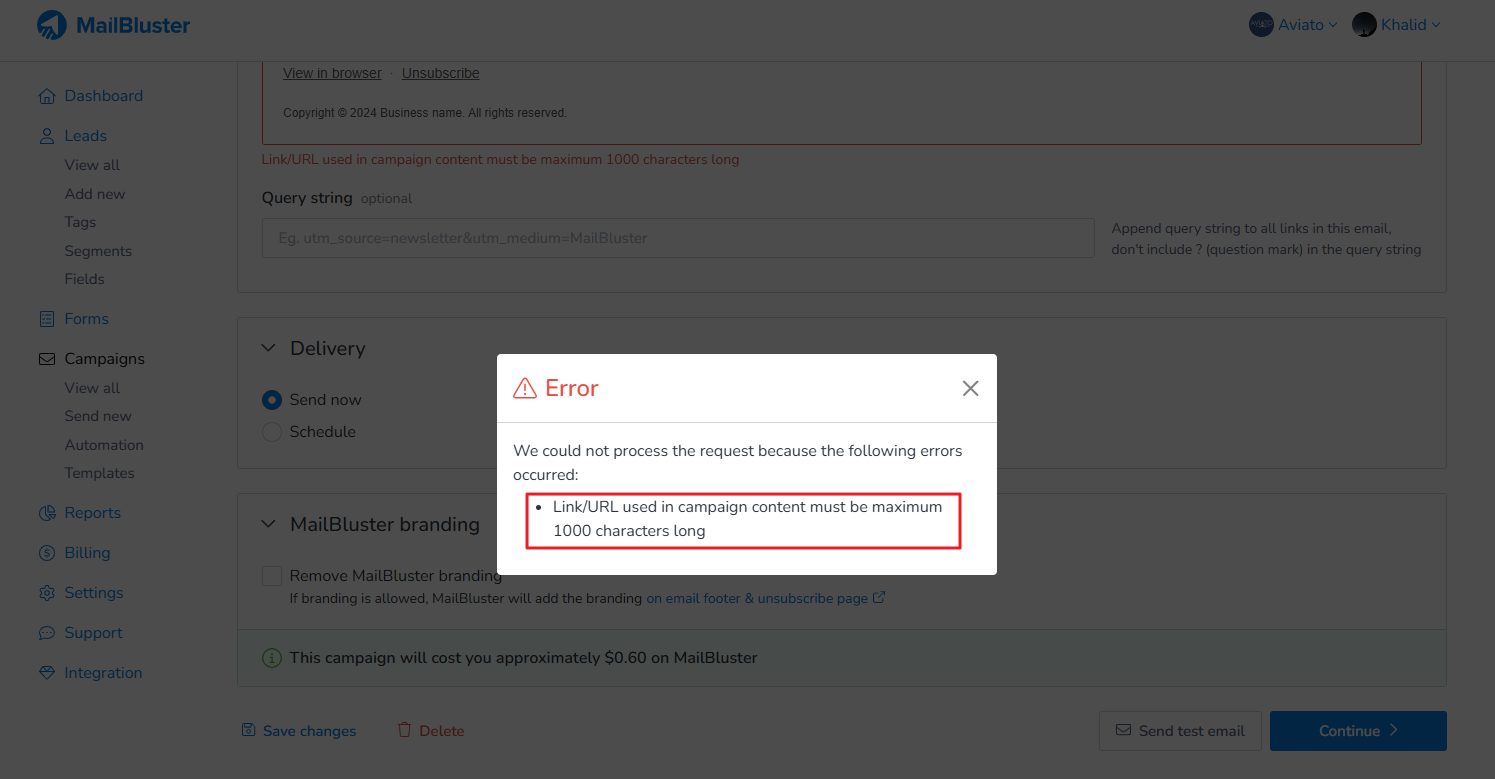
If you are getting this error message, ‘Link/URL used in campaign content must be a maximum of 1000 characters long,’ then you need to remove any URL or button containing a URL that exceeds 1000 characters. Your URL has to be shorter than 1000 characters. You can use a third-party tool like TinyURL to shorten your URL and then place it into your campaign.
Implementing a proper strategy to warm up a new subdomain is essential when sending emails from a new domain. Start with a small volume of emails and gradually increase the number over time to build a strong sender reputation. Continuously monitor key metrics such as open rates, click-through rates, and bounce rates to assess performance and adjust your warm-up strategy as needed.
To successfully warm up a new subdomain and maintain a positive sender reputation with email providers, follow this approach:
Start with a low volume: Begin by sending 1,000 to 5,000 emails per day for the first 3 days.
Gradually increase: Double the volume every few days while closely monitoring your metrics.
Days 4 to 7: Increase to 10,000 – 15,000 emails/day.
Week 2: Scale up to 25,000 – 50,000 emails/day.
Focus on engagement: In the early stages, prioritize sending to your most active users.
Additionally, after moving to a new domain, it’s important to properly configure your SPF, DKIM, and DMARC records for improved email deliverability. Be sure to verify your sender domain in your SMTP provider. For guidance, you can follow this blog guides:
You can store images in MailBluster server. You can do it by using the Drag and drop editor. Please check out the screenshots below where you can store images by uploading the images.
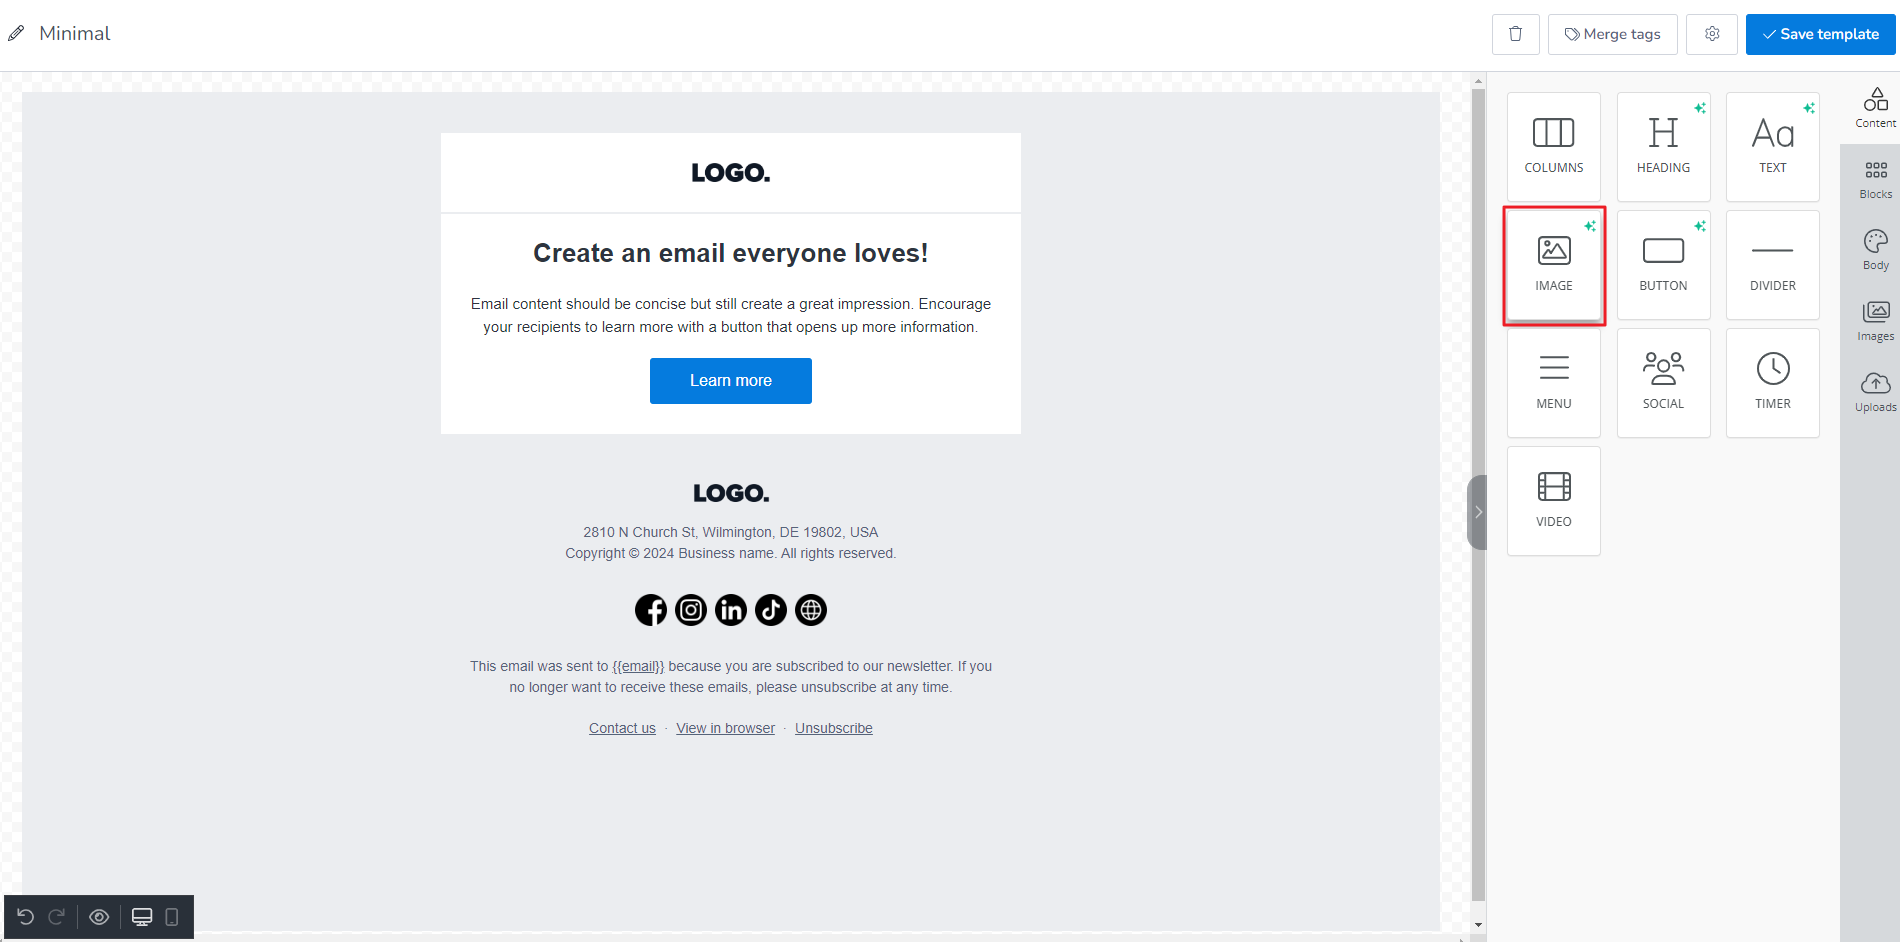
Drag Image from the Content section of the Drag and drop editor and place it on the composed email content.
Click on the Image placeholder, and an Upload image button will appear on the right side of Content section. Either drag and drop an image on the Drop and upload placeholder or click on the Upload image button and upload your desired image on the composed email.
MailBluster will store it on the server, allowing you to reuse the image in future campaigns.
If you want to display a sender image in your email campaign, it’s important to know that Amazon SES does not support adding profile pictures (avatars) to emails. This limitation applies to all email marketing software using Amazon SES.
Profile images are typically managed by the recipient’s email service (e.g., Gmail, Outlook) and are linked to the sender’s email address through their respective user profiles. Since Amazon SES functions as an email-sending service, it does not have the capability to embed or associate profile pictures with outgoing emails.
Alternative Solutions
1. Using BIMI for Brand Logos
If you want to display a brand logo next to your emails, you can implement BIMI (Brand Indicators for Message Identification). BIMI allows businesses to show their verified brand logo in supported email clients like Gmail and Yahoo.
By using BIMI, Gravatar, or other supported email platforms, you can effectively display sender images in your email campaign, even though Amazon SES does not provide native support.
The maximum file size of an image file you can upload to MailBluster is 2MB. You can use image files up to this limit when creating your email campaigns or templates.
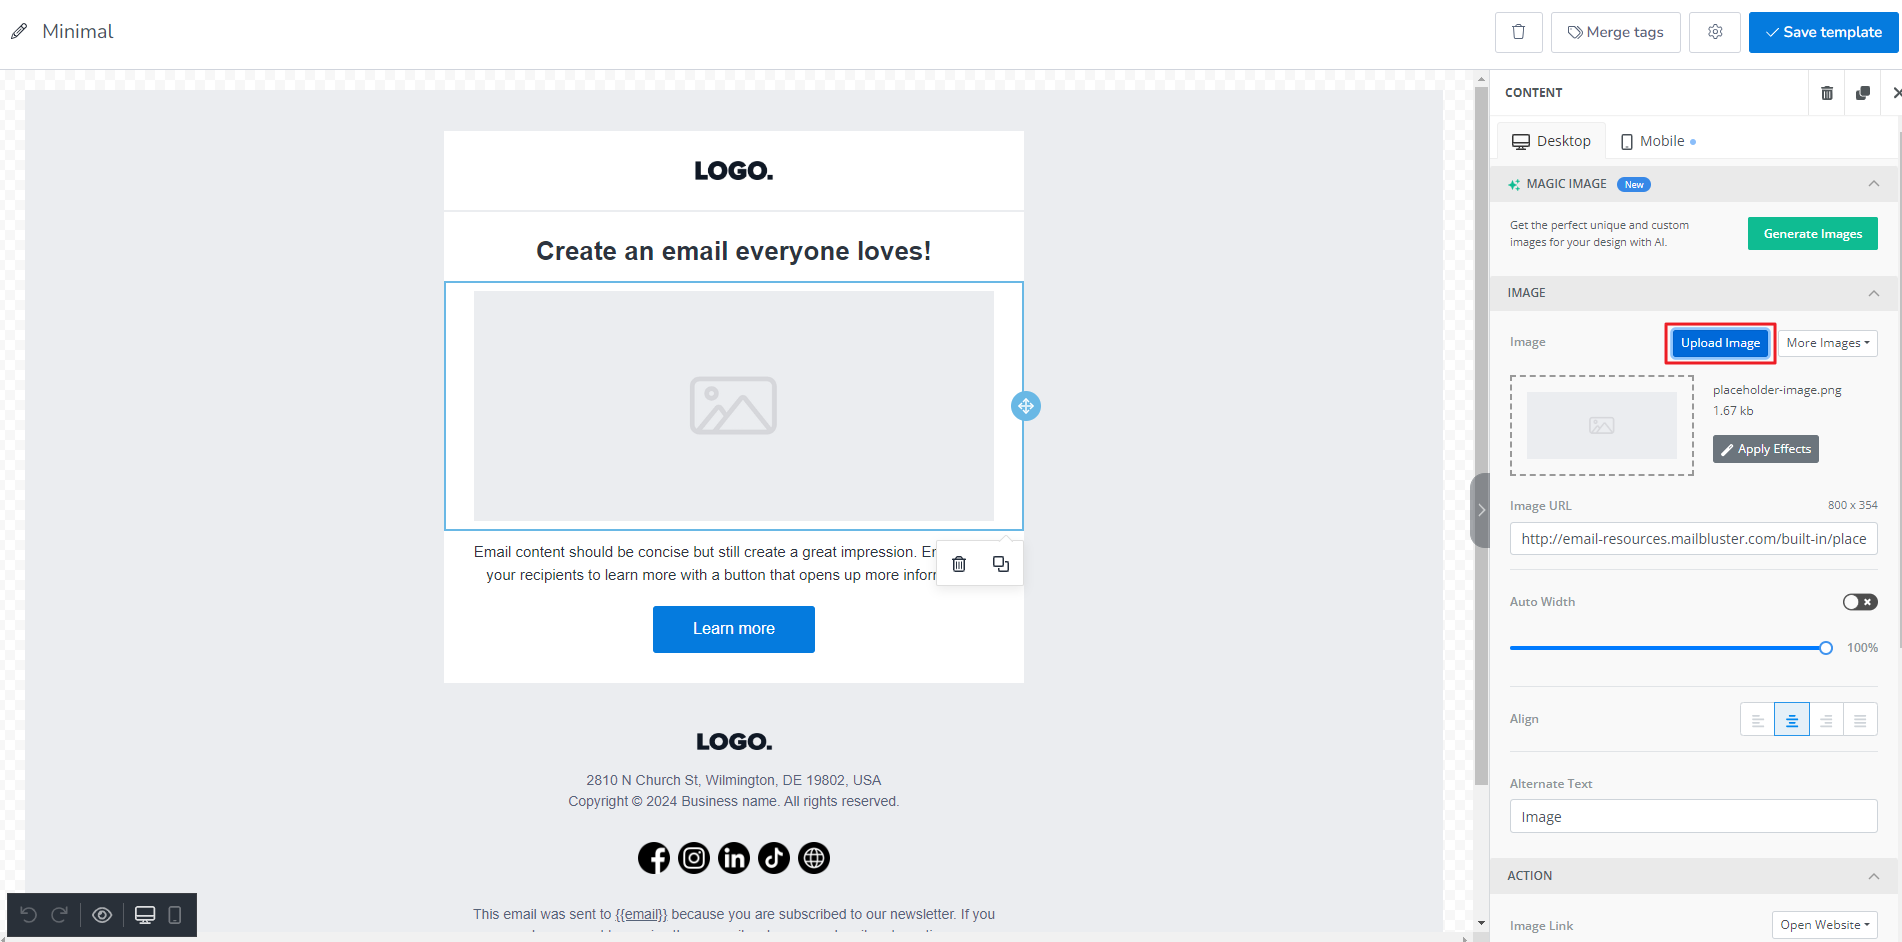
You can add strikethrough in the subject line of your email campaign using Unicode rather than HTML. You can convert text to Unicode for formatting using this TextConverter. However, please note that Gmail may detect this as possible spam due to formatting inconsistencies.
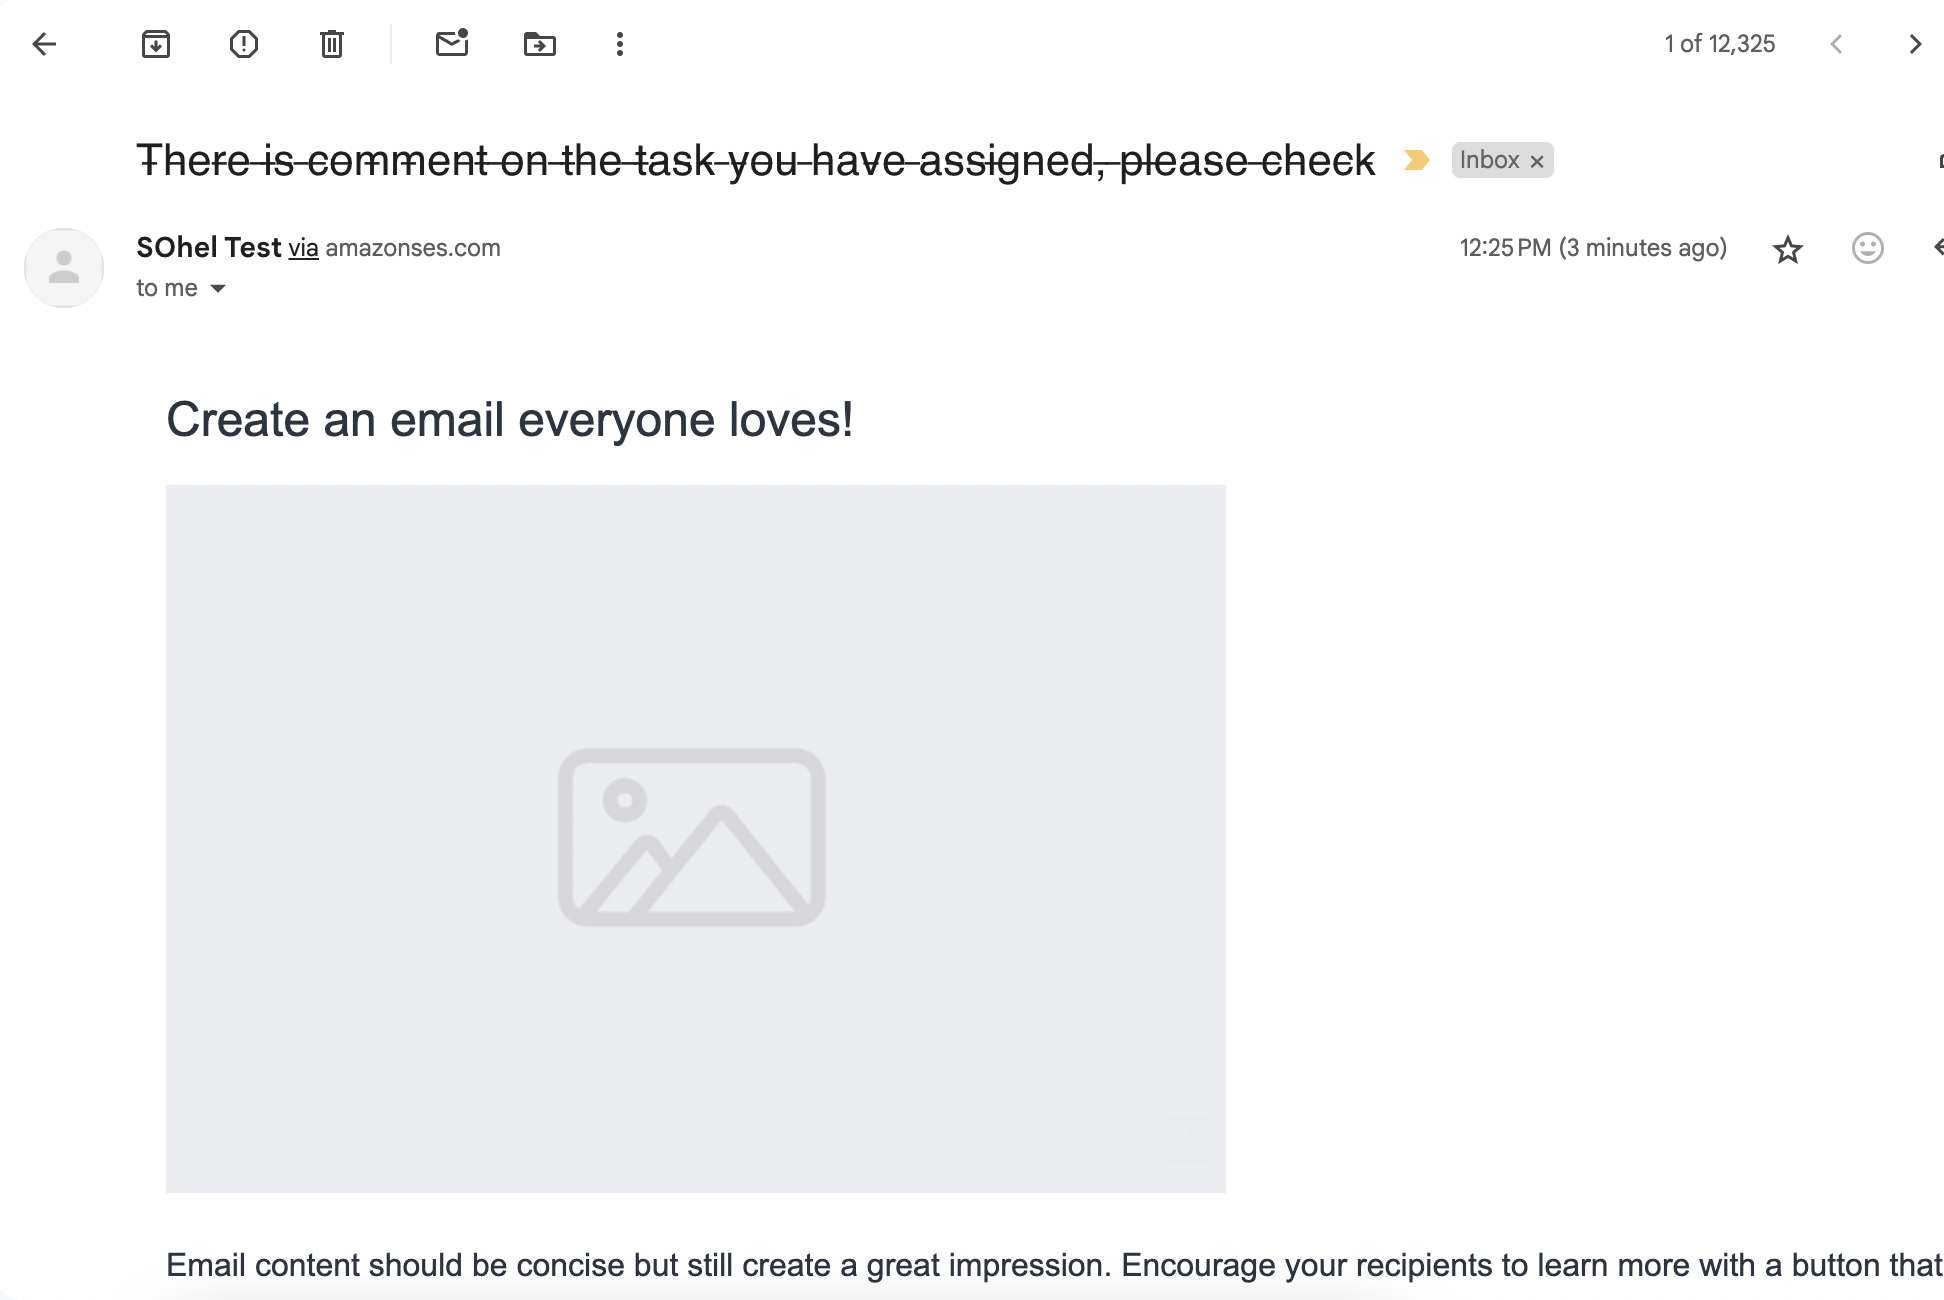
Here is an example where strike through is used in the subject of an email campaign:
You can add a motion logo in your email campaign by using a GIF file. You need to generate a GIF logo first and add it as an image using the Drag and drop editor. It’s just like how you add images to the Drag and drop editor, you just need to select the GIF image.
You can download the cat GIF image that has been shared here and add it to test the behavior.
If your text looks broken in campaign despite appearing fine in the editor, this usually happens when you compose a campaign using the copy-paste technique.
To resolve this issue, there are 2 solutions.
Solution No.1:
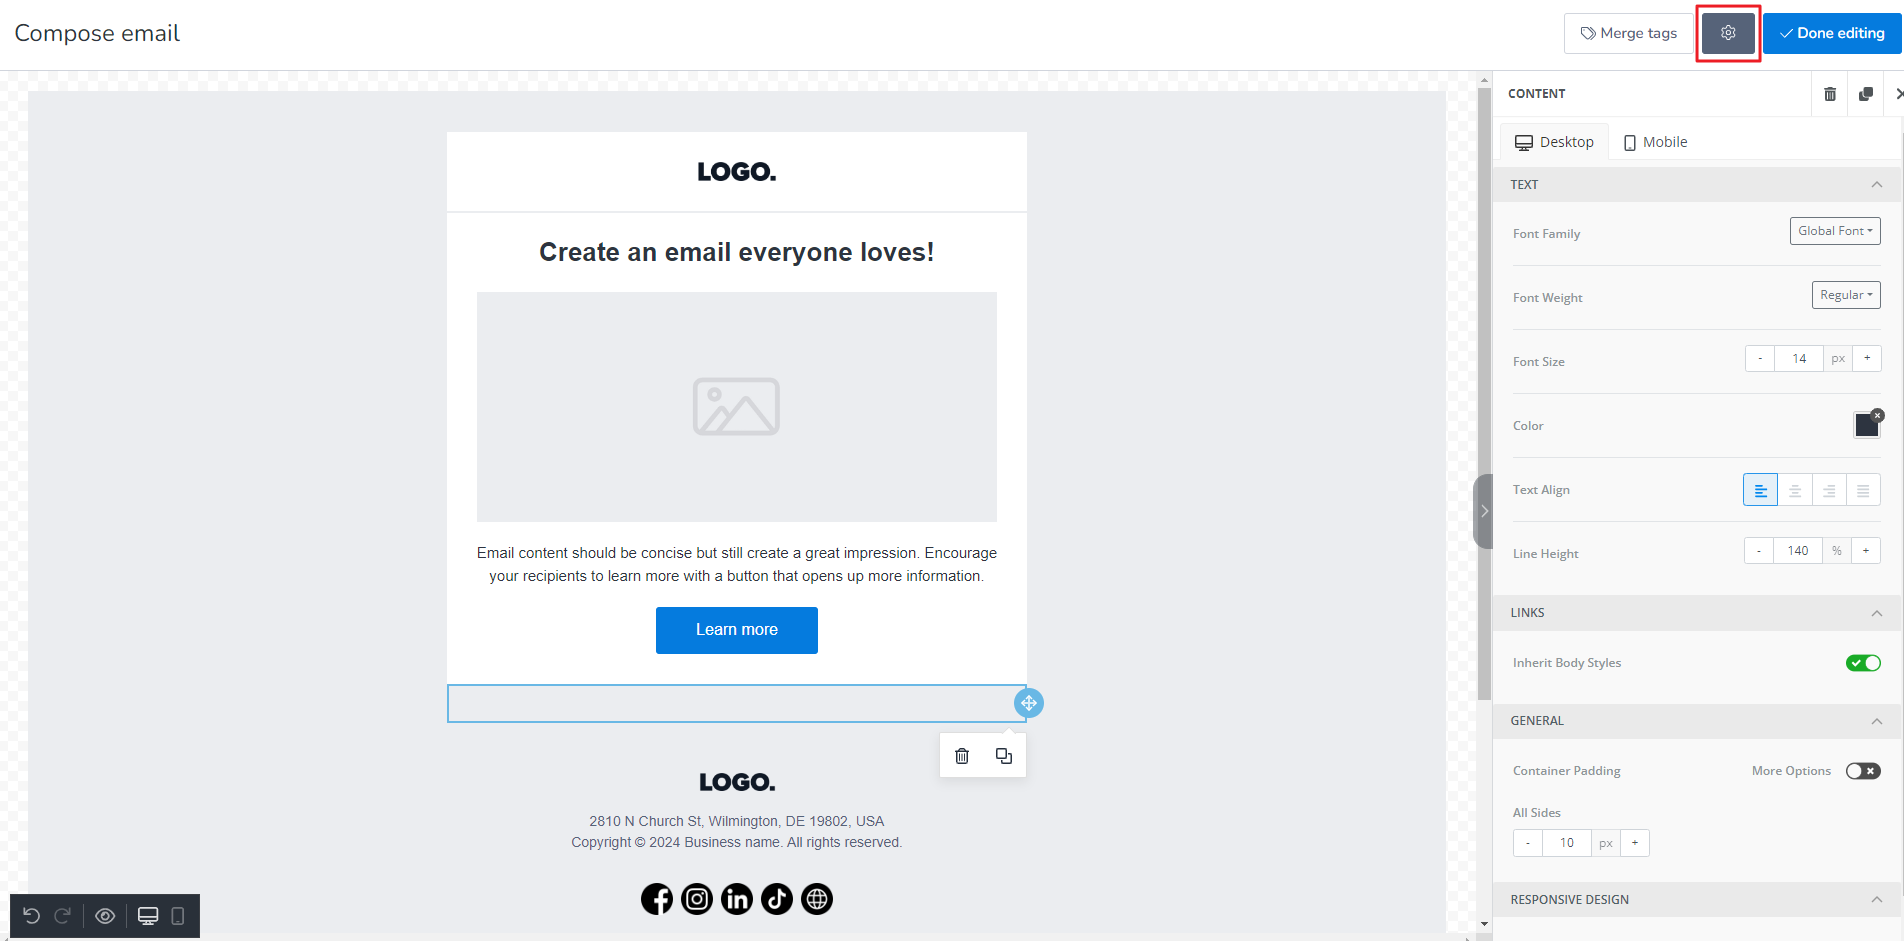
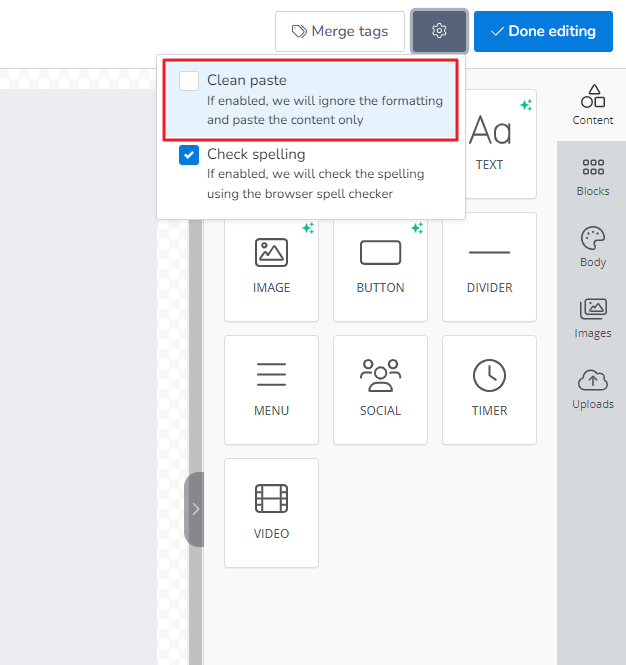
When you copy-paste any text in Drag and drop Editor, click this option on the top right corner as shown below.
Untick the checkbox Clean paste and wait for the editor to load again.
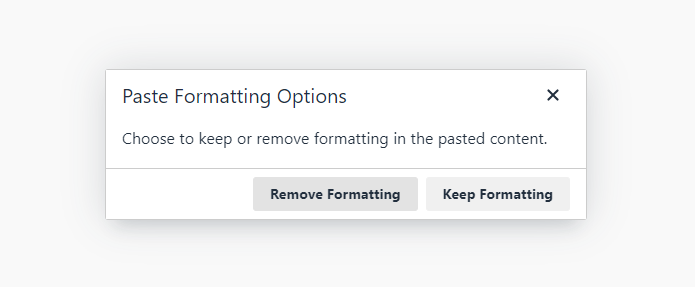
Now paste the text from the source and “Paste Formatting Options” will pop up. You will see these two conditions:
1. If you select “Remove Formatting,” then only the basic structure of the text will be pasted, but the change will not work properly.
2. If you select “Keep Formatting,” then the same design will be pasted, but the change might not work properly.
Solution No.2:
When you paste using Ctrl+Shift+v (for Windows) and Cmd+Shift+v (for Mac), you will not get any formatting options. However, only text will appear. In this case, the change will work properly.
By applying these steps, your text looks broken in campaign issue will be resolved, and your campaign content will appear as intended.
If you want to use UTM for tracking in MailBluster using Google Analytics, you have to use the Query String option available in MailBluster campaign. You can optionally add query string to all of the links of your campaign body as well just before sending a campaign.
Before setting up query string, you need to first set up Google Analytics on your website.
You can follow this guide on how to setup Google Analytics.
Then you need to add UTM tracking in your MailBluster campaign.
Please note: there is no default UTM tracking in MailBluster.
Copy the URL with UTM tracking codes and use it in your specified campaign item, for example, Query string. This can be done by adding UTM to your campaign’s query string. You need to go to Brand > Campaigns > Send new > Query string, as shown in the screenshot below:
Finally, use the UTM for tracking using this guide.
Remember, always test your campaign links with UTMs before sending to ensure they work correctly and track properly in Google Analytics.
If the number of leads exceed your email sending limit of your SMTP provider (and MailBluster if you are under the Starter plan), your campaign will not proceed further. The campaign will show Failed. You should keep an eye on your daily sending limit from MailBluster Dashboard before you try to send any email campaigns from MailBluster.
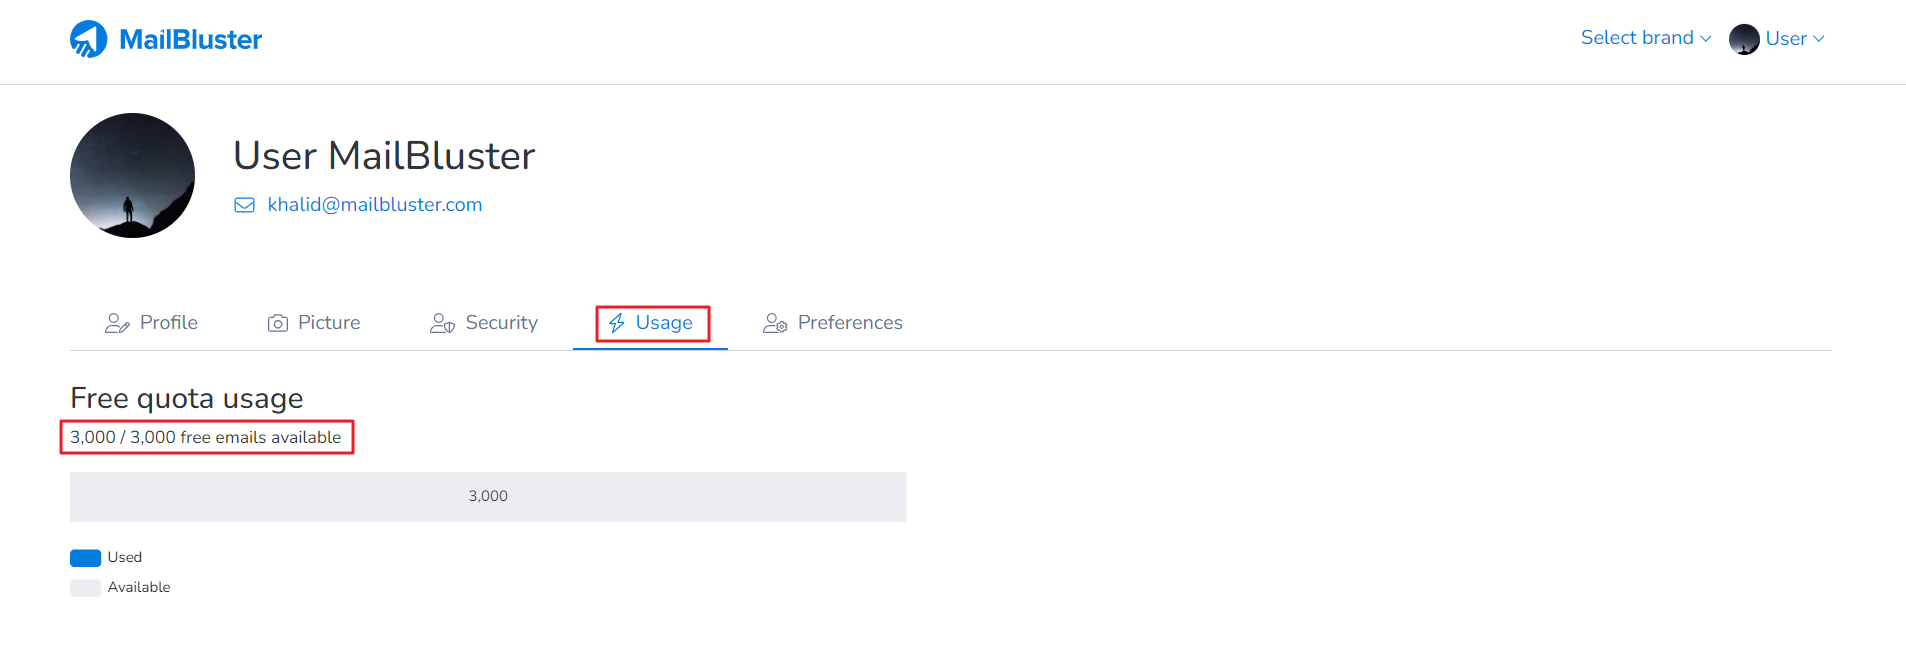
Under Usage, you can see your Free quota usage from Username>My Account. The free quota: 3000 emails are only applicable for a MailBluster account not individual Brand.
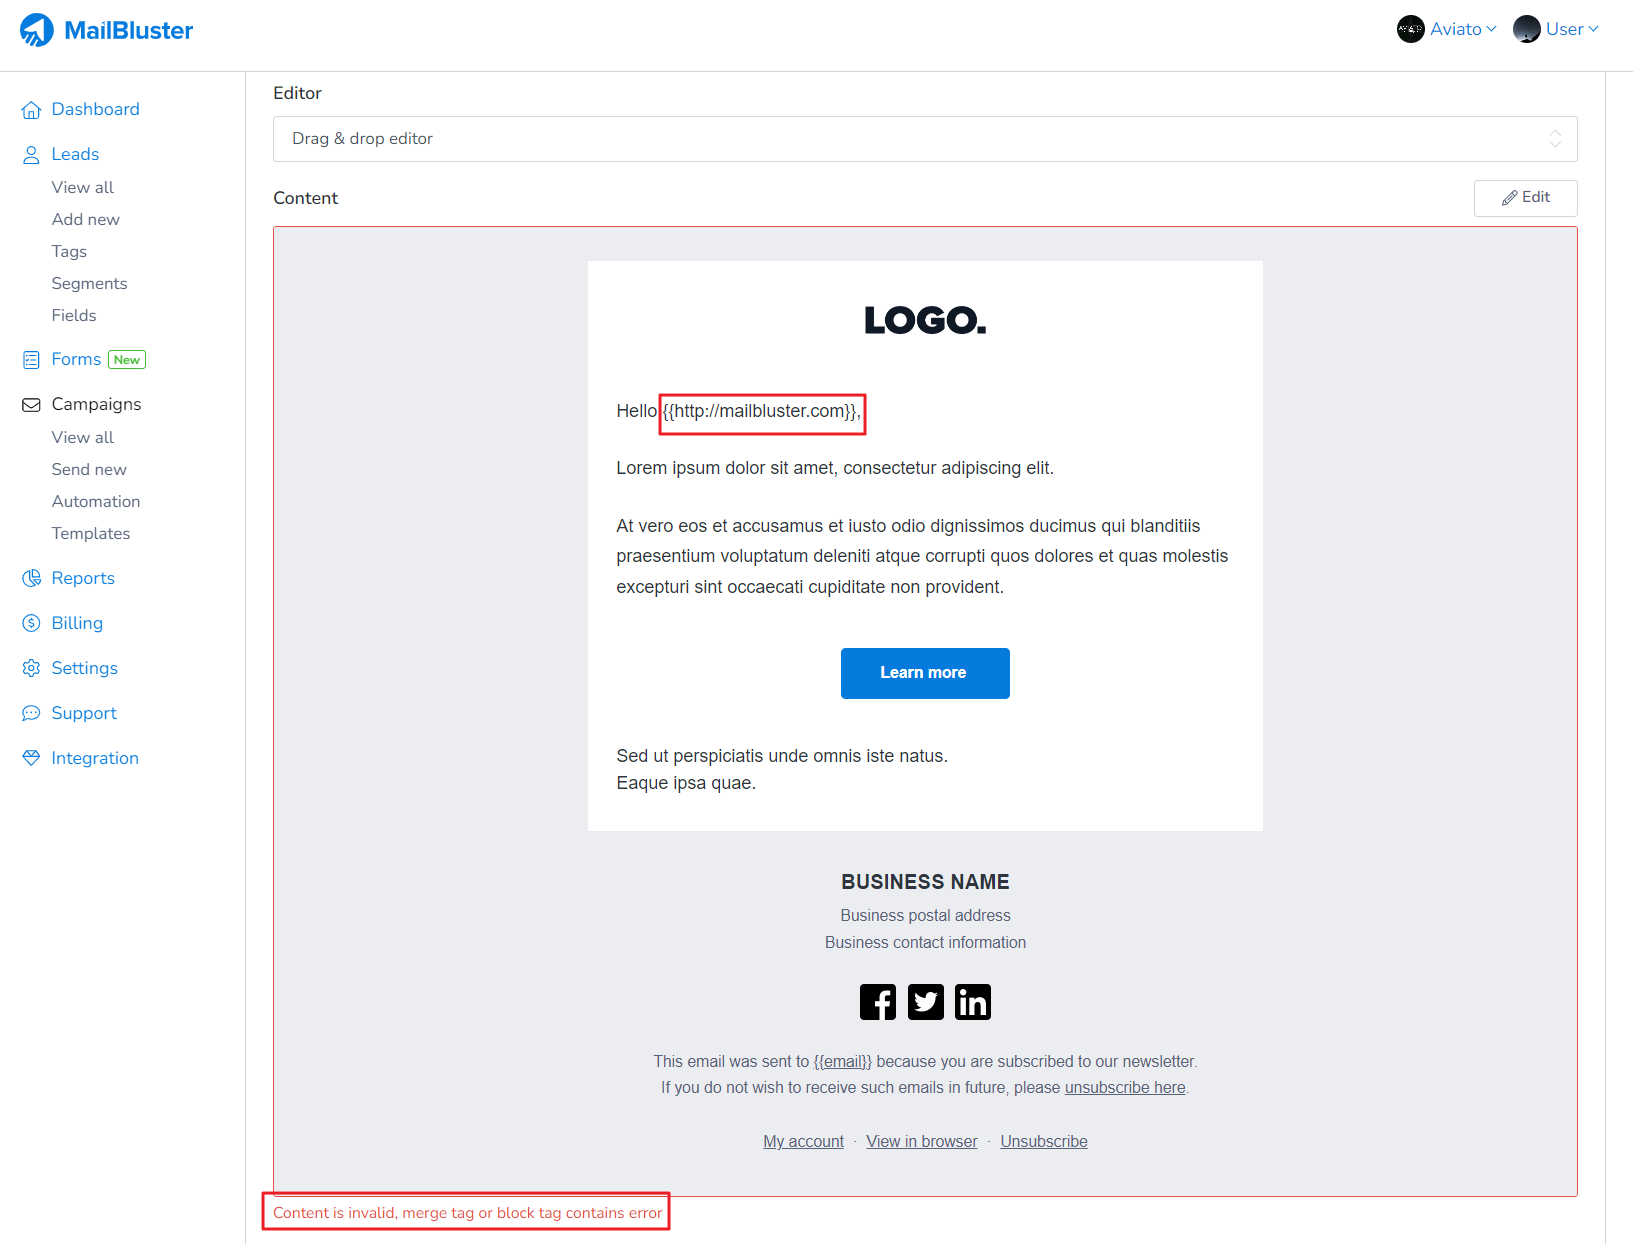
If you encounter the error message “Content is invalid, merge tag or block tag contains error”, it usually happens when merge tags are used incorrectly. For example, if you copy and paste any links in like this {{http://www.URL.com}} then you will get this error message:
The correct way to set the merge tag is this: {{tag_name}}
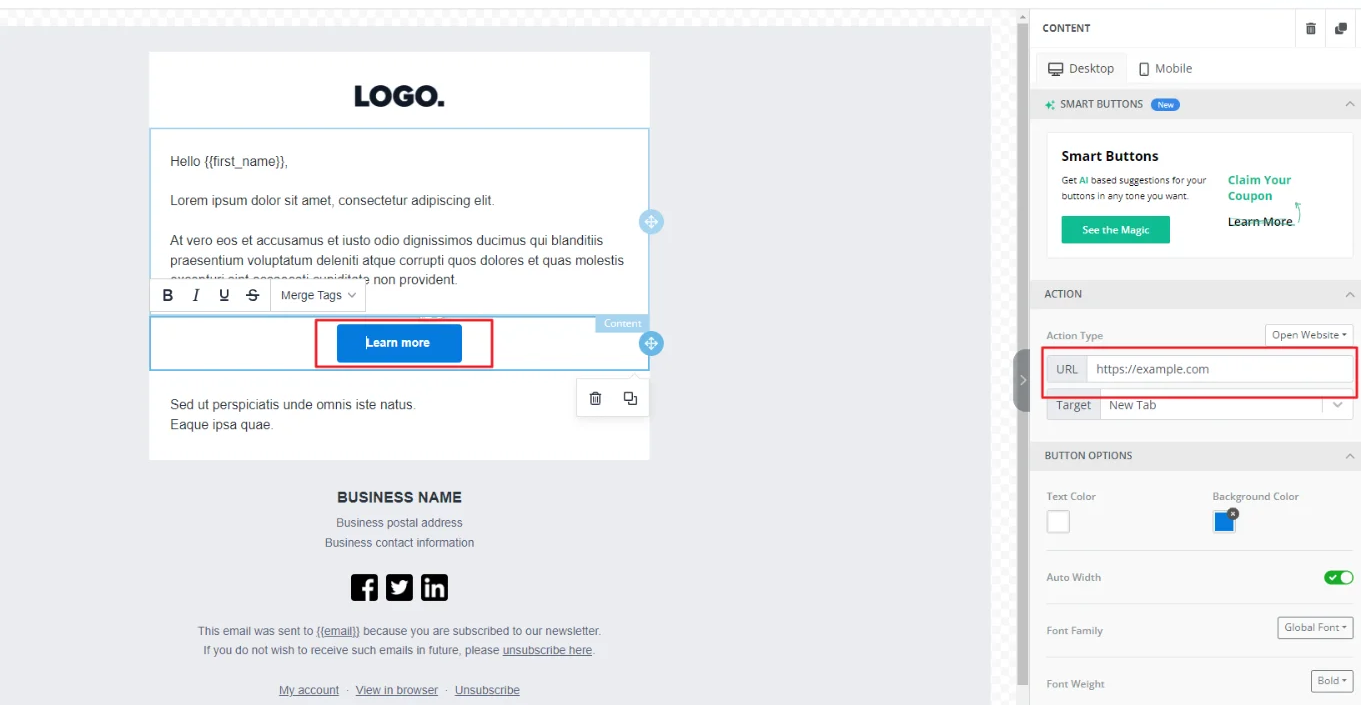
You can try this method if you want to include links in your campaign without the merge tags:
Please Note: Using the wrong merge tag will trigger this error: “Content is invalid, merge tag or block tag contains error.“
By following this method, you’ll avoid the merge tag or block tag contains error issue and ensure your campaign content works correctly.
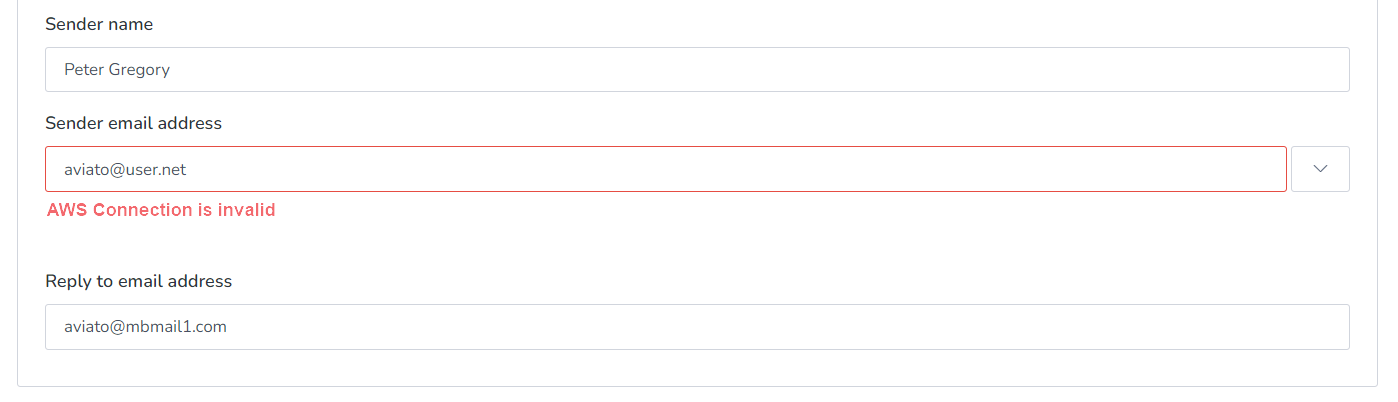
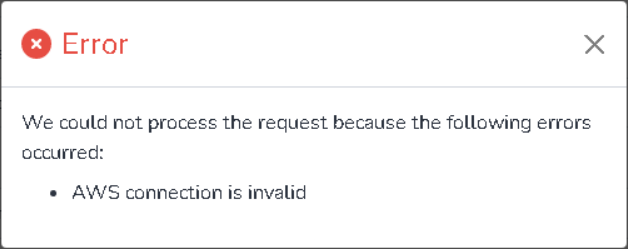
If you see the error message “AWS connection is invalid” under the Sender Email Address,
Or this one:
it means your AWS account has not been properly verified or connected with MailBluster. You need to verify your Sender Email Address in AWS (by signing in to AWS console) by following this guide: Verify Sender Domain
Once verified, you can generate AWS credentials like Access key and Secret access key and set your subscriber’s region in AWS. Then connect the AWS account with MailBluster using the following guide: https://app.mailbluster.com/pages/aws-setup-guide.
Short preheader text automatically populates in email campaigns if it is too short. Preheader text is essential for every email, and email systems rely on it to display a preview in the inbox. You must set a preheader text greater than 30 characters long. This is because preheader text is inevitable for any type of email. If you do not set a custom preheader or provide one too short to meet the 30-character minimum, email systems will start populating the preheader with email content. To avoid that happening, you should always set a preheader of at least 30 characters. For mobile devices, aim closer to the 55-character maximum. This ensures your preheader displays fully and gives recipients a clear idea of your email content. Properly set preheaders improve engagement, make emails look professional, and prevent email systems from populating them automatically.
By following these guidelines, you can prevent the issue where short preheader text automatically populates and maintain full control over your email campaign previews.
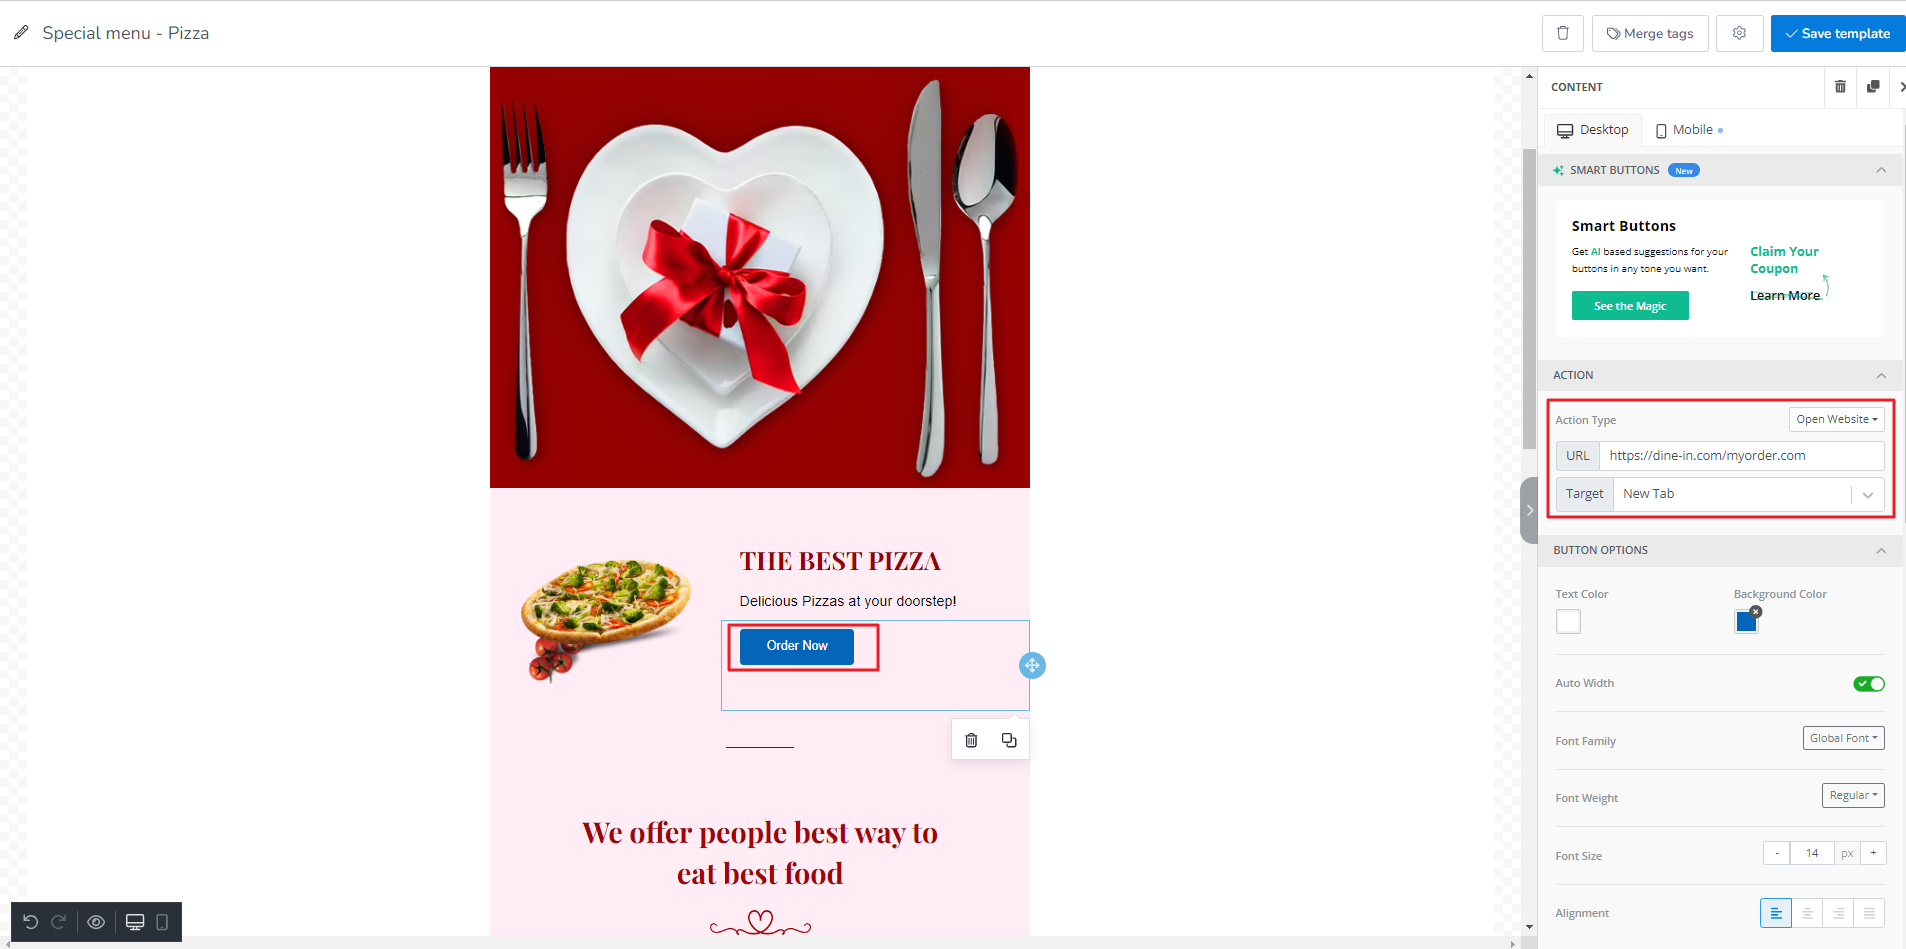
If your CTA button URL is showing 404 error during test emails, the link is broken, misconfigured, or redirected incorrectly. This issue causes a poor user experience and lowers email campaign performance.
To fix this first, you need to sign in to your AWS account. Then, navigate to Amazon SES (You selected region) > Configuration sets > mailbluster-30375 (this can be any random number) in your AWS account. On this page, click the Edit button under Overview tab General details section. On the edit page, disable/remove Custom redirect domain and save changes.
By addressing these steps, you can stop the CTA button URL showing 404 error and make sure your subscribers reach the right page every time.
If you want to use a default merge tag in your email campaign because some recipients don’t have values such as First Name, Last Name, or Full Name in their records, you can set a default value instead.. The Default value can be inserted like this in your email campaign: {{ first_name or “default value” }}
Here is a real example: {{ first_name or “Hello!” }}
Here we have mentioned the value inside the double quote.