You can easily schedule a campaign in MailBluster once your email design and settings are ready. Let’s assume that you’ve completed all of the prerequisite steps before sending email campaign from MailBluster and have already designed your email campaign and now, you are ready to send your campaign.
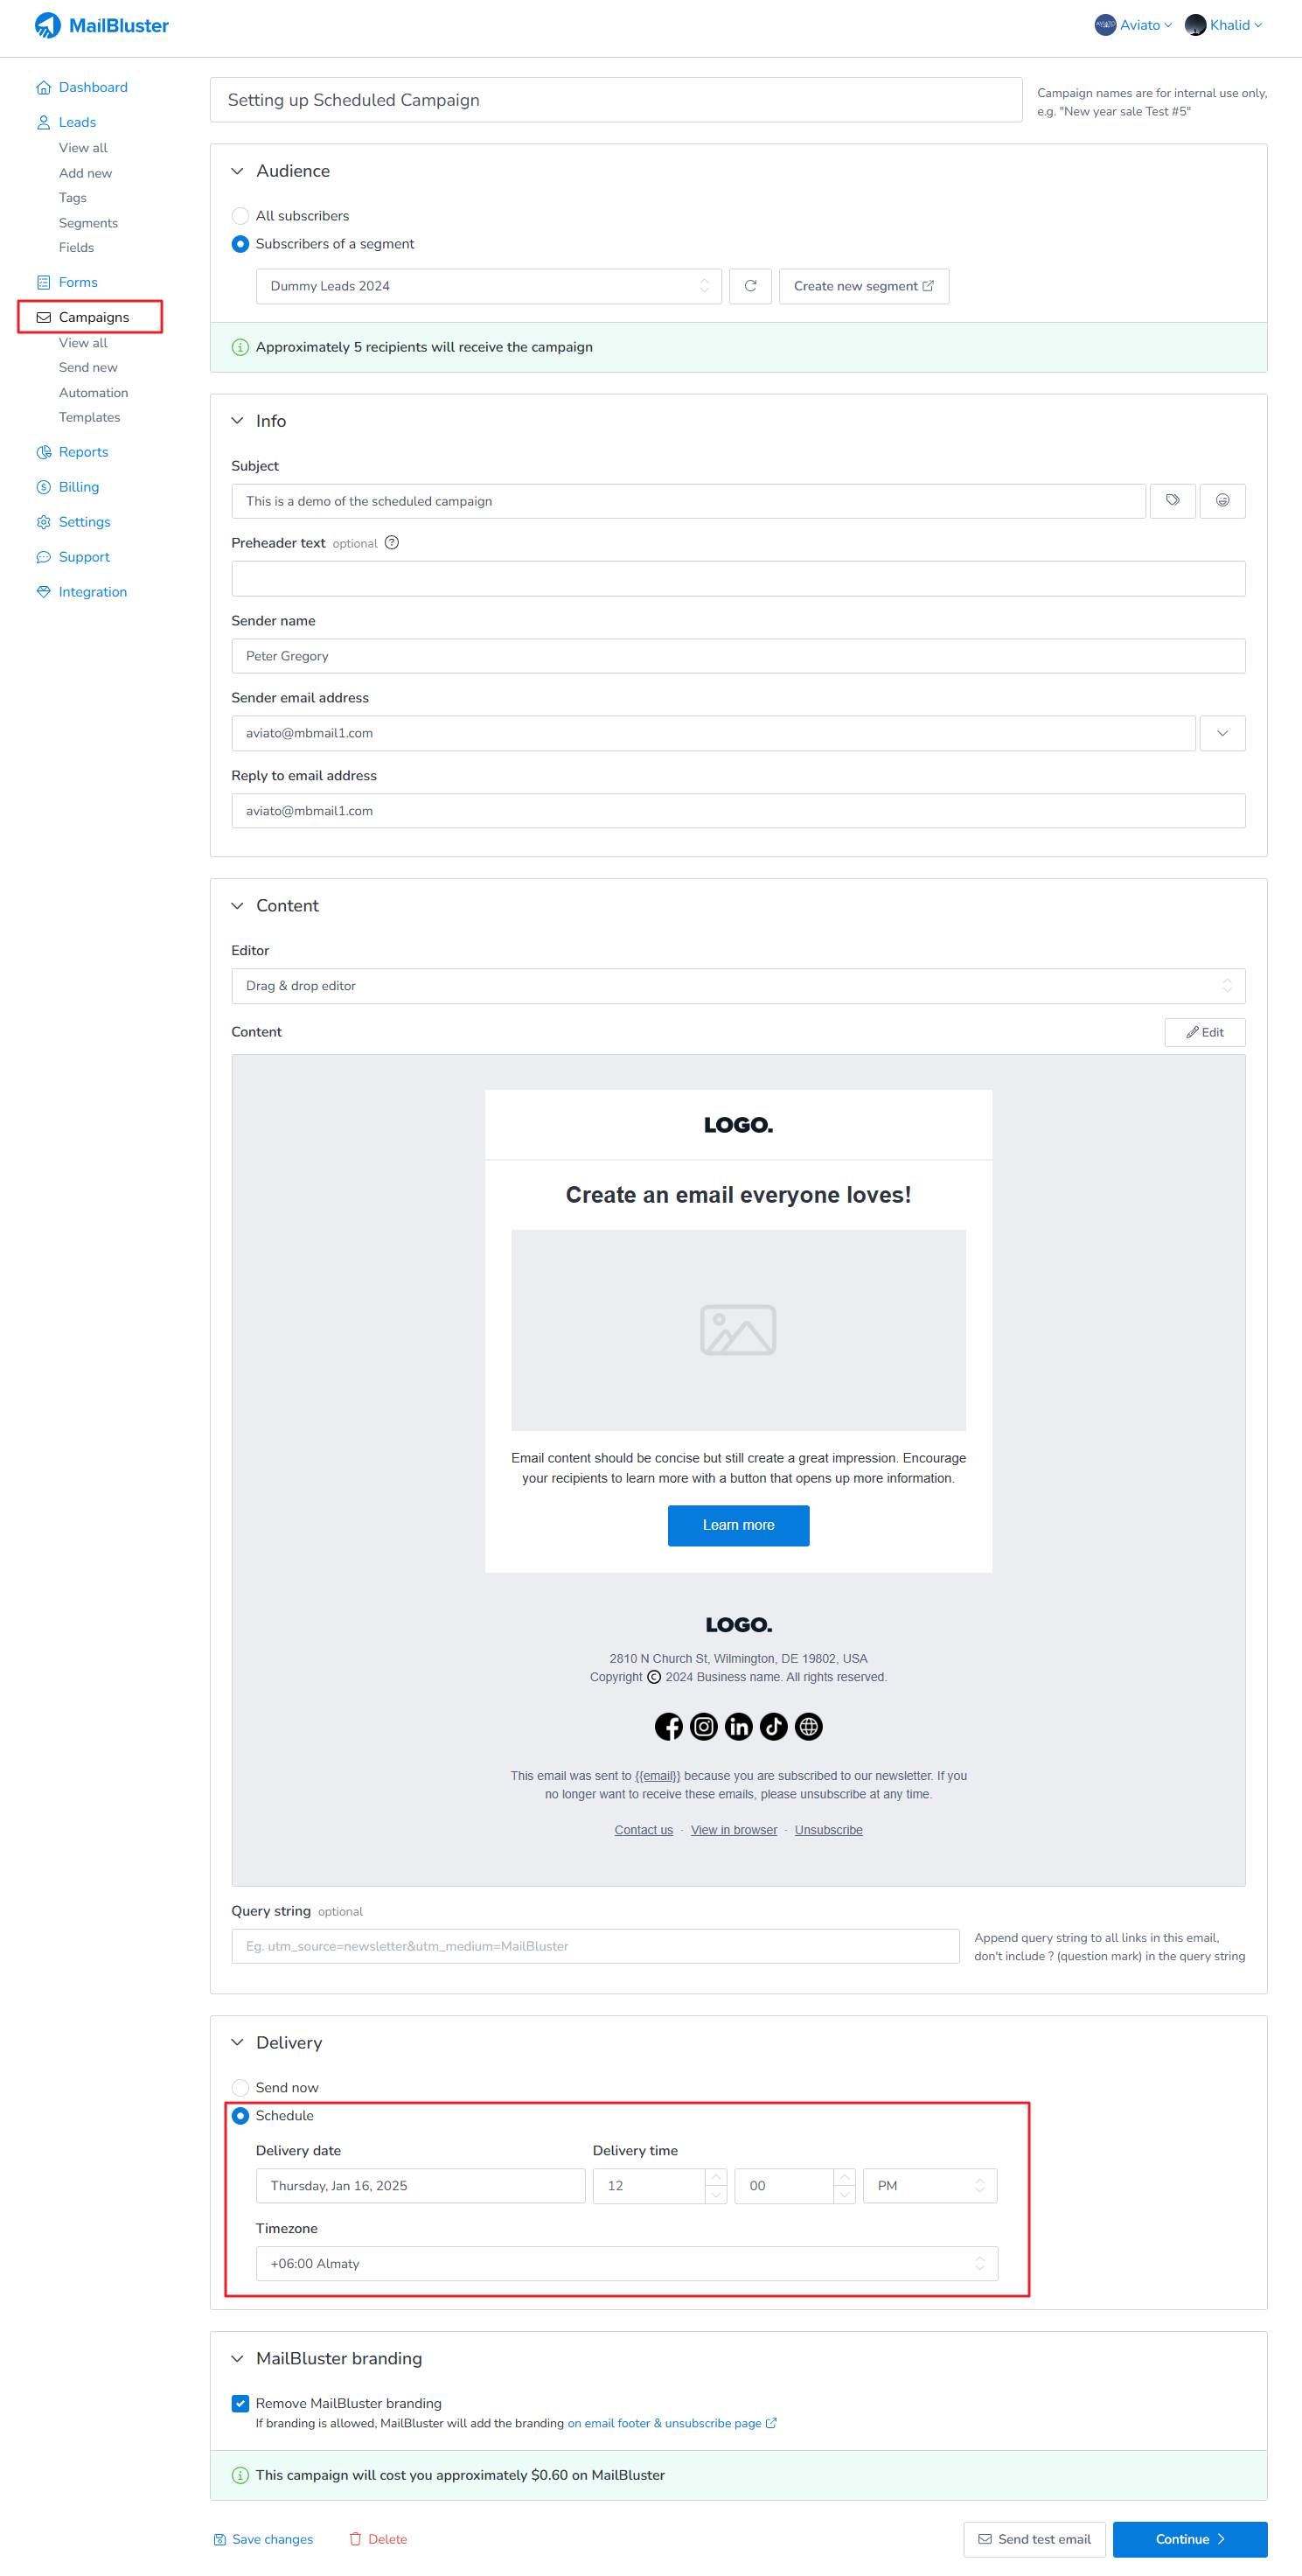
Now what you need to do is scroll down to the bottom of your campaign page and look for the Delivery section, where you need to select the Schedule option and enter your preferred Delivery date, Delivery time, and timezone. Then click Continue to proceed.

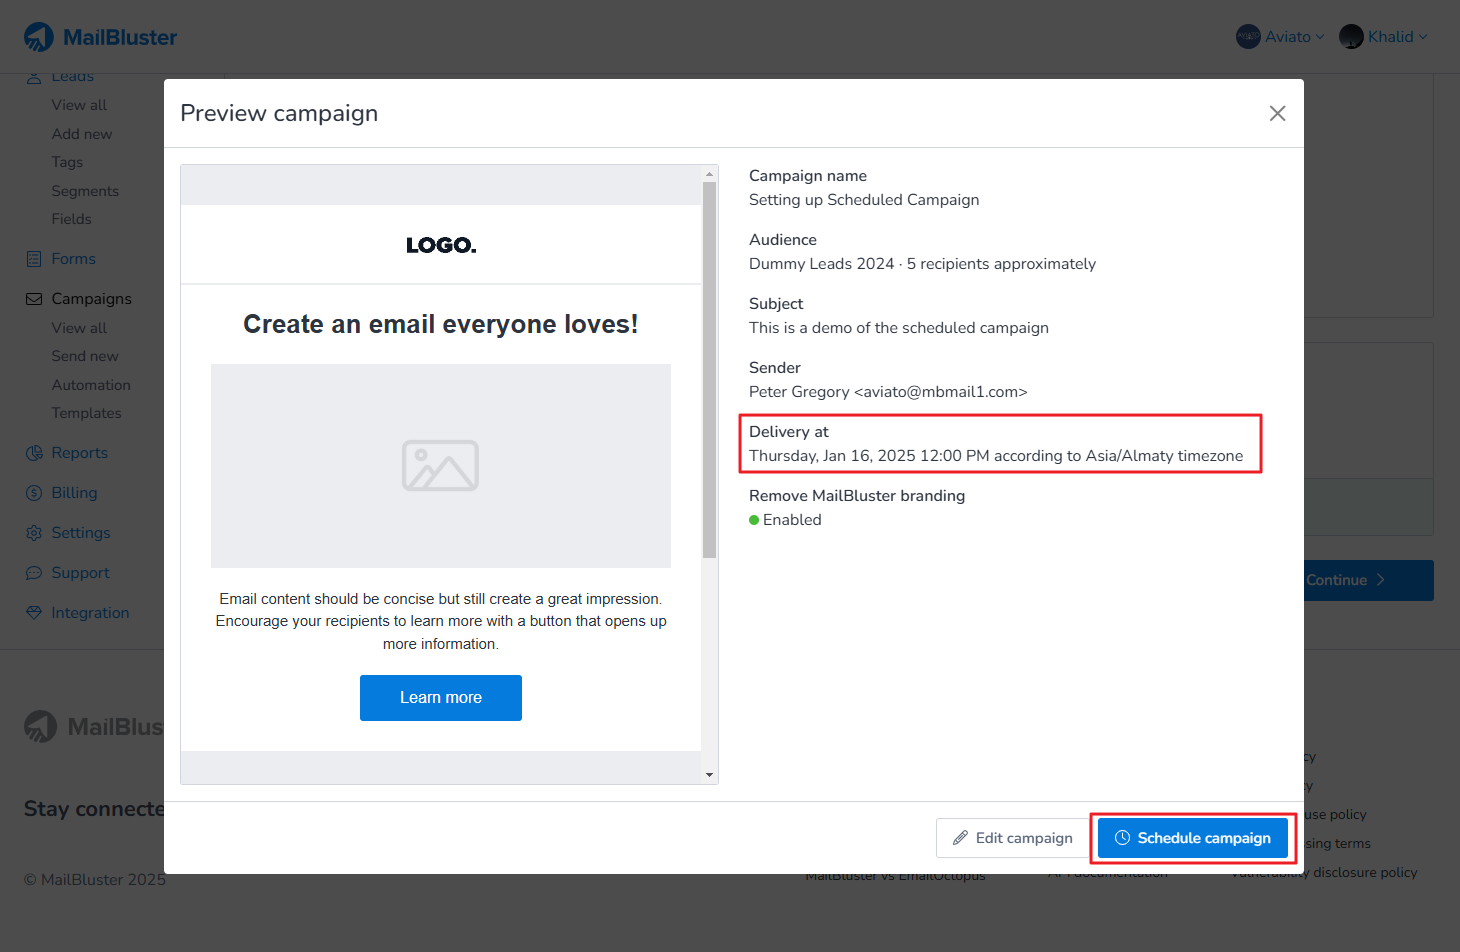
When the Preview Campaign window pops up, check the scheduled time under ‘Delivery At.’ After clicking ‘Schedule Campaign button,’ your campaign will be ready to send to the recipients at the specified time you set.

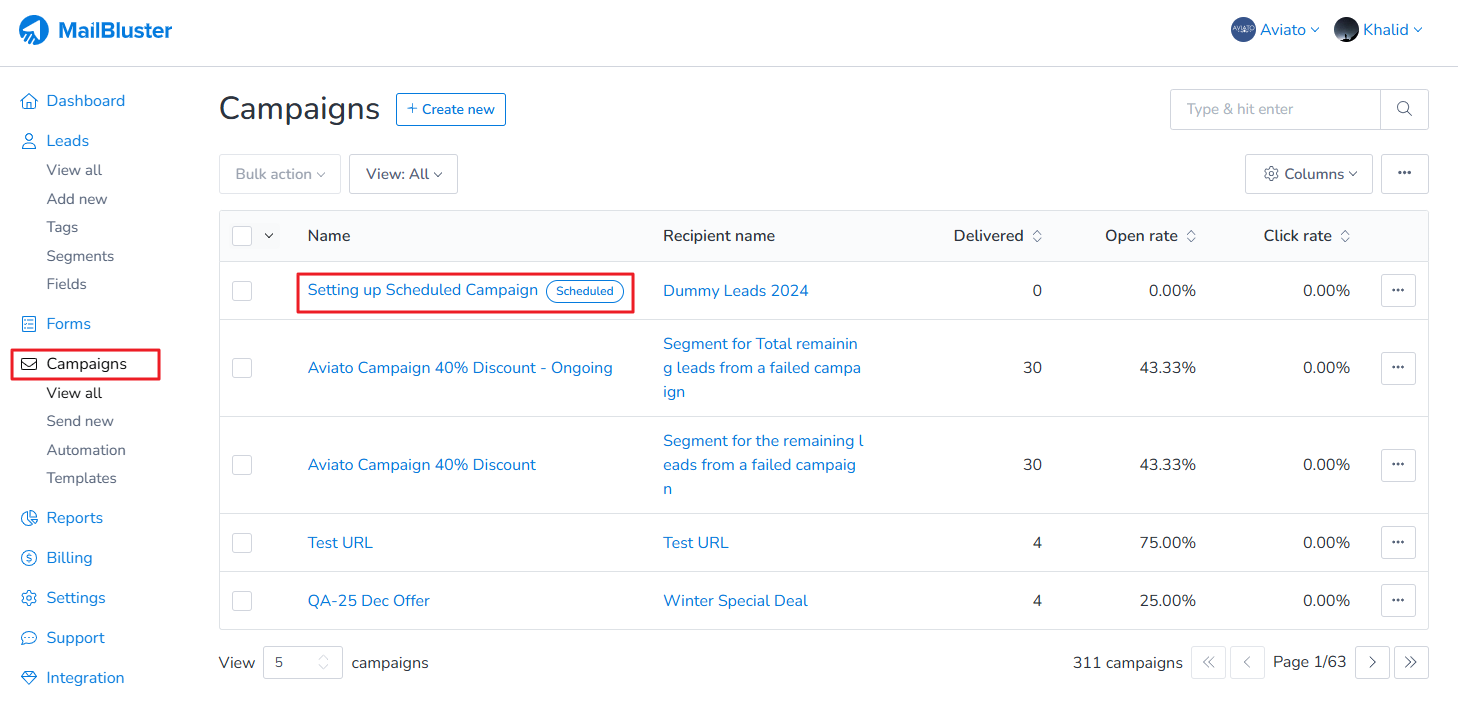
It will be marked as ‘Scheduled‘ in the Campaigns section as shown below.
