To set up Google Postmaster for your Sender Domain, you need to follow these steps.
Sign in to https://postmaster.google.com. Then click on Get Started.
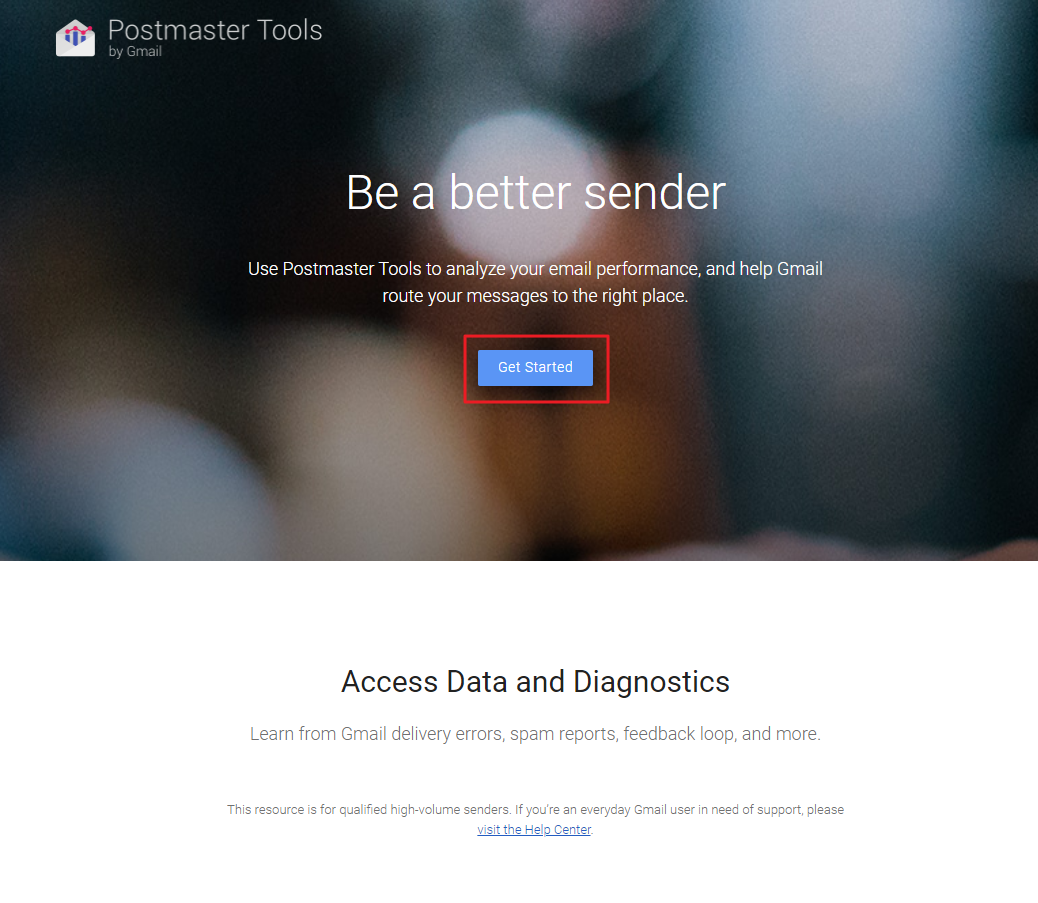
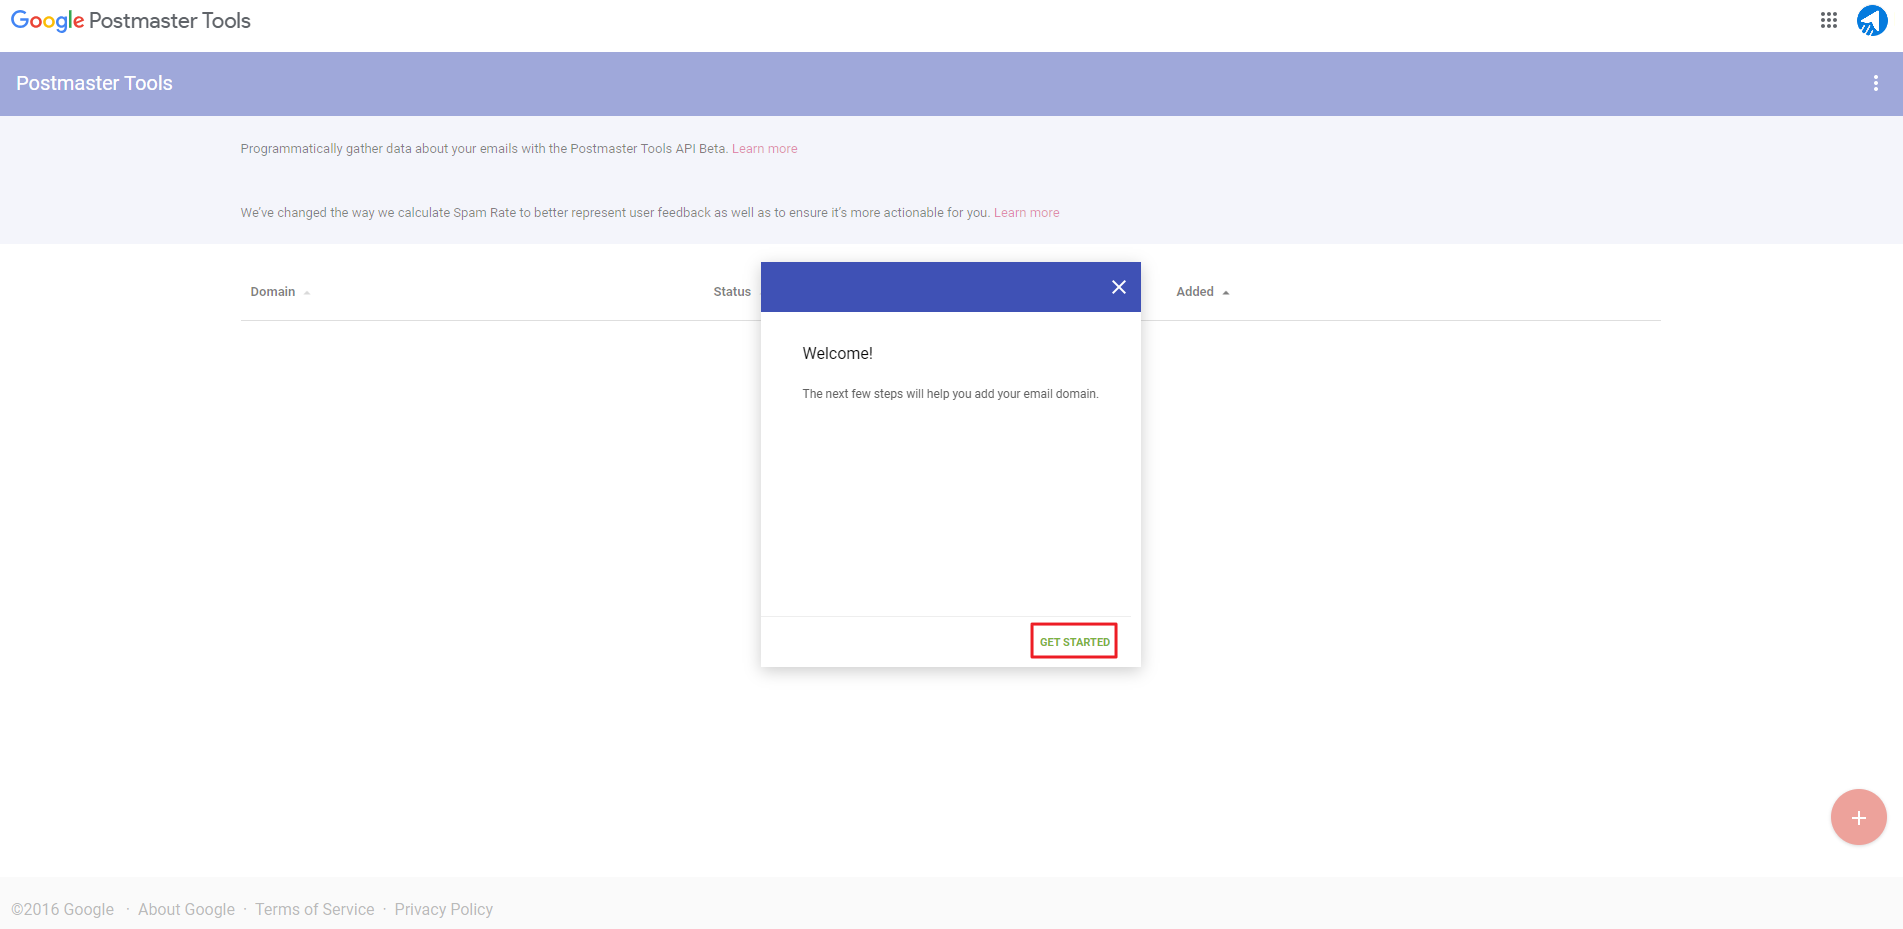
Click Get Started
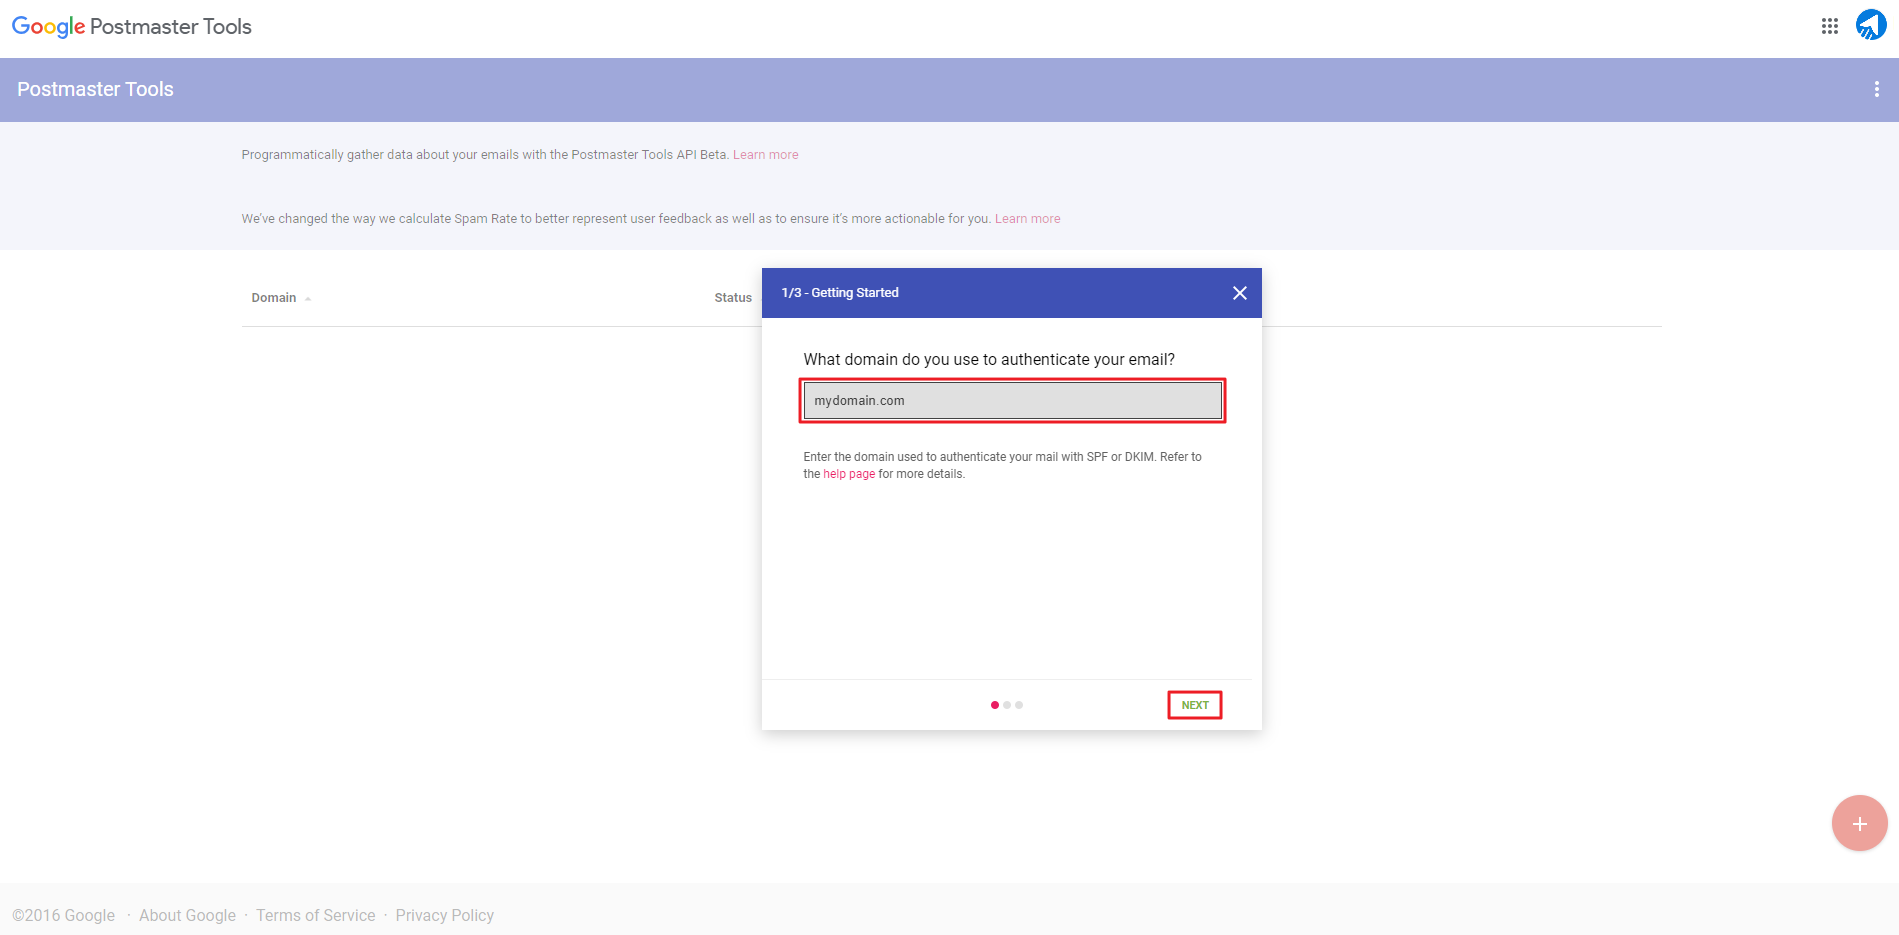
Enter your domain URL and then click Next
Copy TXT record from Google Postmaster and paste it in your DNS Management
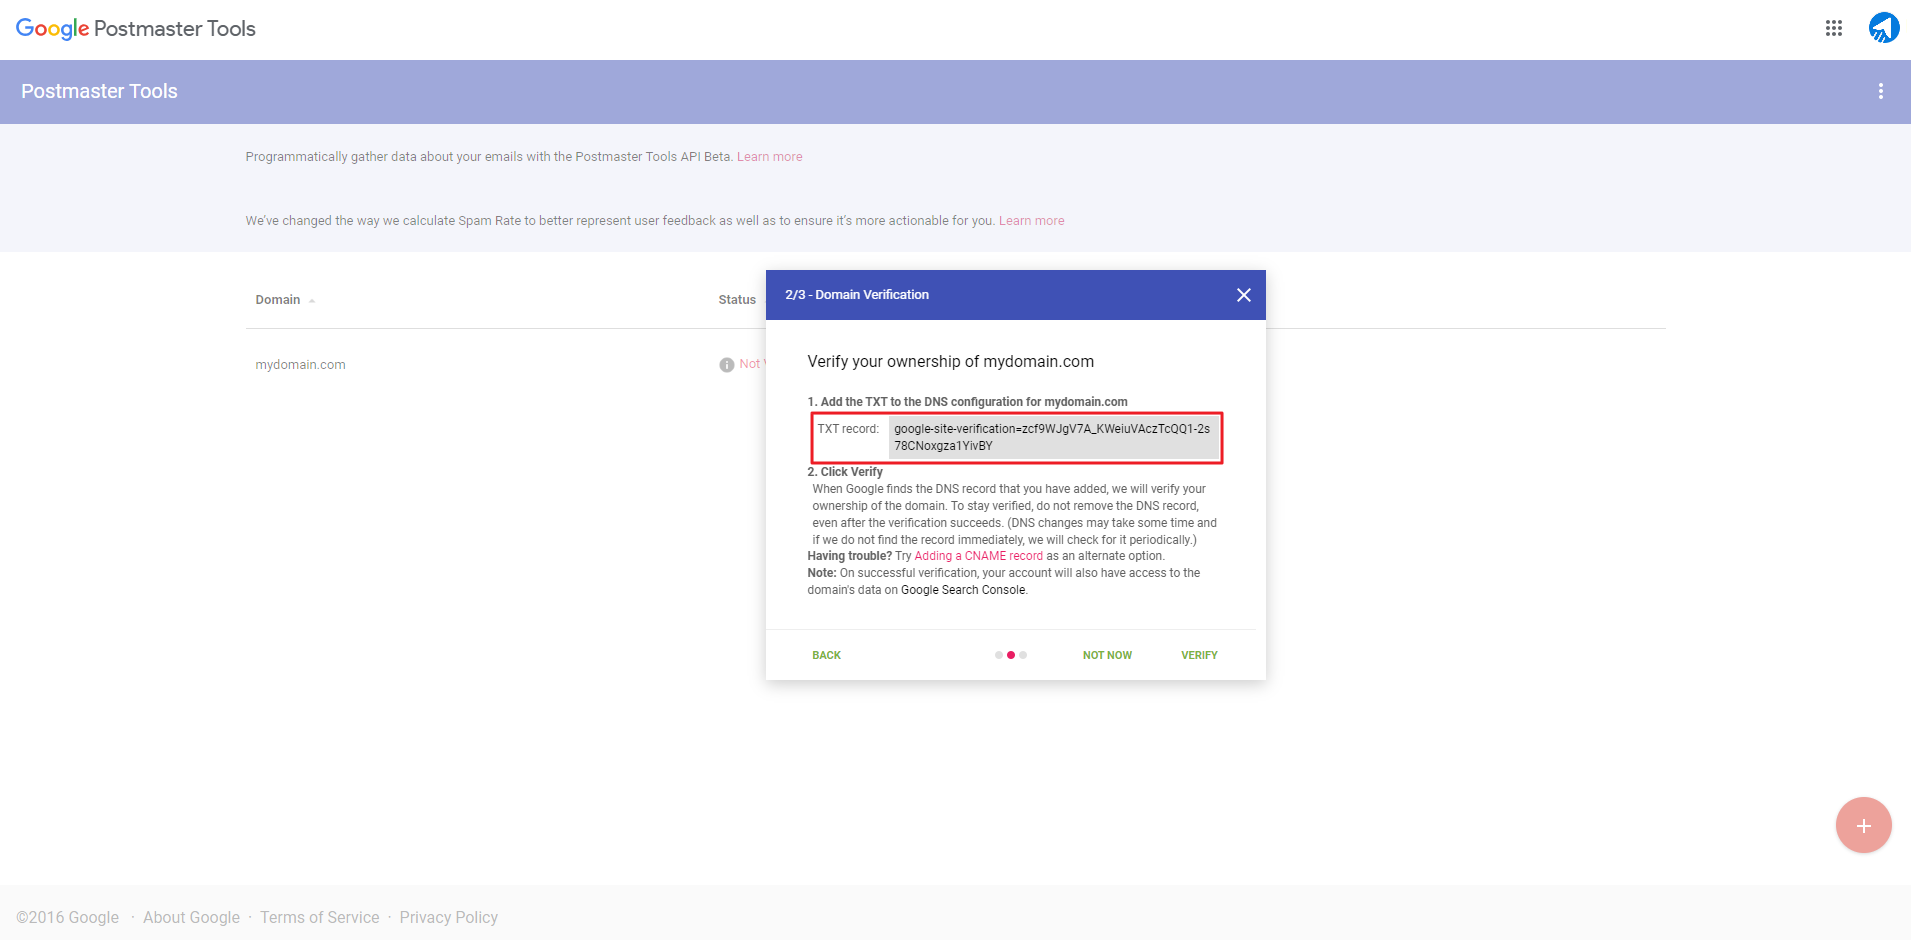
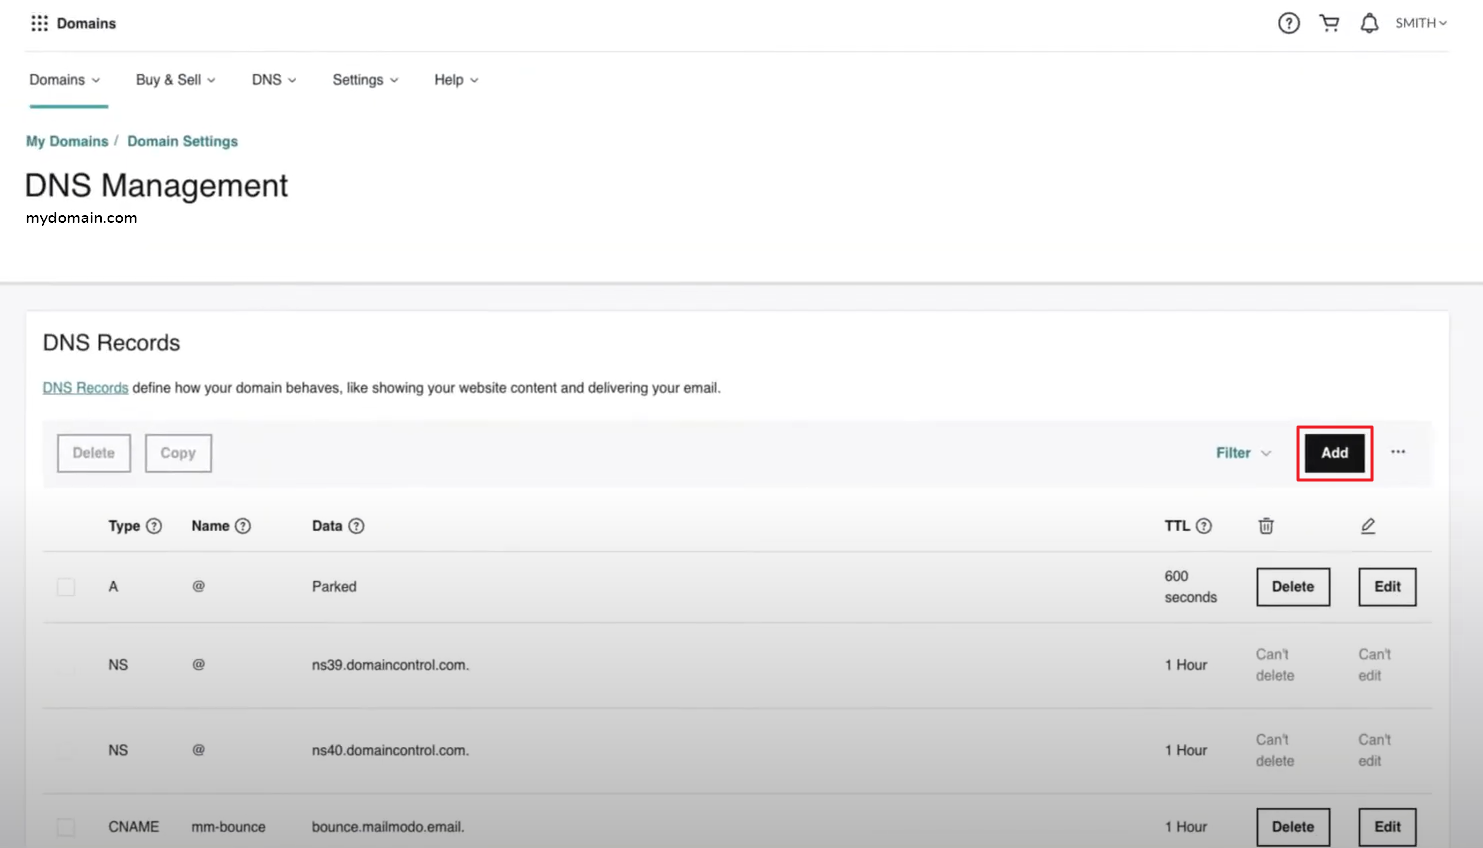
In your DNS Management, click Add
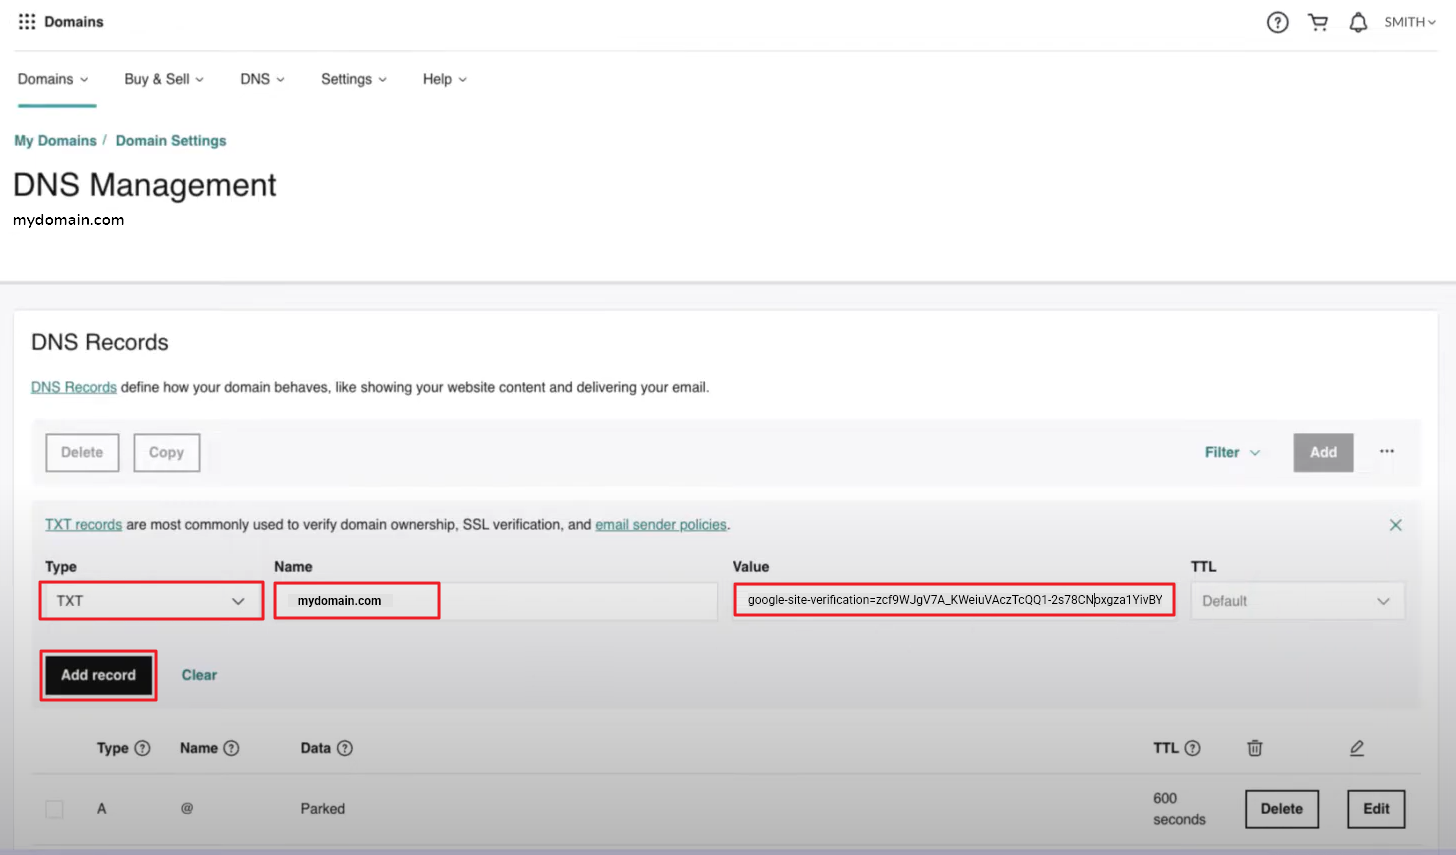
Select Type TXT, Name – yourdomain.com and Value – TXT Record from Google Postmaster. Then click Add record
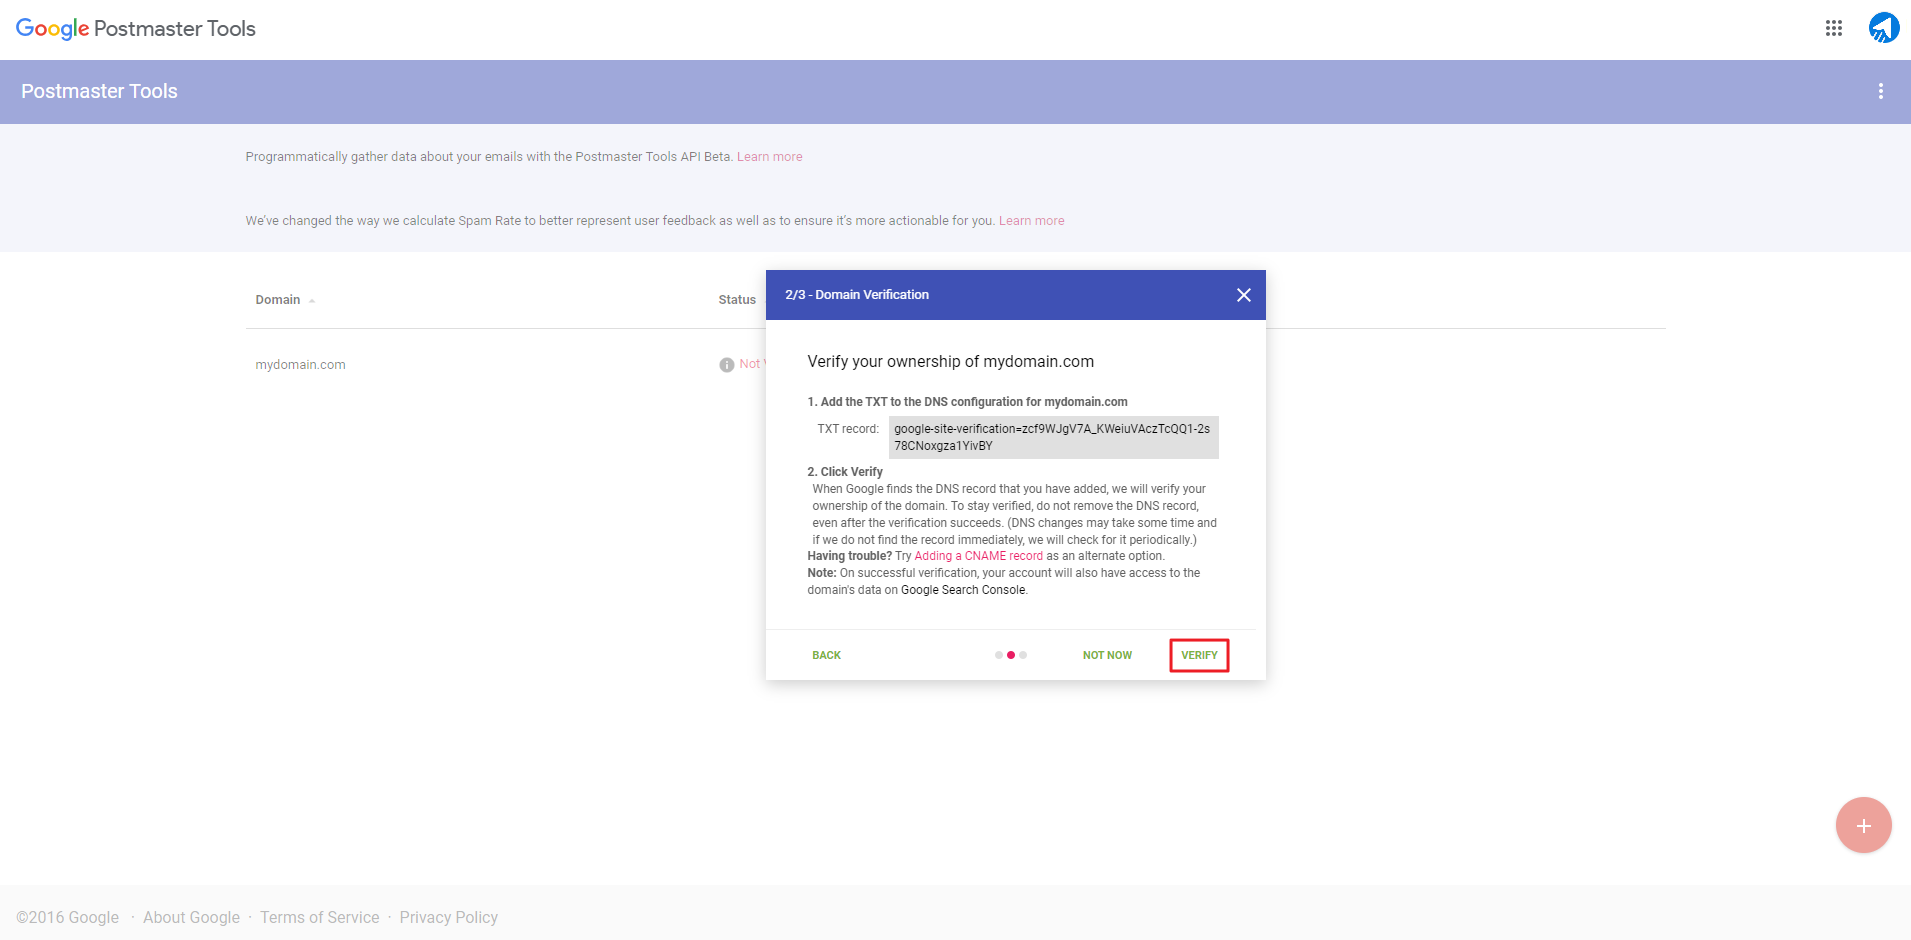
Once the domain record is added, go to Google Postmaster Tools and click Verify
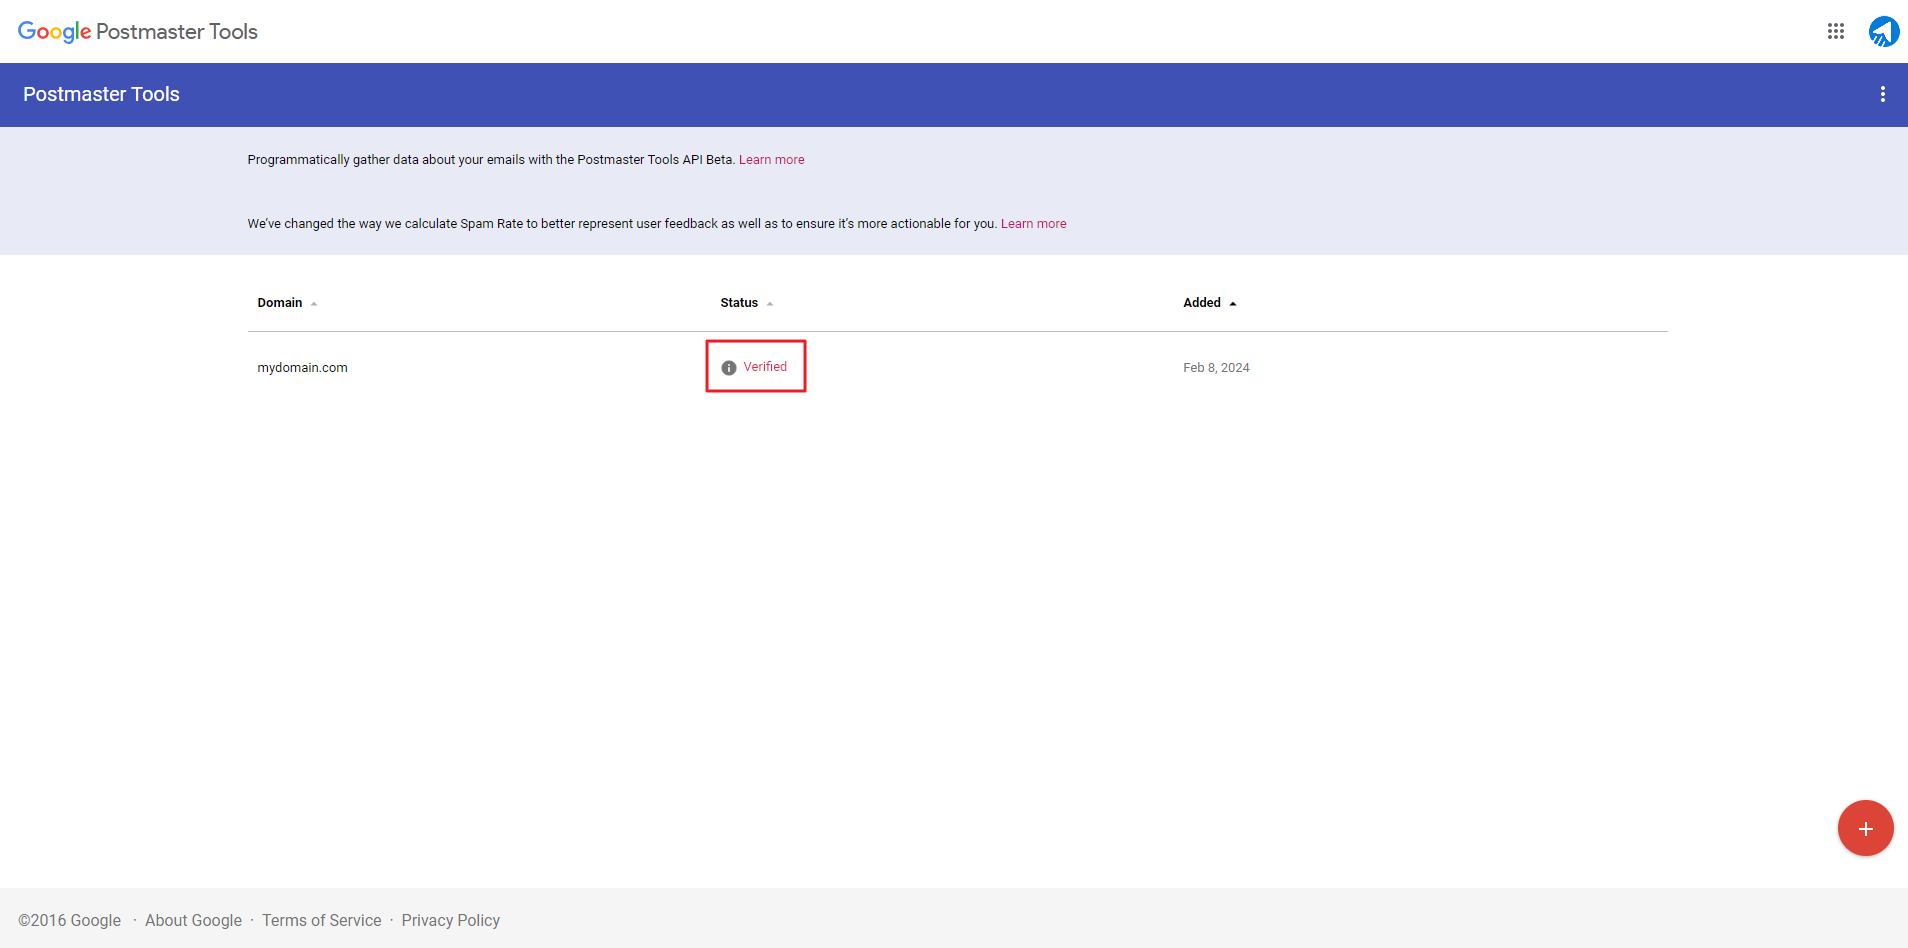
You will see the status as Verified in the Postmaster Tool
Now that the Google Postmaster Tools is configured, use it to measure your spam rate and overall health of your sender domain.