A Welcome Email in email marketing is the first message sent to new subscribers who have just signed up for a newsletter, service, or product. It’s a way to greet them, confirm their subscription, and often provide a warm introduction to your brand. Welcome emails usually thank the subscriber for joining to encourage further engagement.
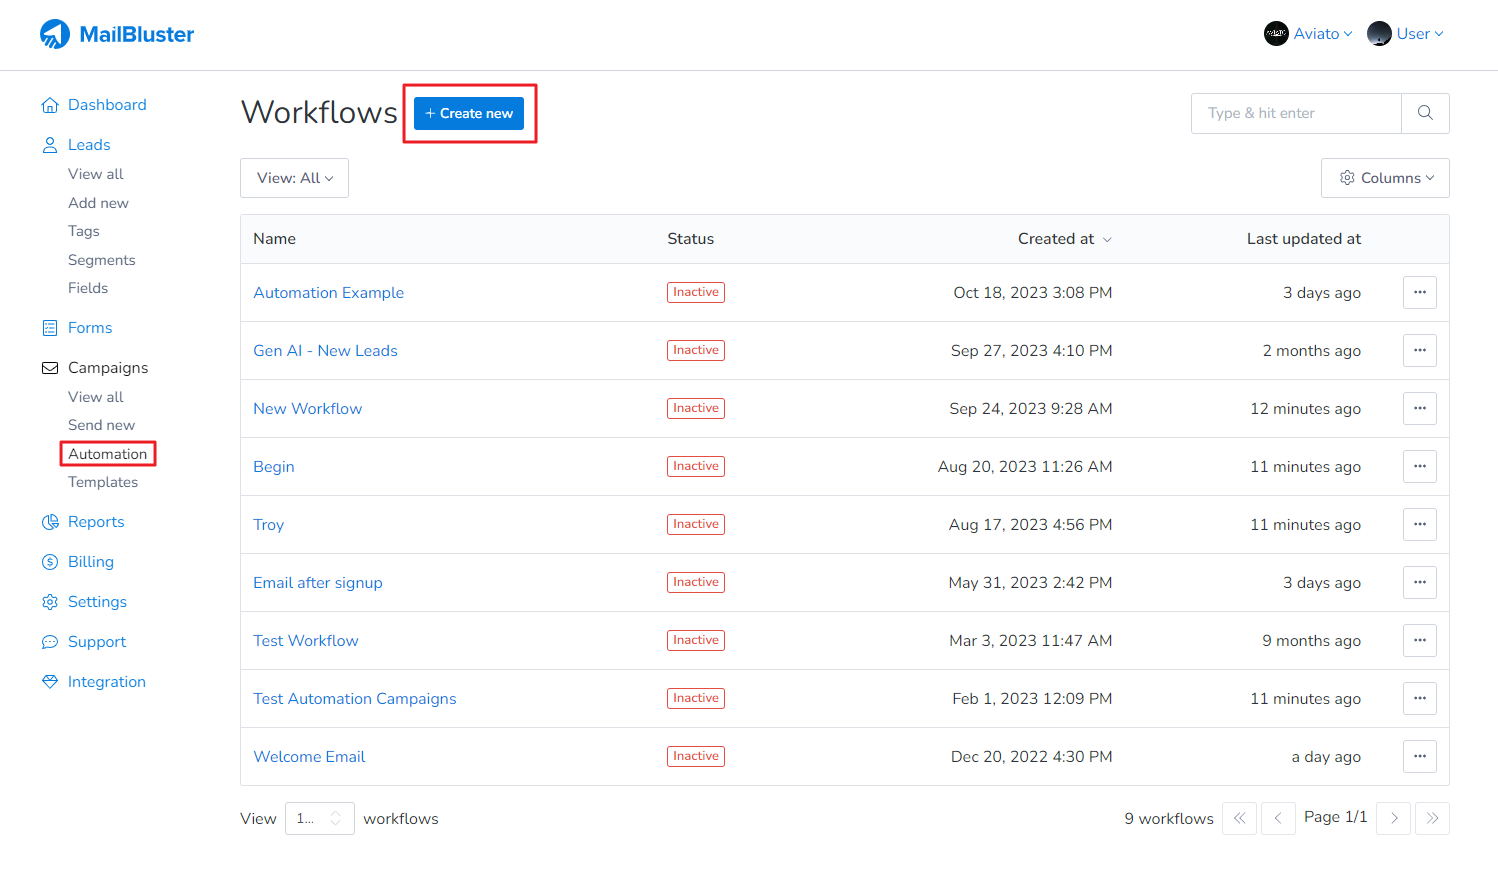
1. To send Welcome Email from MailBluster, first go to Automation under Campaigns. Click on Create new.
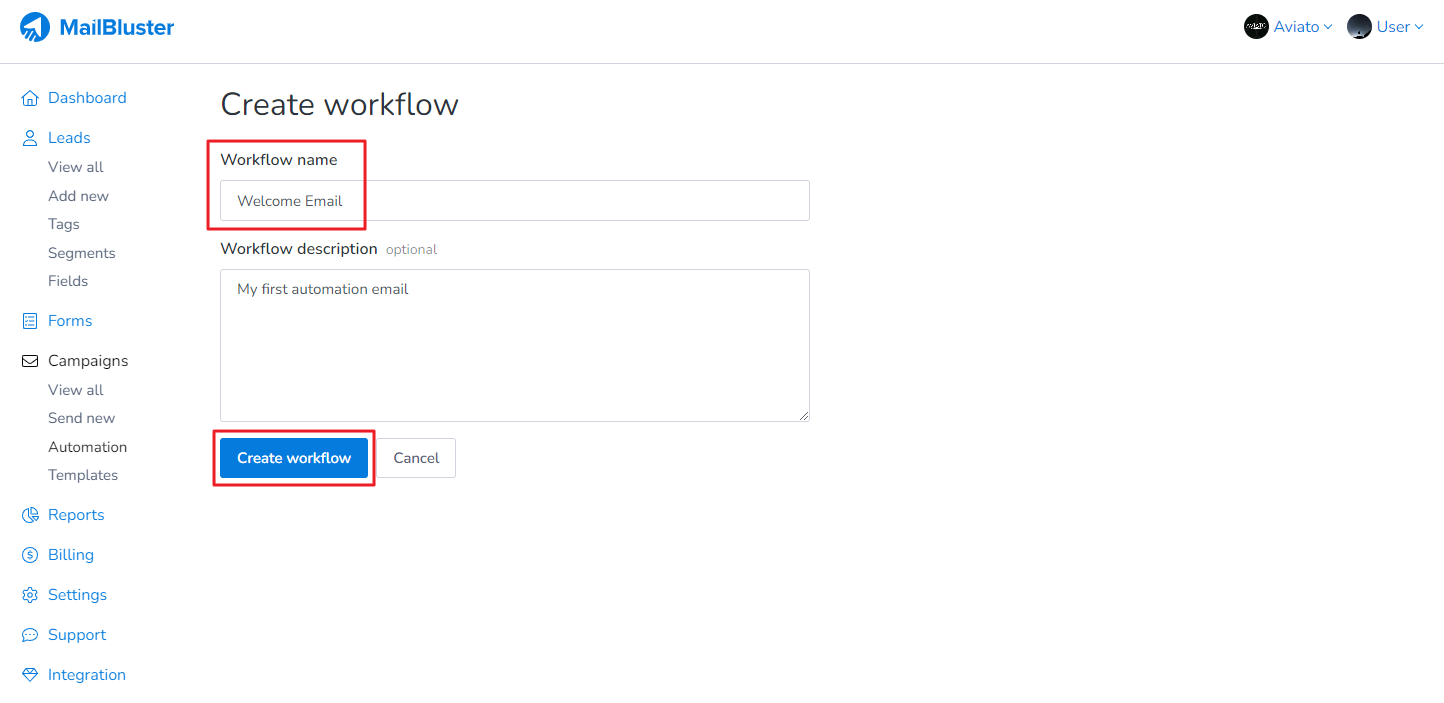
2. Create workflow opens. Enter the Workflow name and Workflow Description. Then click Create workflow.
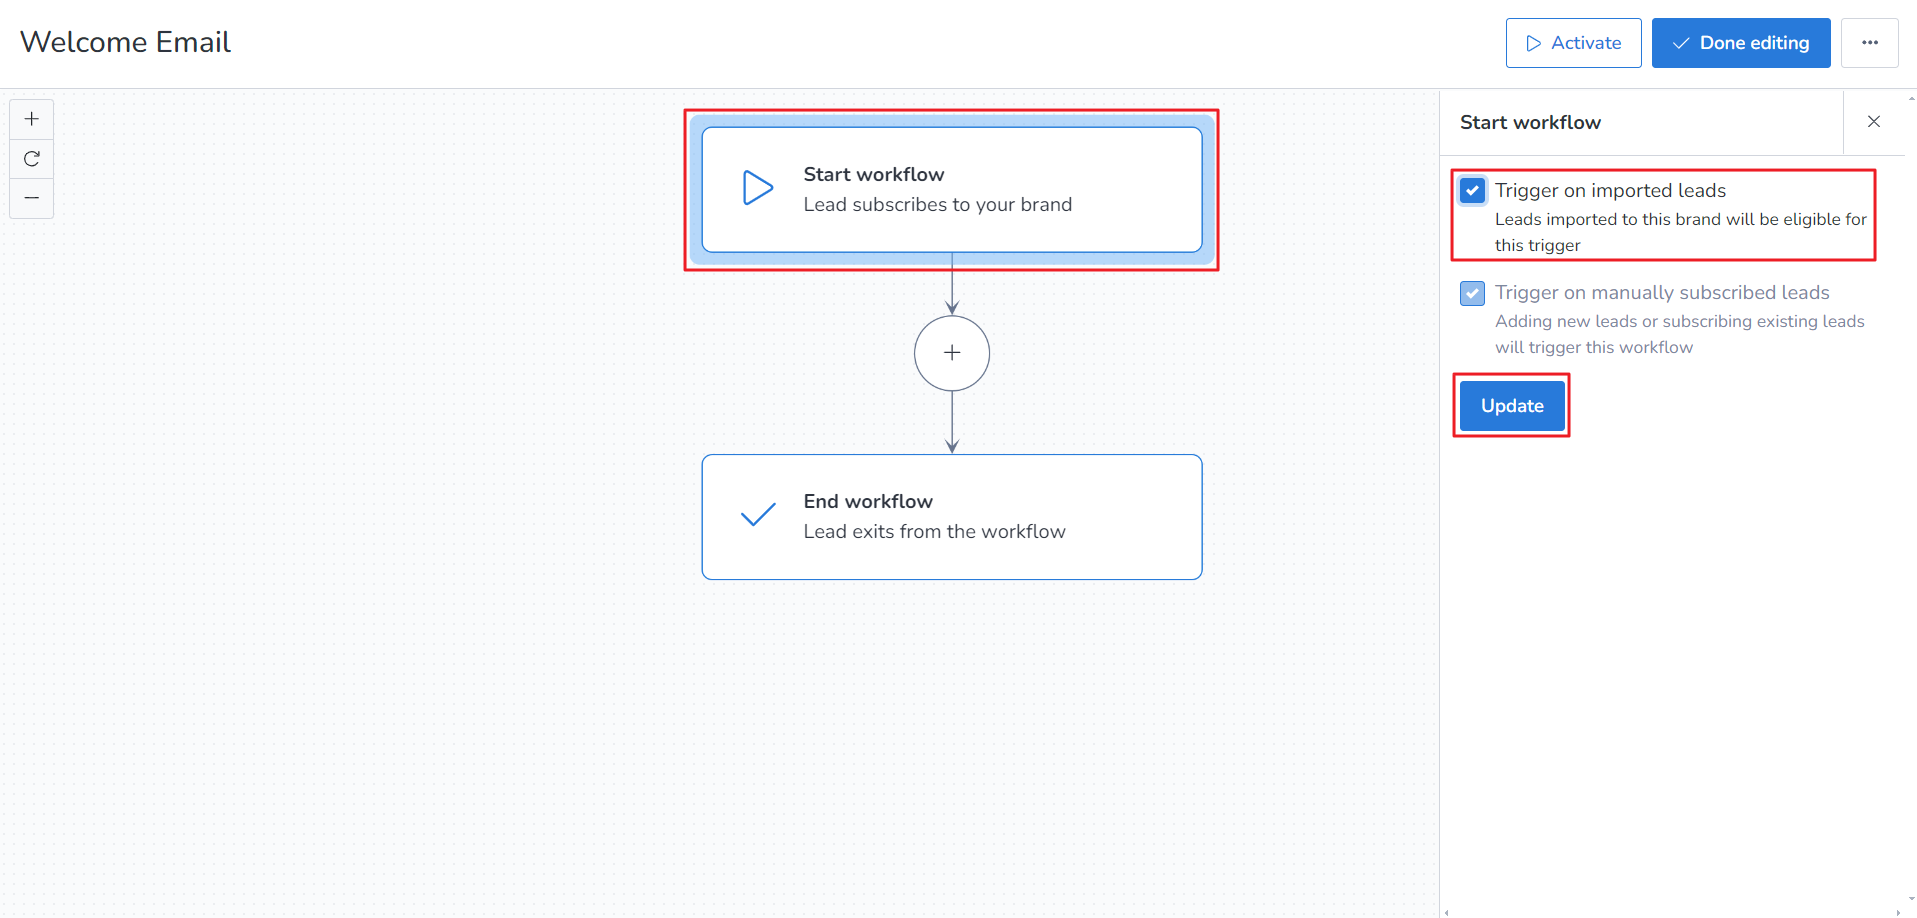
3. Click on the Start workflow and tick the checkbox Trigger on imported leads and then click Update button.
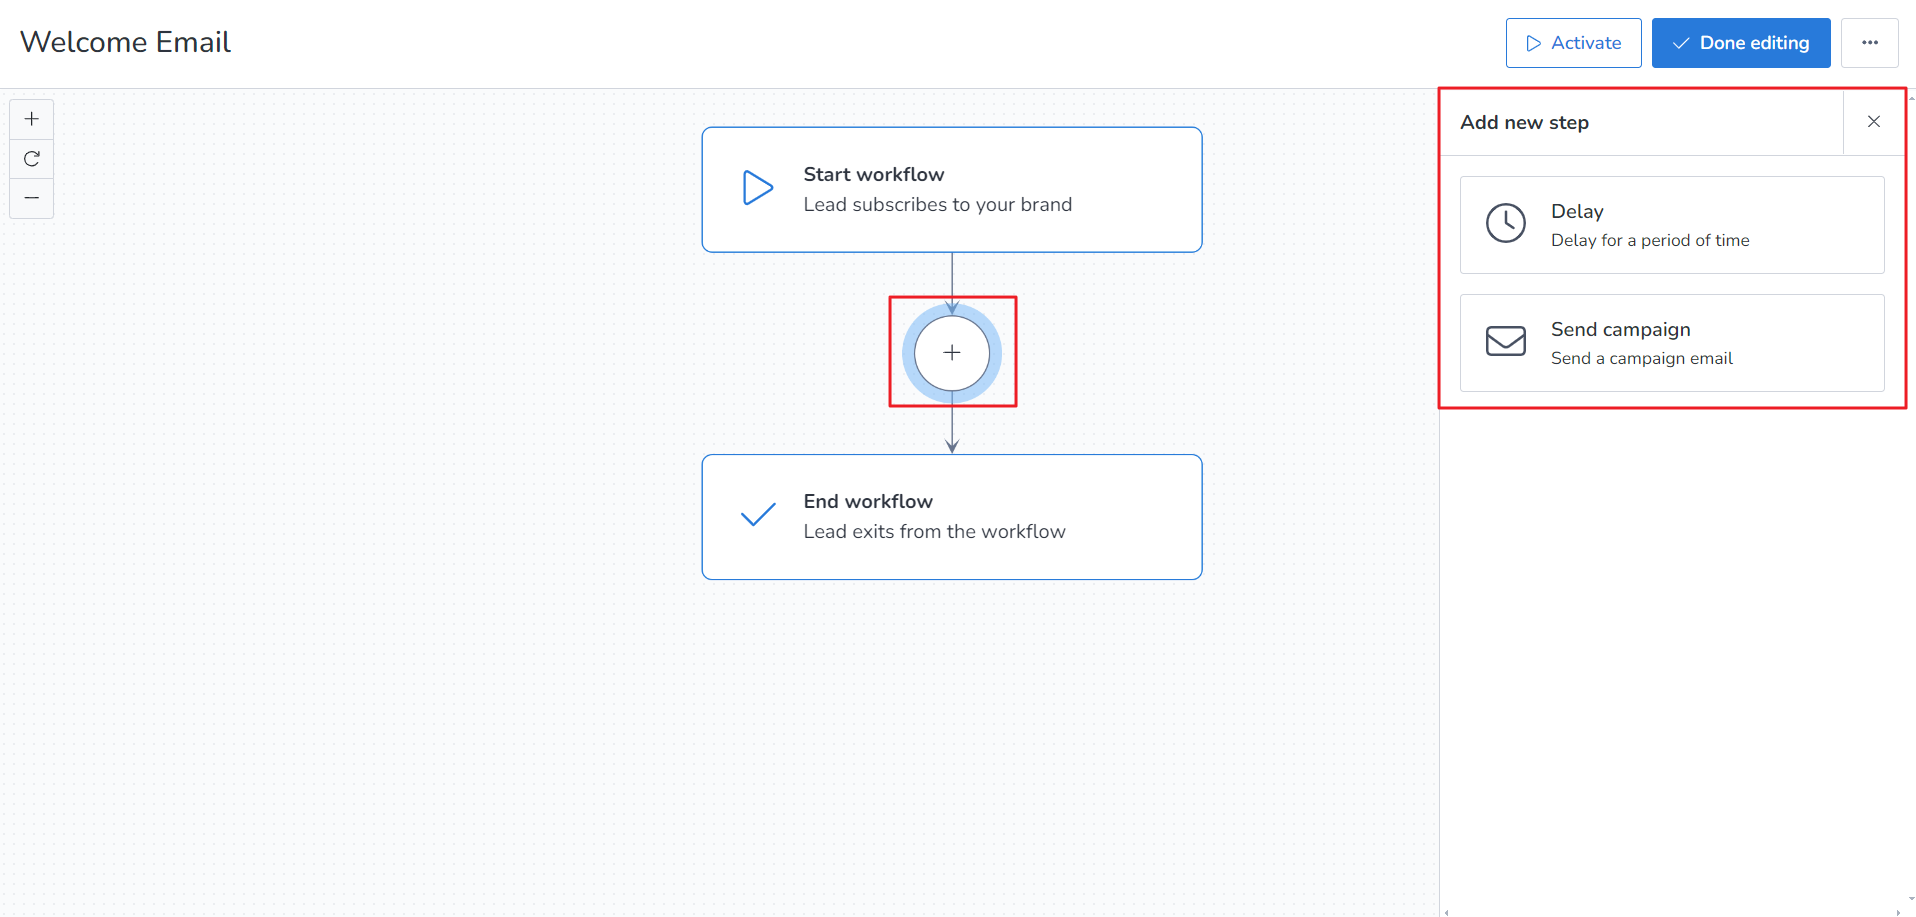
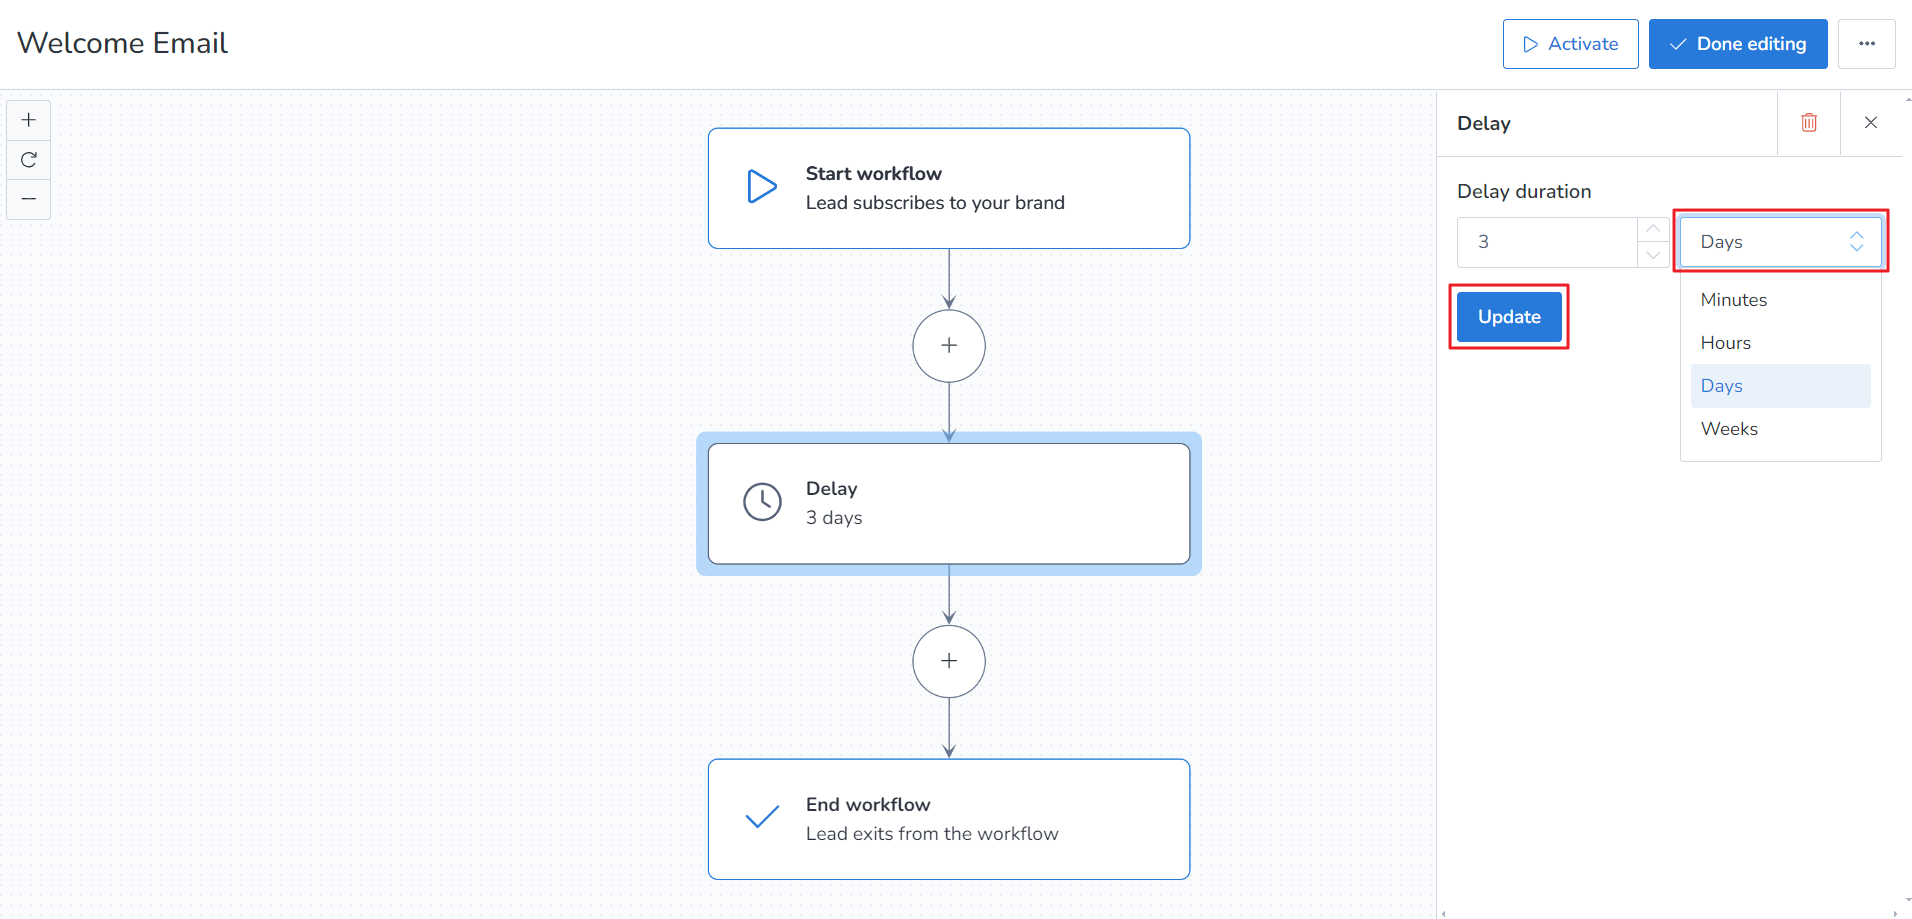
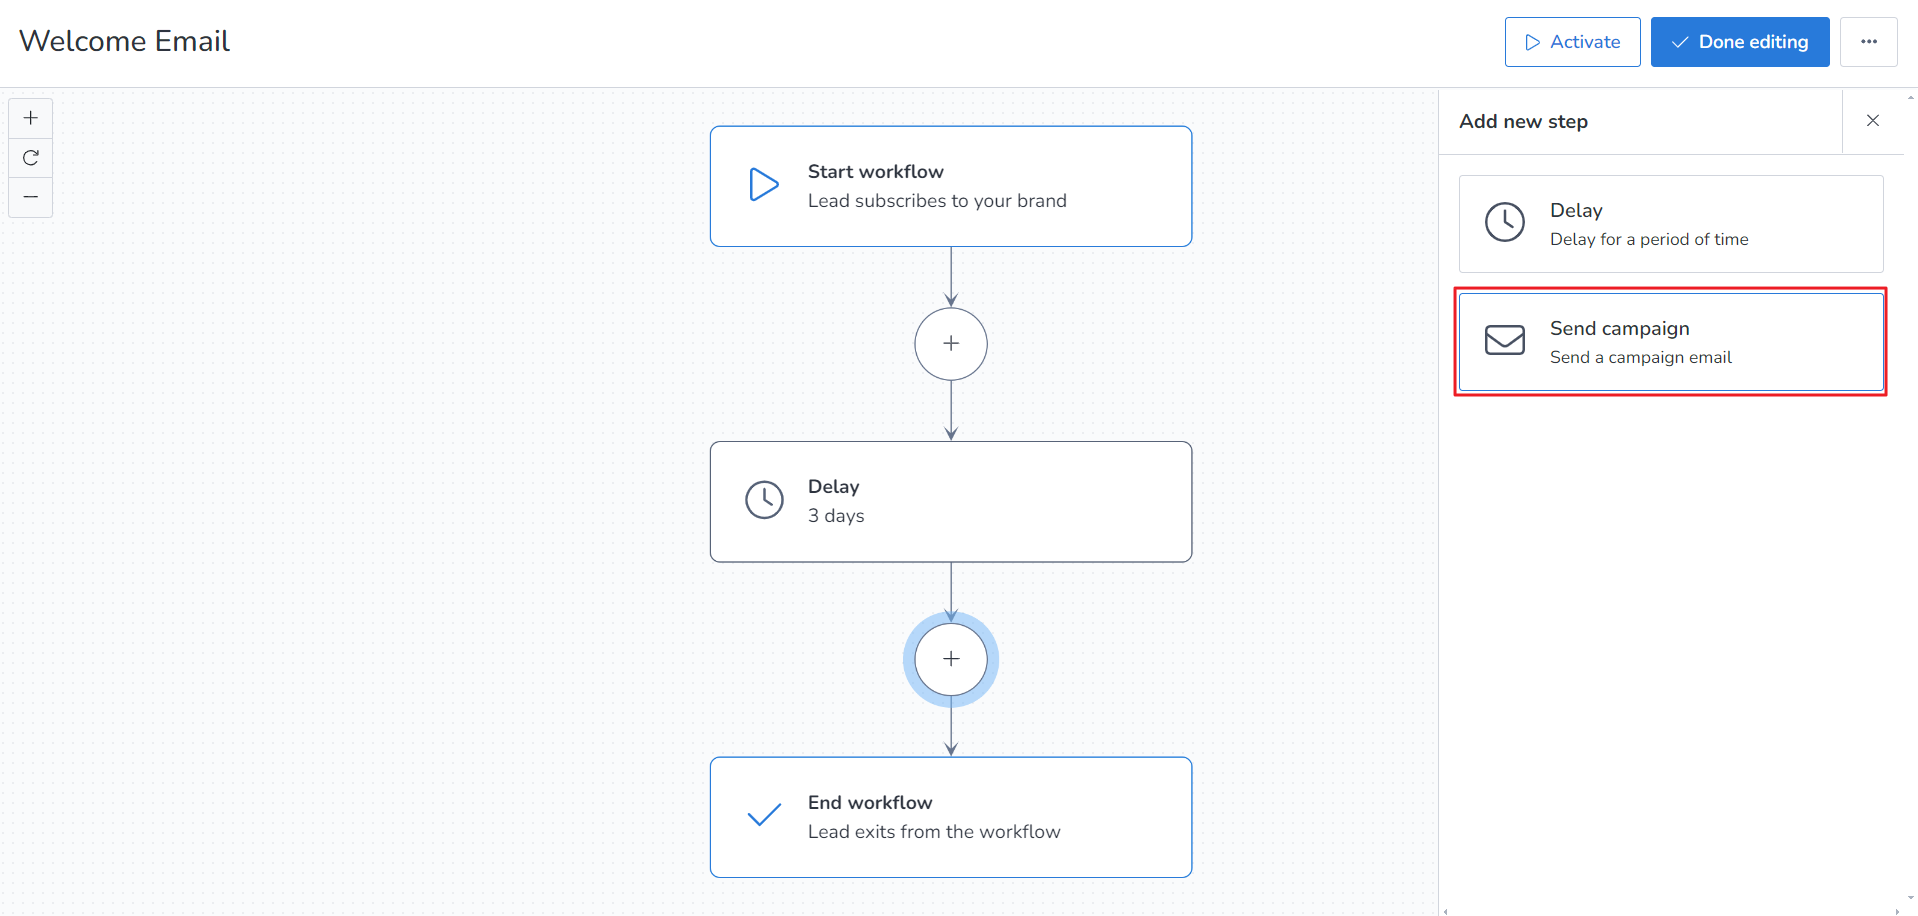
4. Now click on the circular “+” sign and under Add new step, you will get two options: Delay and Send Campaign. Delay allows you to set schedule for that campaign while Send campaign allows you to set the campaign for sending.
5. If you select Delay then the following option appears, through which you can delay your particular campaign.
6. If you select Send campaign then you will be forwarded to Edit campaign which is show in the next screenshare.
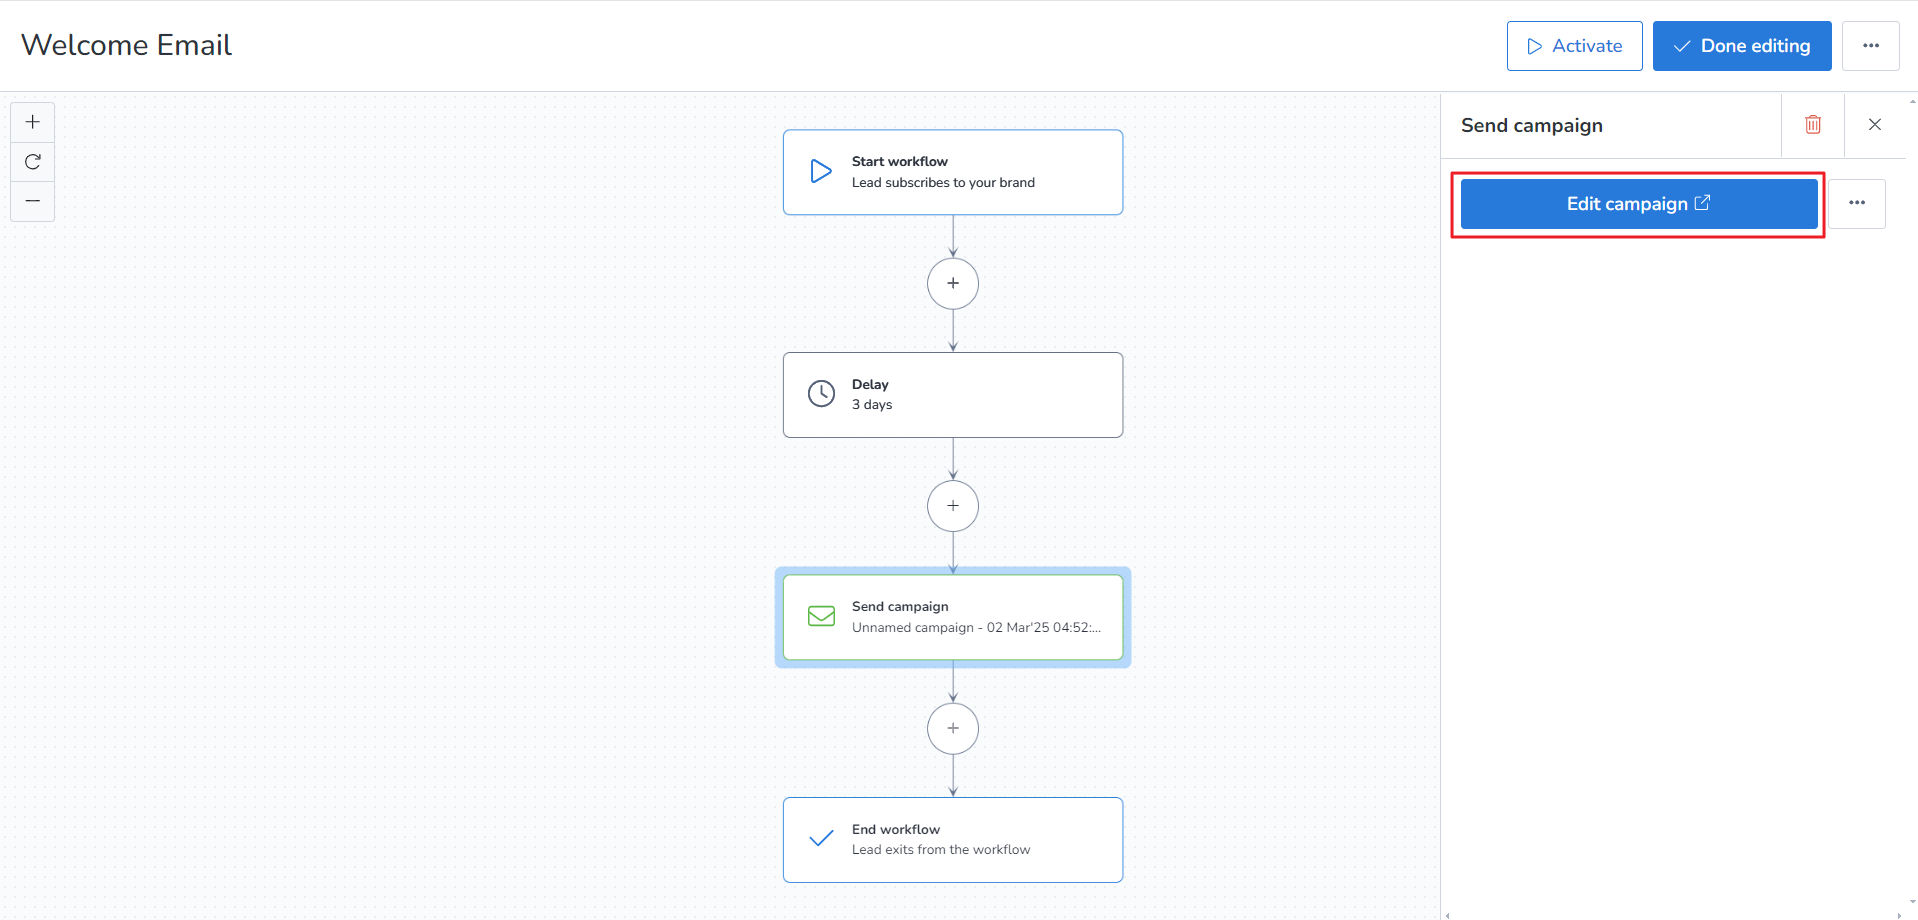
7. Click on Edit campaign button.
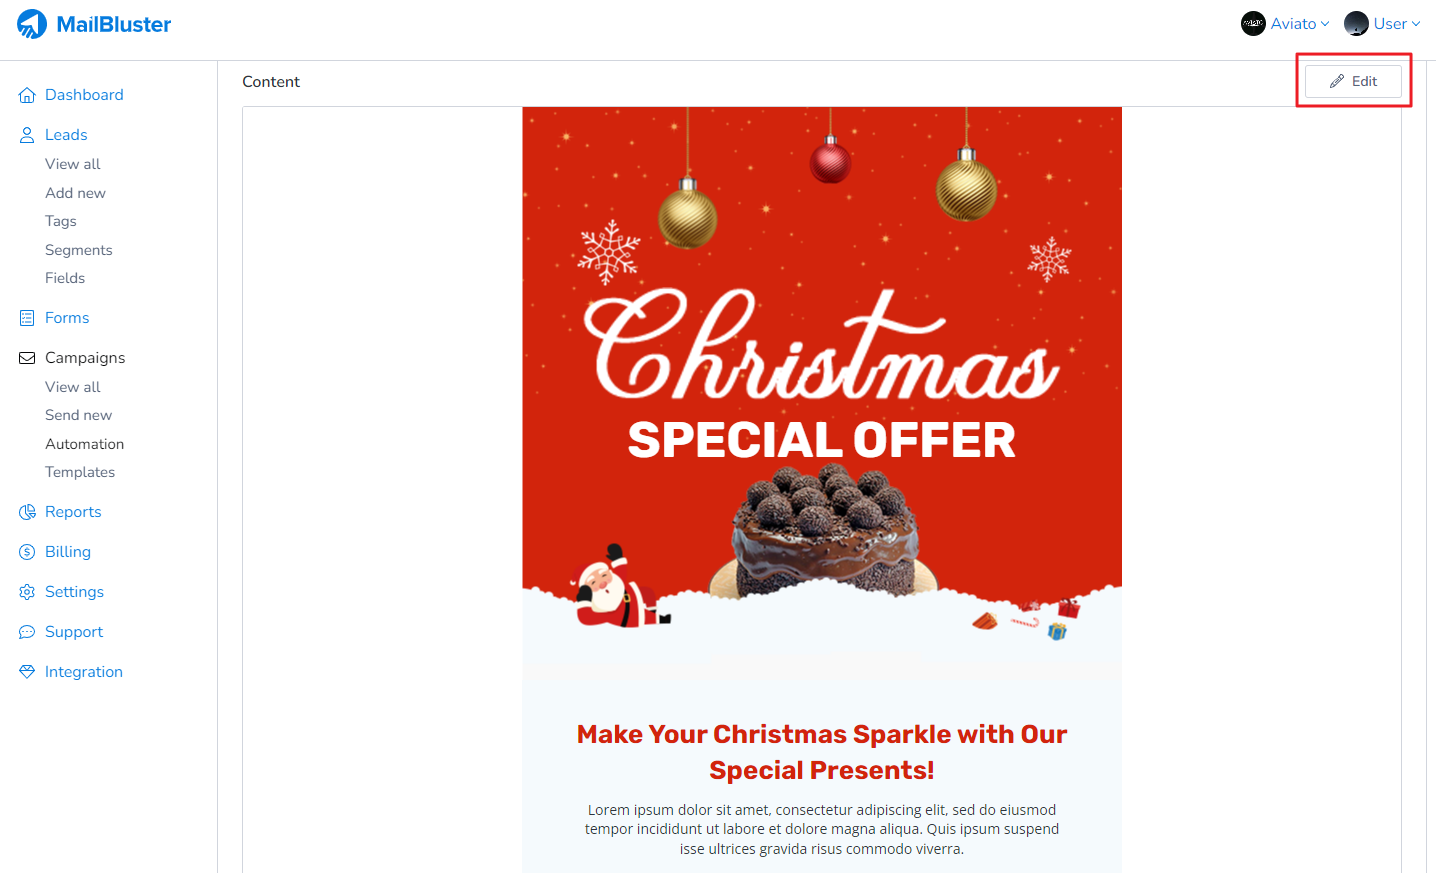
8. Now enter campaign details as shown below. Click on Content.

9. Here we have set a sample campaign.
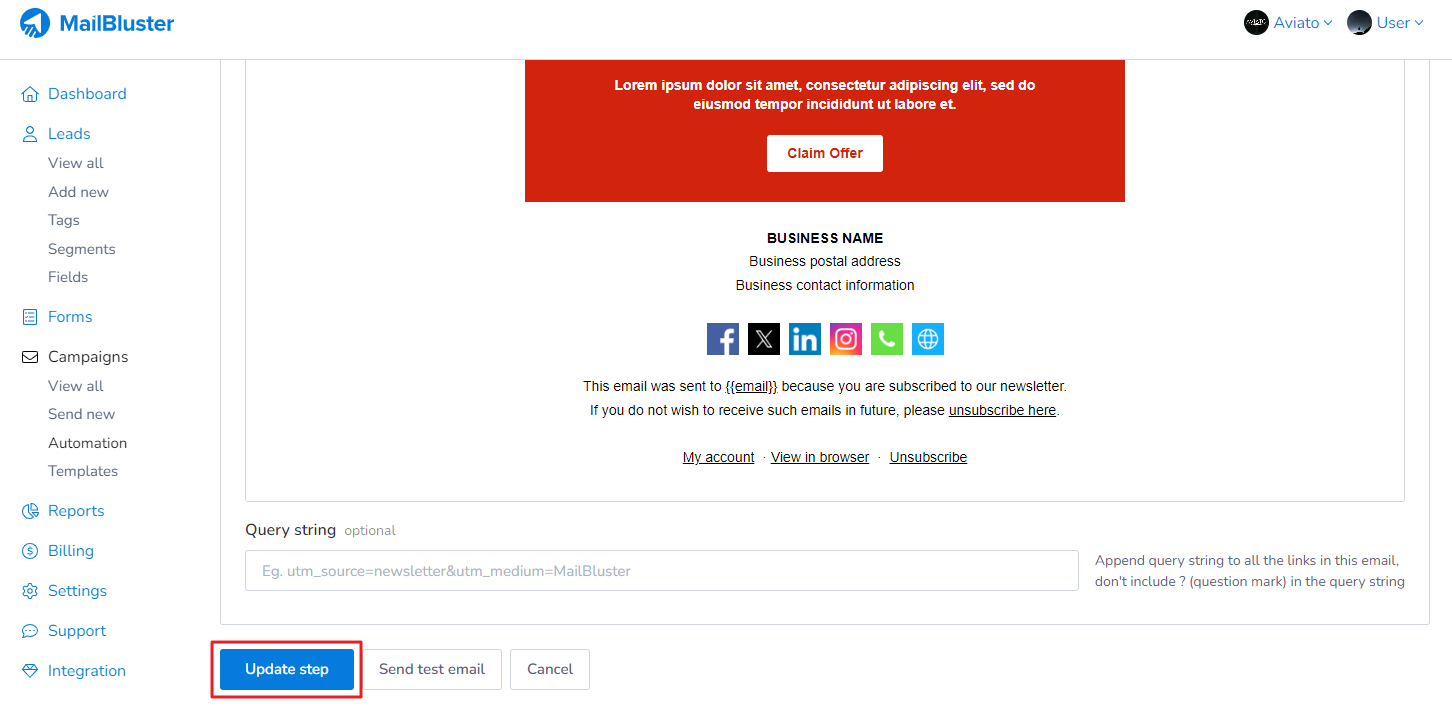
10. Now scroll downwards and click Update step
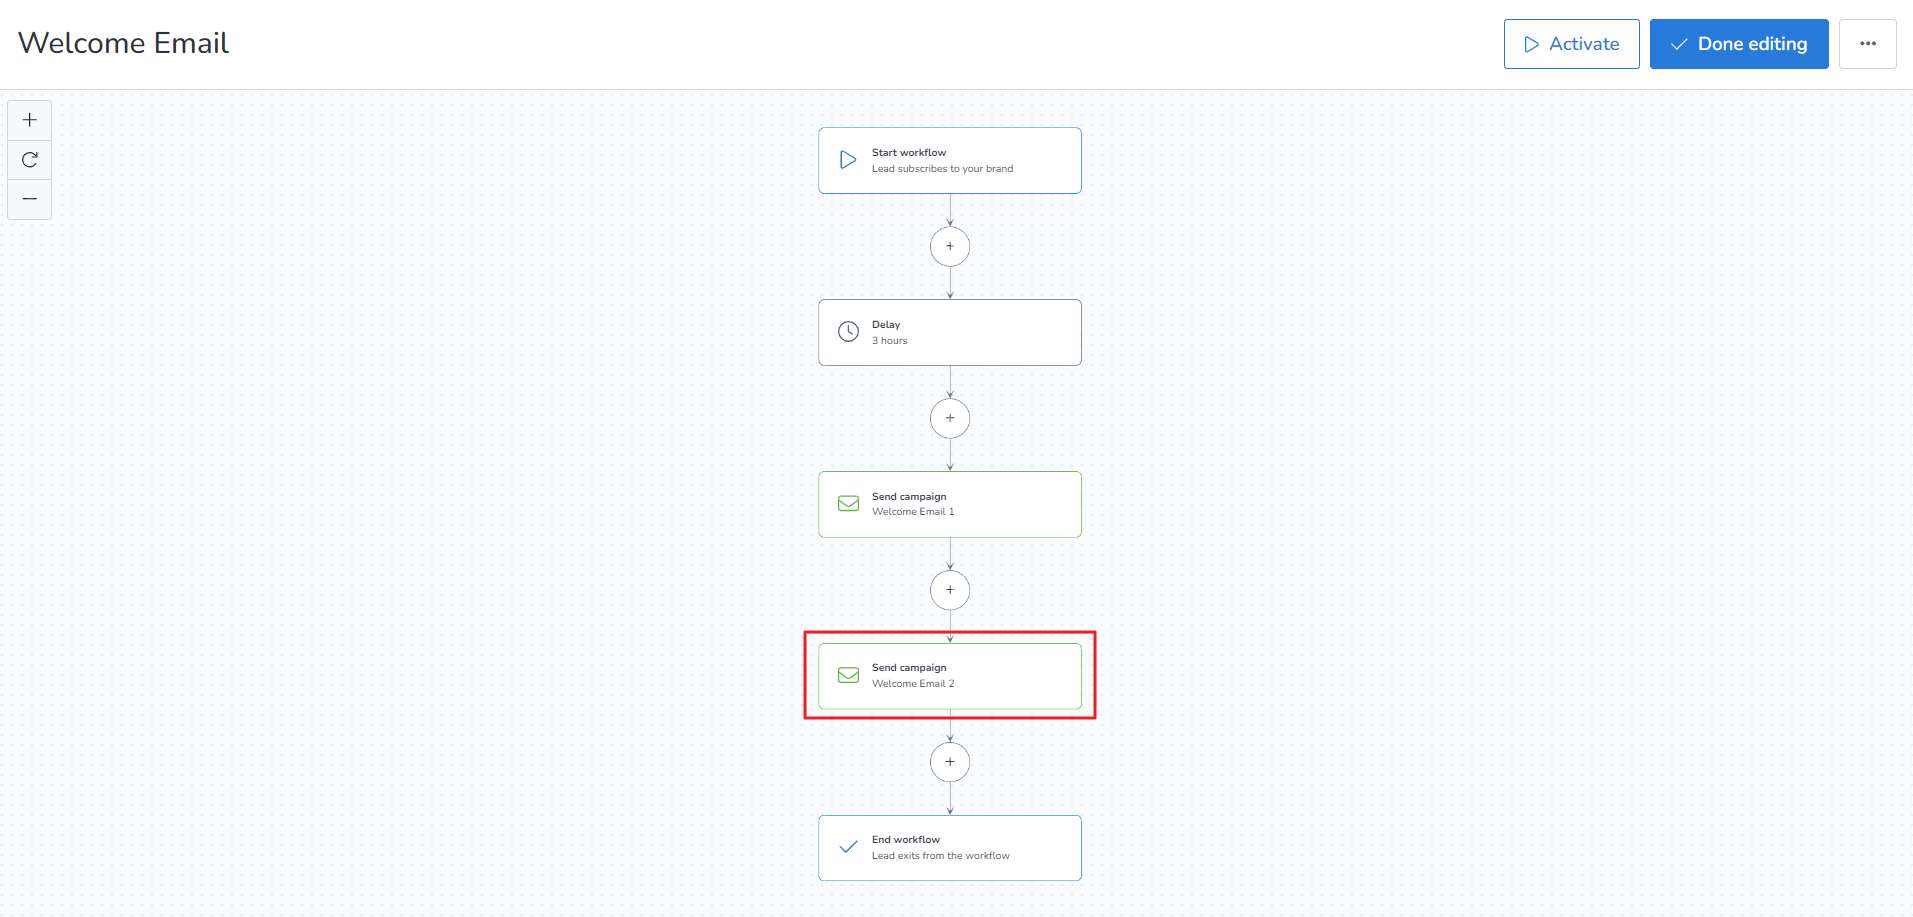
11. You can repeat step 5 and step 7 and create another campaign.
The workflow should look like this.
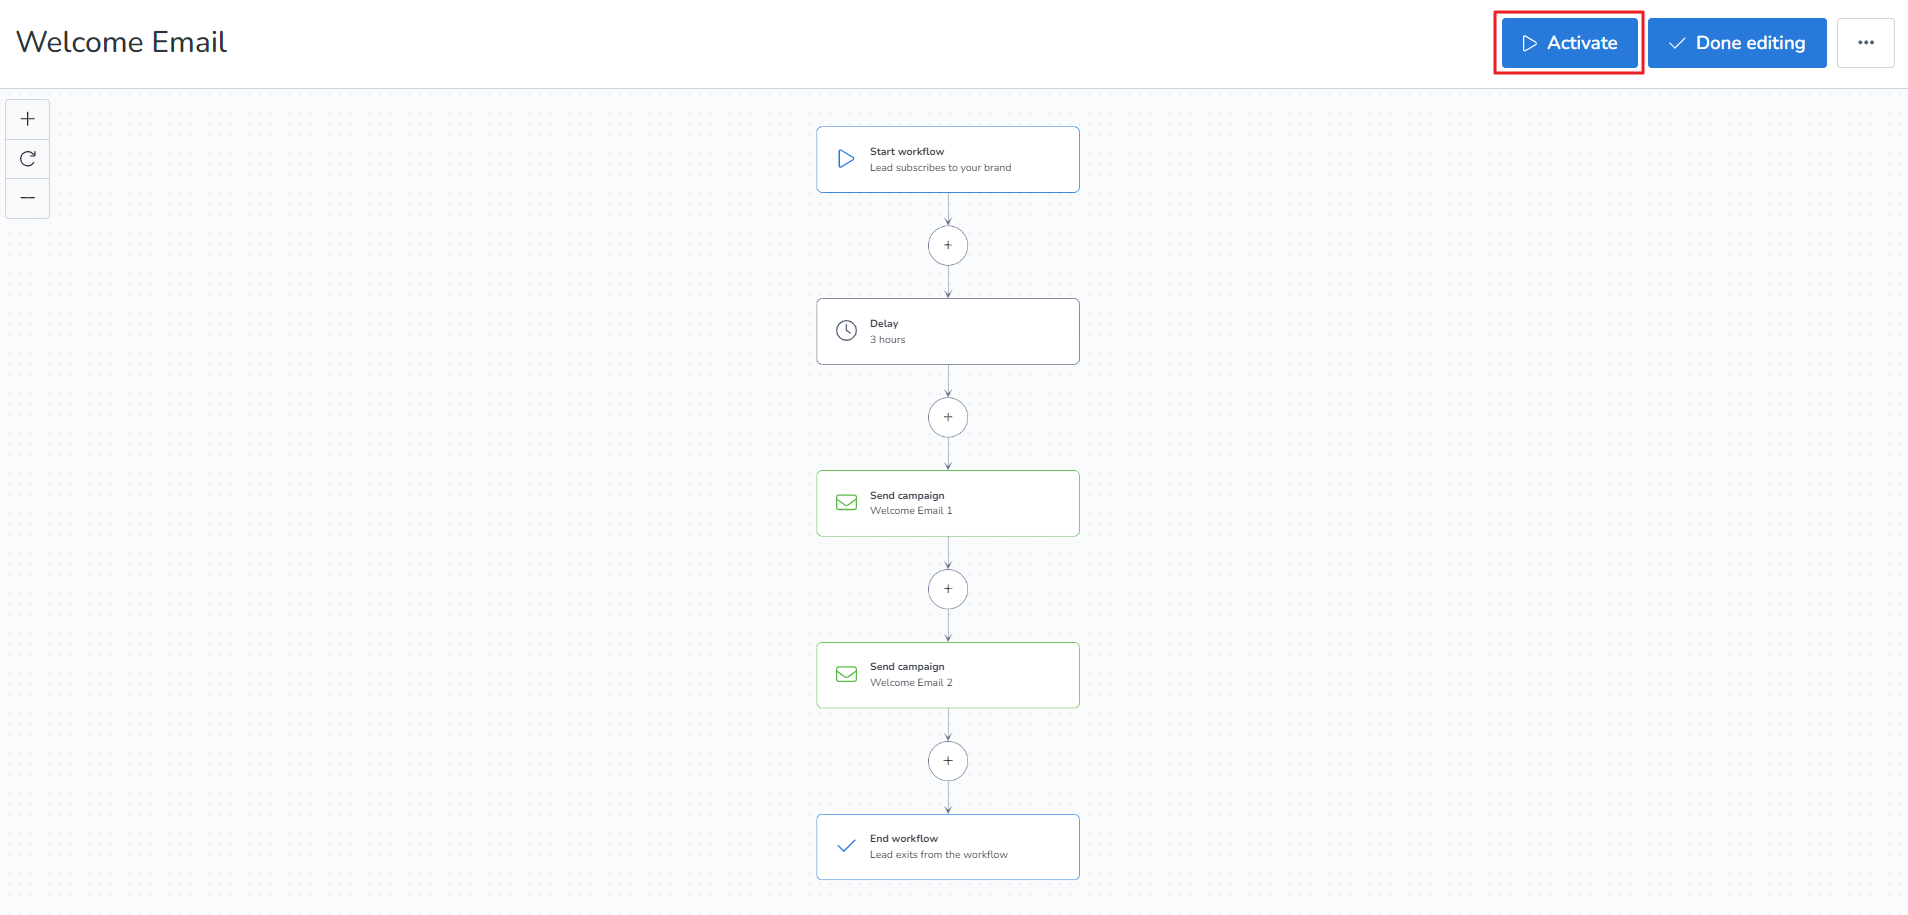
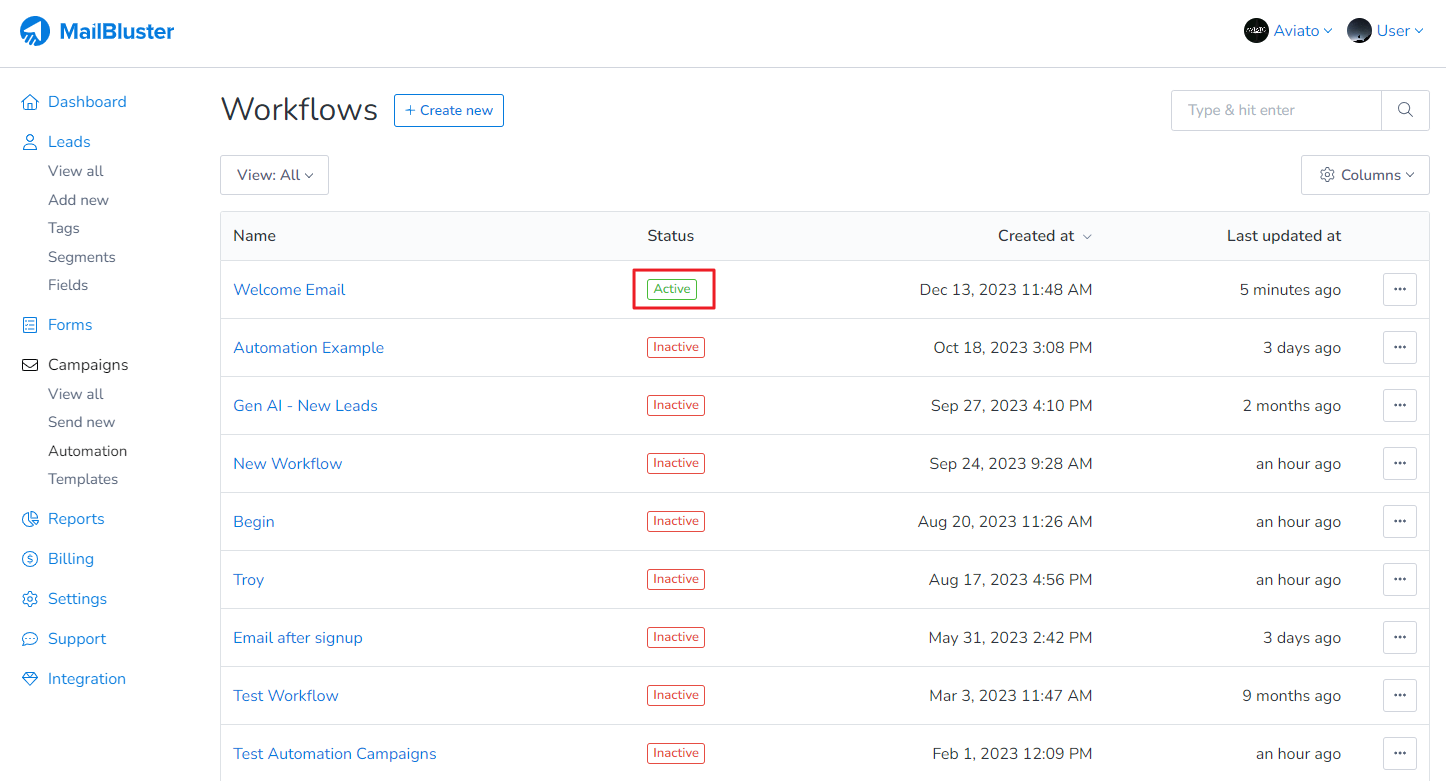
12. Click Activate to start the Automation workflow.
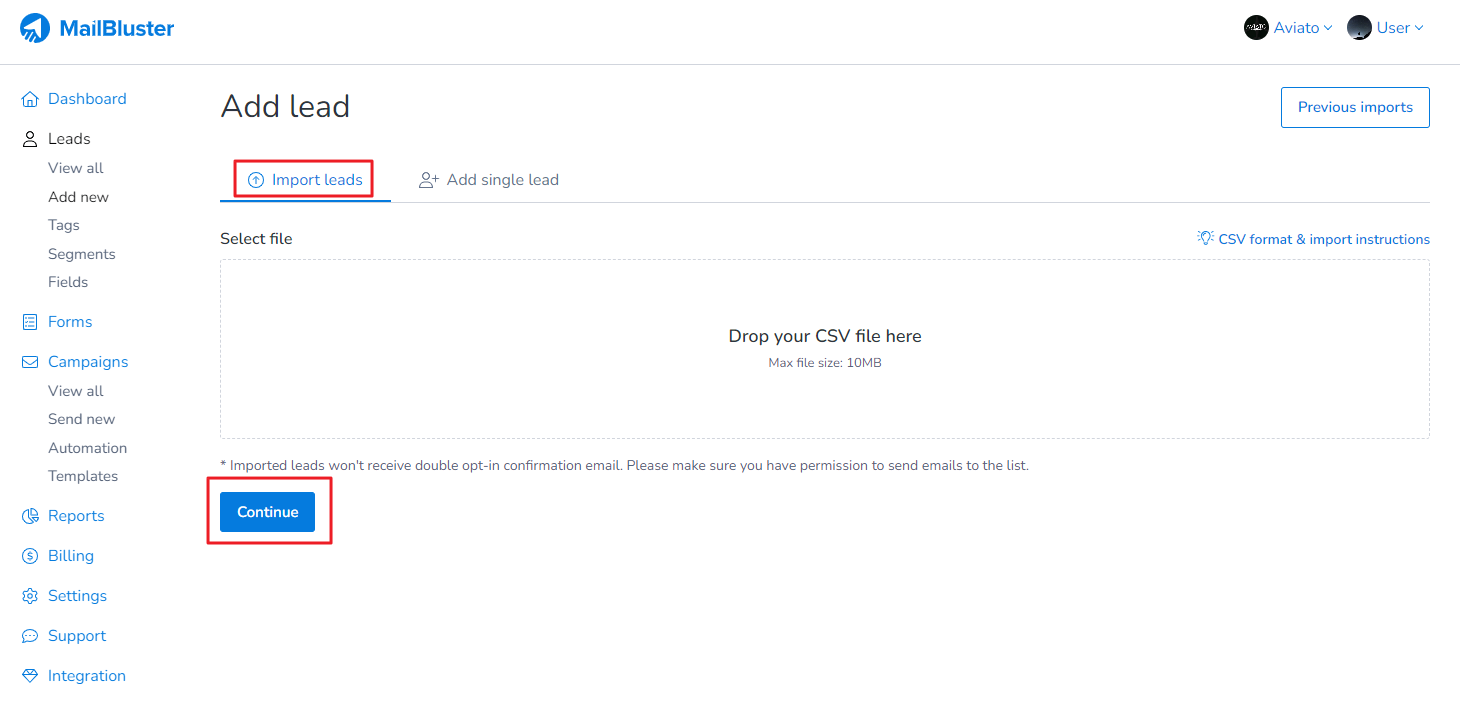
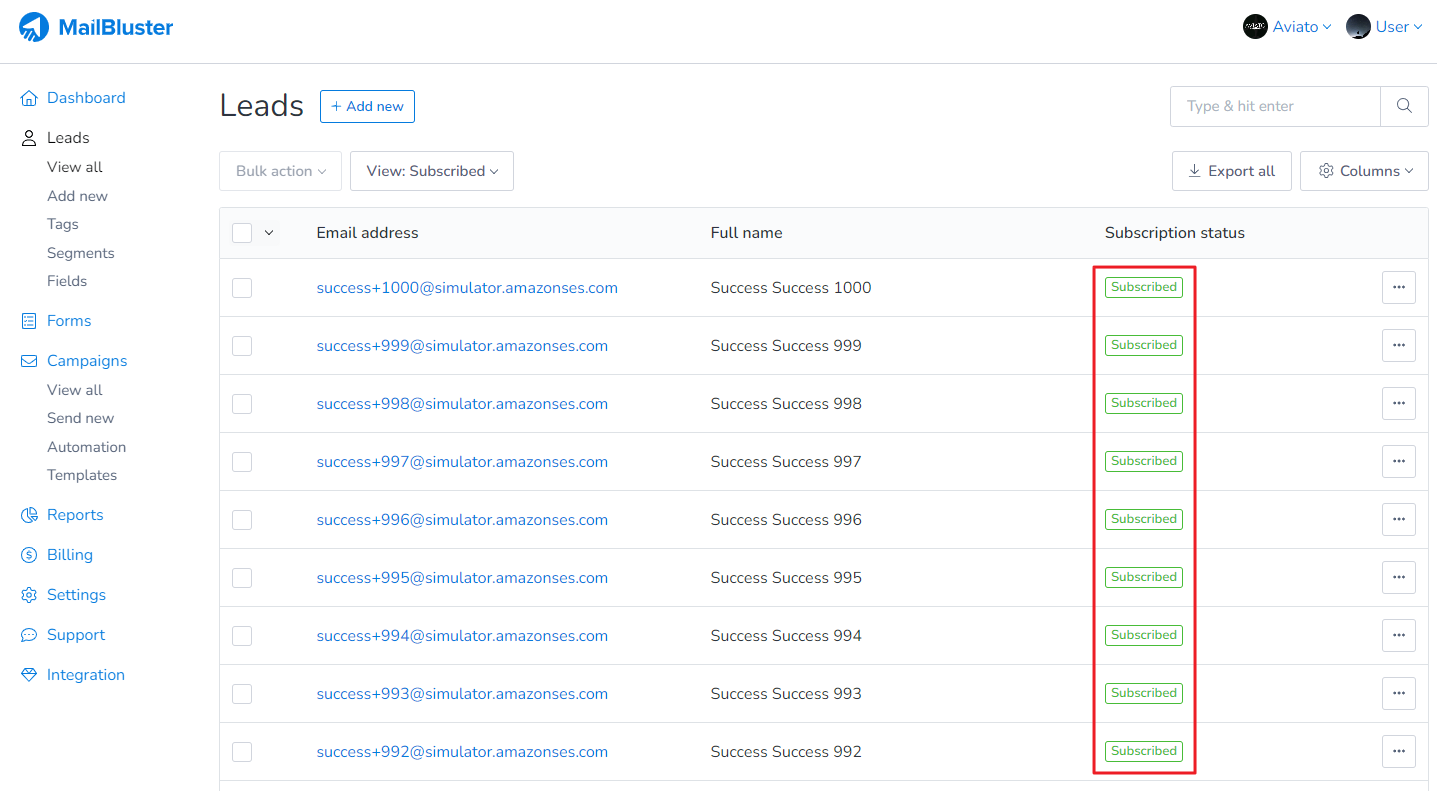
13. Now import new leads (who has just subscribed) from Add new > Import leads and attach a CSV file then click Continue.
14. The subscribed leads will receive the Automation campaigns.
15. Make sure the Workflow remains Active while you import new subscribed leads into MailBluster.
Please Note: Automation emails are paid emails because they don’t have any branding on them.