Verifying your domain in Amazon SES is an essential step for improving email deliverability and maintaining sender credibility. It also increases your chances of moving out of the AWS Sandbox when requesting production access. Furthermore, once your domain is verified, you can send emails from any address under that domain without verifying each one individually.
Here are the following steps on how to verify domain in Amazon SES.
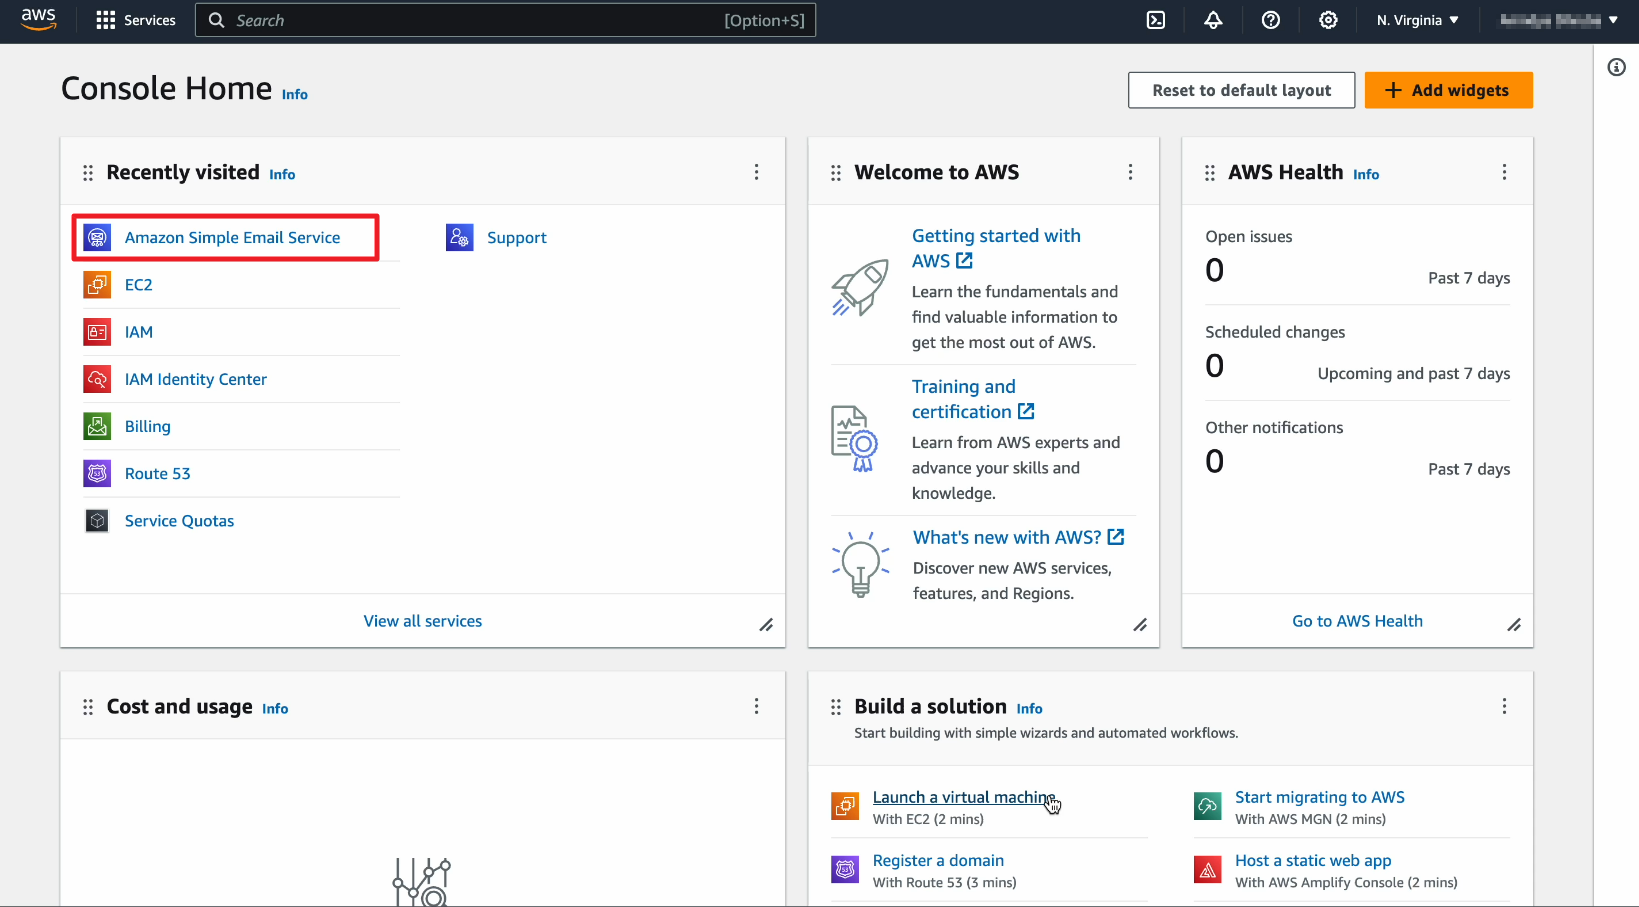
1. Sign in to your AWS Management console and select Amazon Simple Email Service
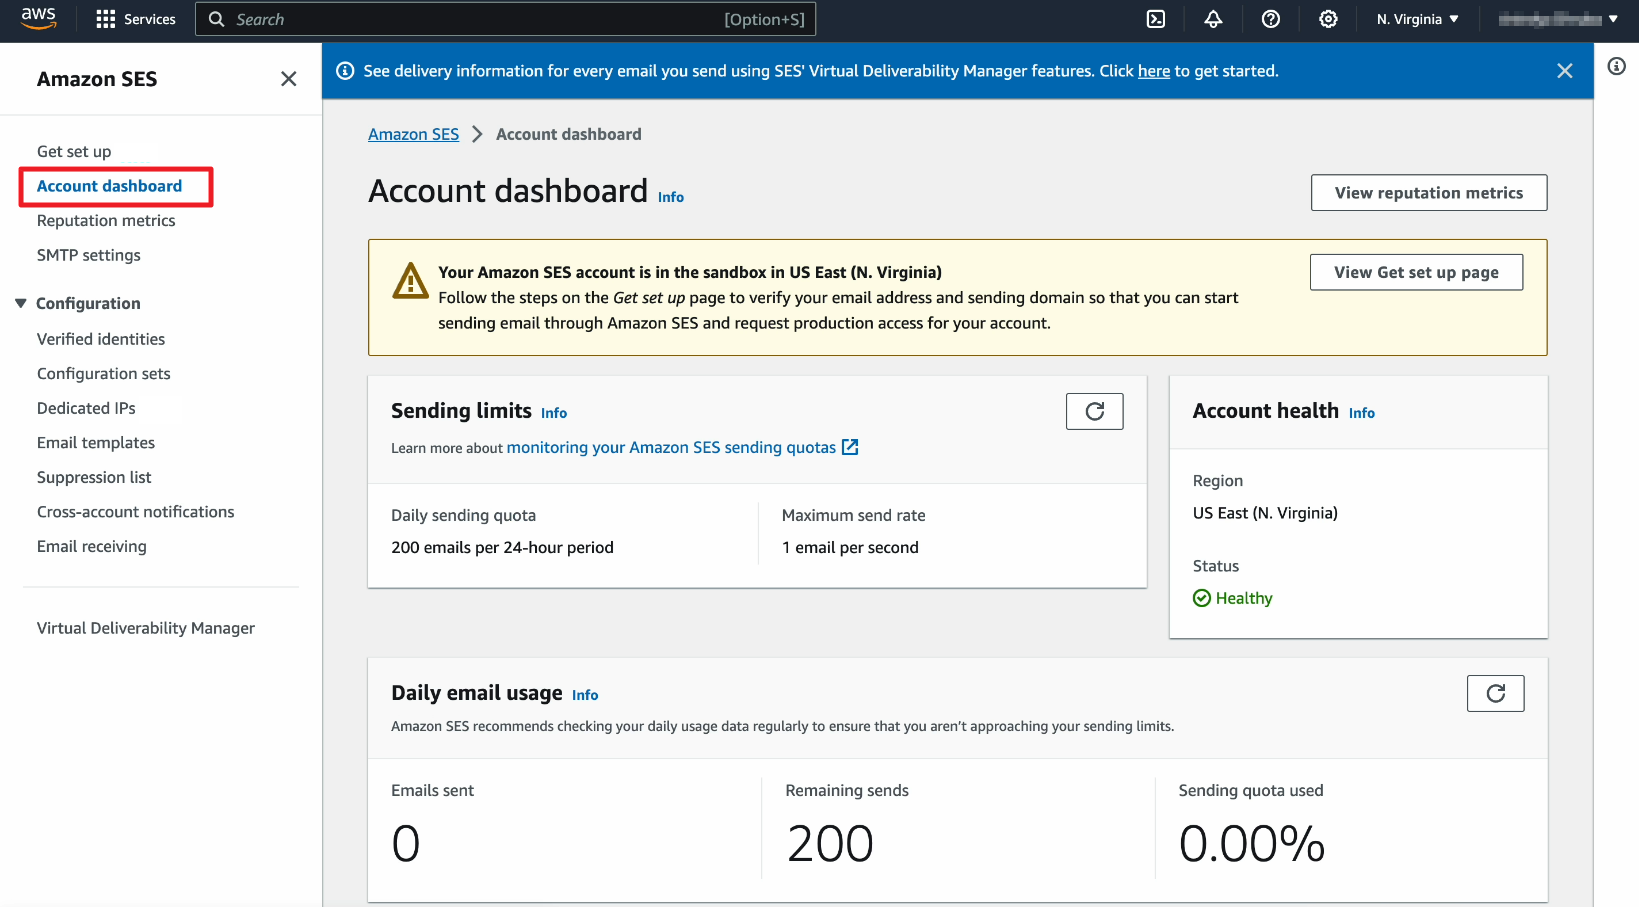
2. Click on Account Dashboard
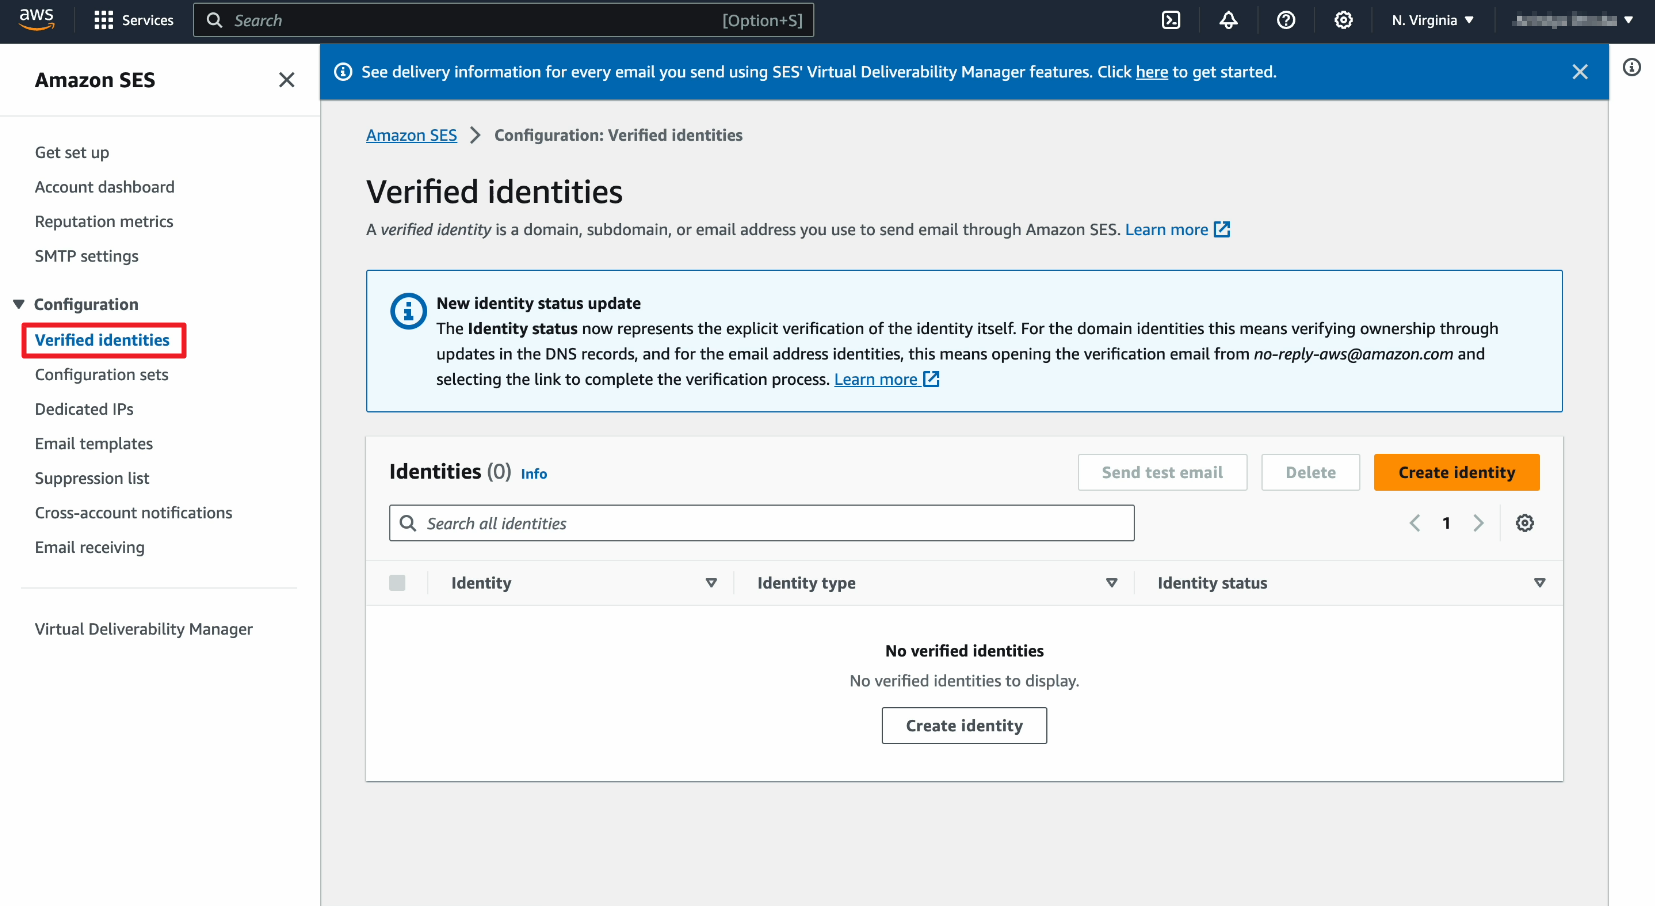
3. Click on Verified Identities
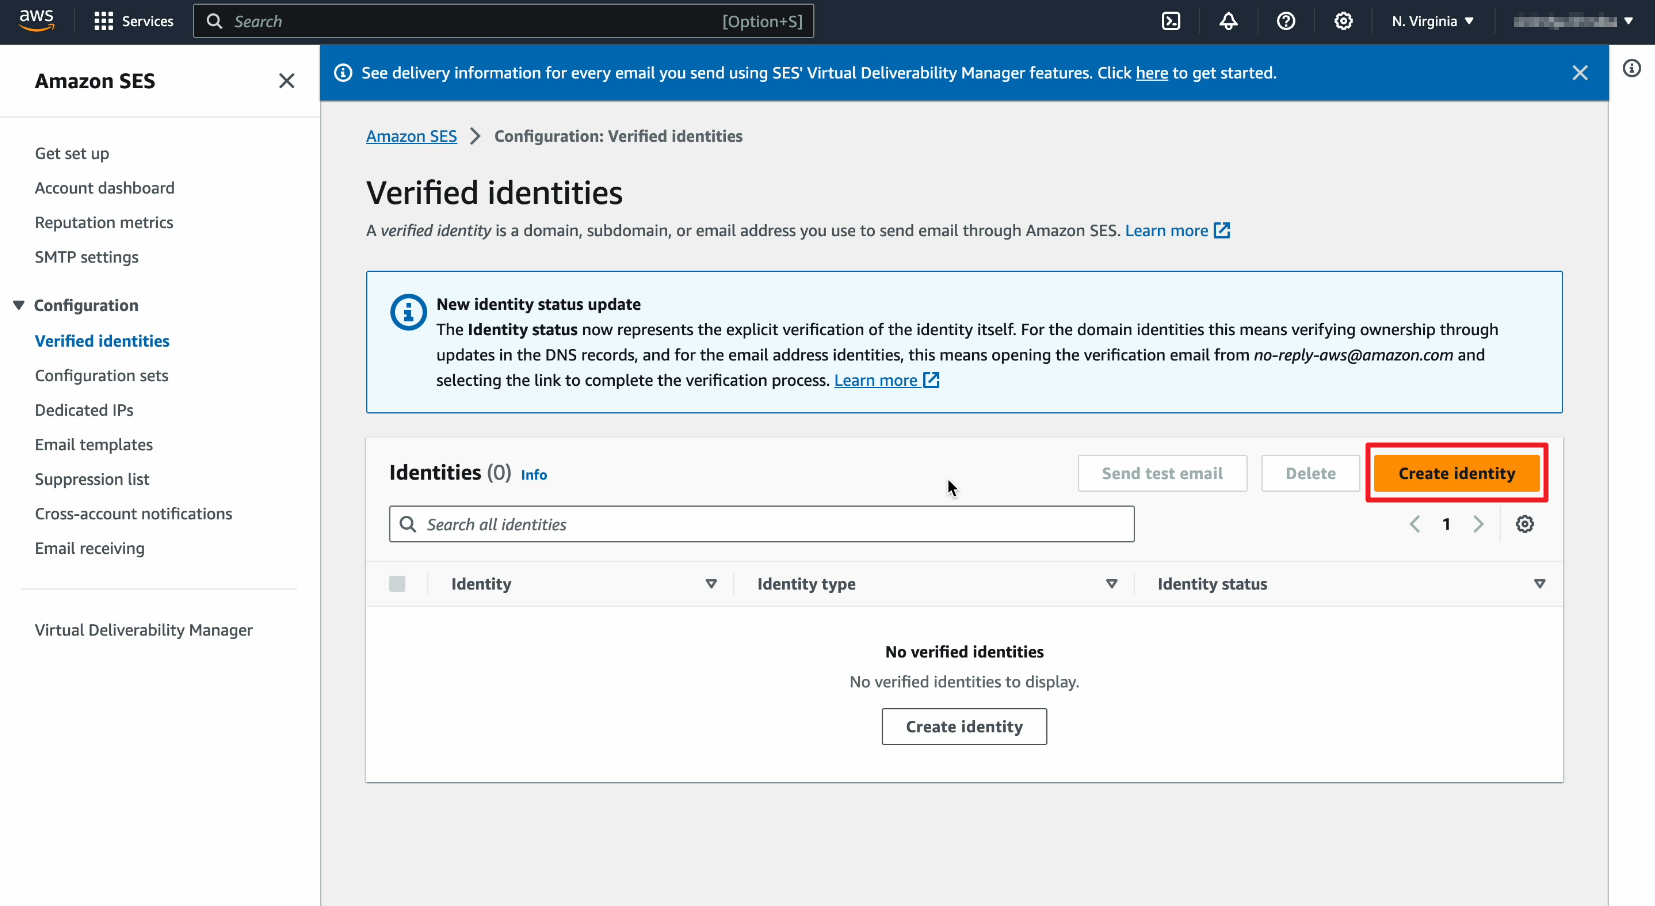
4. Click on Create identity
5. Select Identity type: Domain
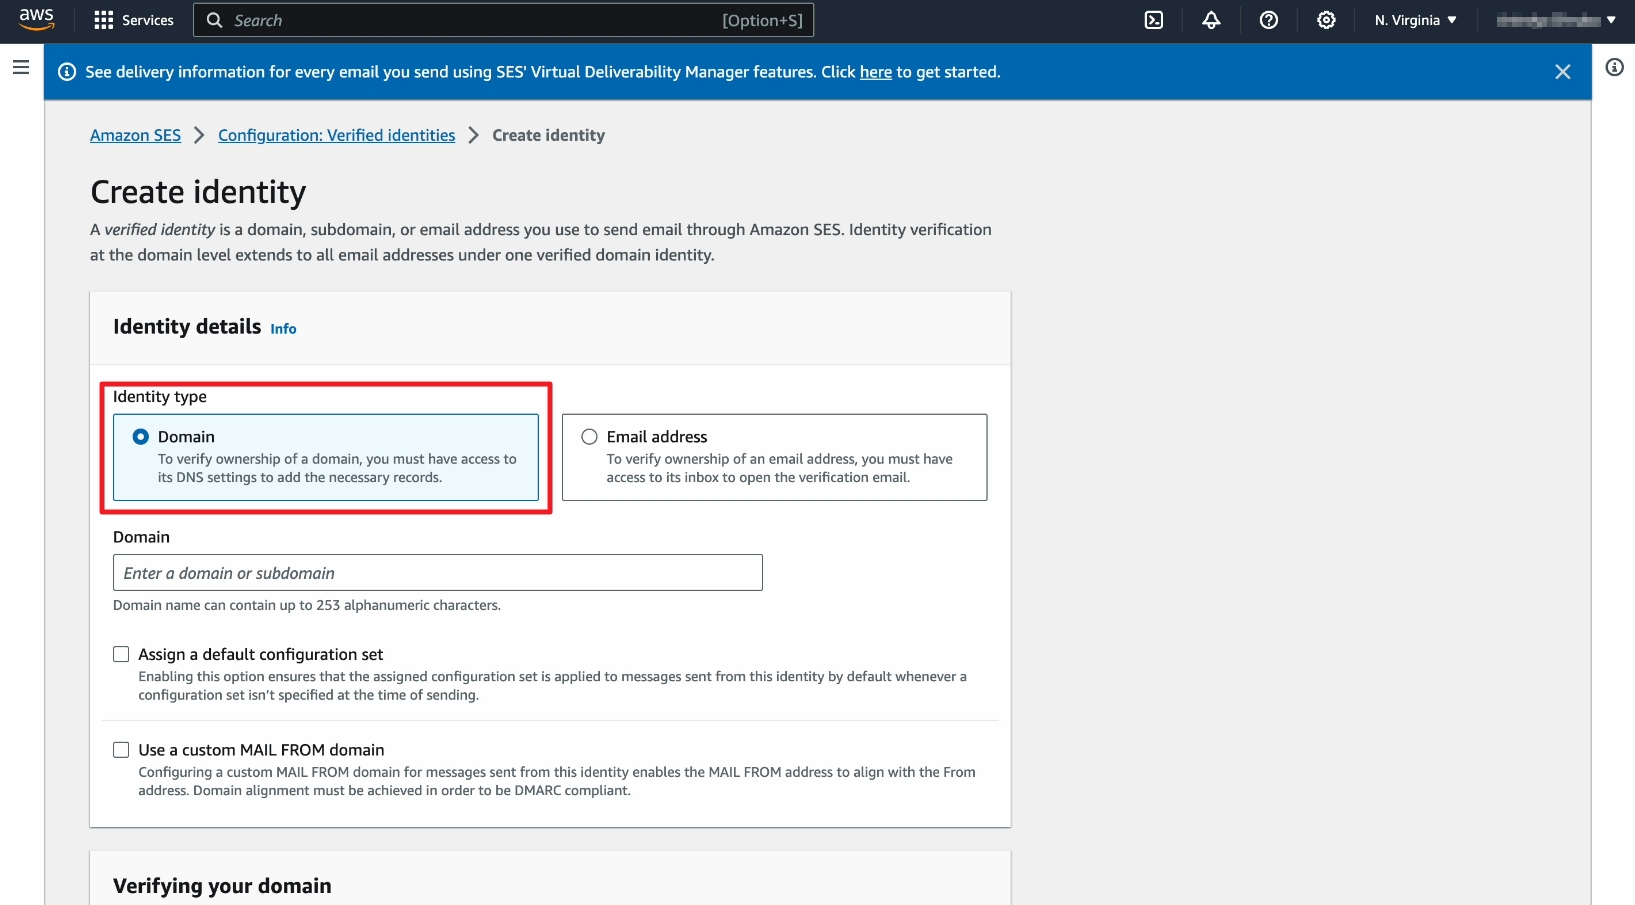
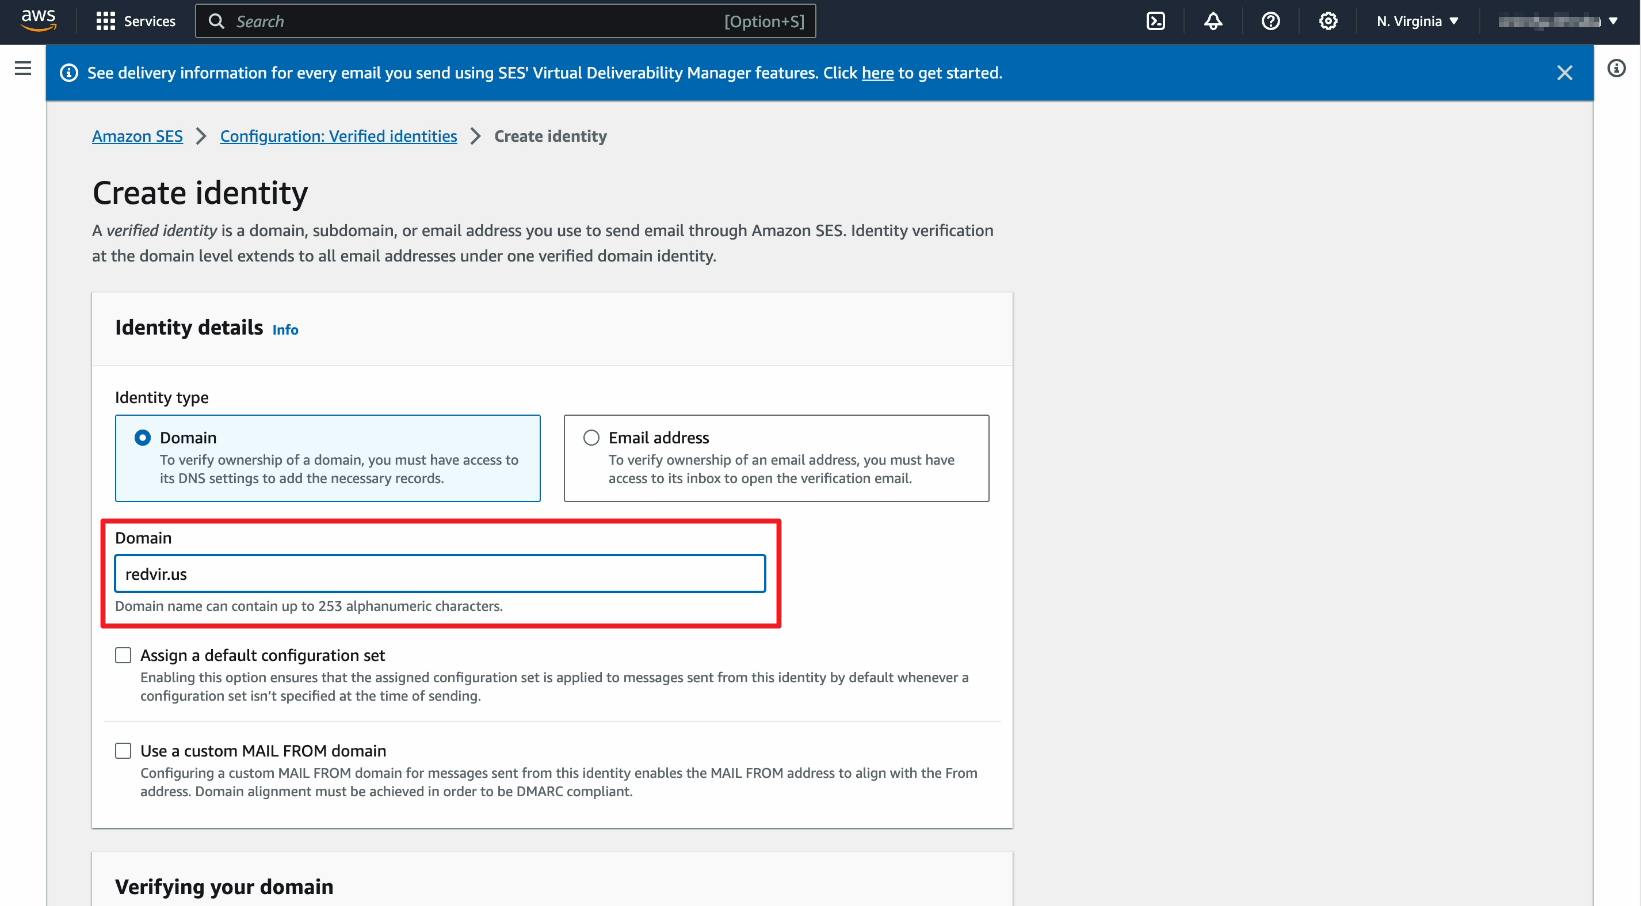
6. Enter the name of your valid domain
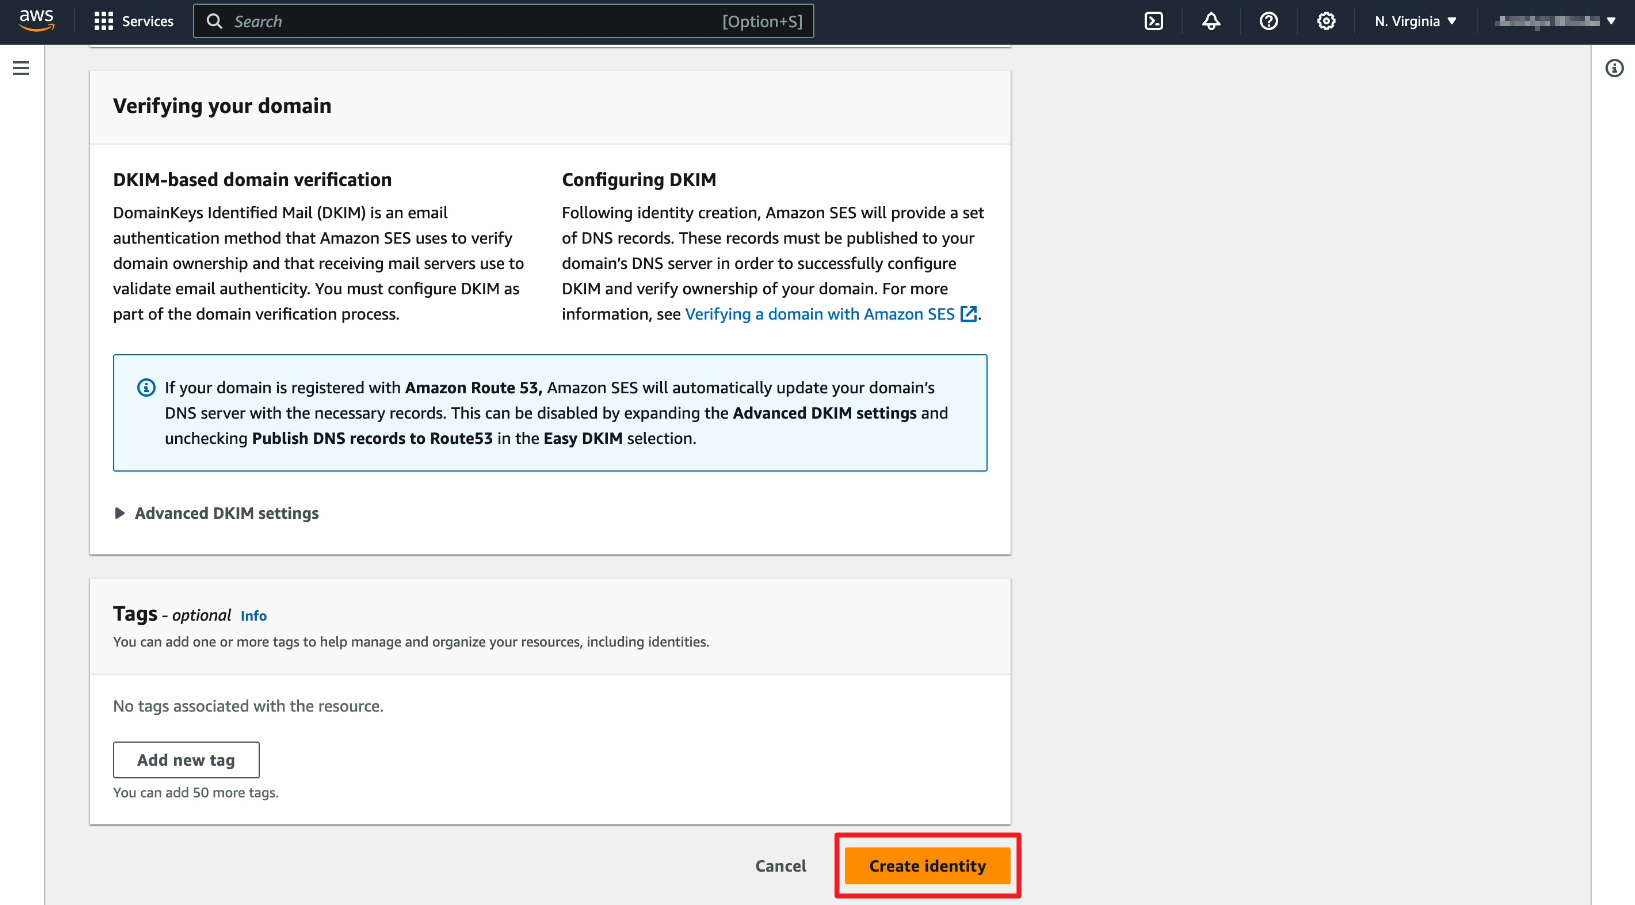
7. Scroll down then click on Create identity
8. Now go back to the Amazon SES page and you will notice that the Identity status is showing Verification pending.

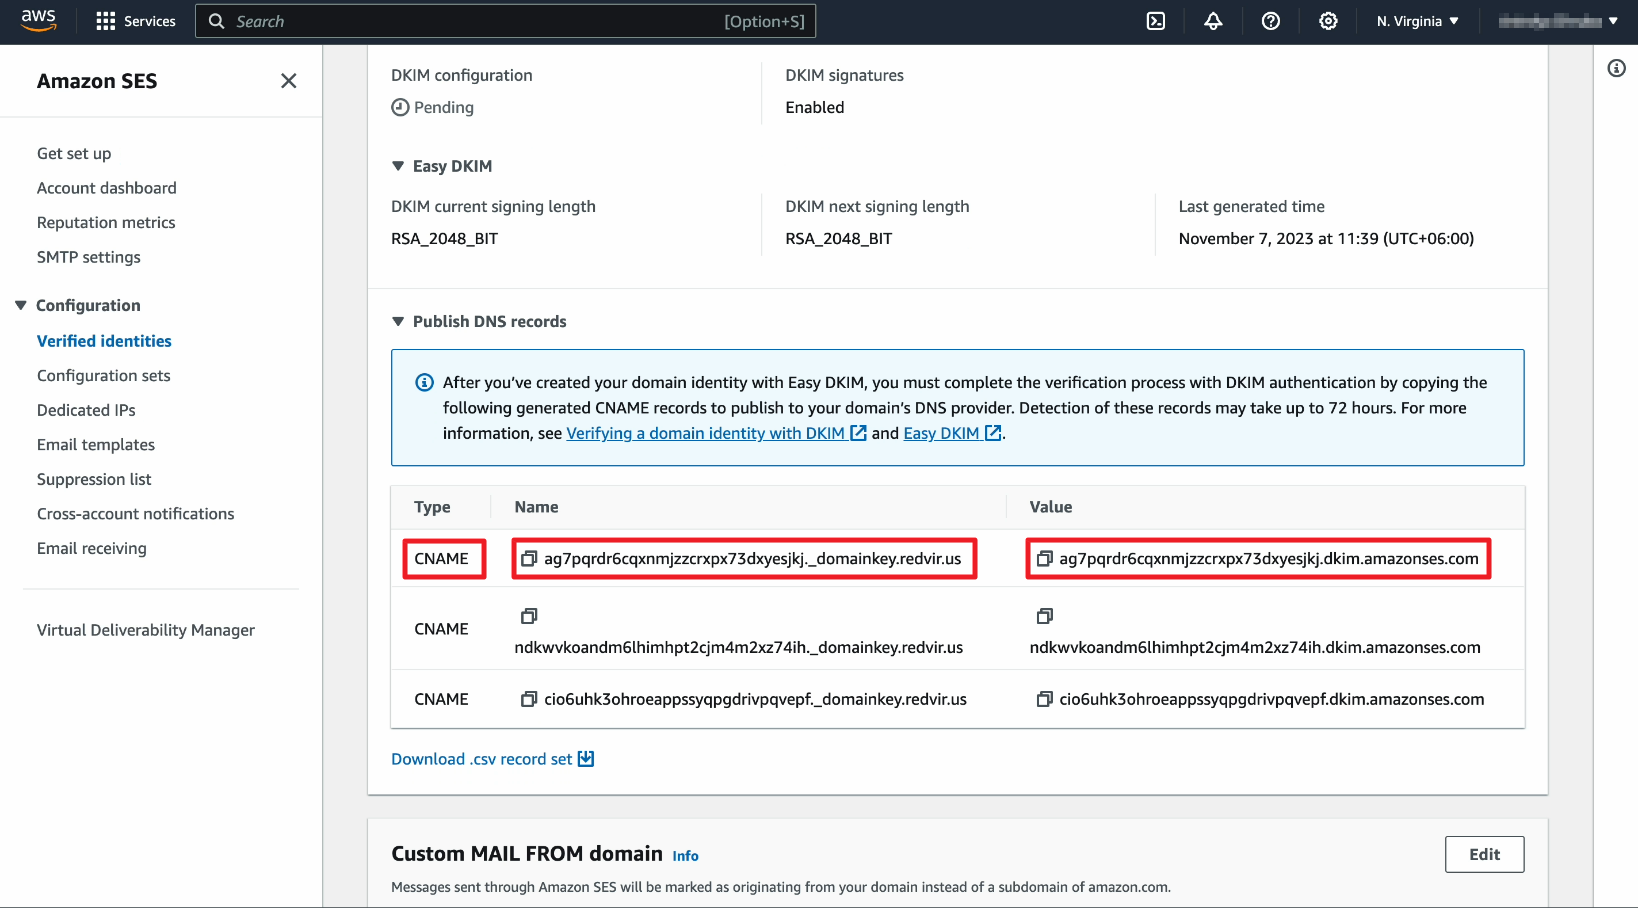
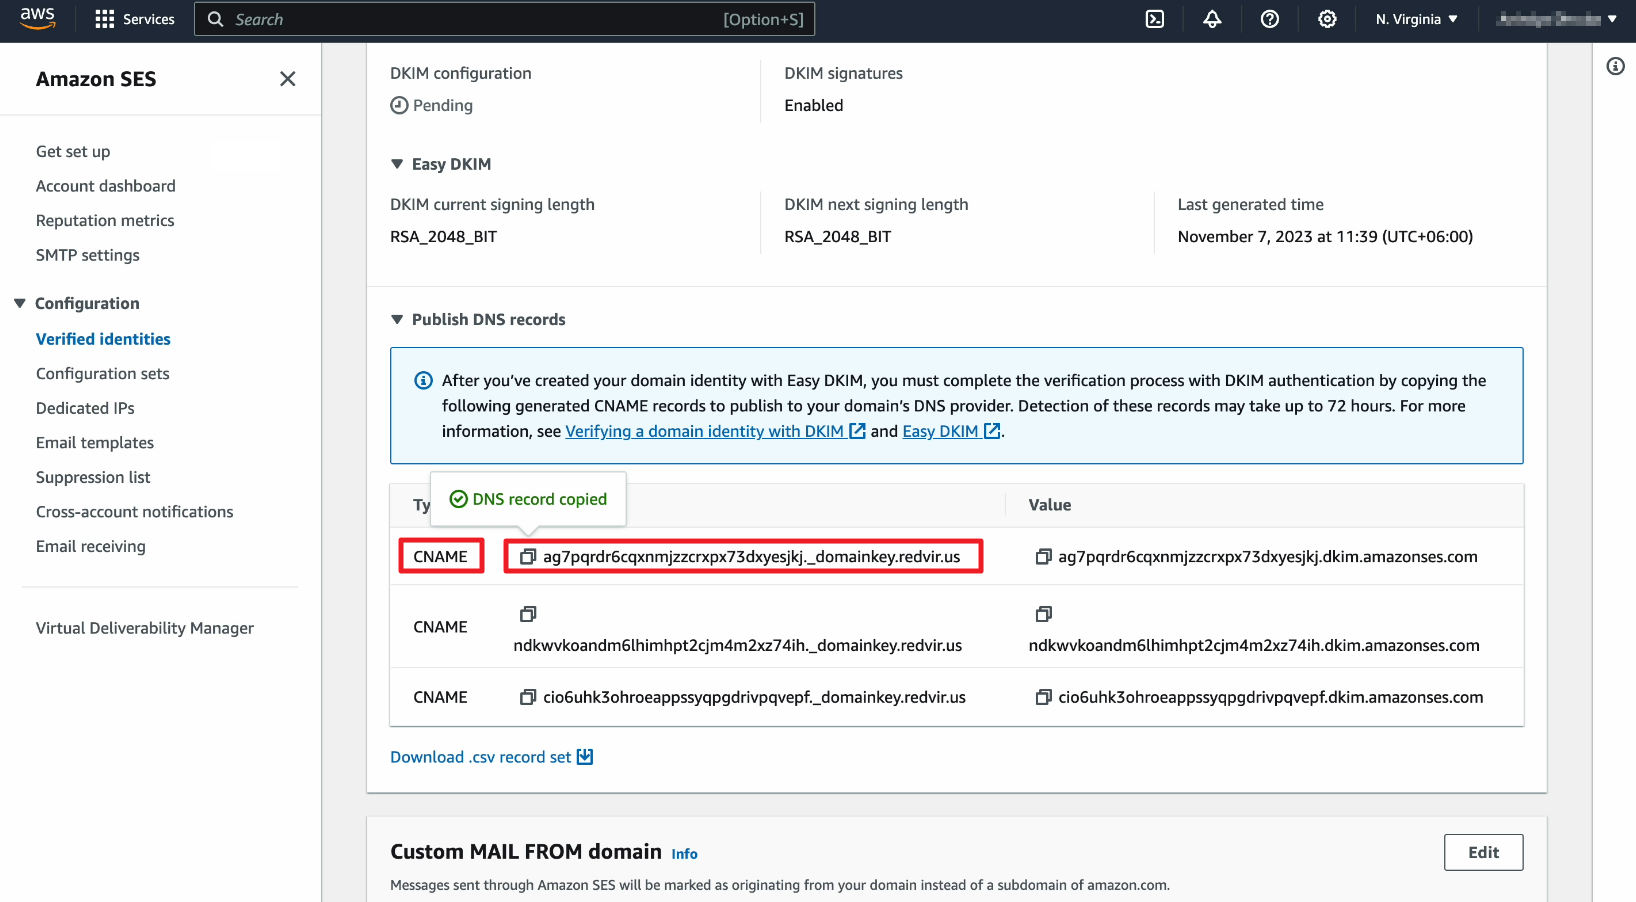
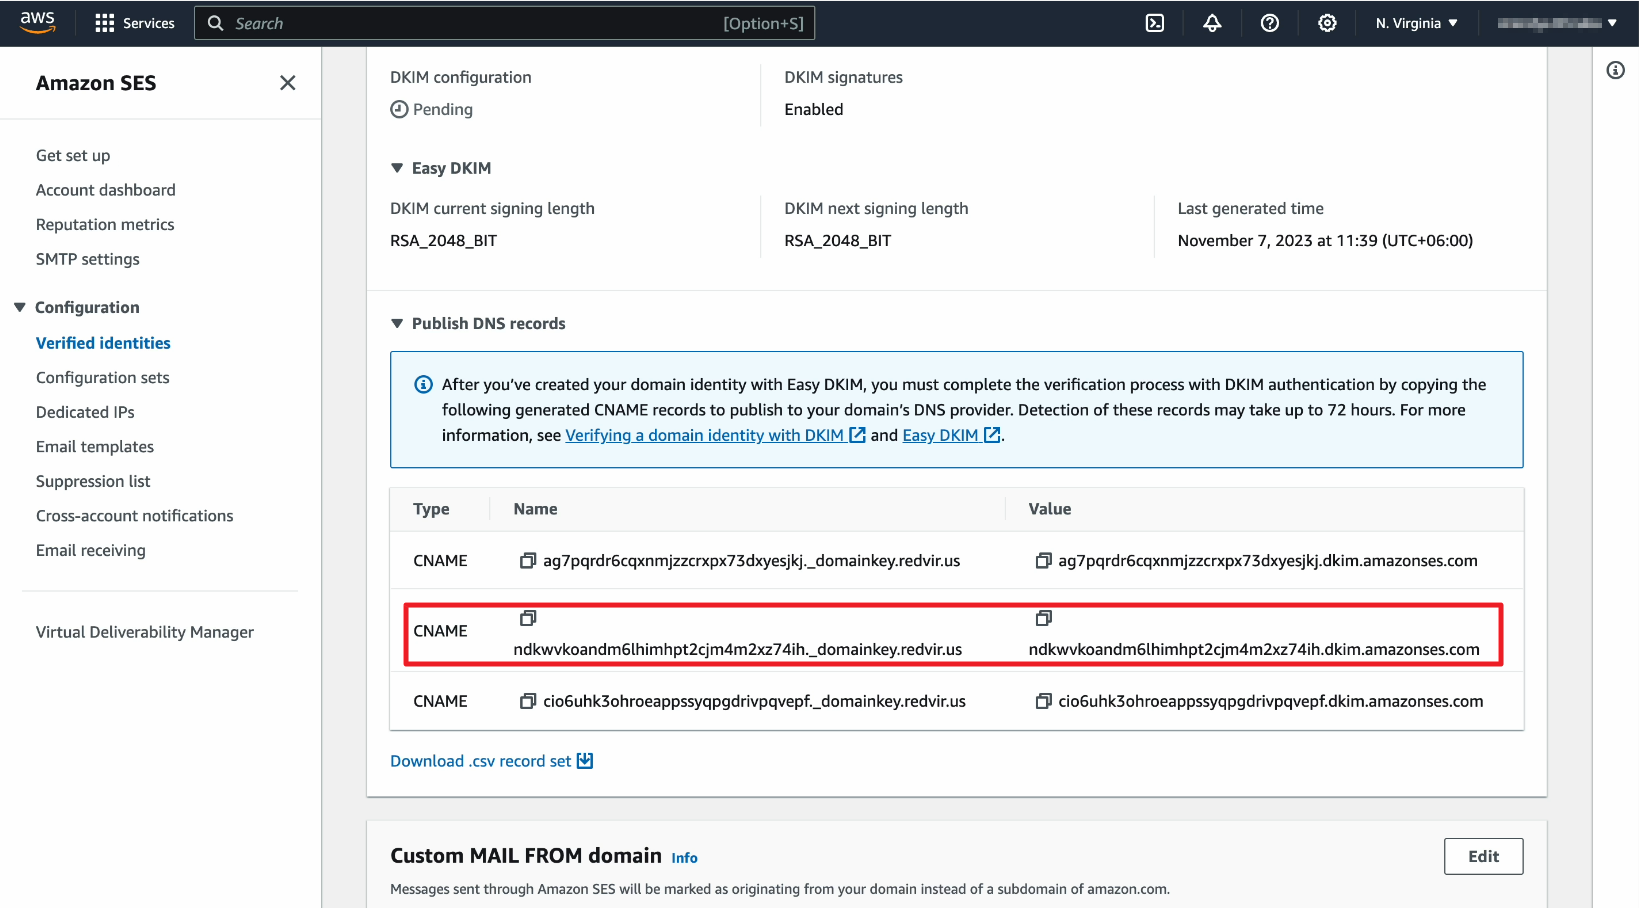
9. You will also notice after scrolling downwards that the DKIM configuration is showing pending status
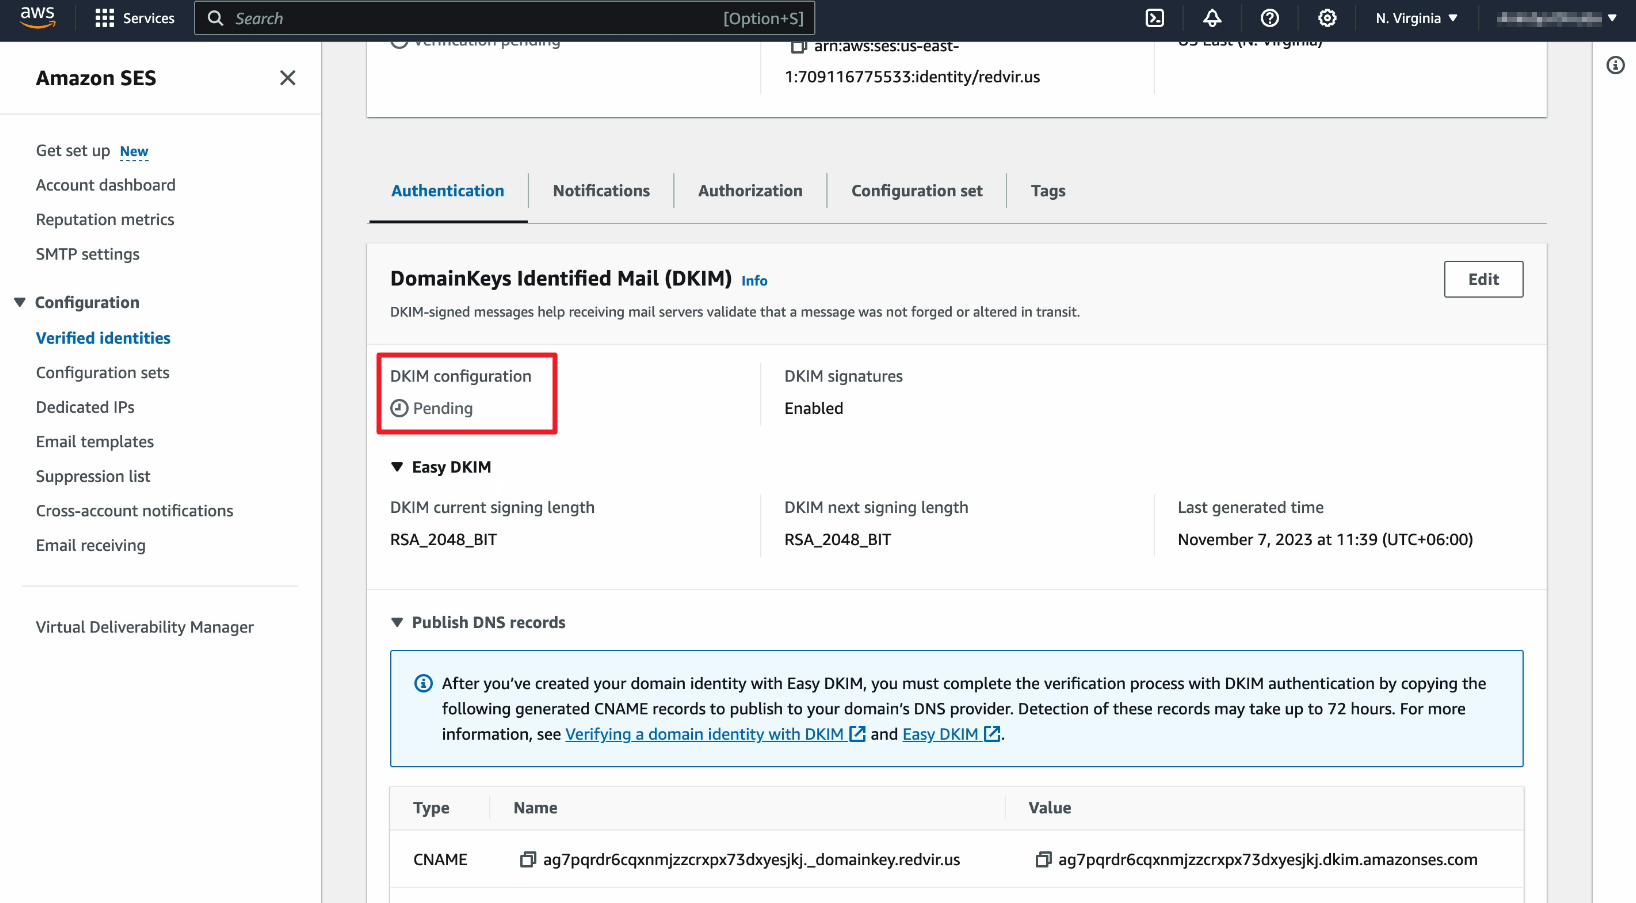
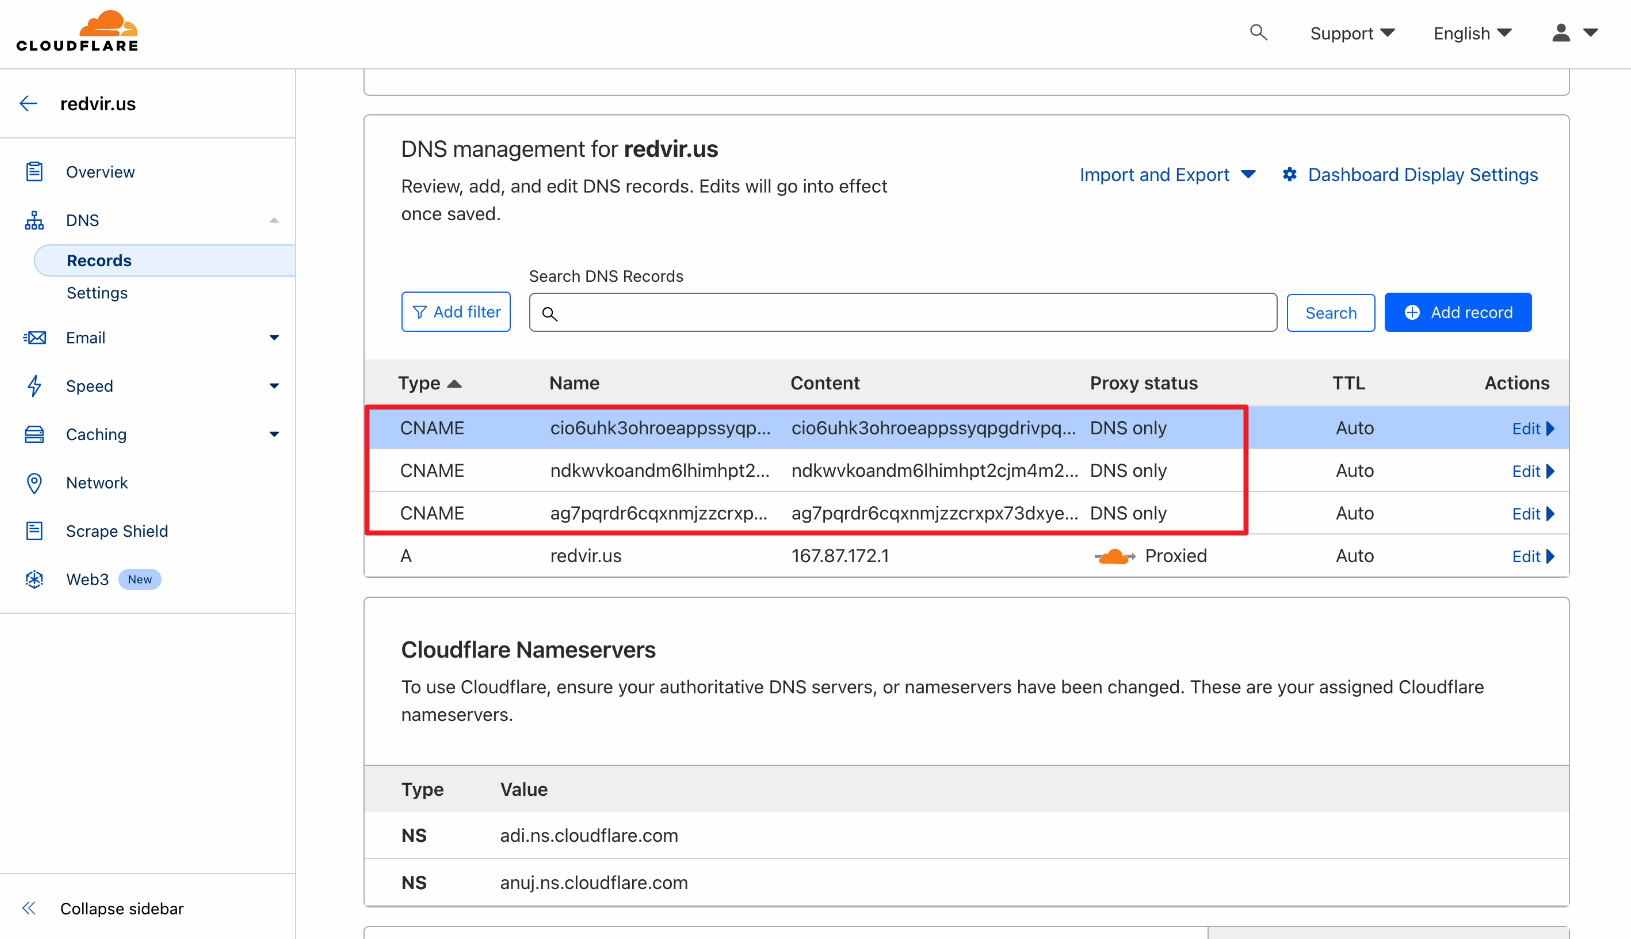
10. Scroll down and copy the first CNAME Records (Name and Value) somewhere to use it on your domain control panel (DNS Management) later. Do keep open the browser tab, you will need this later
11. we are using the CPANEL of our Cloudflare domain. Go to Records and check the DNS management section of your domain.
Please Note: Most domain CPANELS have the same basic configuration like Cloudflare
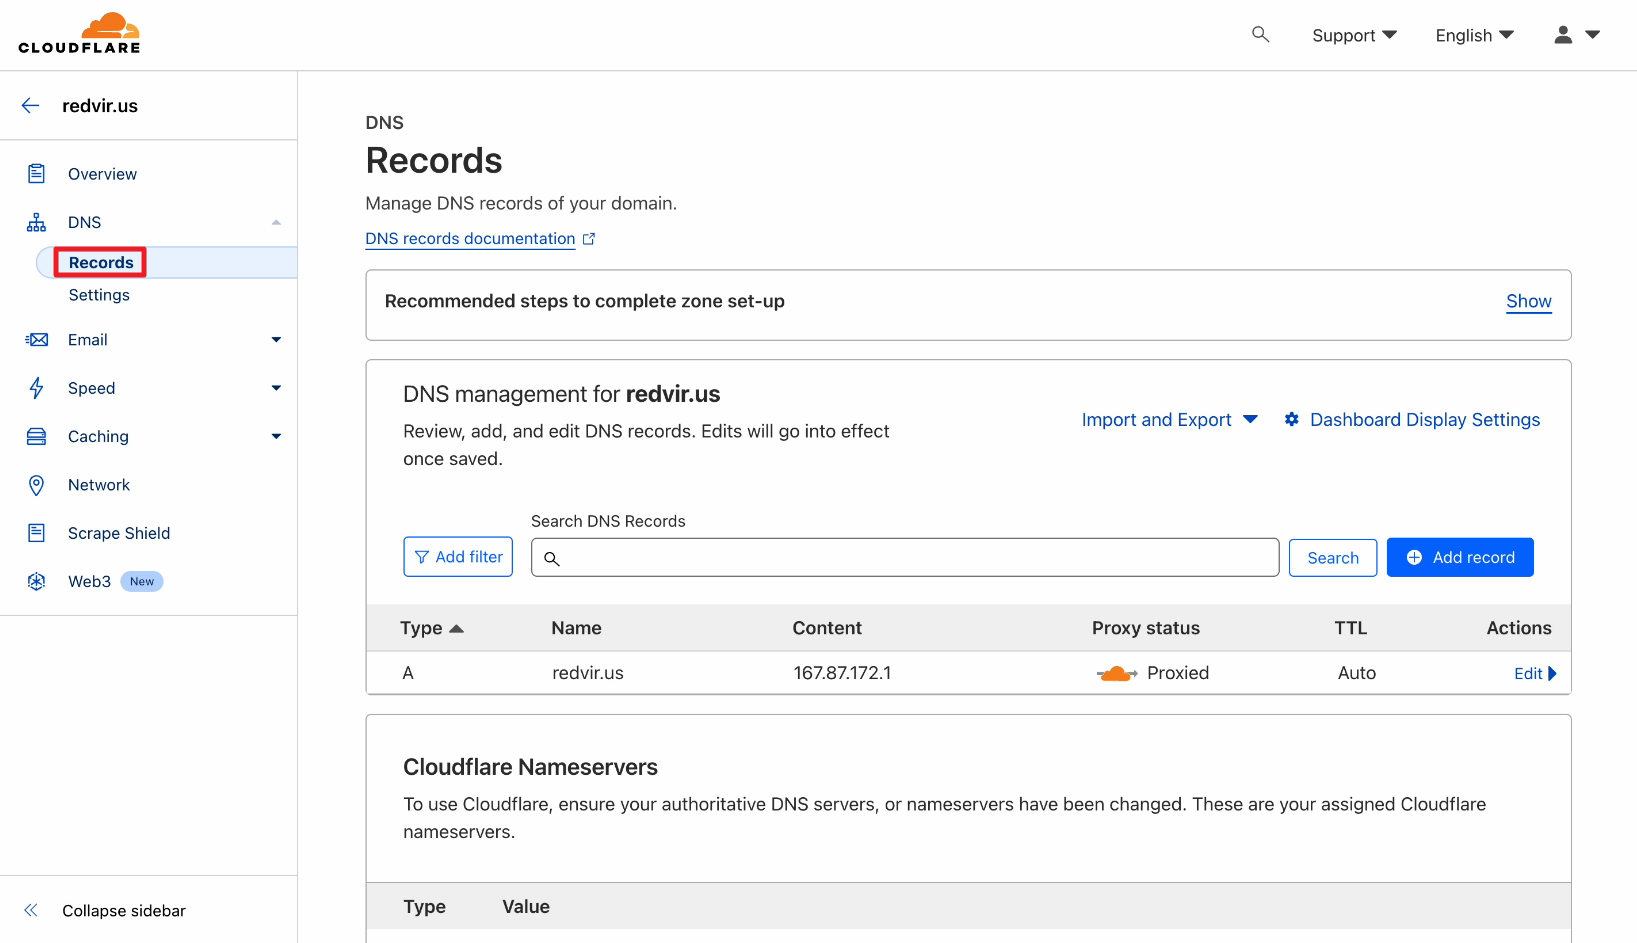
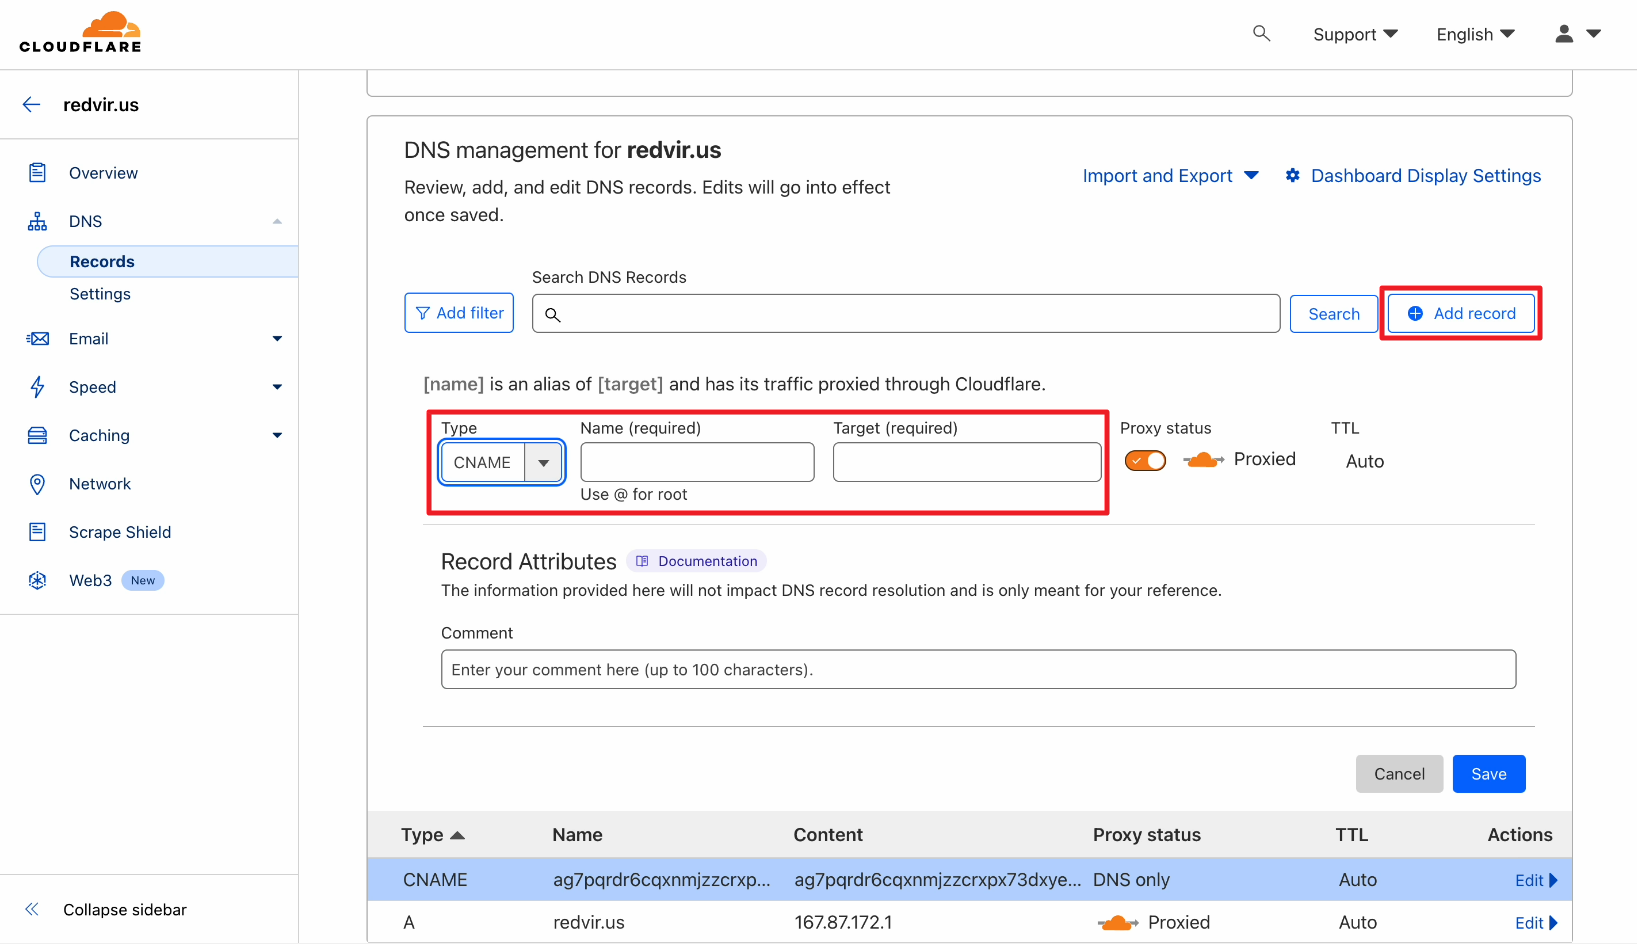
12. Click Add Record under DNS Management
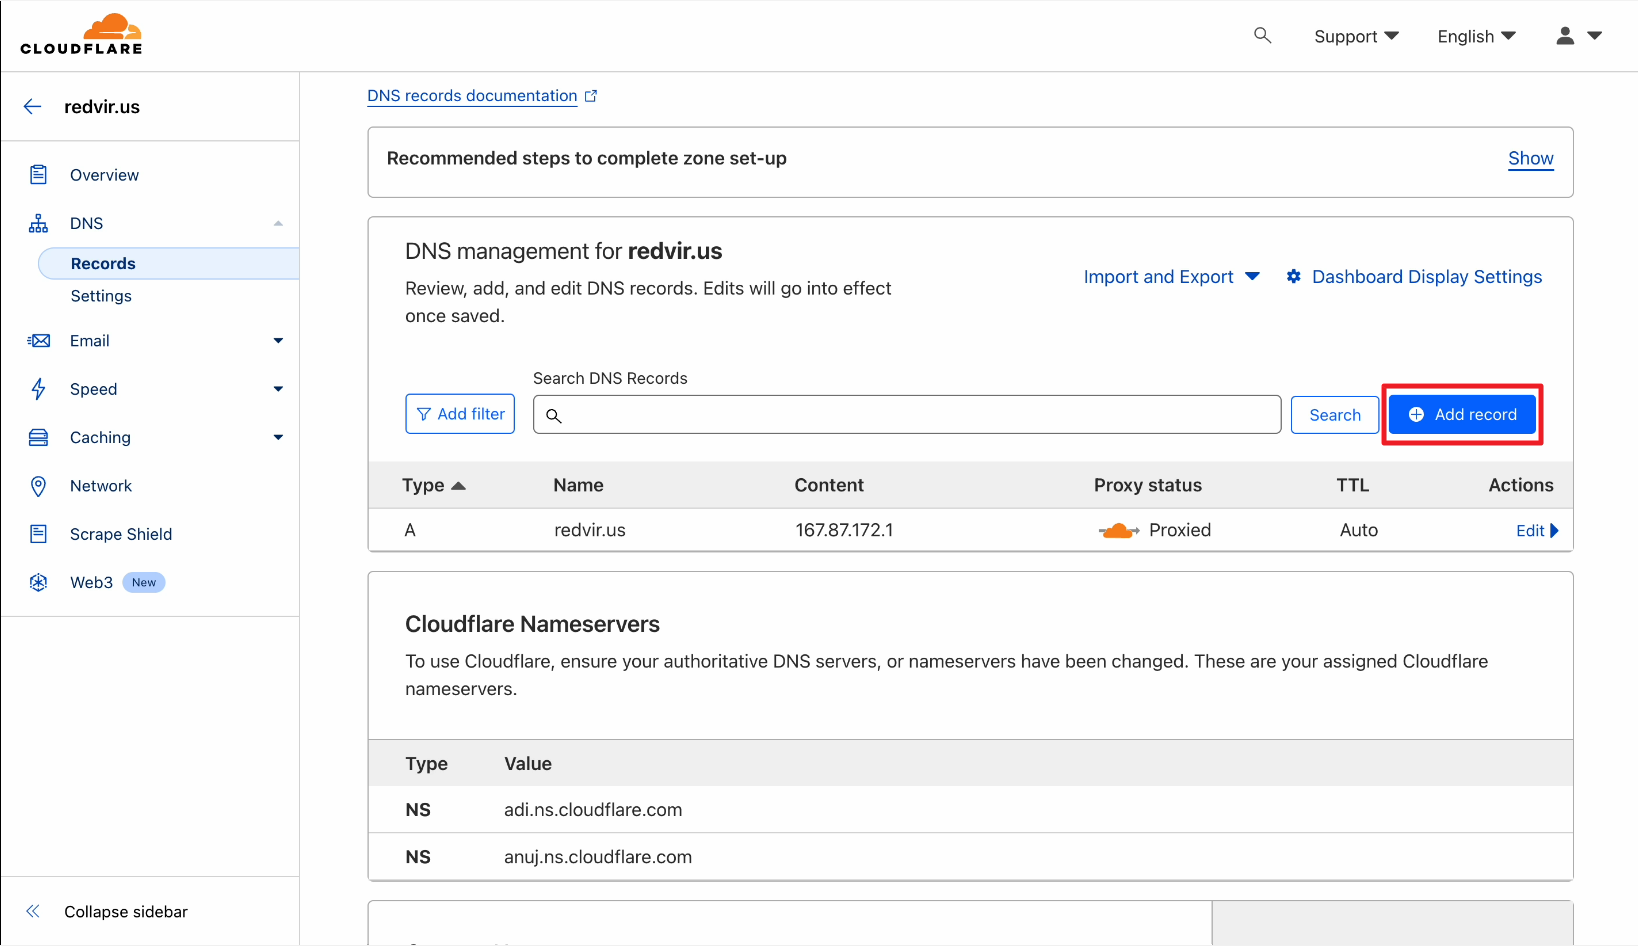
13. Select CNAME from the dropdown list
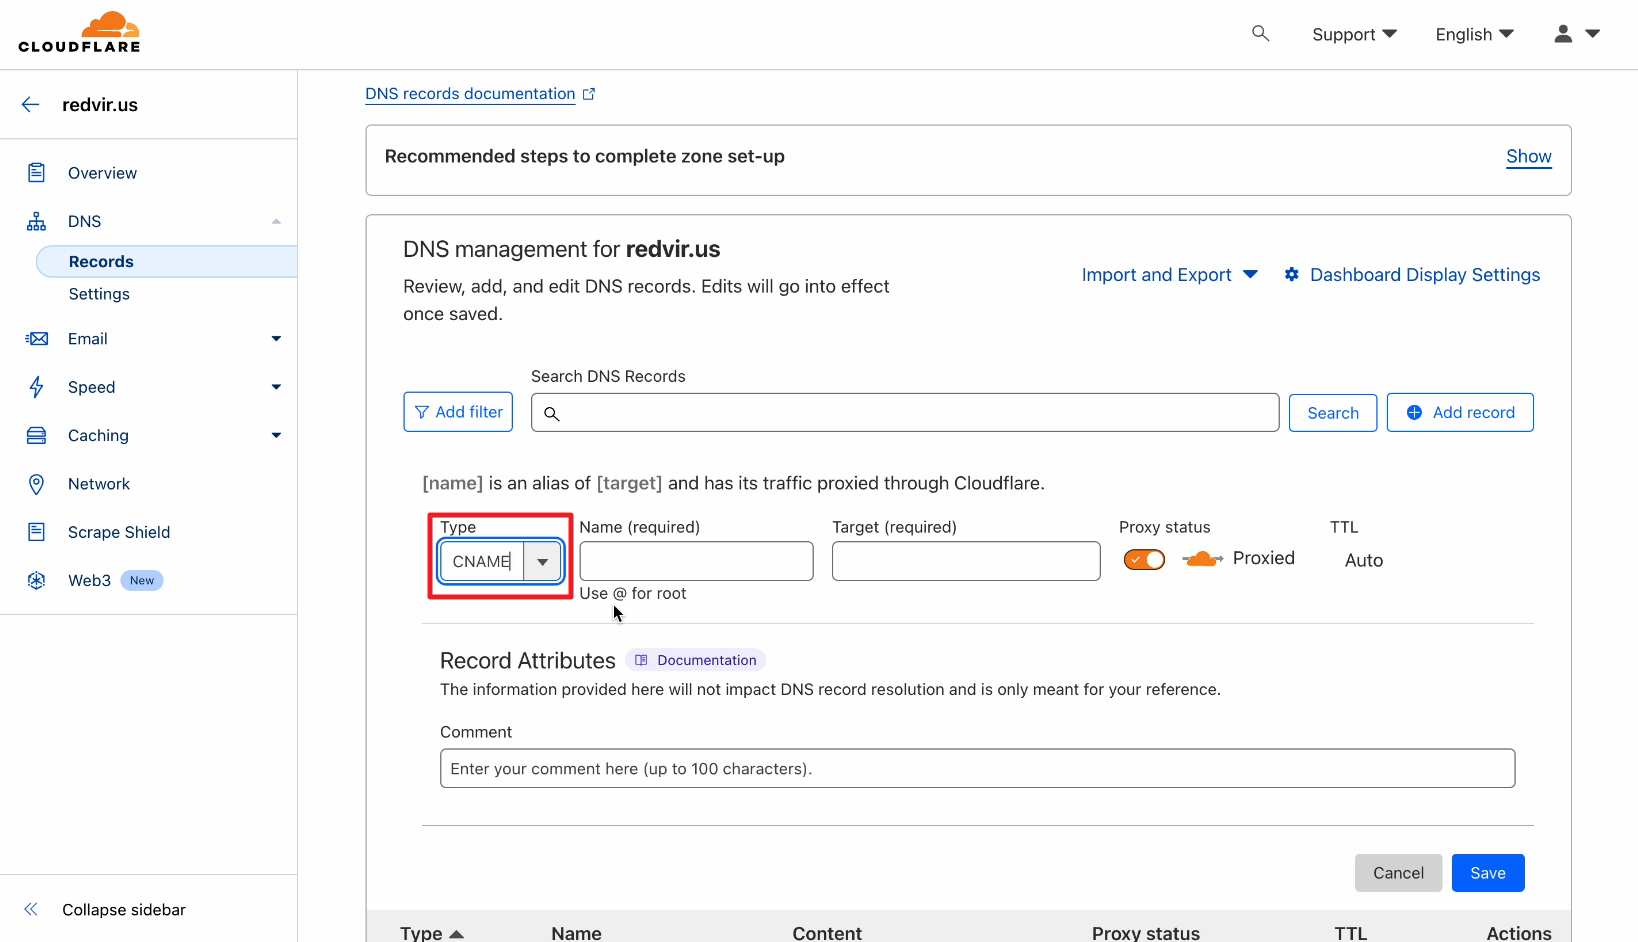
14. Copy the first CNAME Records – Name from Amazon SES page to your DNS Management section of your domain CPANEL
15. Copy the first CNAME Records – Value from Amazon SES page to your DNS Management section of your domain CPANEL

16. Paste the first CNAME Records – Name and Value in the DNS Management section of your domain’s CPANEL
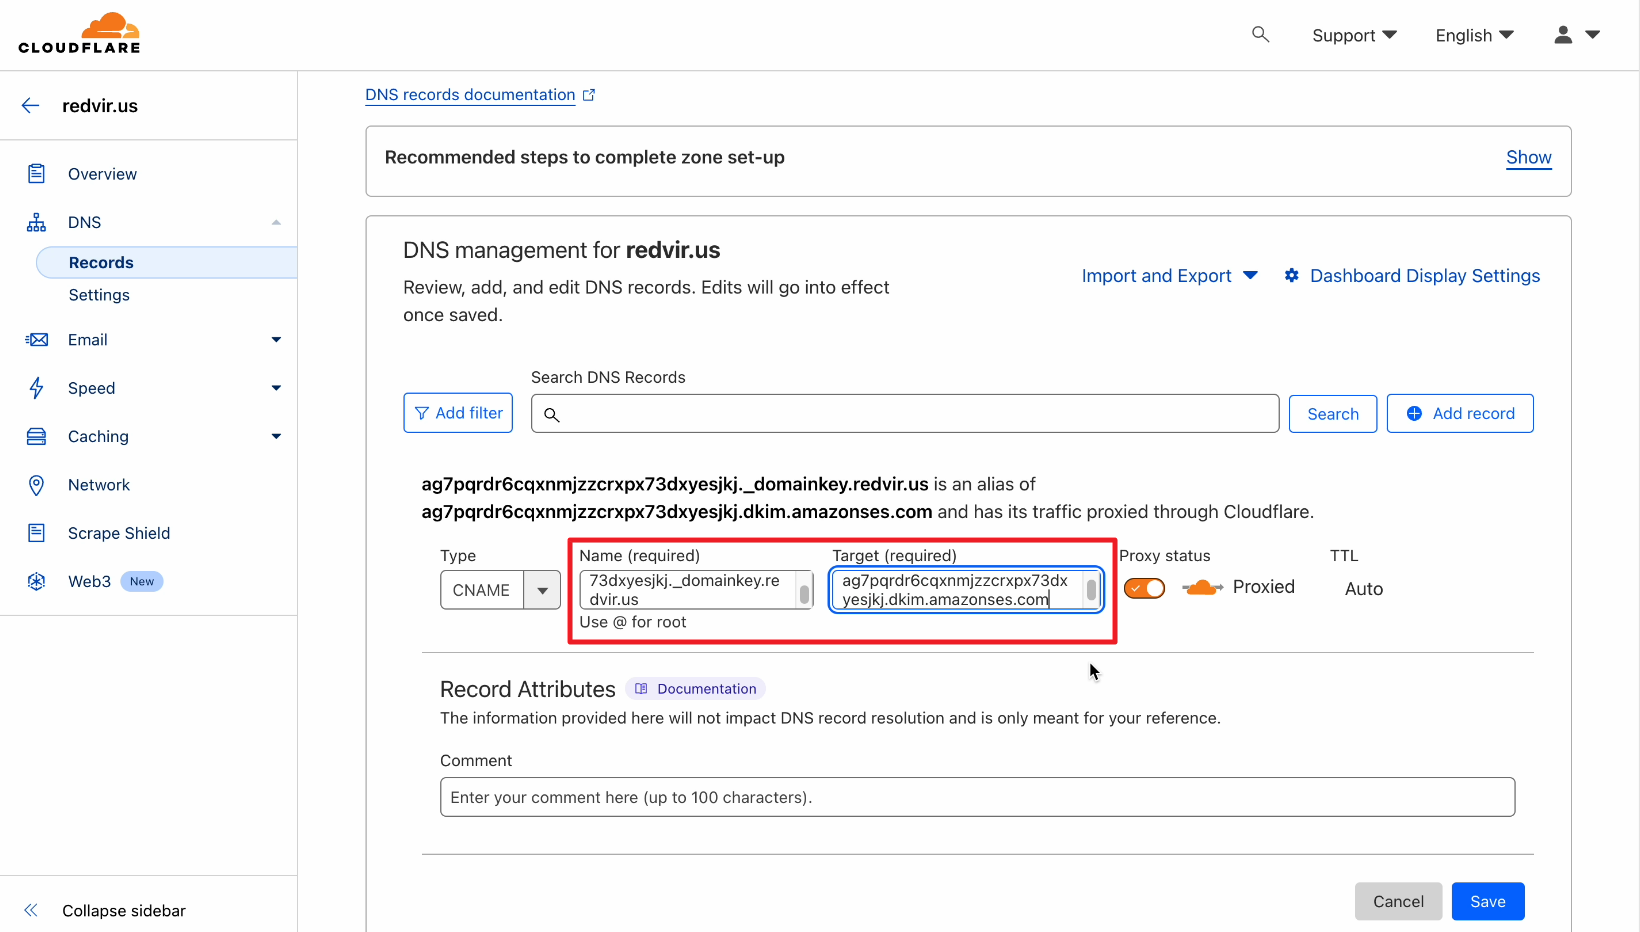
17. Be sure to set the Proxy status to Off (Otherwise you might face DNS Validation Error) and the click Save for saving the configuration
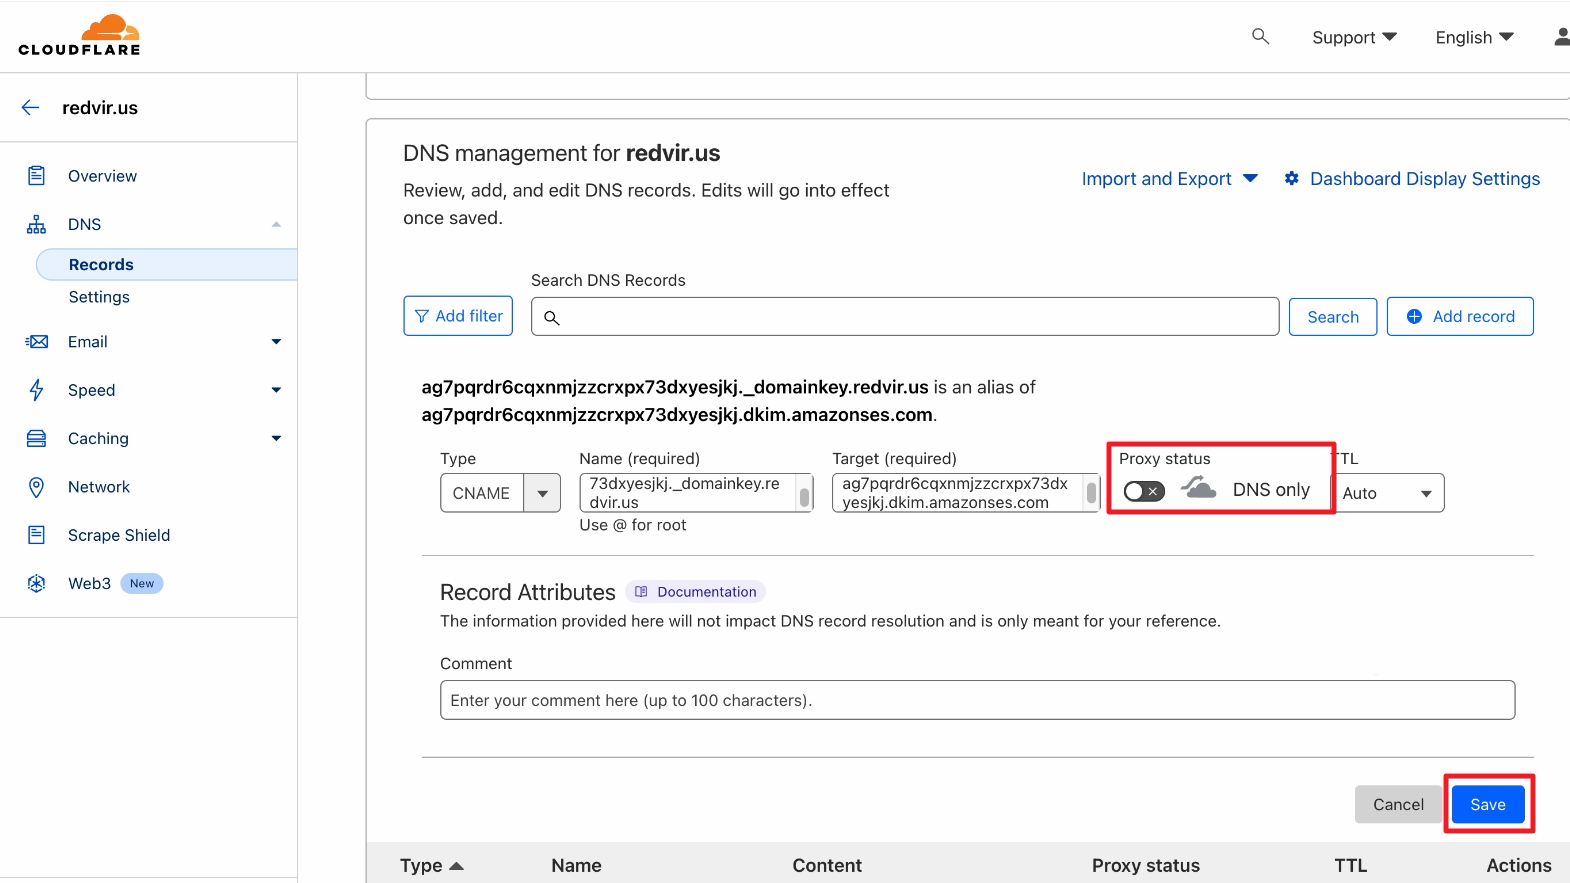
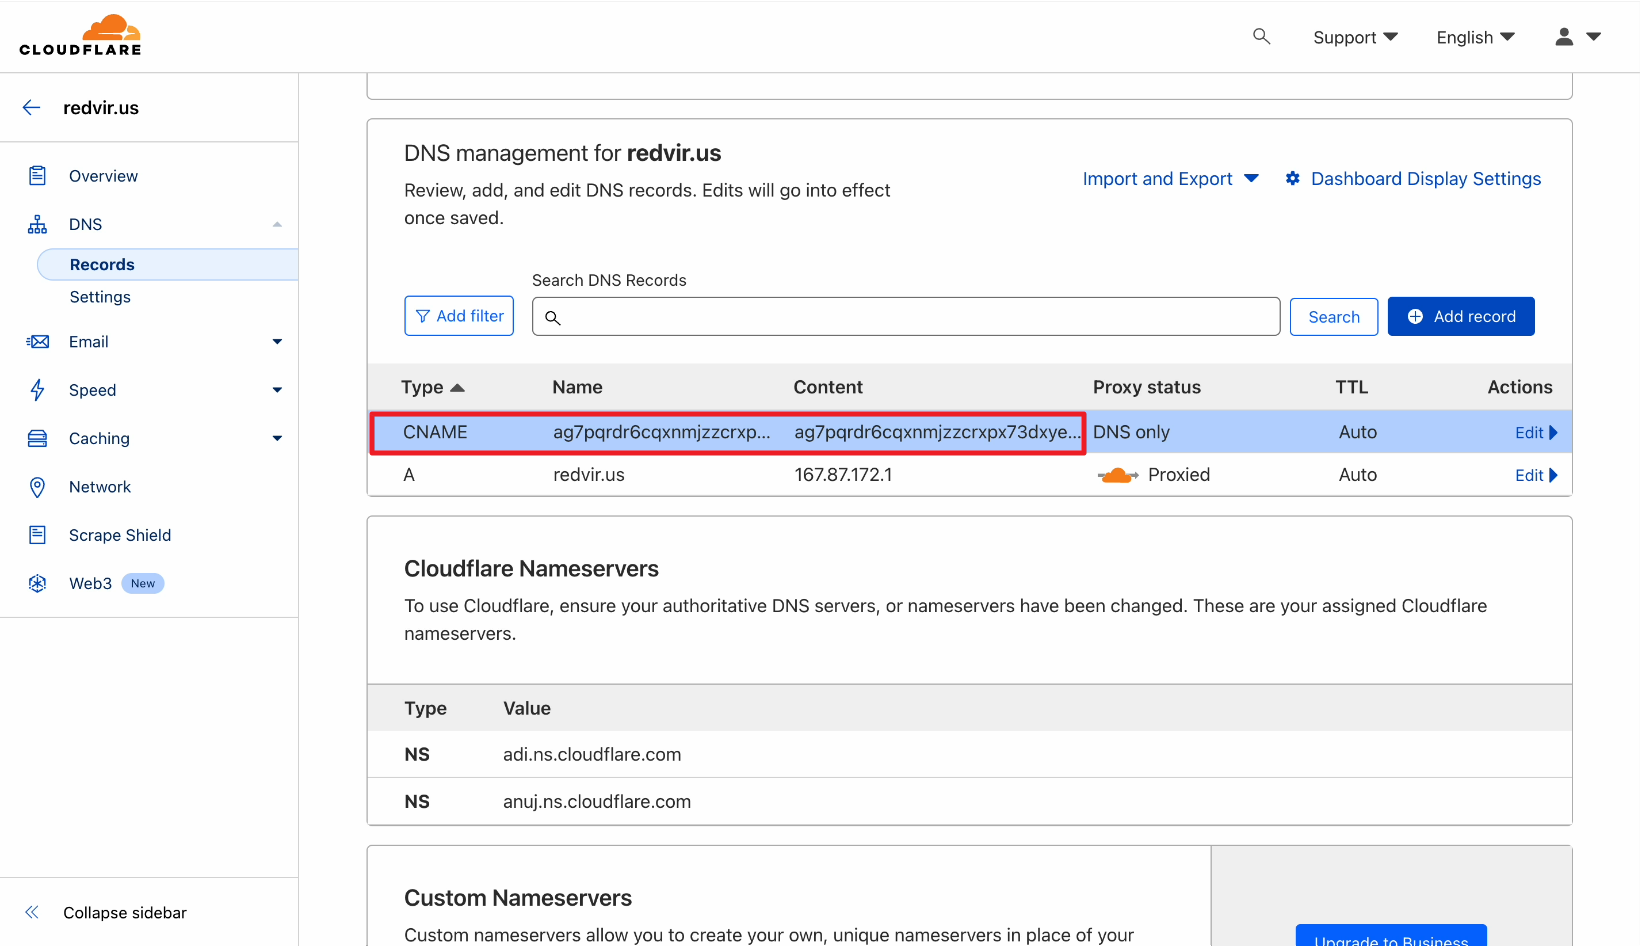
18. The first CNAME configuration has been saved successfully
19. Now copy the second CNAME records from Amazon SES page
20. And then Add record, select CNAME and paste the second CNAME Records – Name and Value in the DNS Management section of your domain’s CPANEL exactly like before
21. Do the same thing for third CNAME records from Amazon SES page by copying it
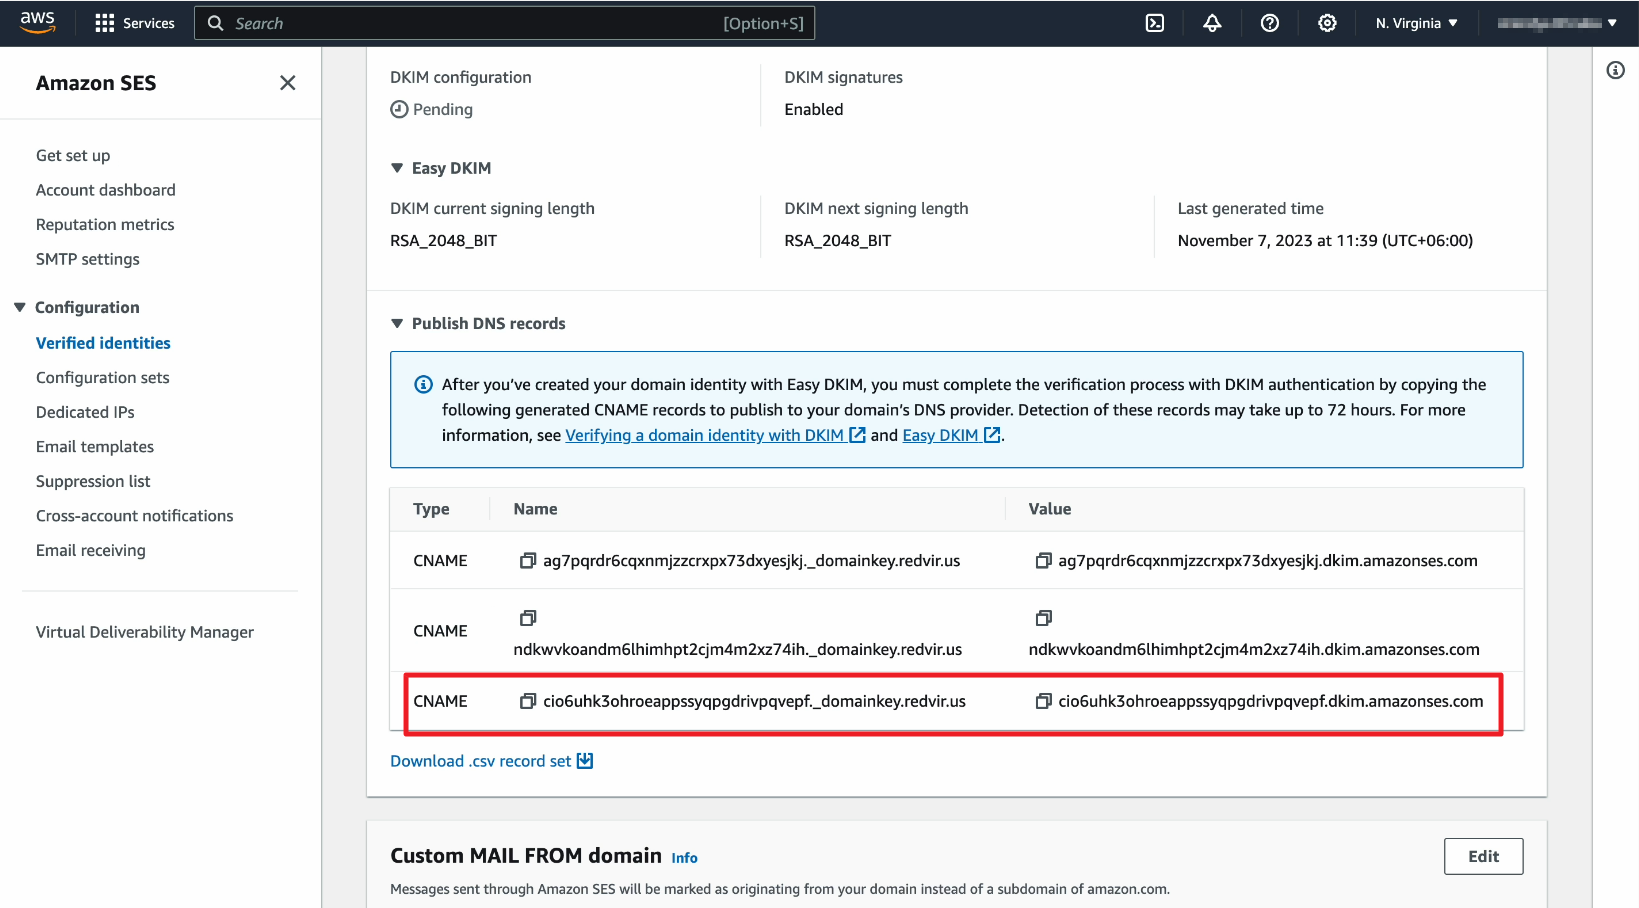
22. And paste it in the DNS Management section of your domain’s CPANEL exactly like before with Proxy status set to Off and click Save
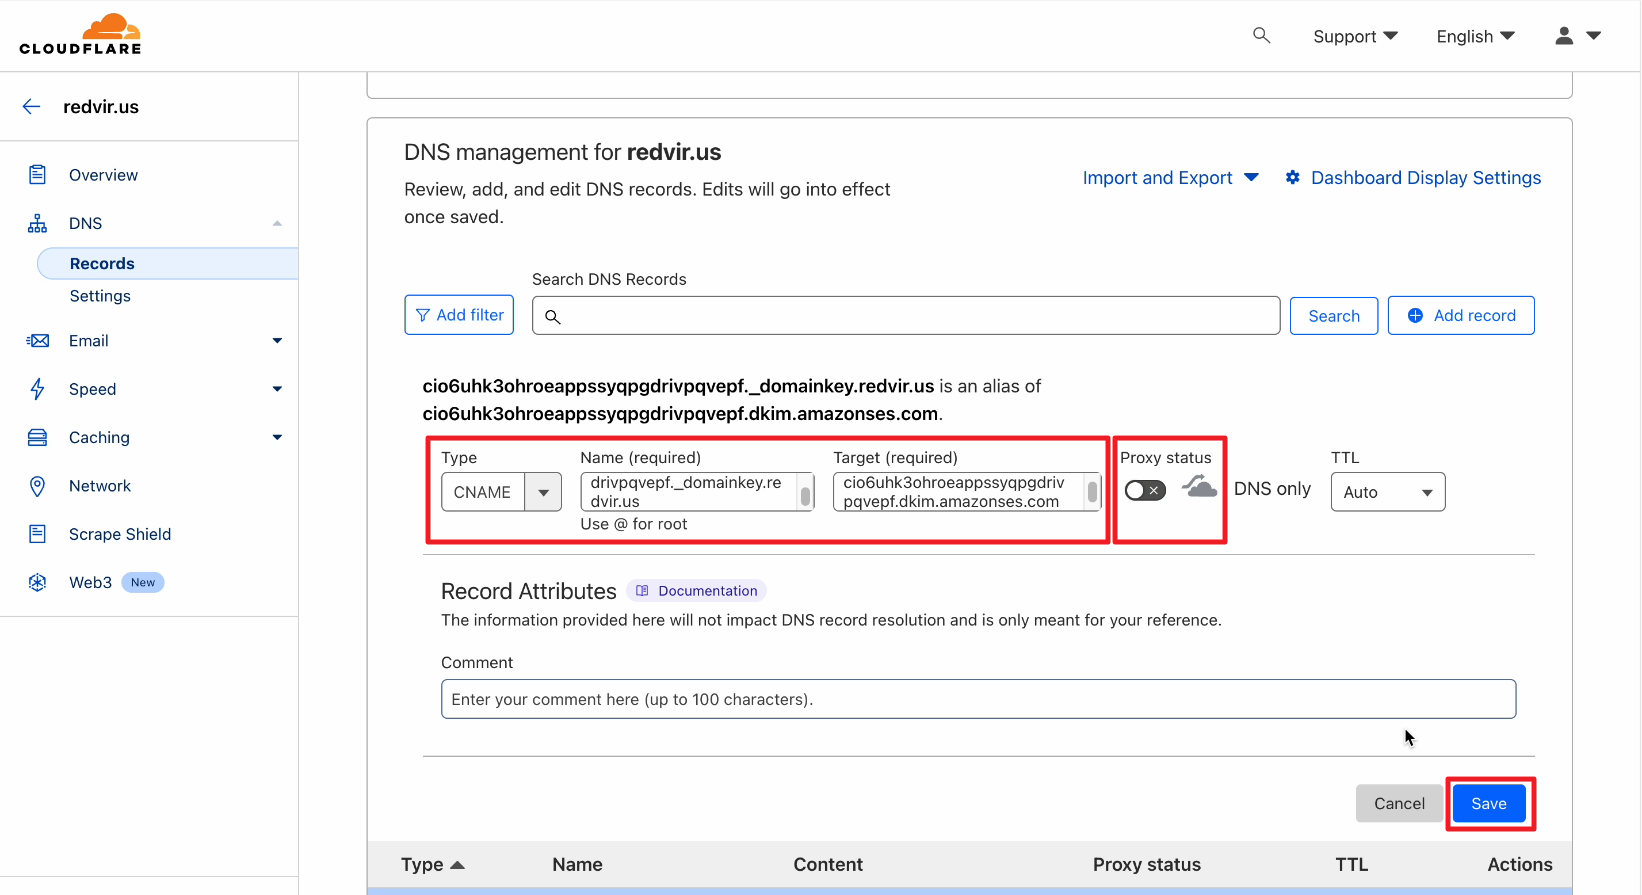
23. Now you DNS Configuration is complete with 3 CNAME Records – Name and Value.
Please note: DNS propagation takes time depending on the Domain service provider. You need to allow some time.
24. Now go back to Amazon SES page, click on Verified identities and check the Identity status. It will now show that the domain is Verified successfully
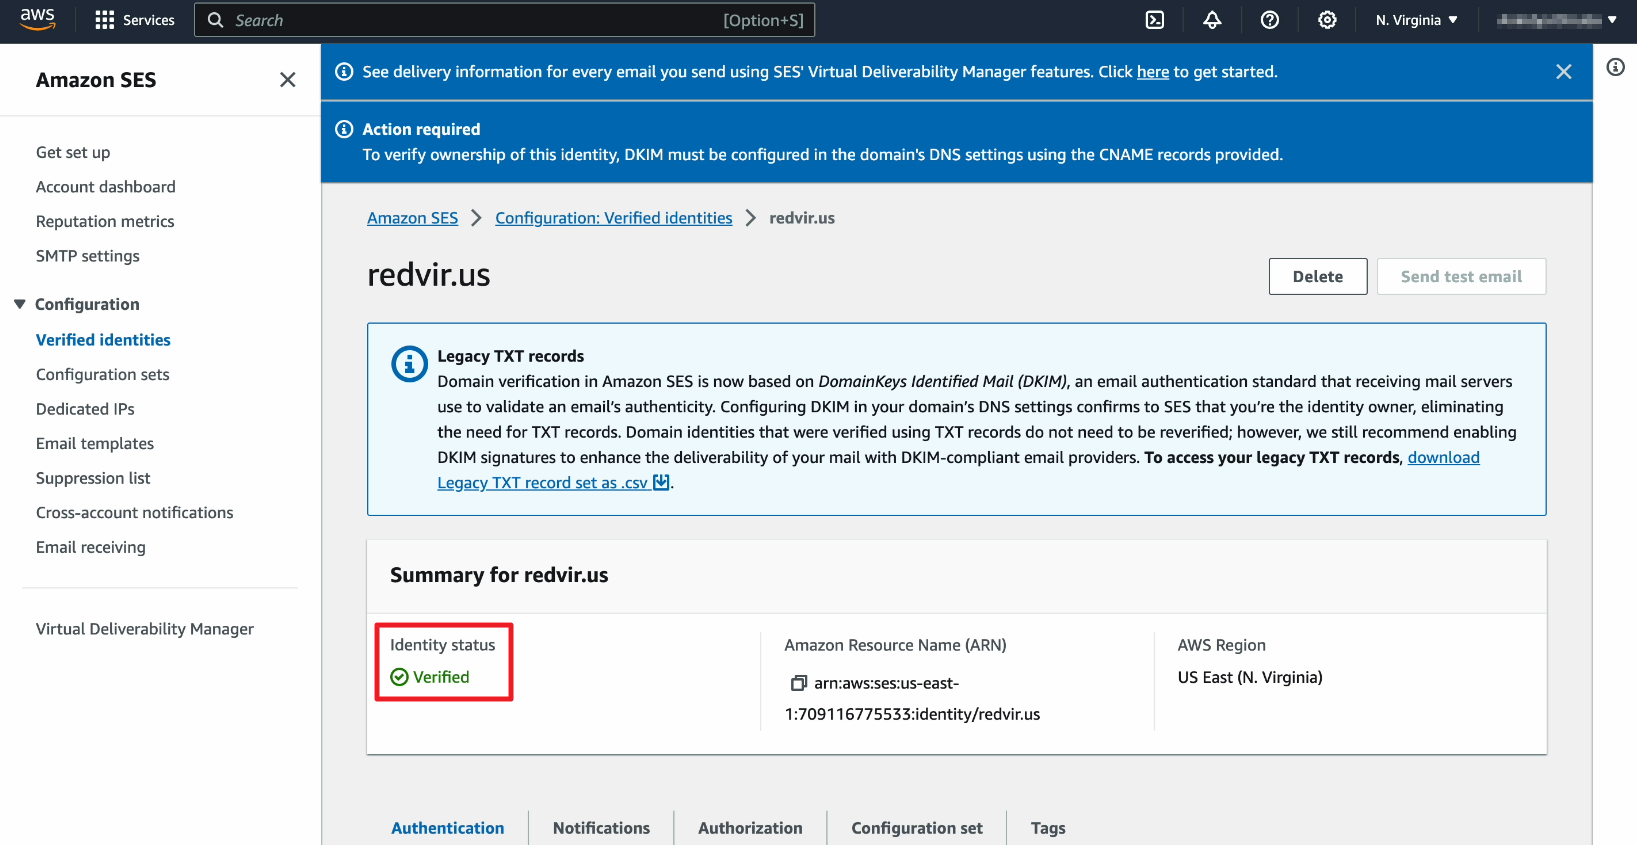
After you verify your domain in Amazon SES, your emails are more likely to reach the inbox instead of being marked as spam. Additionally, verified domains improve your overall sender reputation and simplify bulk email management. Therefore, this step is crucial for maintaining consistent and professional communication with your audience.