You need to verify your sender email address first in Amazon SES before you can use it in your Brand in MailBluster. Verifying sender email address is the most important part because this will help you later when you request Amazon SES for moving out of sandbox mode.
Here are the following steps on how to verify your email address in Amazon SES.
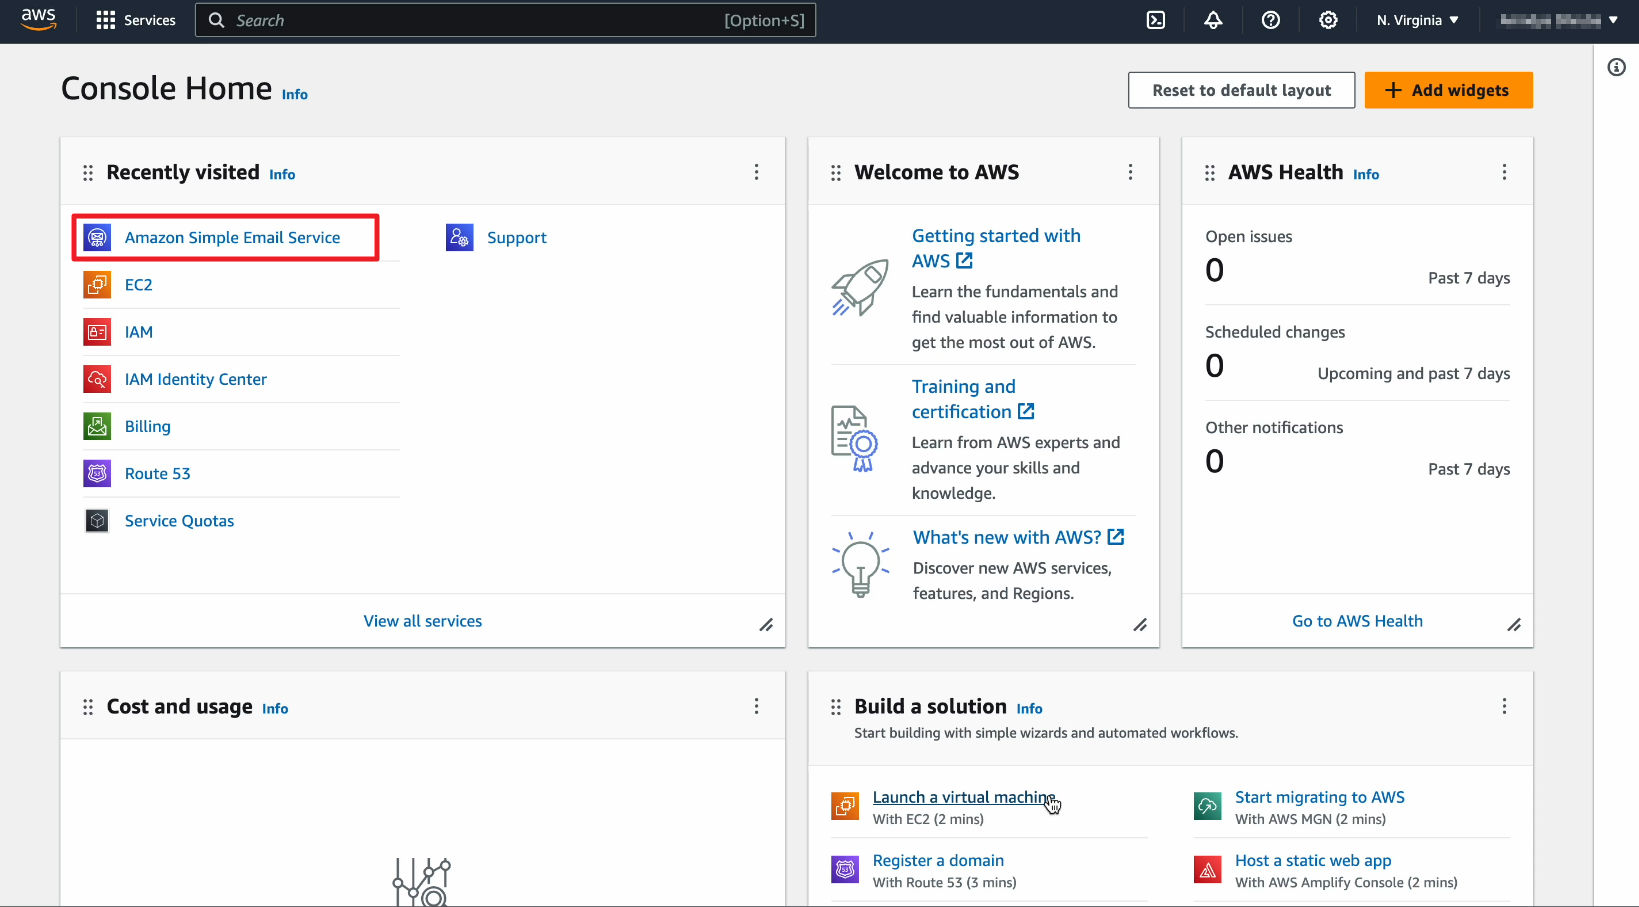
1. Sign in to your AWS Management Console and select Amazon Simple Email Service
![Clicking on Amazon Simple Email Service](https://mailbluster.com/wp-content/uploads/2023/11/VerifyAWS_01.png)
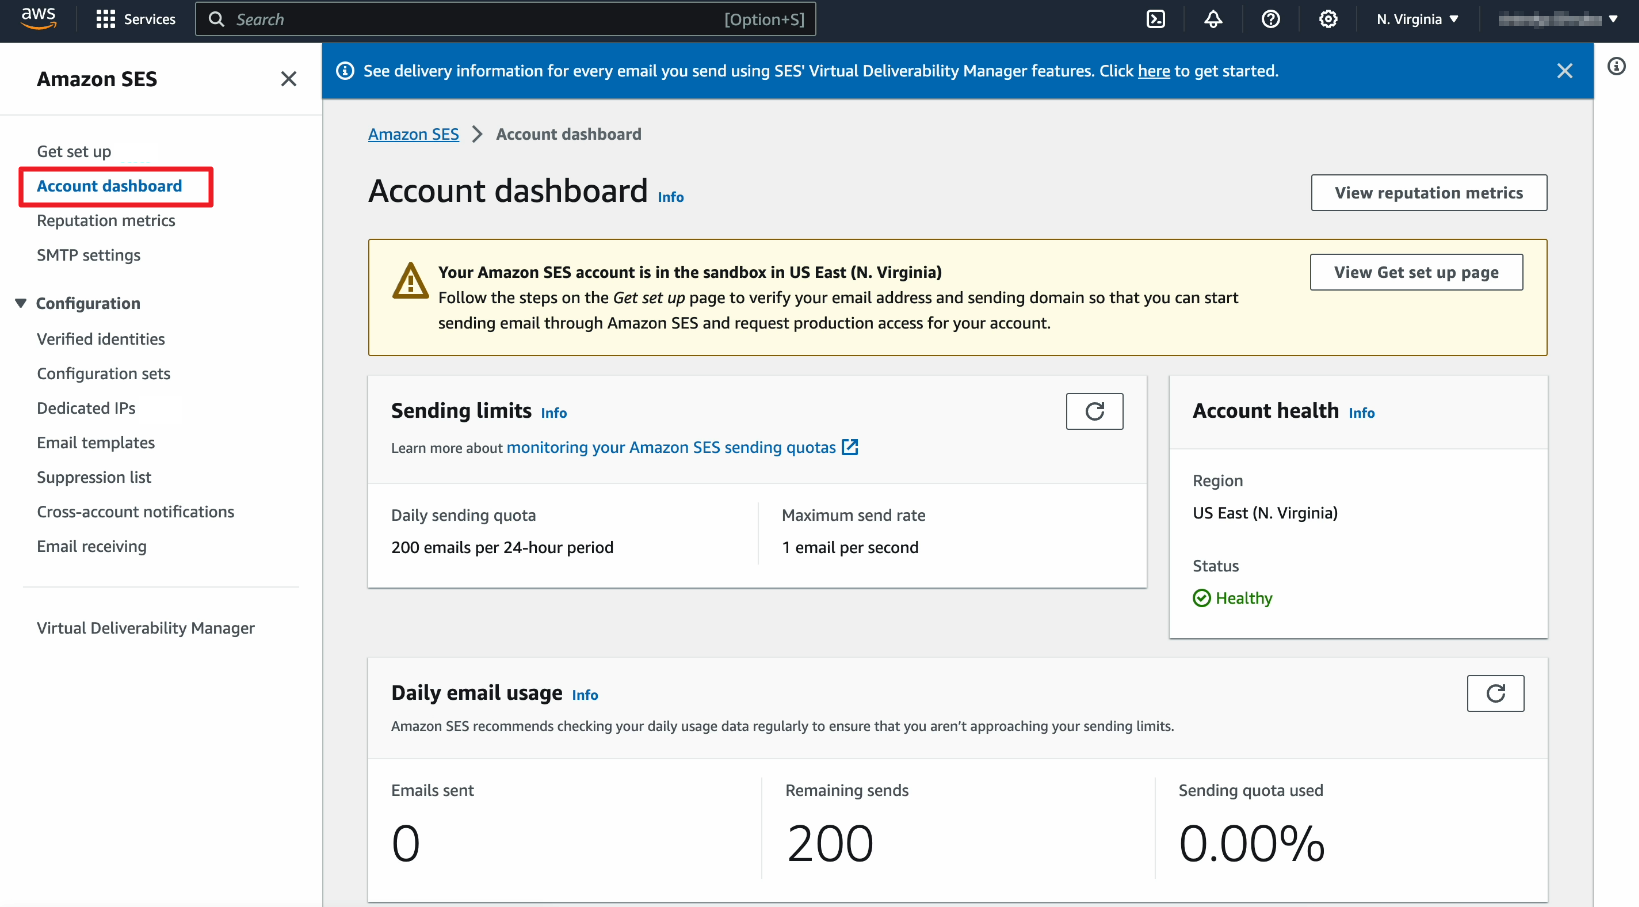
2. Click on Account Dashboard
![Clicking on Account dashboard](https://mailbluster.com/wp-content/uploads/2023/11/VerifyAWS_02.png)
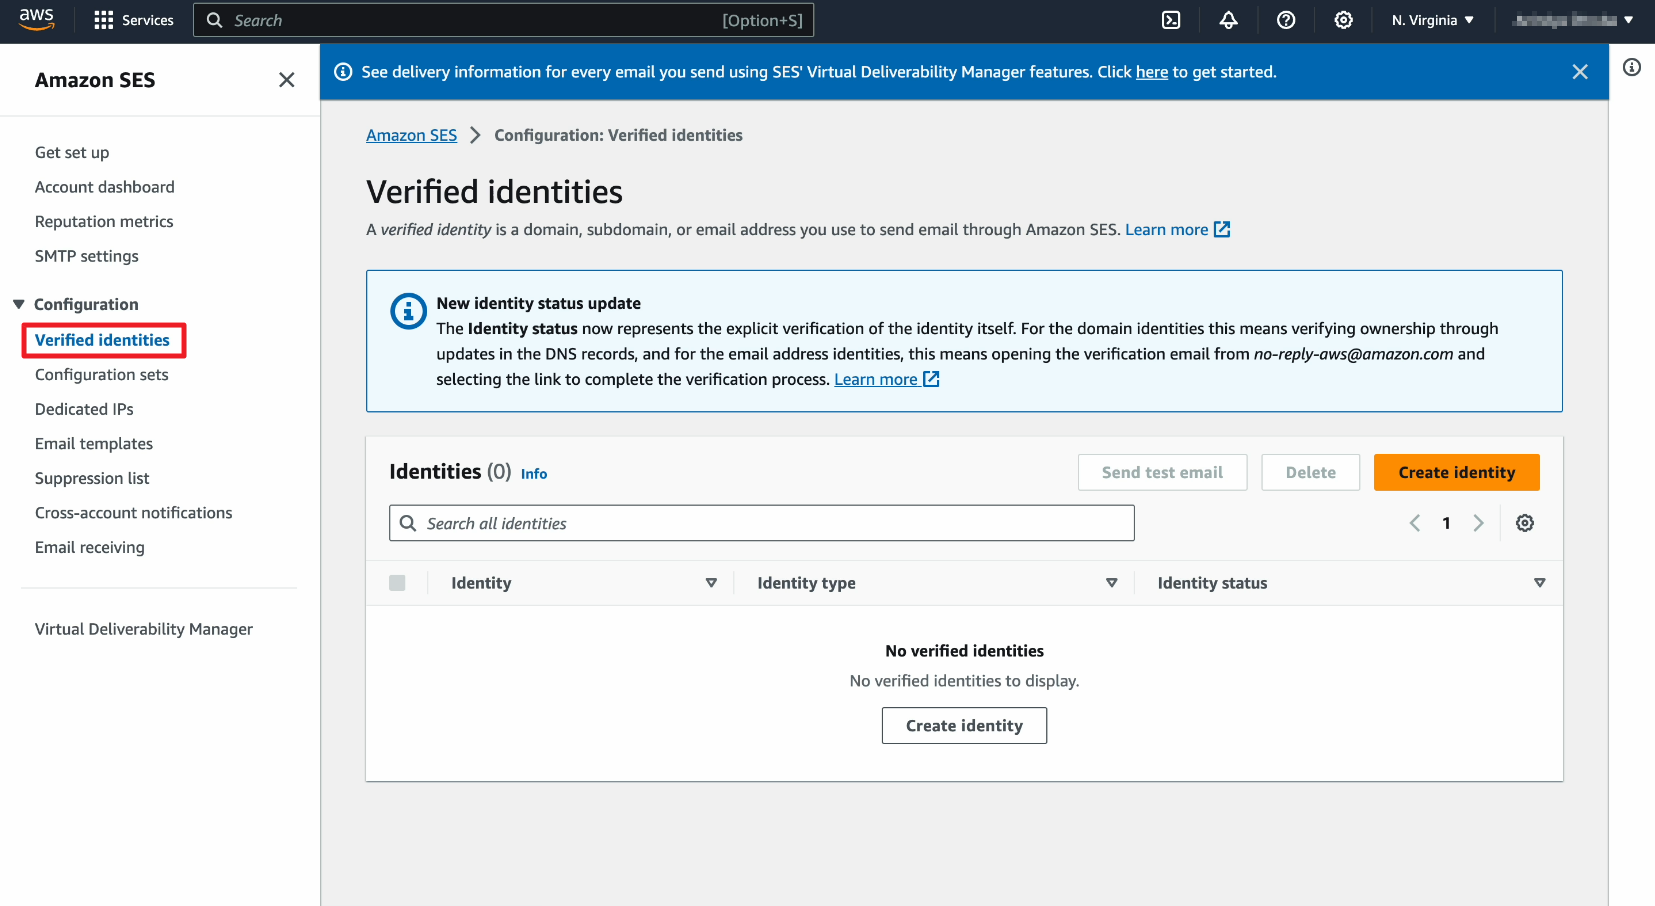
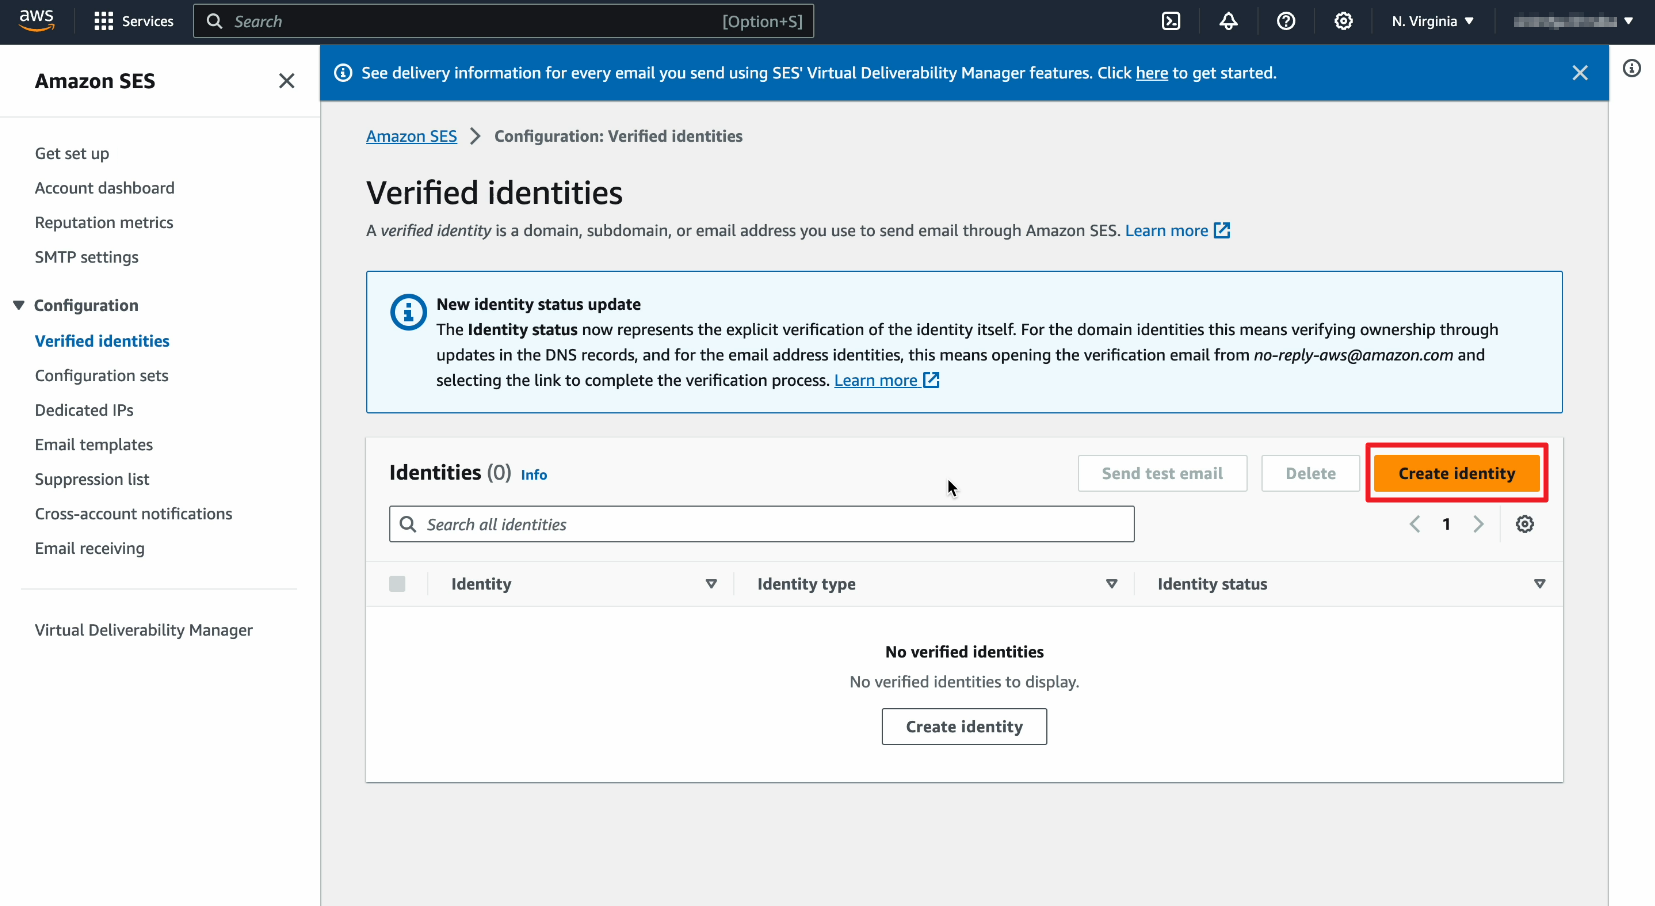
3. Click on Verified Identities
![Clicking on Verified Identities](https://mailbluster.com/wp-content/uploads/2023/11/VerifyAWS_03-1.png)
4. Click on Create identity
![Clicking on Create identity](https://mailbluster.com/wp-content/uploads/2023/11/VerifyAWS_04-1.png)
5. Select Identity type: Email address
![Selecting Email address](https://mailbluster.com/wp-content/uploads/2023/11/VerifyAWS_05.png)
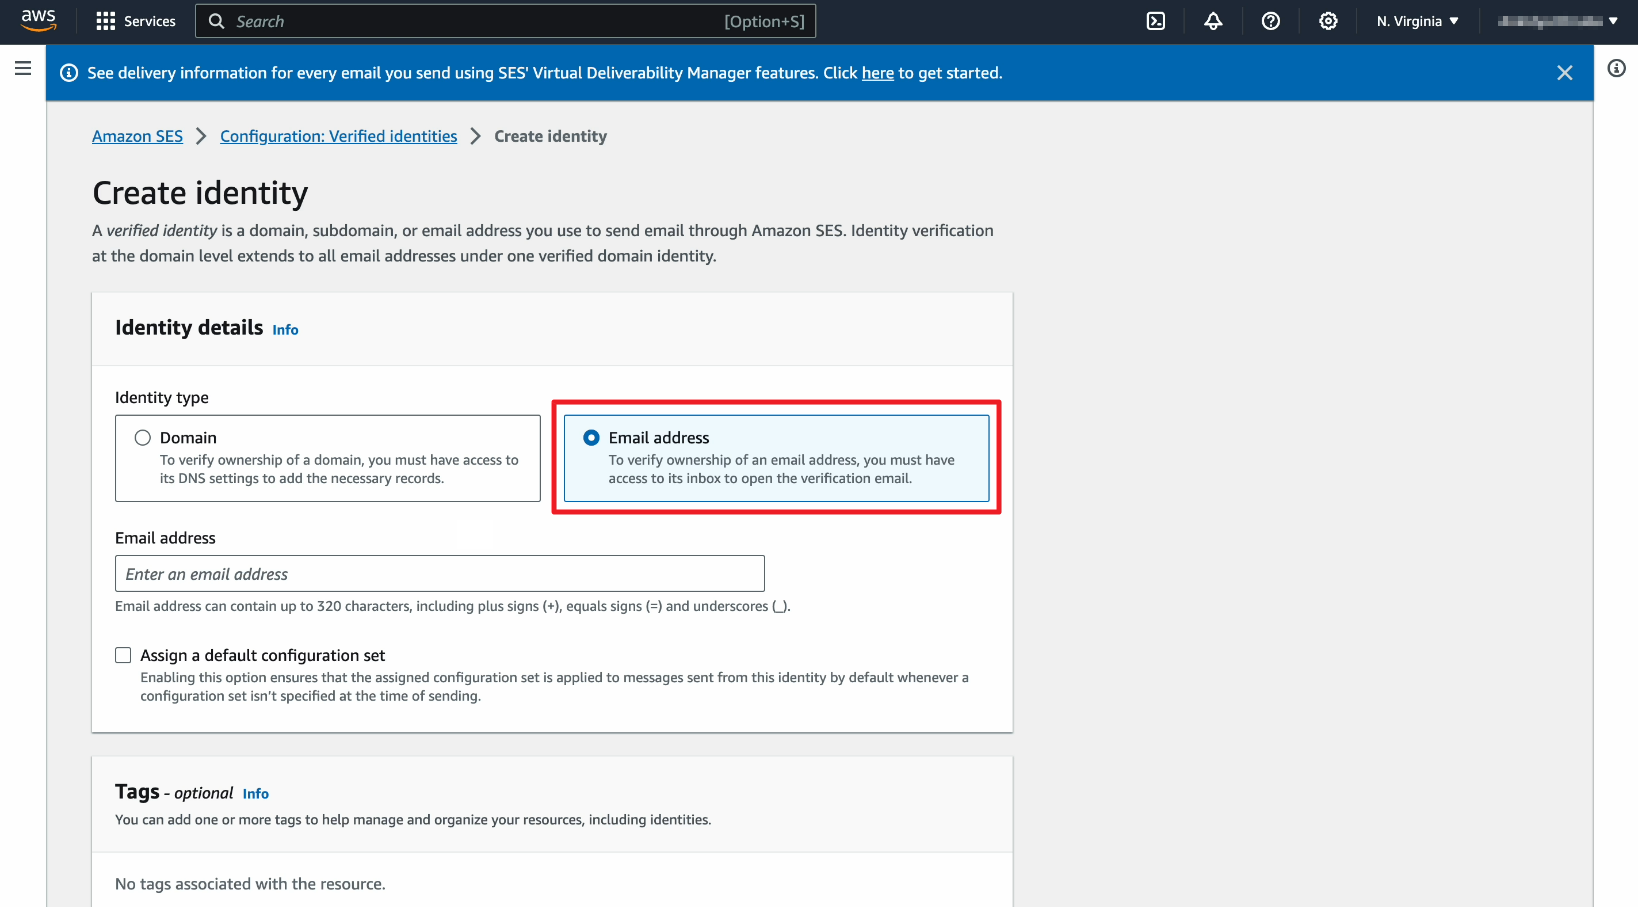
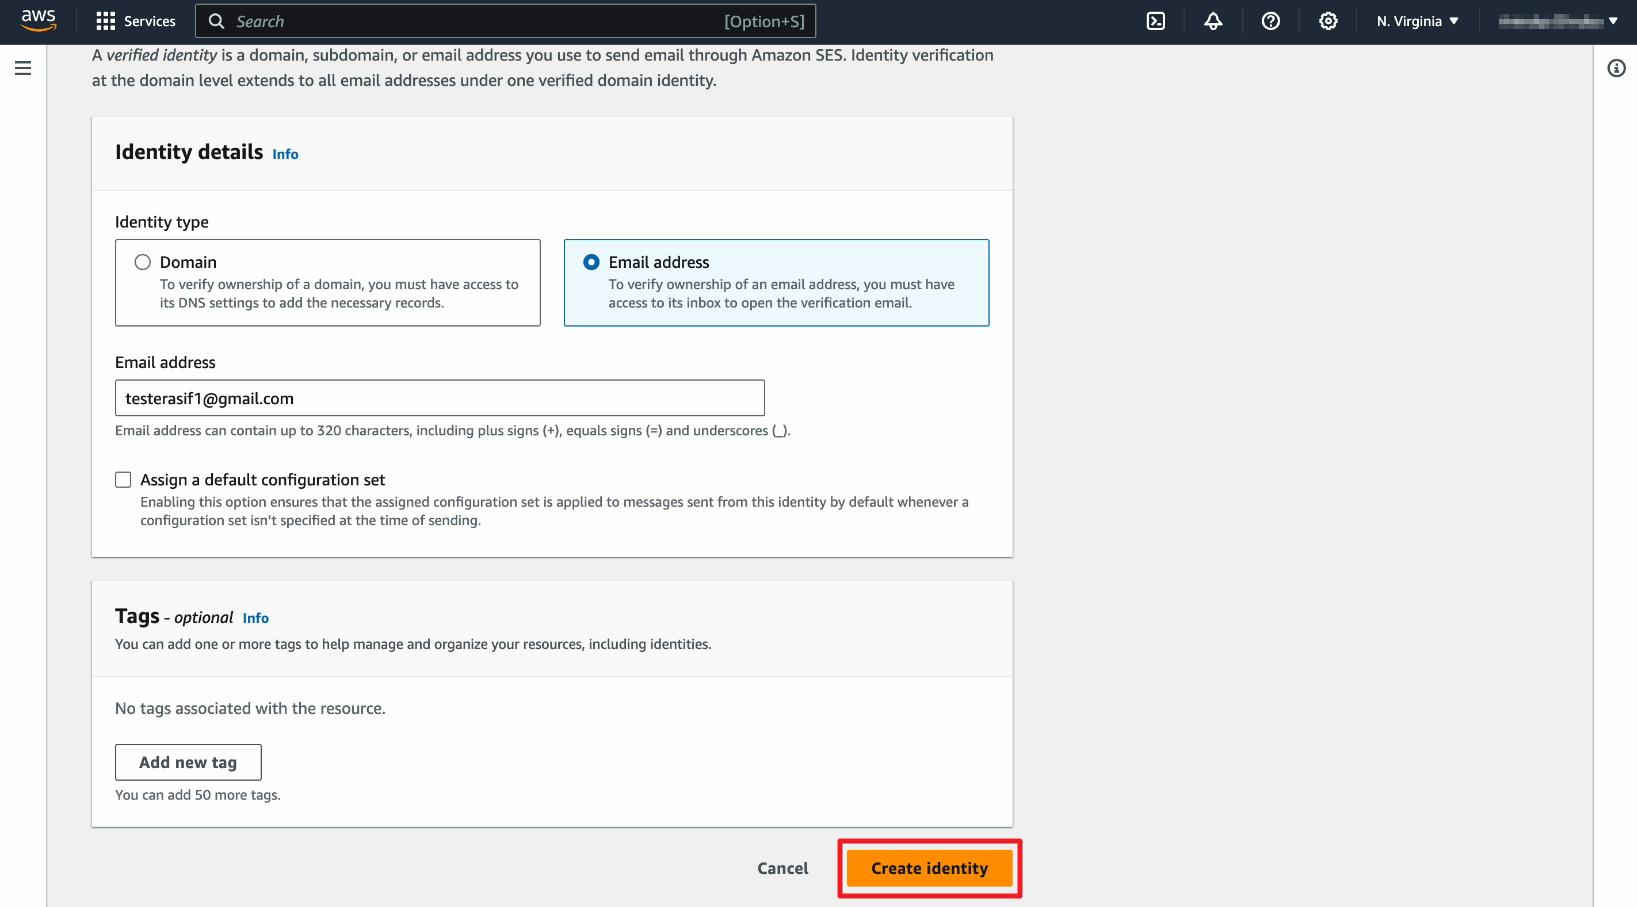
6. Enter the email address which your want to set as sender email address.
Please note: sender email address is not your AWS account email address or MailBluster account email address
![Entering email address in Create identity under Amazon SES](https://mailbluster.com/wp-content/uploads/2023/11/VerifyAWS_06.png)
7. Scroll down and click Create identity
![Clicking on Create identity button](https://mailbluster.com/wp-content/uploads/2023/11/VerifyAWS_07.png)
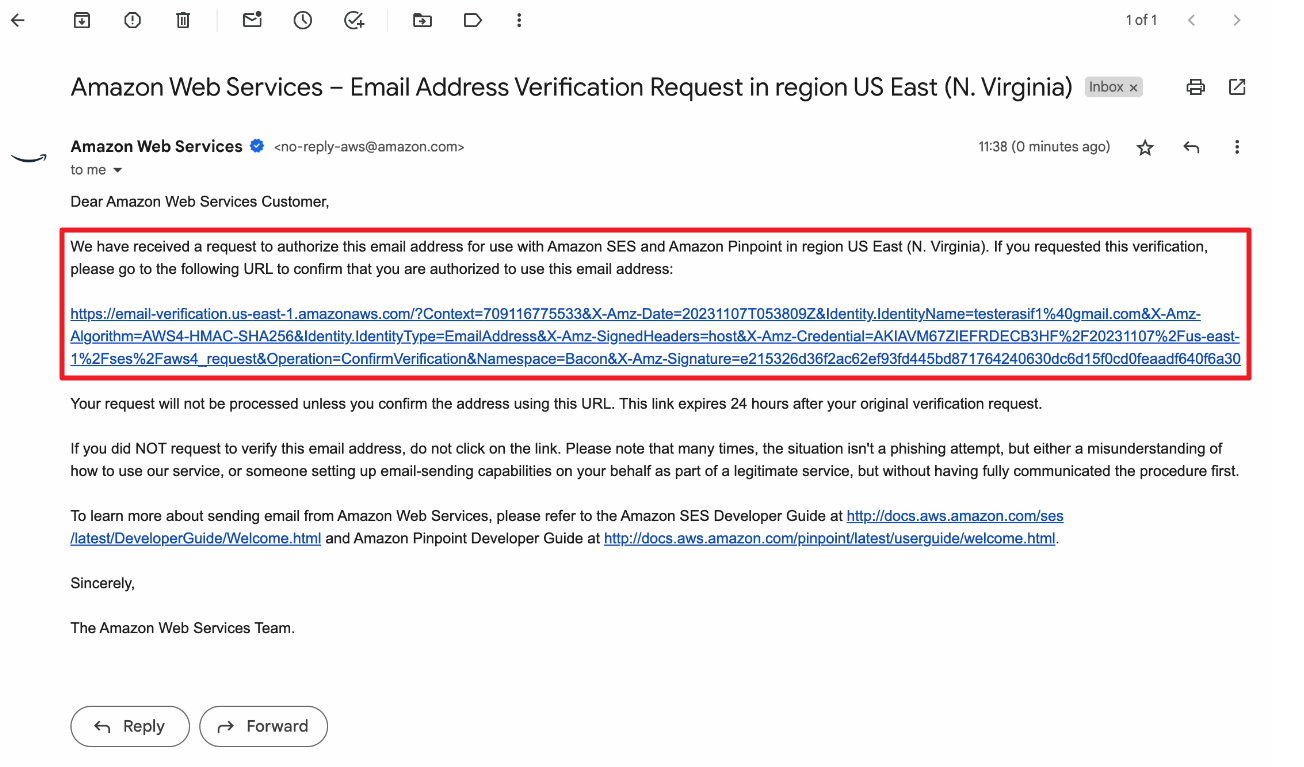
8. Now go back to Amazon SES page and you will notice that the Identity status is showing Verification pending. This means Amazon already send an email to this sender email address with a link
![Identity status is showing Verification pending in Amazon SES](https://mailbluster.com/wp-content/uploads/2023/11/VerifyAWS_08.png)
9. You need to check the Inbox of this email. There should be an email from Amazon SES
![Clicking on the Verification email from AWS](https://mailbluster.com/wp-content/uploads/2023/11/VerifyAWS_09.png)
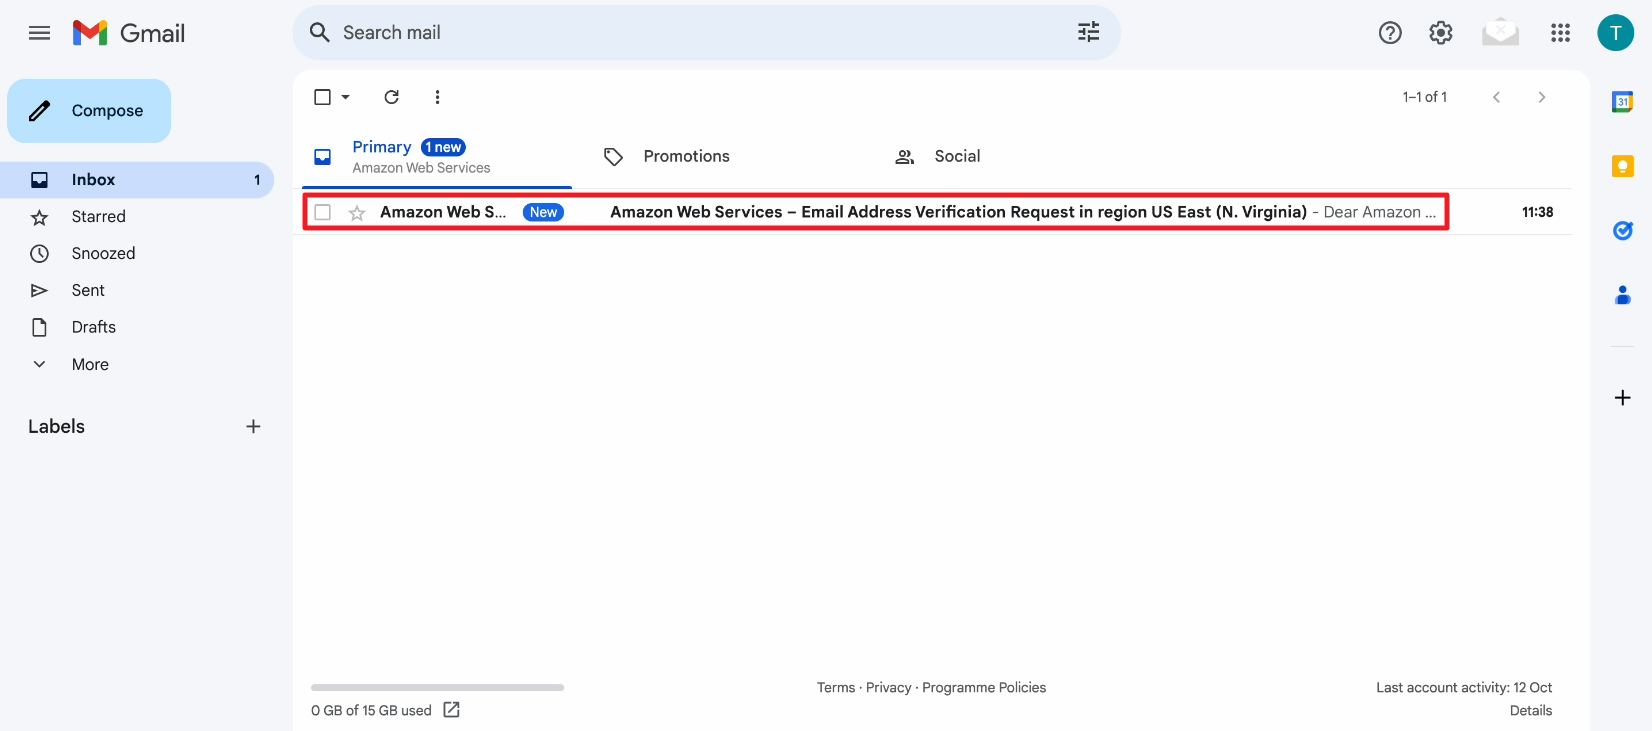
10. Click on the email from Amazon SES and then click on the link in the email for confirmation.
![Confirmation link for verification of the email address](https://mailbluster.com/wp-content/uploads/2023/11/VerifyAWS_10.png)
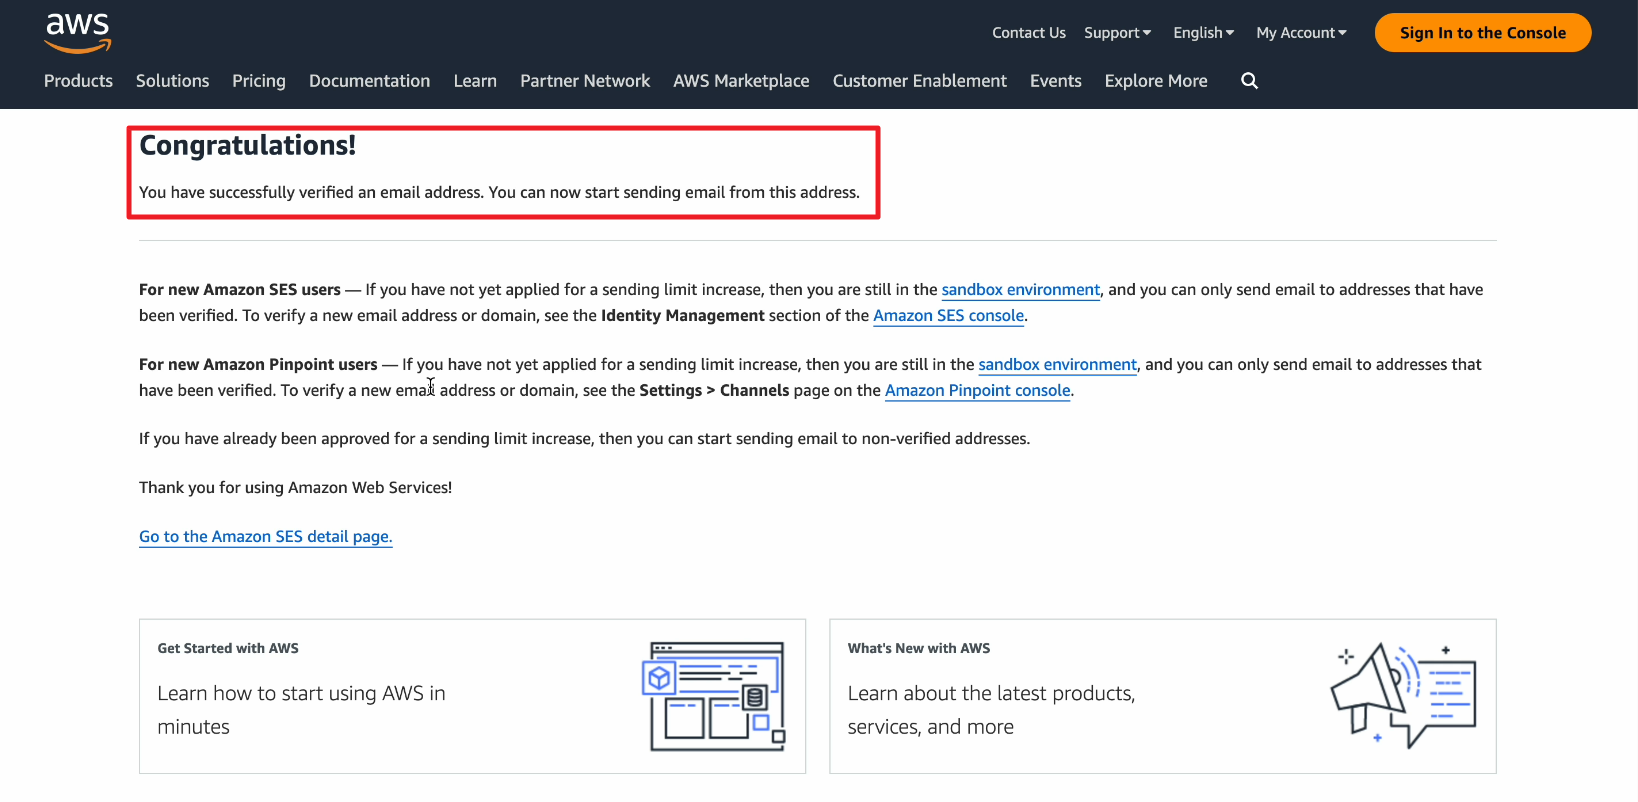
11. The link will take you straight to Amazon SES page with a confirmation message that your sender email address has been verified.
![Amazon SES showing congratulations and notifying that email address has been verified](https://mailbluster.com/wp-content/uploads/2023/11/VerifyAWS_11.png)
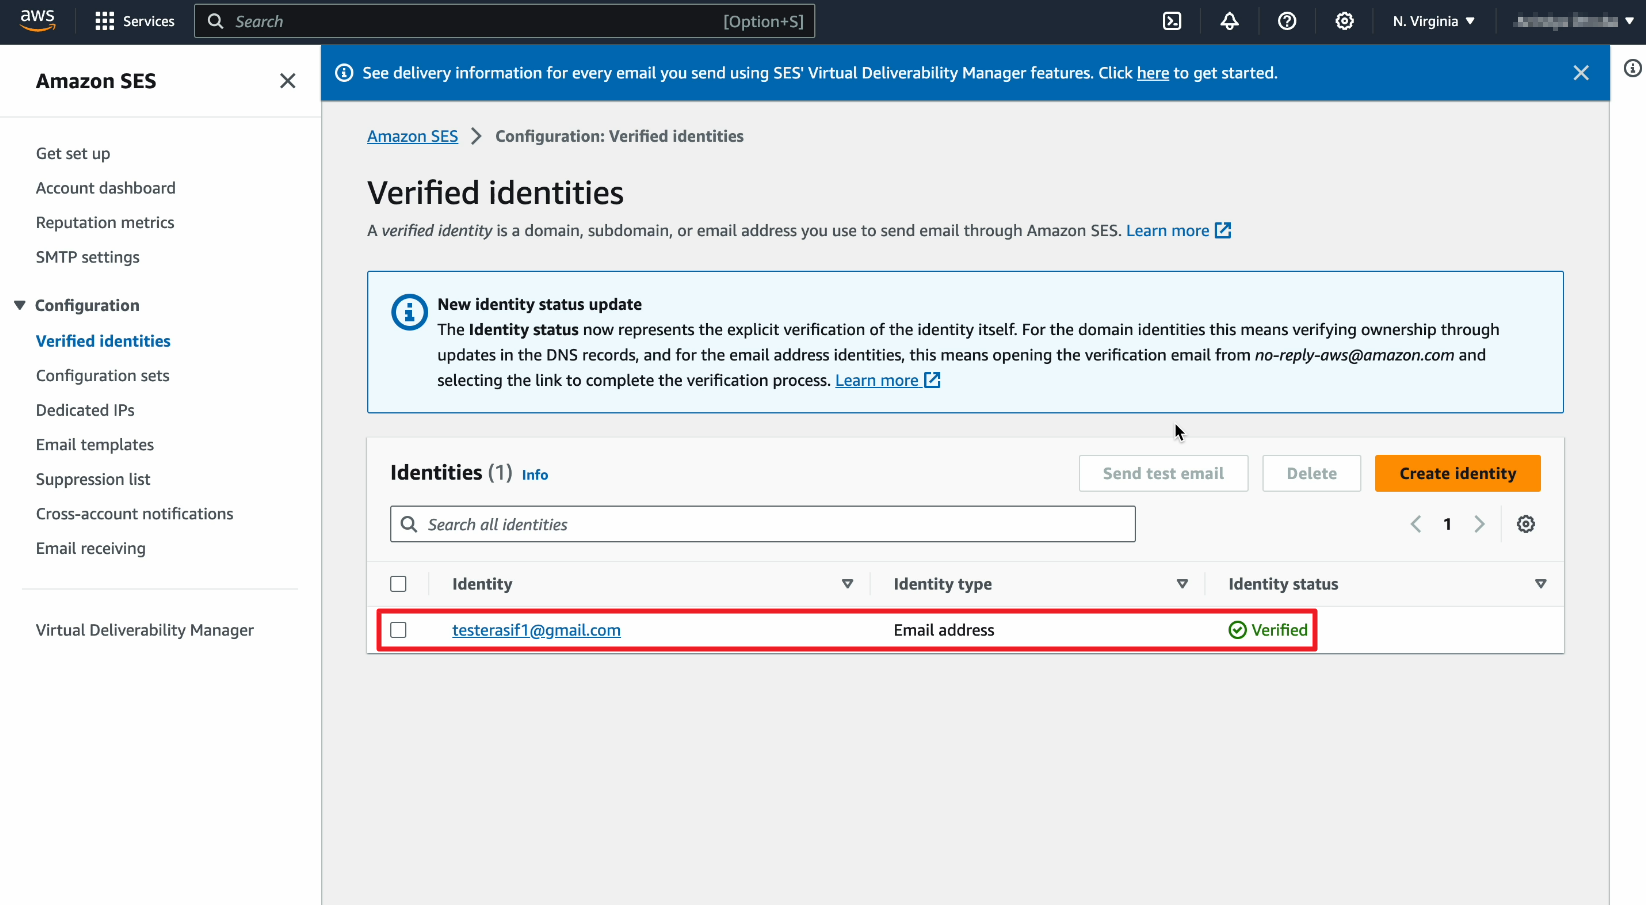
12. Now go to Amazon SES page and you will notice that the Identity status is showing Verified.
![Identity status showing Verified in Amazon SES](https://mailbluster.com/wp-content/uploads/2023/11/VerifyAWS_12.png)
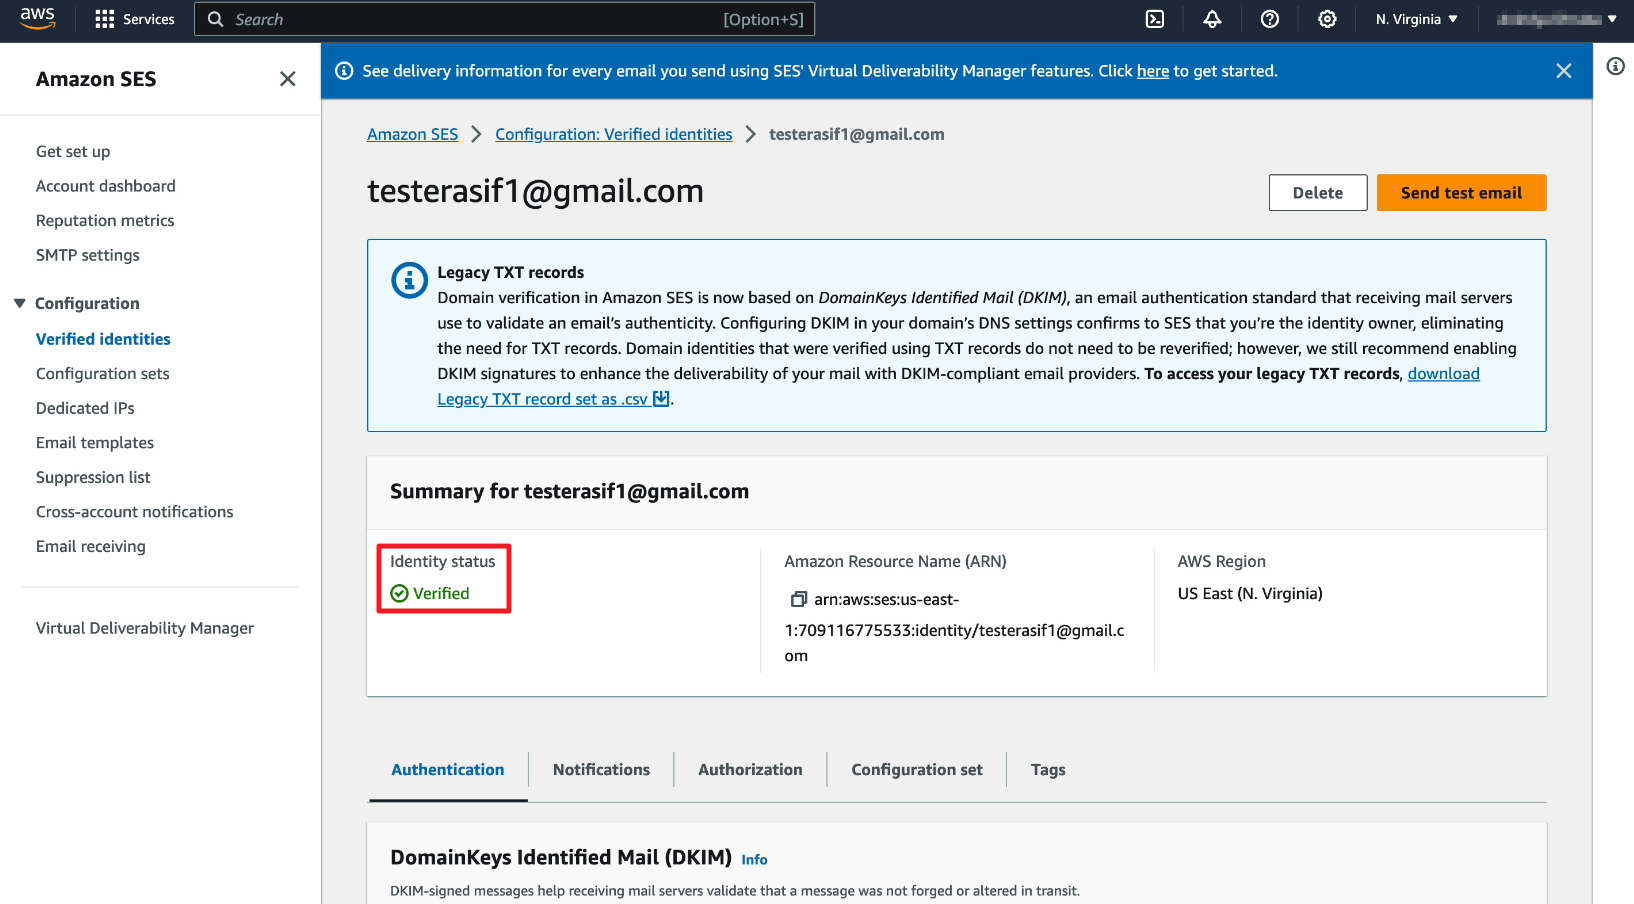
13. Now click on Verified identities and you will see that your sender email address has been successfully verified by AWS.
![Identity status showing email address has been verified](https://mailbluster.com/wp-content/uploads/2023/11/VerifyAWS_13.png)