The Senders feature in MailBluster simplifies the entire process of managing sender identities and DNS records, removing the need for any manual configuration within your AWS dashboard. With this feature, you can easily verify your sender domain directly from your MailBluster account. This verification ensures that your emails are authenticated and trusted by receiving servers, which improves deliverability and reduces the chances of your emails being marked as spam.
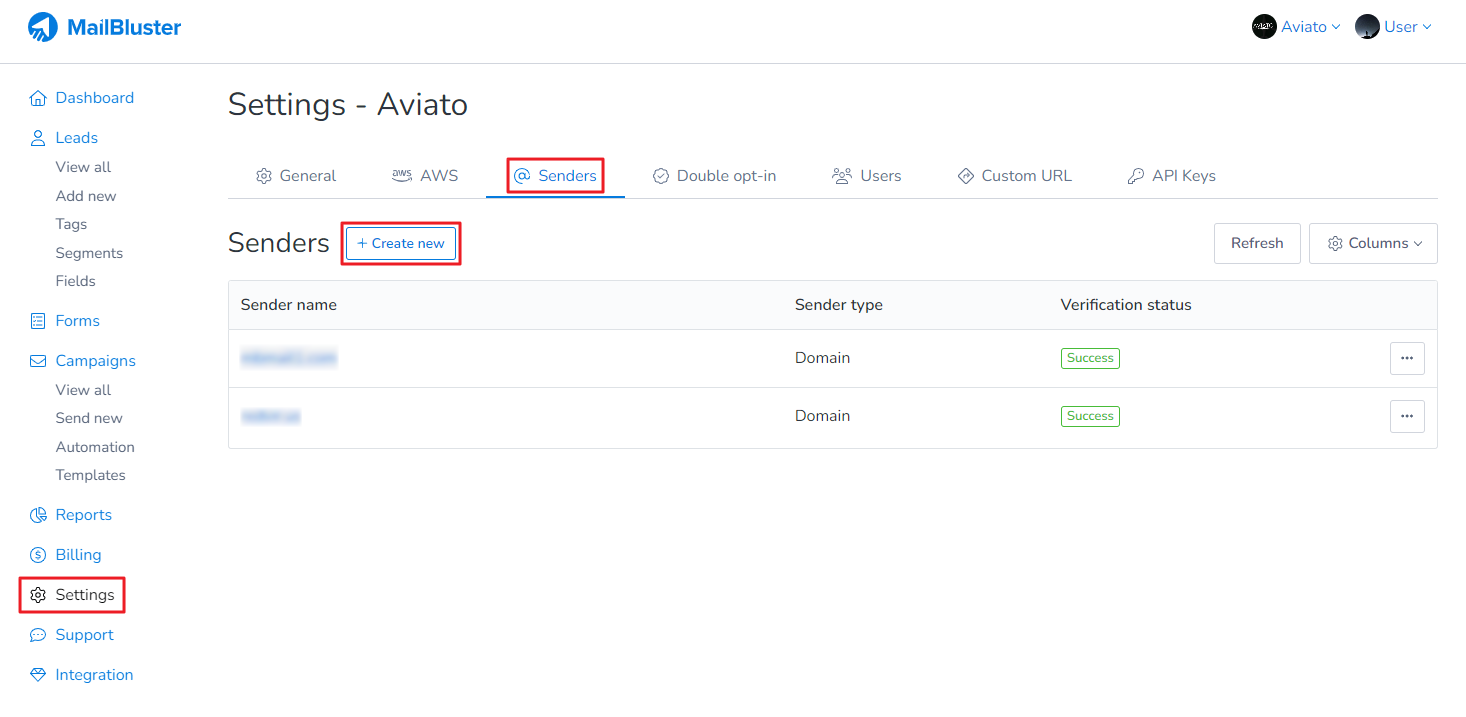
Now, you can easily verify your Sender Domain from within MailBluster. Just go to your Brand > Settings > @Senders.

Click on Create new
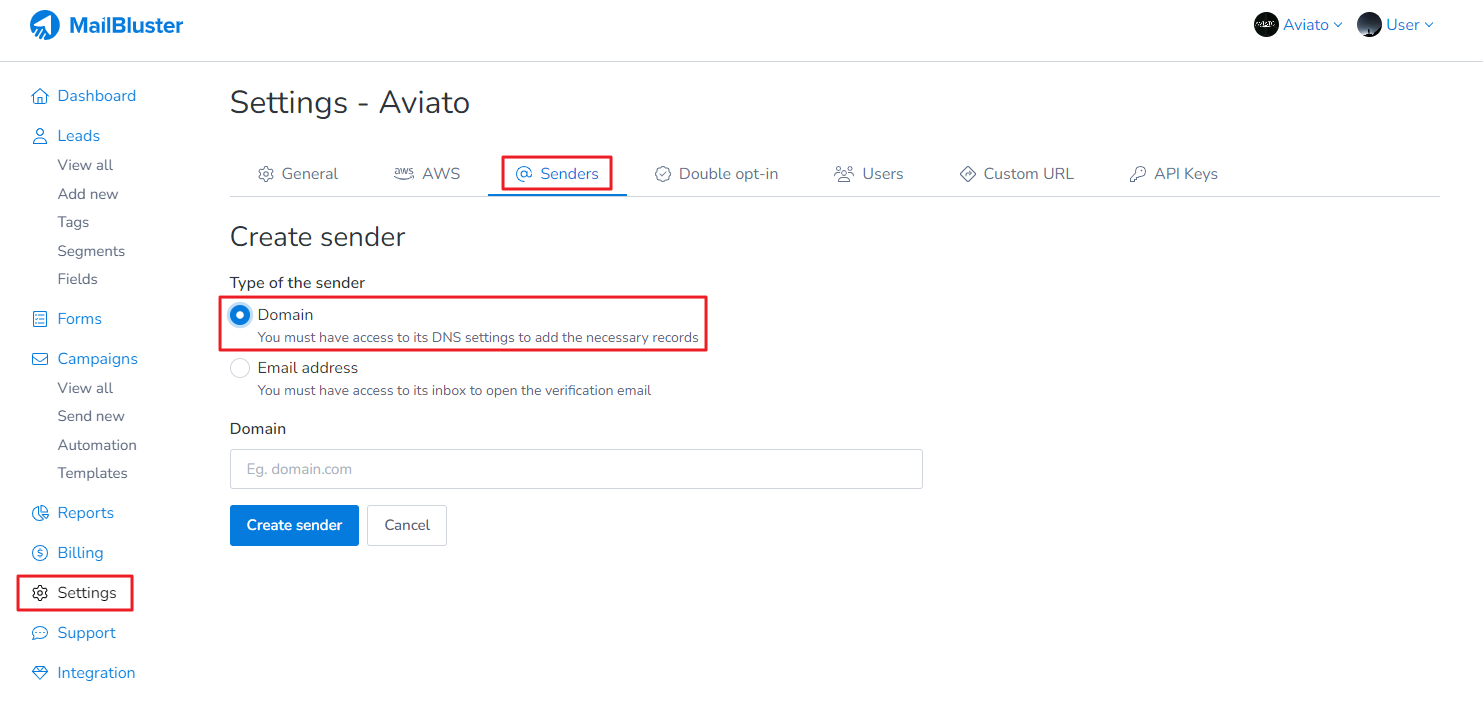
Select Domain for domain verification
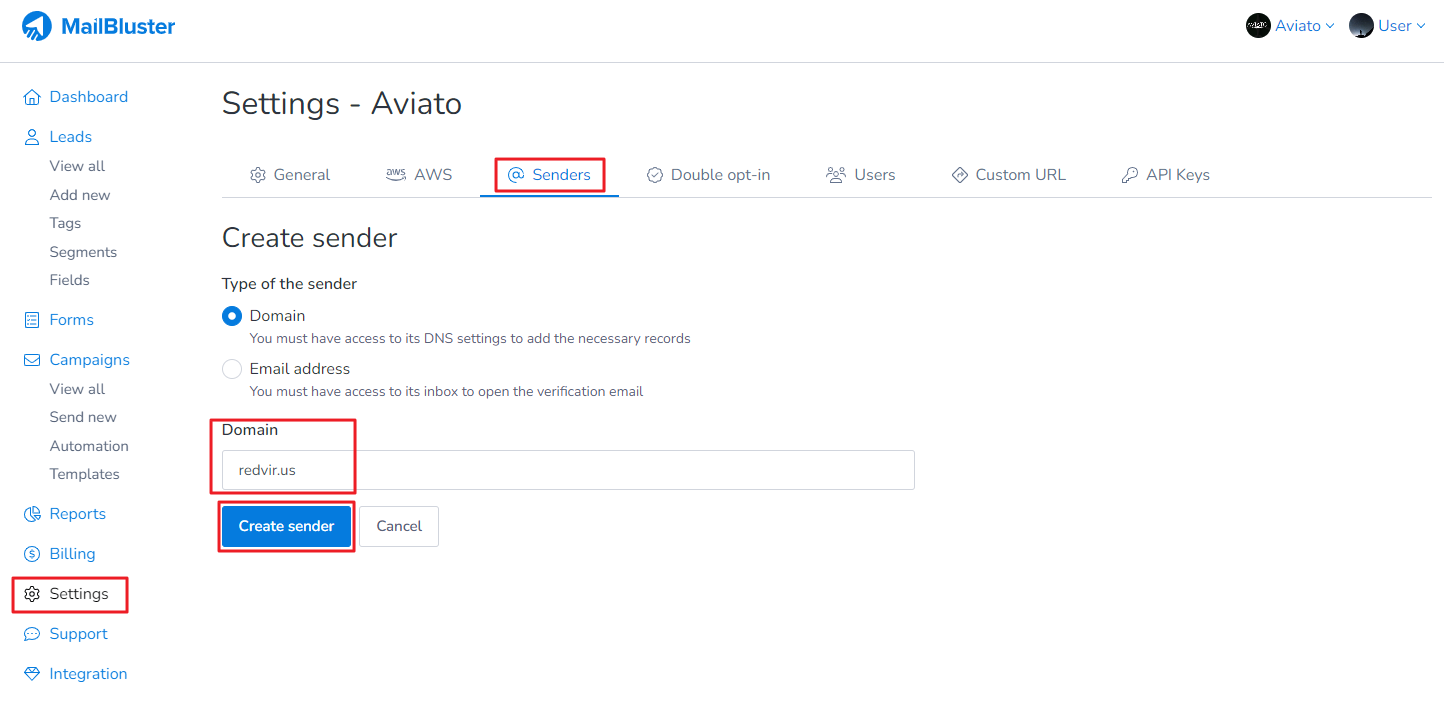
Enter your domain address and then click Create sender
Read the instructions carefully and click View Sender
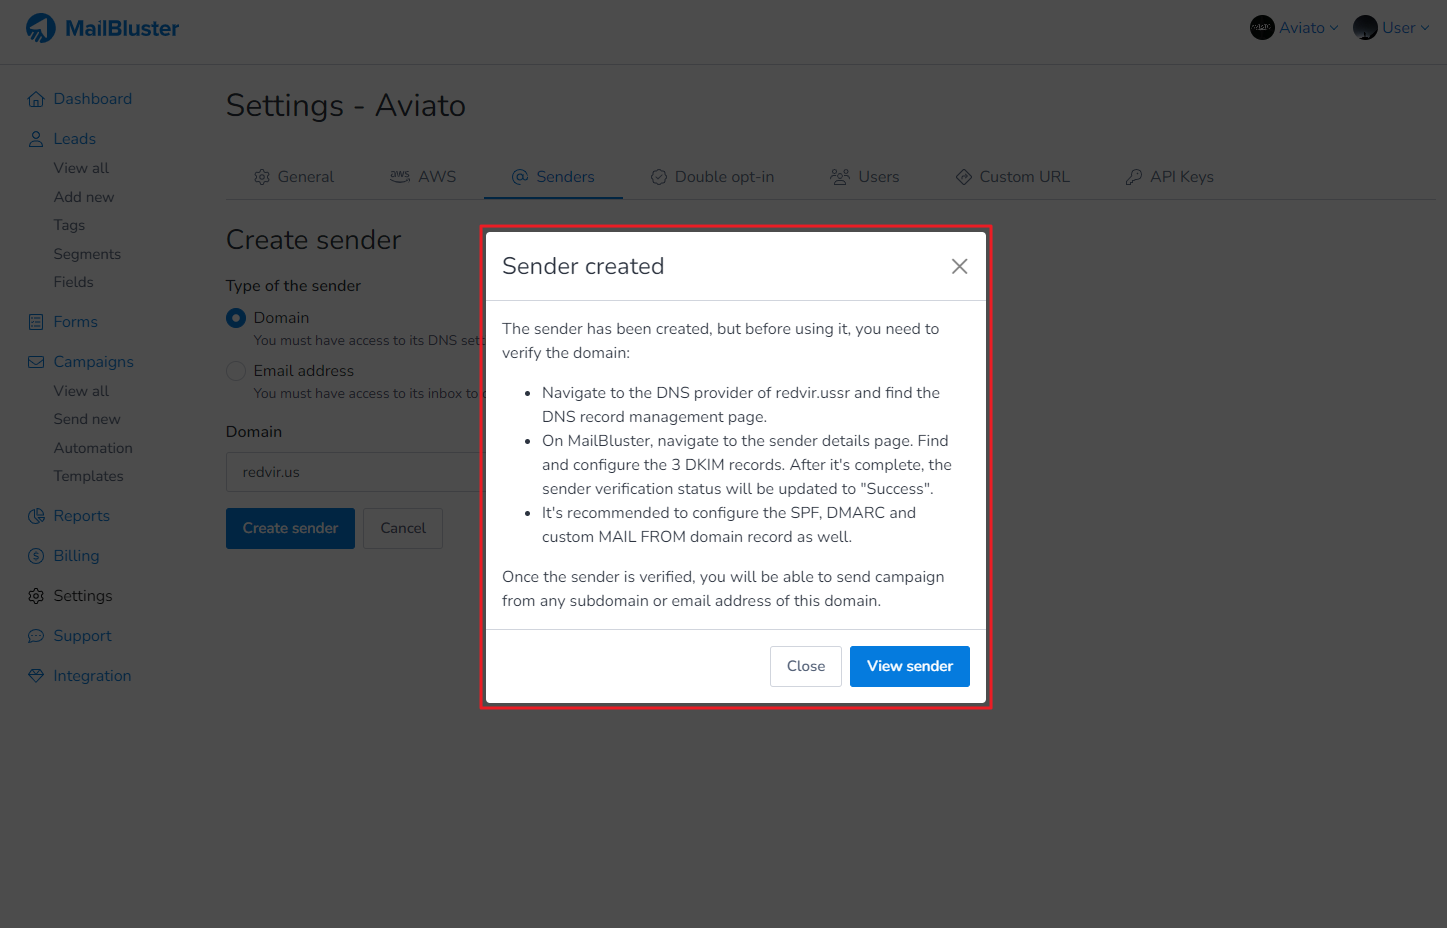
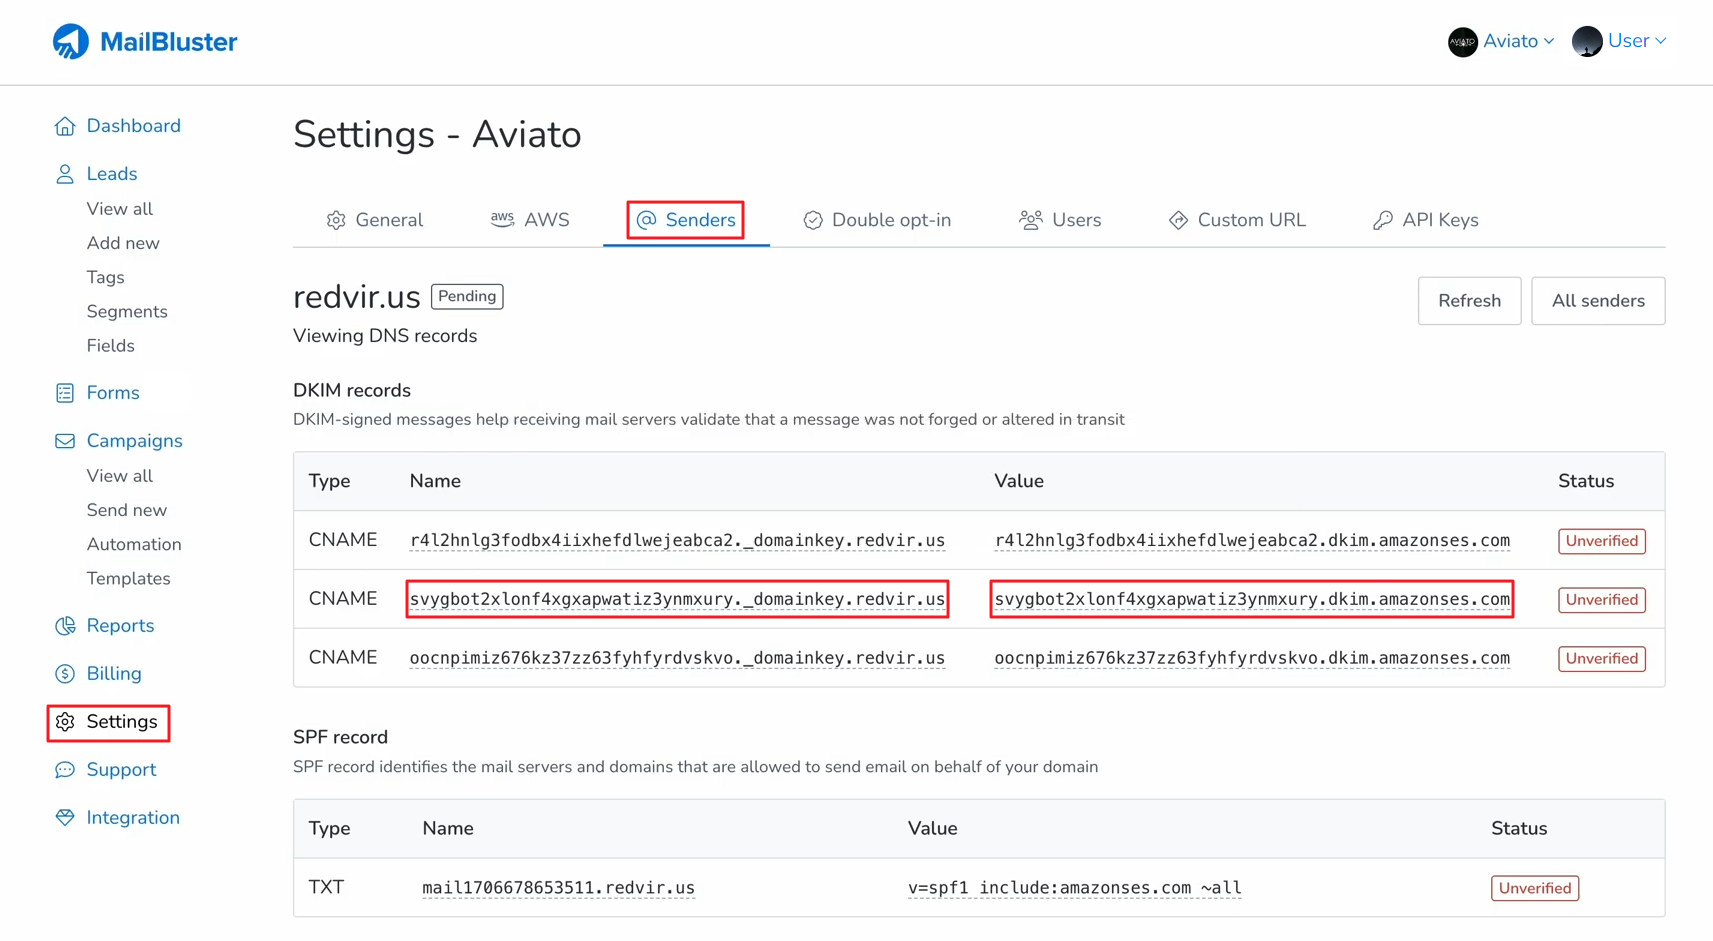
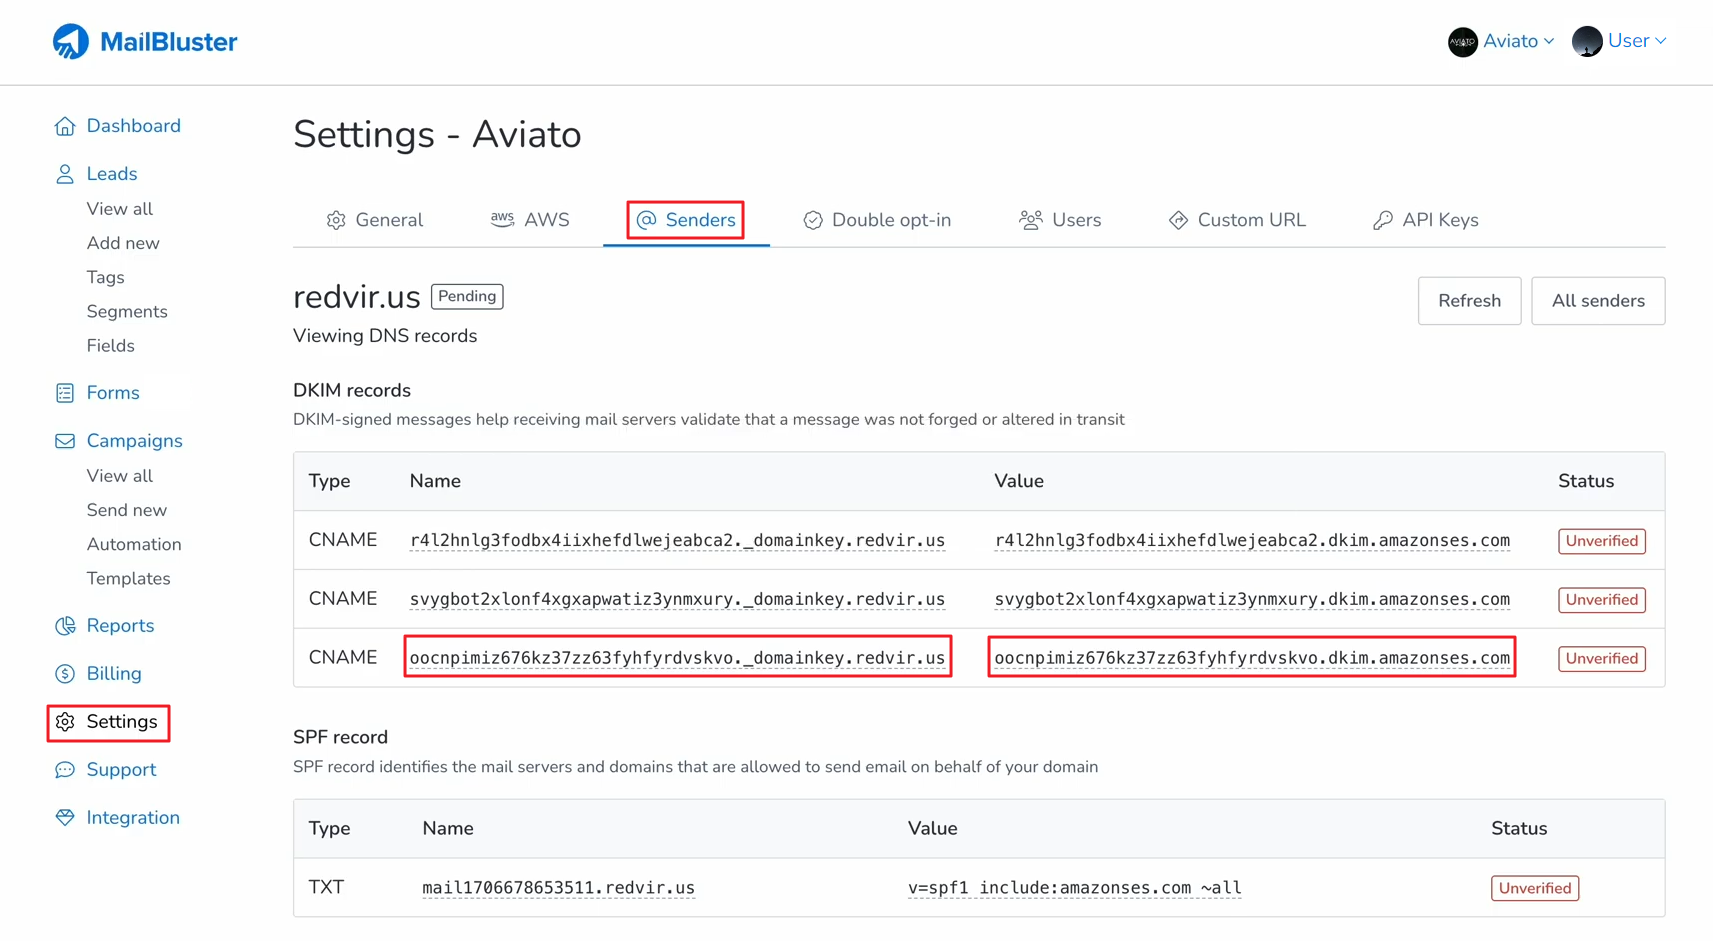
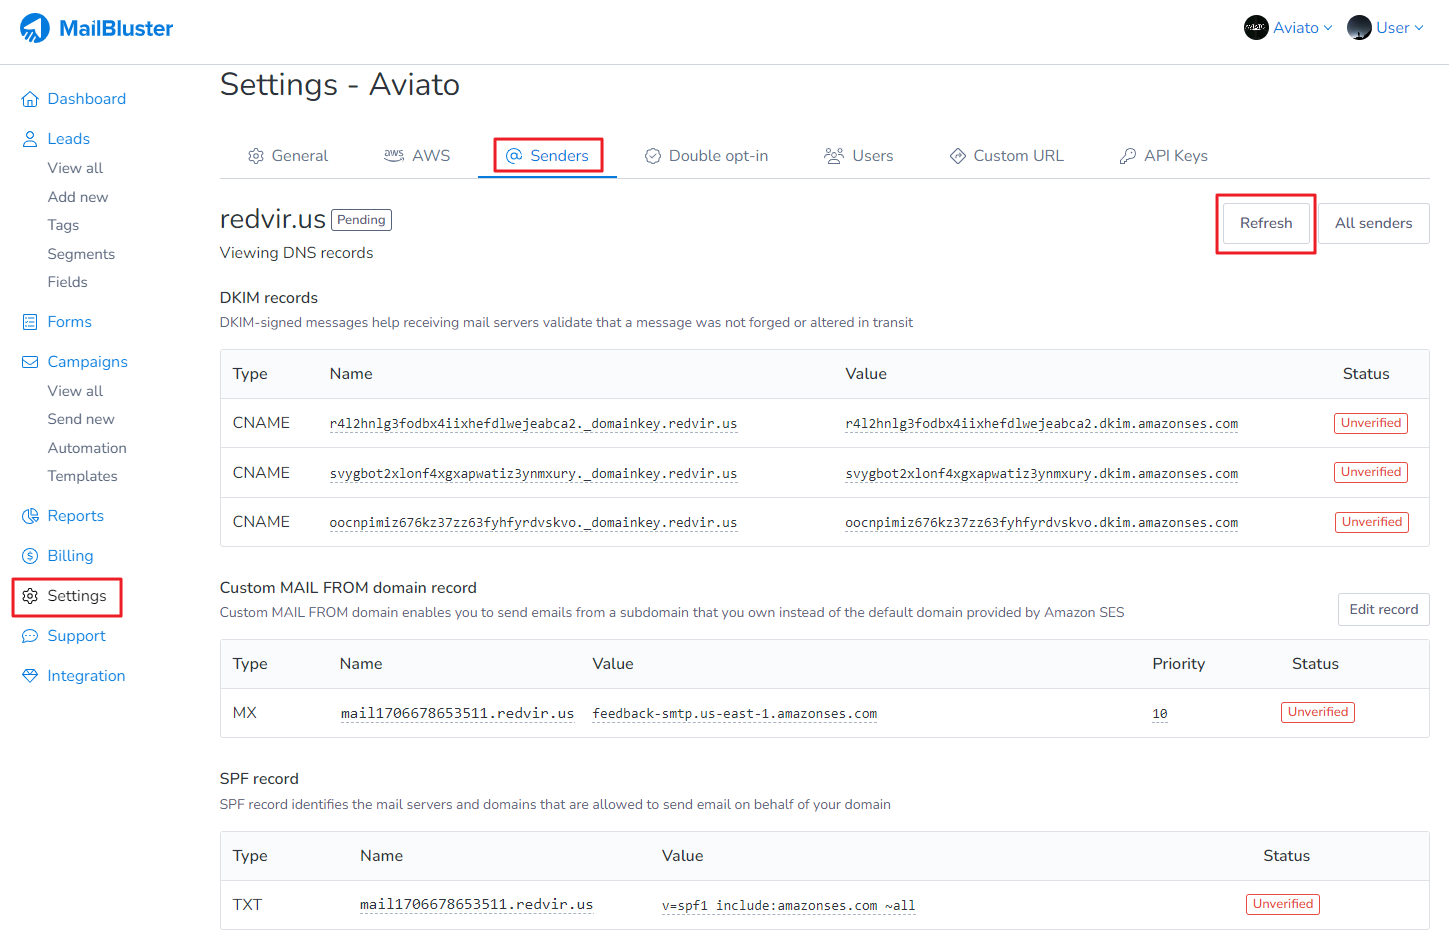
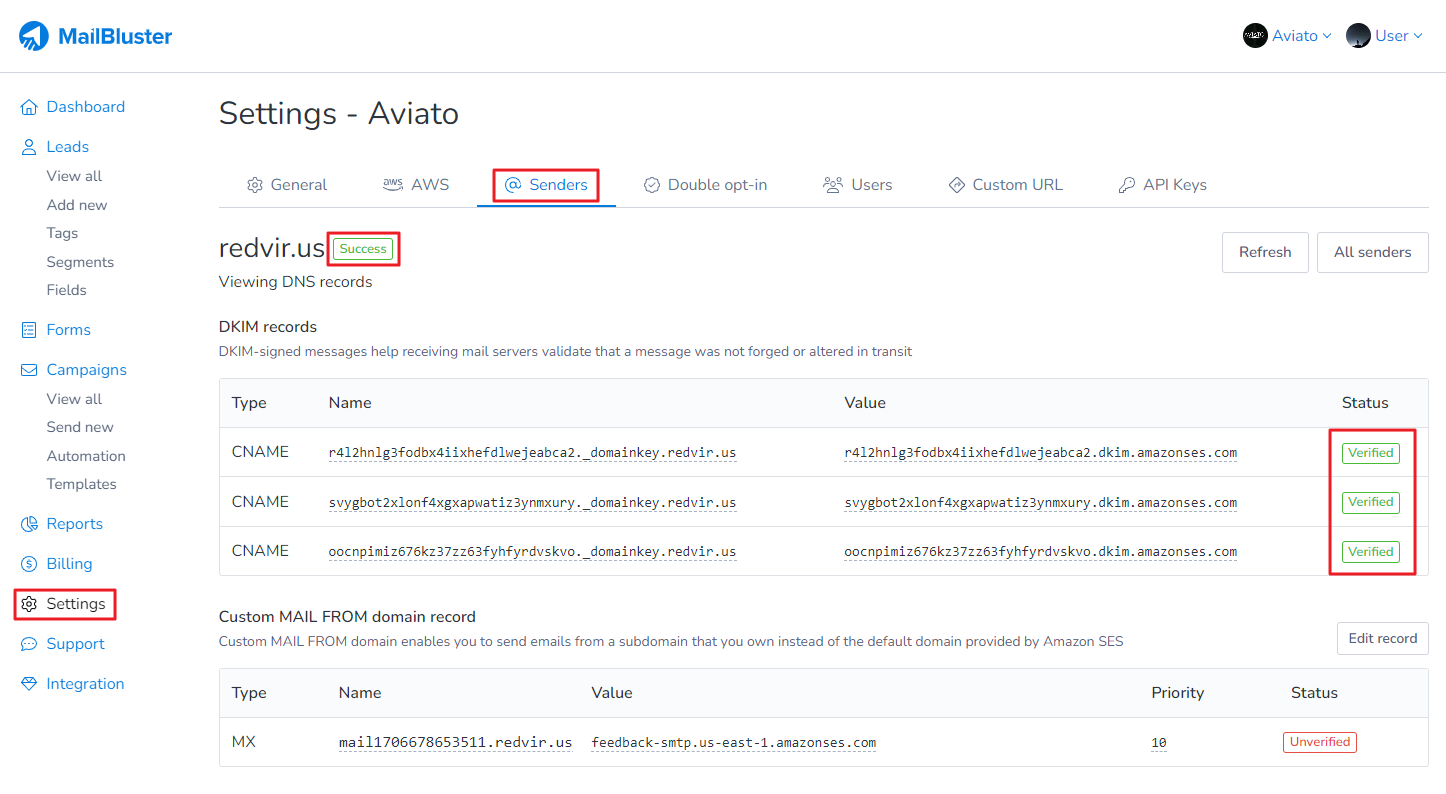
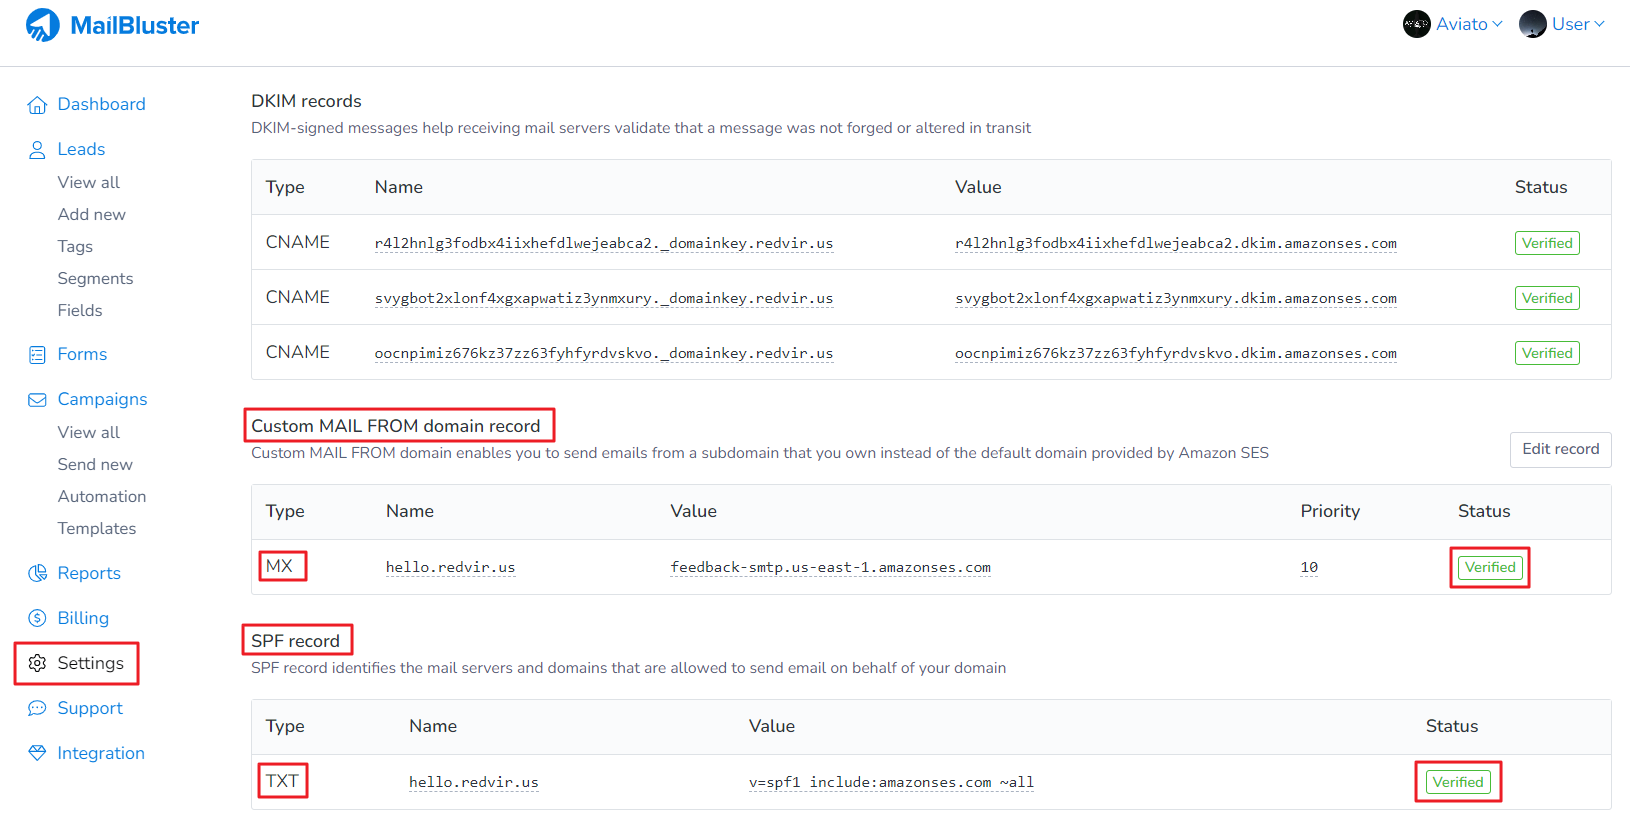
You will notice that your sender domain is showing “Pending” status along with DKIM records, Custom MAIL FROM domain record and SPFF record as “Unverified”
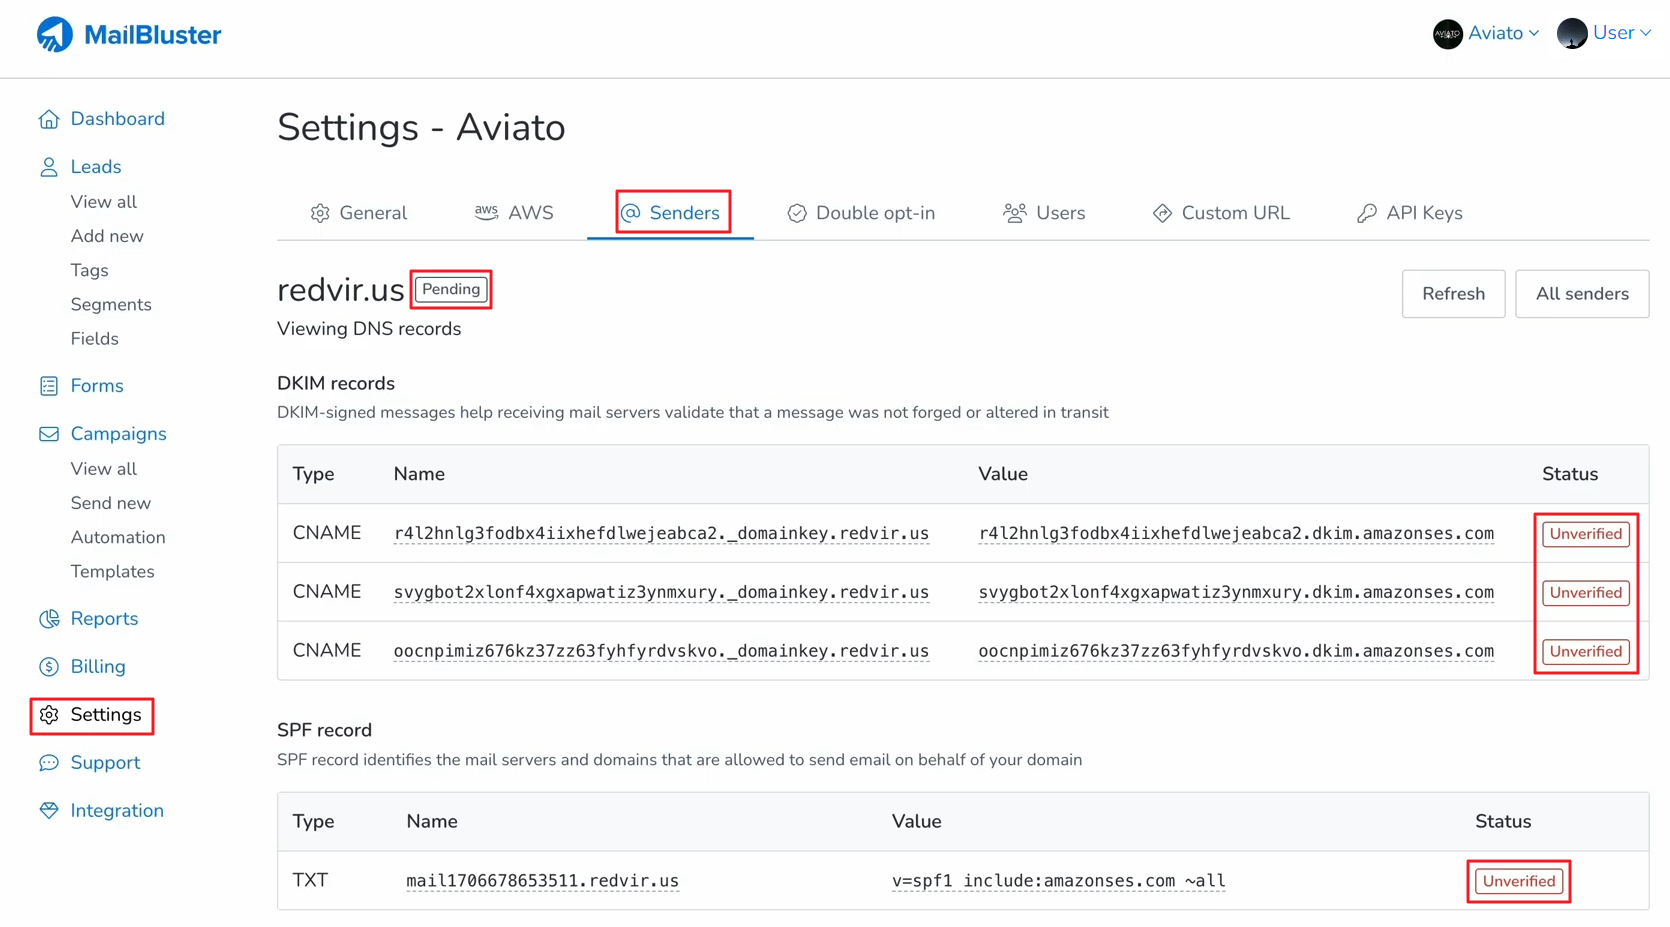
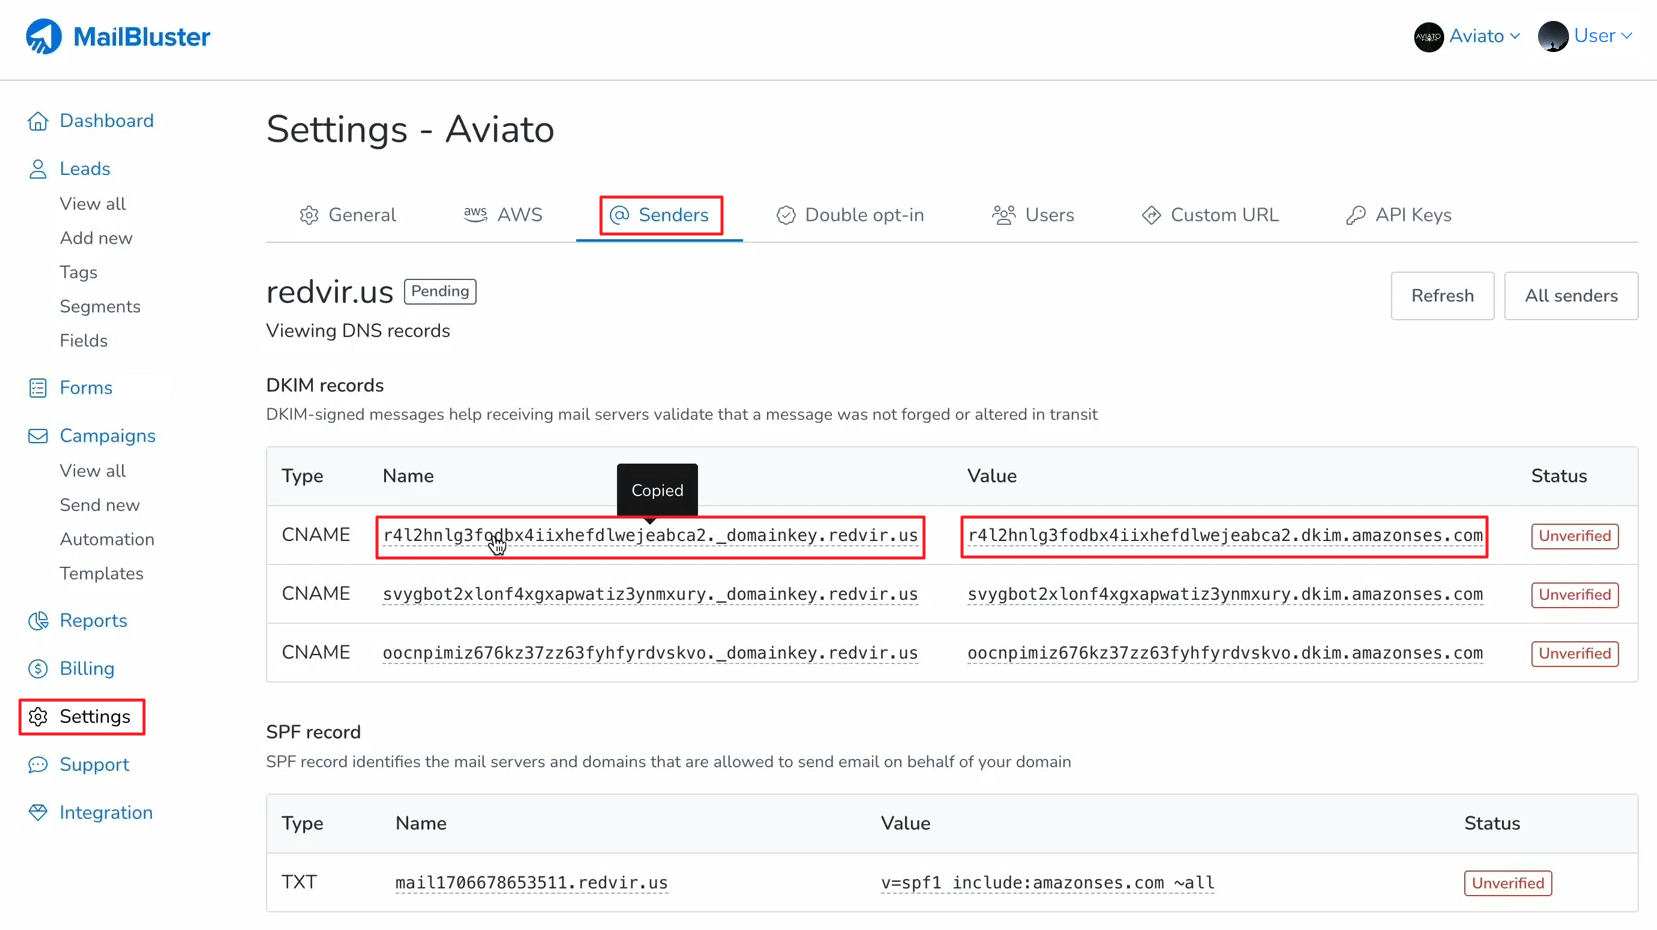
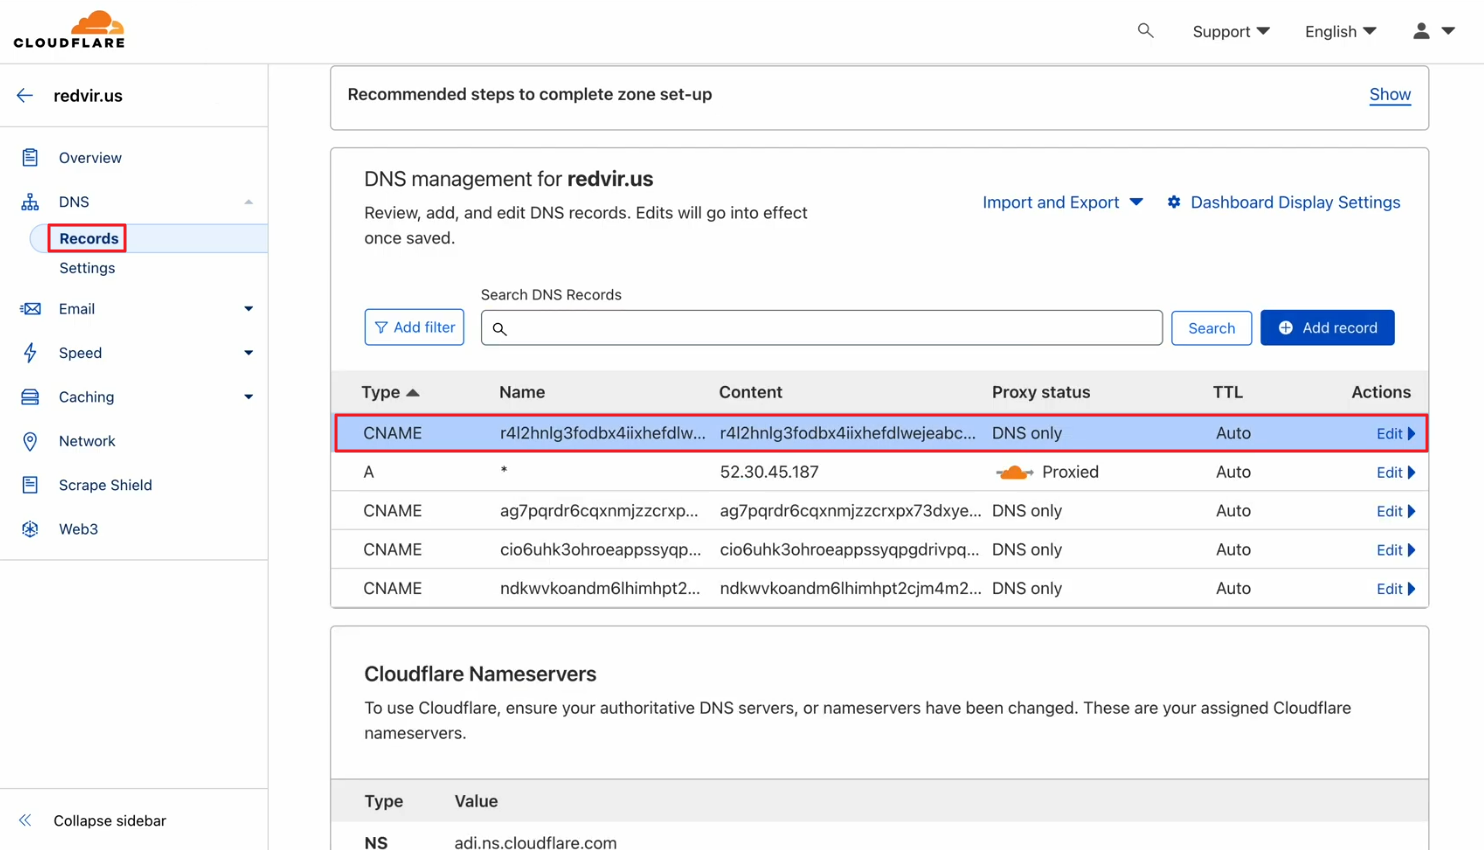
Copy the generated Name and its Value from each of the CNAMEs under DKIM records
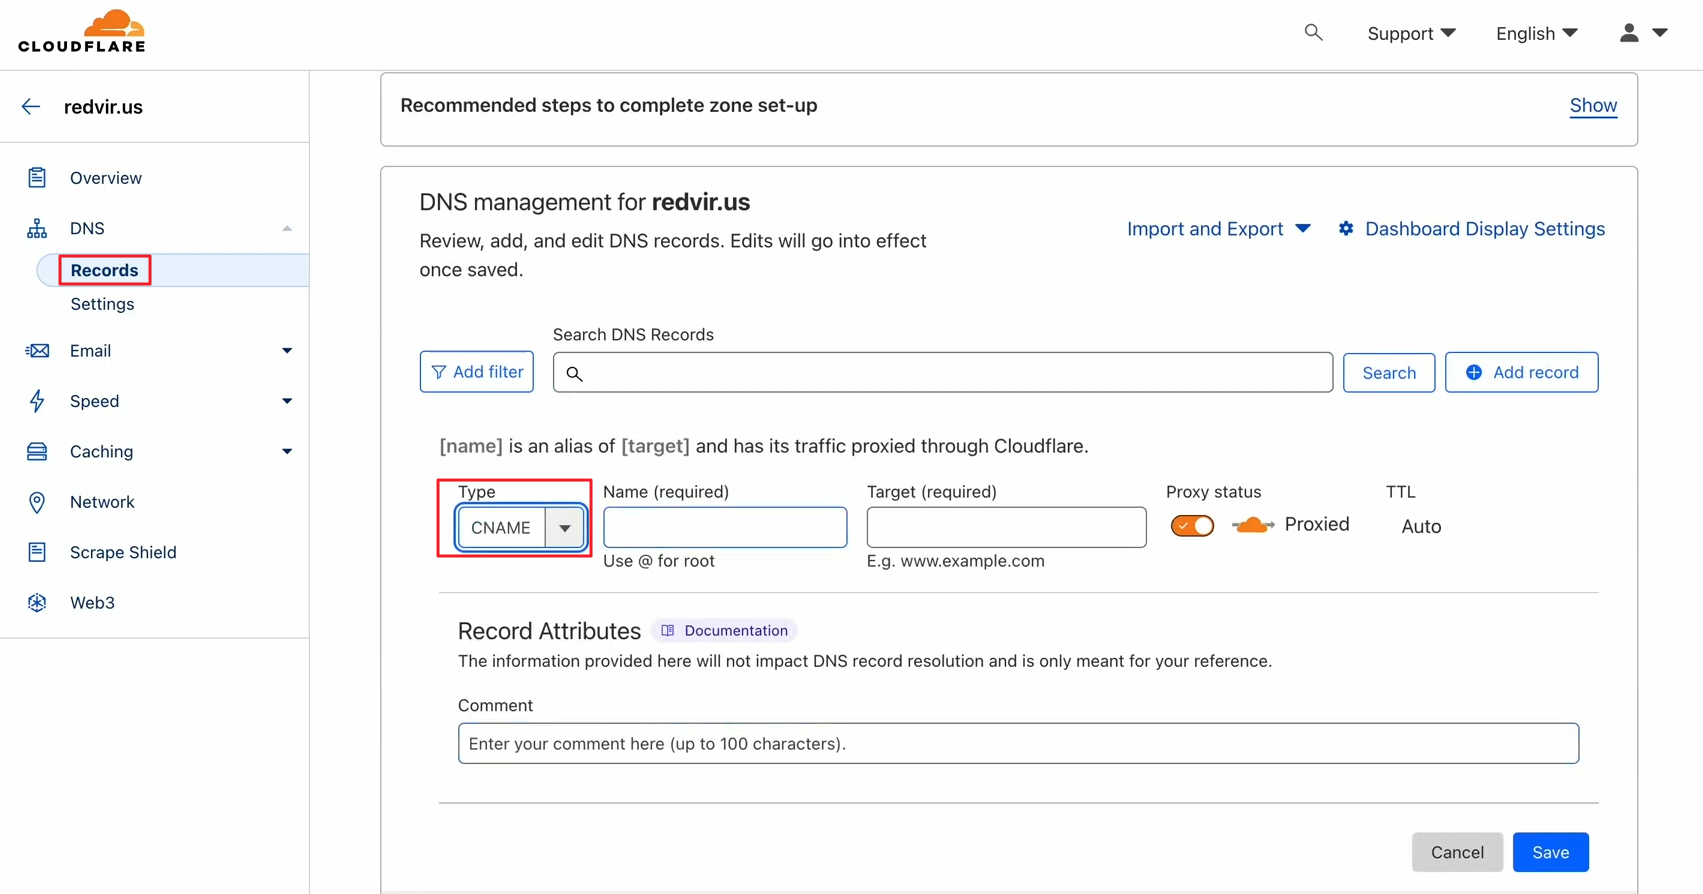
Now go to the DNS > Records of your Domain’s CPANEL / DNS Management console and select Type CNAME
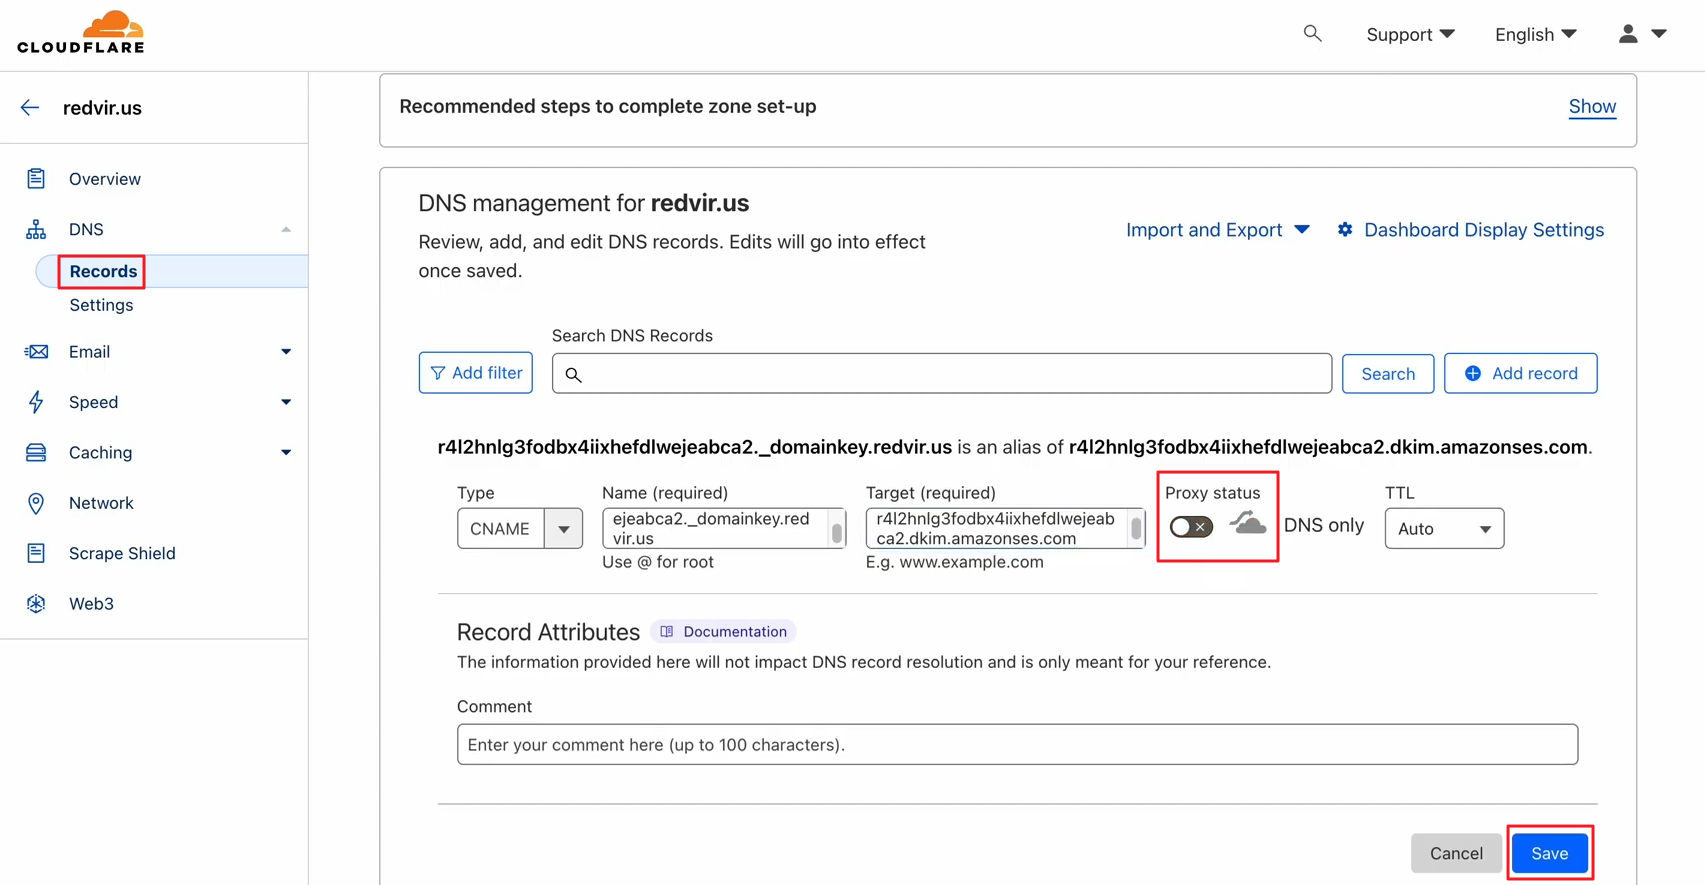
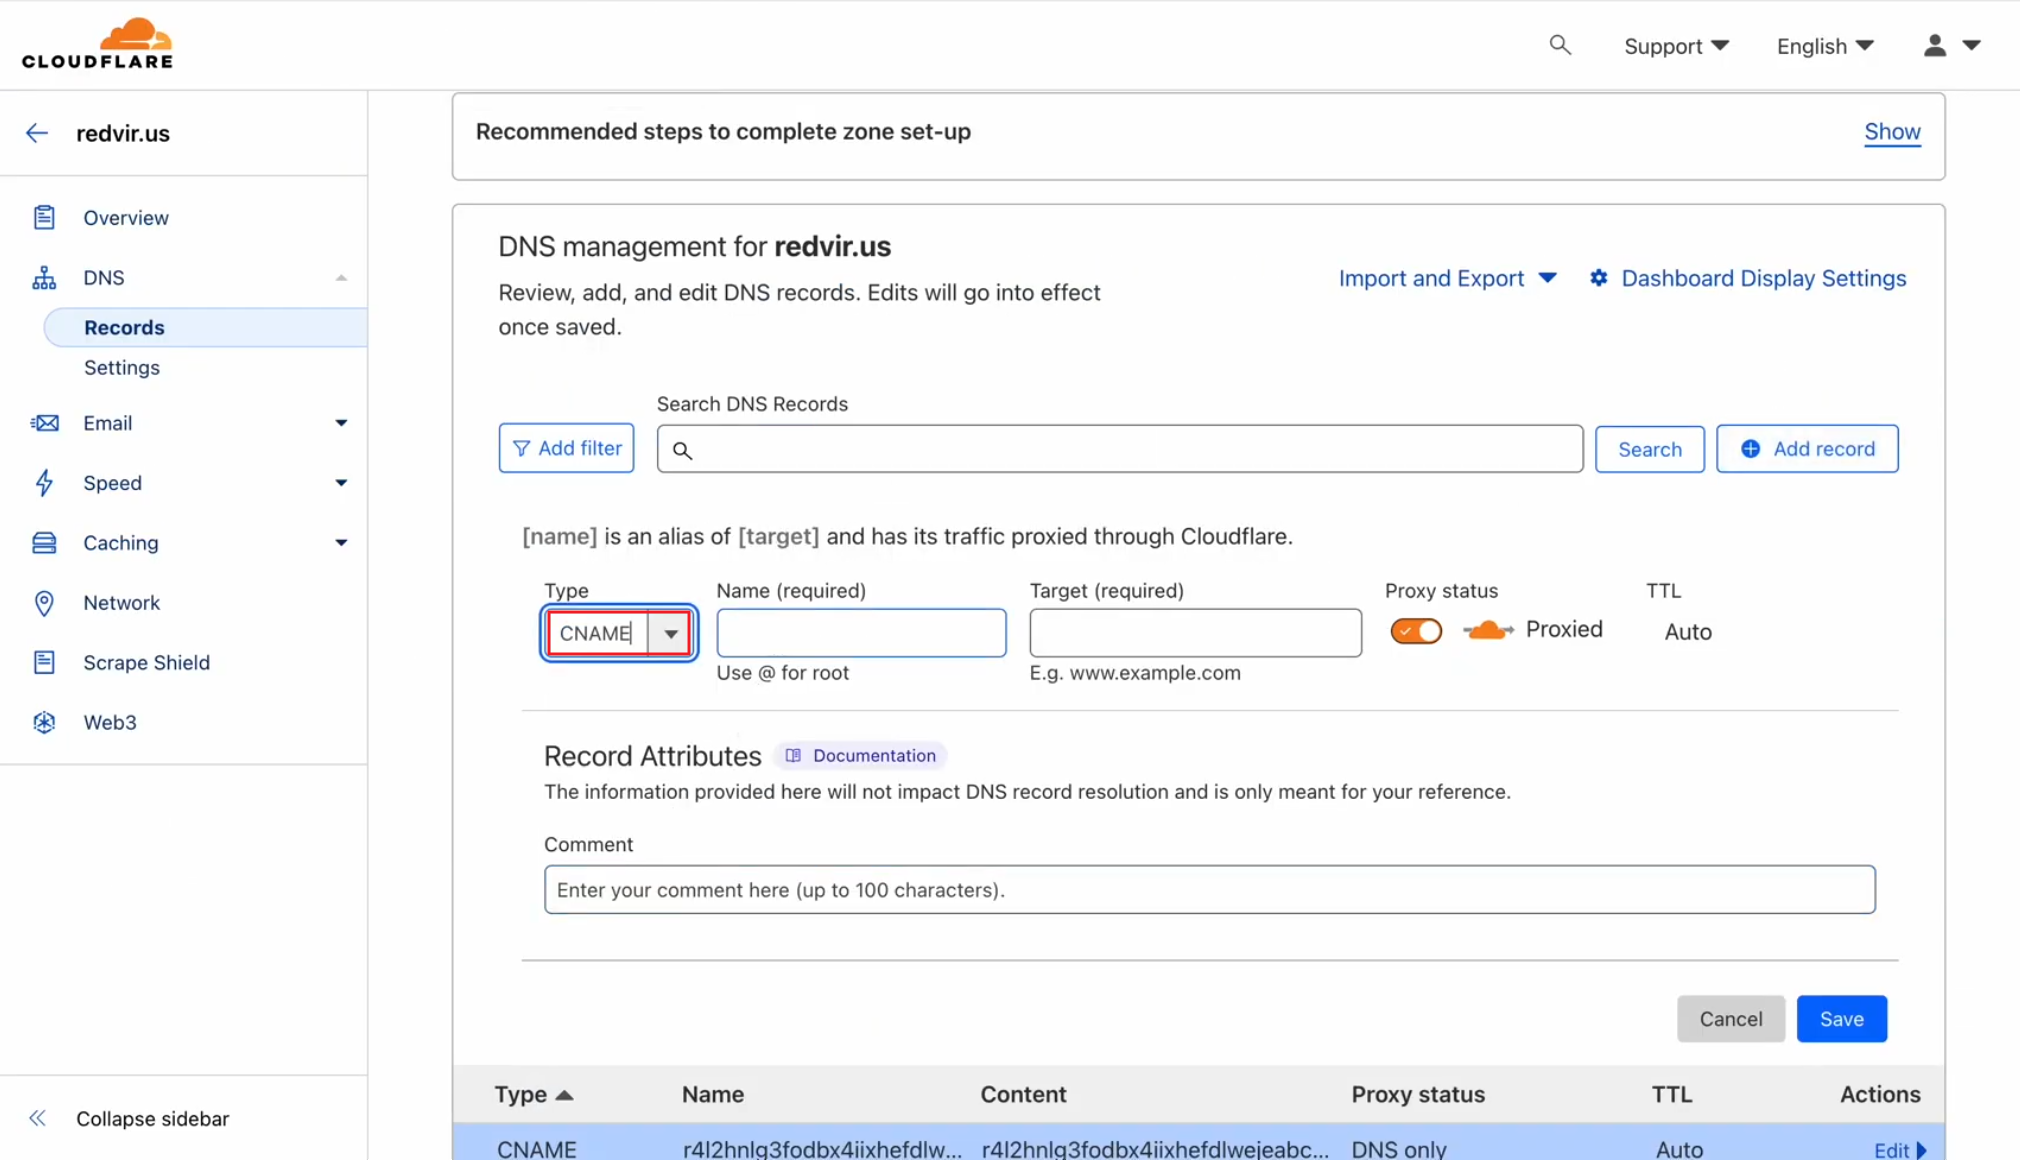
Copy Name and Value from MailBluster and paste to DNS Management as shown below

Set Proxy status to off. Then click Save
A CNAME record will be created in your DNS Management
Now click Add record in your DNS Management
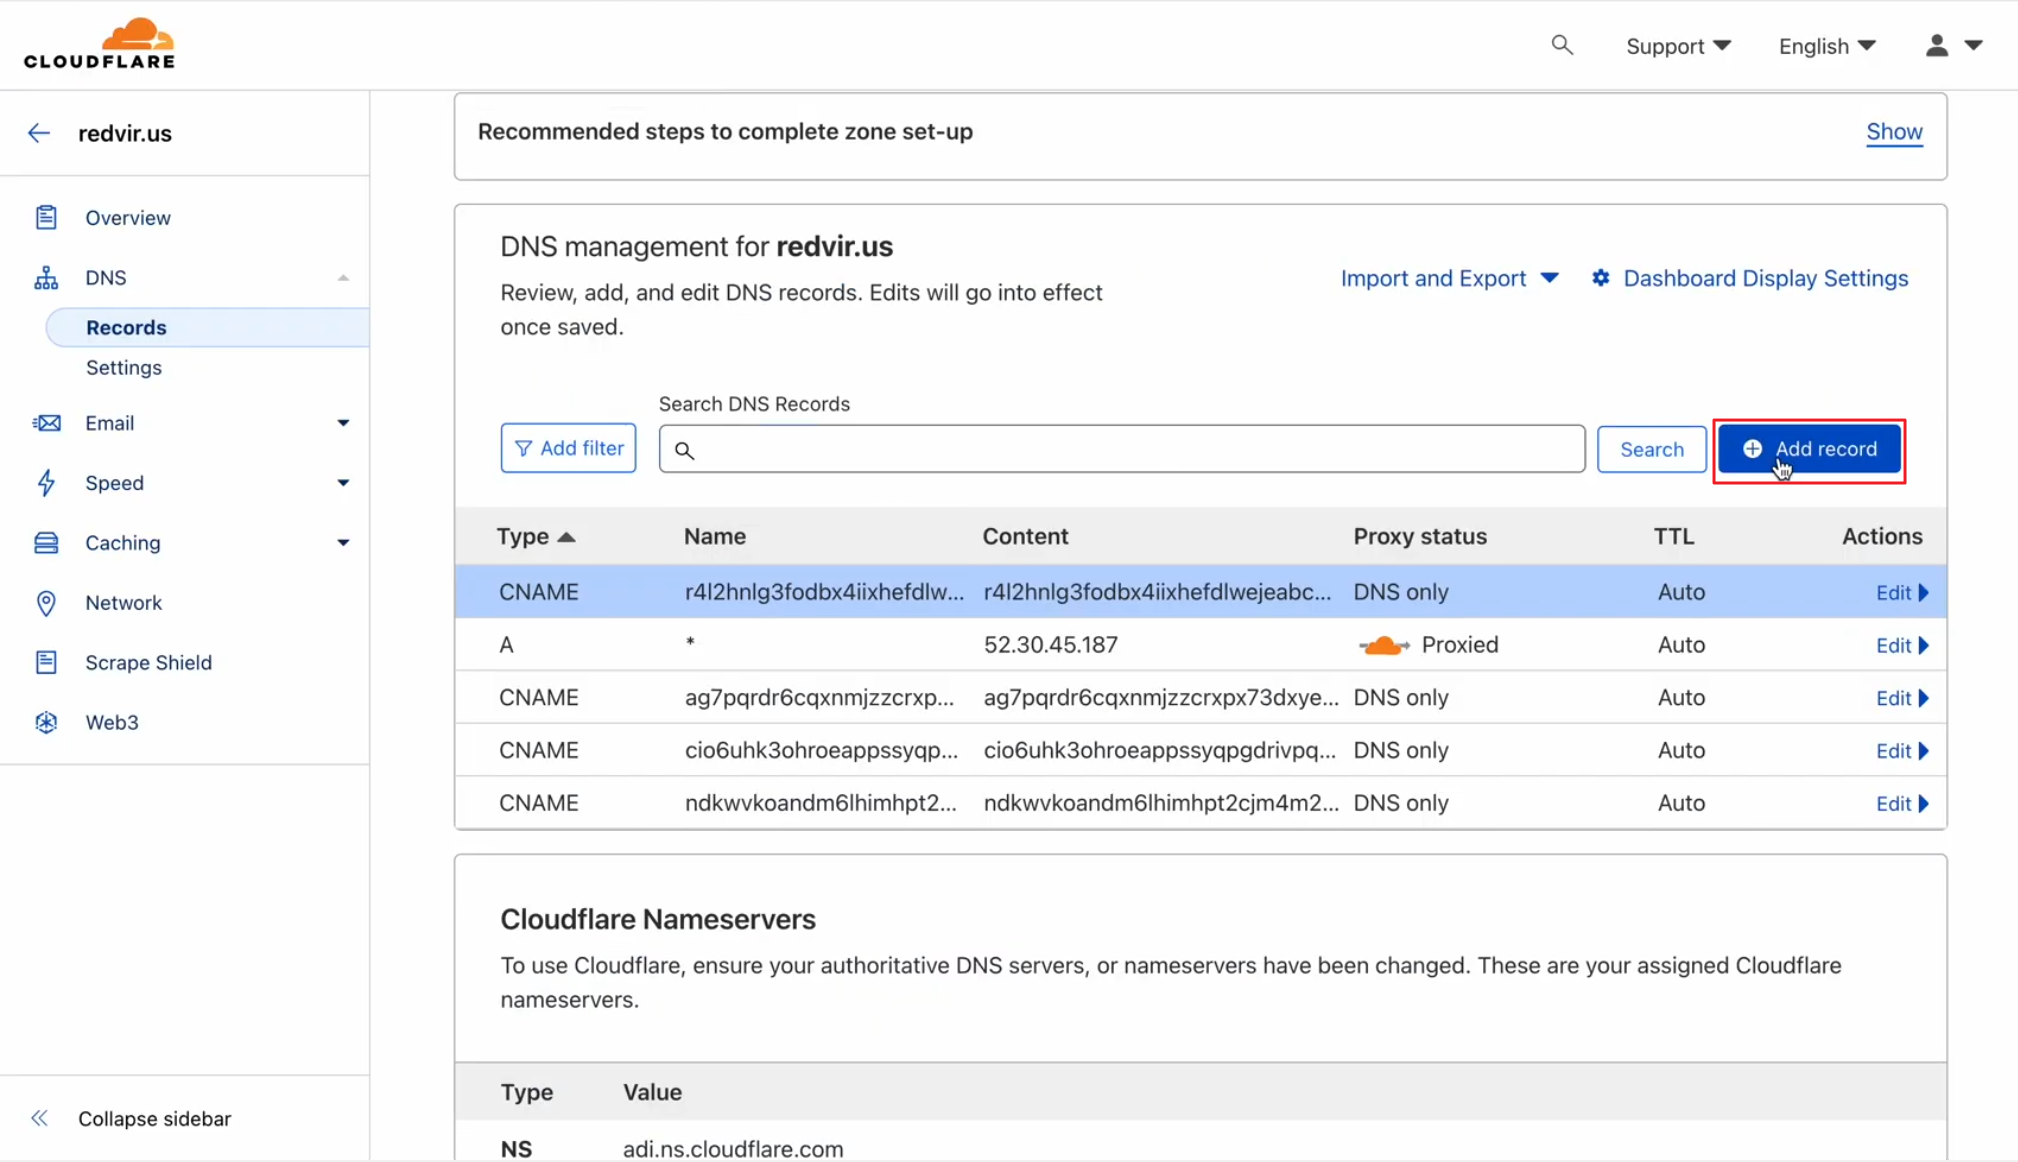
Select Type CNAME and copy paste the 2nd CNAME from MailBluster
Here we copied the 2nd CNAME and its Value from @Senders of MailBluster
And paste it into your DNS Management like the one shown below
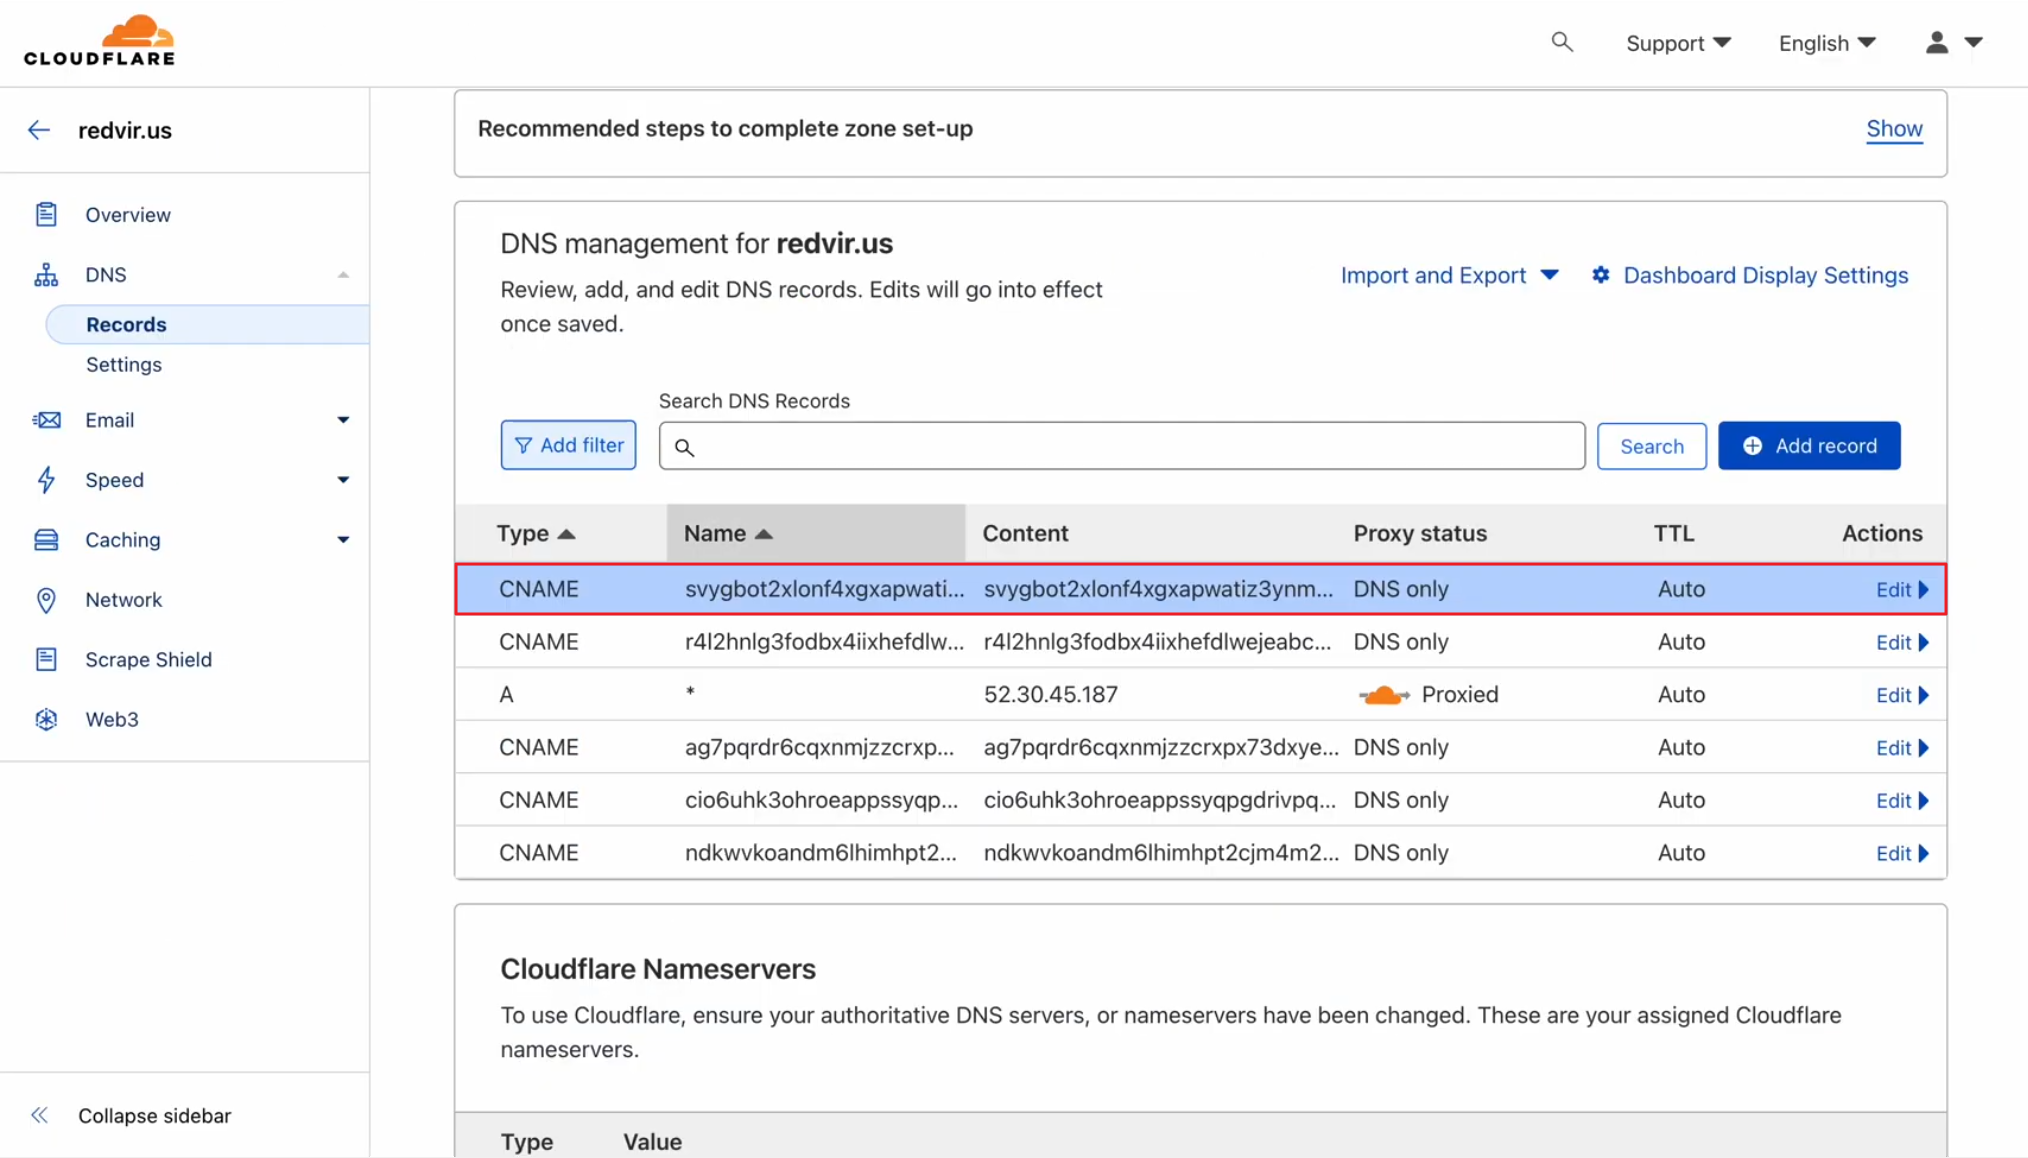
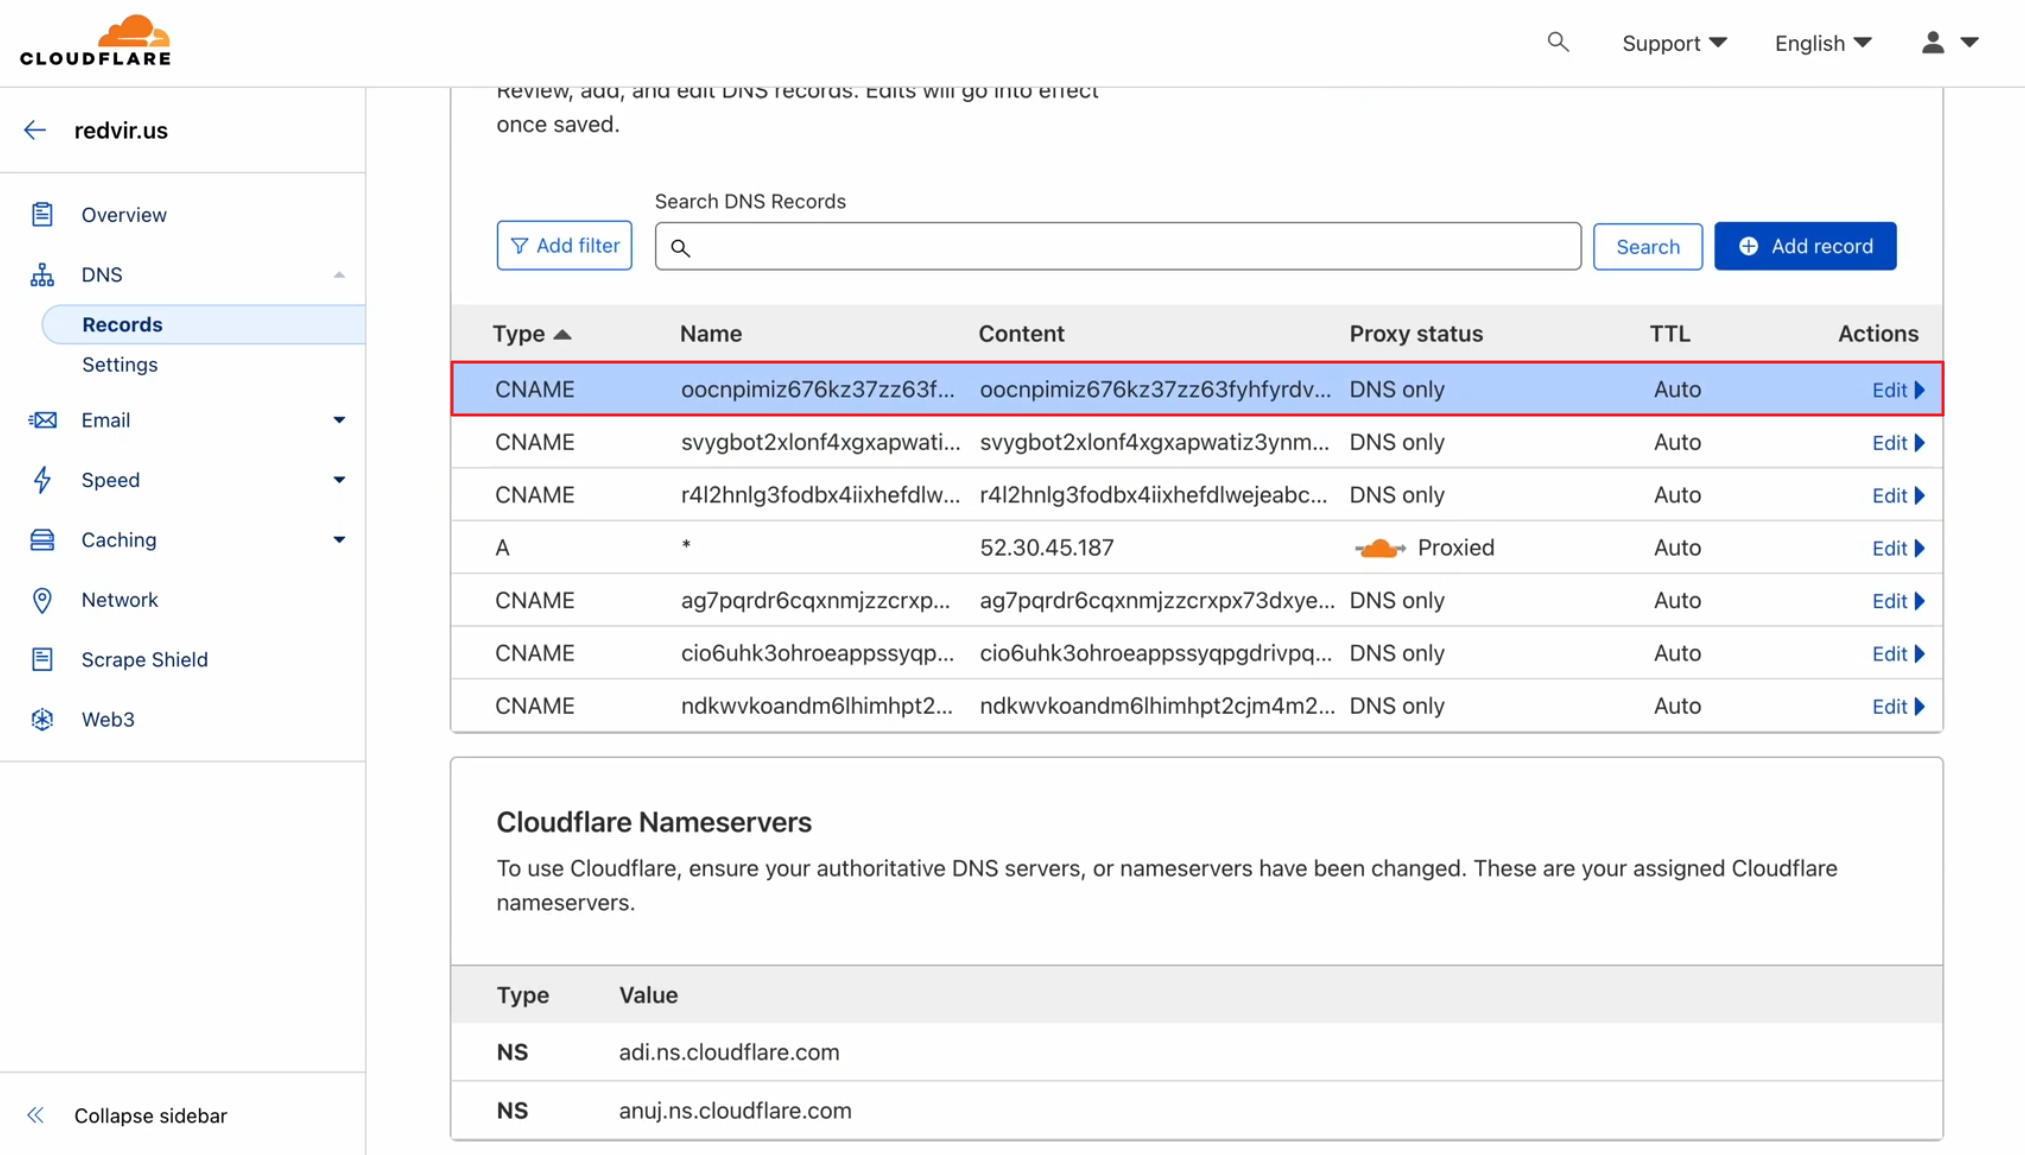
Follow the same procedure for the 3rd record by copying it from MailBluster
And paste it to your DNS Management as 3rd record
Wait approximately 48 hours maximum for DNS values to propagate and then click Refresh
The DNS Records will show “Verified” and domain will show “Success”
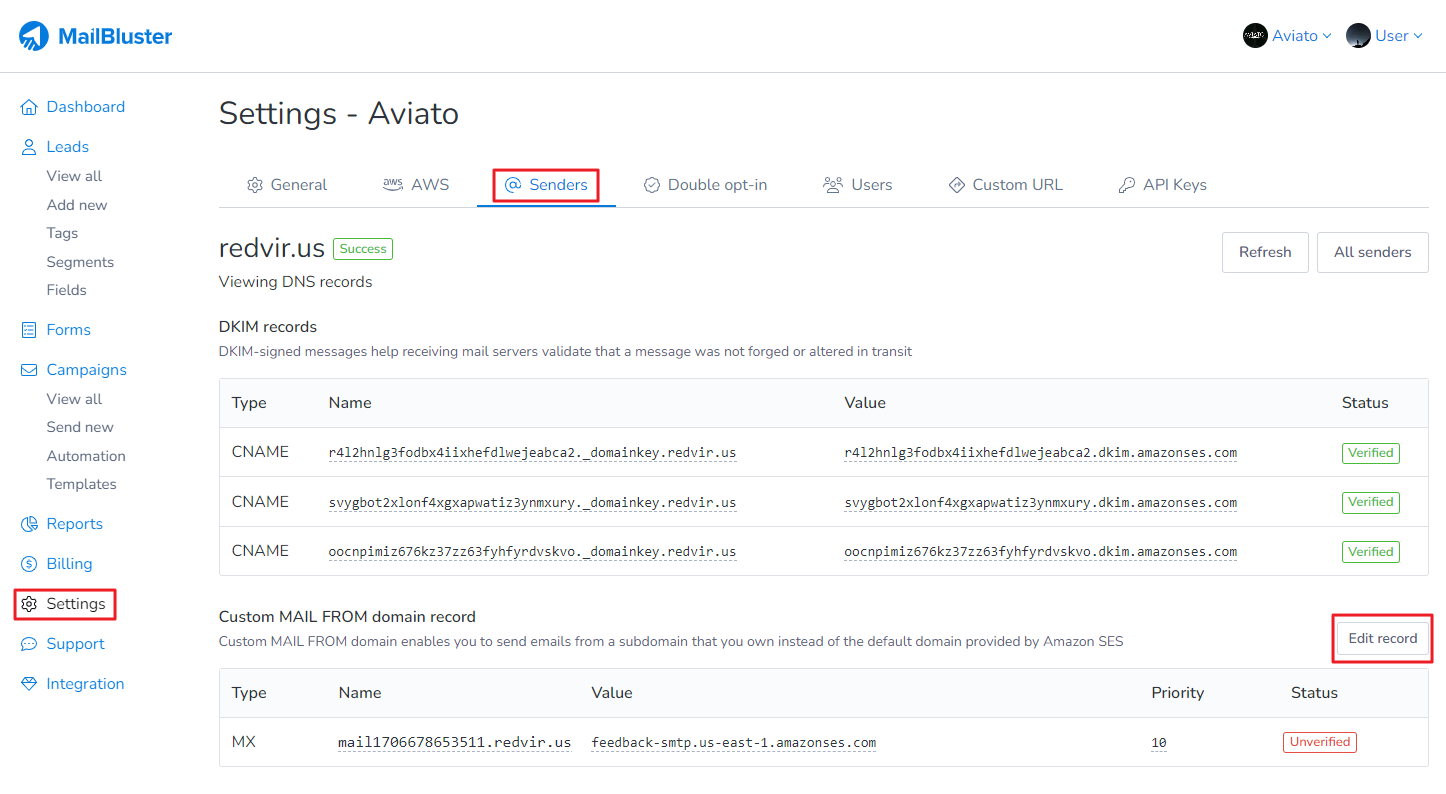
Now click Edit record for Custom MAIL FROM domain record
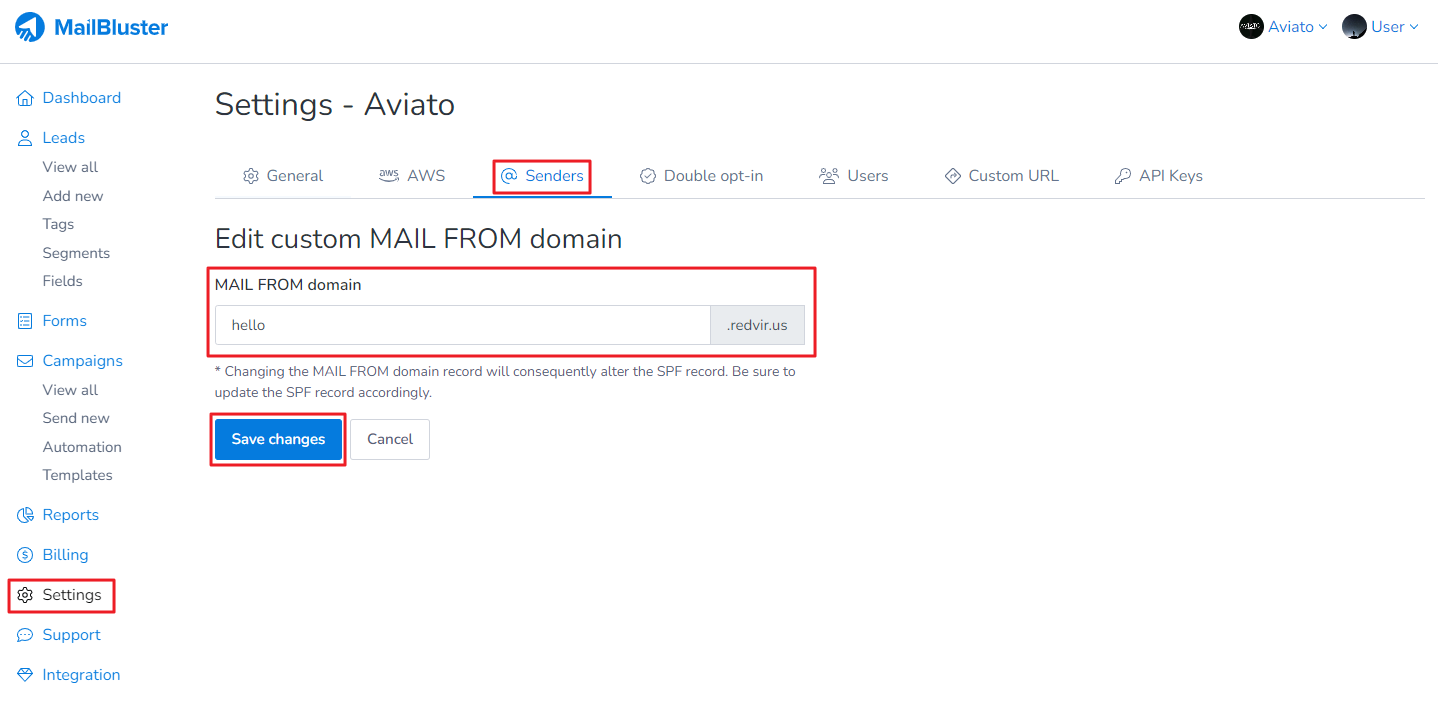
Enter subdomain in MAIL FROM domain and then click Save changes
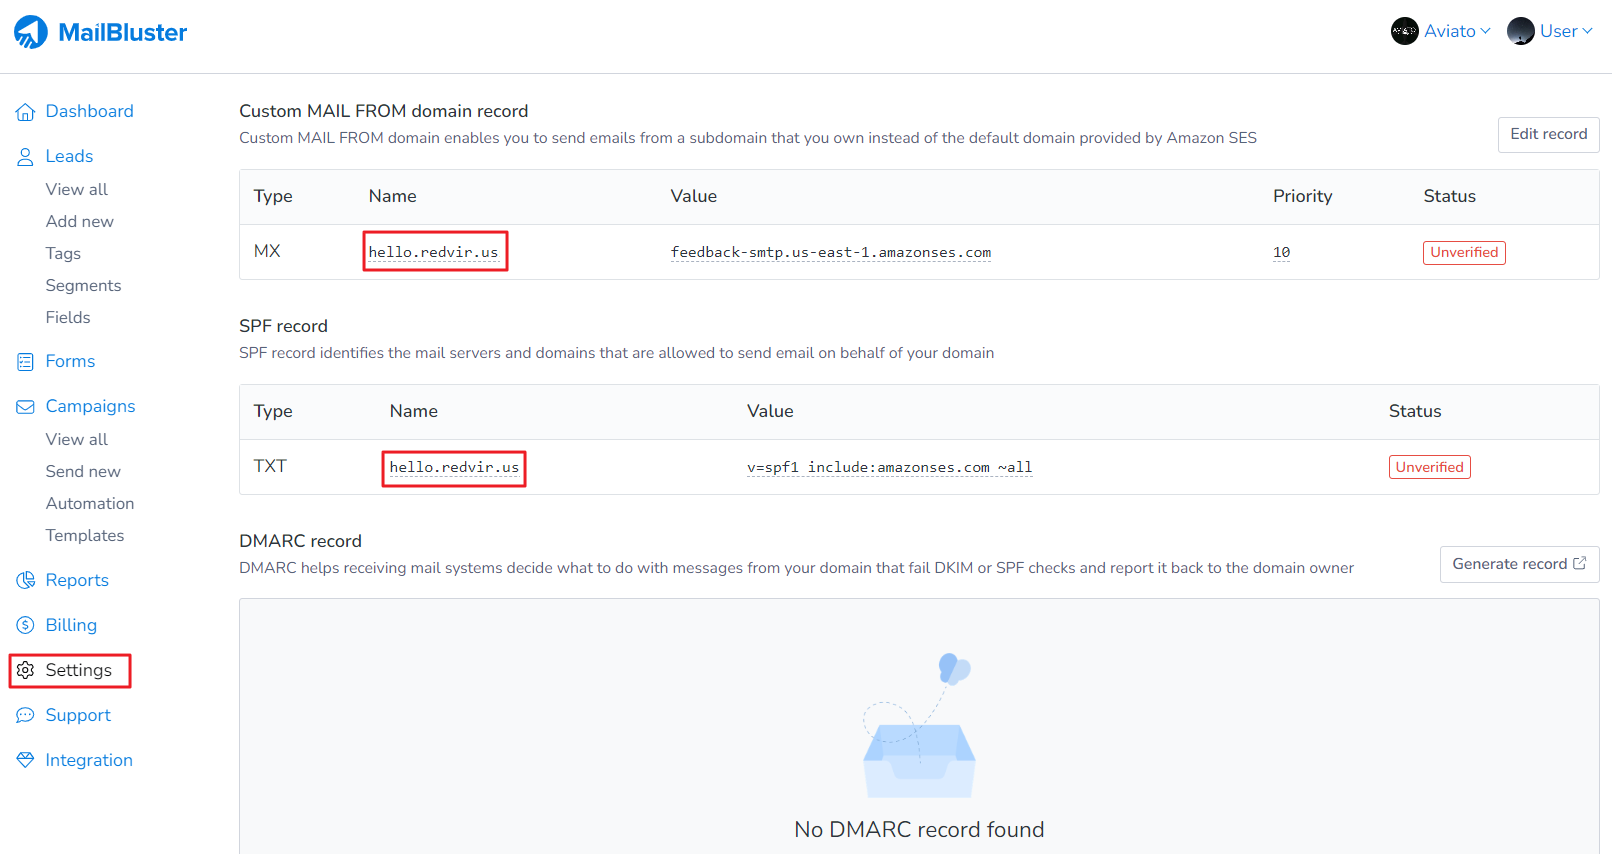
You will notice that the Custom MAIL FROM domain record and SPF record will be changed to the new subdomain
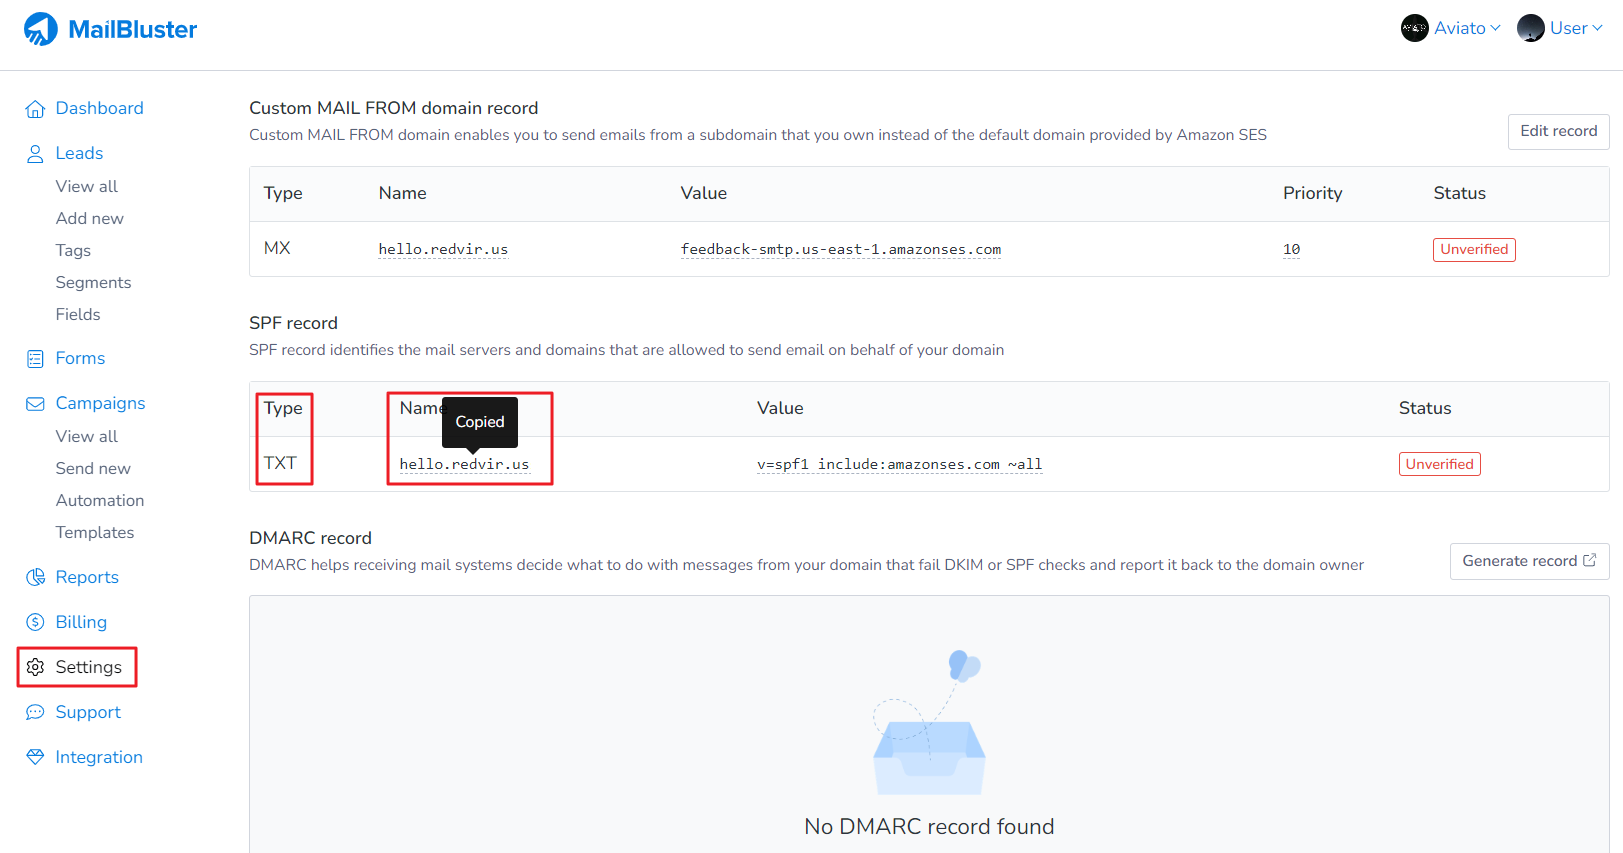
Copy the Name from the SPF Record
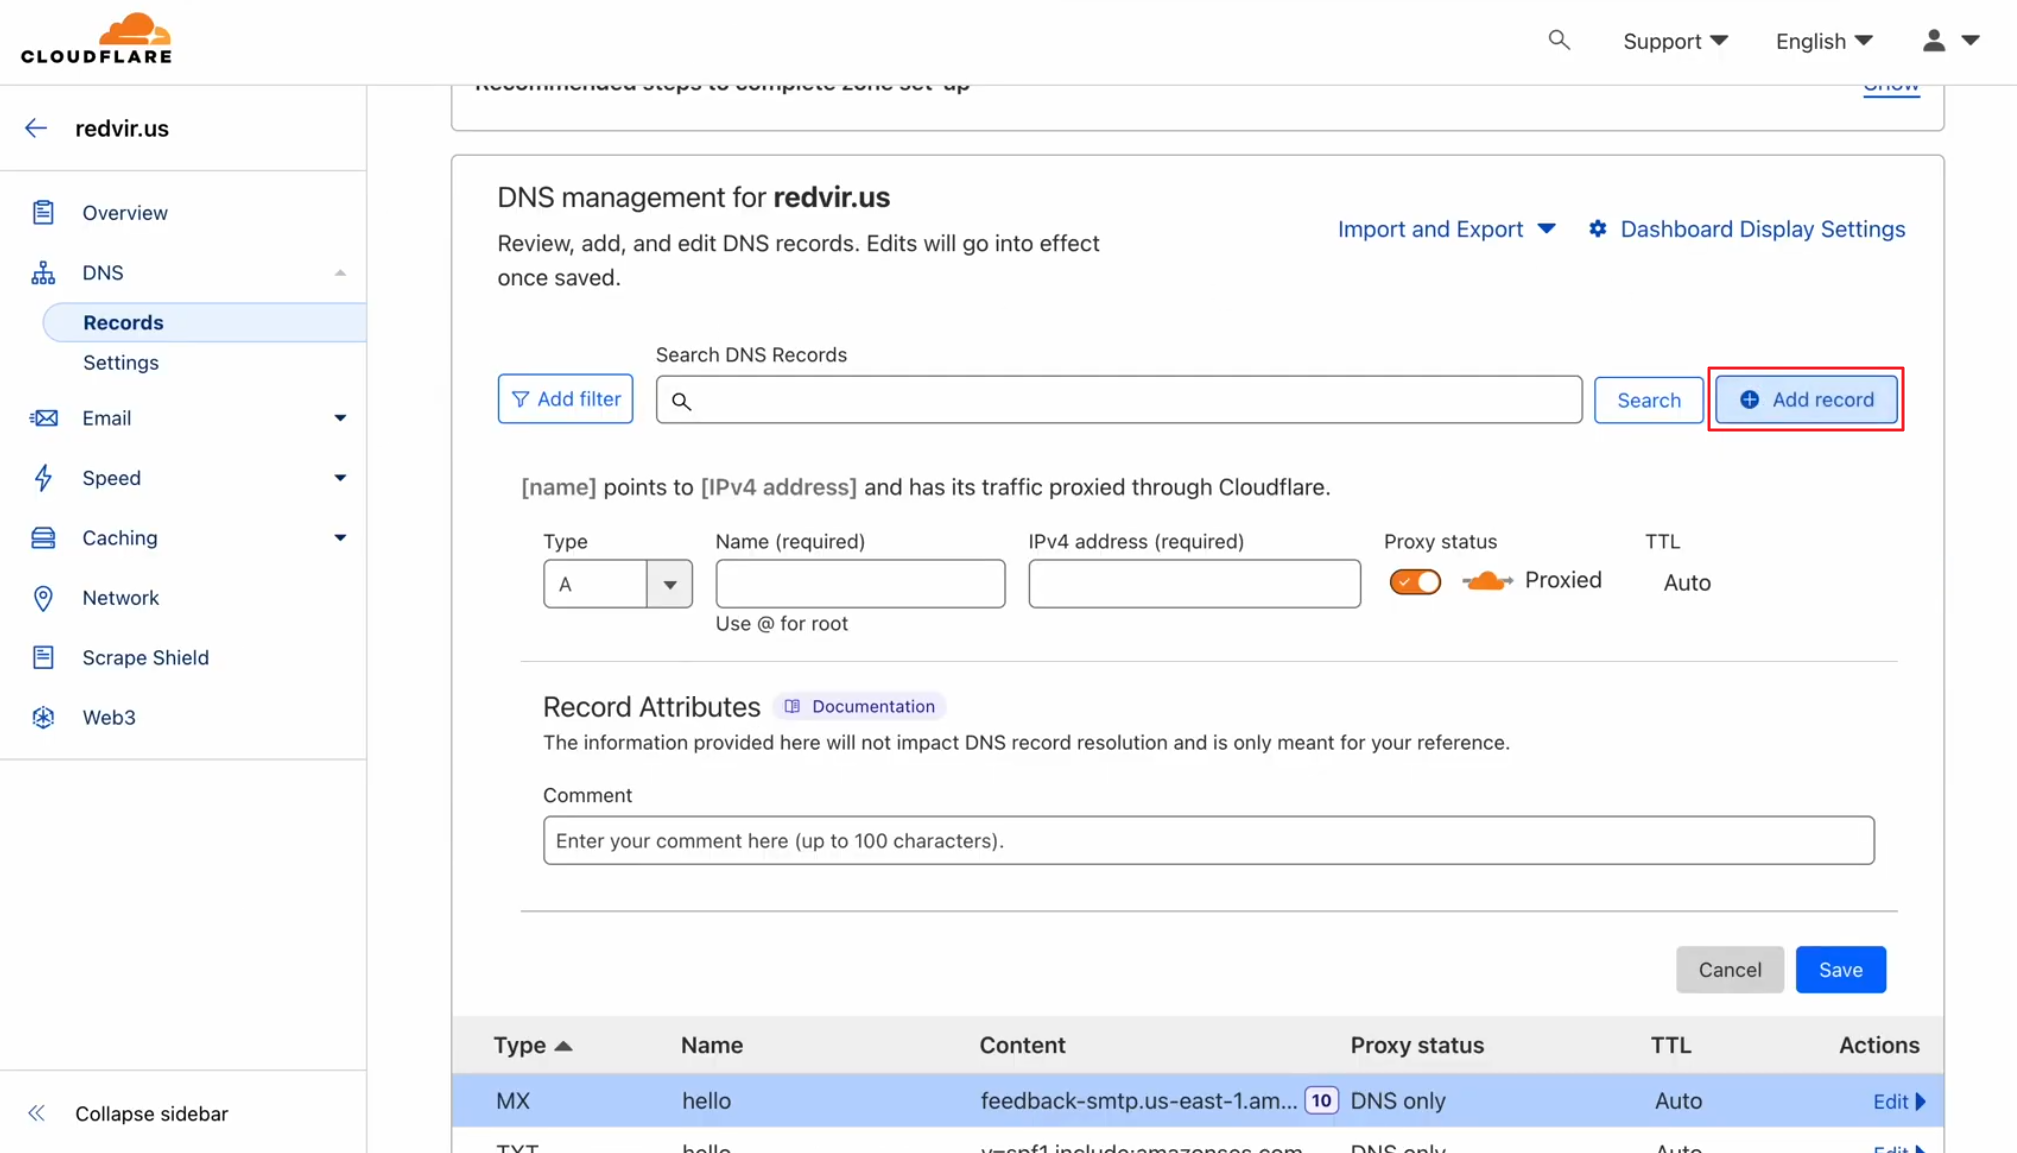
Click Add record from your DNS Management
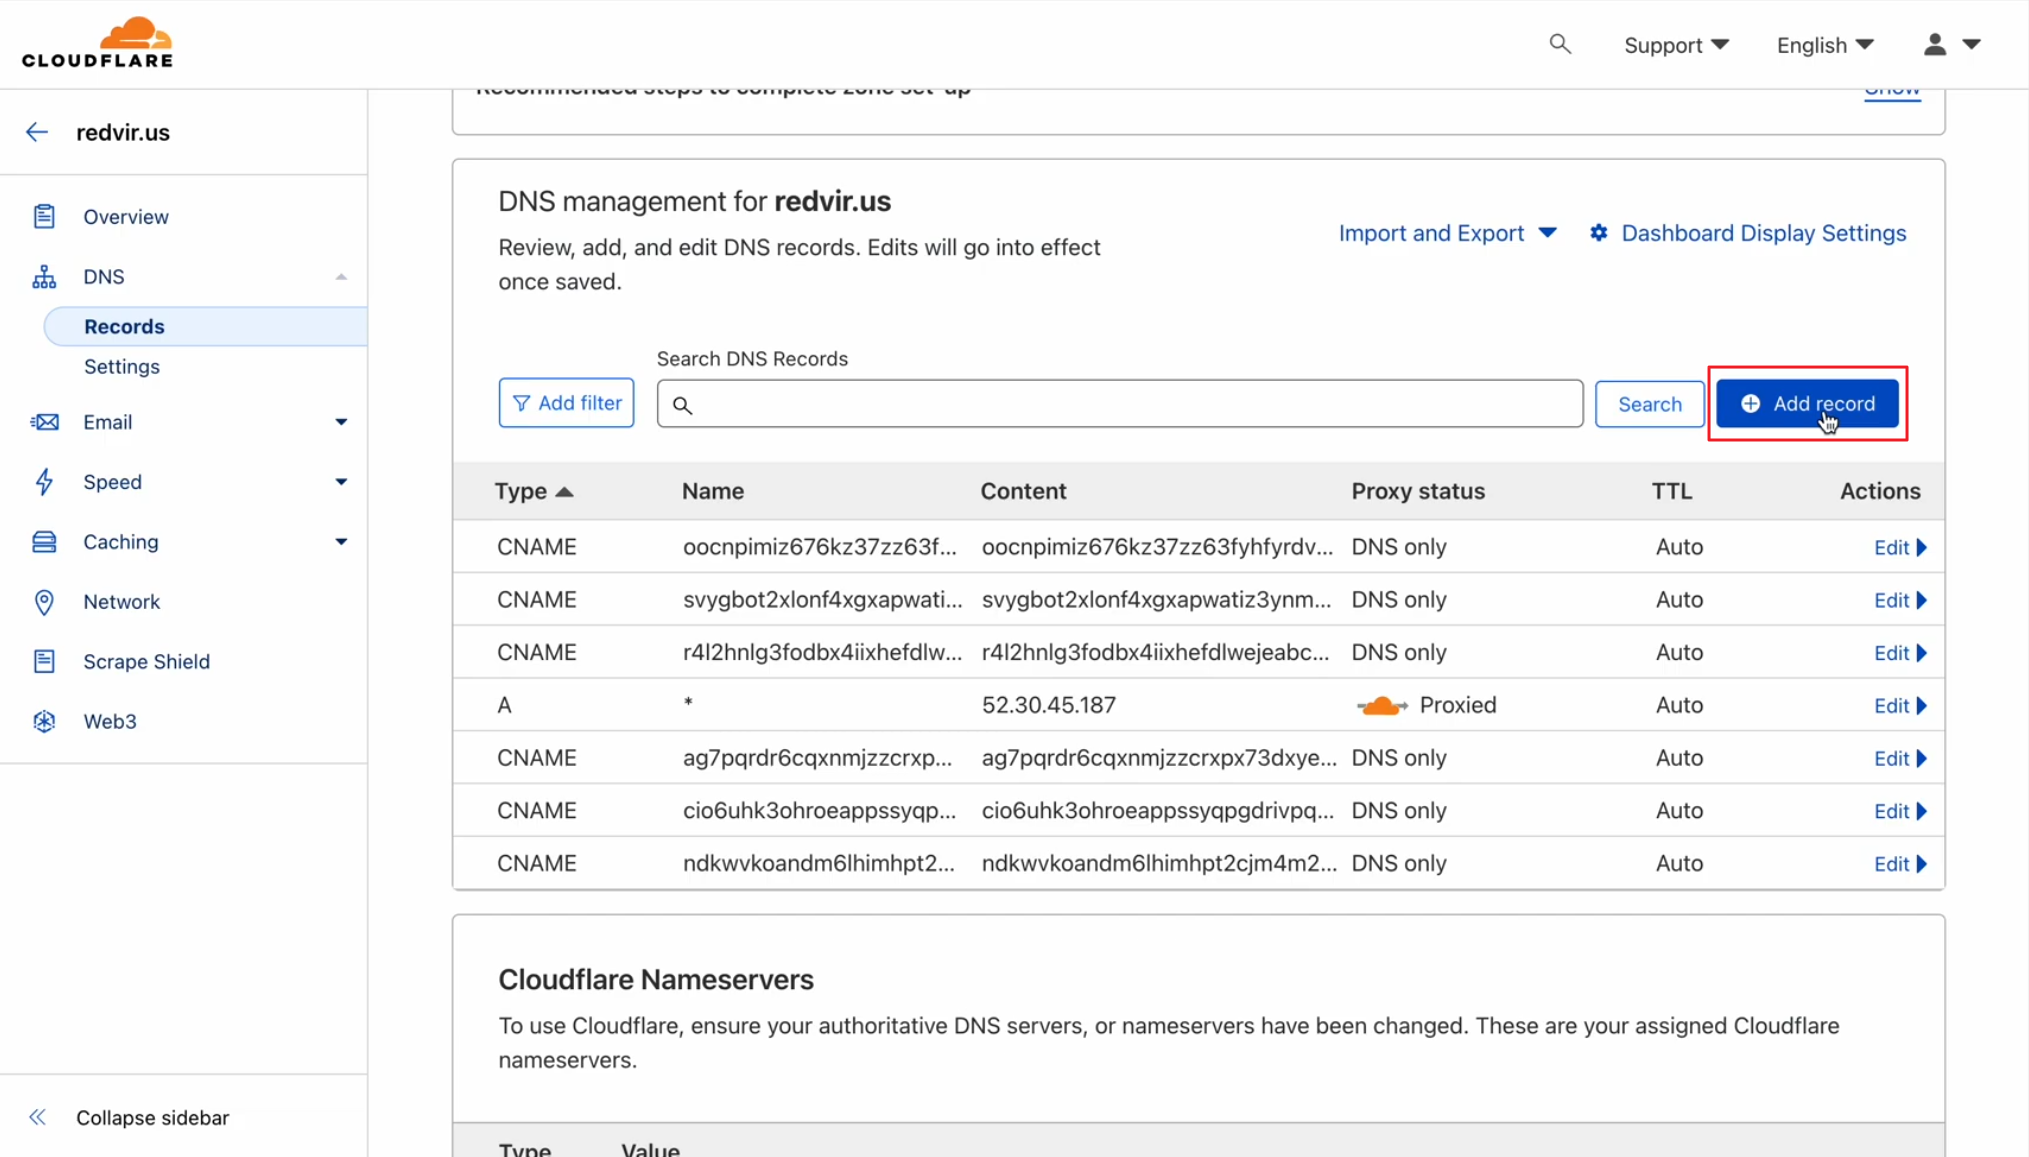
Select Type TXT and Name for your domain
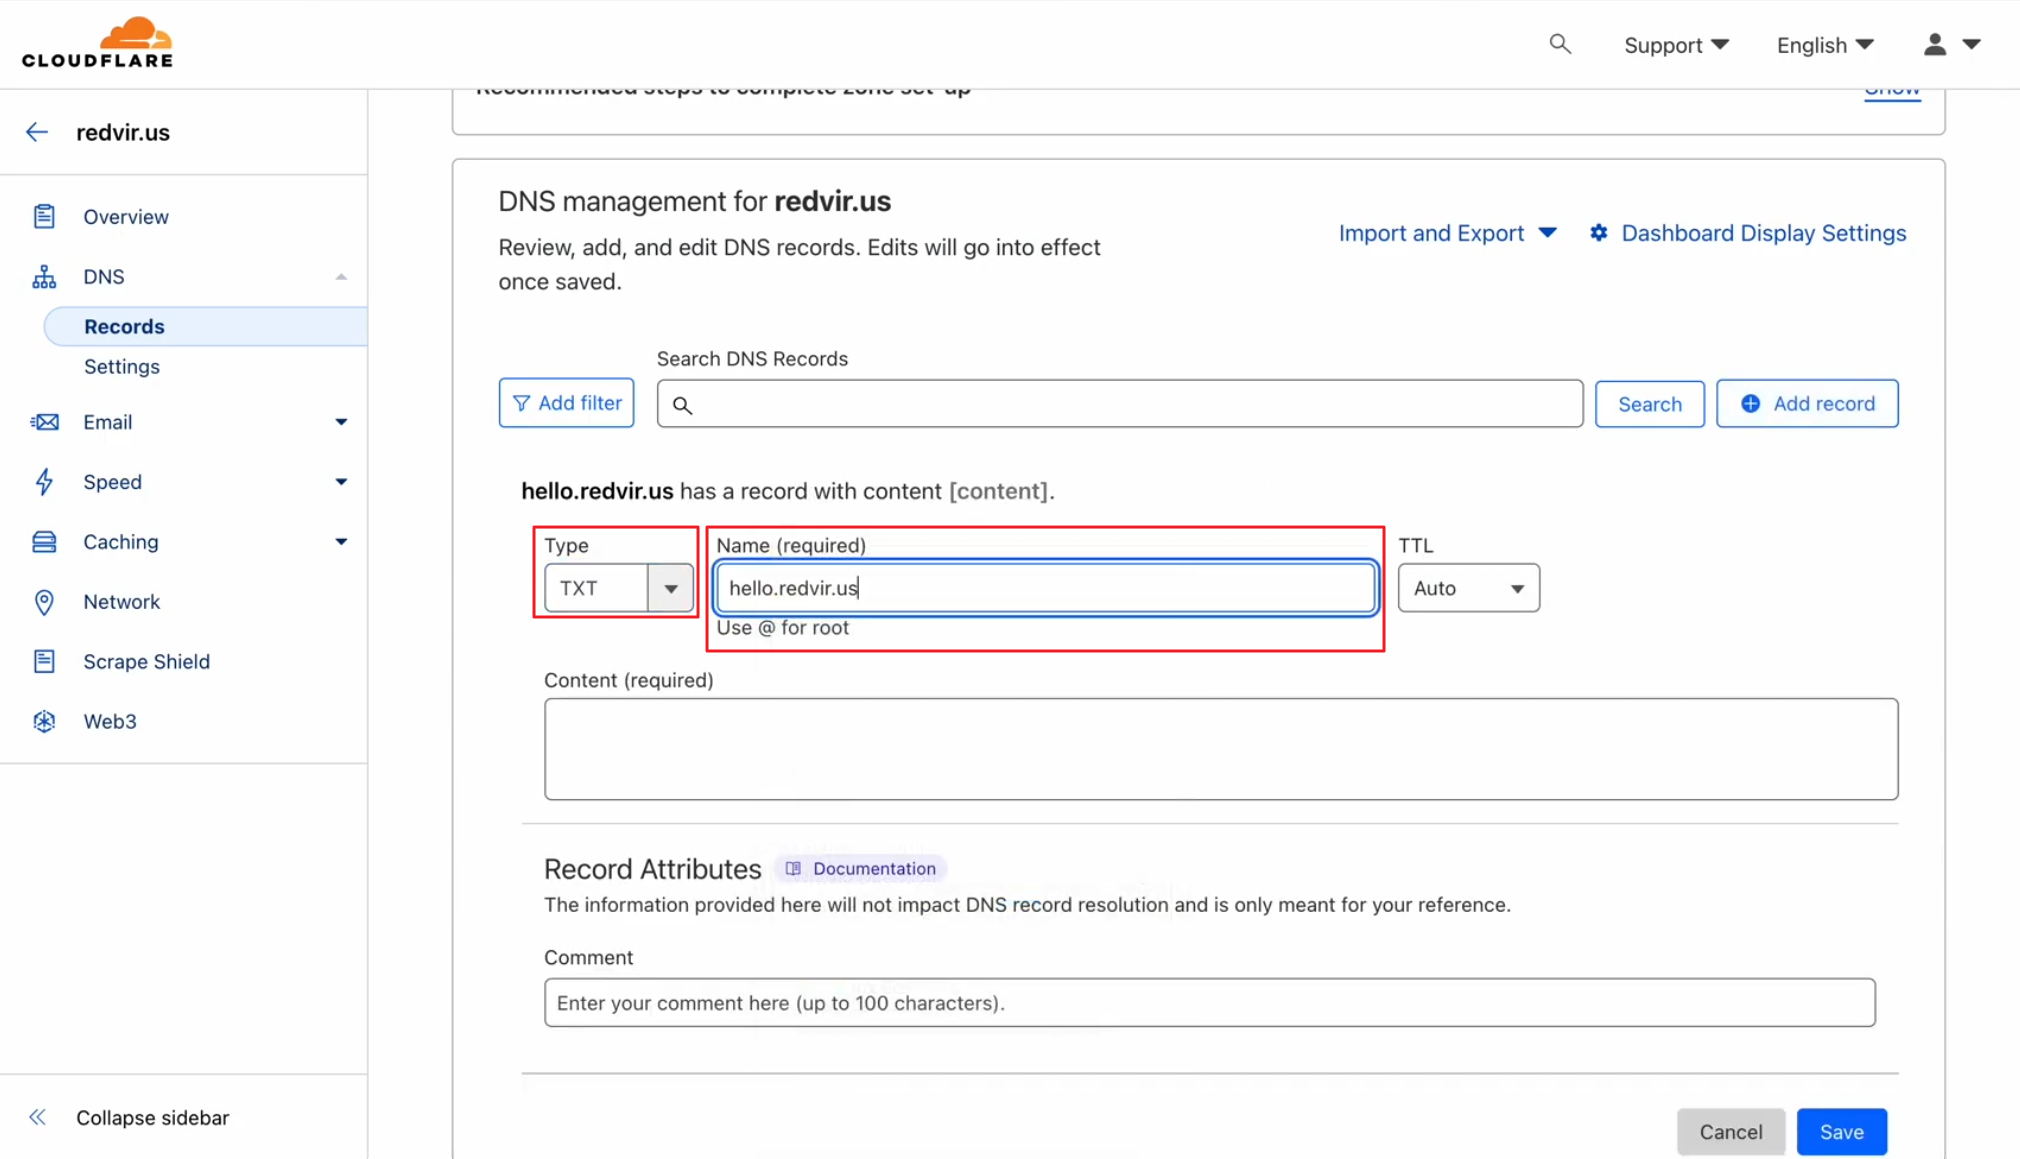
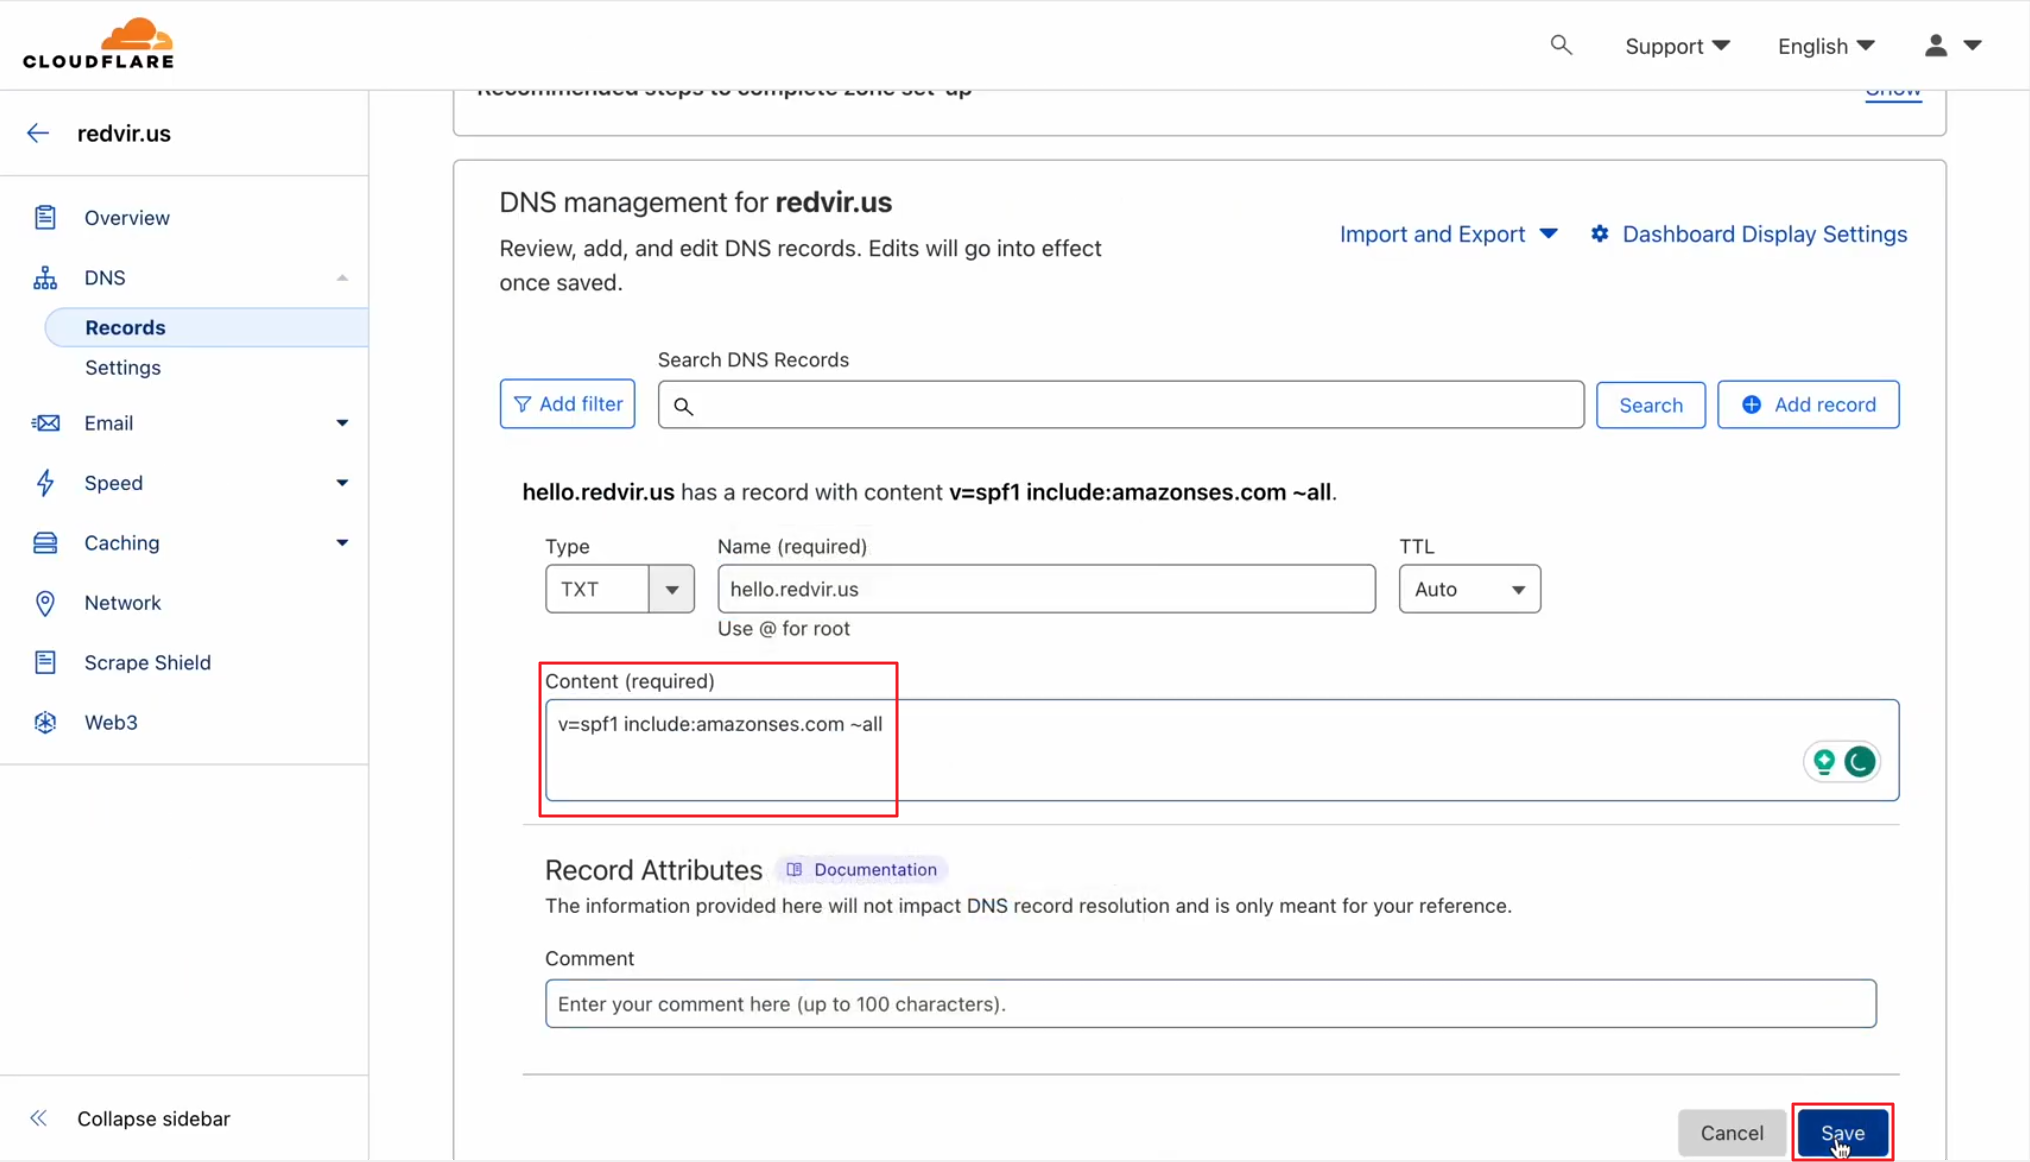
Copy Value from SPF Record

Paste in Content (required) and click Save
TXT record is now added to your DNS Management

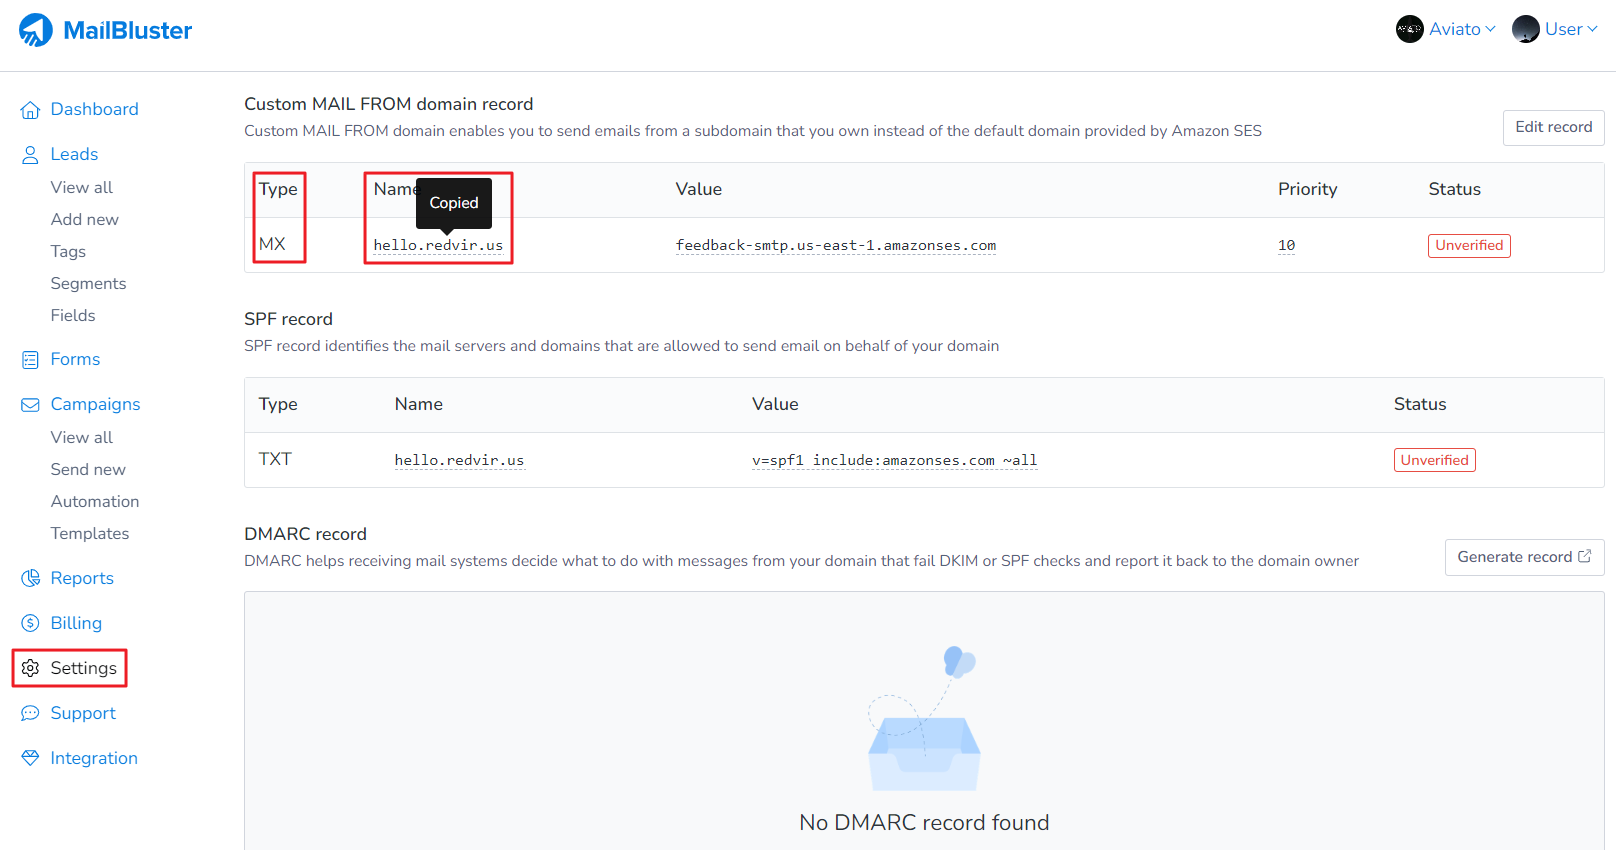
Copy the Custom MAIL FROM domain record
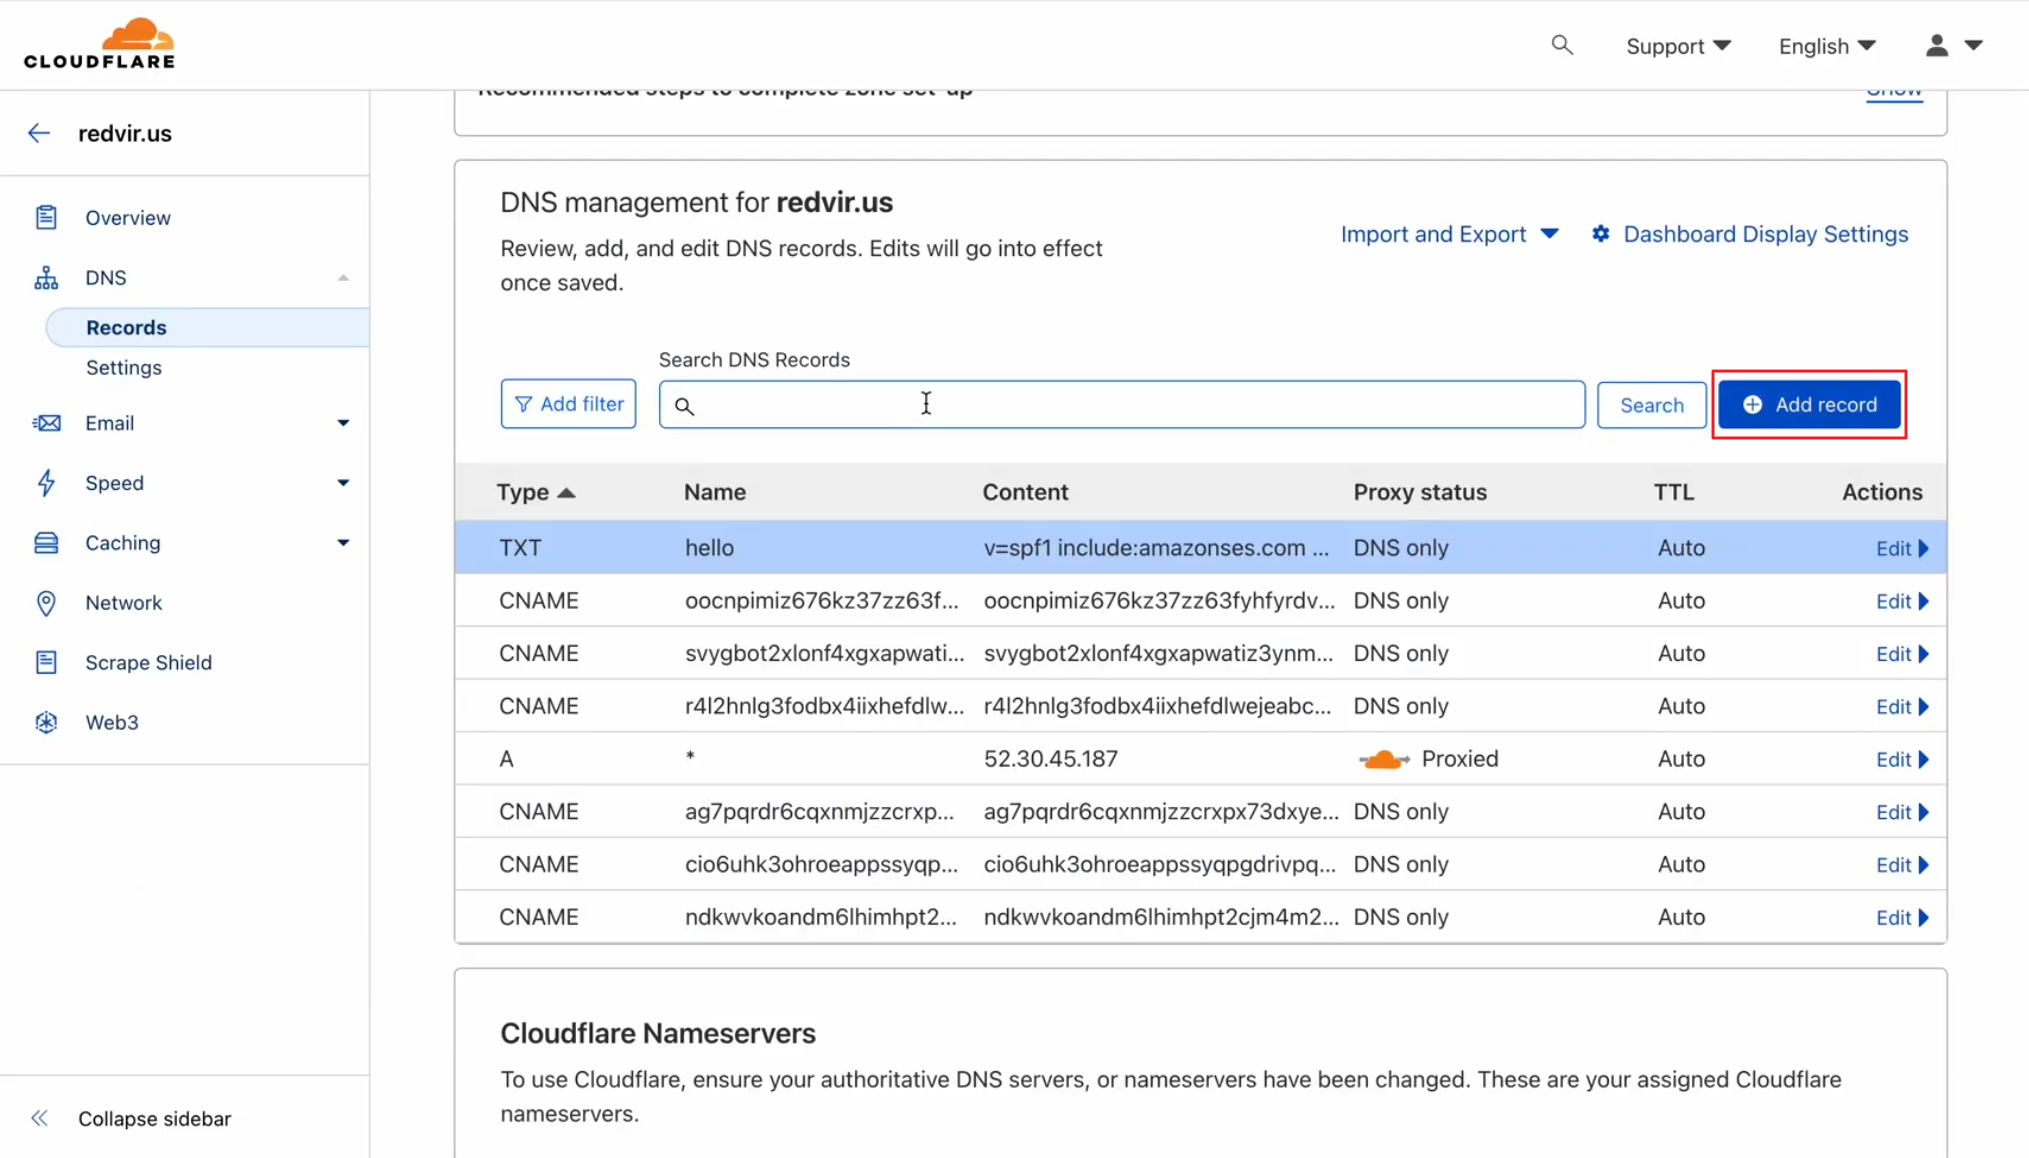
Click Add record from your DNS Management again
Copy Name, Value and Priority from Custom MAIL FROM domain record

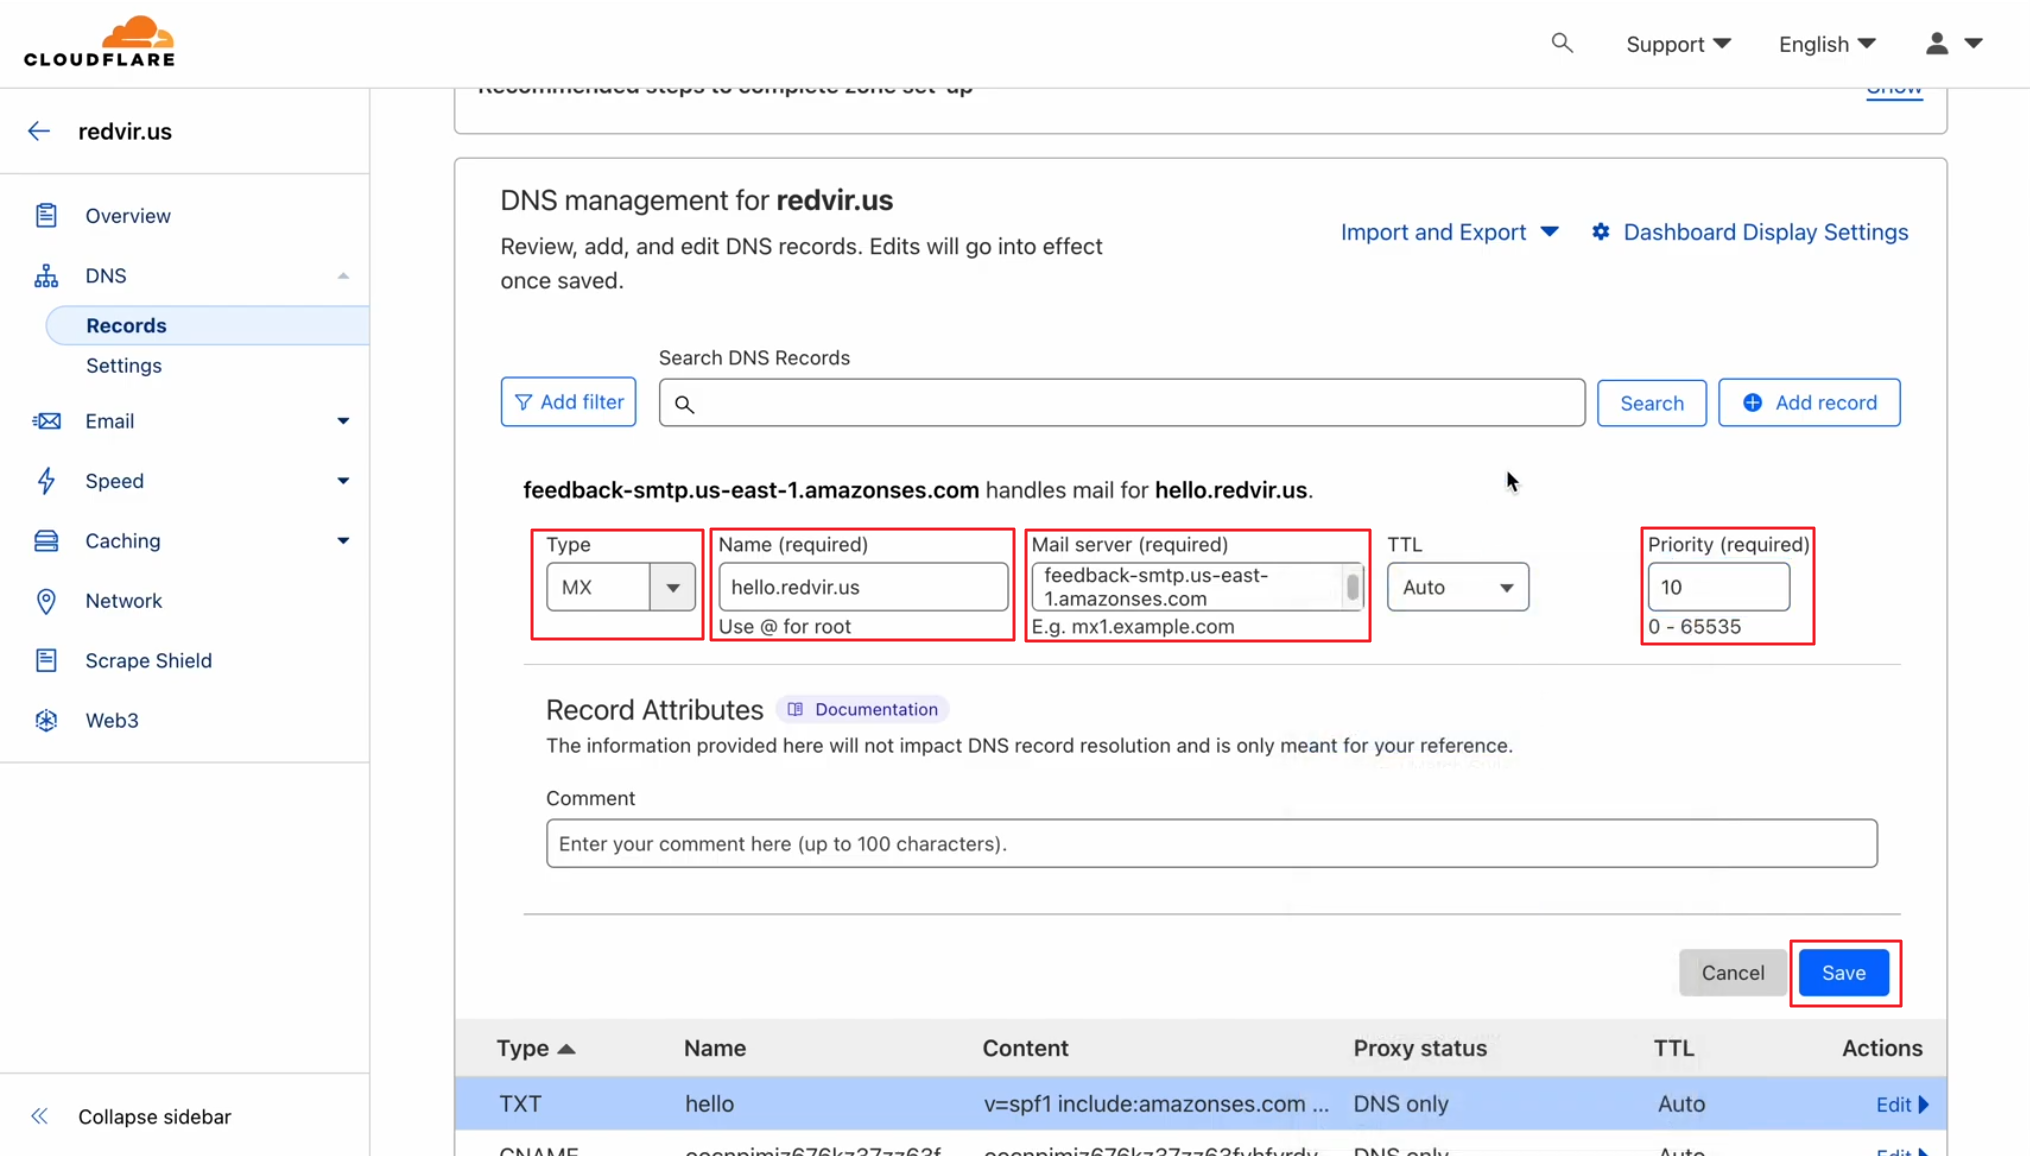
Paste it to DNS Management as MX Record Type, Name (required), Mail server (required) and Priority (required). Then click Save.
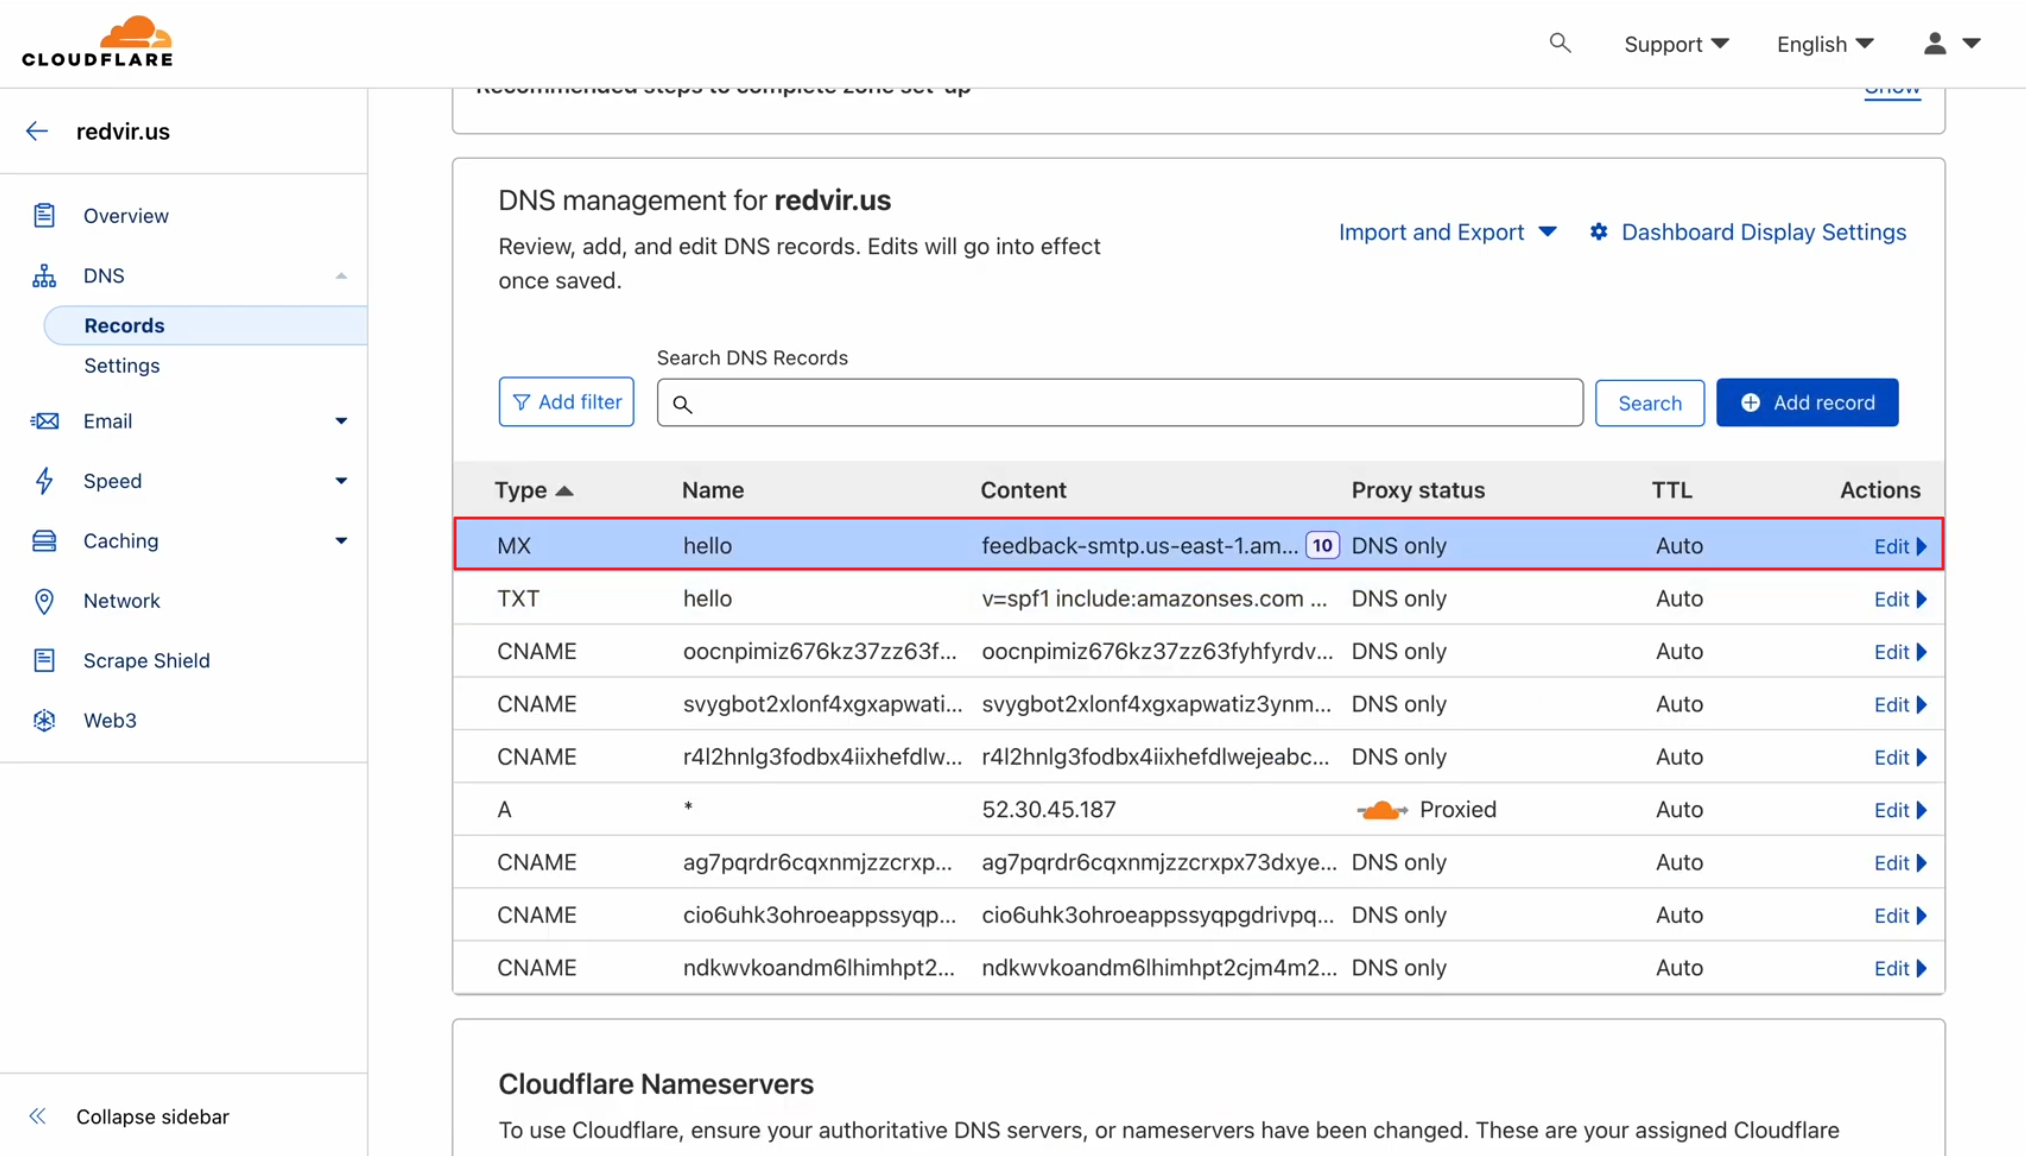
MX Record is added to your DNS Management
You will now notice that Custom MAIL FROM domain record and SPF record will show “Verified“
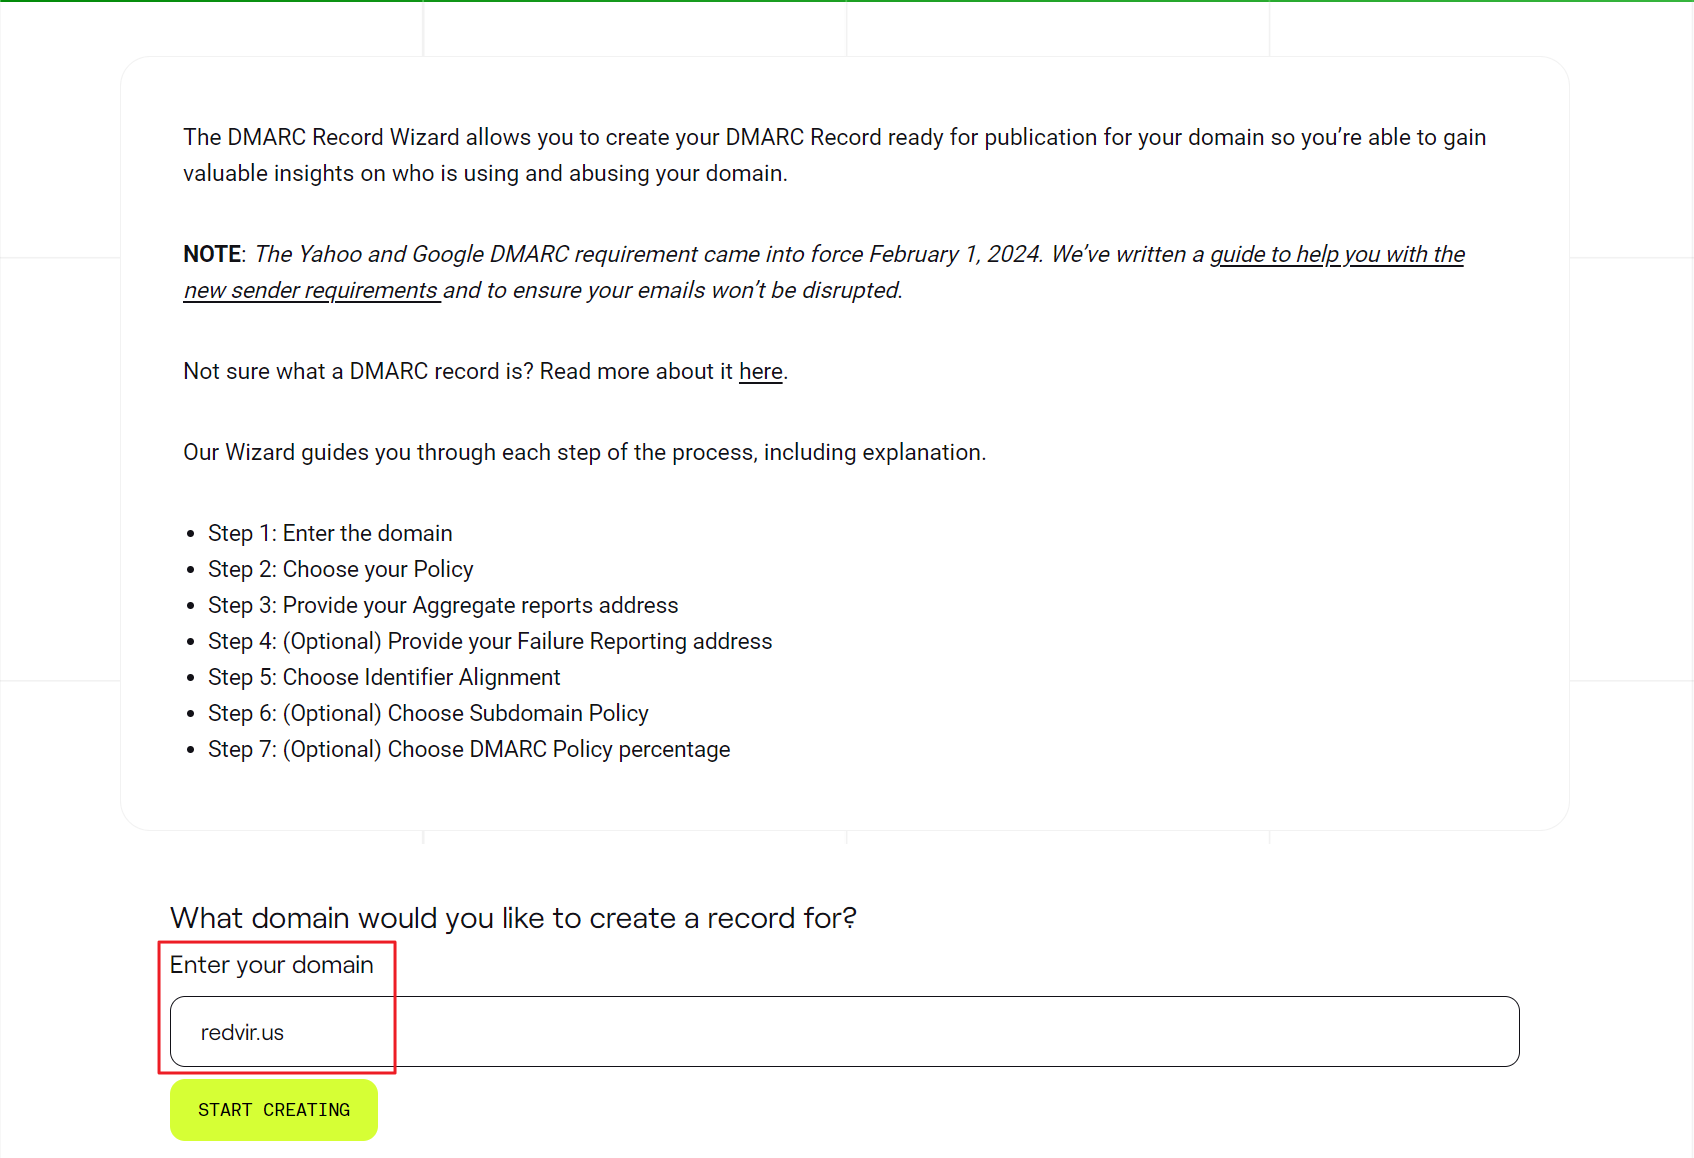
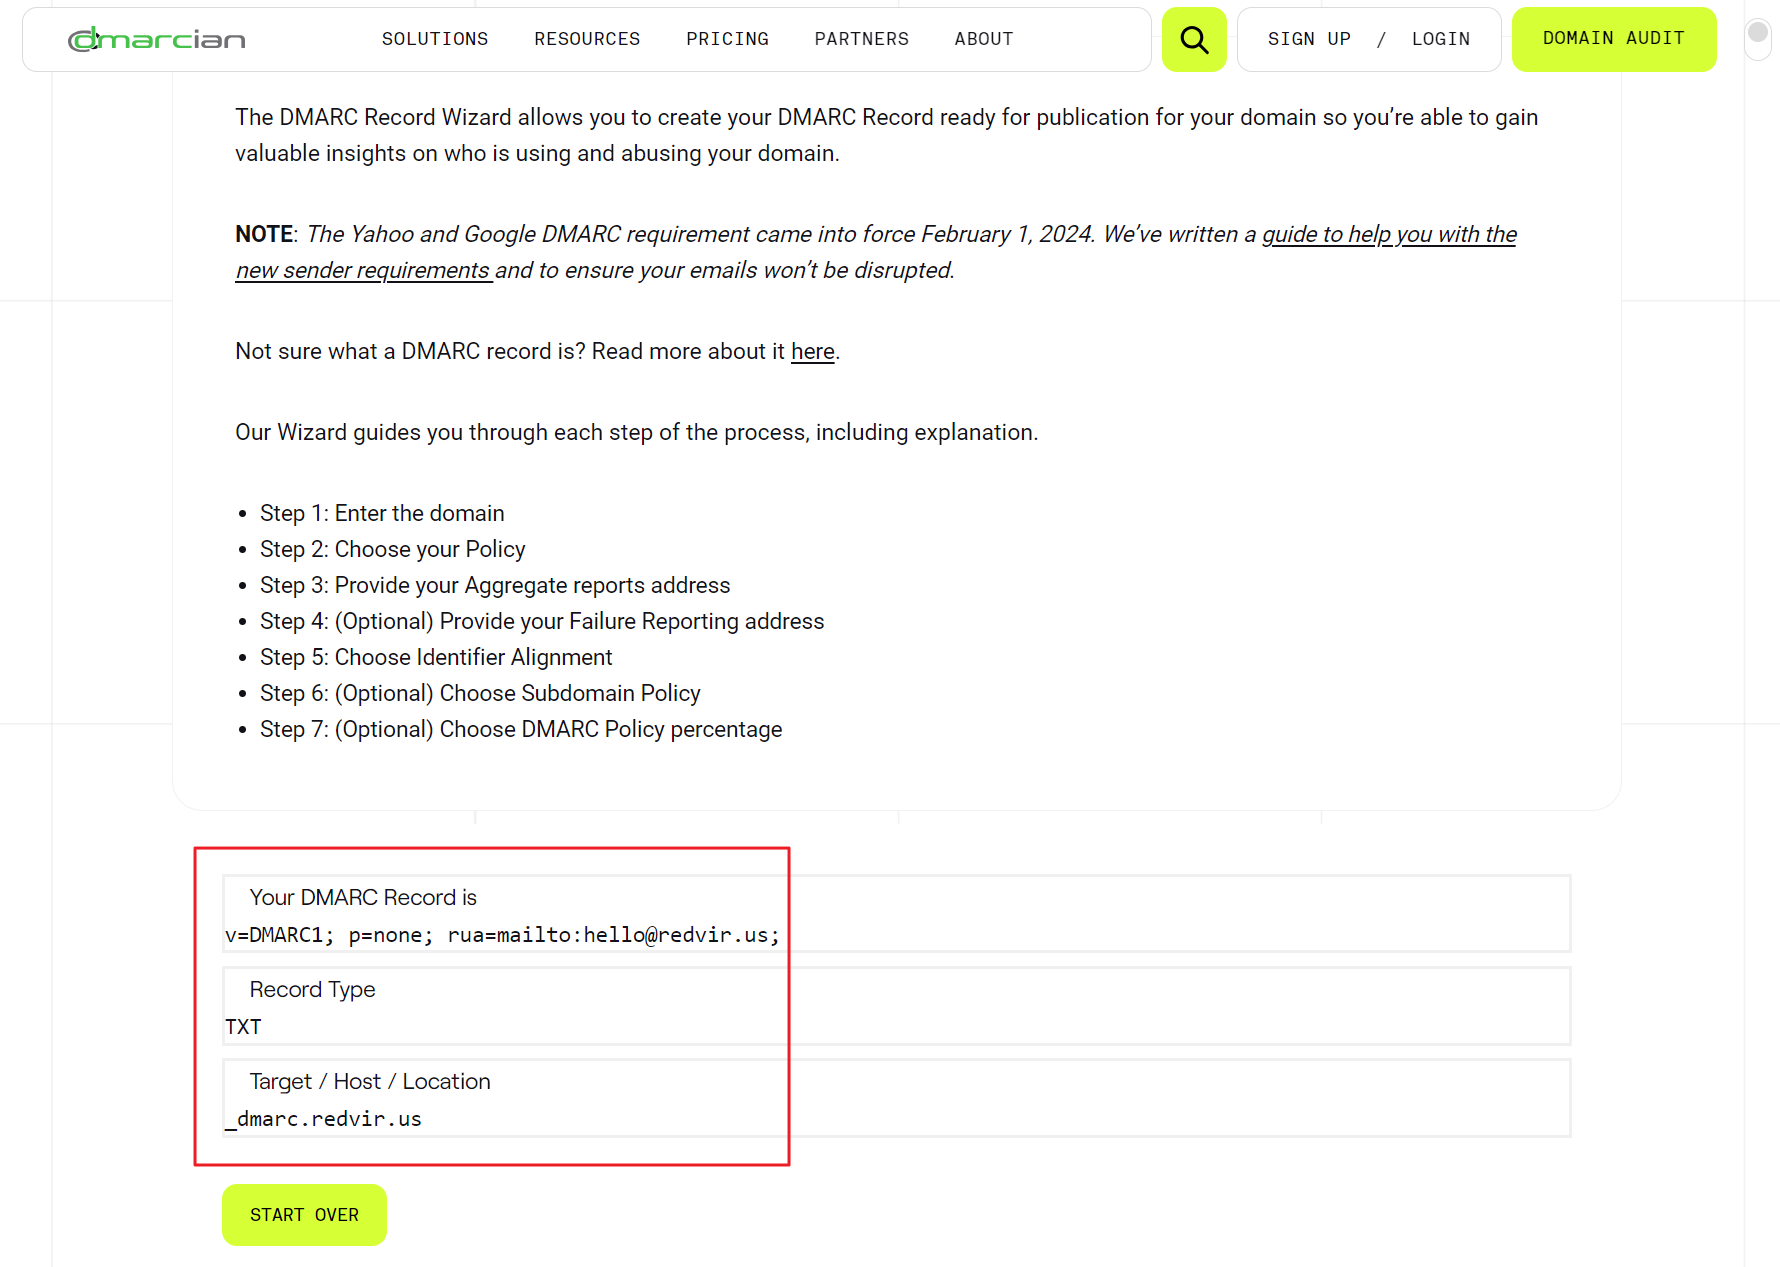
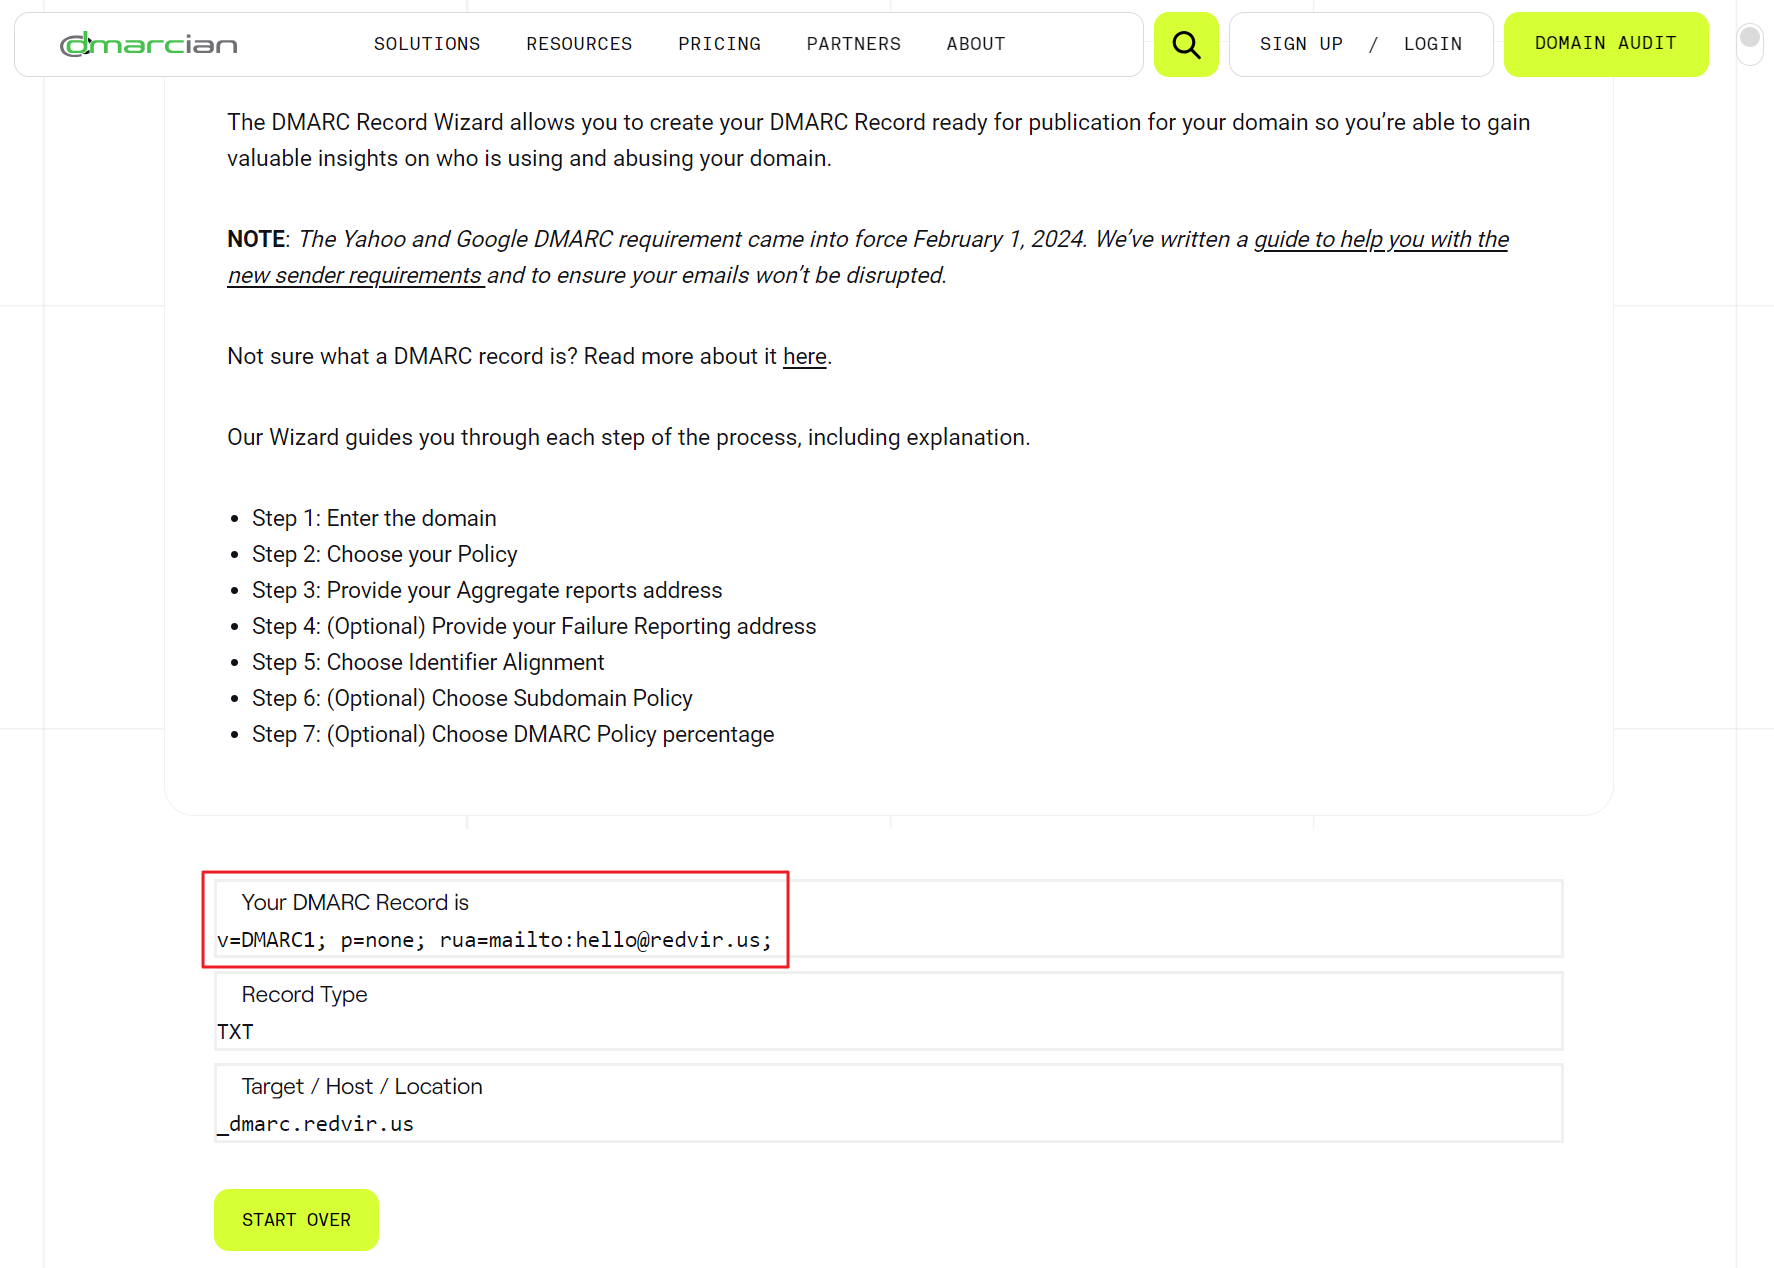
Now, it’s time to Generate record for DMARC. Click on the Generate record button

Enter your domain address for DMARC
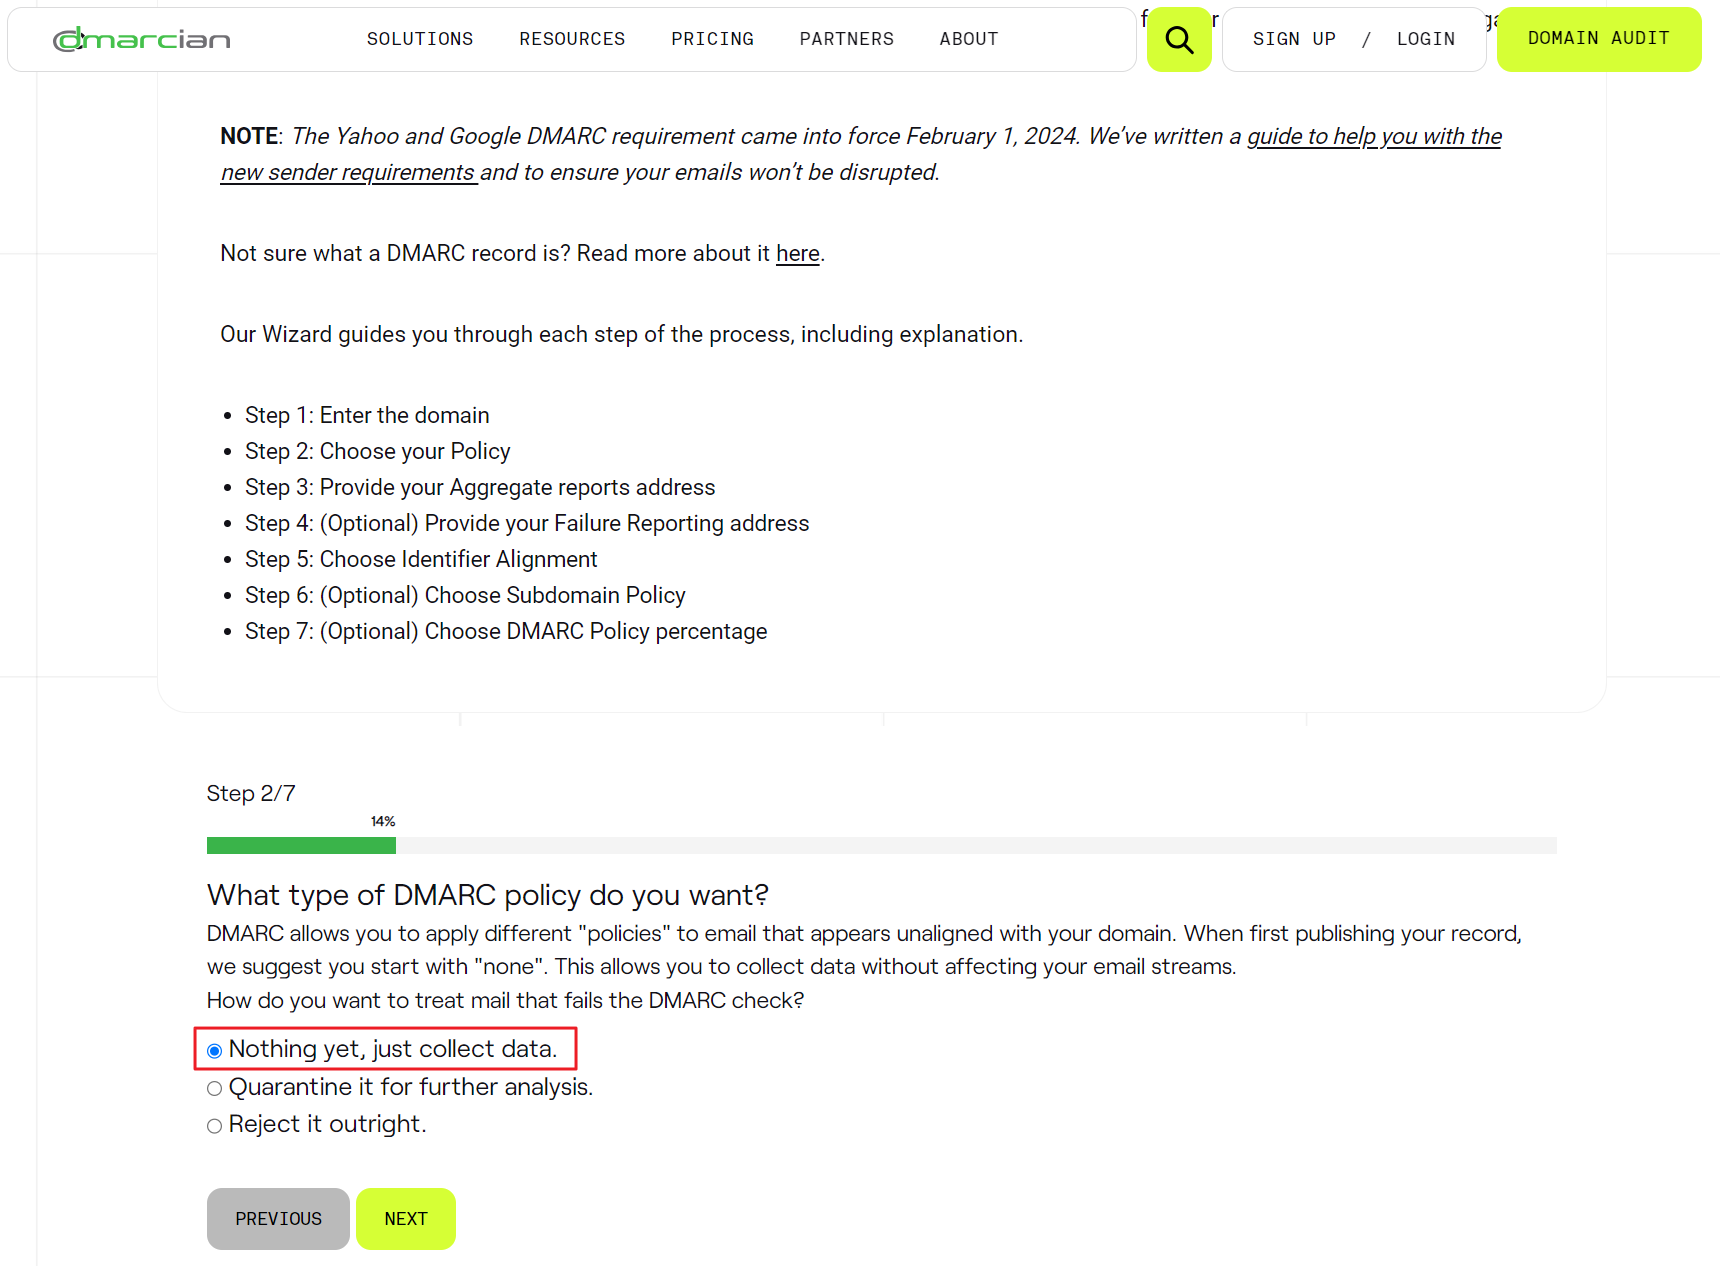
Select type of DMARC policy Nothing yet, just collect data
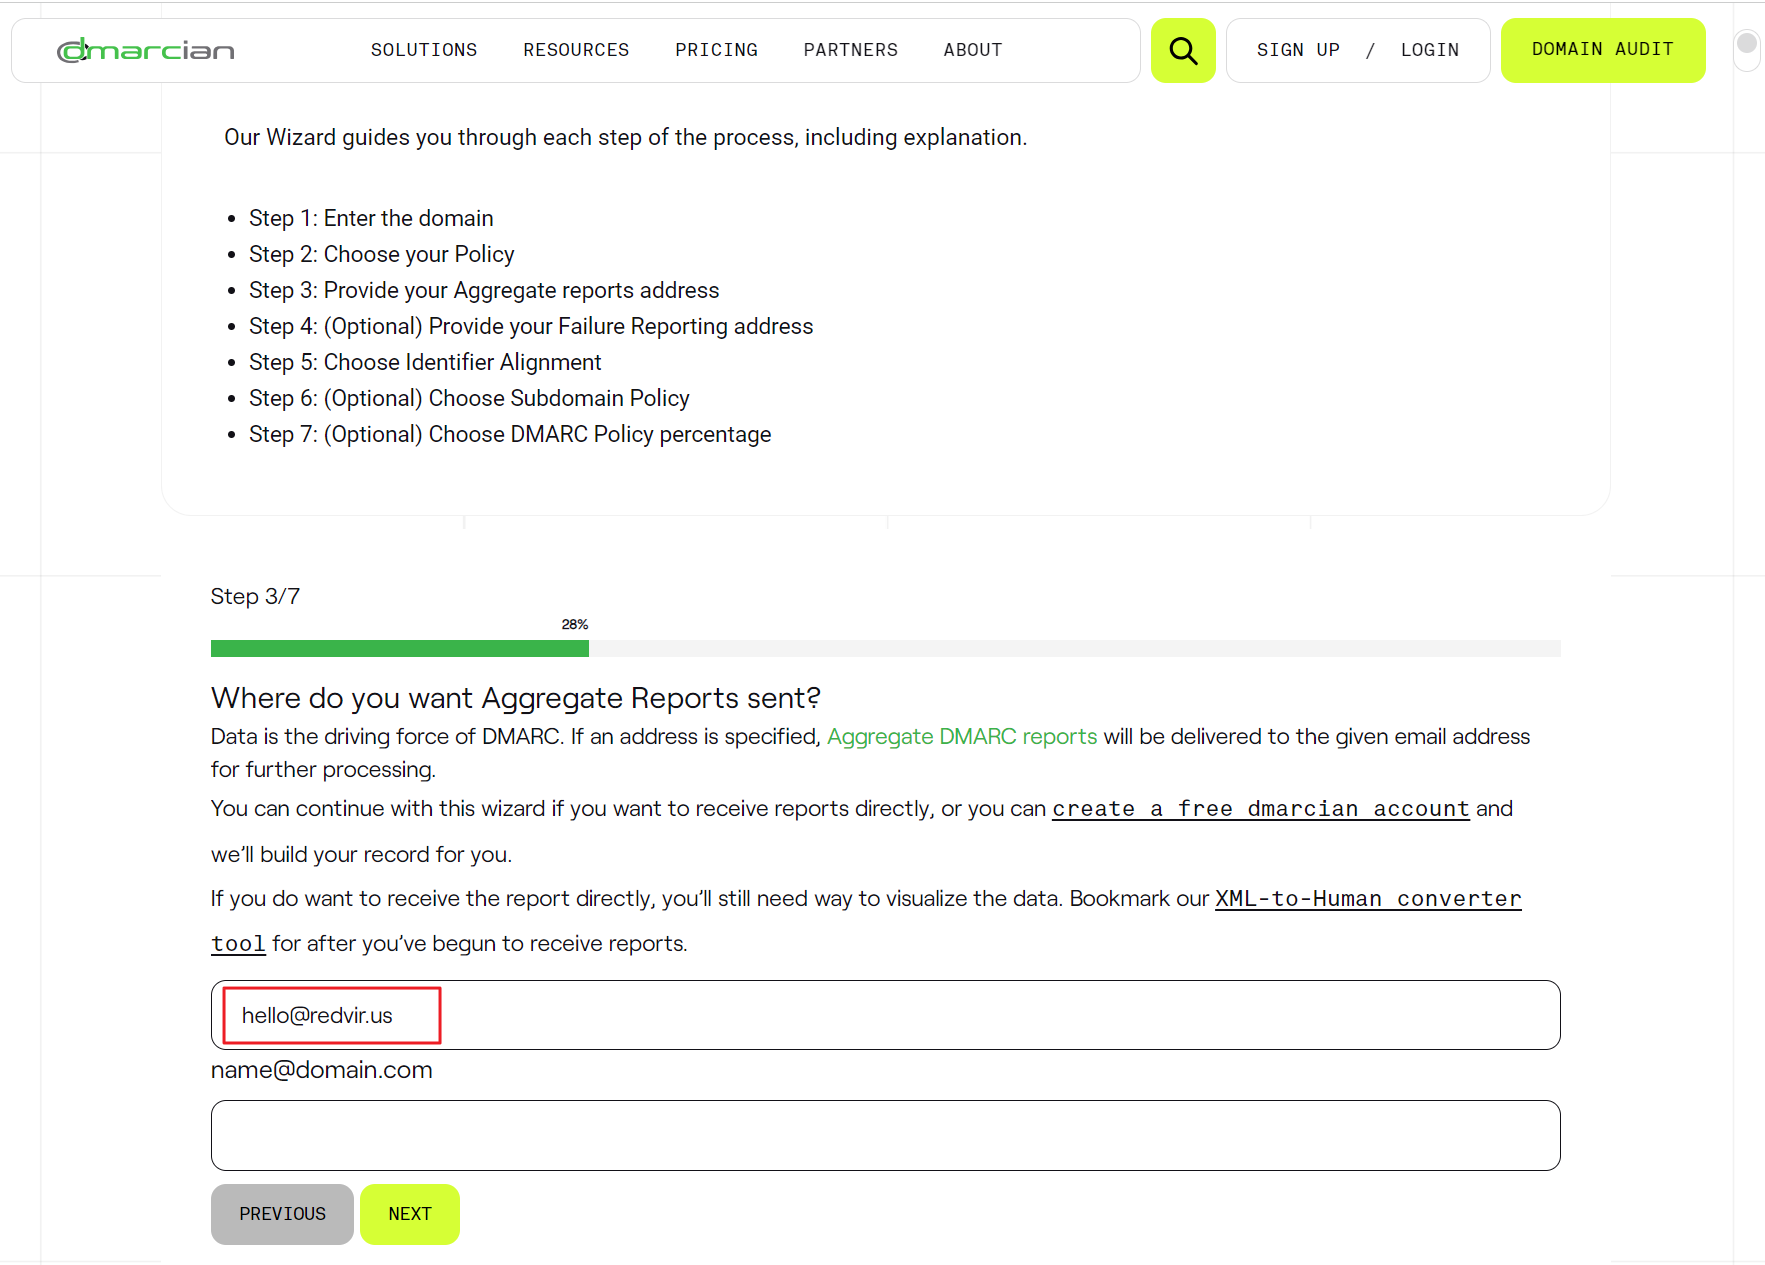
Select the domain for Aggregate Reports sent
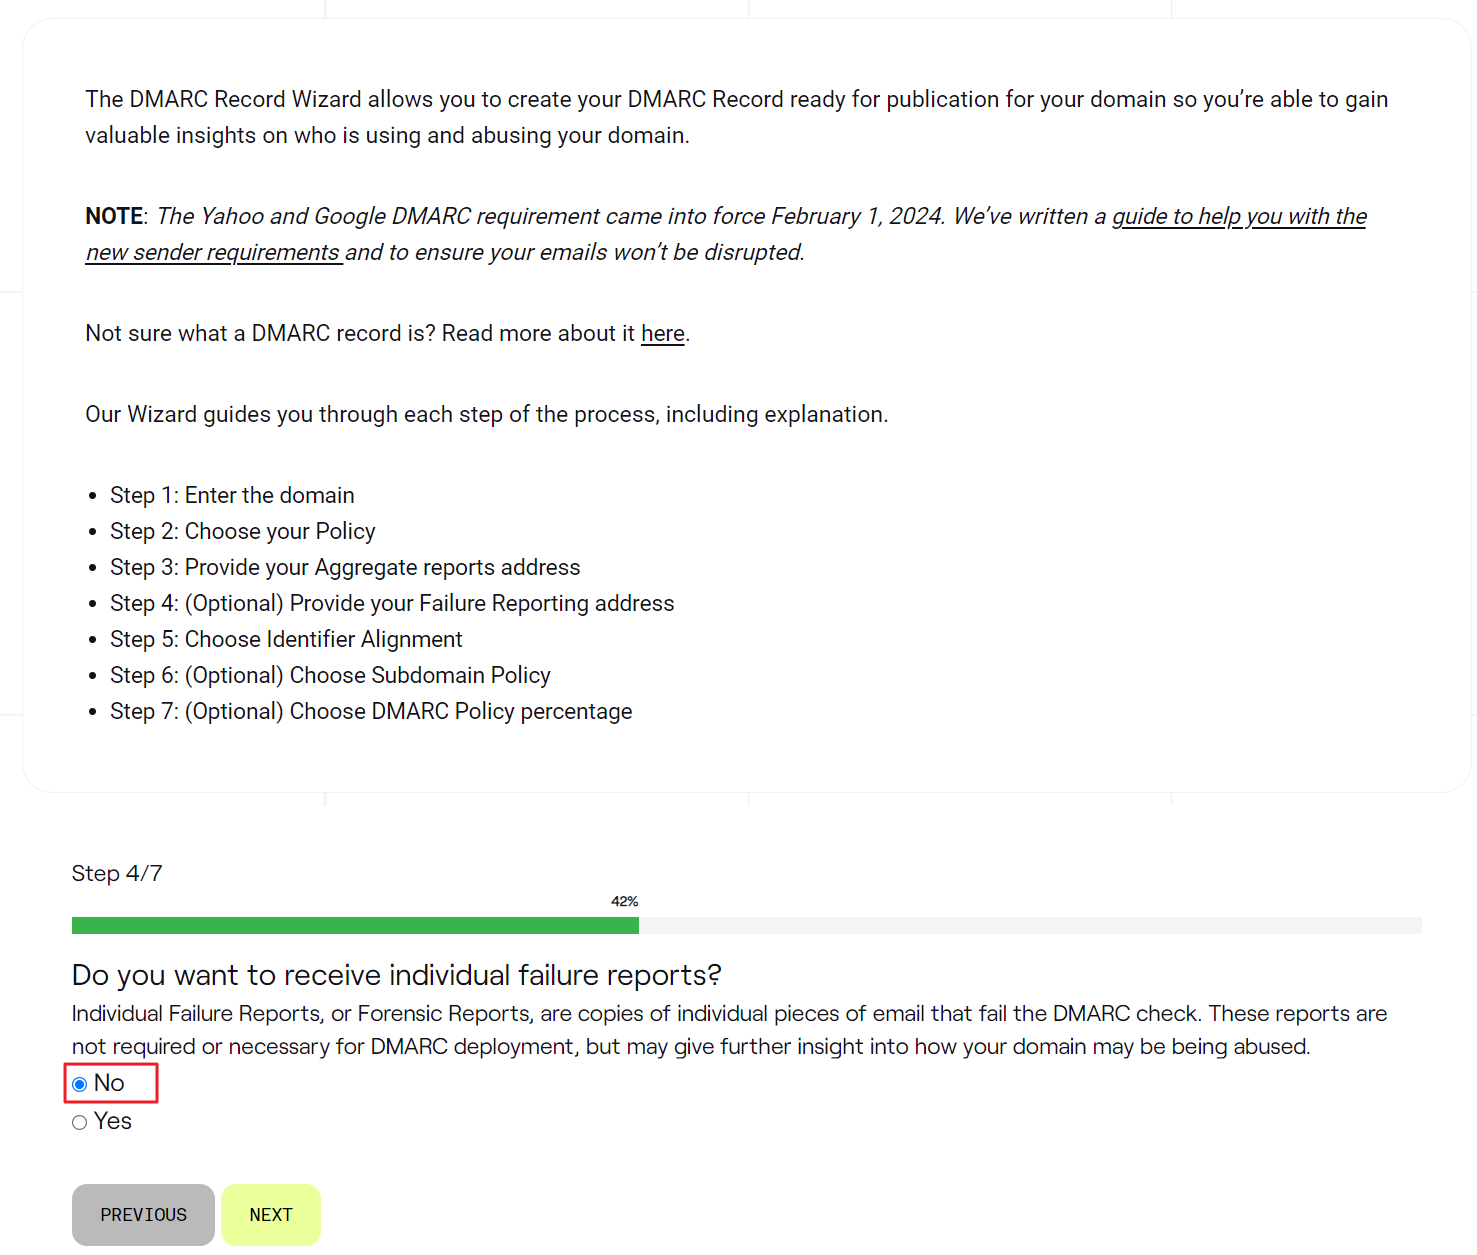
Select No for Individual failure reports
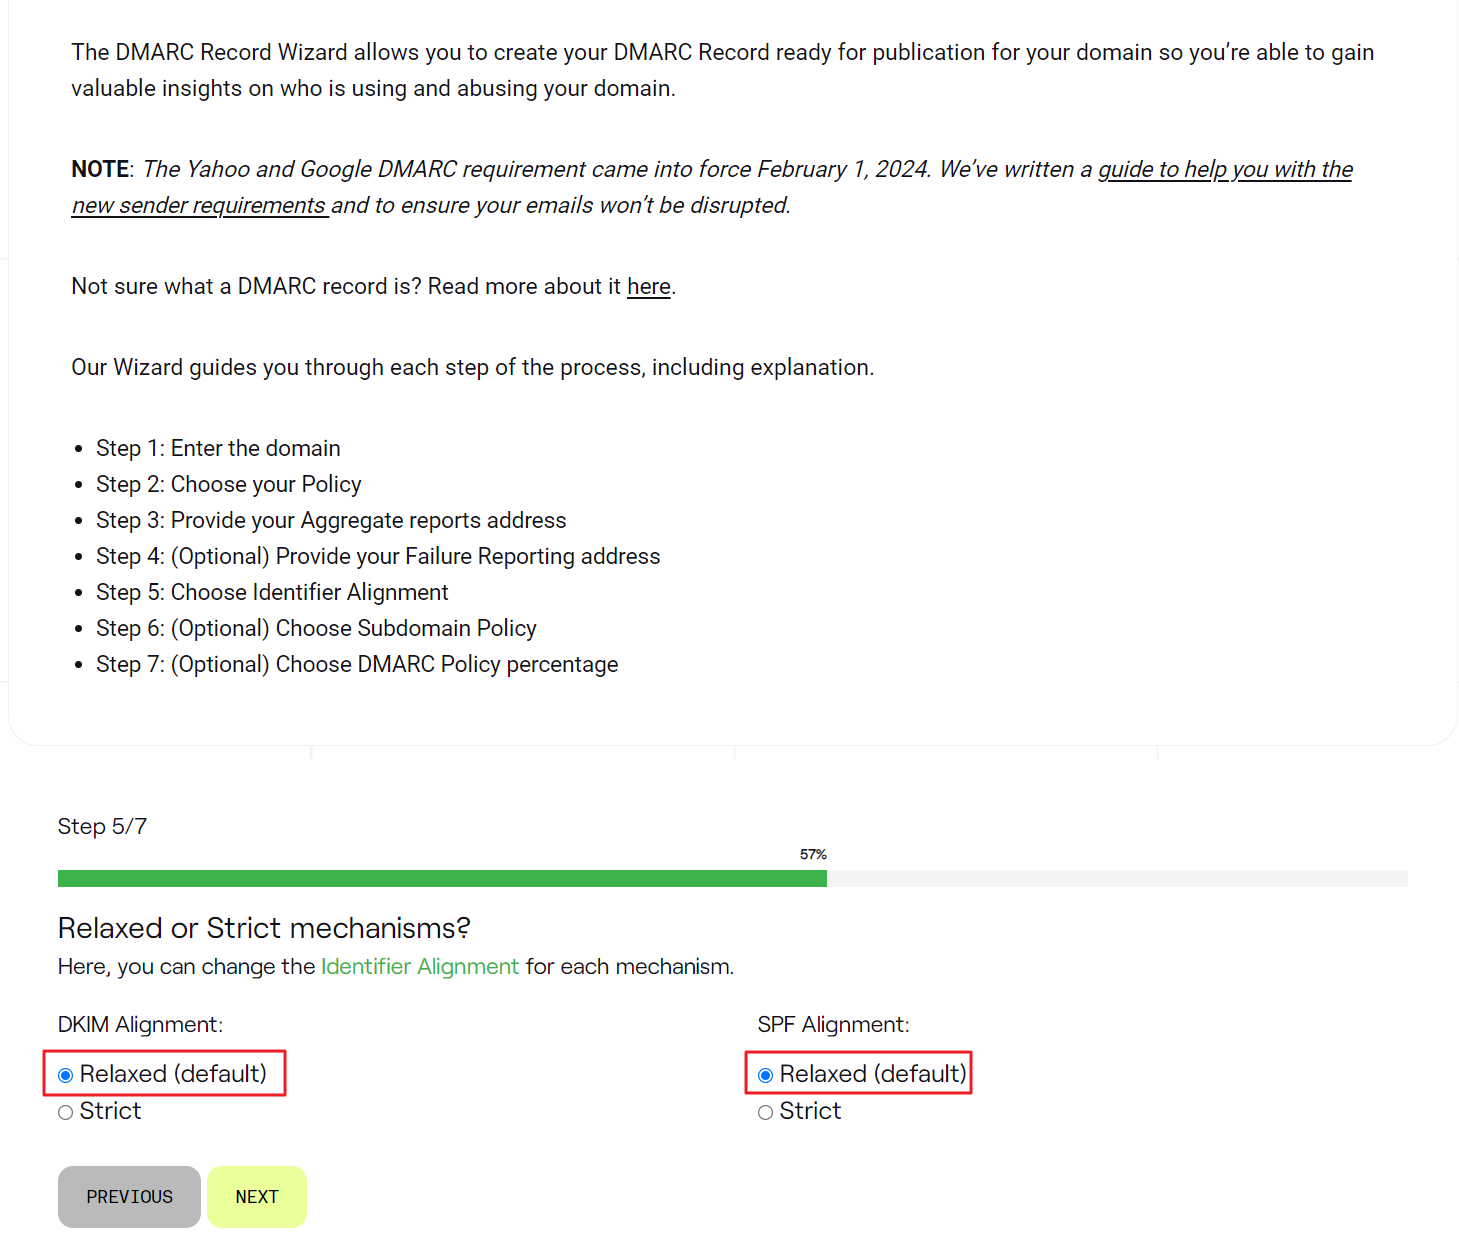
Select Relaxed mechanisms
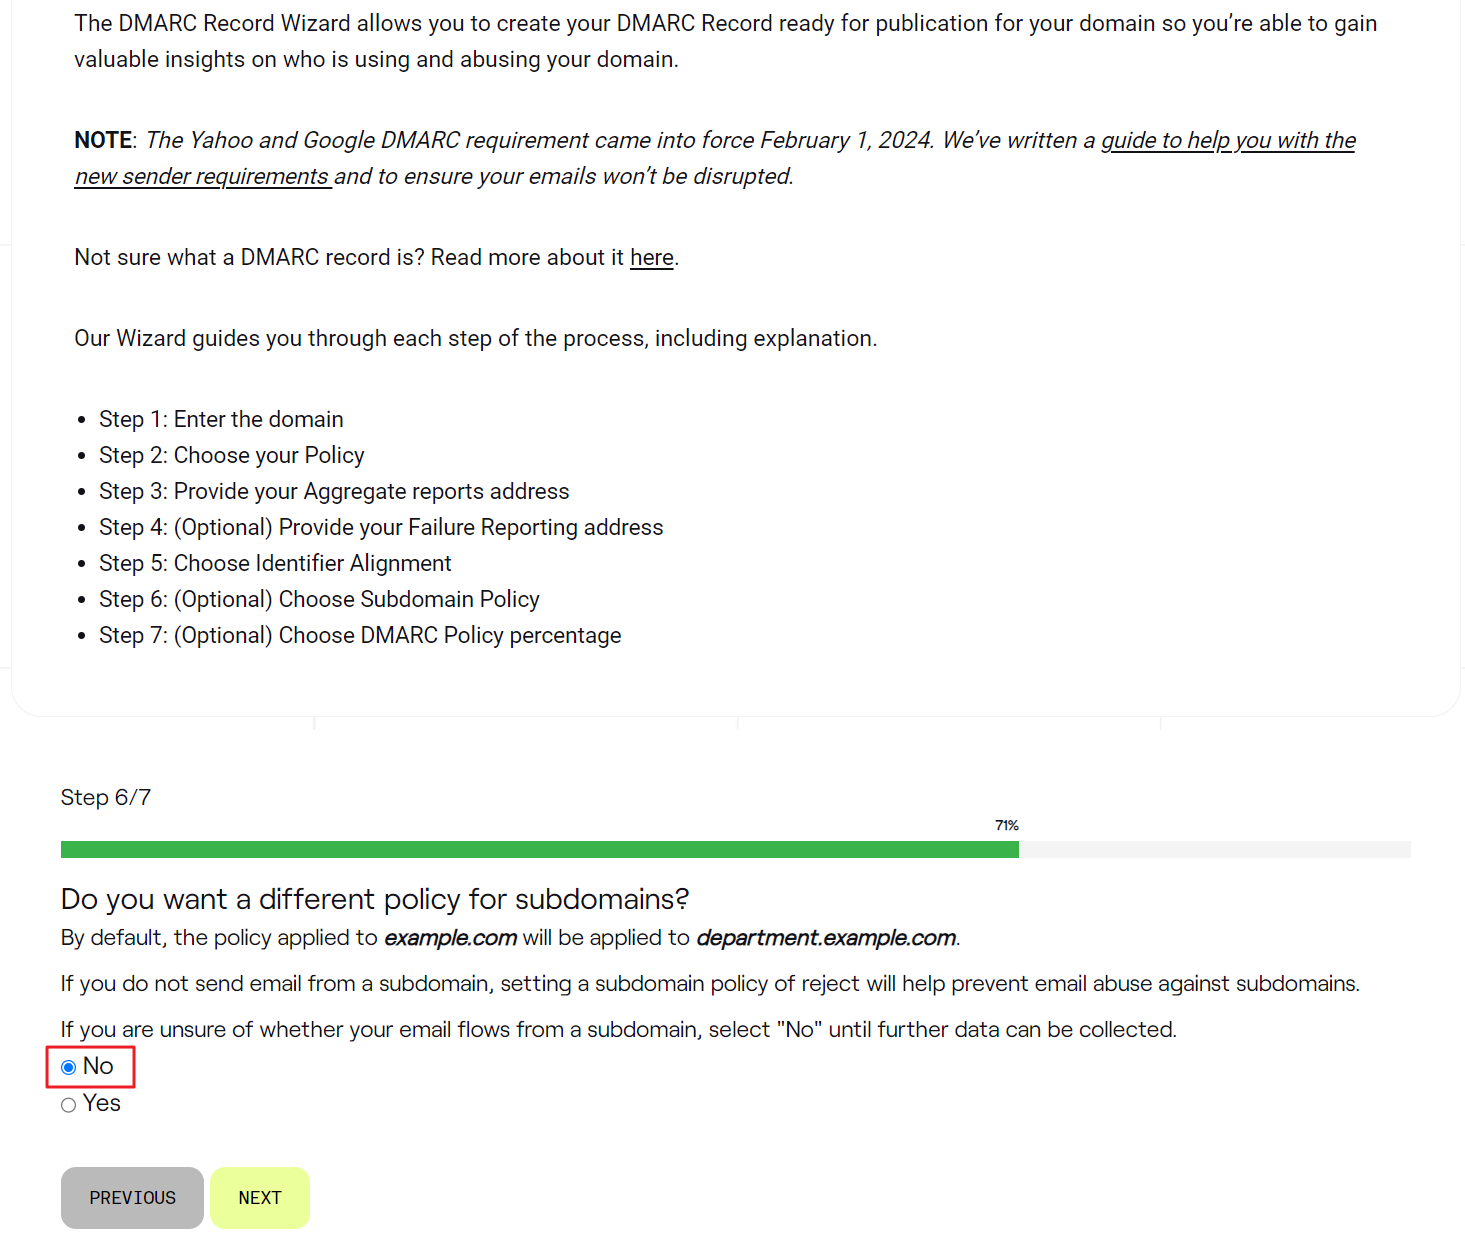
Select No for different policy for subdomains
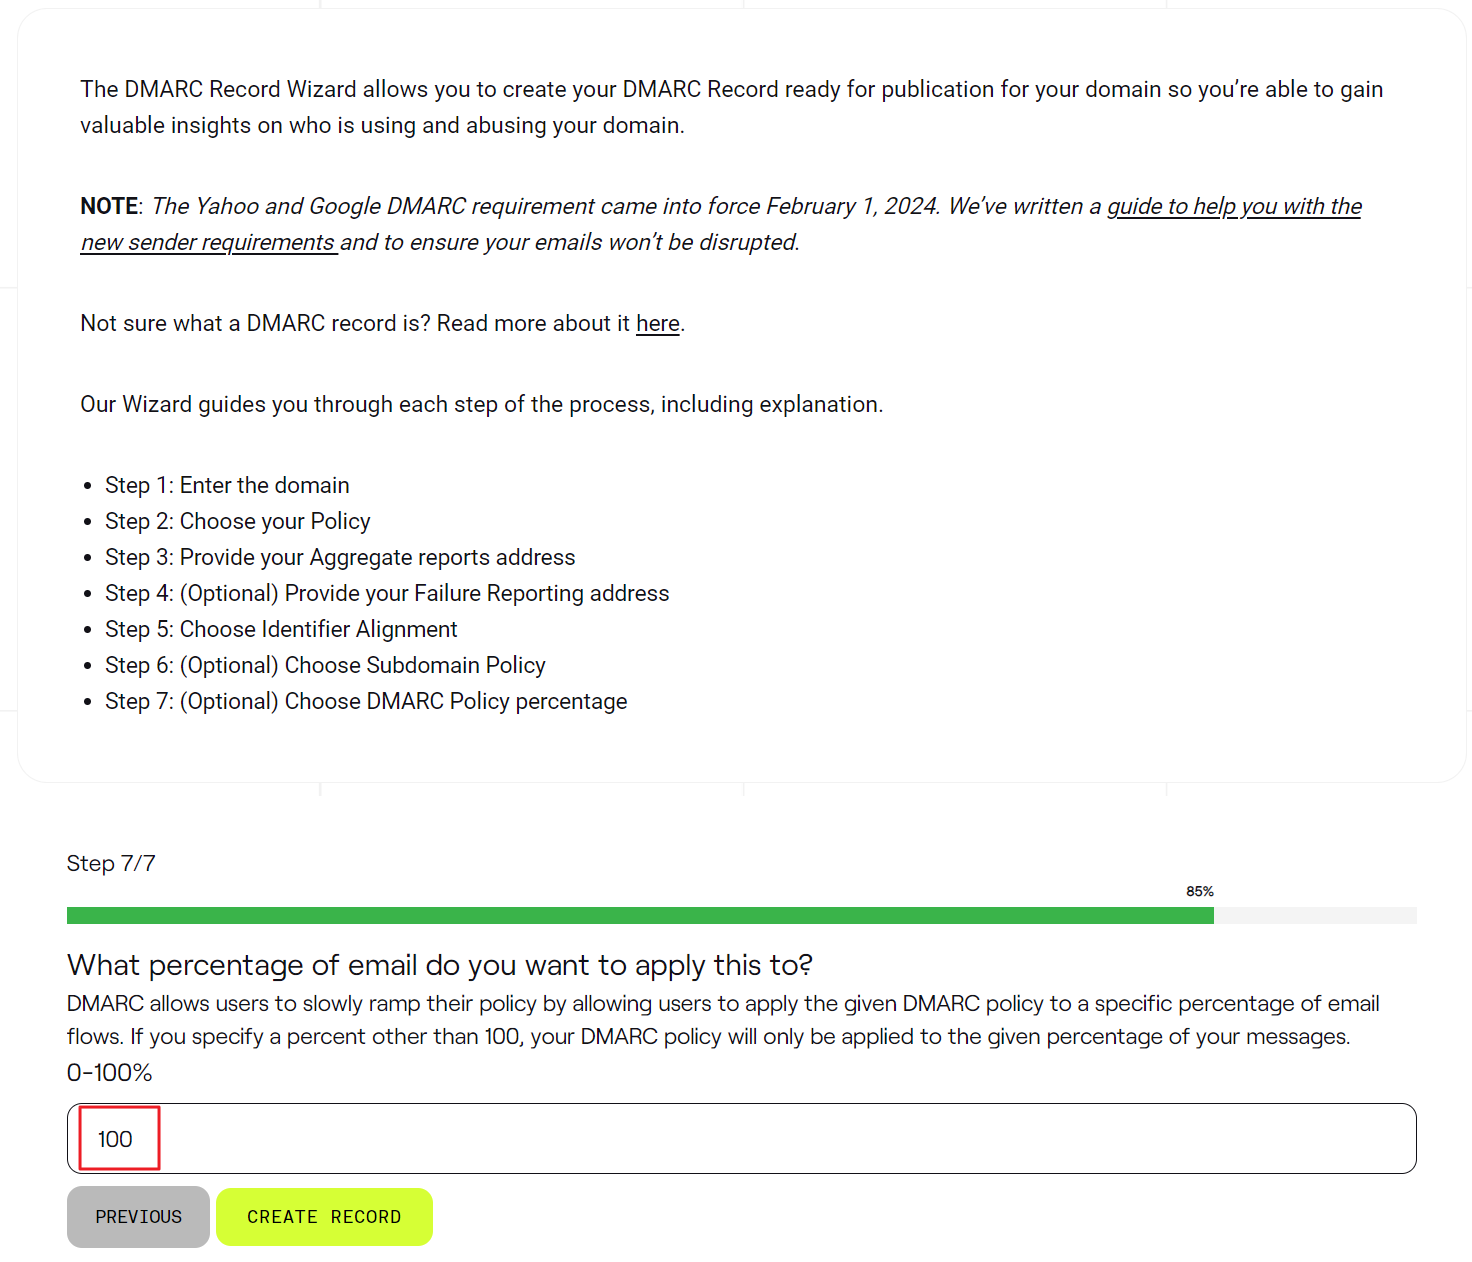
Select percentage of email 100
Click Create Record and your DMARC will be generated
Go to your DNS Management and click Add record
Select Type and Name (Required)
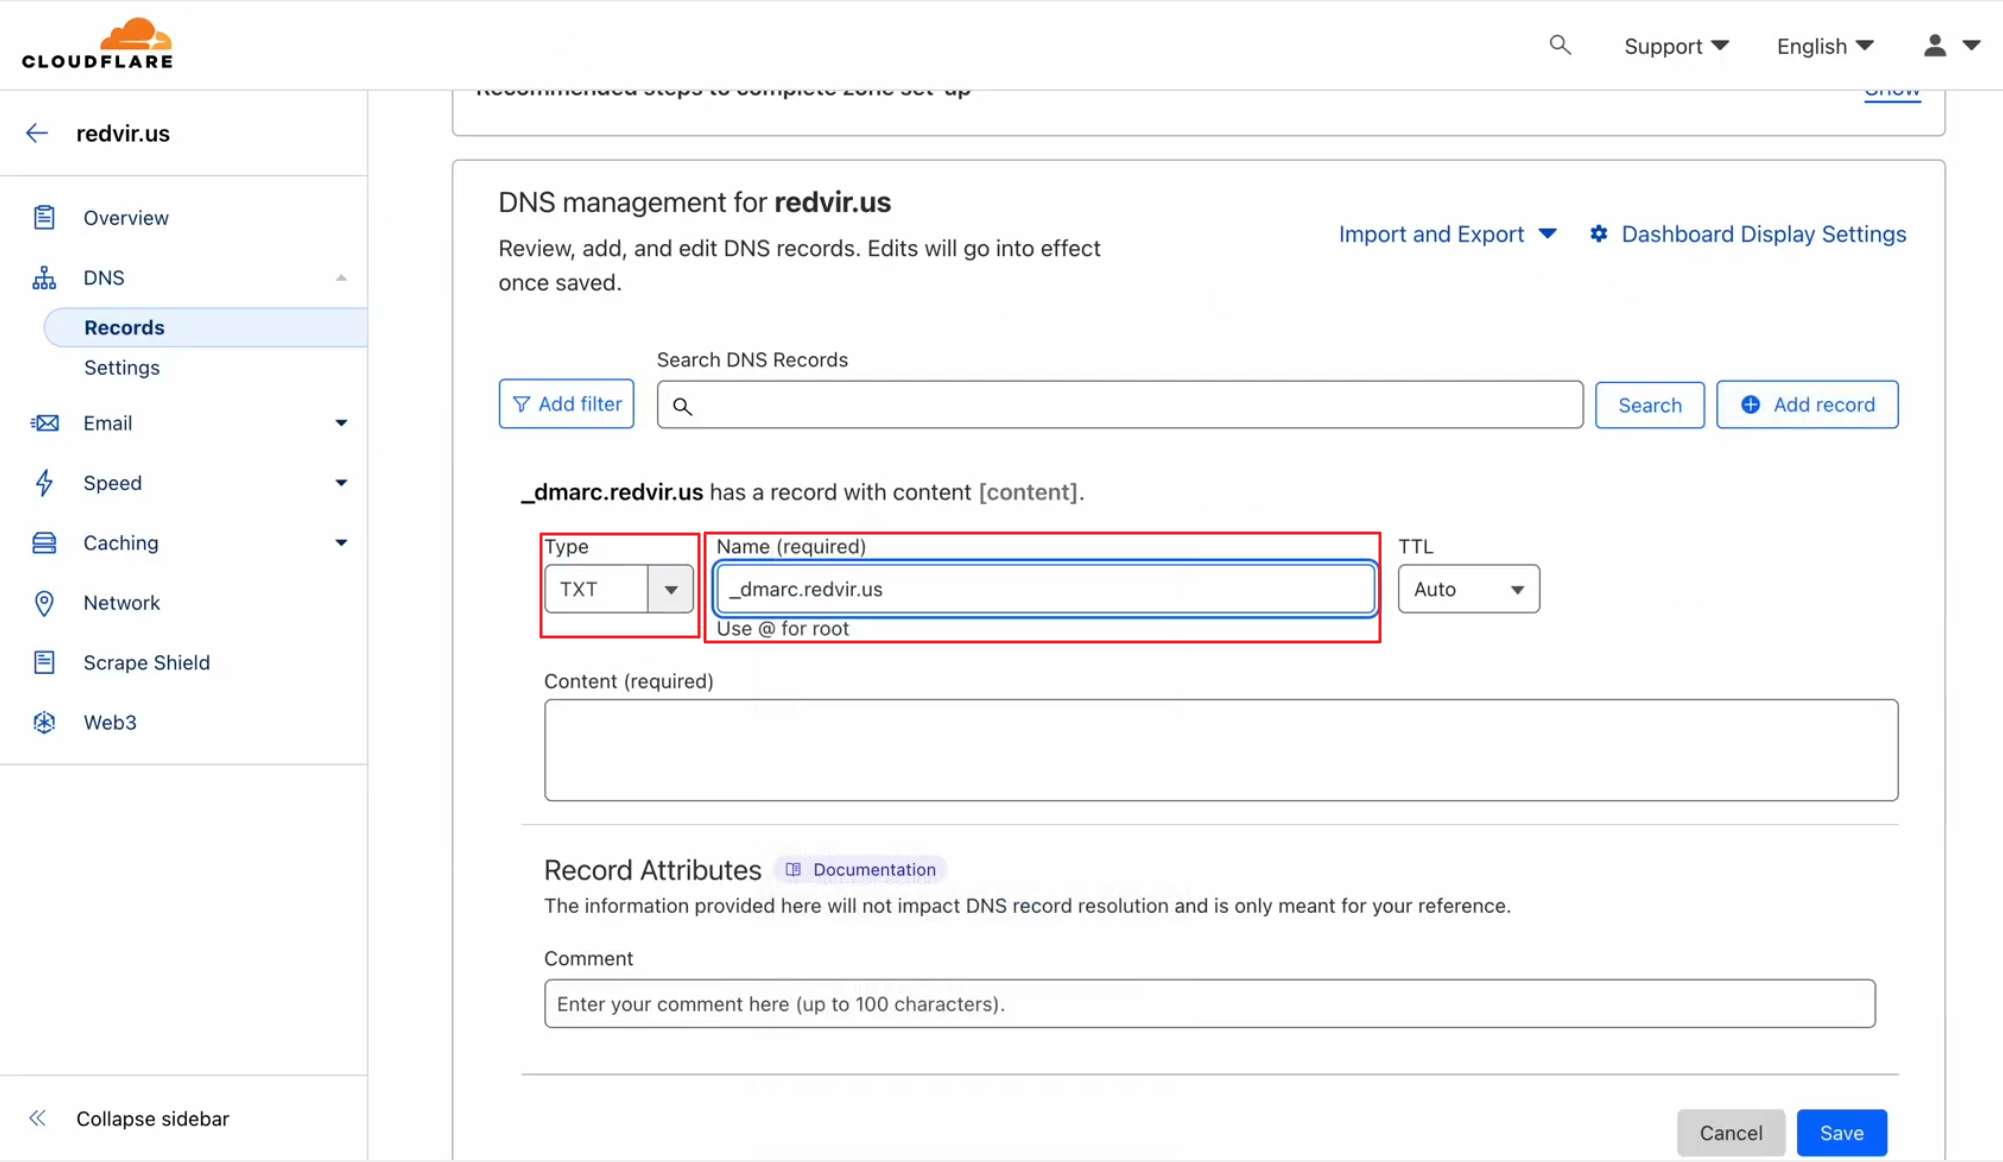
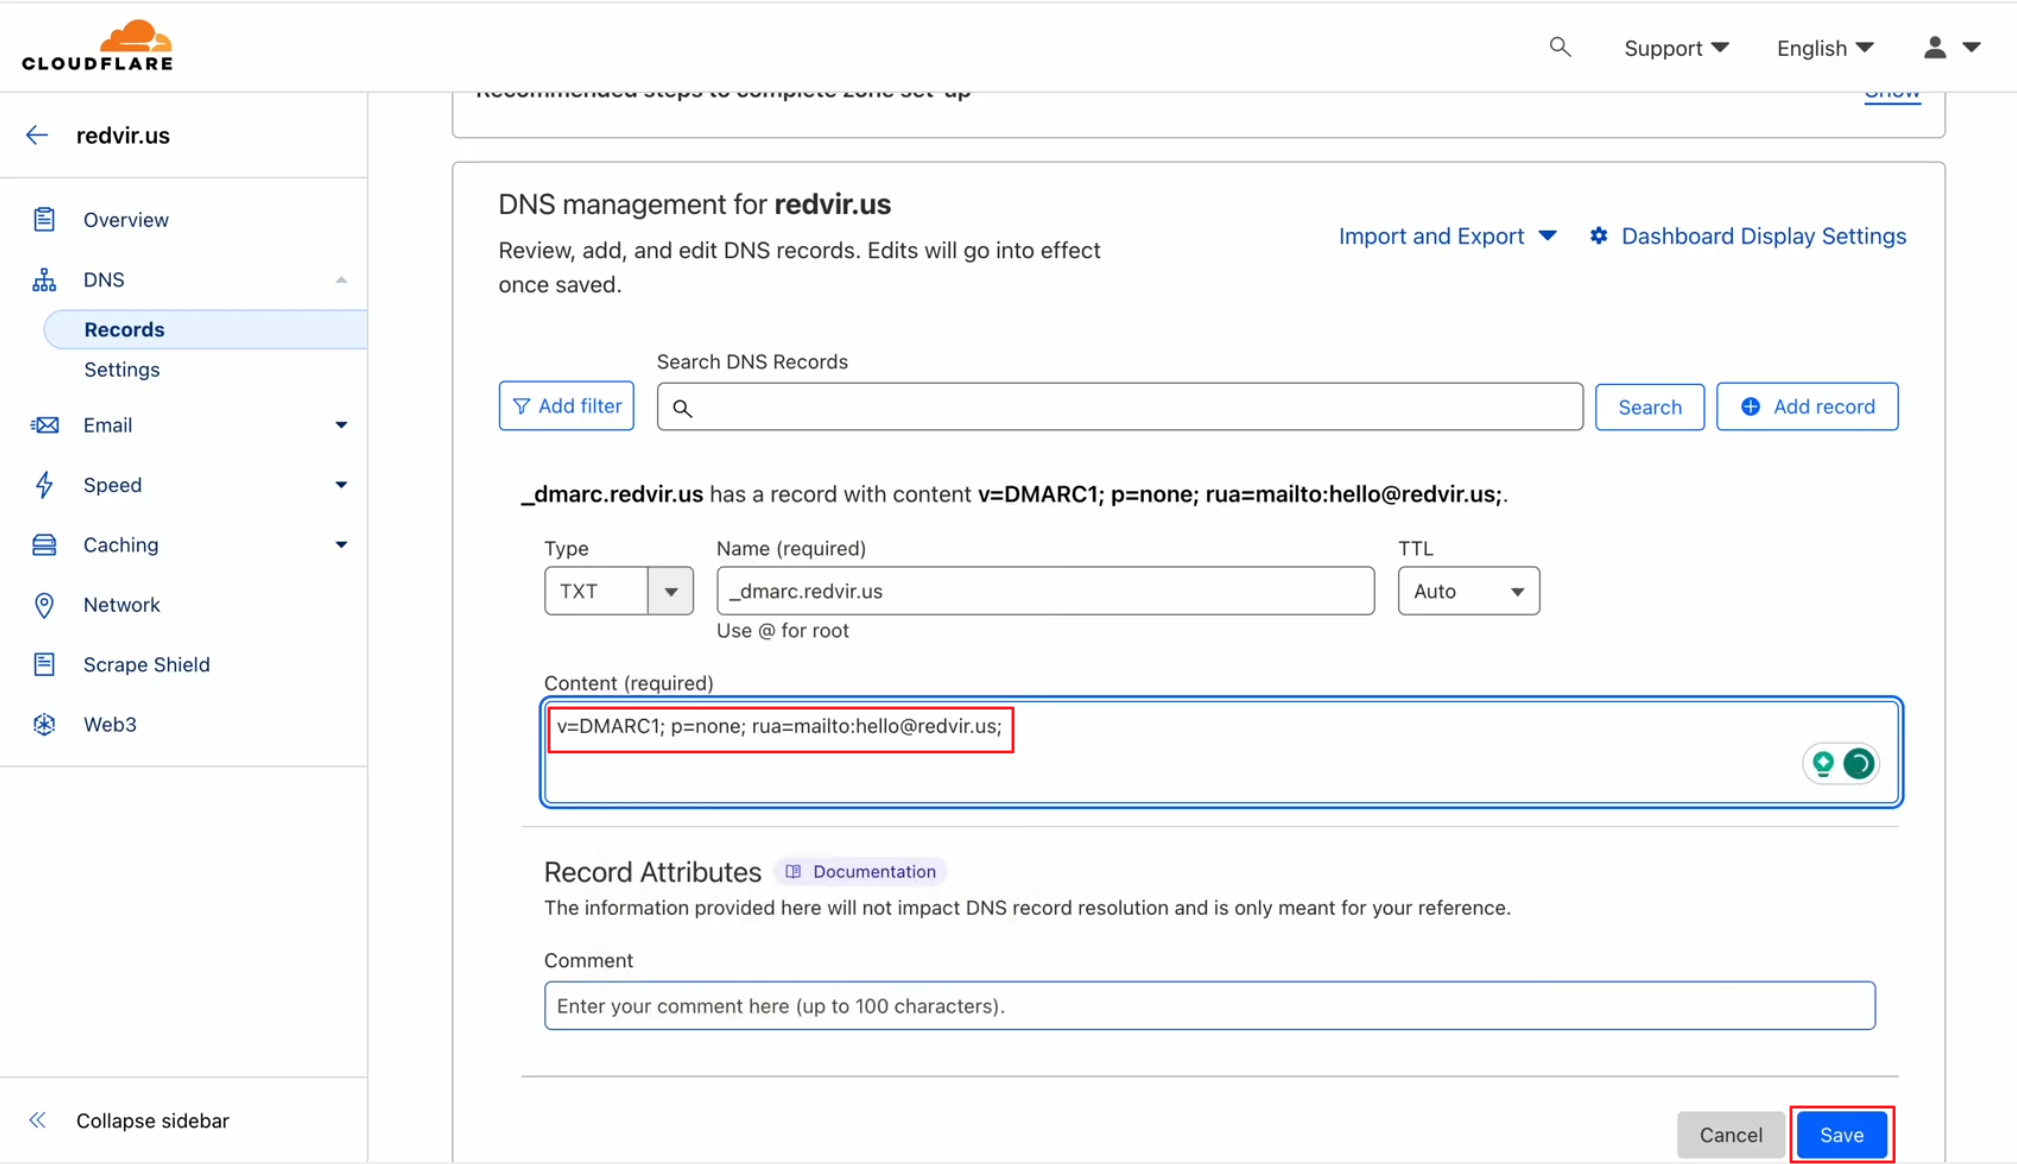
Copy the generated DMARC Record
And paste it in your Domain management and then click Save
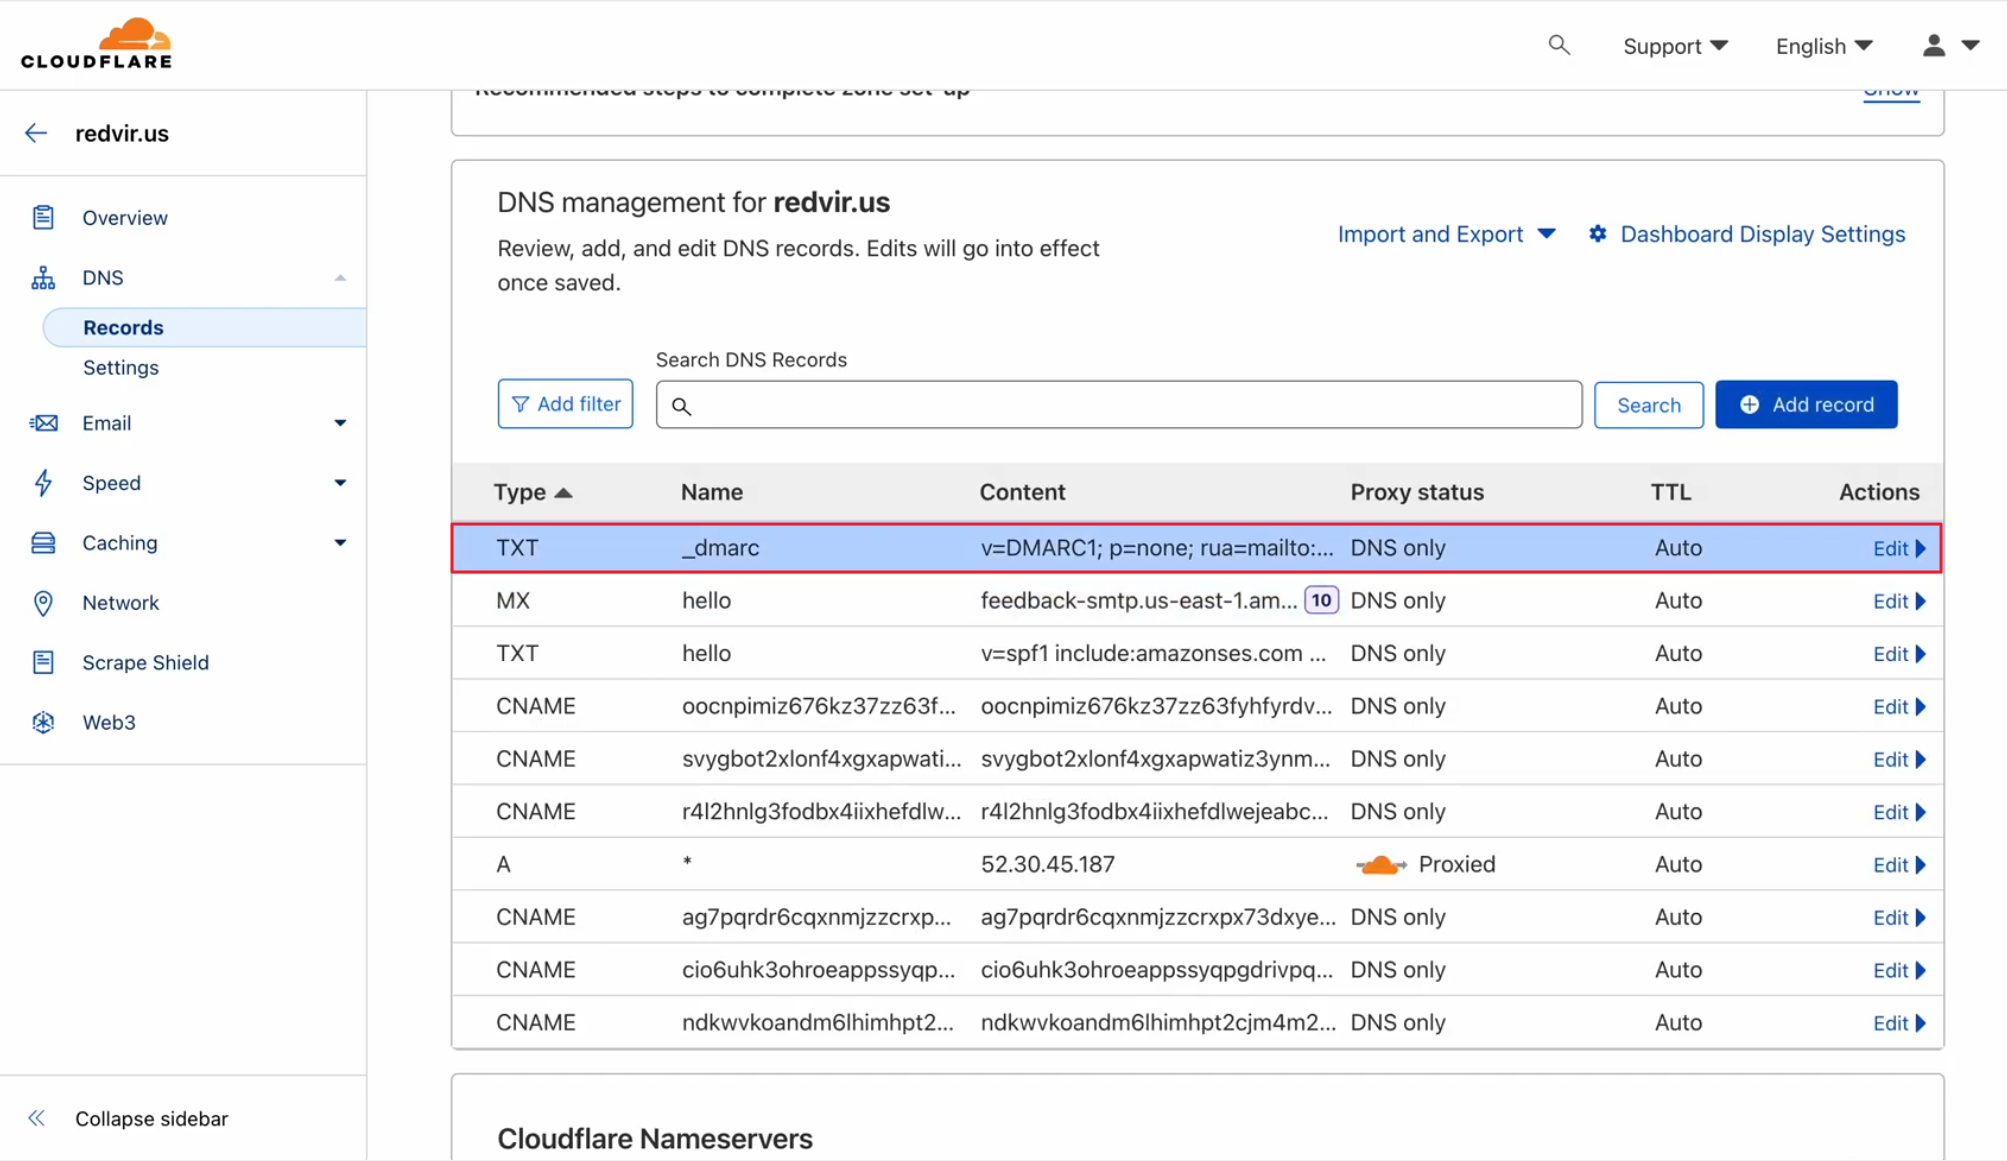
Your DMARC Record will be saved in your Domain Management
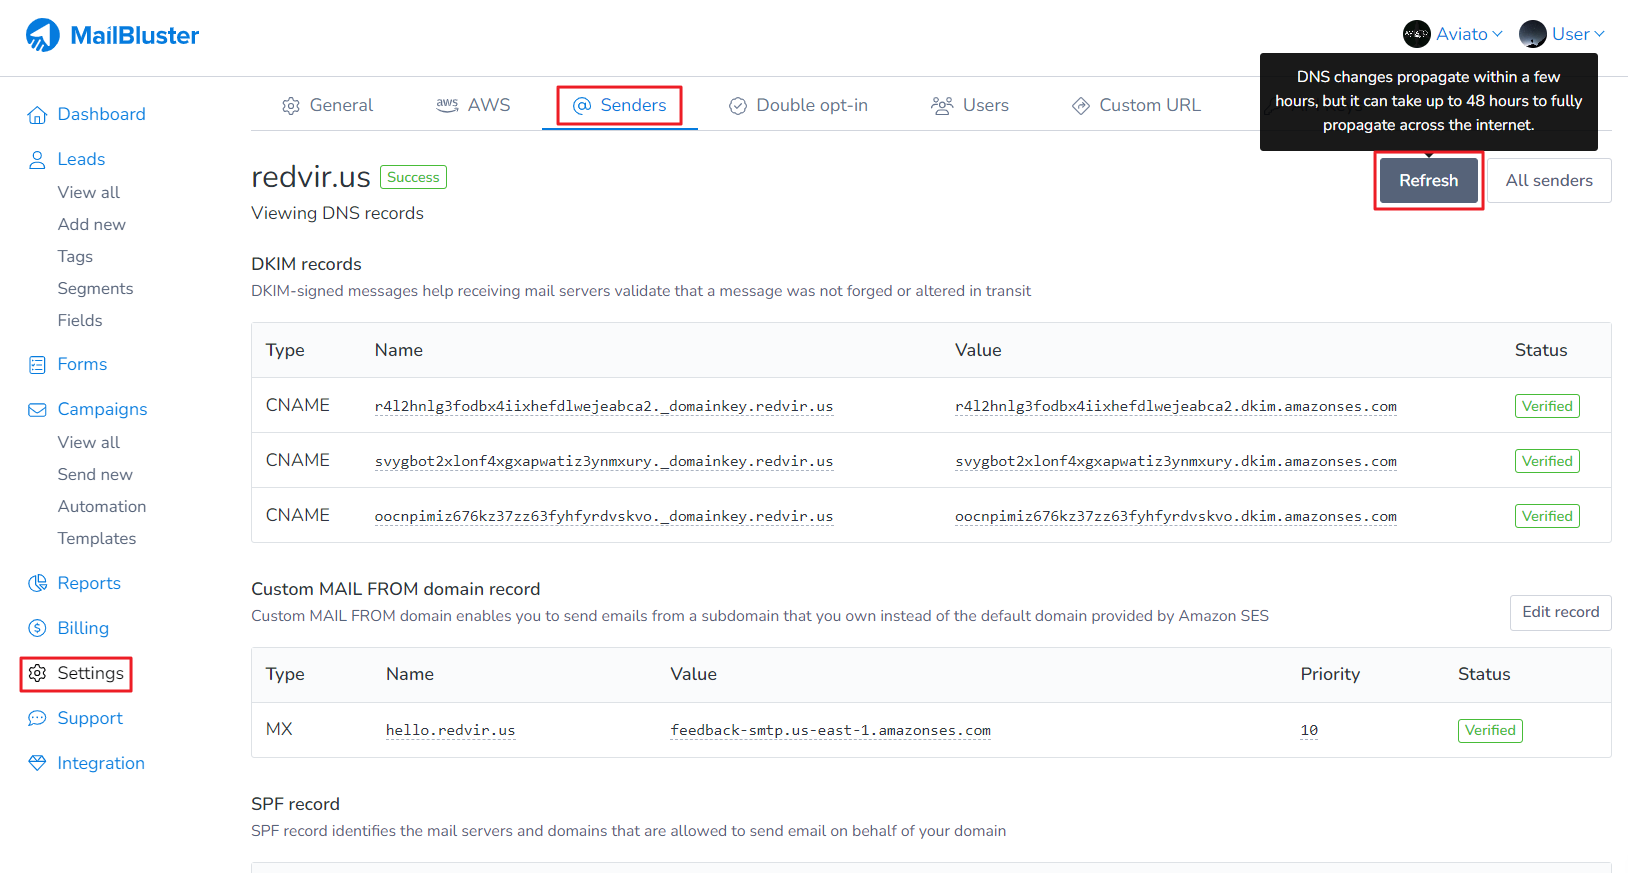
After 48 hours click Refresh button in MailBluster
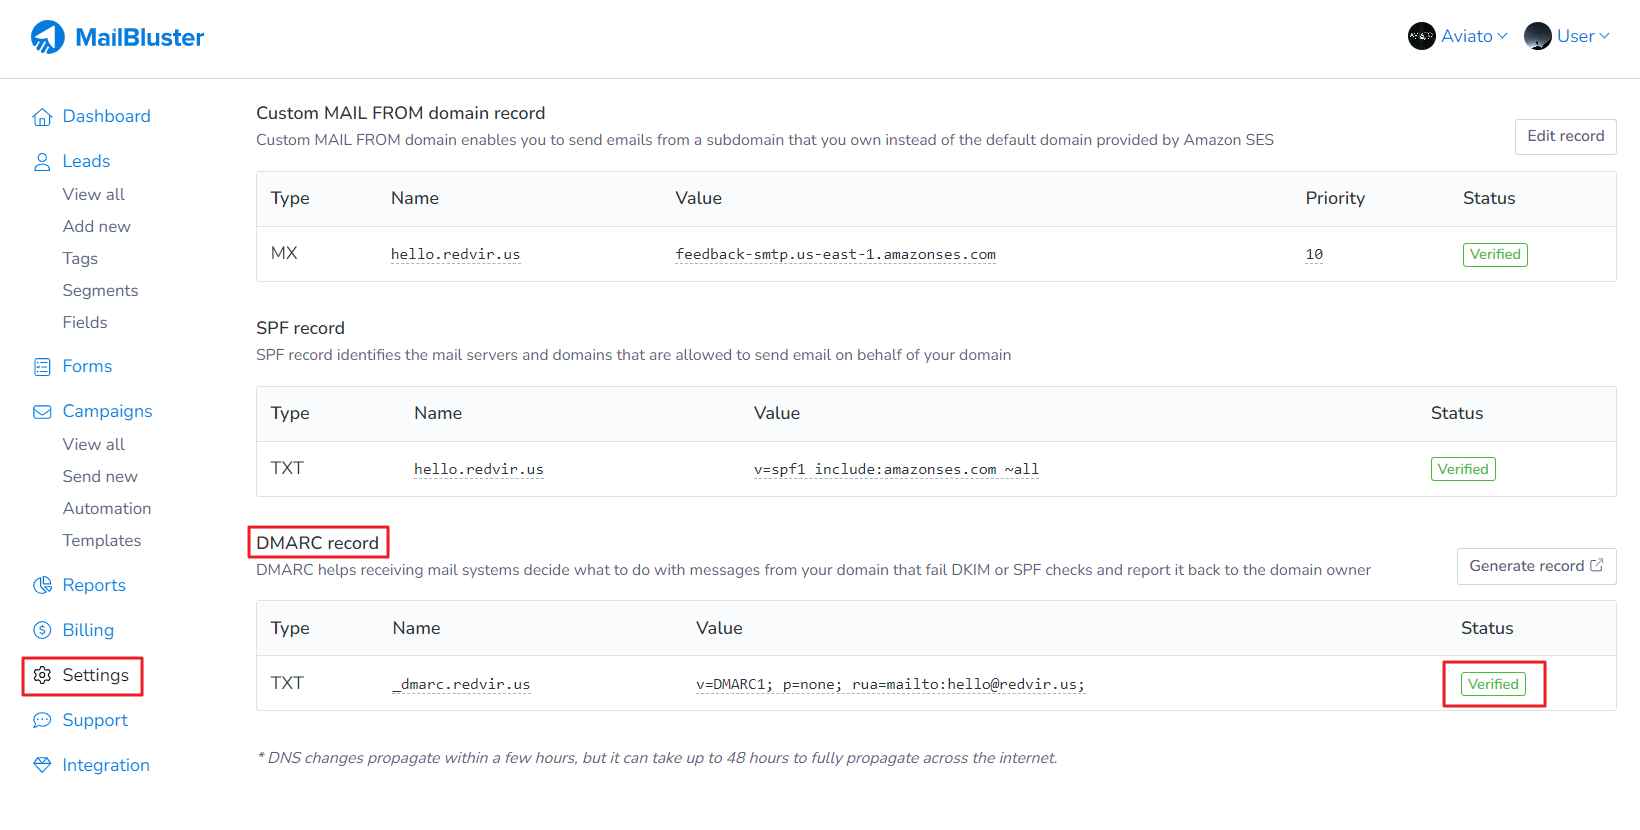
Your DMARC record is now Verified
Now you have successfully verified your domain in AWS from MailBluster. As a result, you’ll be able to send authenticated, trusted emails through MailBluster with higher deliverability and better inbox placement.
A detailed video can also be found here: Simplify your sender management using MailBluster