Here you will learn how to create a segment and send emails to that specific segment. Follow these steps to complete the process effectively.
1. You can use tags and static segment to form a group of leads.
Here we have used Tags in MailBluster. First click on Create new.
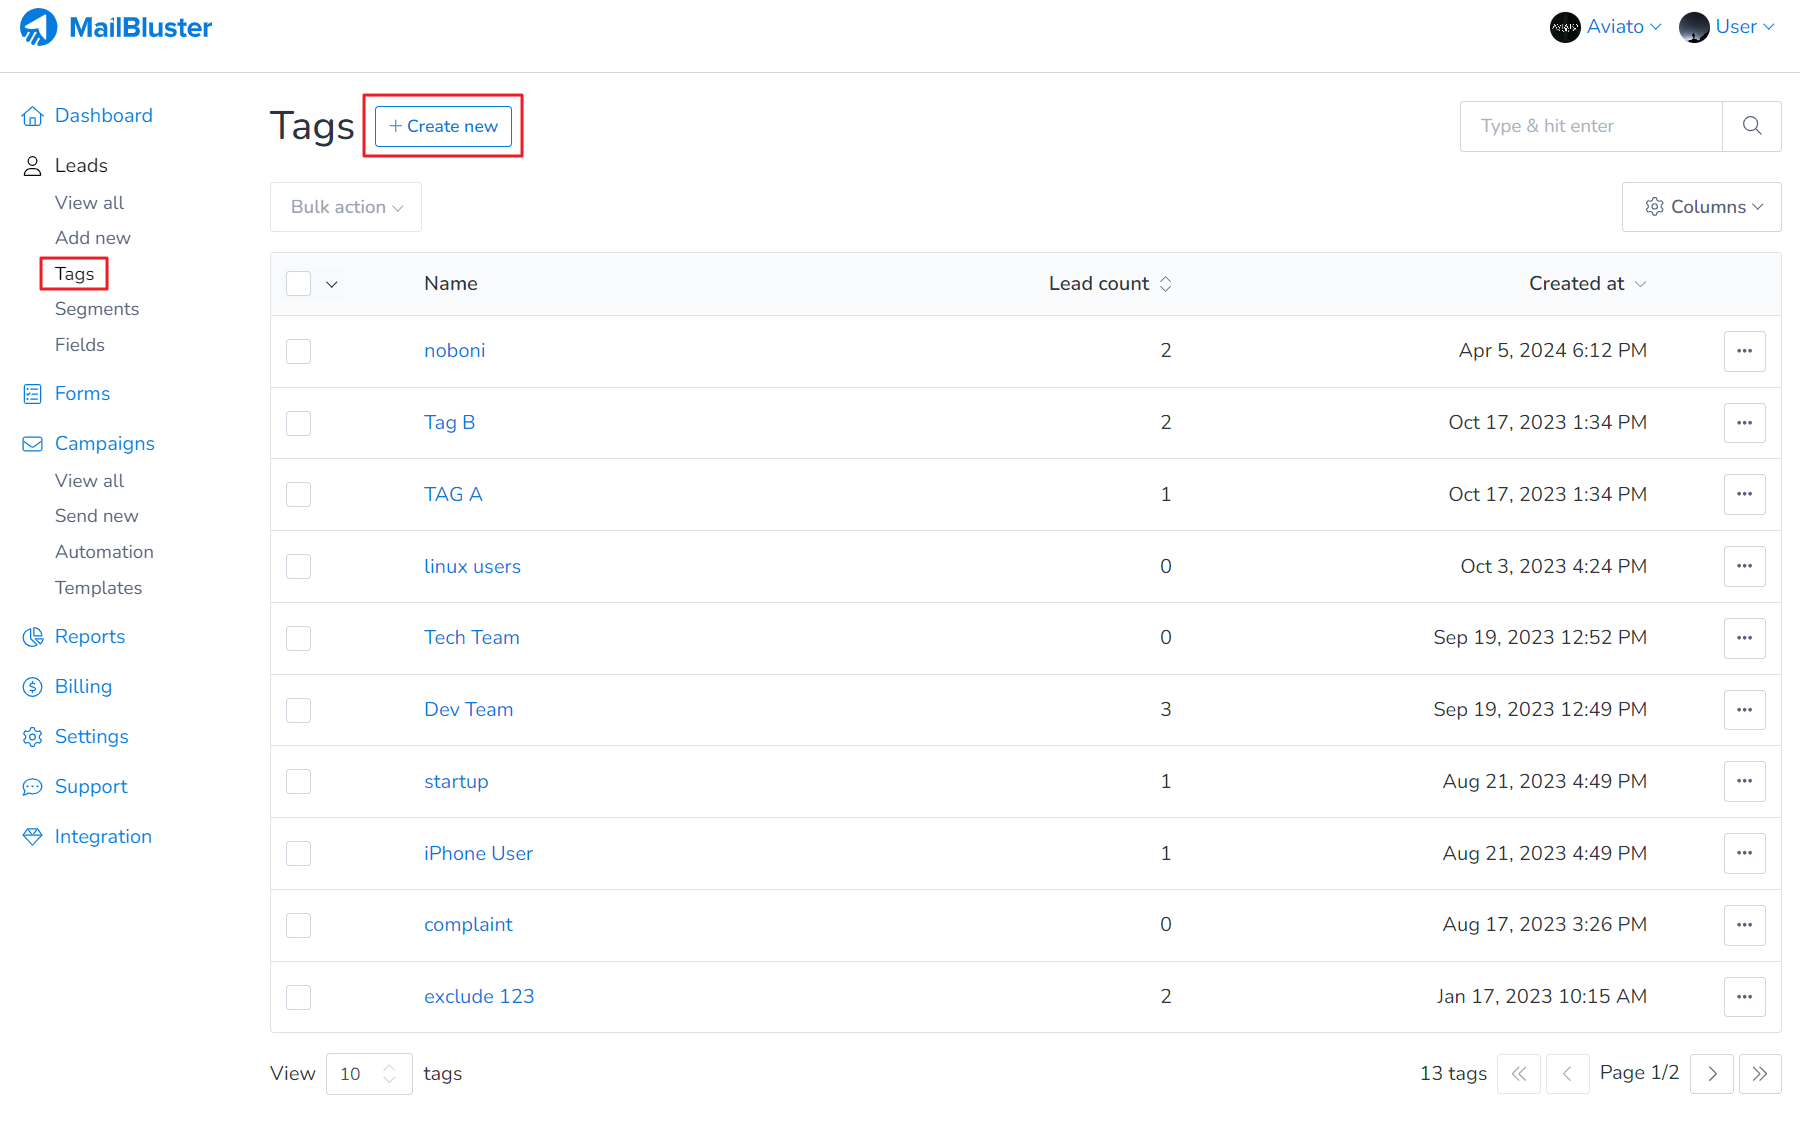
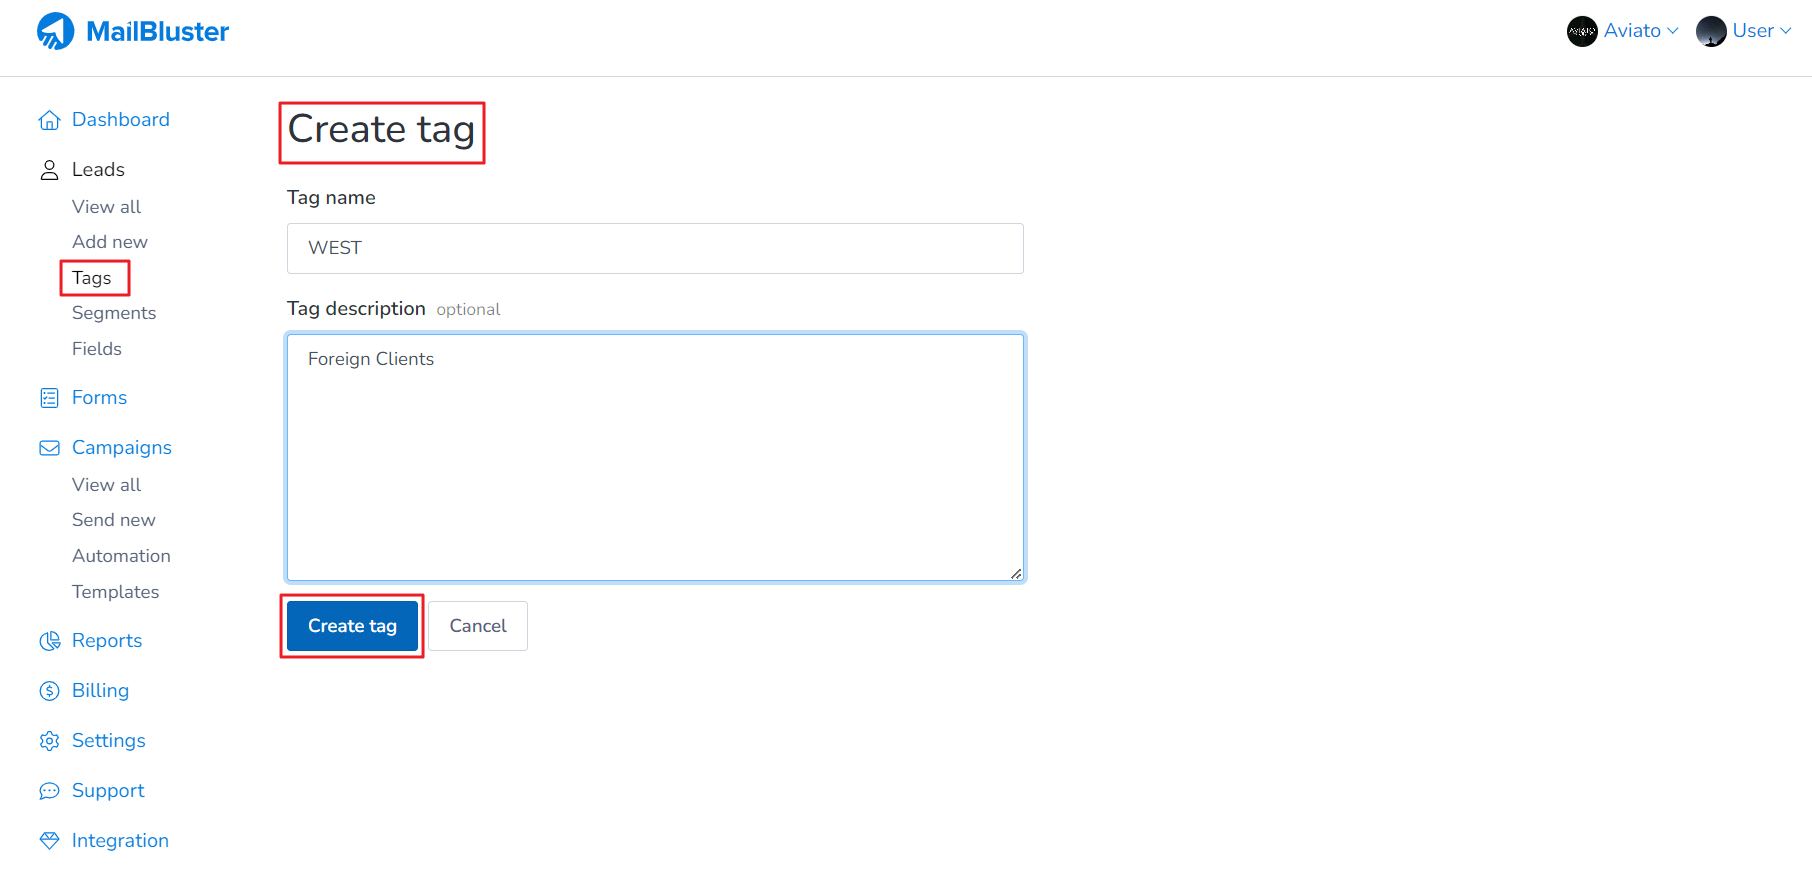
Then Create tag with any suitable name. We used here “WEST” as an example.
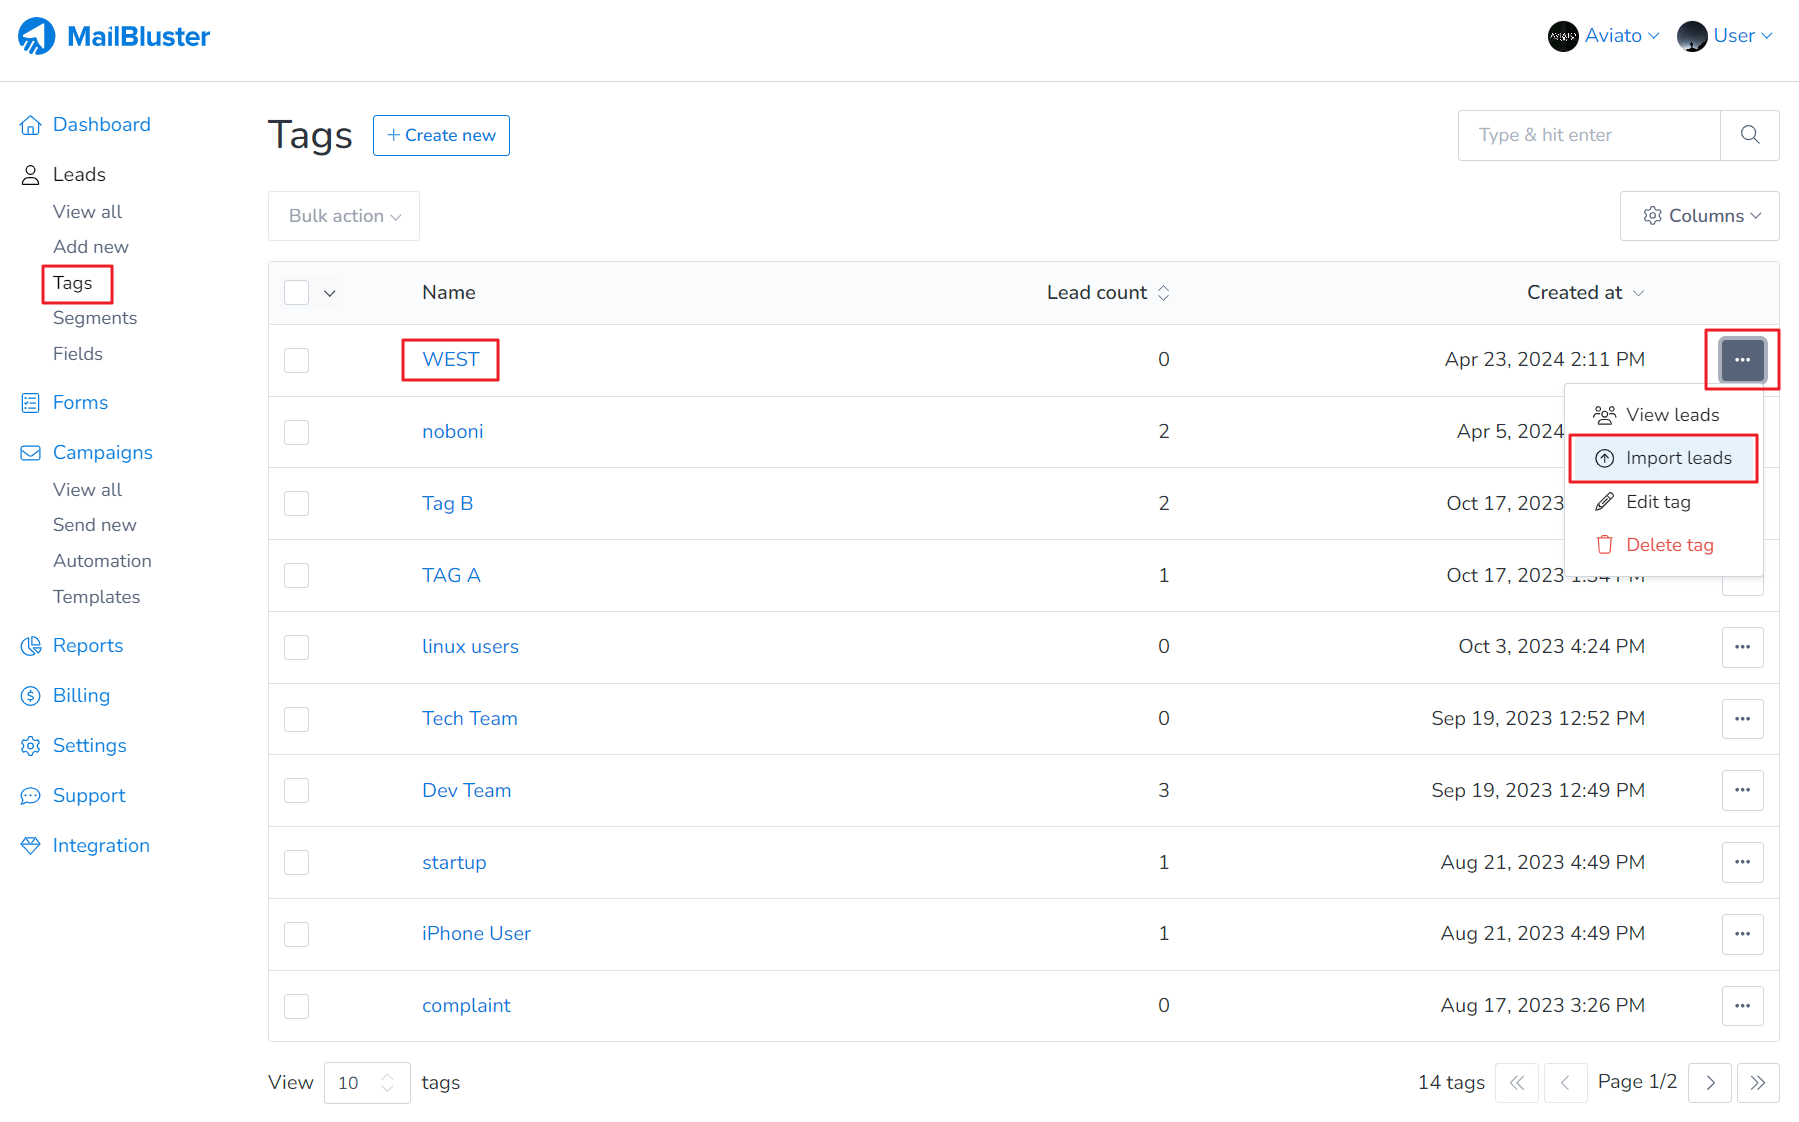
Once the tag is created, click on 3 dot ellipsis and then click Import leads.
Import a CSV file containing Leads (name, email address, subscribe status) under that tag name.
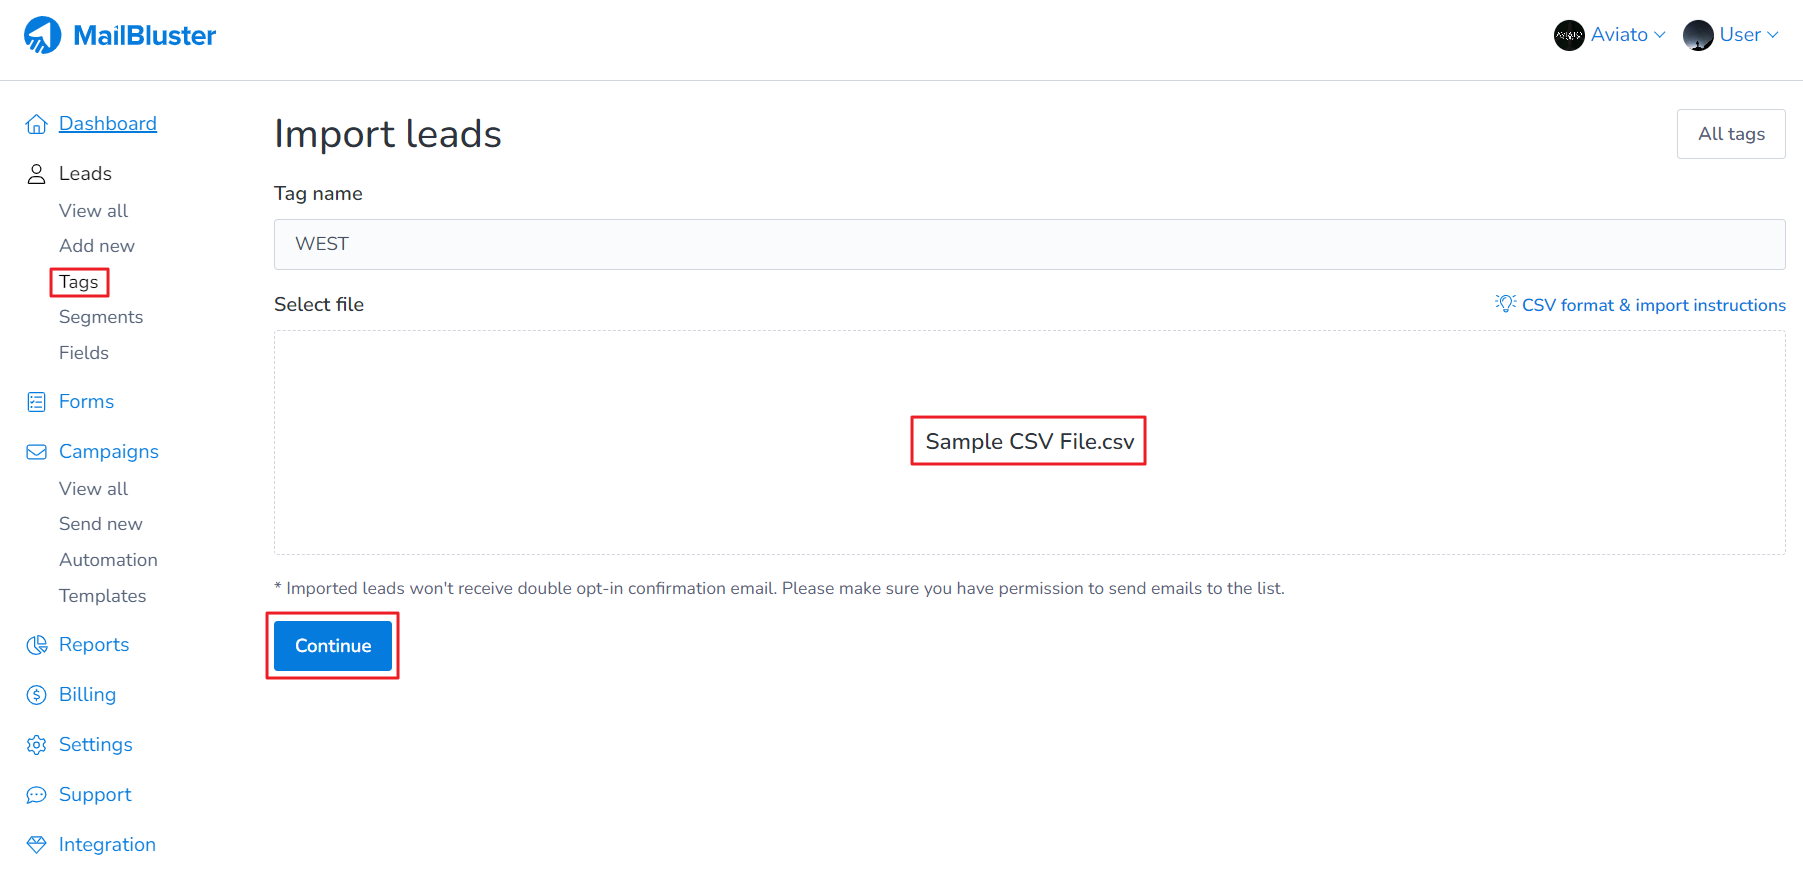
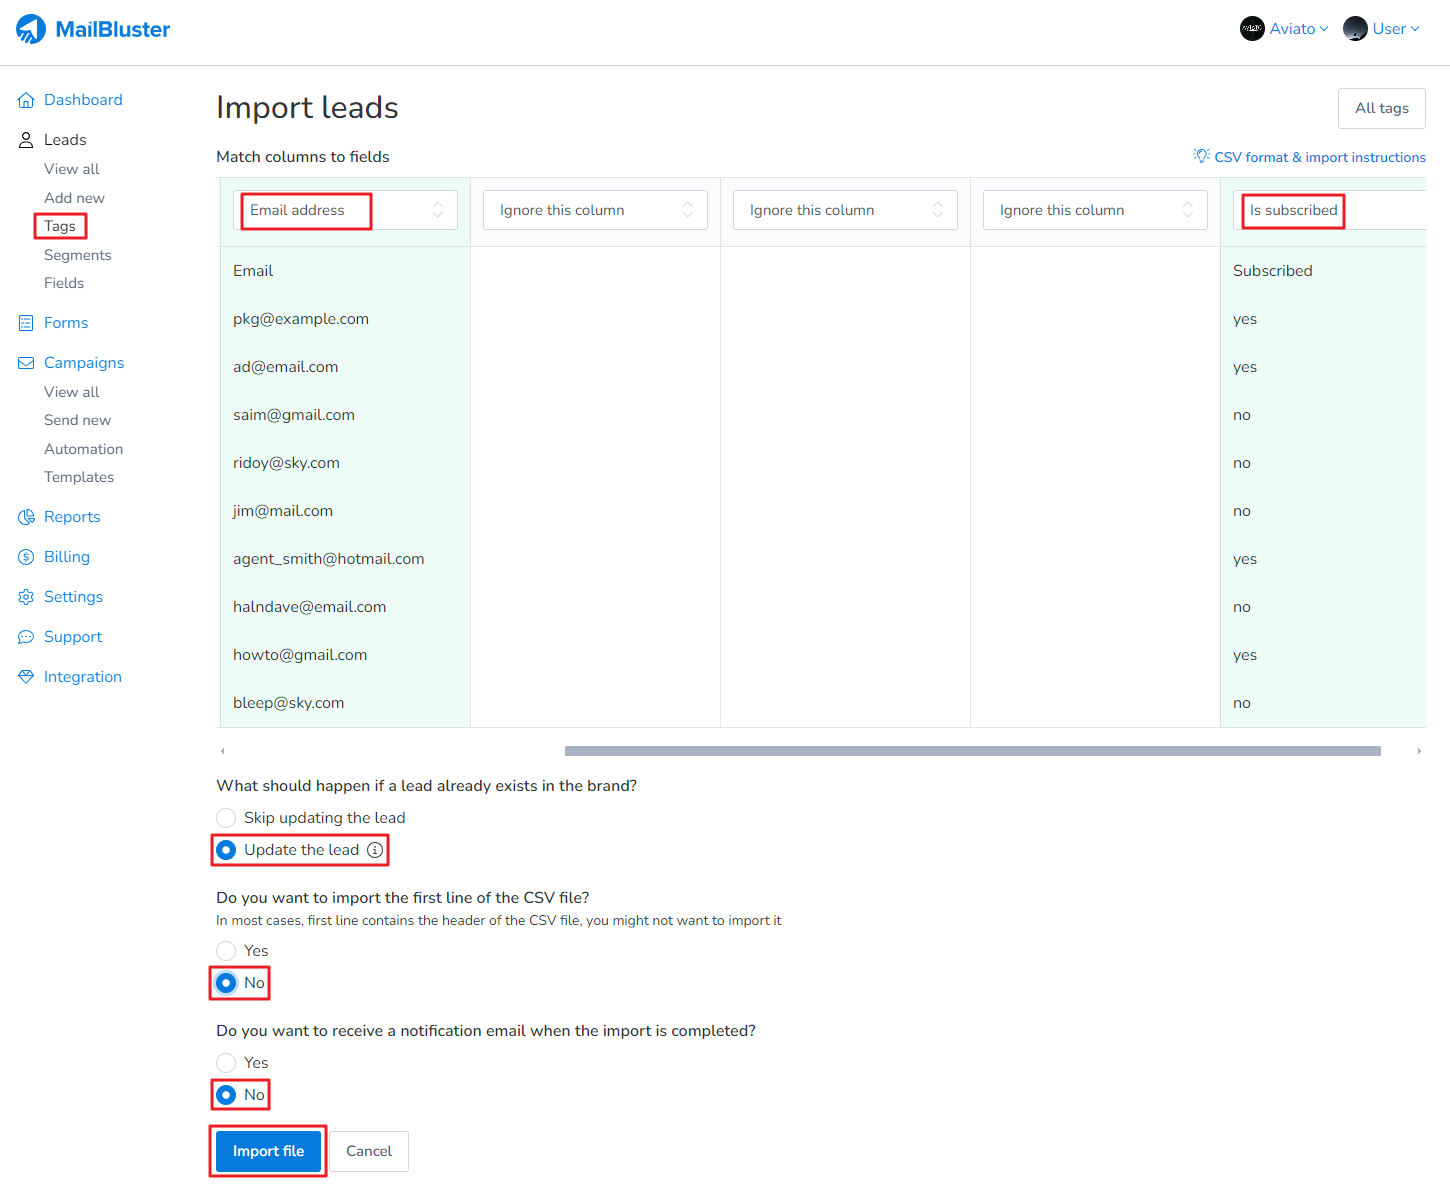
Highlight the respective fields according to its heading as shown below with the following configuration. Then click Import file.
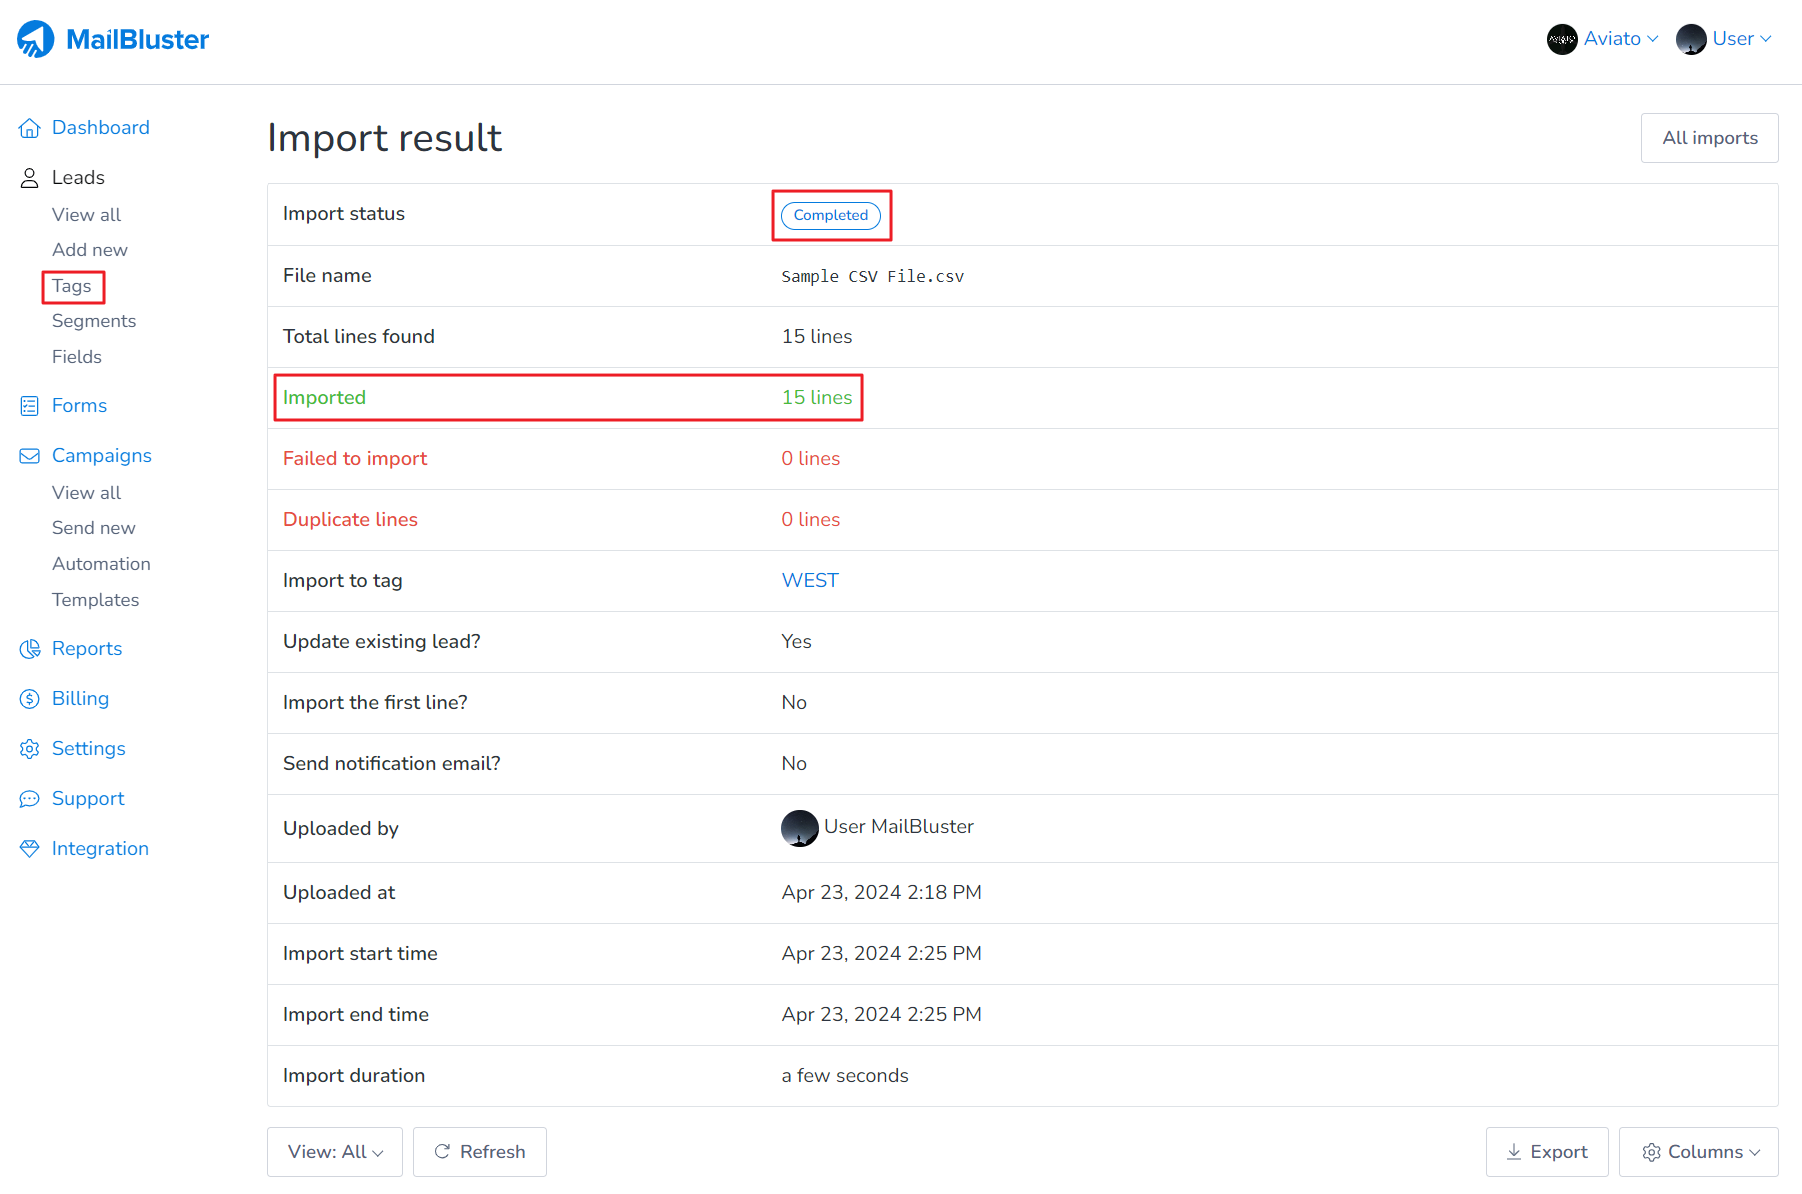
Once the leads are successfully imported under the tag “WEST”, you will be see the status “Completed”.
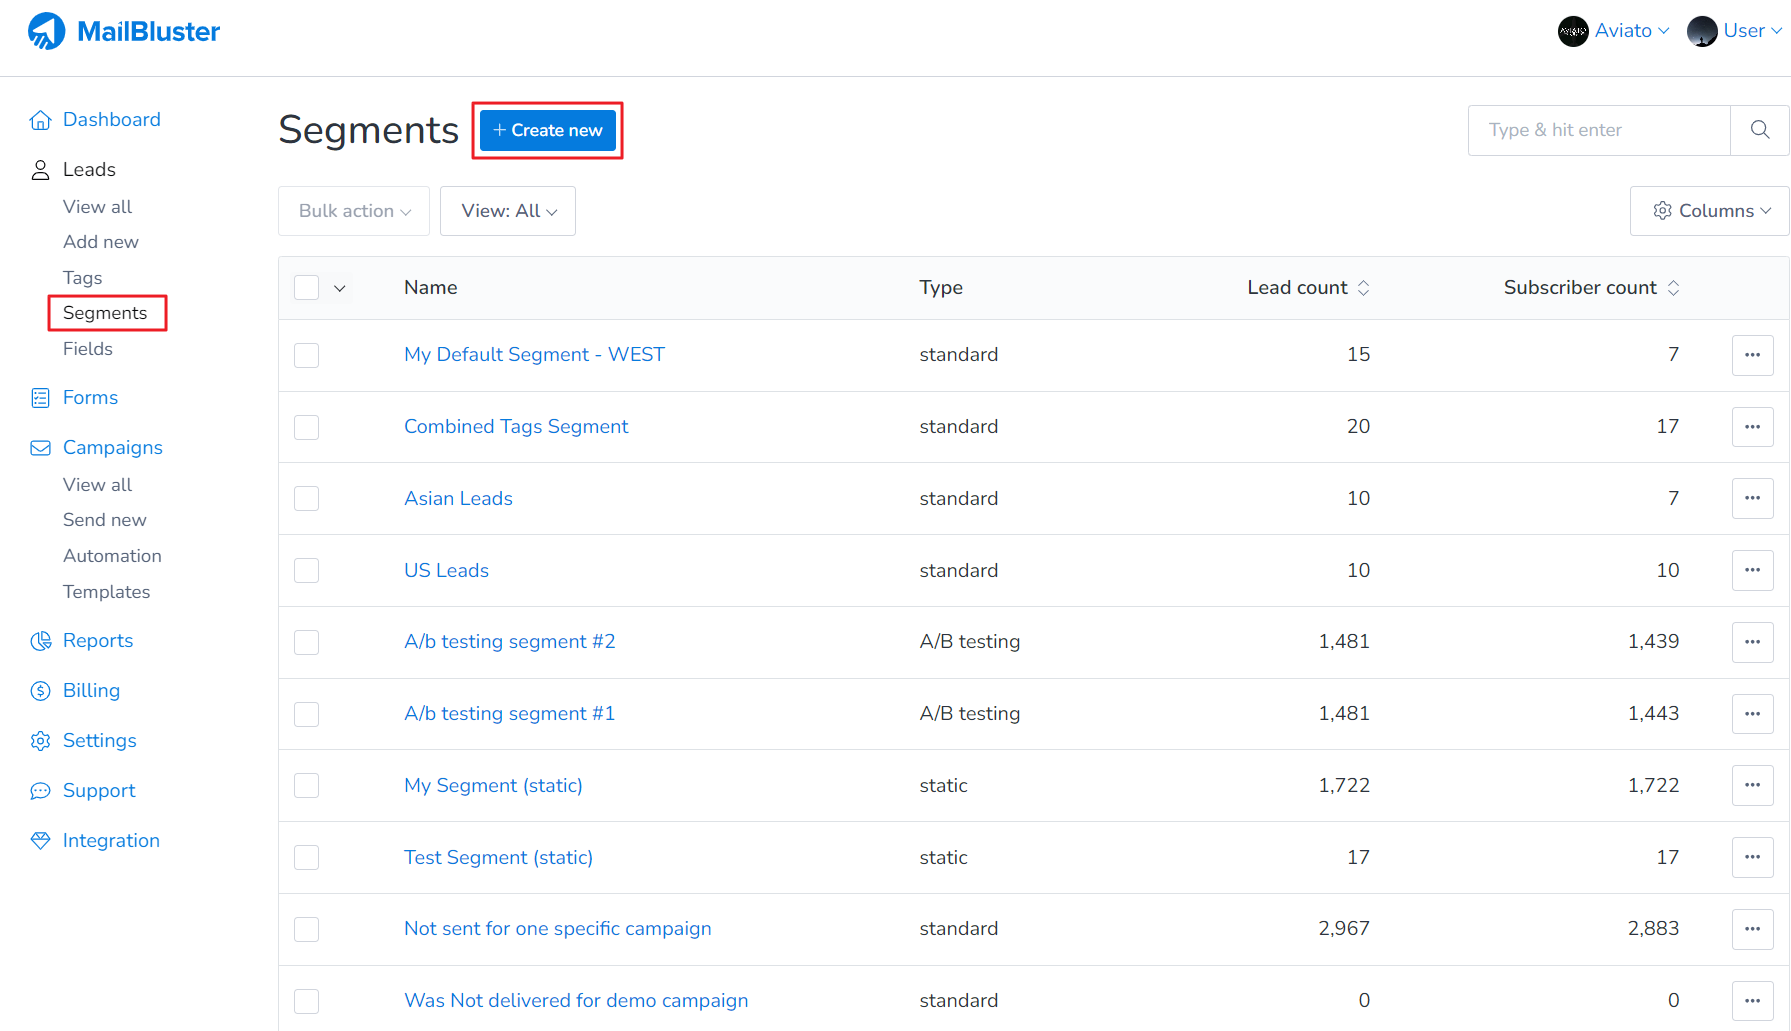
Now go to Segments, and click Create new.
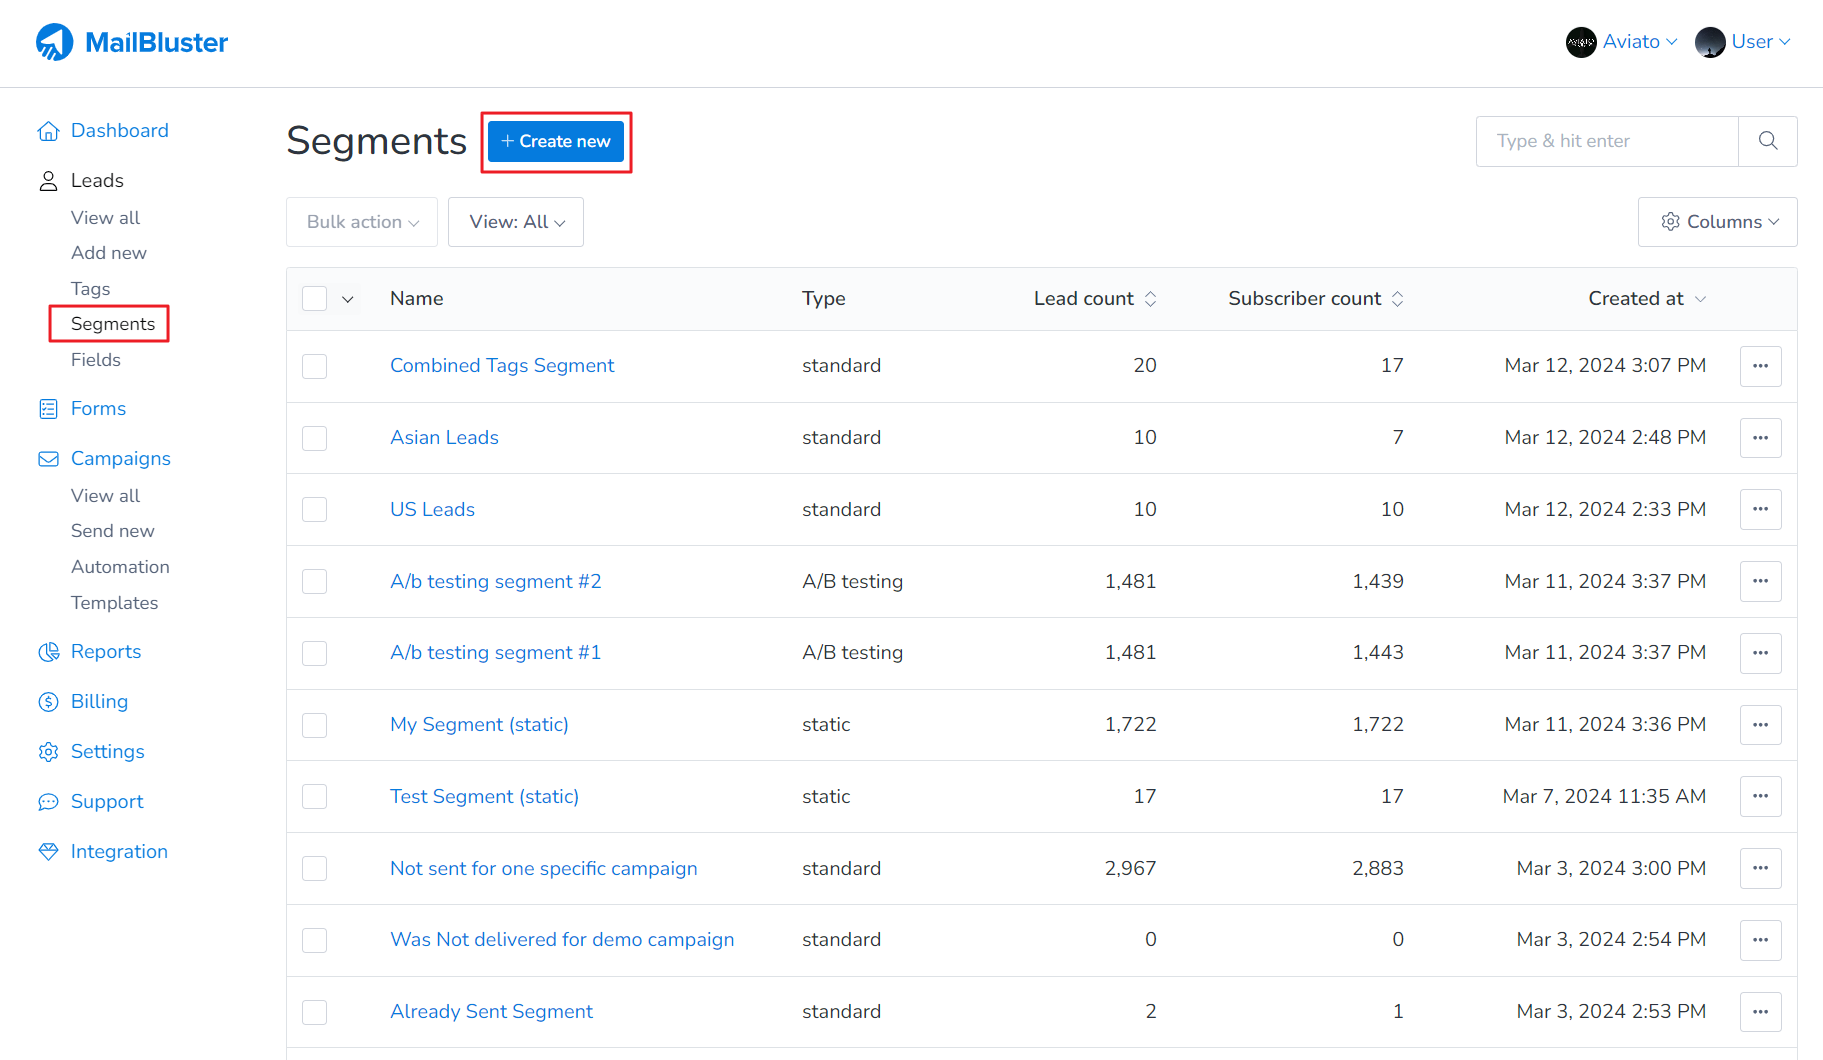
Select Standard segment and then set a segment name with the following configuration. Make sure you select Tags in Standard segment.
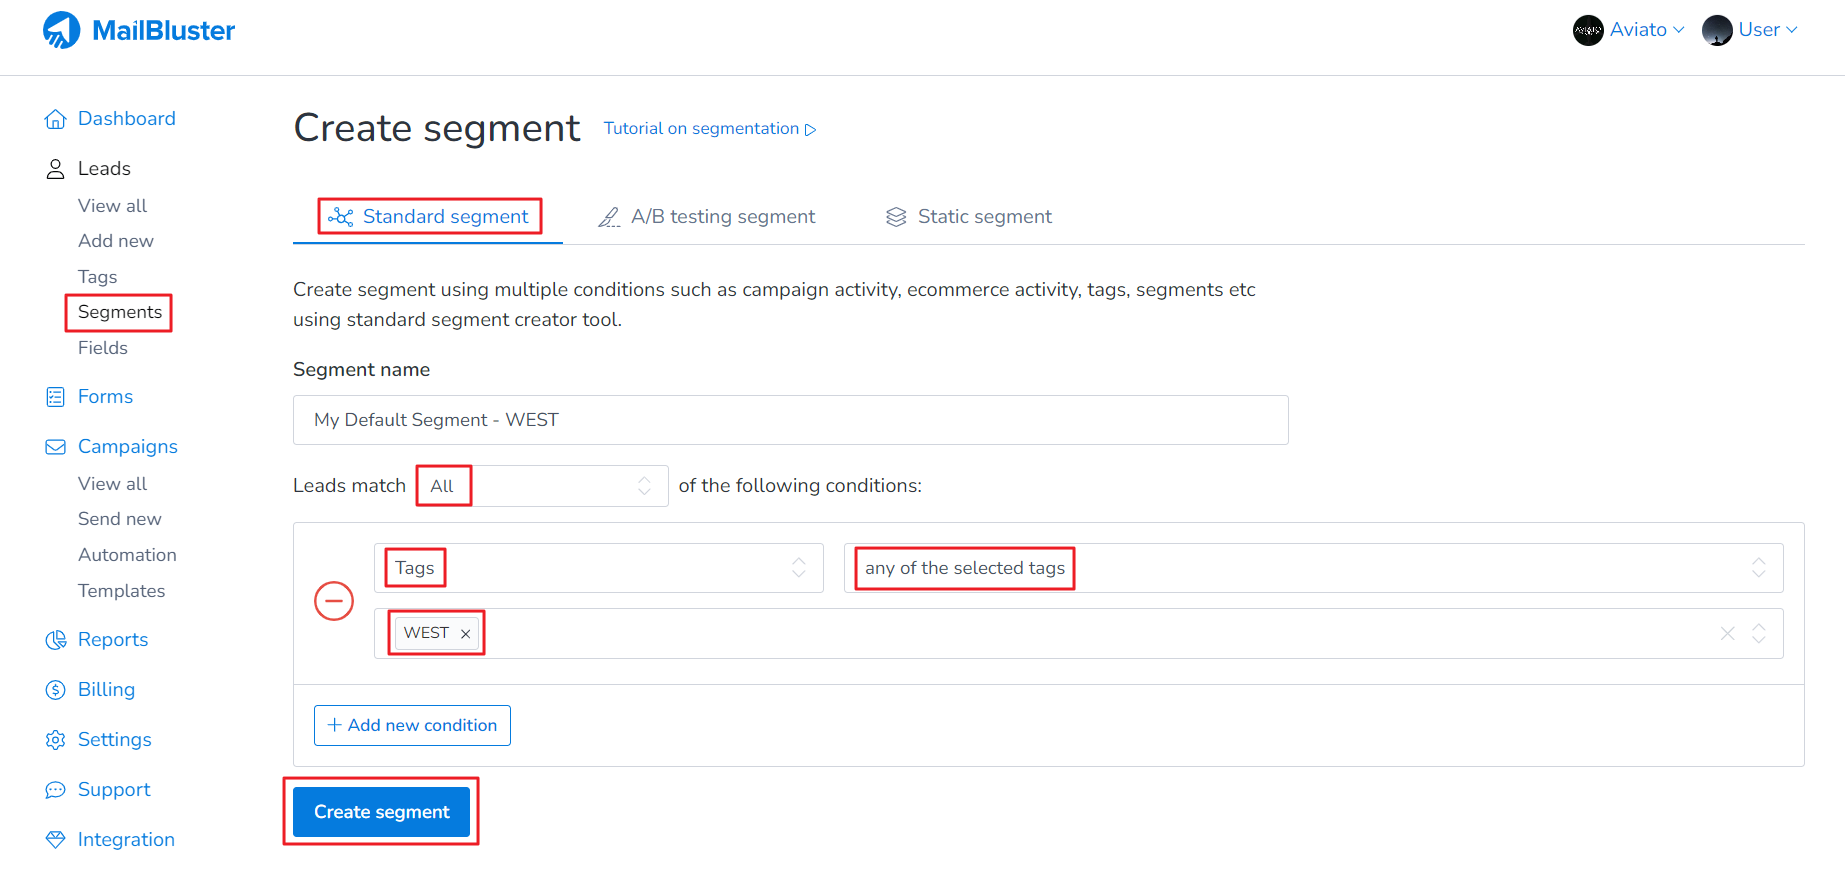
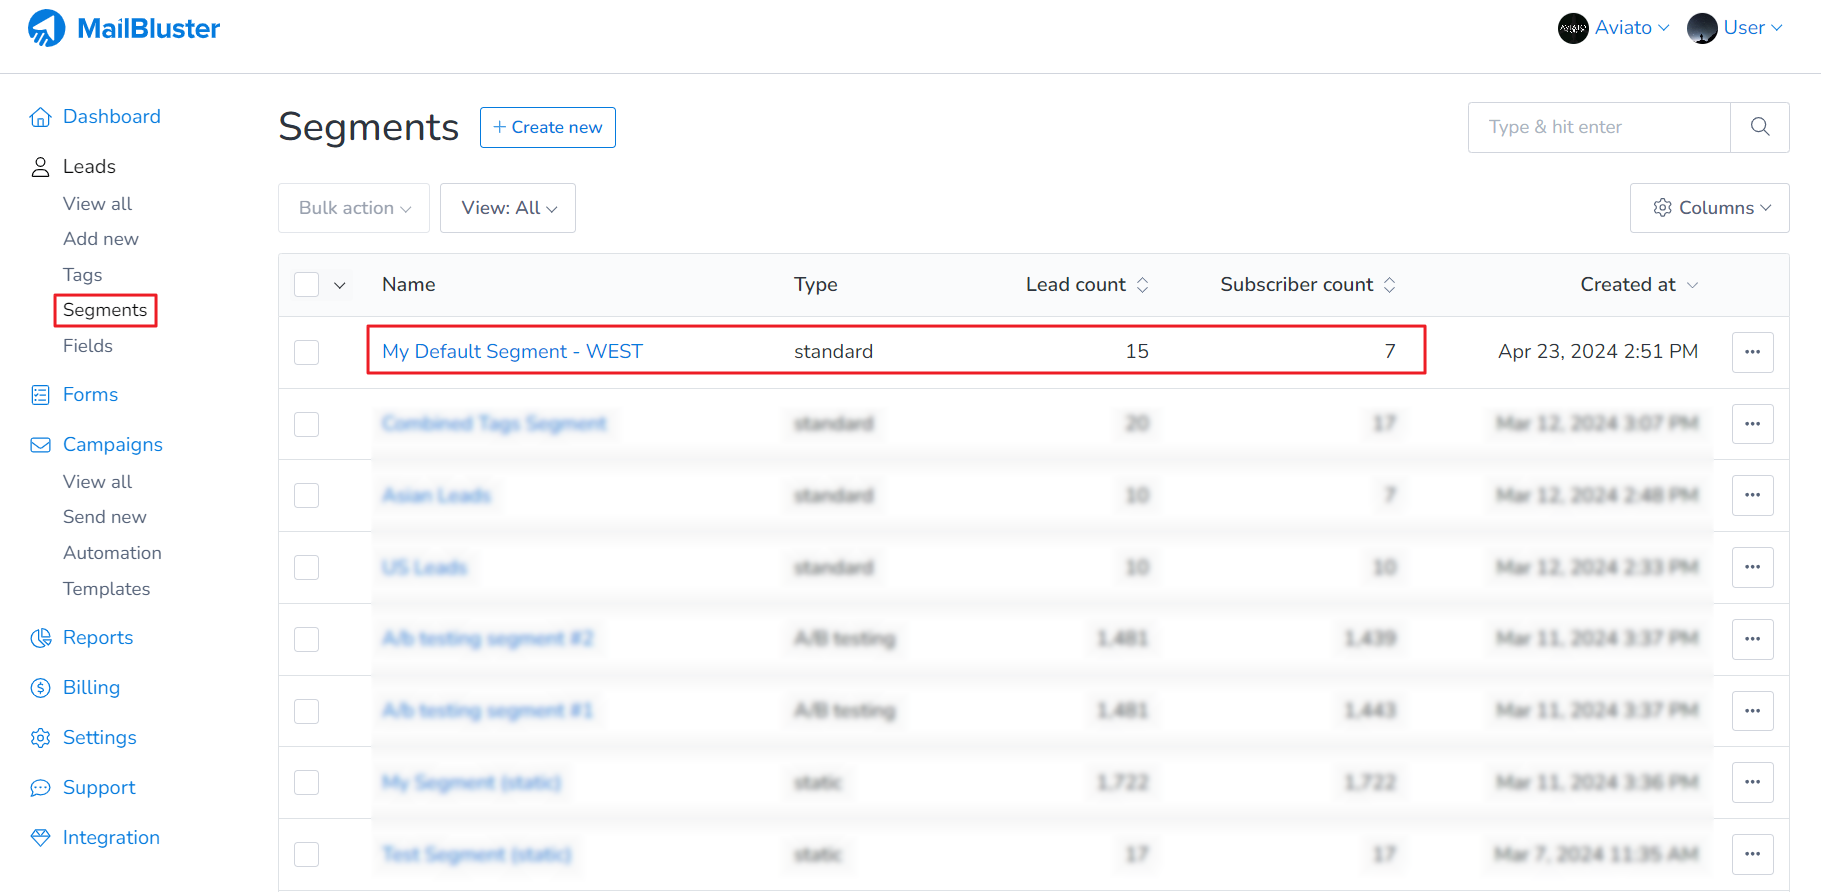
The standard segment with Tag “WEST” has been created. It is showing Lead count (total leads under the selected Tag) and Subscriber count (those who subscribed to your Brand). Be sure to note down the segment name so that you can select it from campaign creation menu easily.
Now go to Campaigns, and click on Create new.
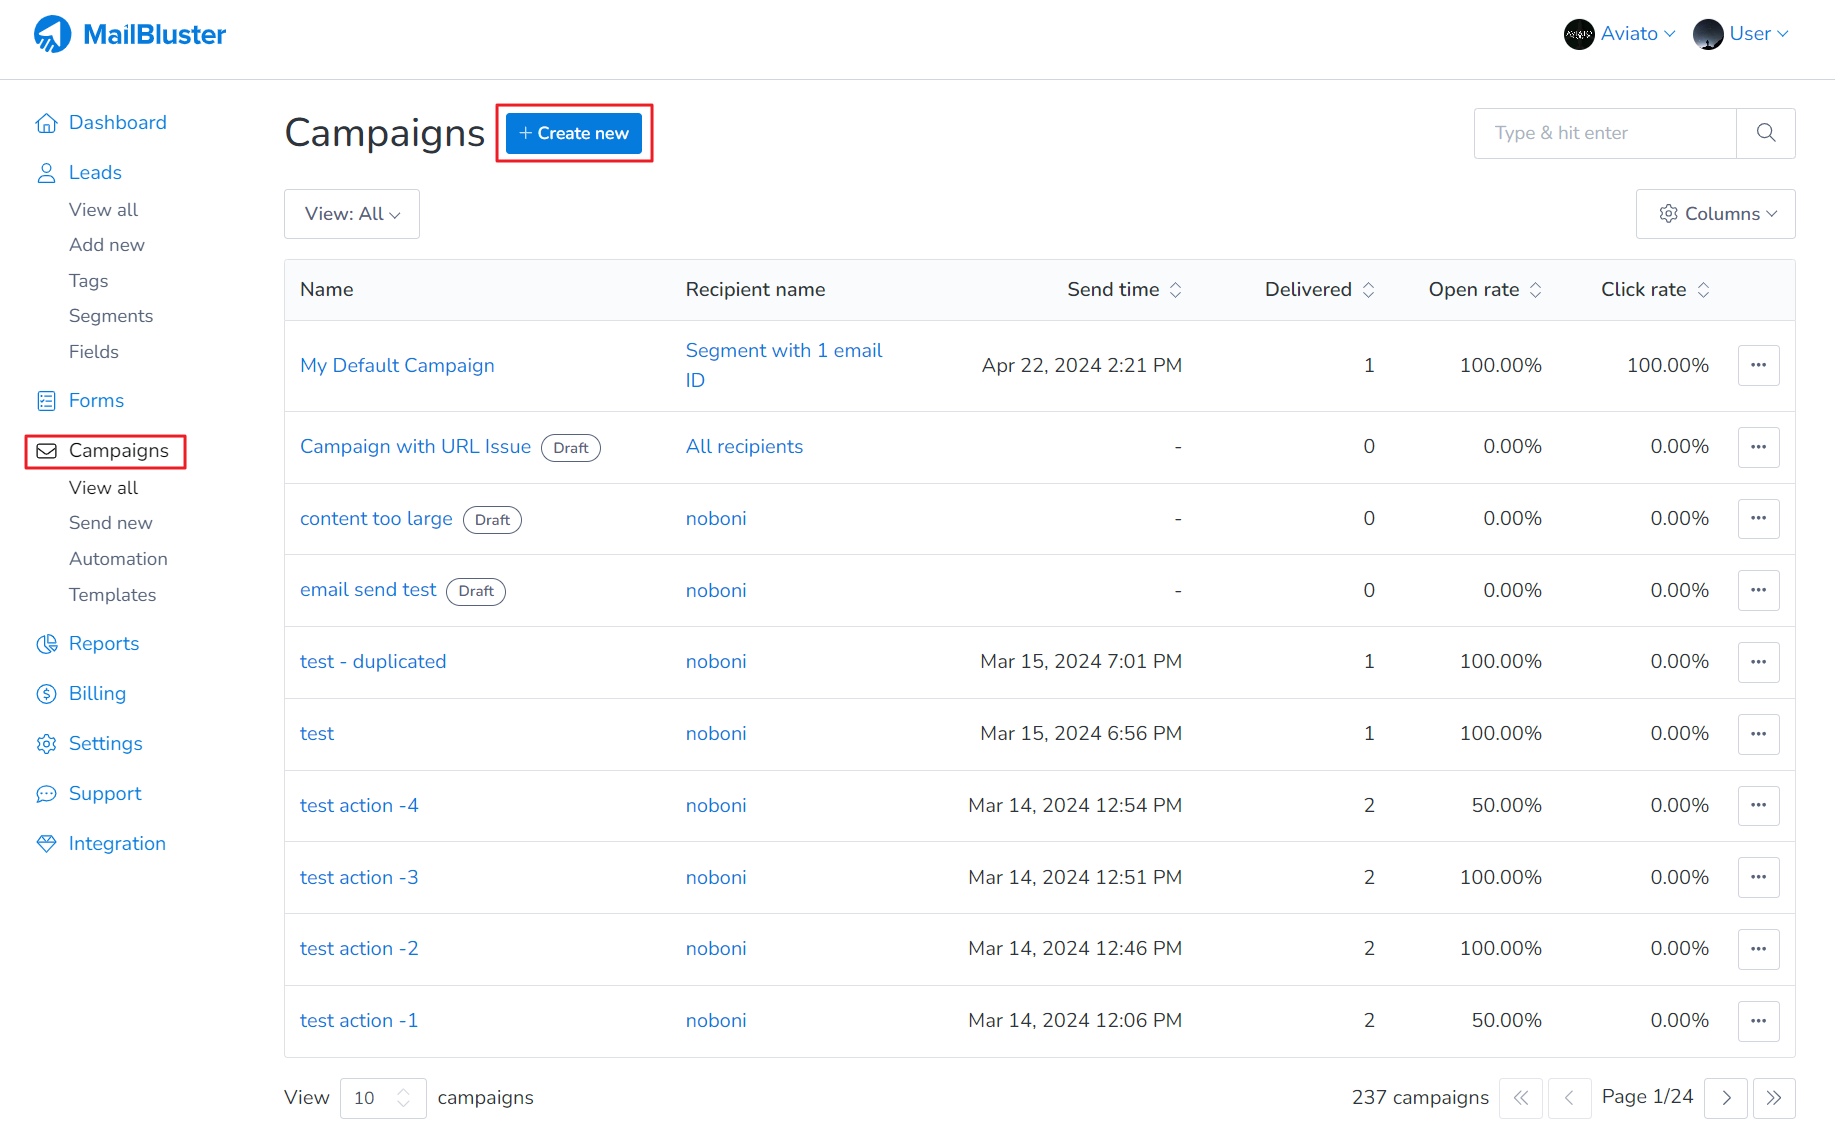
Set a suitable campaign name, and now finally select Subscribers of a segment. Select the segment you have just created earlier using Tag “WEST”. Now you will be able to send campaign to this segment.

2. If the leads are not yet added to your Brand, you can import them into a static segment as shown below and send the campaign to that segment.
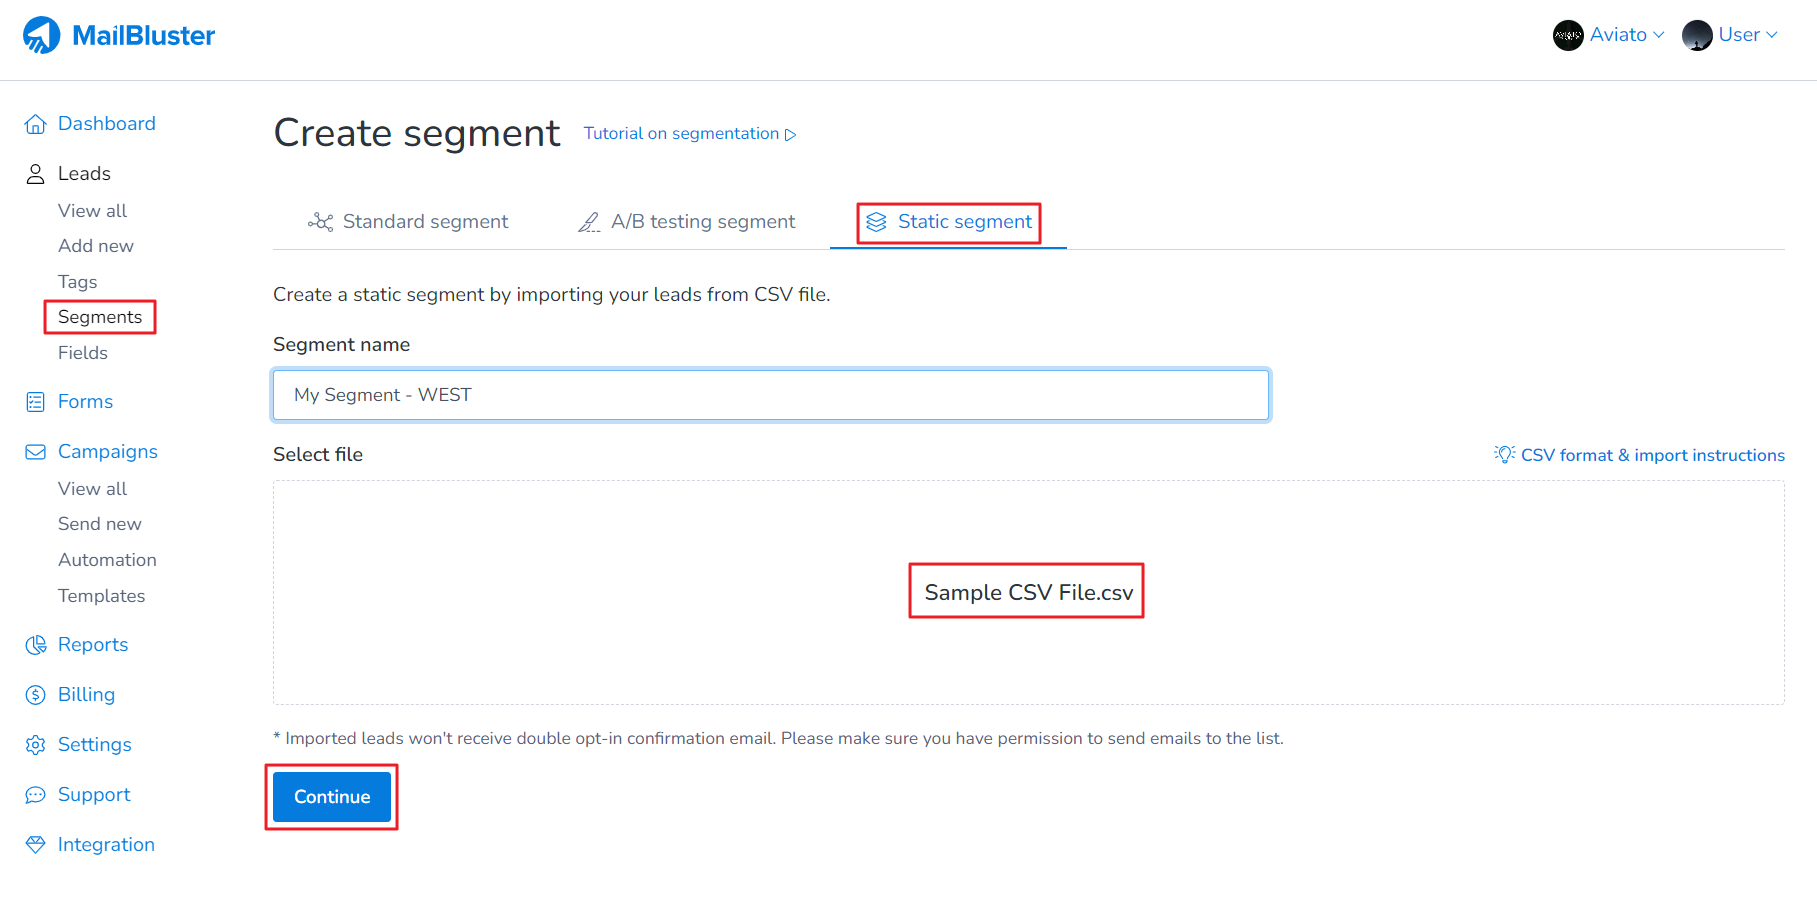
Go to Segments and click Create new.
Make sure you select Static segment. Here we use a sample name “My Segment – West”. Then upload the CSV file containing Leads (name, email address, subscribe status). Click Continue after you drag and drop the CSV file.
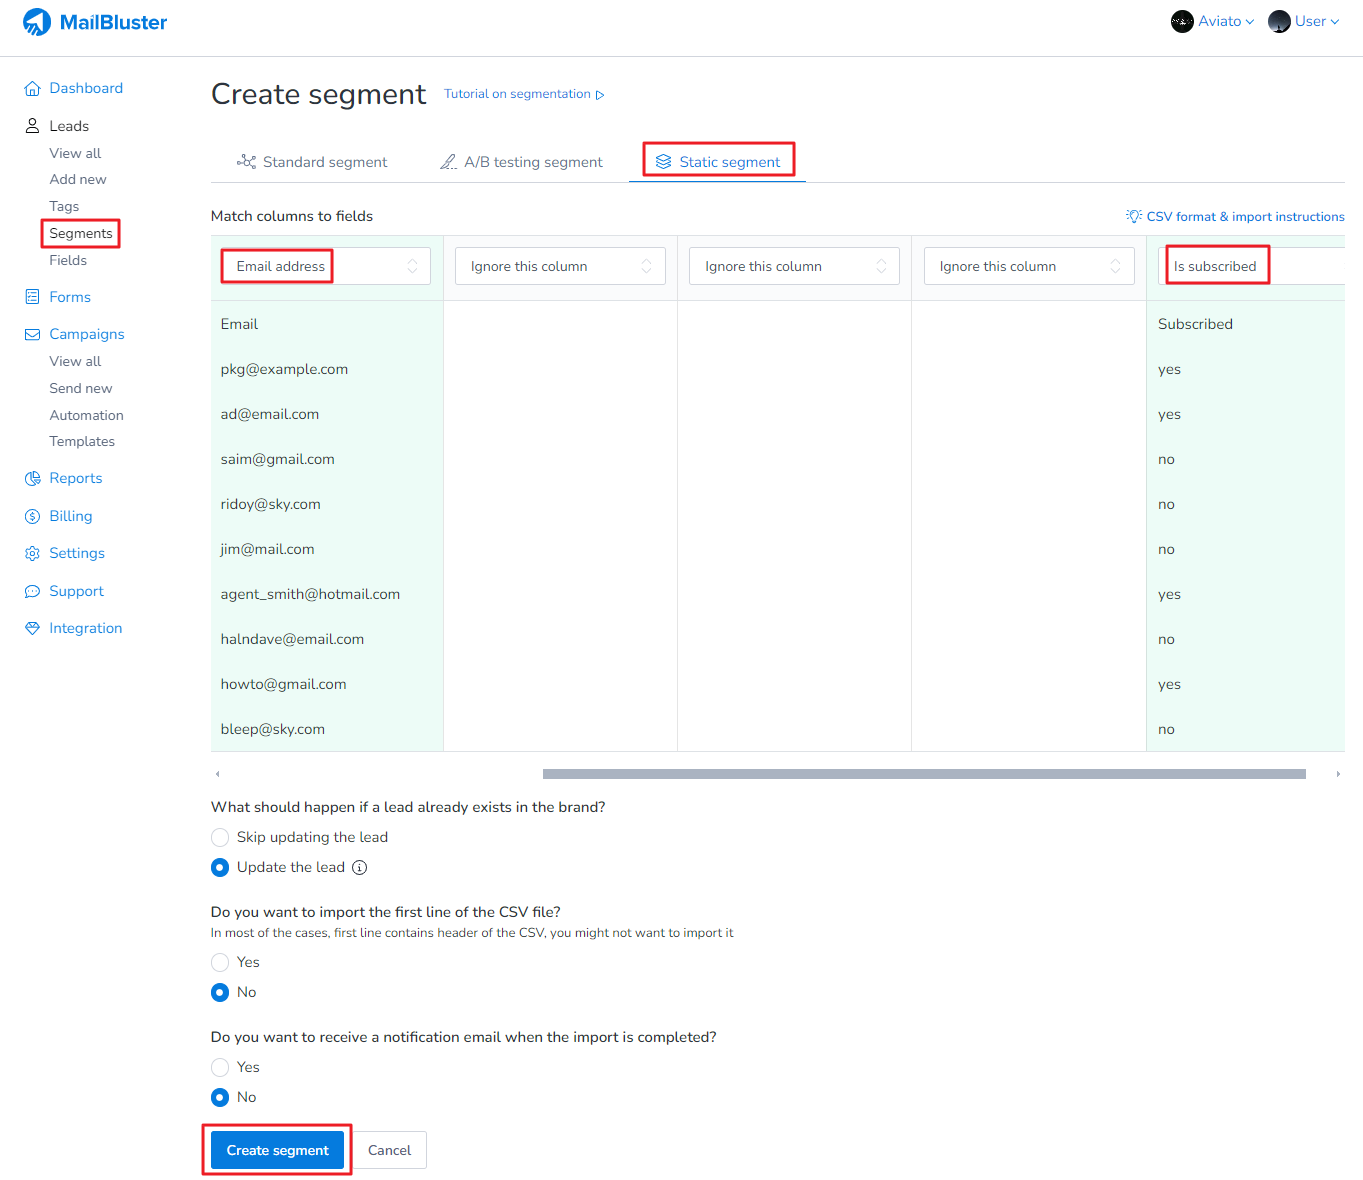
Highlight the respective fields according to its heading as shown below with the following configuration. Then click Create segment.
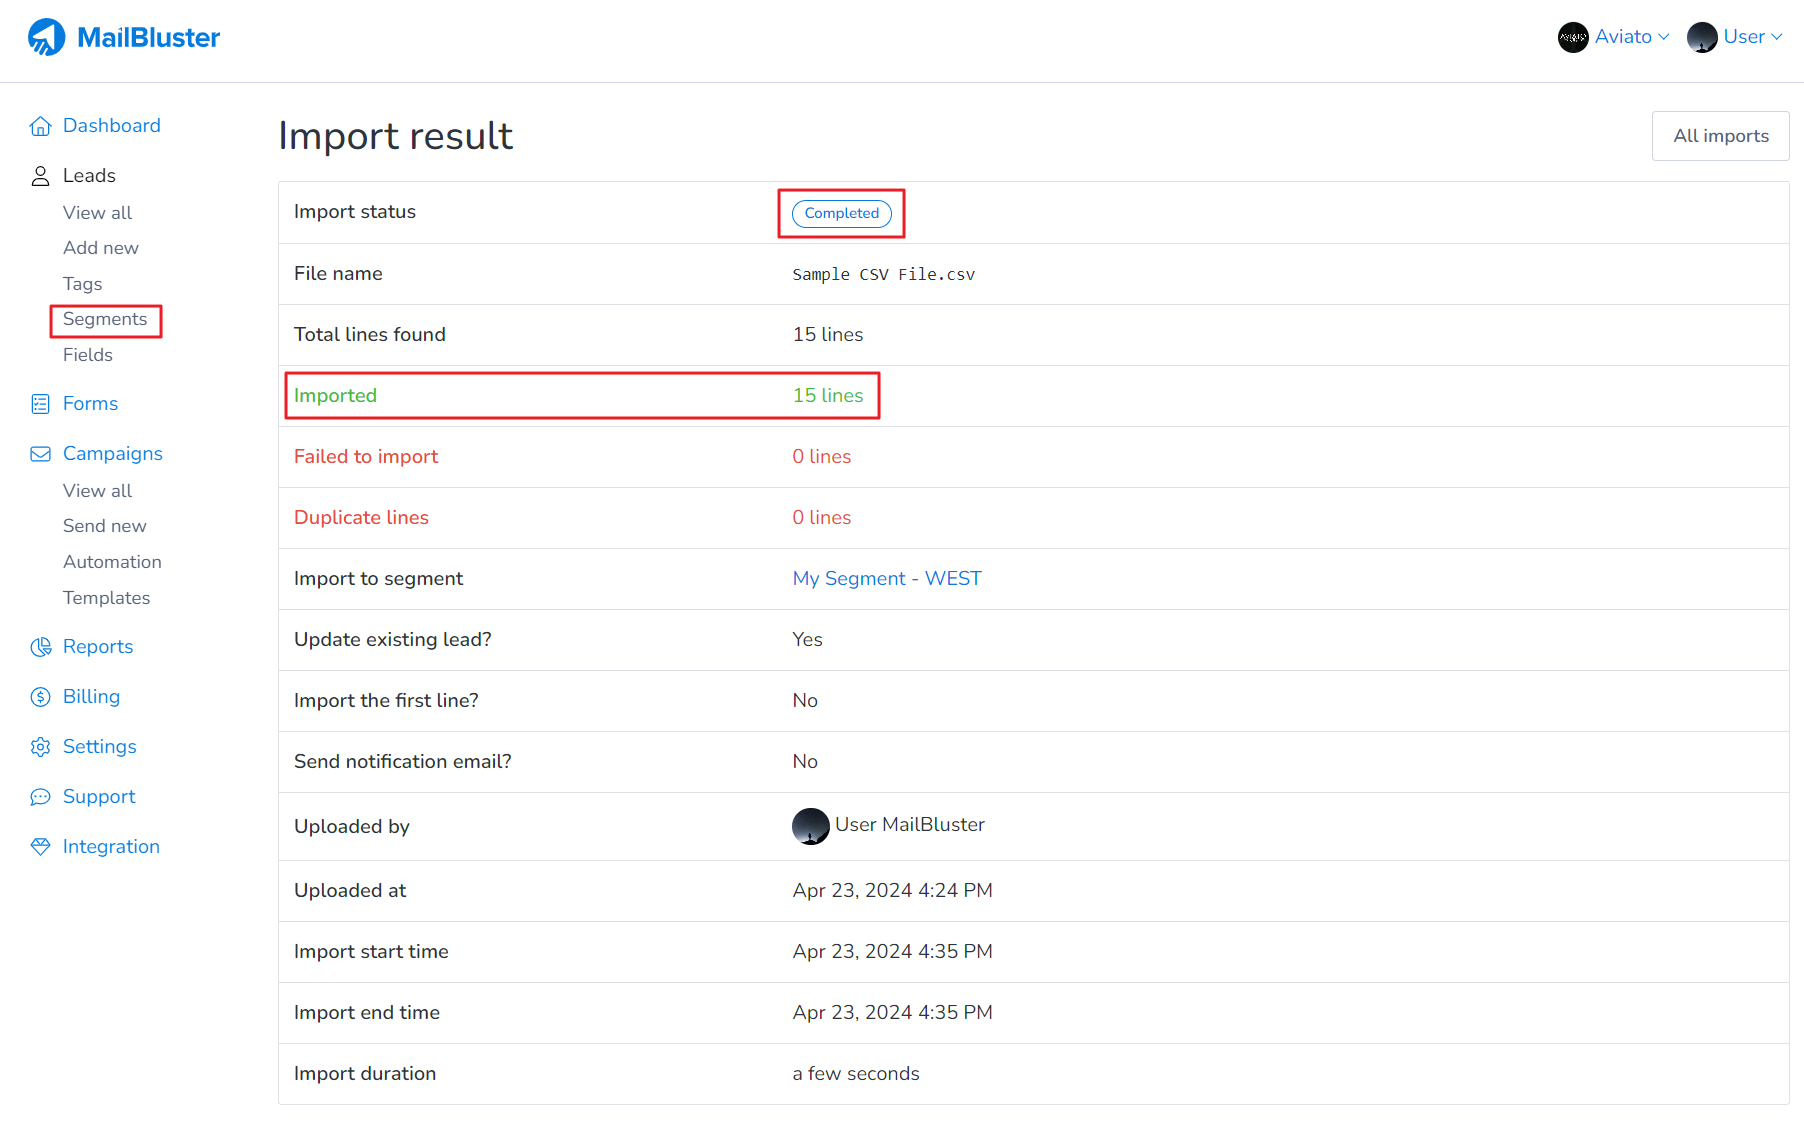
You Static segment will be created once the leads are successfully imported with the status “Completed”.
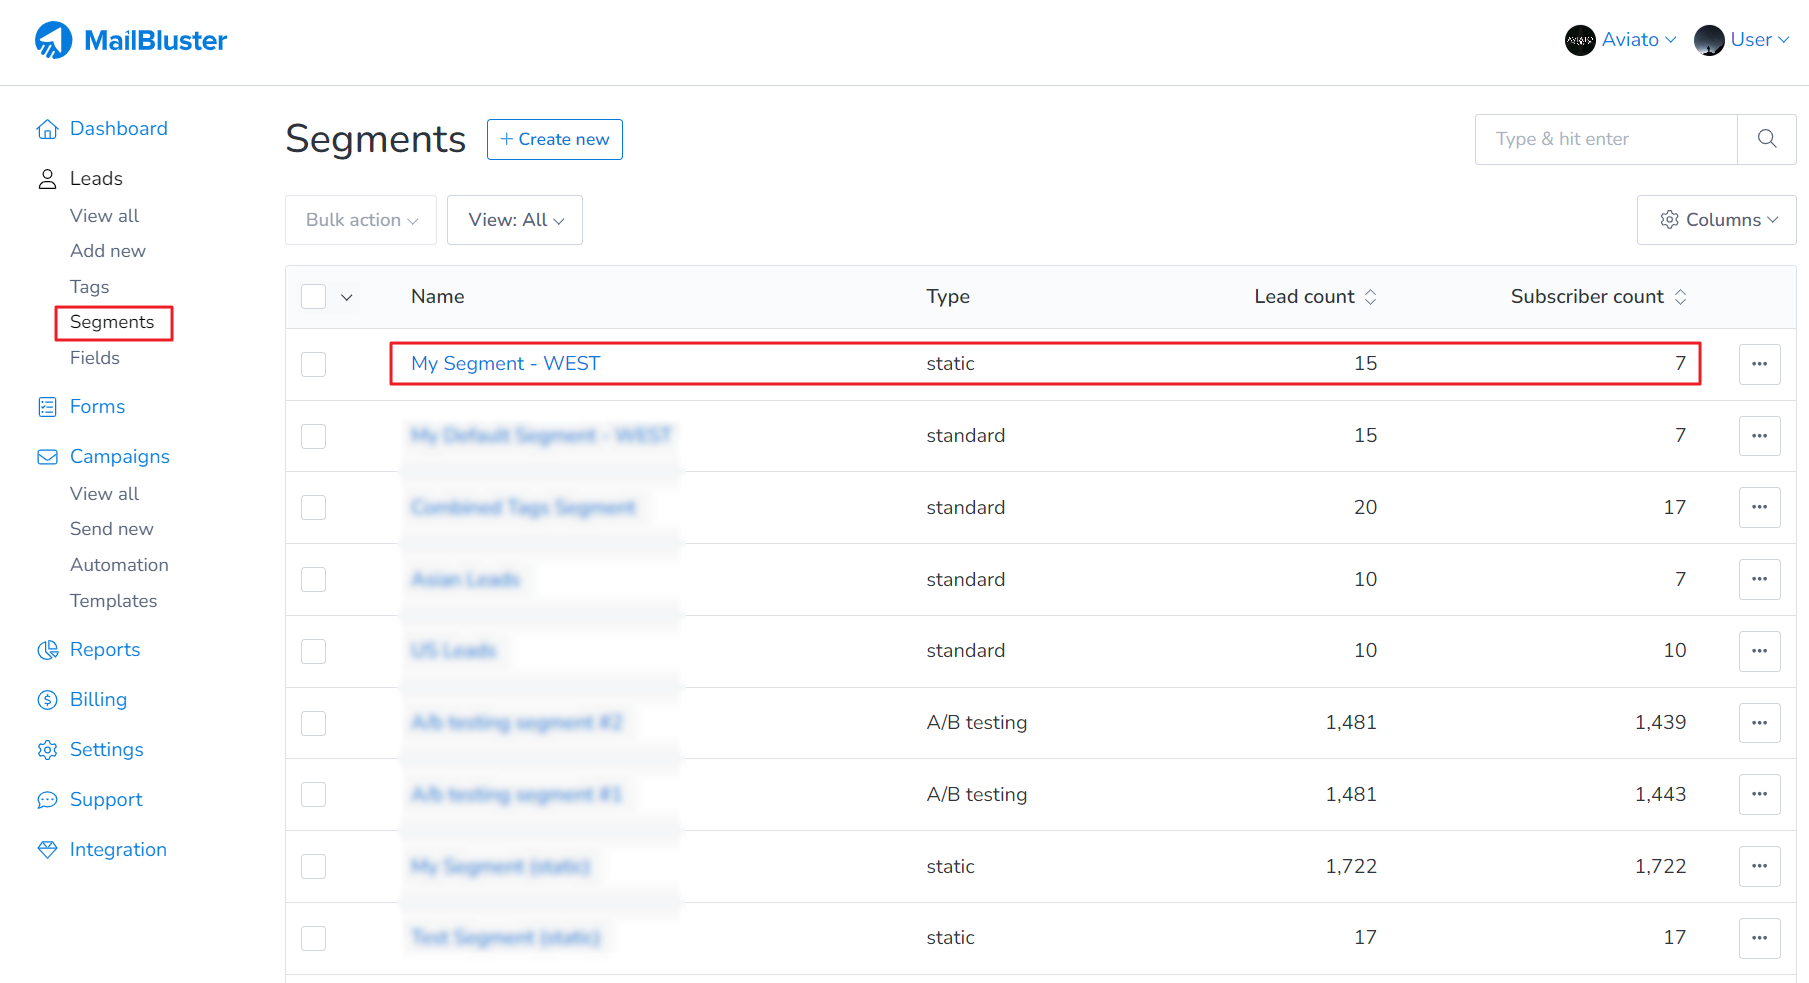
You will see the Static Segment “My Segment – WEST” under Segments with Lead count (total leads under the selected Tag) and Subscriber count (those who subscribed to your Brand).
Now create a campaign as before and select that Static Segment “My Segment – WEST” a shown below.

3. If your leads are already added to your Brand, you can attach tags to them. Then, based on these tags, you can create a standard segment and send the campaign to that segment as mention earlier in 1.
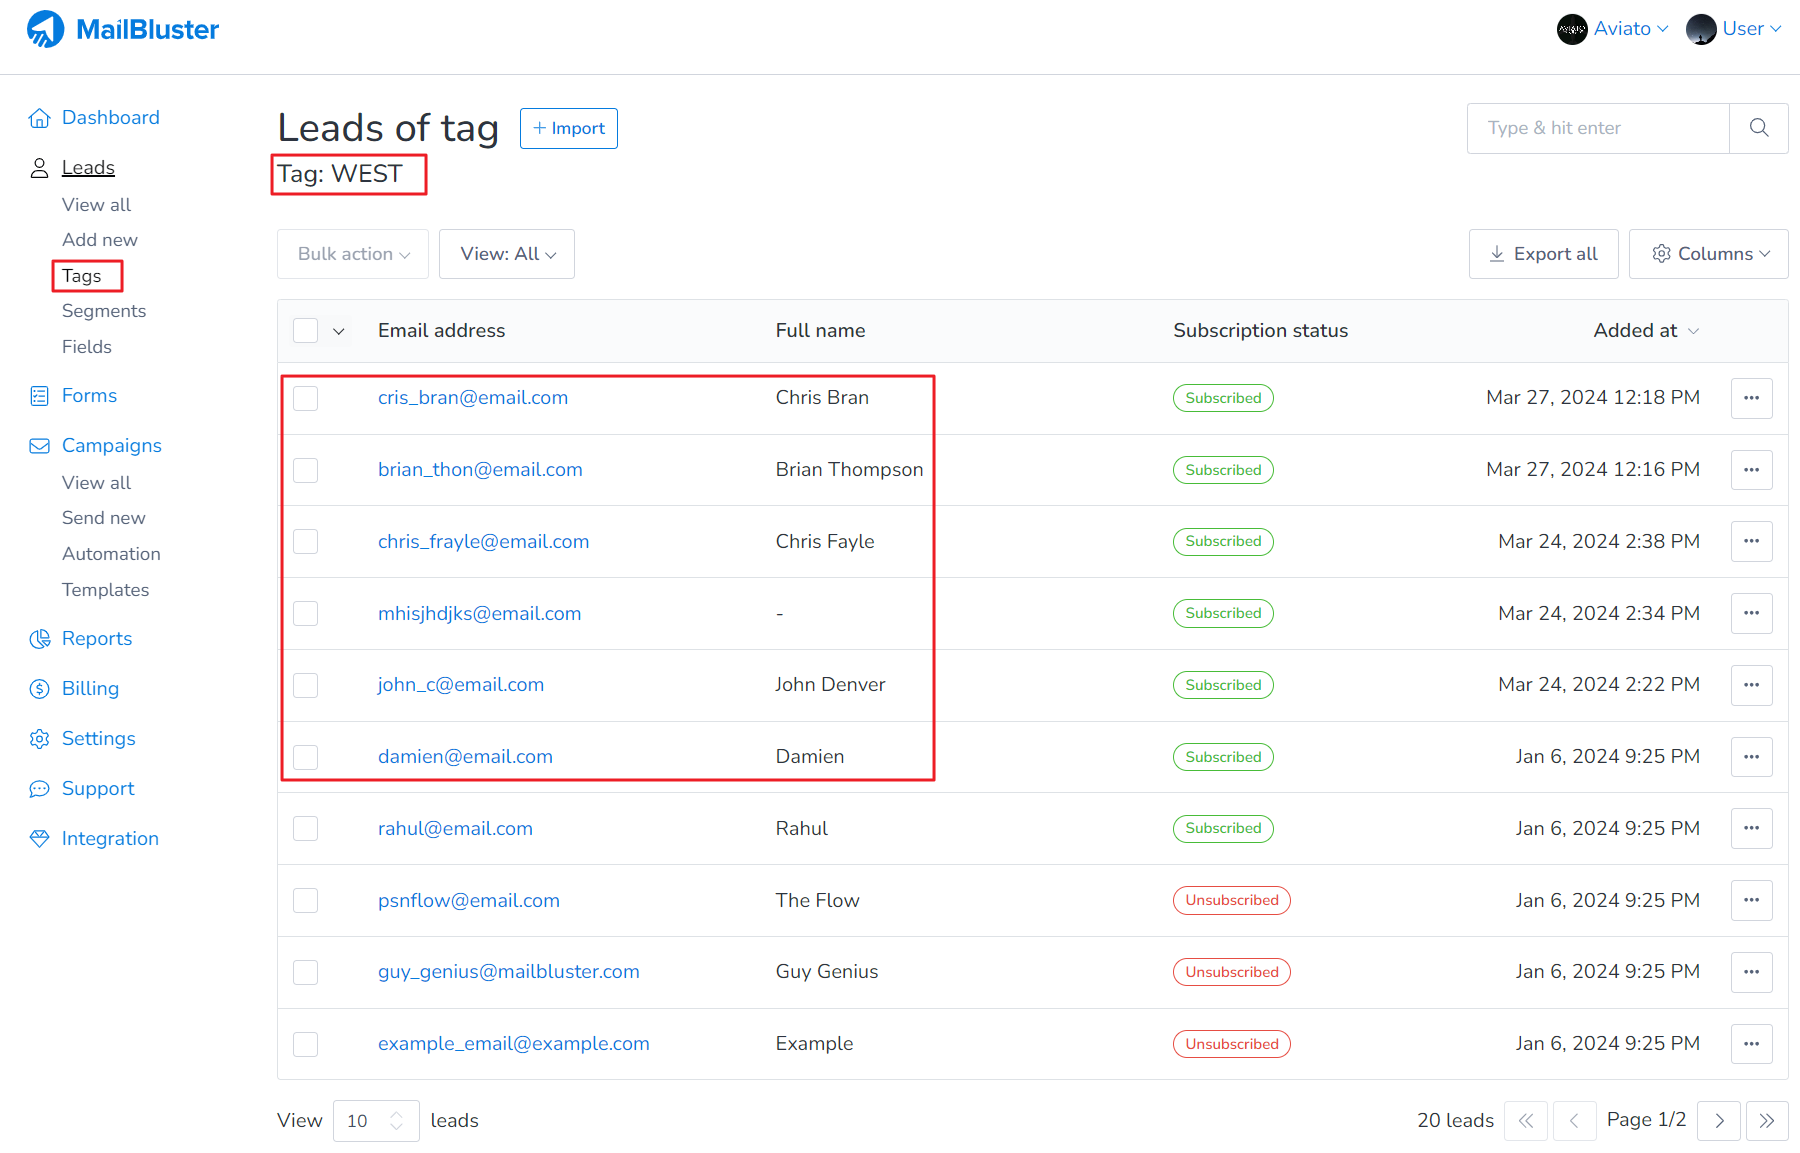
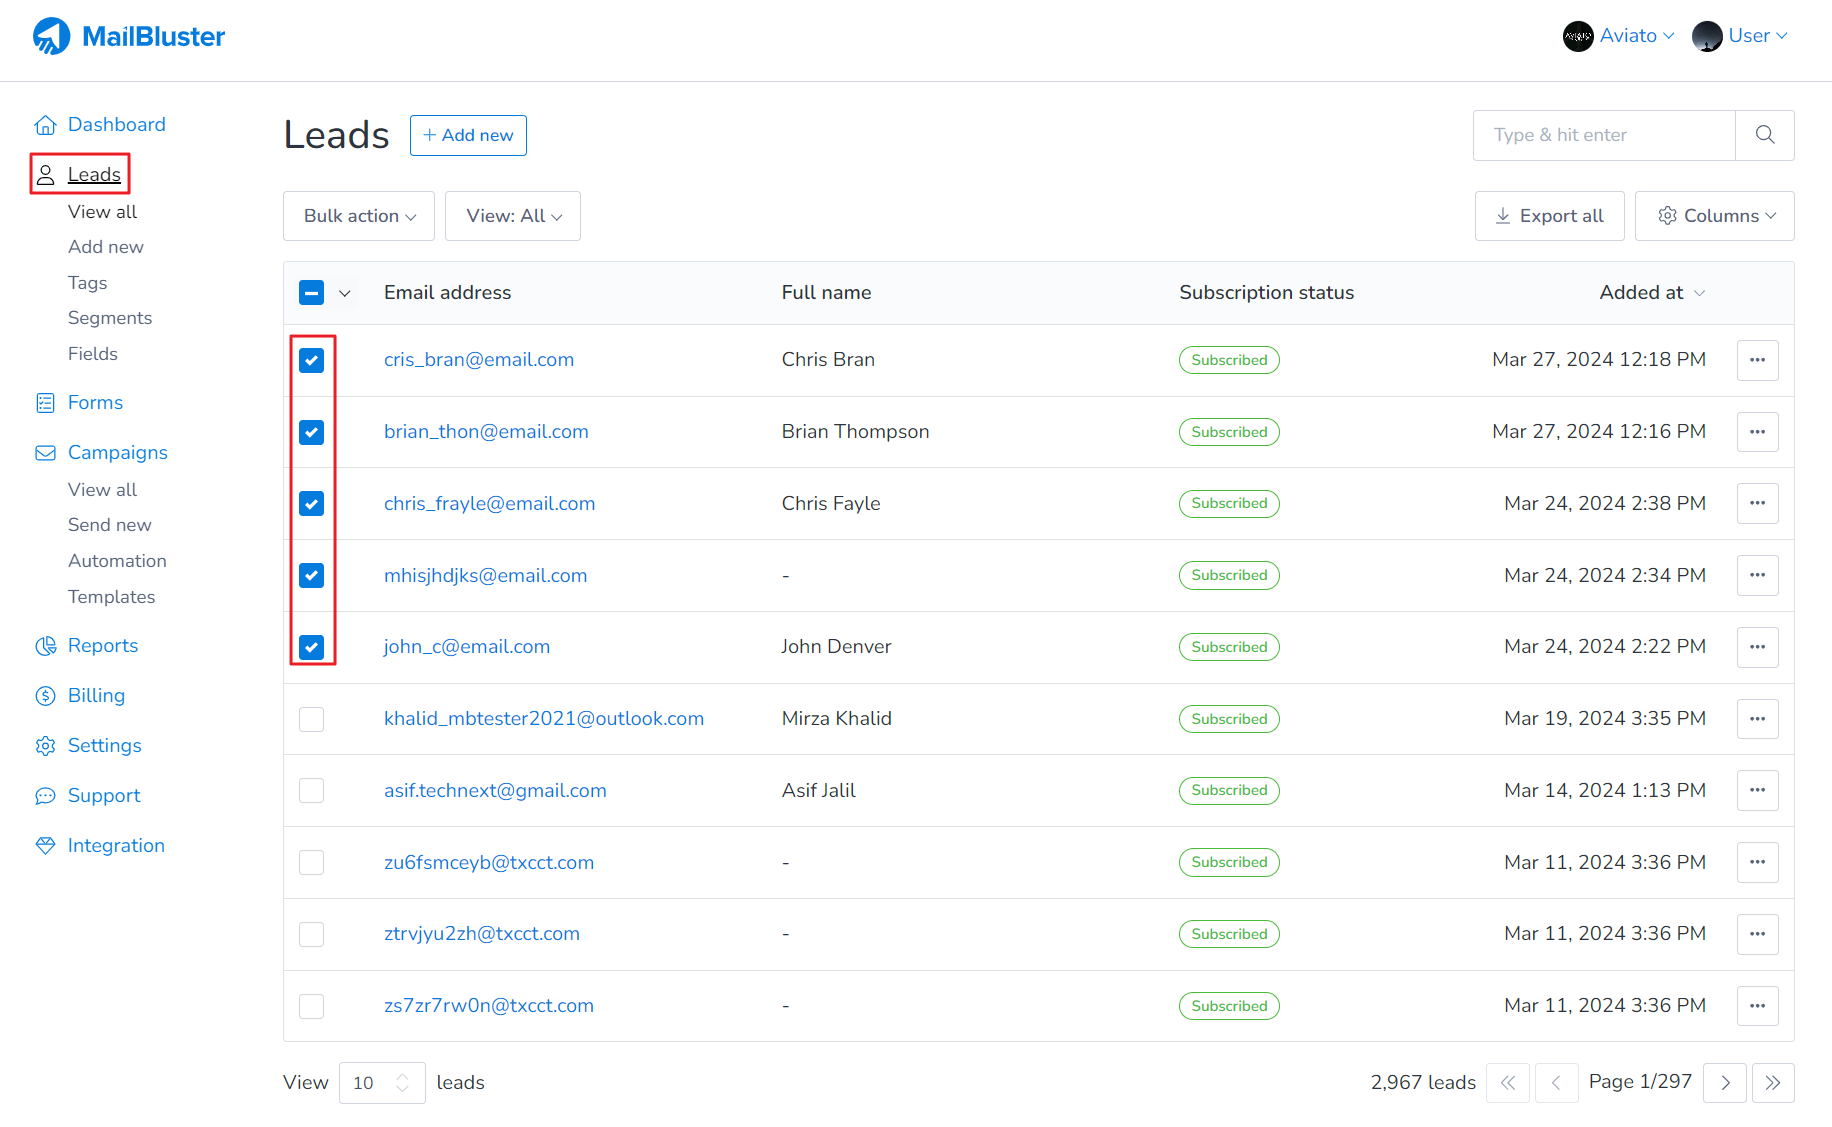
Here is how you can add Tag to your Leads. We have already created Tag name “WEST”. So now we just need to assign the Tag to our selective leads. Just go to Leads. Select the desired leads by clicking the check boxes as shown below.
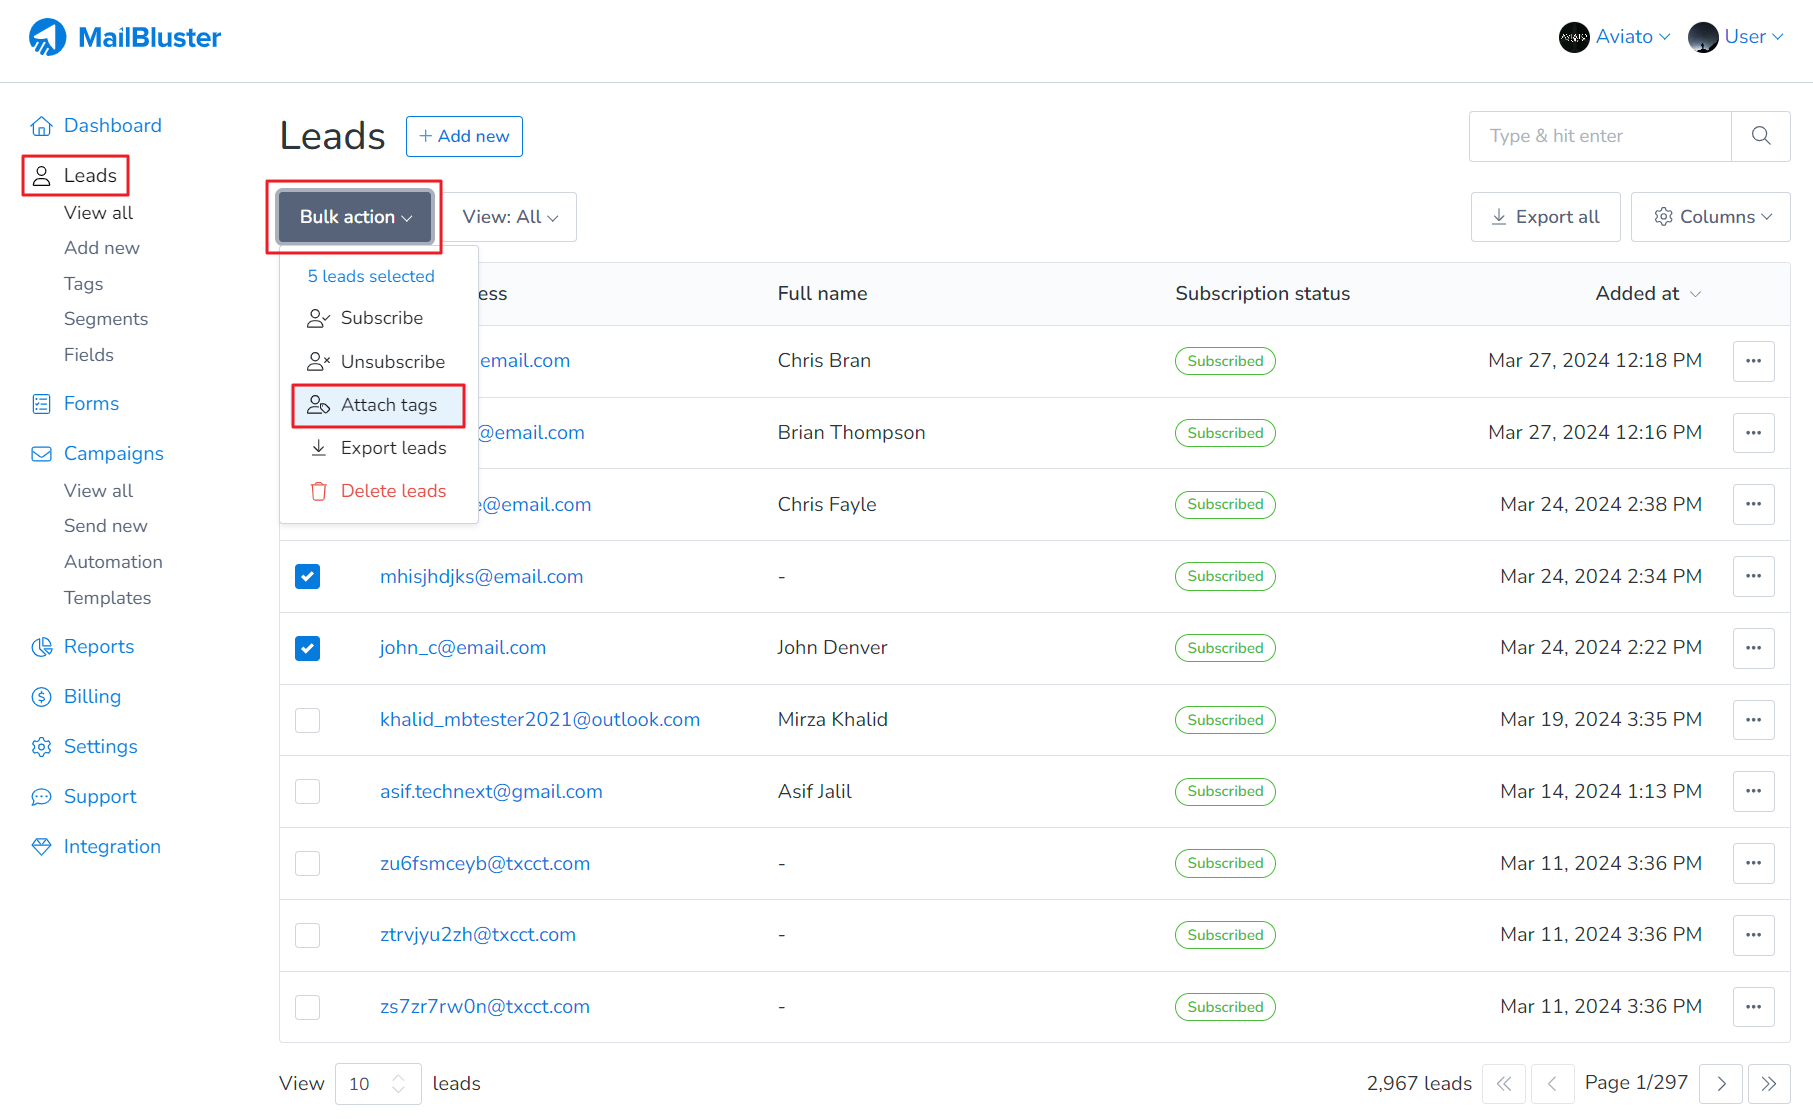
Click on Bulk action and the click Attach tags.
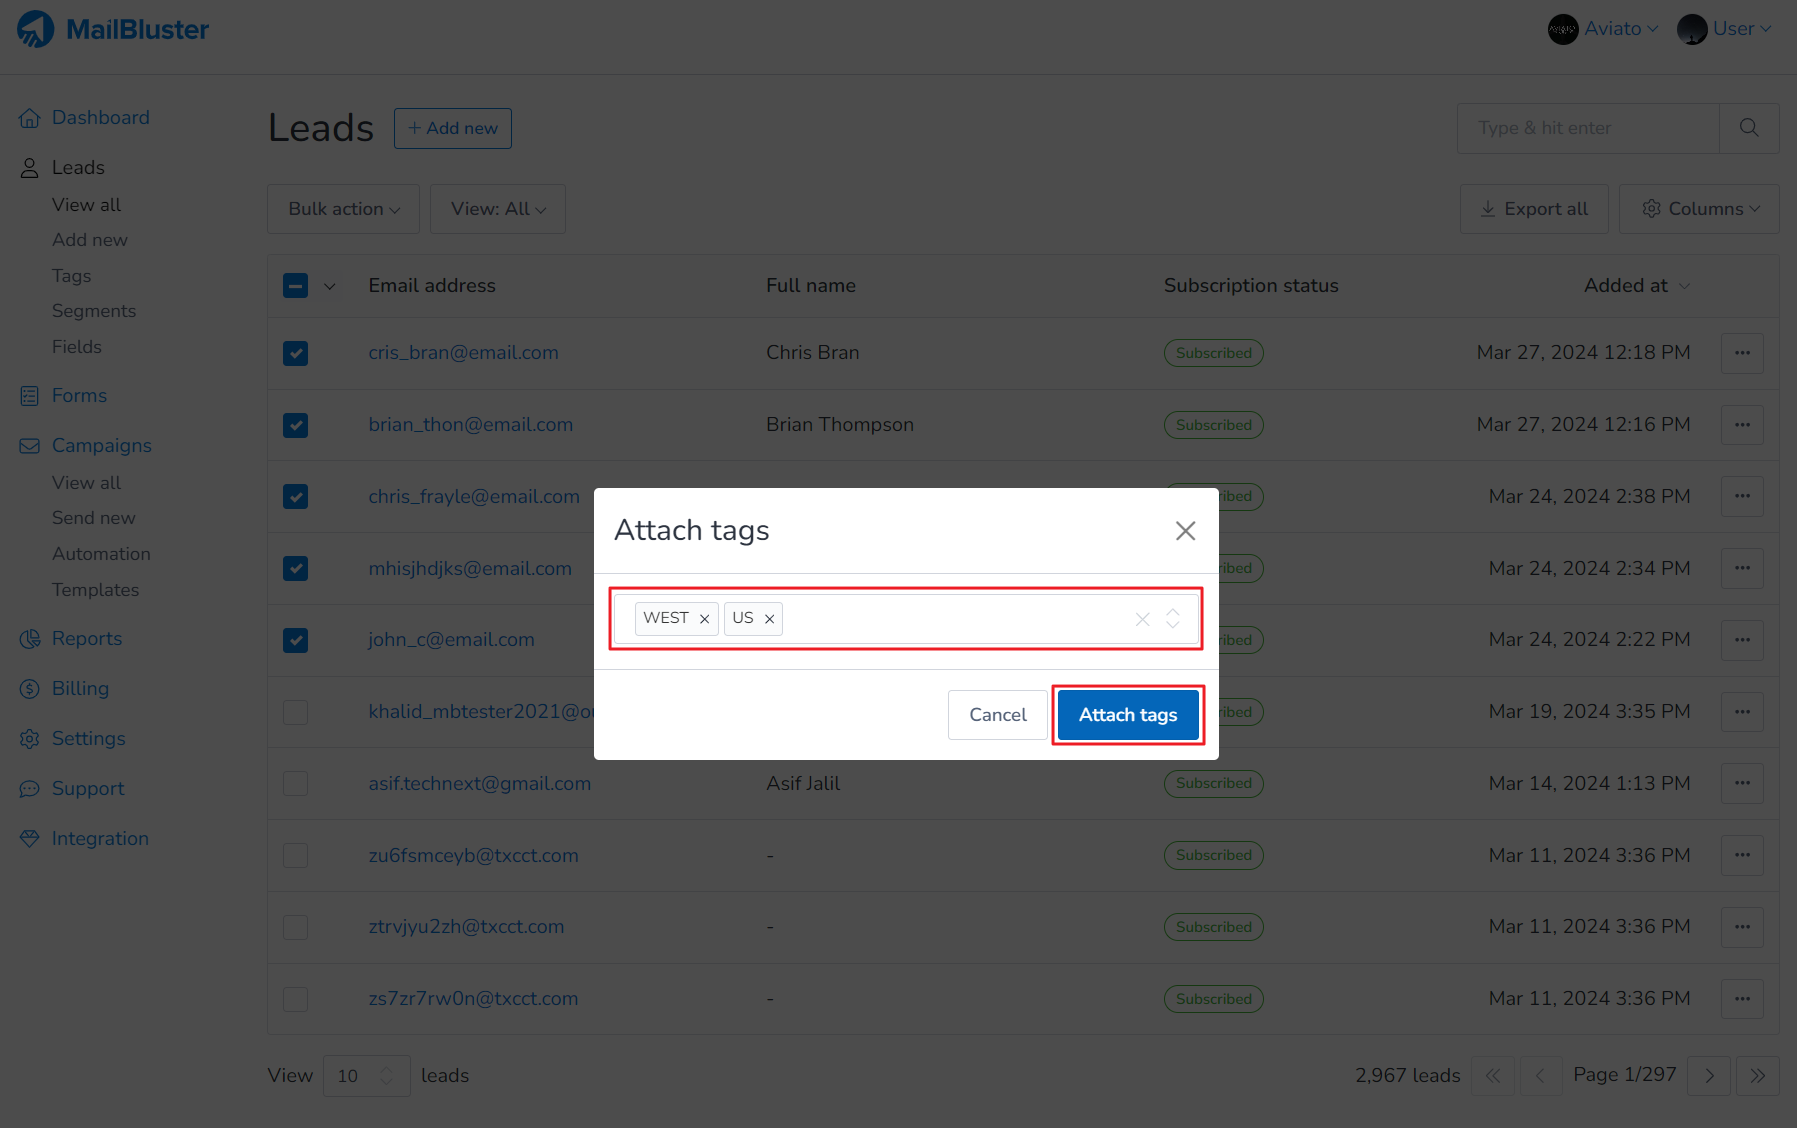
A popup screen will appear to select one or multiple tags to assign to the selected leads. Here we selected multiple tags “WEST” and “US”. Now click Attach tags.
Now if you go to Tags and click on WEST, you will those leads are under this tag successfully.