Salesforce integration with MailBluster using Zoho enables seamless lead transfer and email marketing automation between the two platforms. Salesforce is a cloud-based Customer Relationship Management (CRM) platform that helps businesses manage customer interactions, sales, marketing, and support processes. It centralizes data, streamlines workflows, and provides tools for automation, analytics, and personalized customer engagement.
This guide demonstrates how to integrate MailBluster with Salesforce using the Salesforce Developer Website. We are also using a third party app called Zoho Flow to integrate leads from Salesforce to MailBluster. Zoho Flow process information more quickly than the previously discussed Pabbly.
So, let’s dive into the Zoho integration with Salesforce right away first.
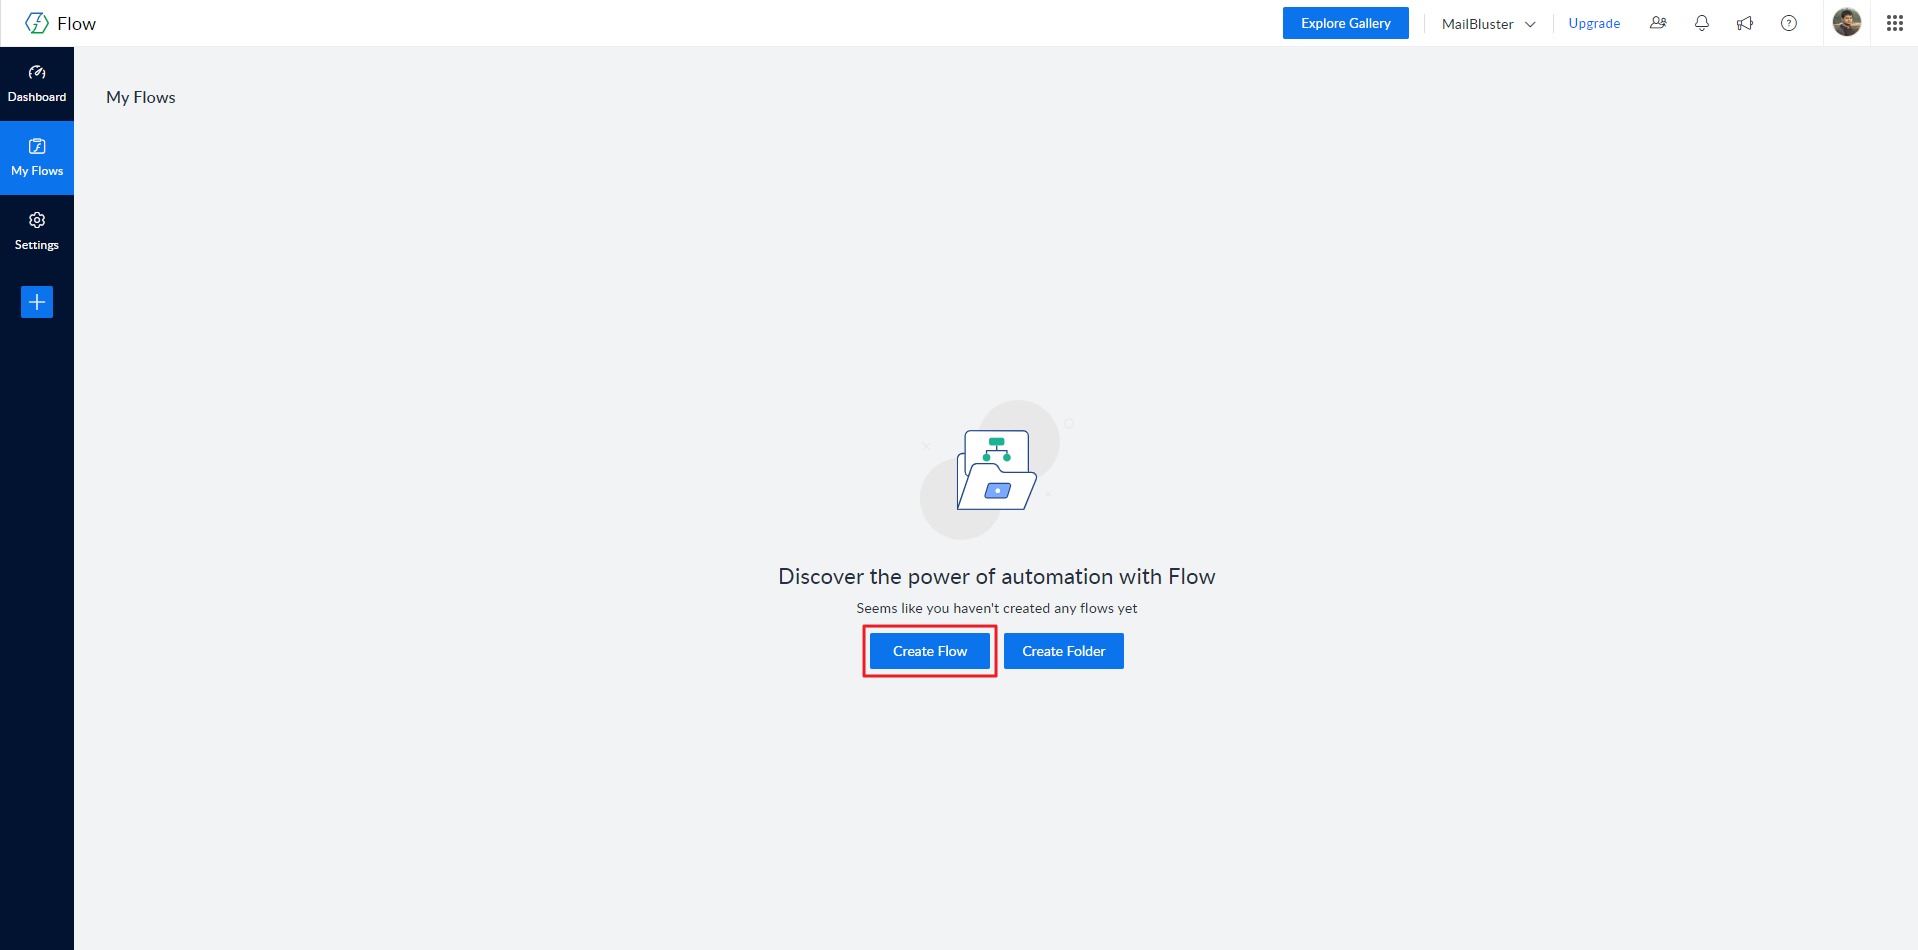
Just sign in to Zoho Flow, and click on Create Flow.
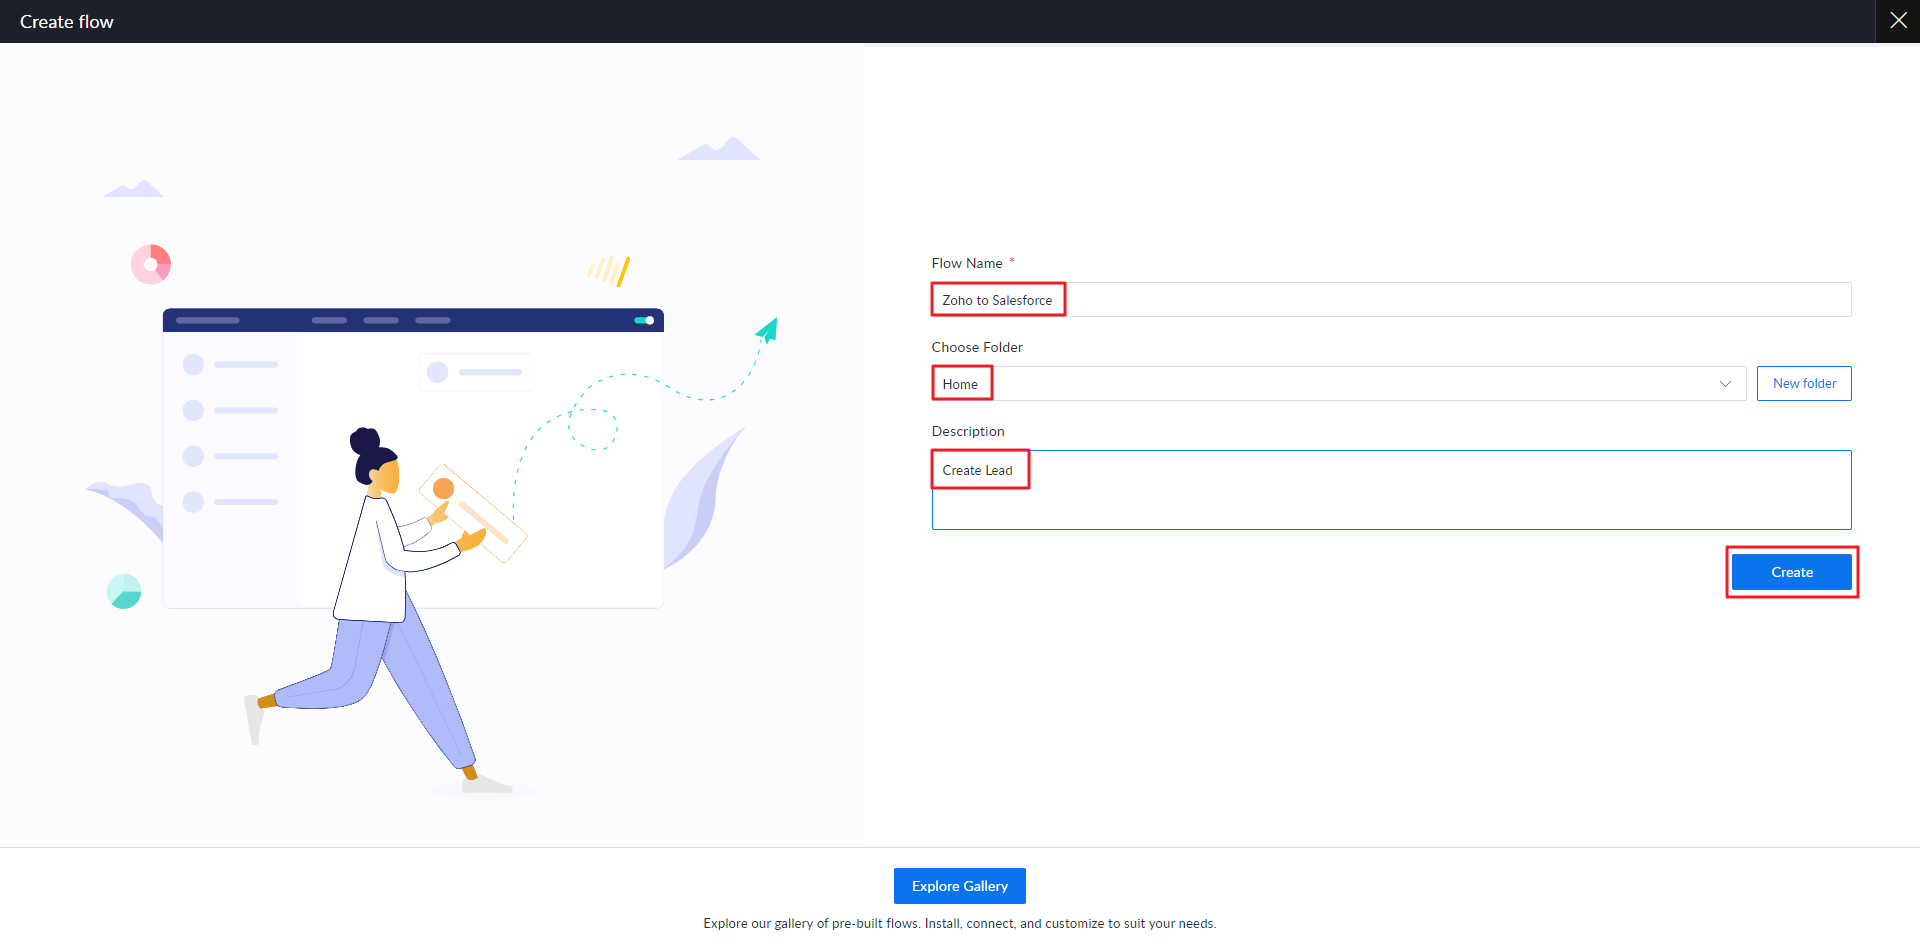
Enter Flow Name along with Choose Folder ‘Home’ and ‘Create Lead’ filling in the Description. Then click Create.
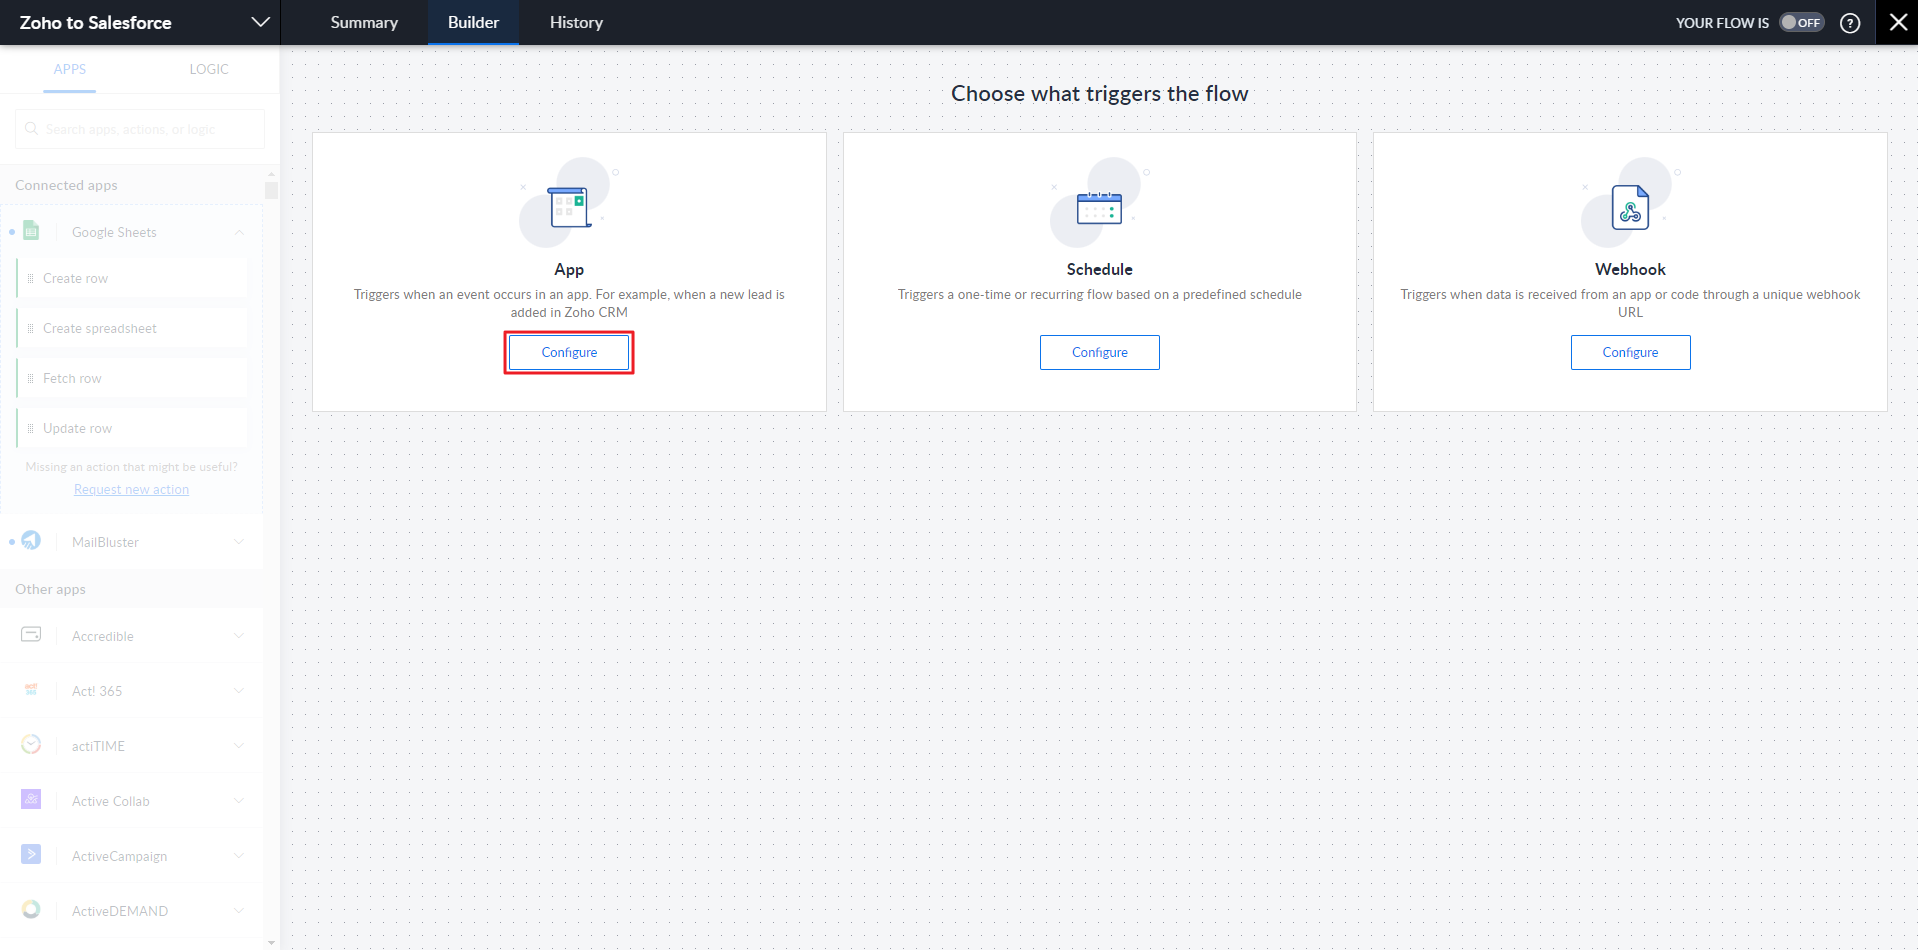
Now, under Choose what triggers the flow, click Configure in the App section.
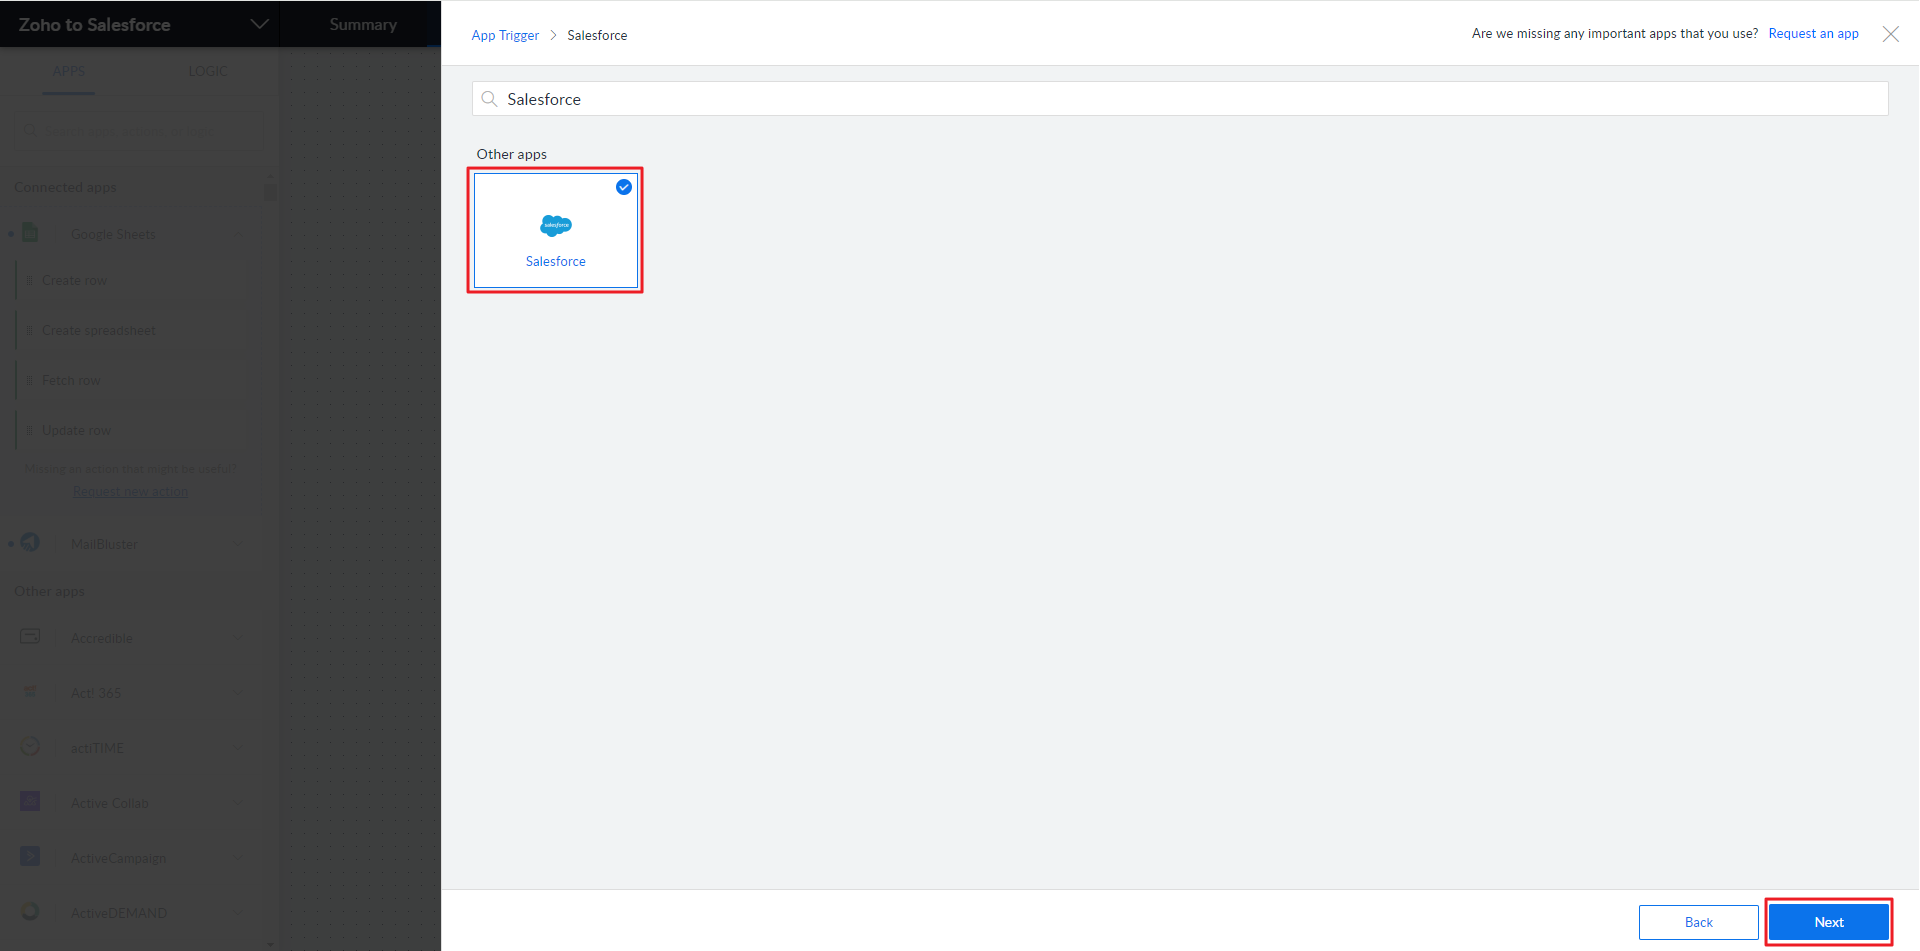
On the next screen, type ‘Salesforce’ in the search bar and select Salesforce.
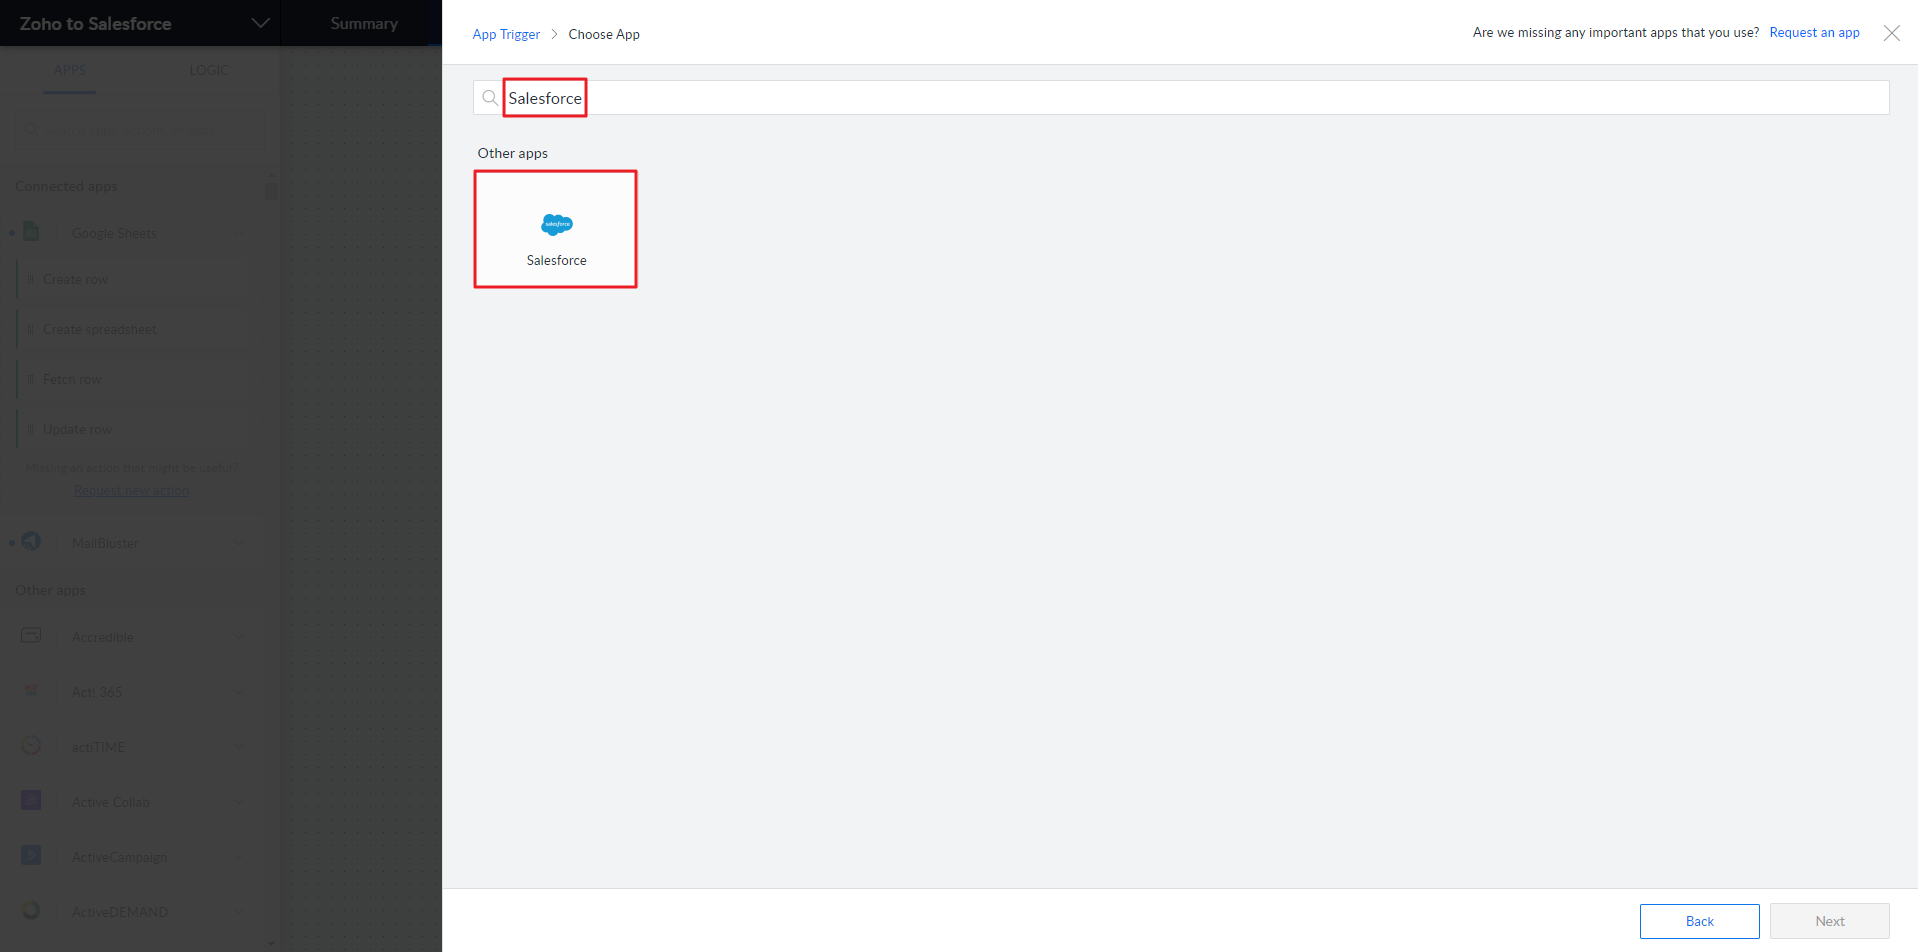
After selecting Salesforce, click the Next button.
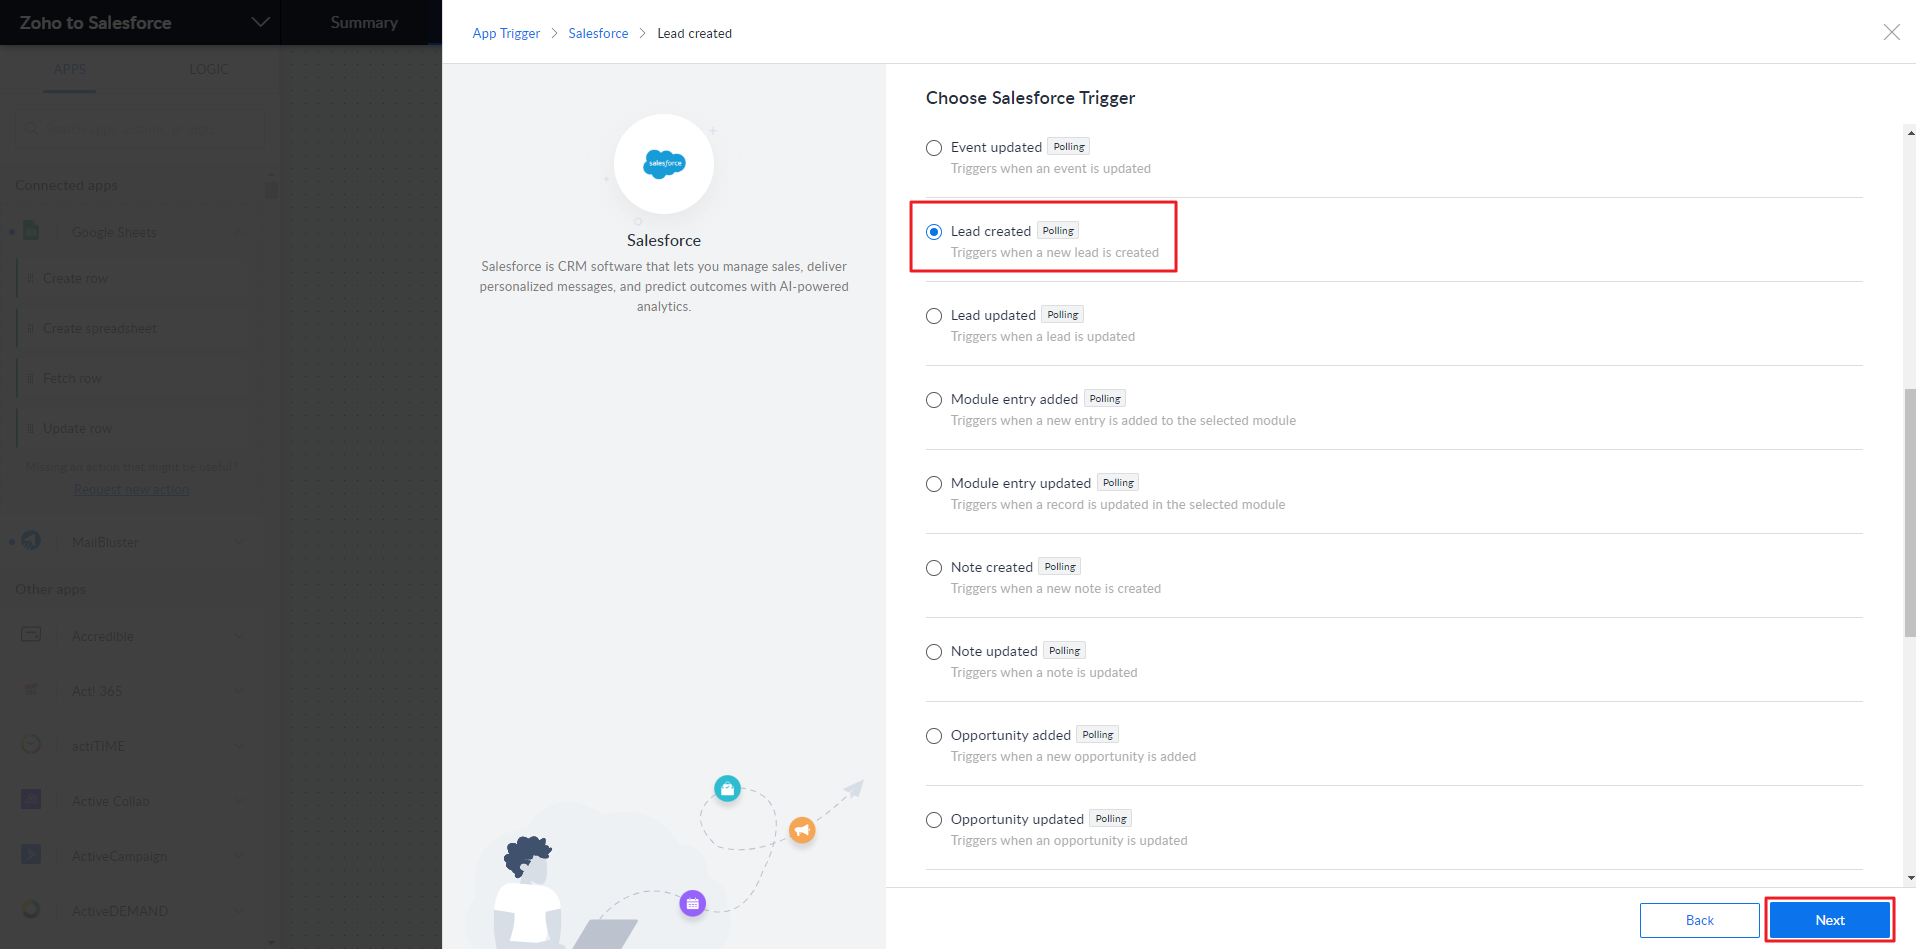
You need to ‘Choose Salesforce Trigger‘. Scroll down and select Lead created and and then click Next.
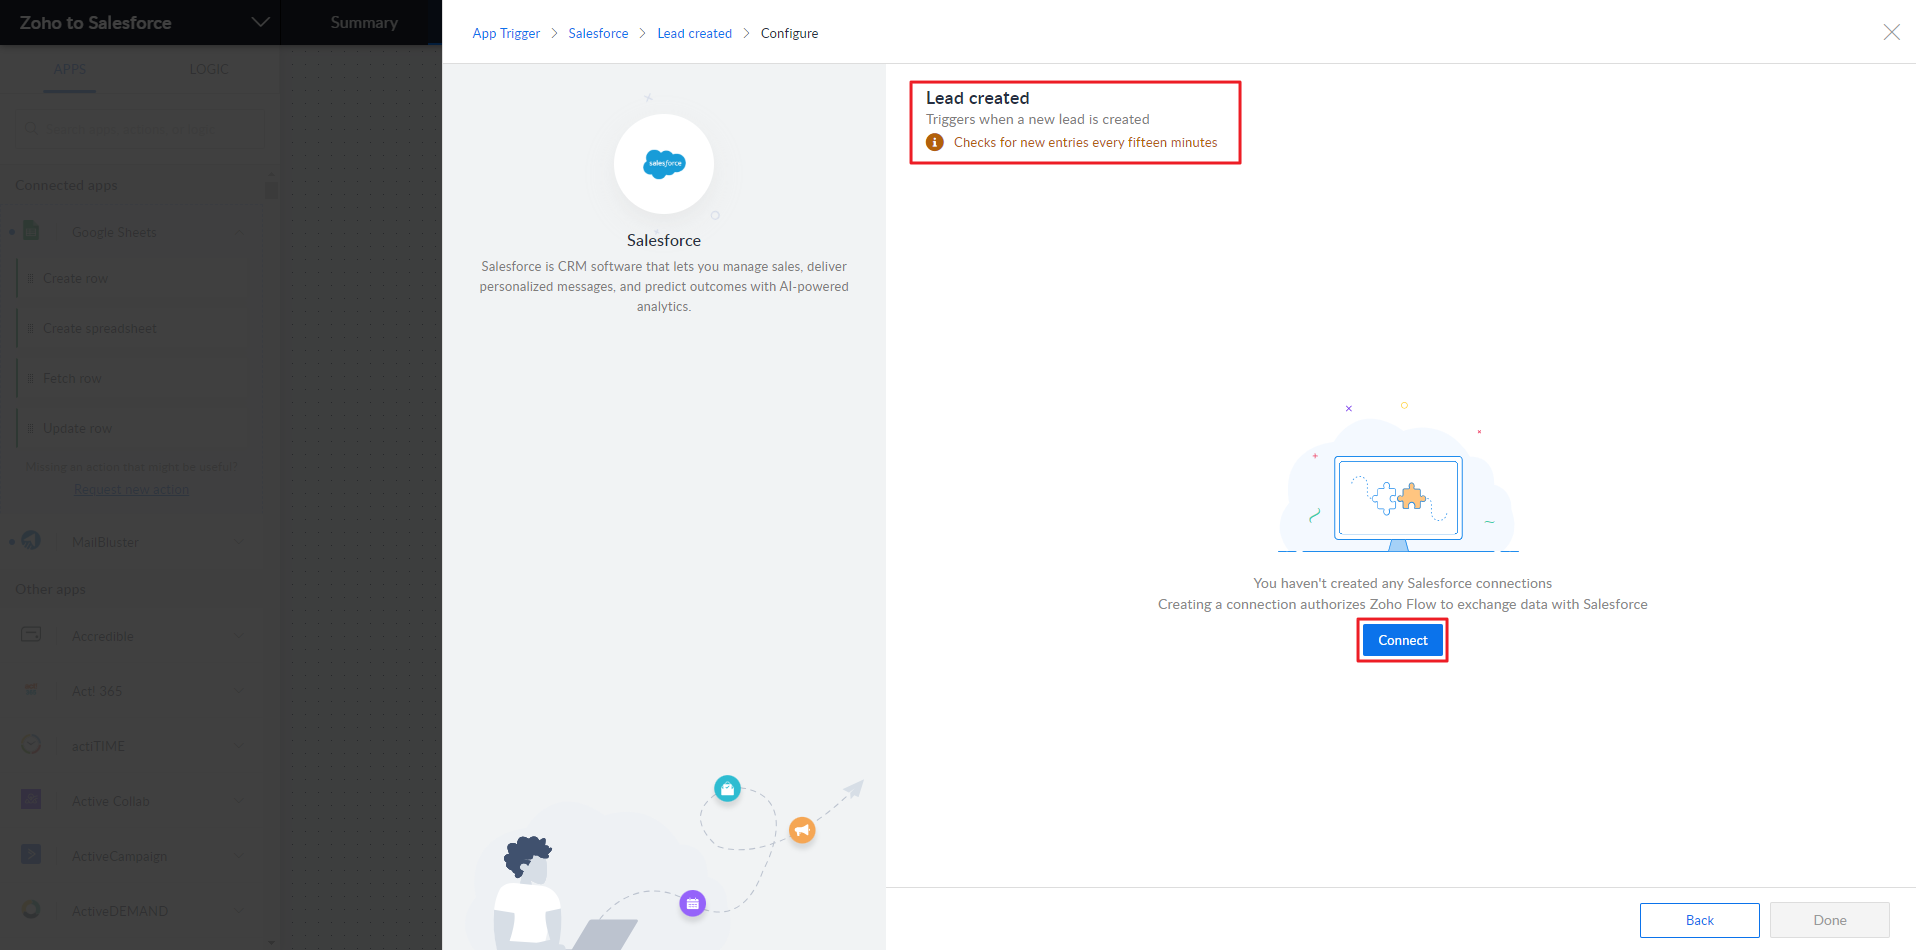
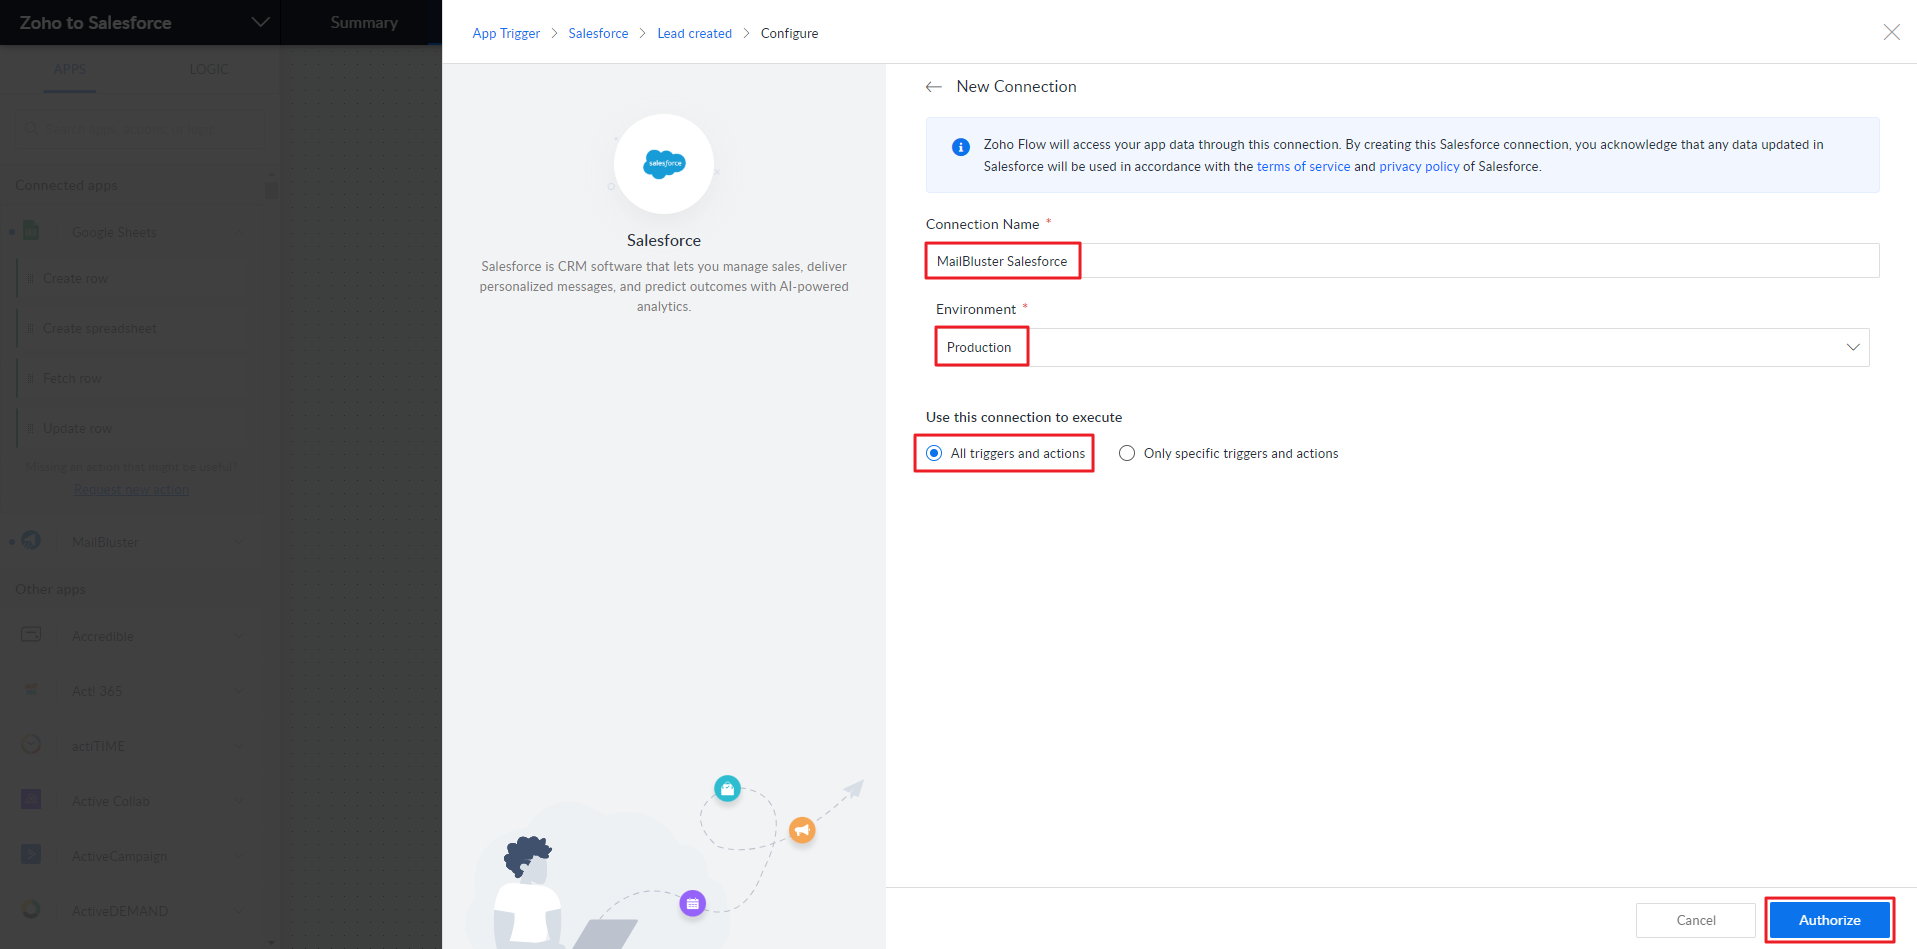
On the next screen, you need to ‘Configure‘ the Salesforce connection. You will notice that the ‘Lead created‘ notification. Click Connect button.
Enter the Connection Name, select Production under the ‘Environment‘ tab. Then select All triggers and actions under ‘Use this connection to execute‘. Click Authorize button.
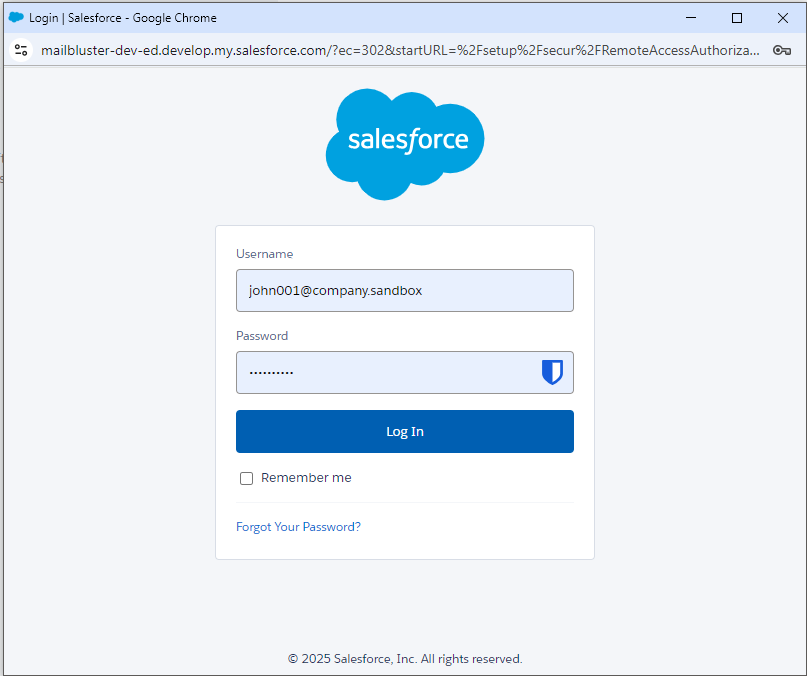
Now you will be asked to sign in to Salesforce Developer Website. Be sure to use your appropriate username, as it will be used to sign in to Salesforce.
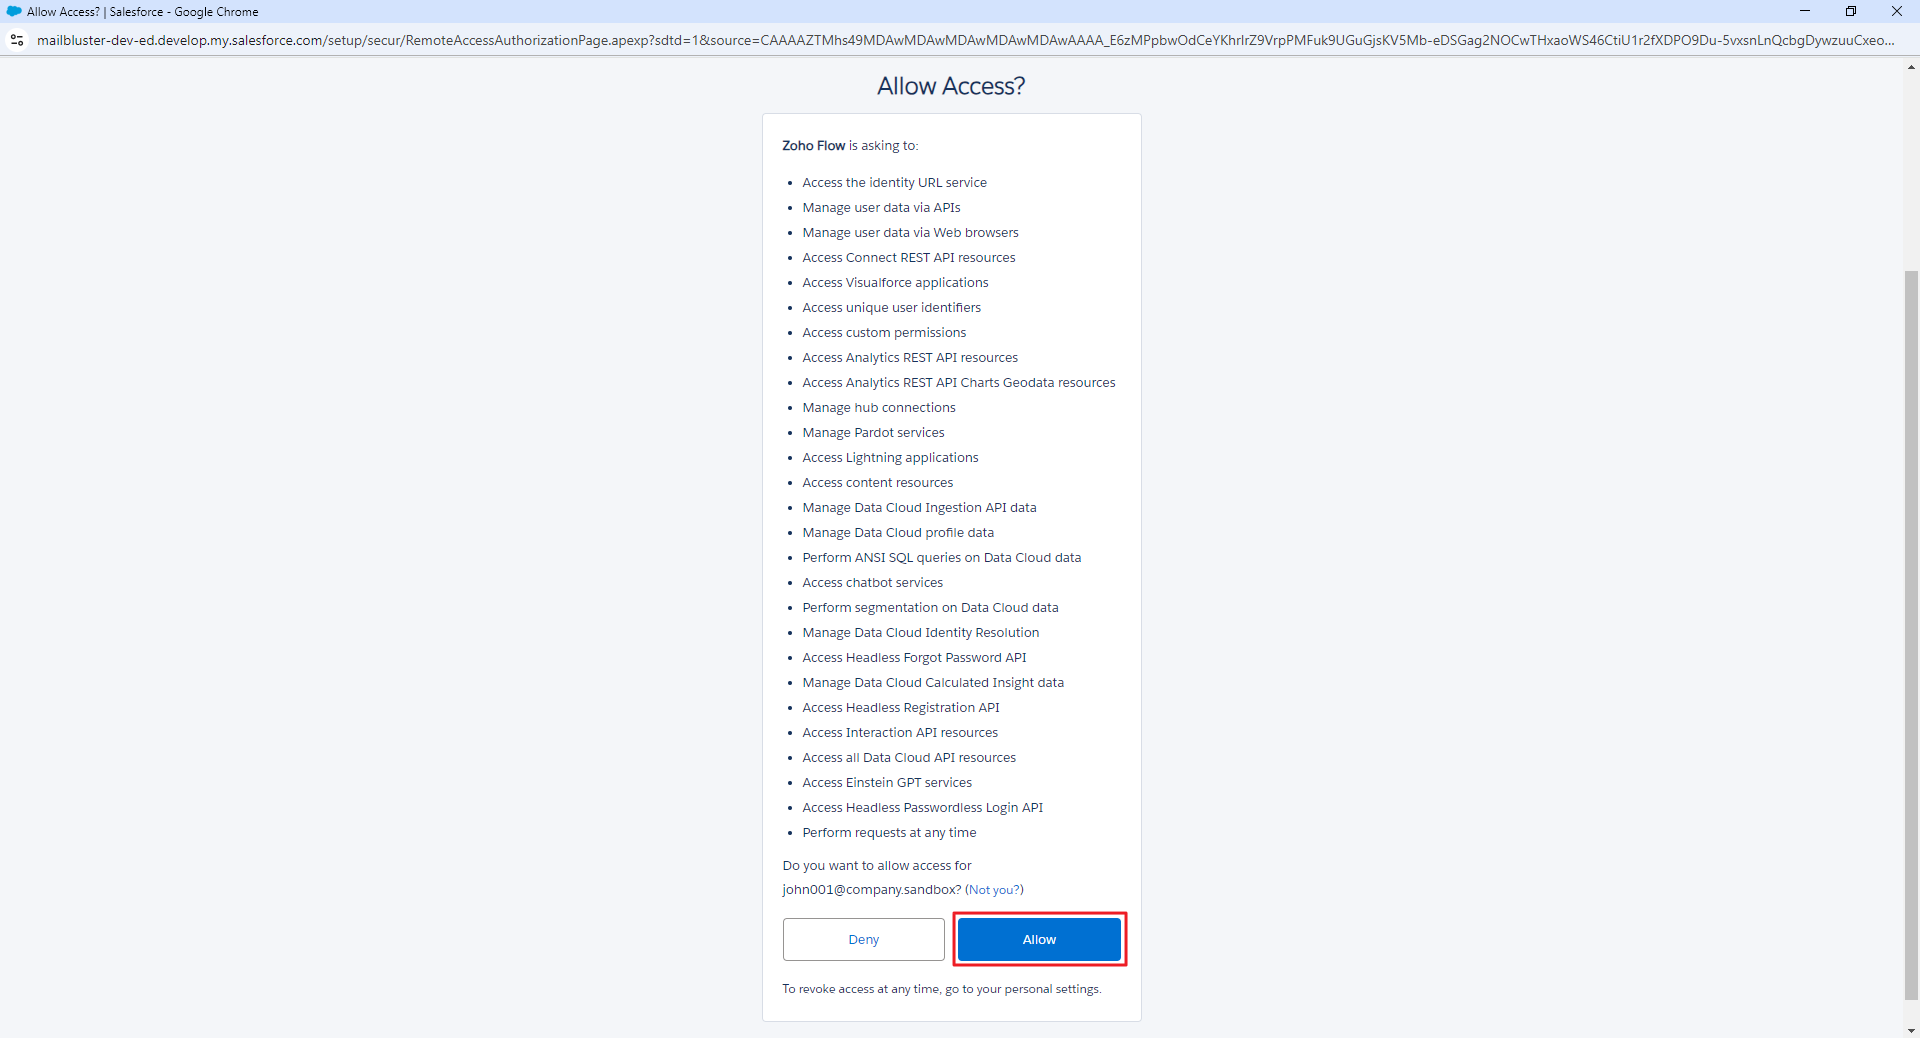
Click Allow button for Zoho Flow as it is asking to for access.
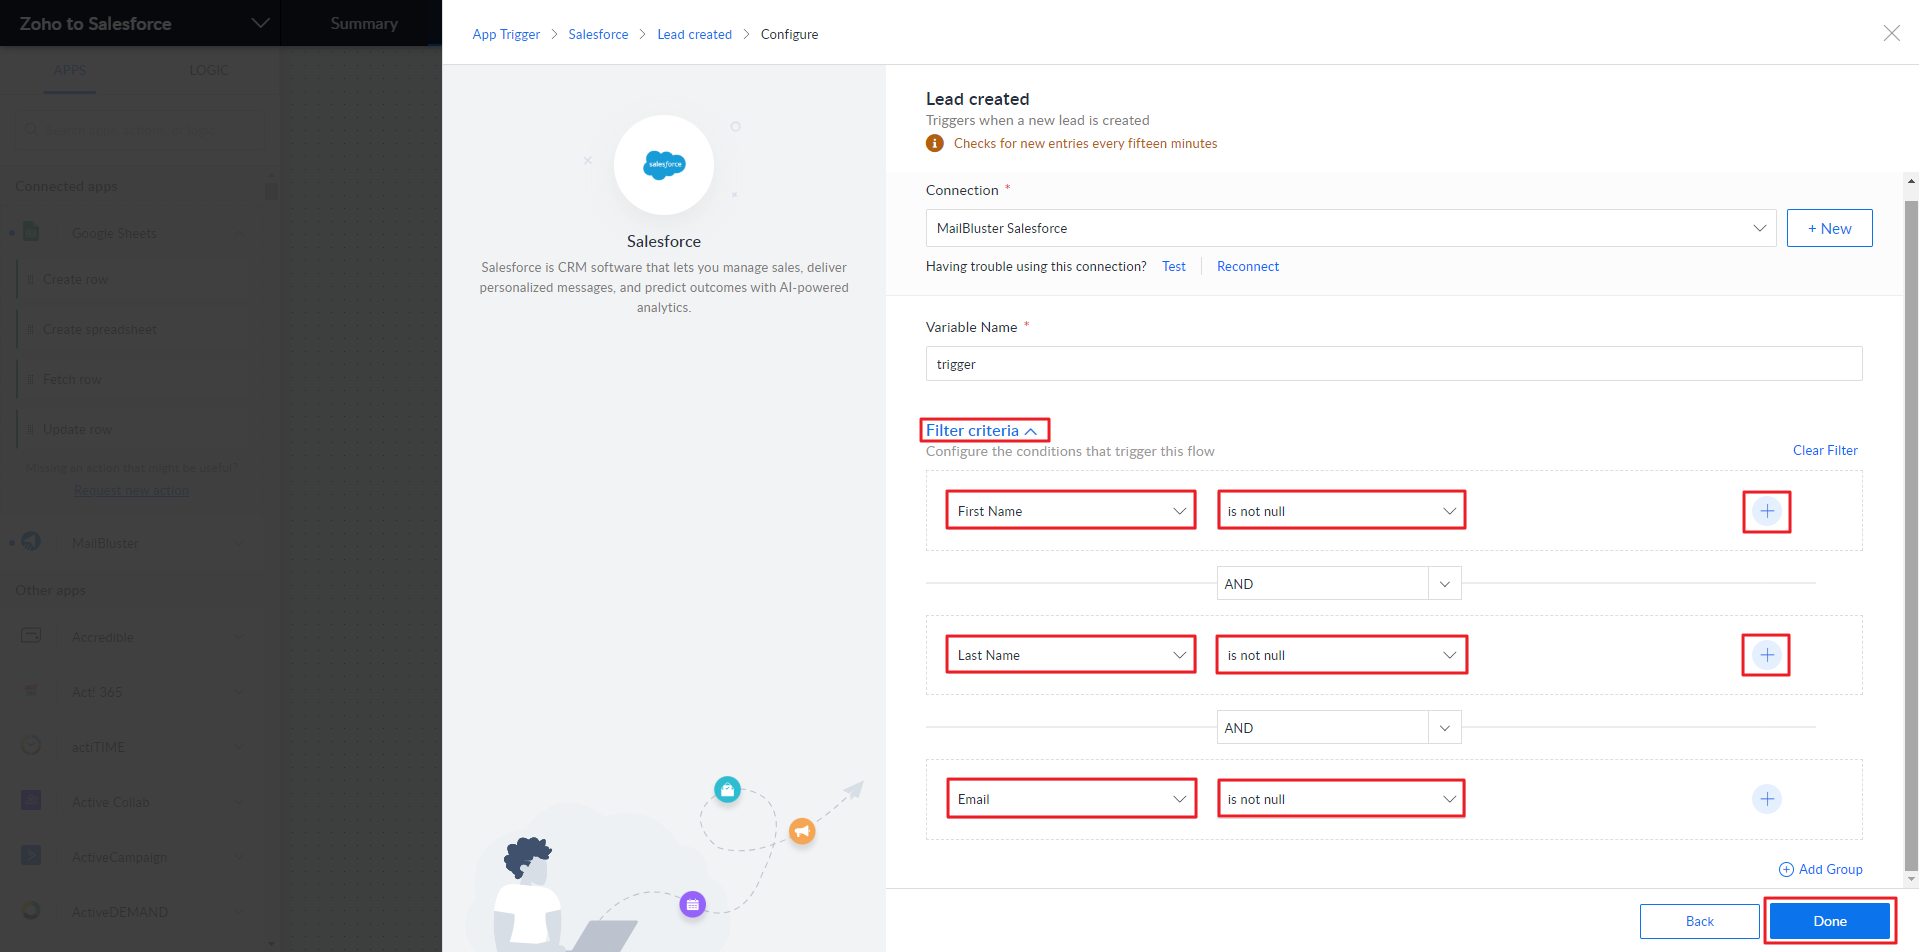
Now, you need to set the Filter criteria by clicking on it and Configure the conditions that trigger the flow. Set ‘First Name’, ‘Last Name’ and ‘Email’. Also, select ‘is not null’ in the next field in every condition. Then click Done.
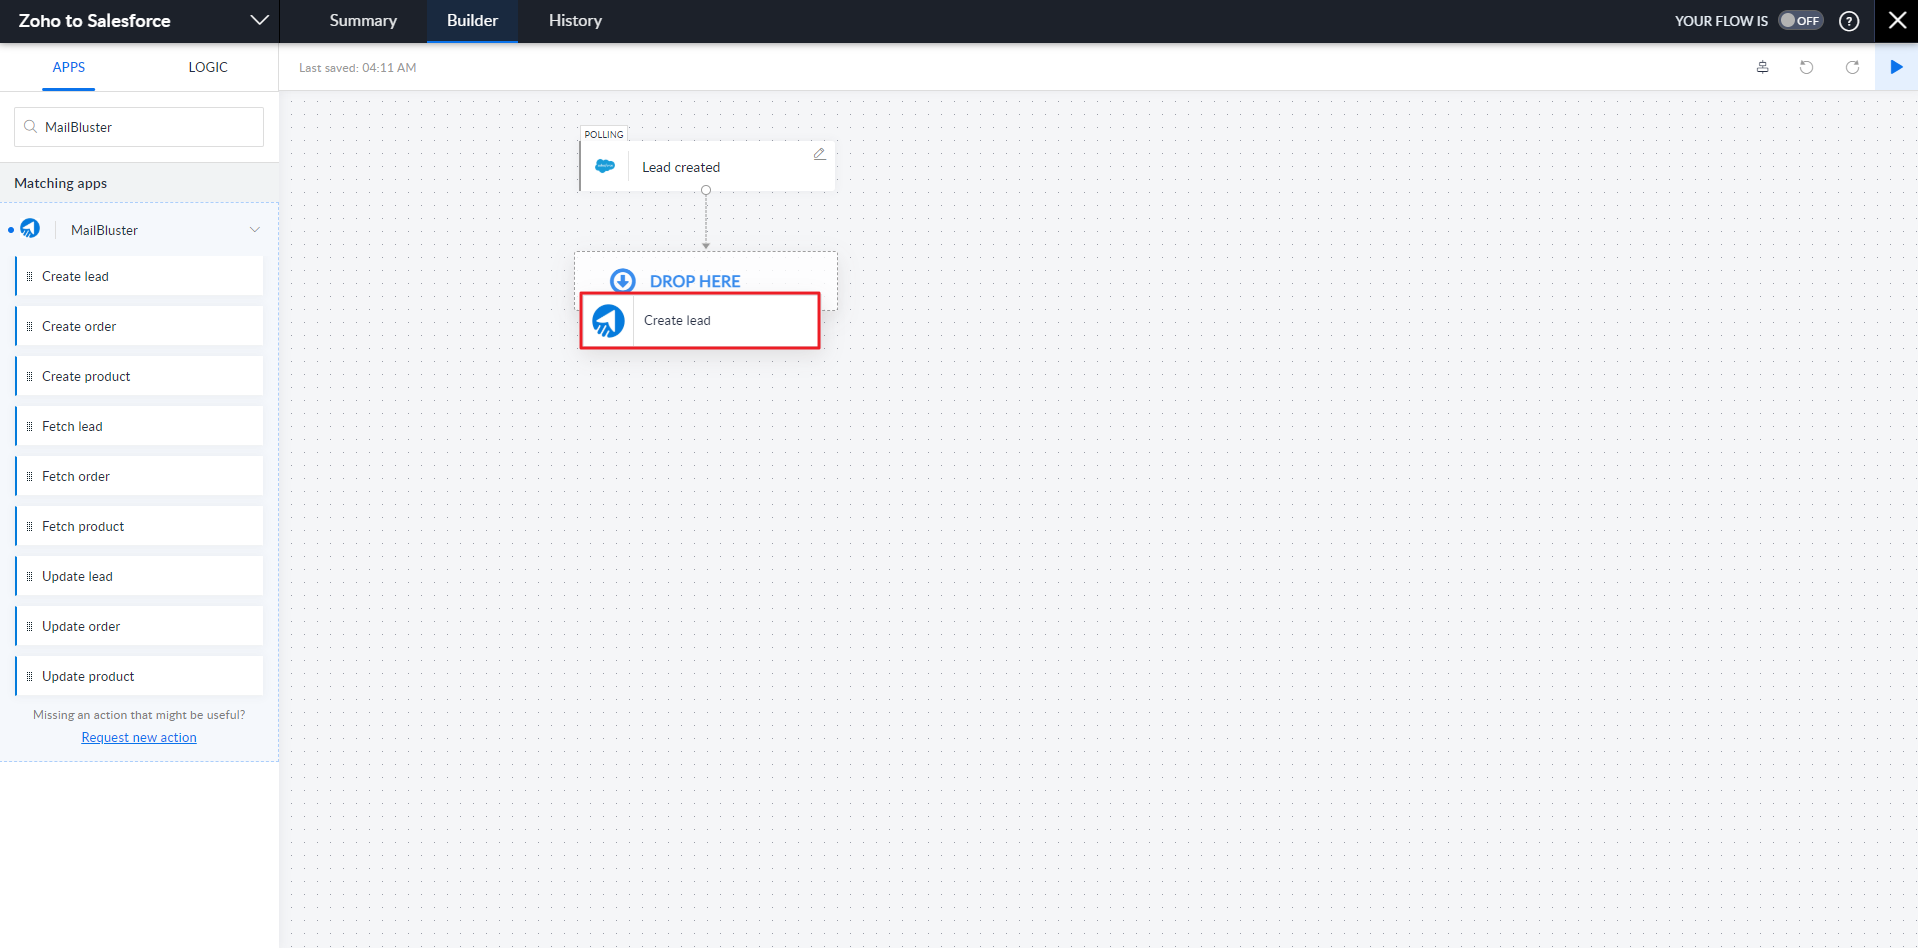
Now, Salesforce’s Lead created is created in the flow diagram. In the search field, type MailBluster and drag & drop the Create Lead block of MailBluster under Lead created.
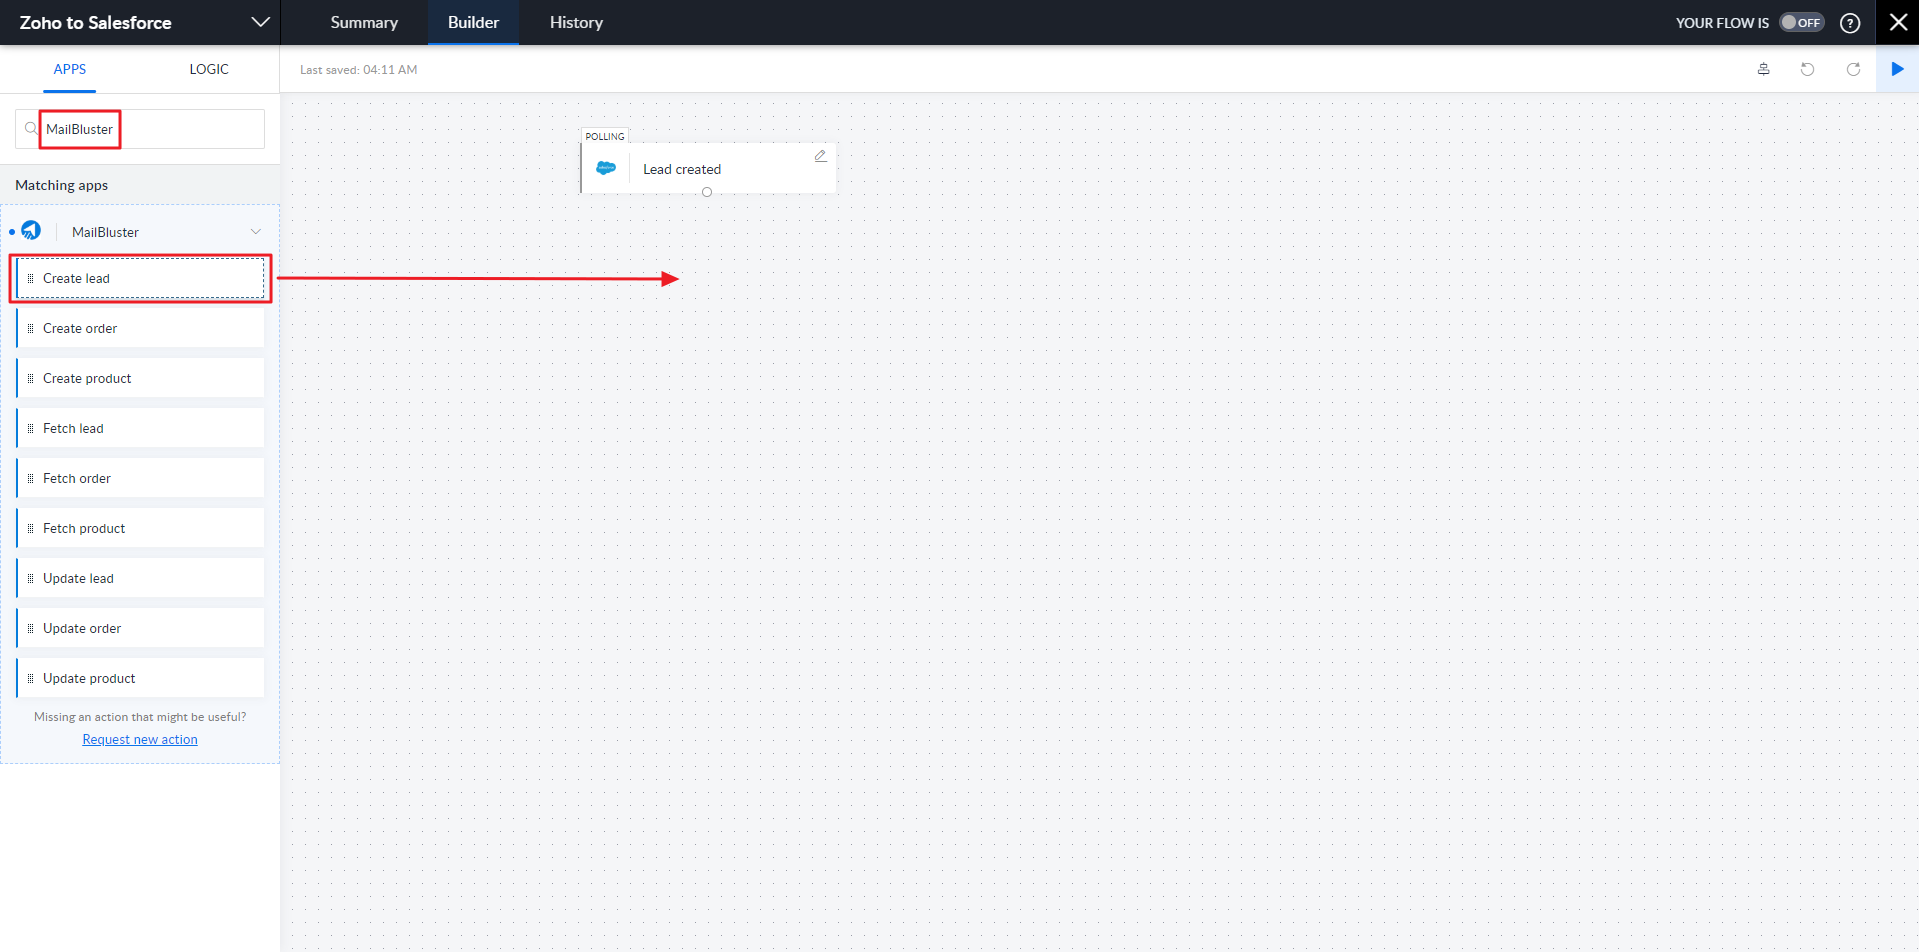
Create Lead has to be dropped in the flow chart as shown below.
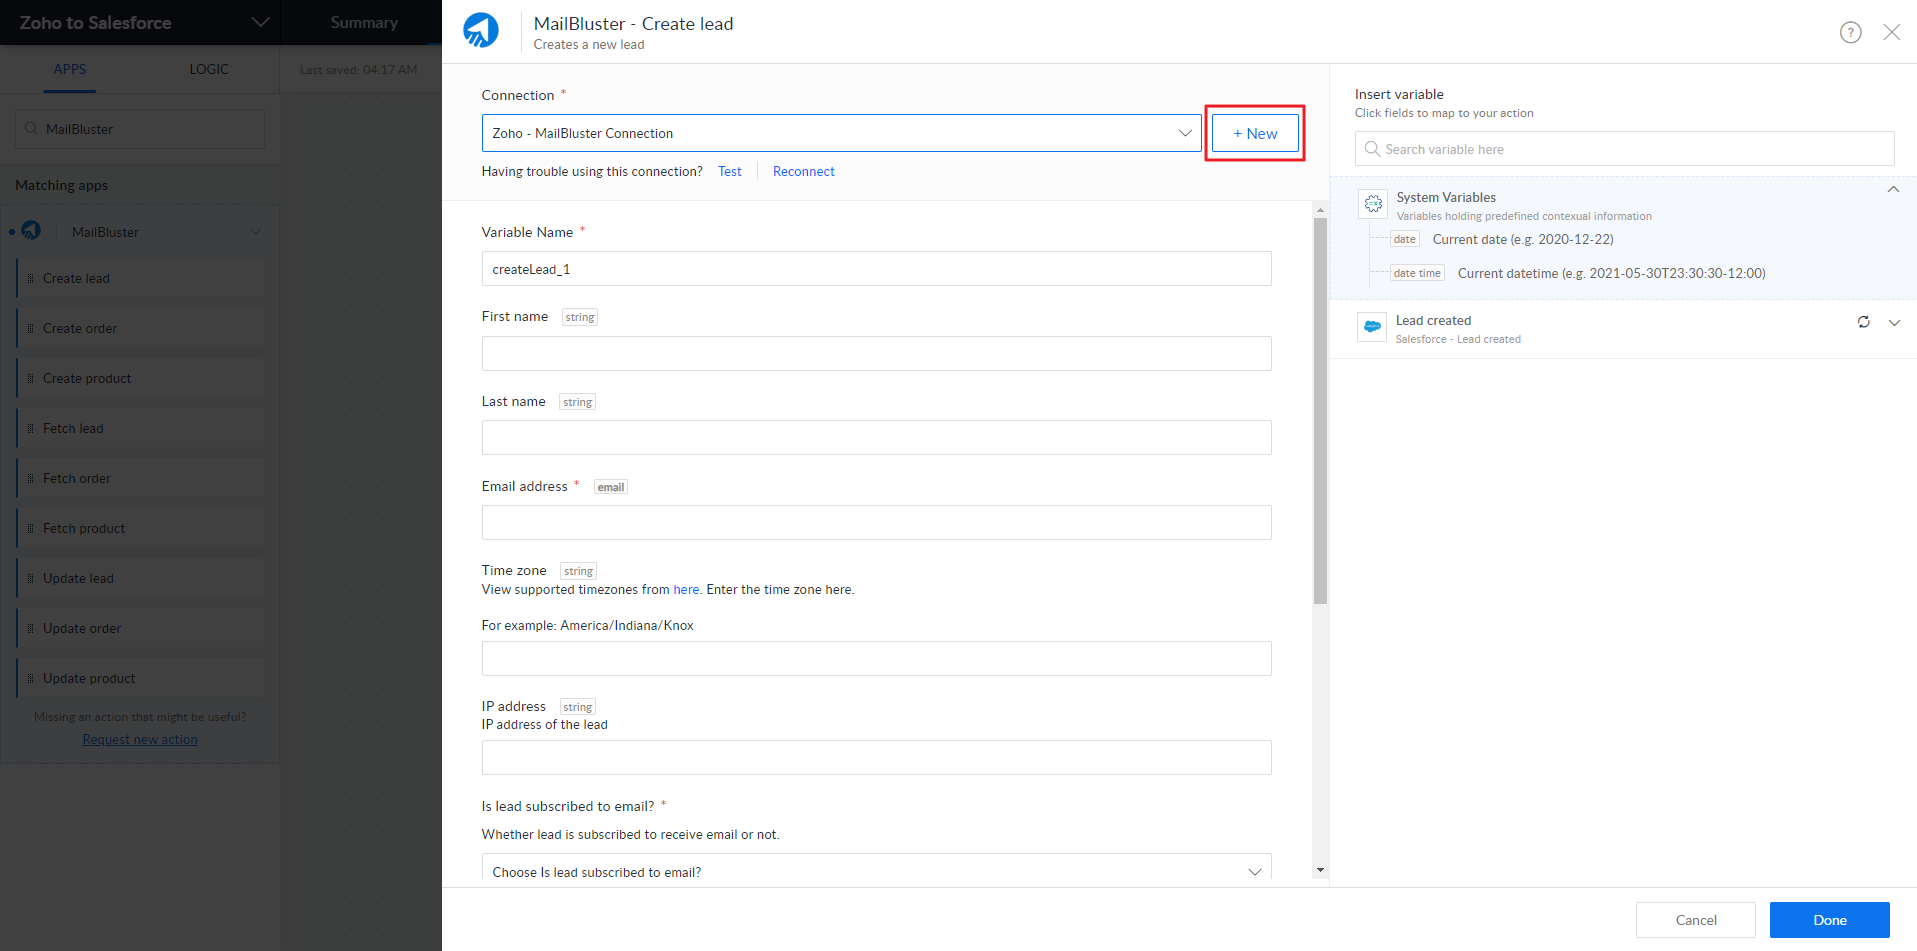
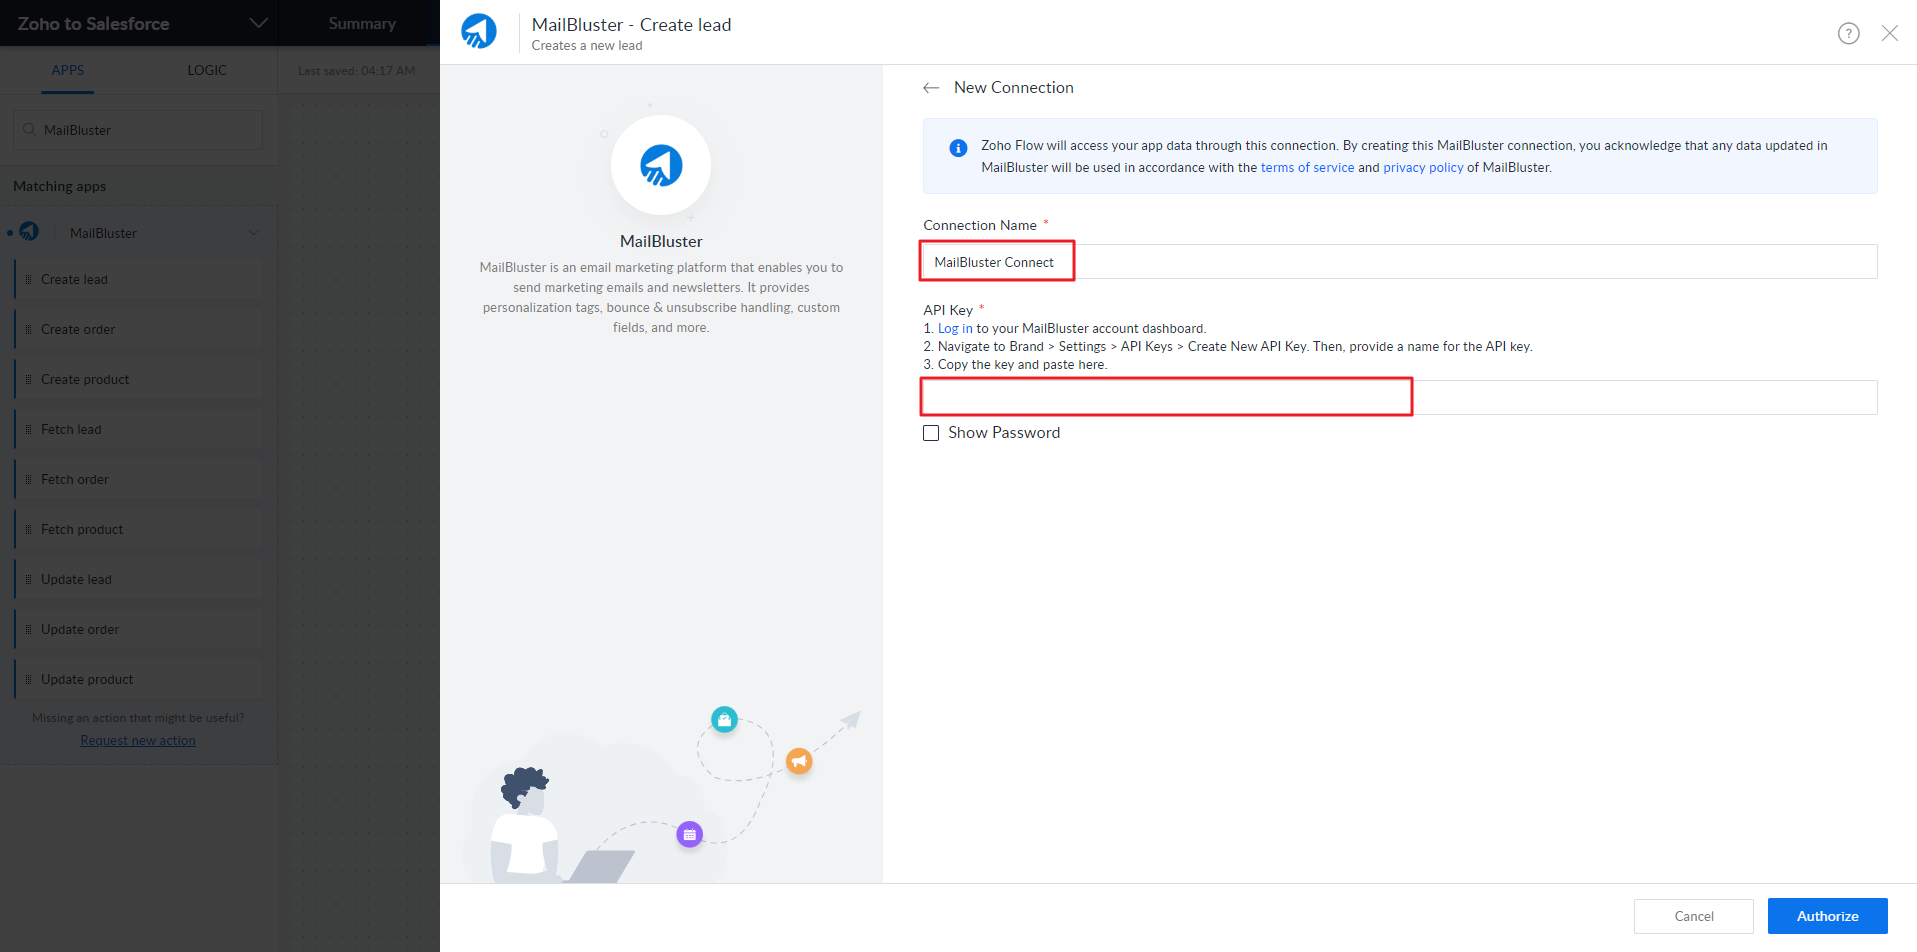
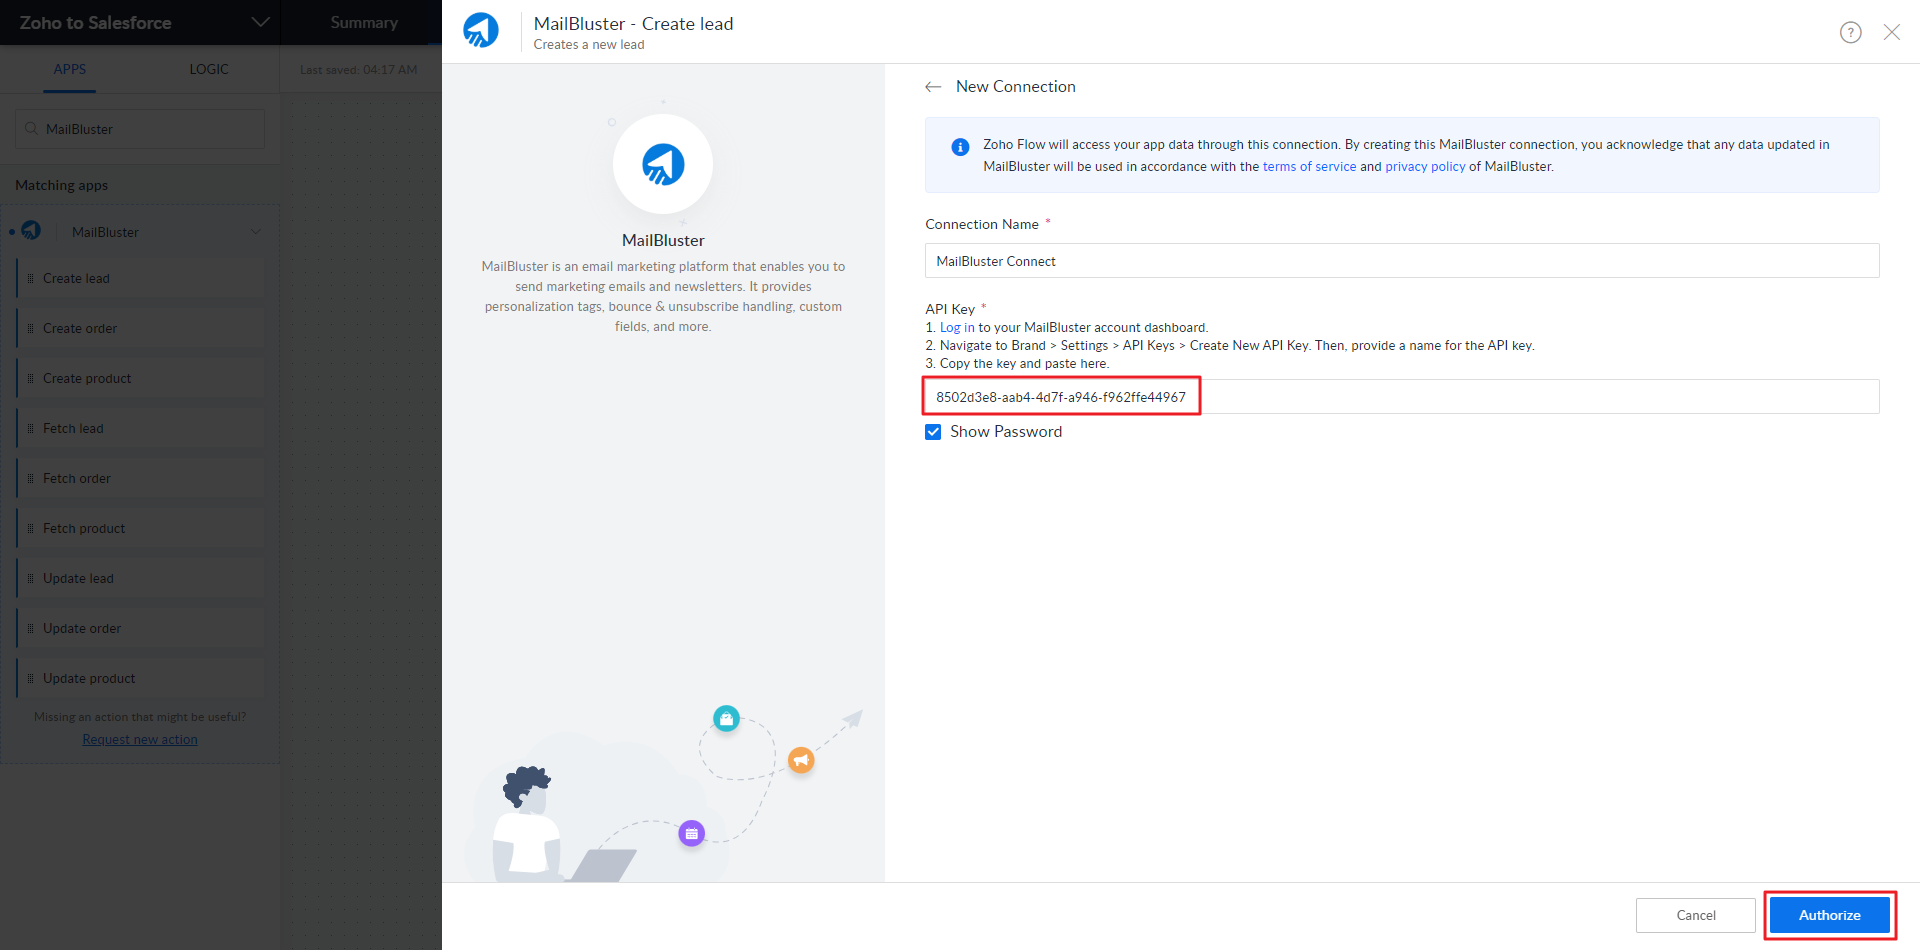
A new window will now appear. Click +New to connect MailBluster with the API key.
Enter Connection Name and copy the API key value from MailBluster.
Sign in to MailBluster and go to your MailBluster Brand > Settings > API Keys. Click +Create new button.
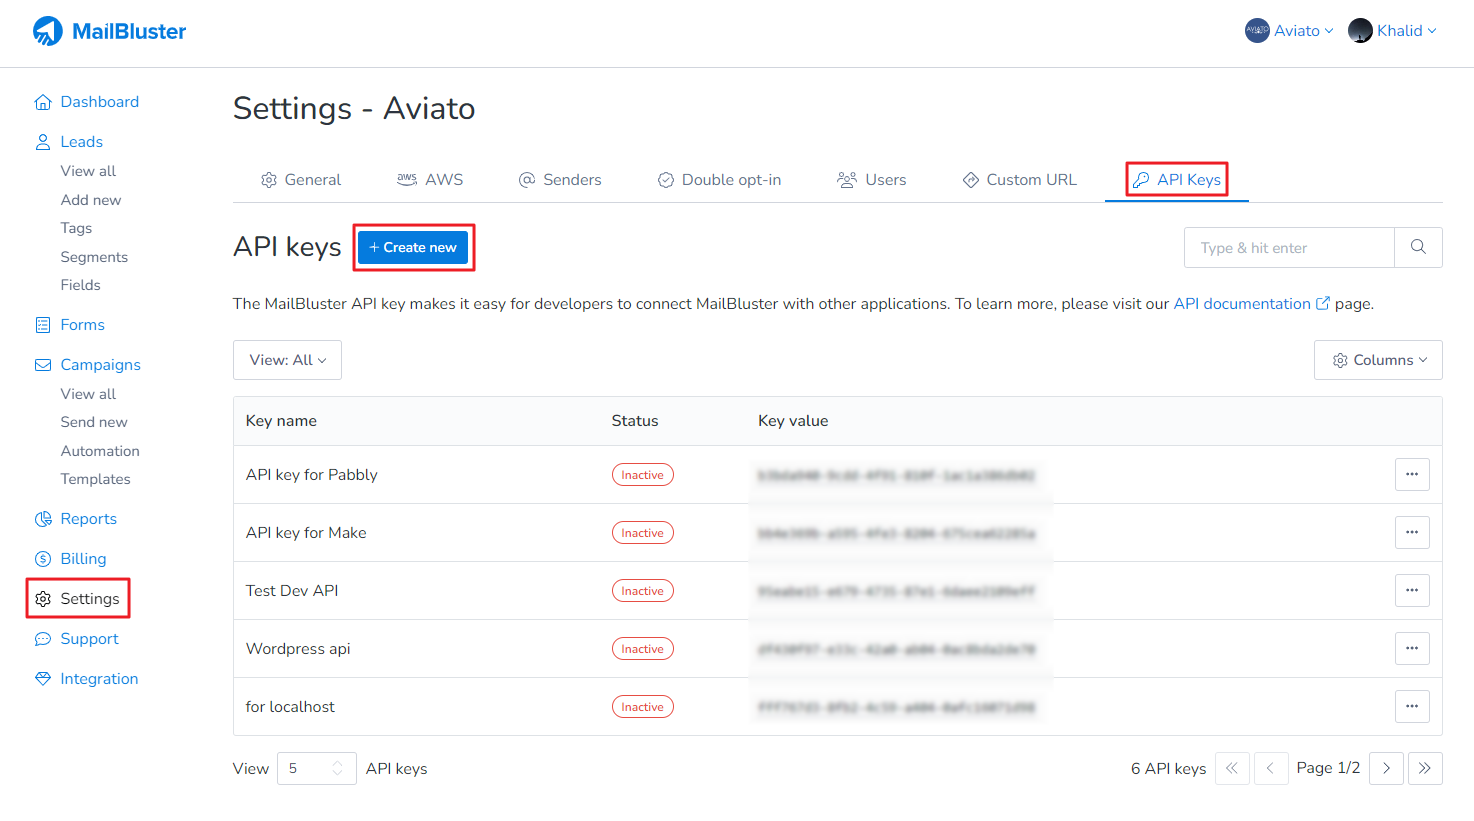
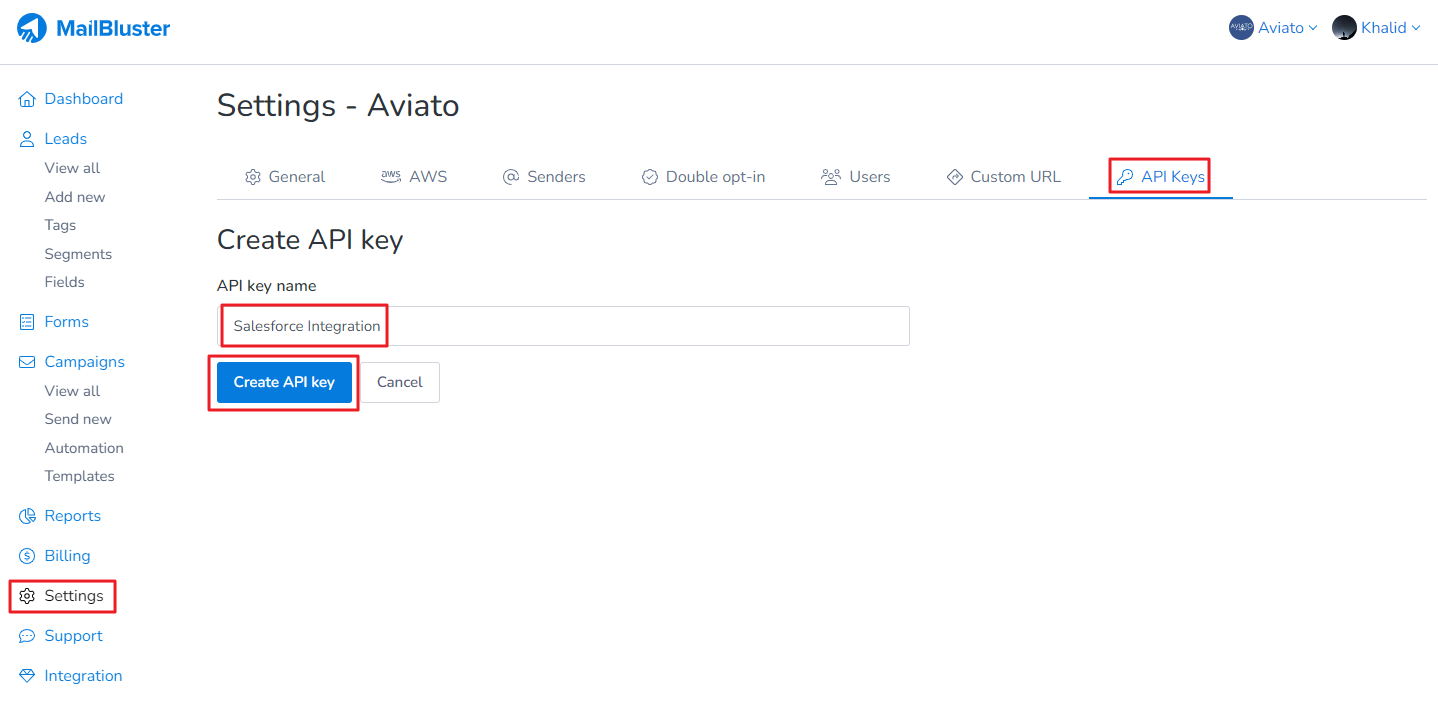
Type the API key name and then click Create API key button.
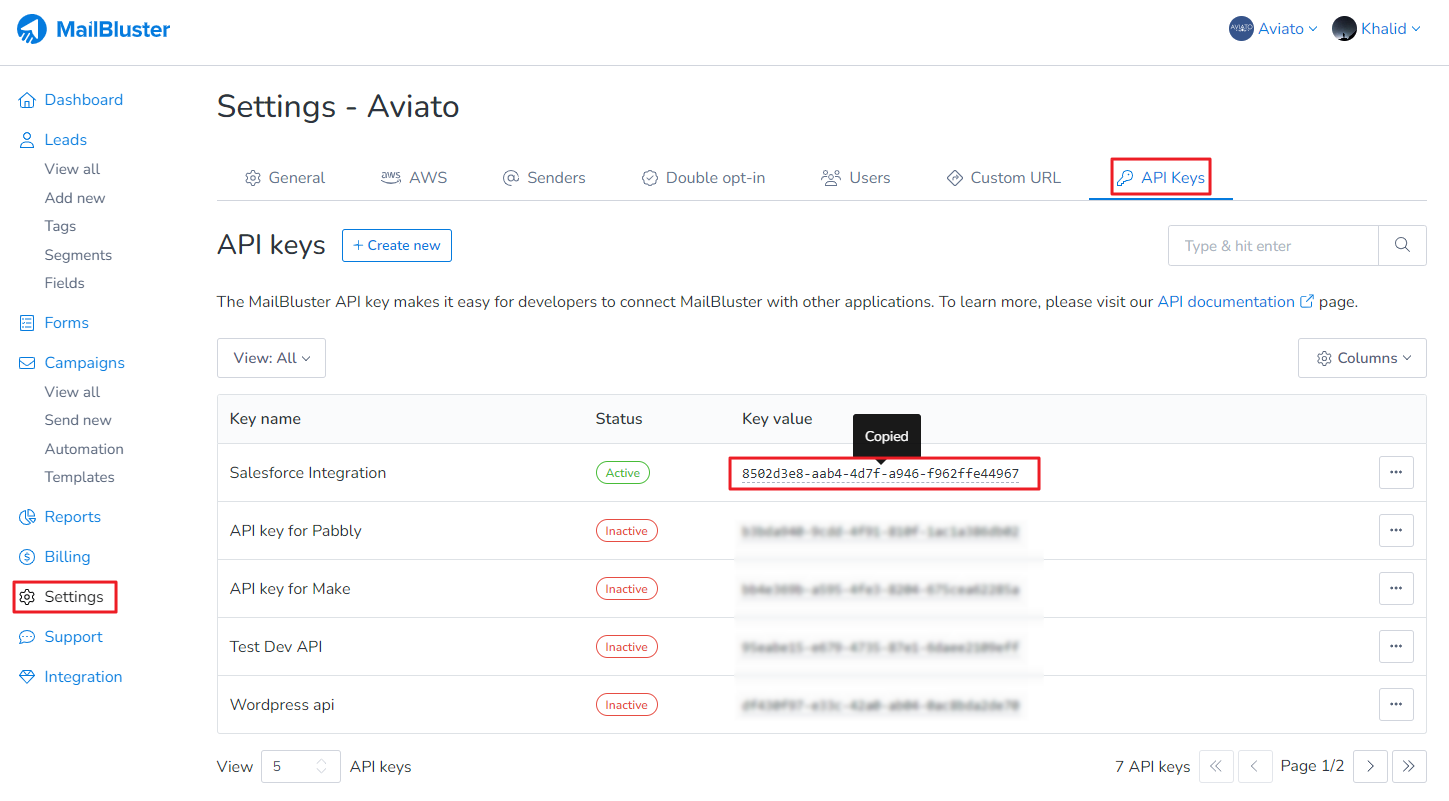
Copy the API key value as shown below.
Go to Zoho Flow and paste it there then click Authorize.
In this step, enter ‘String‘ in the Connection field. Edit the First Name field and click on ‘First Name‘ under Insert Variables. Repeat this action for the Last Name and Email fields.
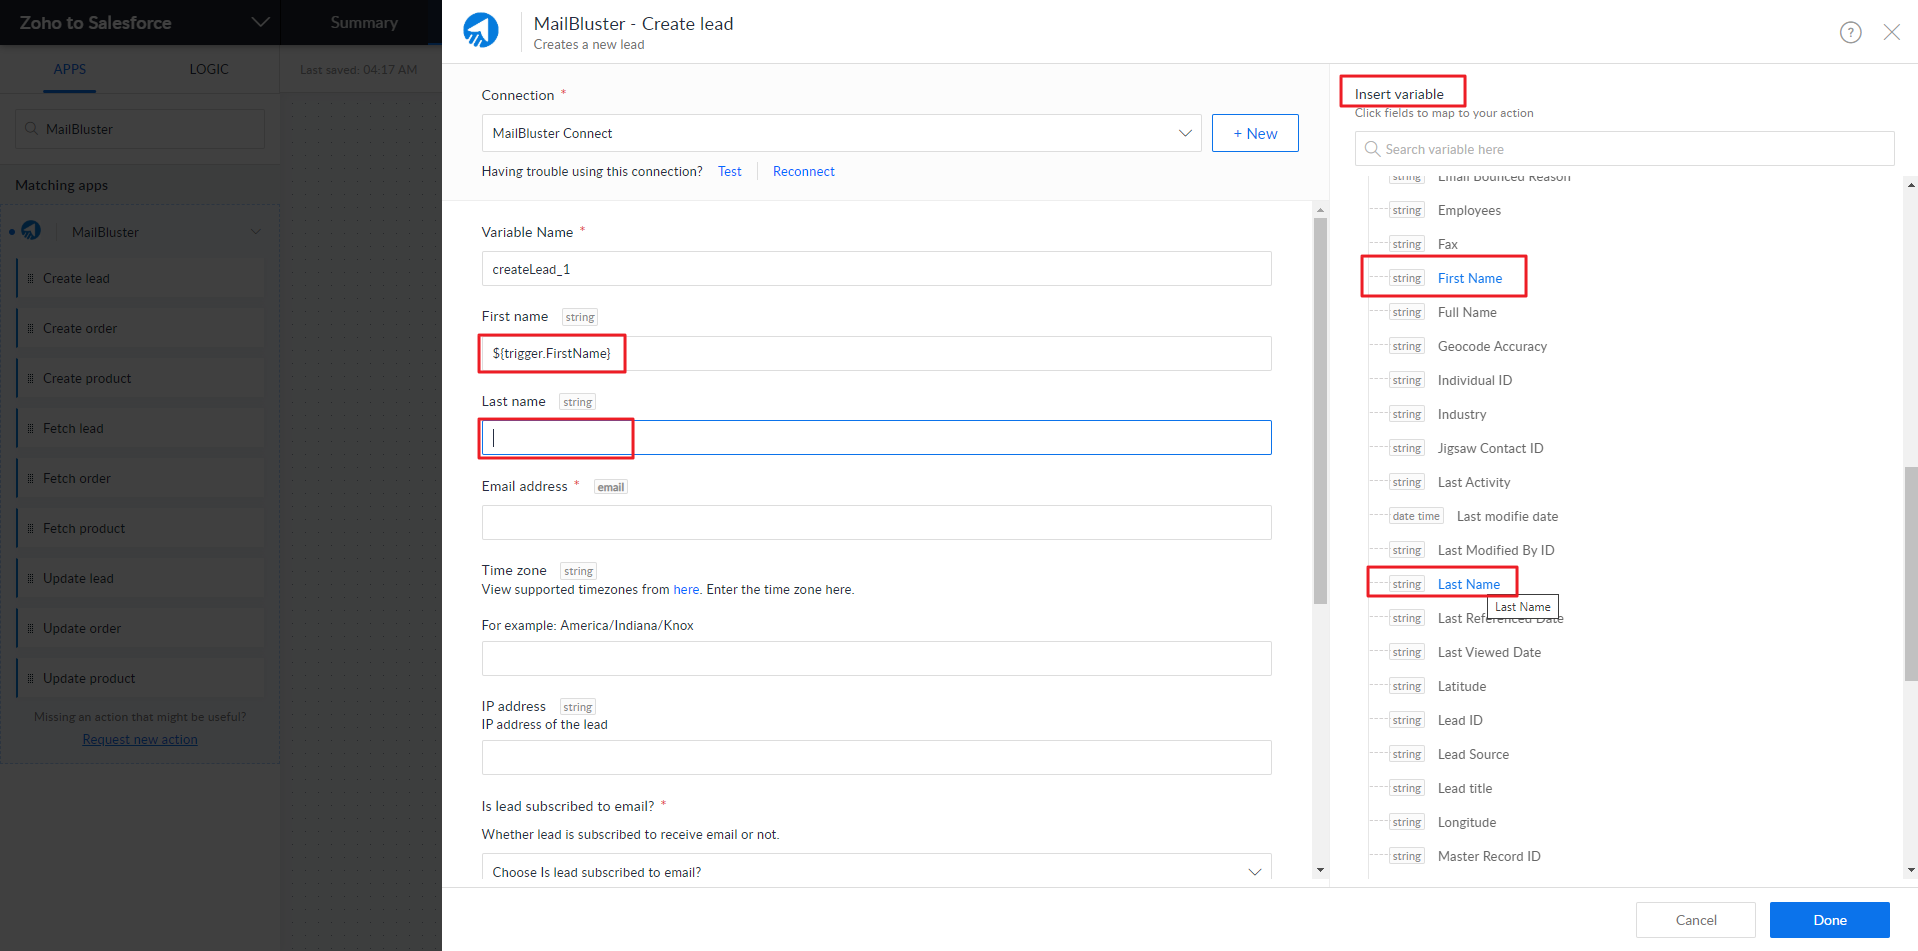
Scroll down to the ‘Whether lead is subscribed to receive email or not’ field and ‘Override existing lead?‘ field are selected as True. Then click Done.

Your workflow has been completed successfully. Now, Switch ON the workflow and you will get a confirmation as shown below.

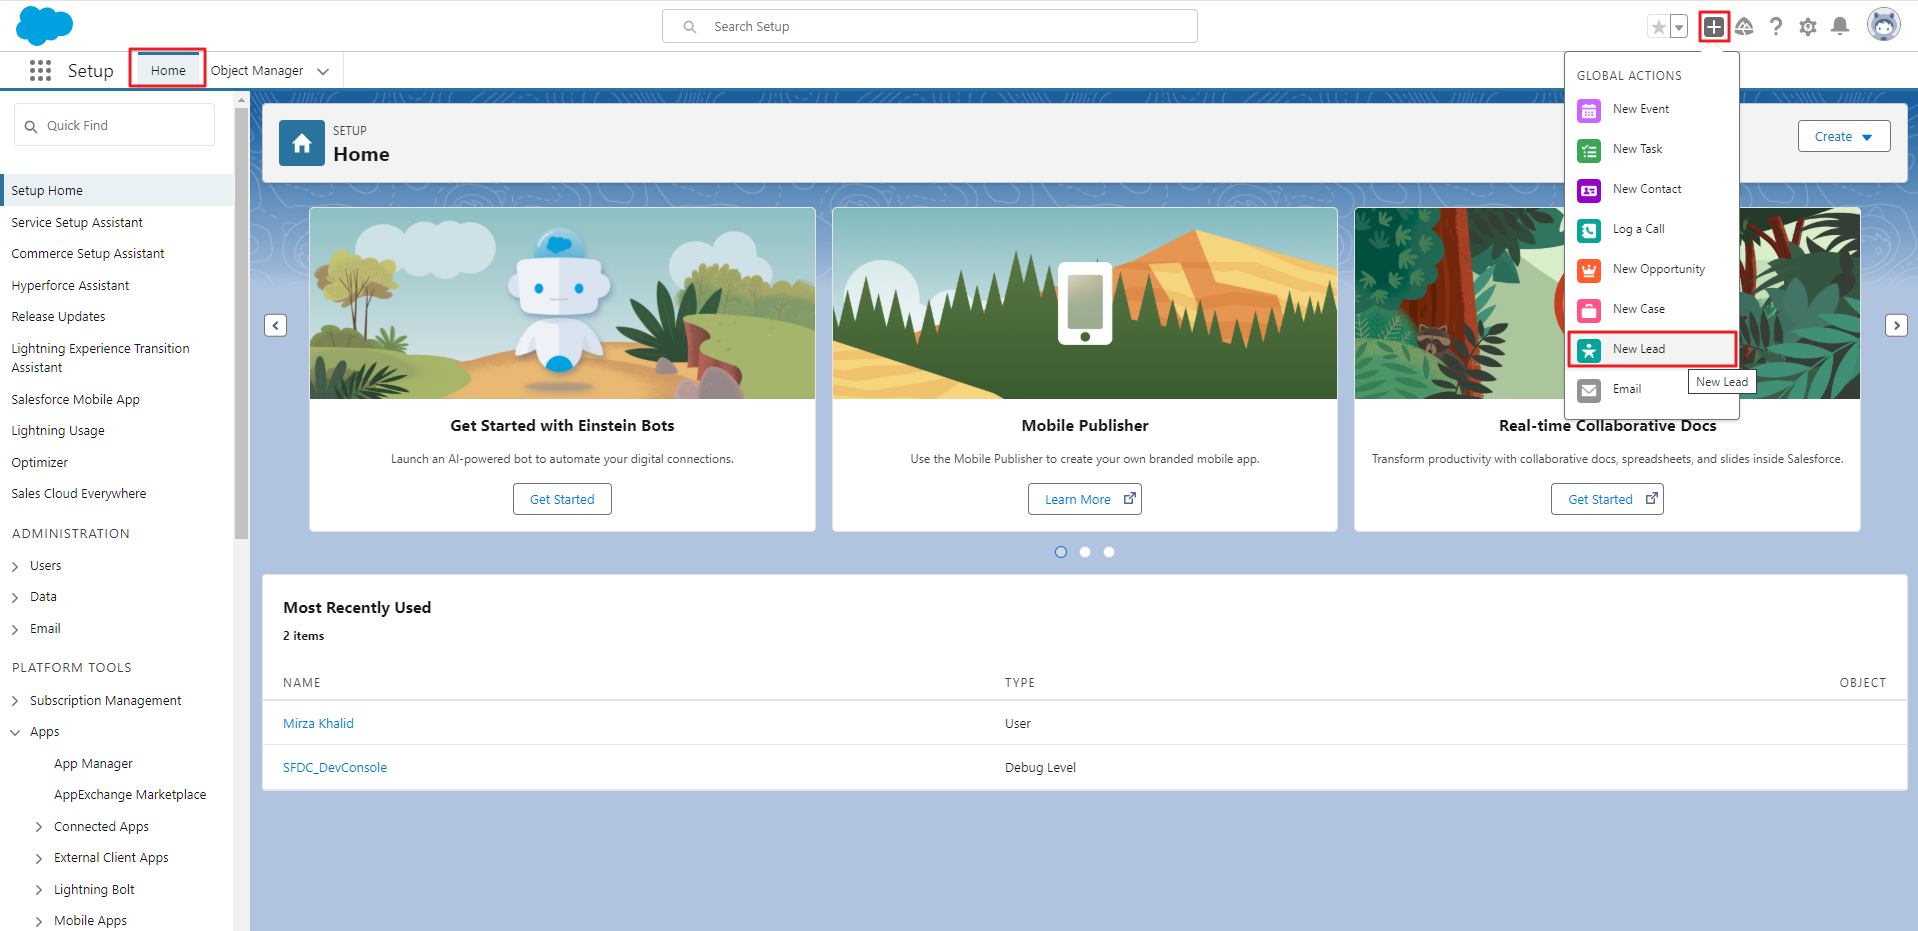
Go to the Salesforce Developer Website and sign in to your account. Click Home and then on the’+‘ icon and then click on New Lead.
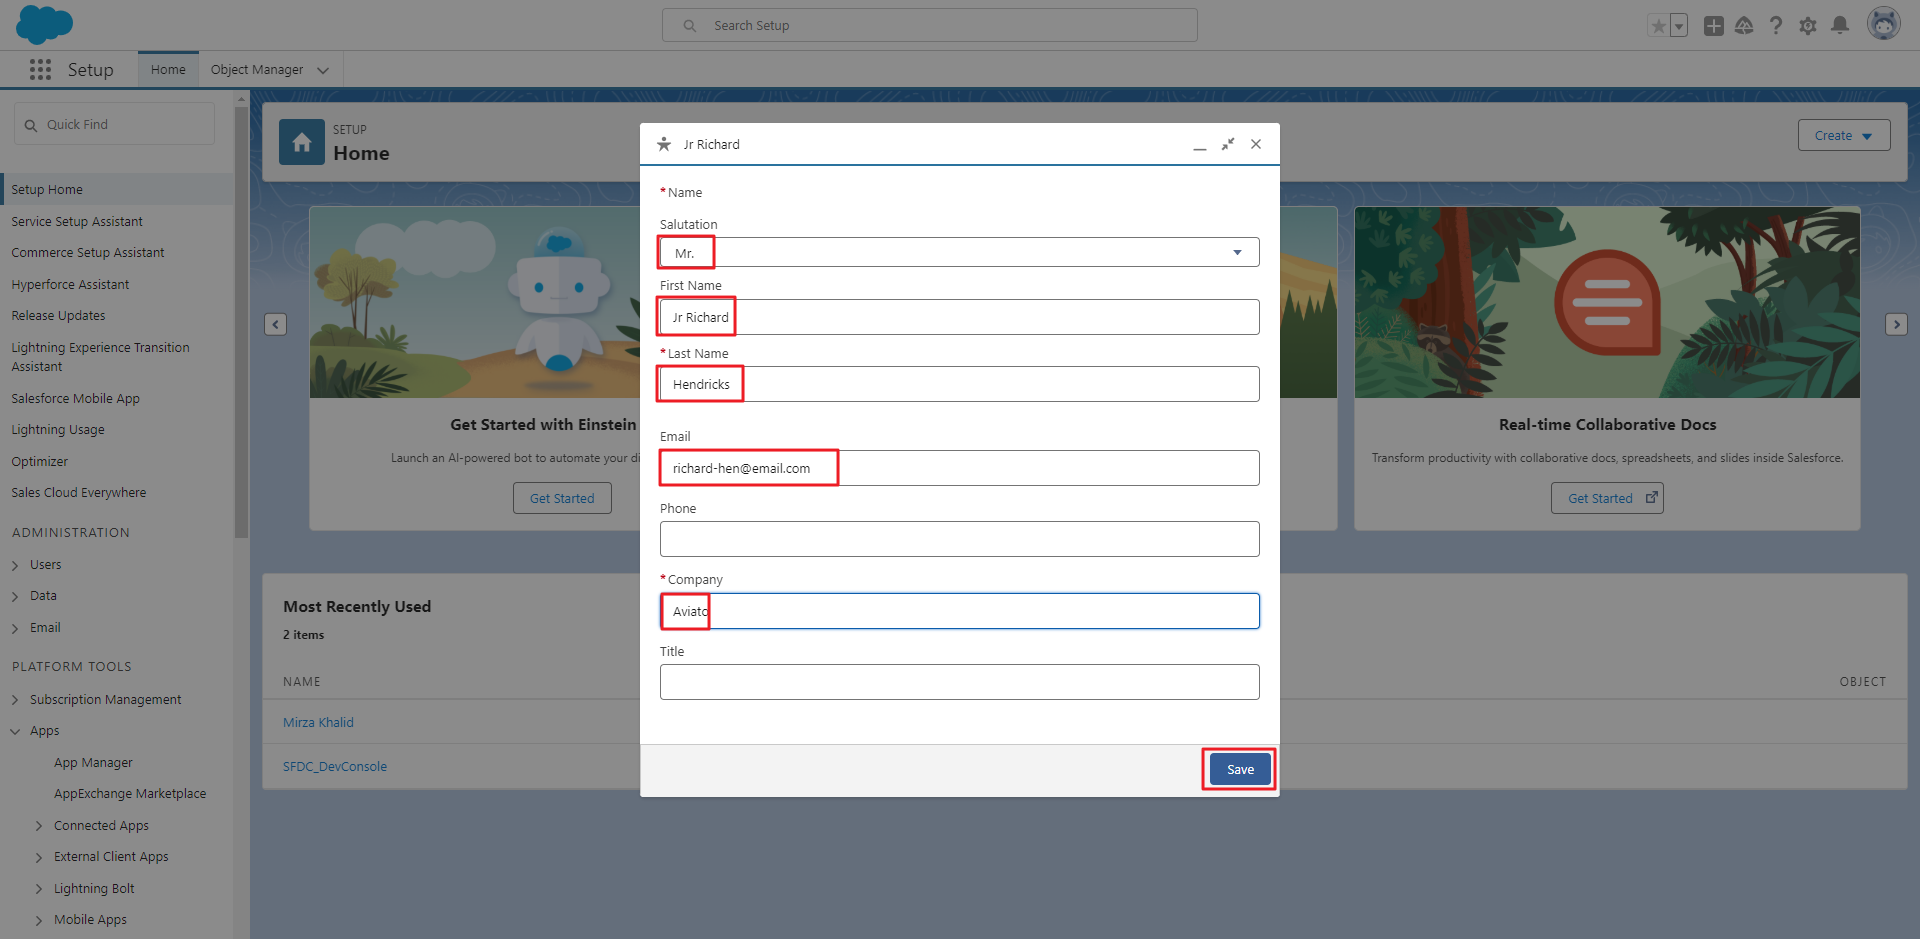
Be sure to fill in the information along with the Company field as shown below. Click Save.
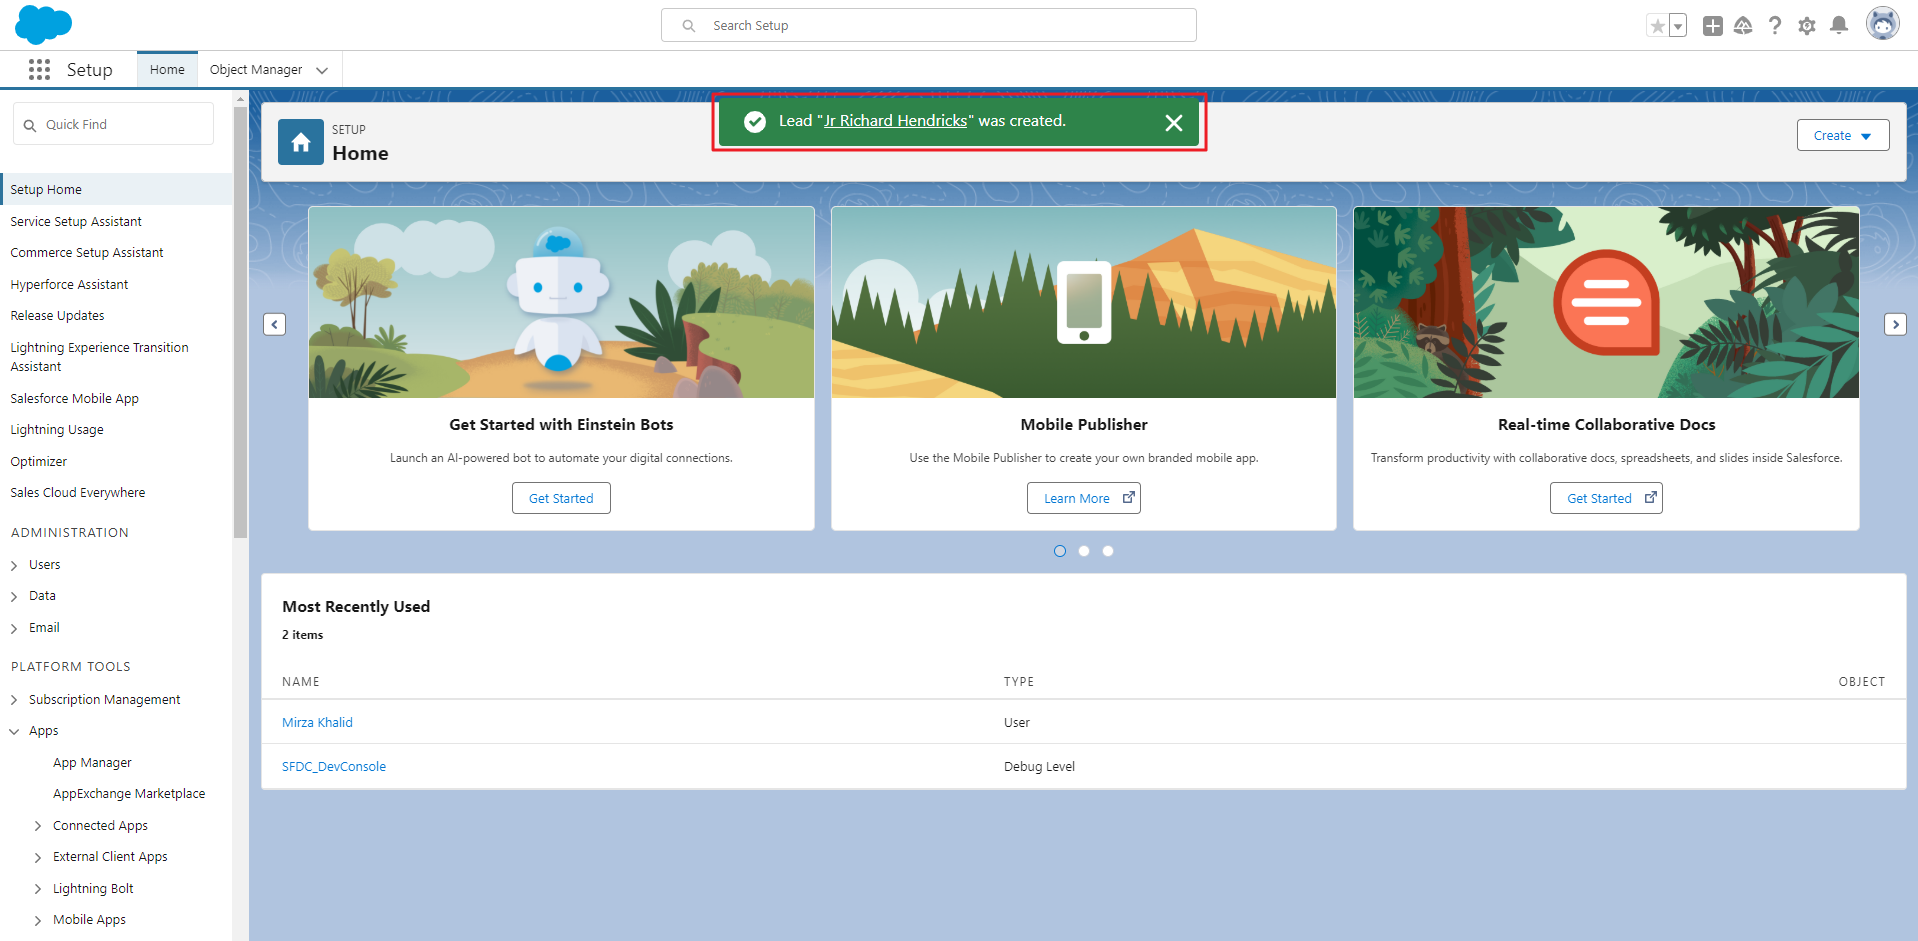
You will see a notification that a New Lead has been created.
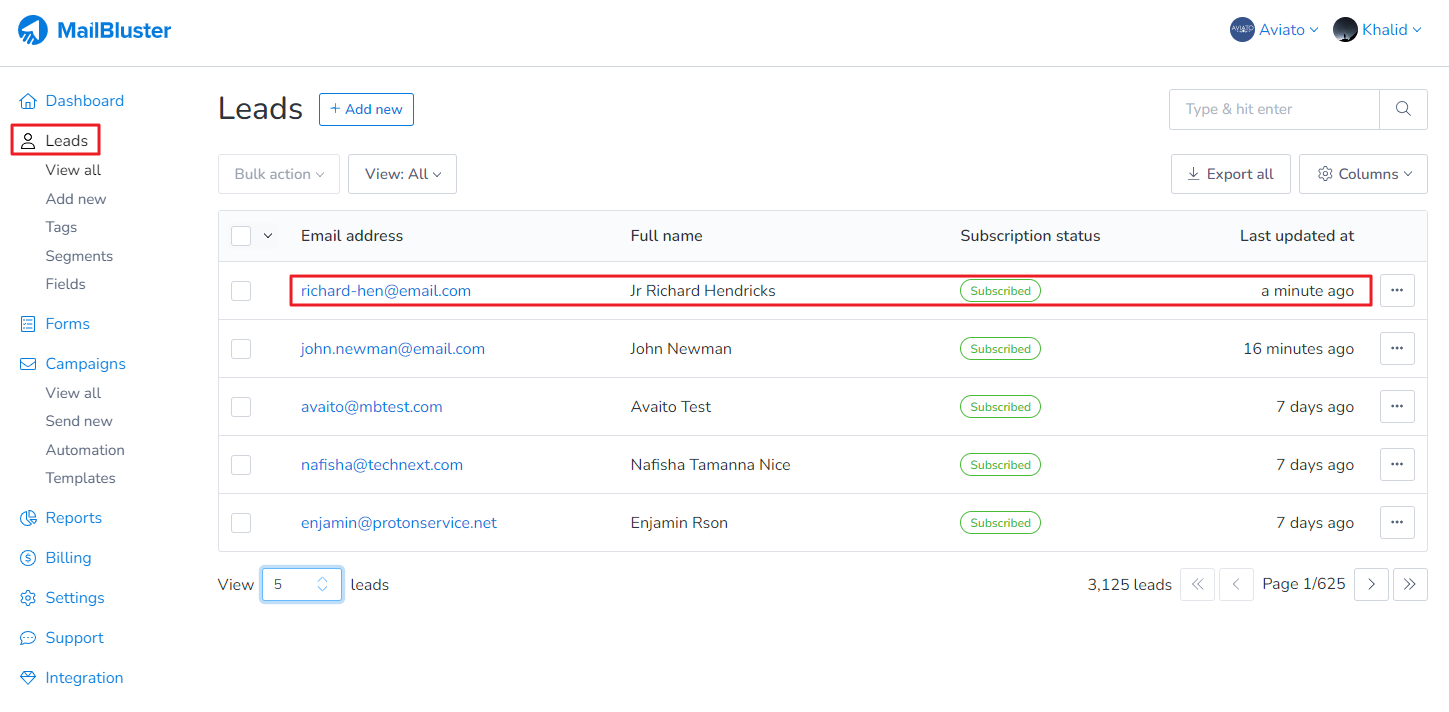
You have to wait few minutes, then go to MailBluster’s Leads section and check if the lead is visible.