Salesforce integration with MailBluster using Pabbly provides an efficient way to automate lead syncing and email marketing workflows without writing any code. Salesforce is a cloud-based Customer Relationship Management (CRM) platform that helps businesses manage customer interactions, sales, marketing, and support processes. It centralizes data, streamlines workflows, and provides tools for automation, analytics, and personalized customer engagement. Salesforce also offers integrations, customizable solutions, and industry-specific applications, making it a versatile platform for organizations of all sizes.
In this guide, we’ve used Salesforce’s Developer Website to demonstrate how to integrate MailBluster with Salesforce.
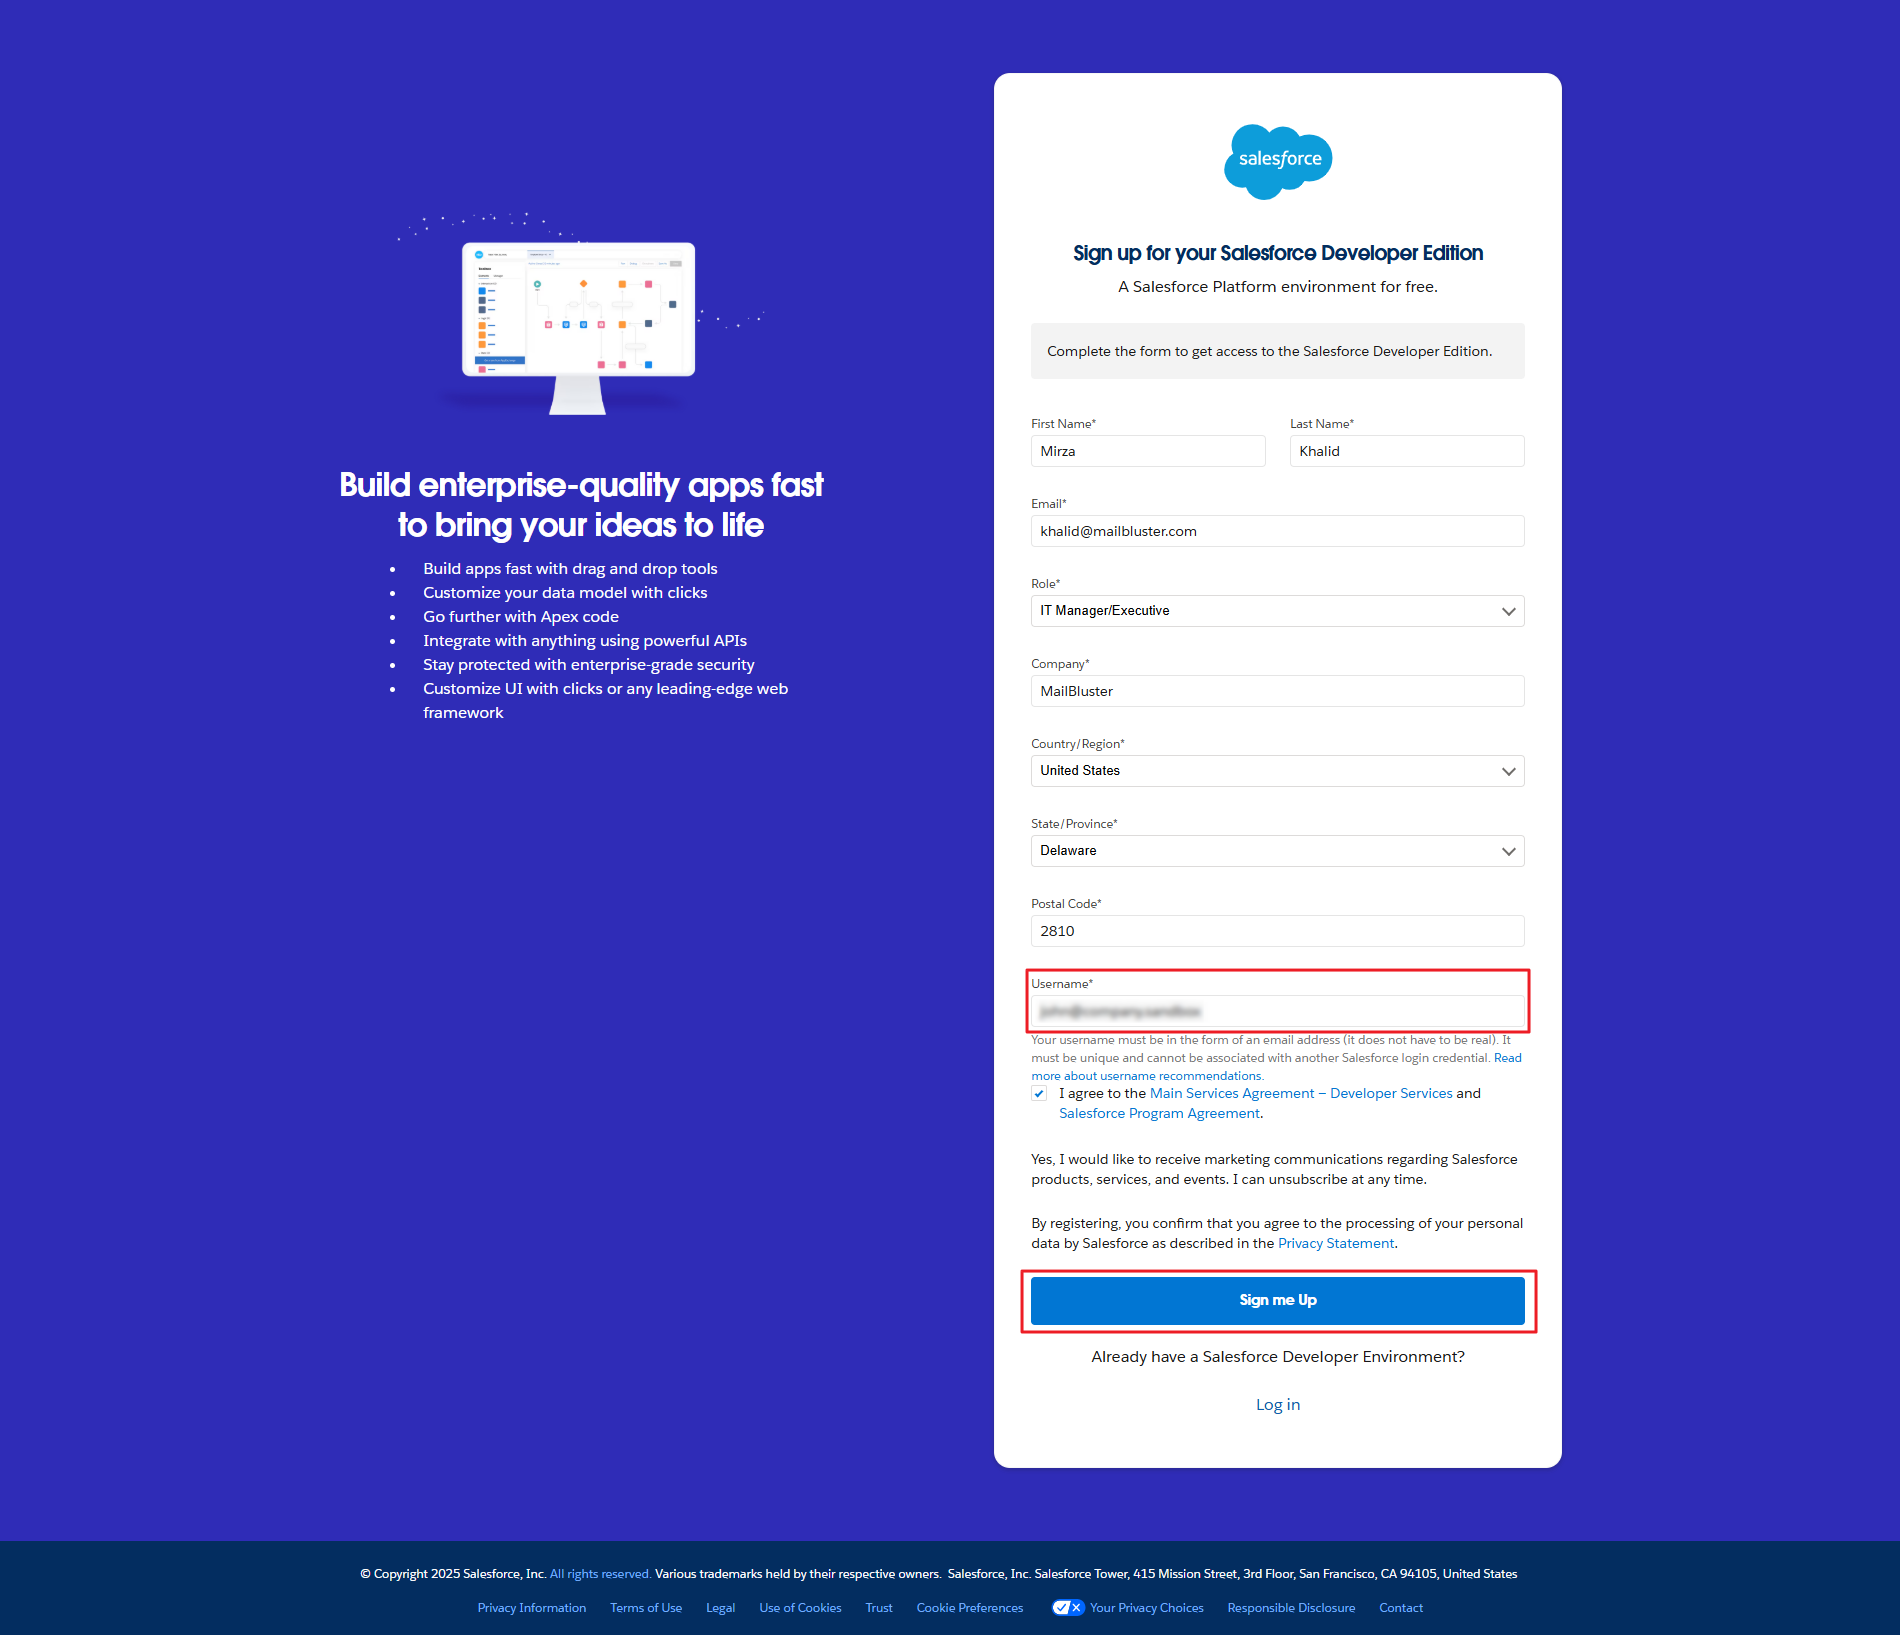
To begin, you need to sign up on Salesforce through the Salesforce Developer Website. Be sure to set a proper username as it will be used to sign in to Salesforce.
Remember to use your full email ID, including the domain (e.g., [email protected]), when filling out the form’s Username field.
Afterward, verify your email and log in to Salesforce Developer using your email ID and password.
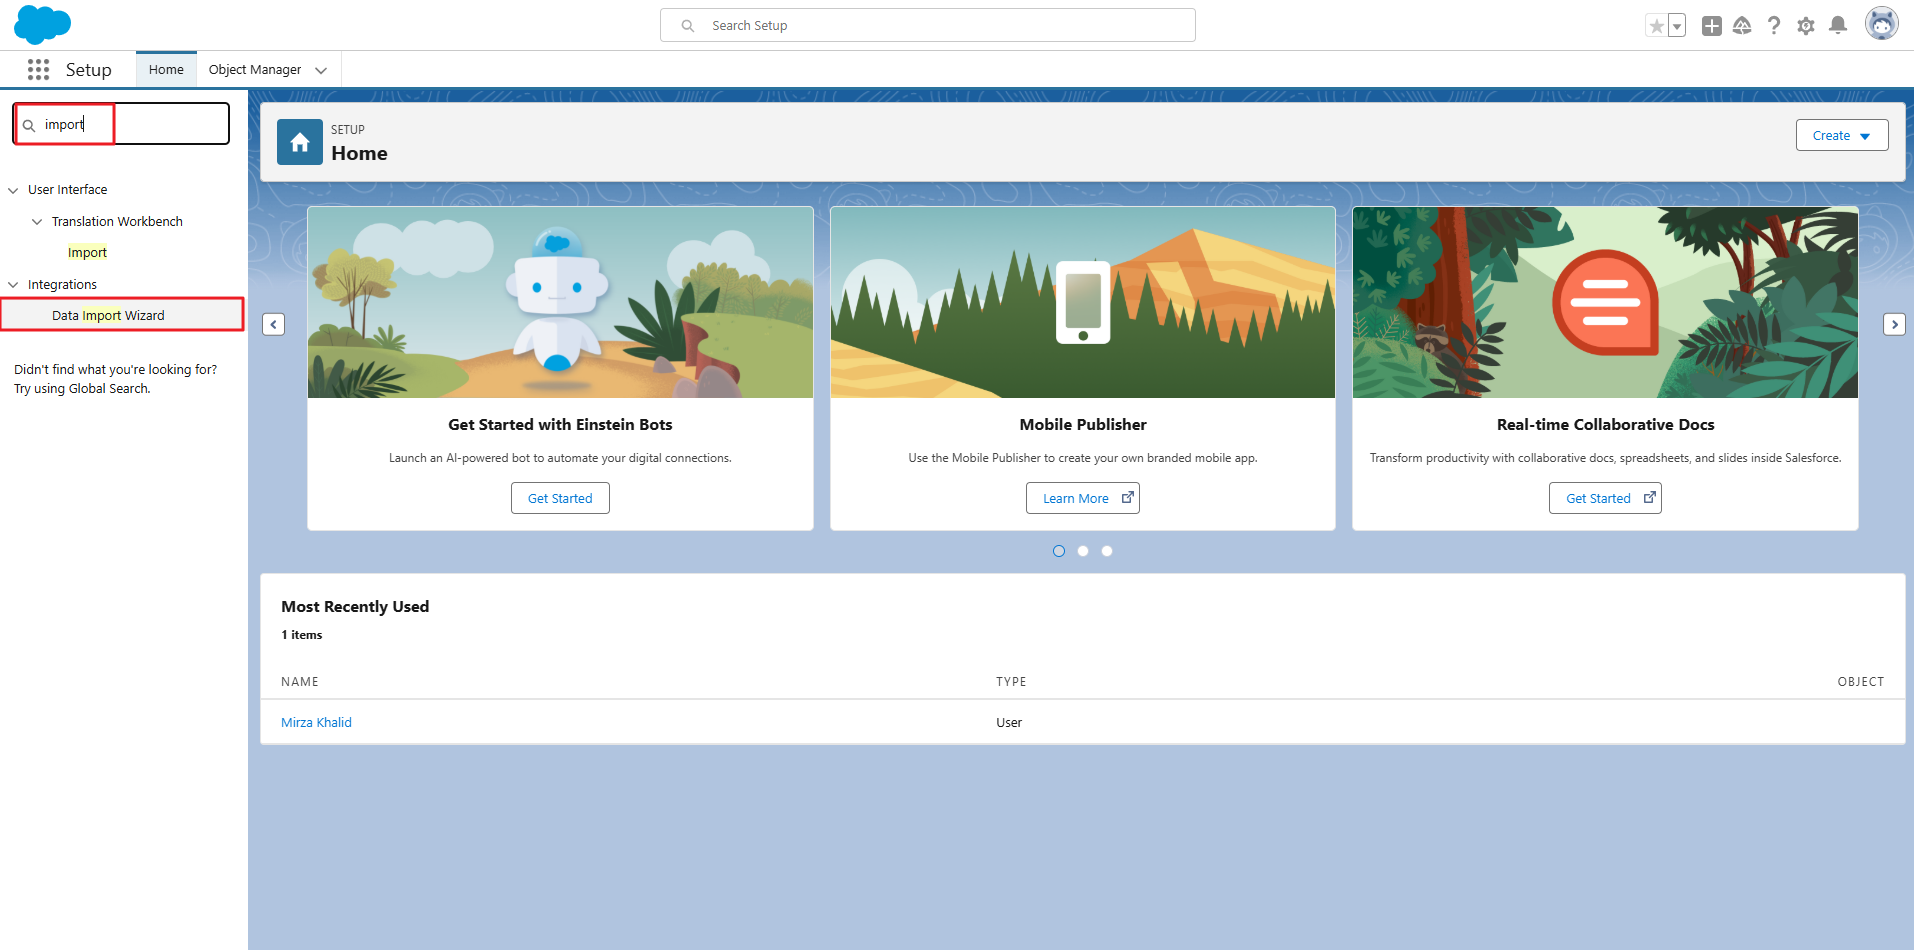
Now, you need to add or upload leads to Salesforce. Click on the Home, then type ‘import‘ under Search bar. Now, click on Data Import Wizard.
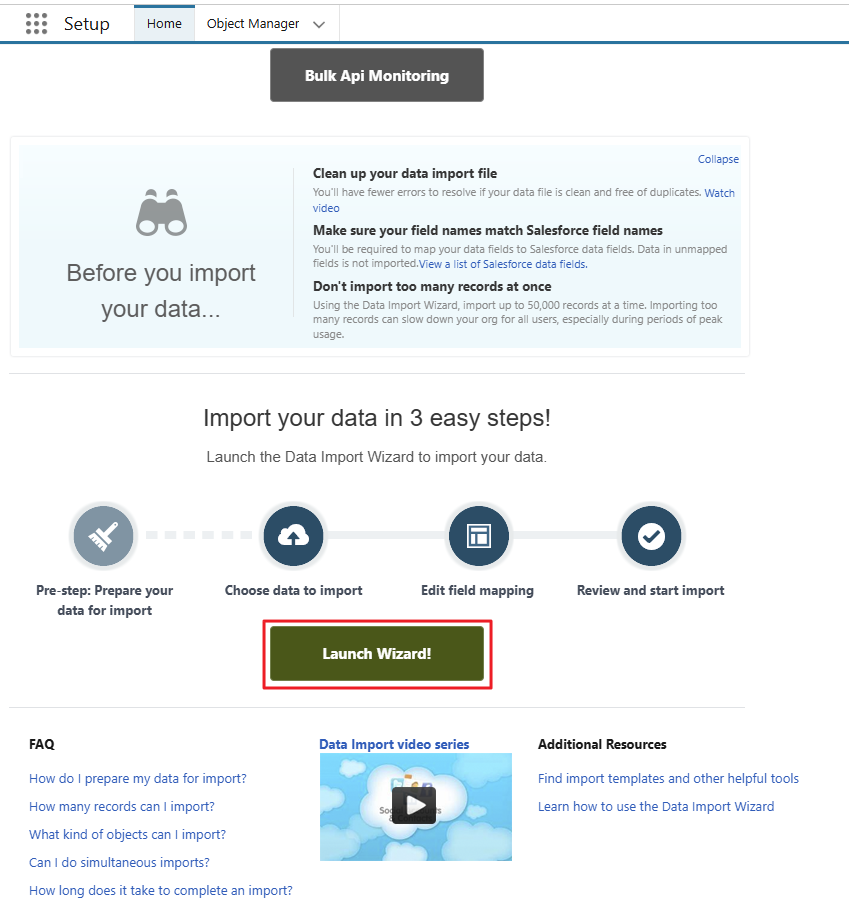
Click on Launch Wizard.
Click on Leads under Import Data into Salesforce.

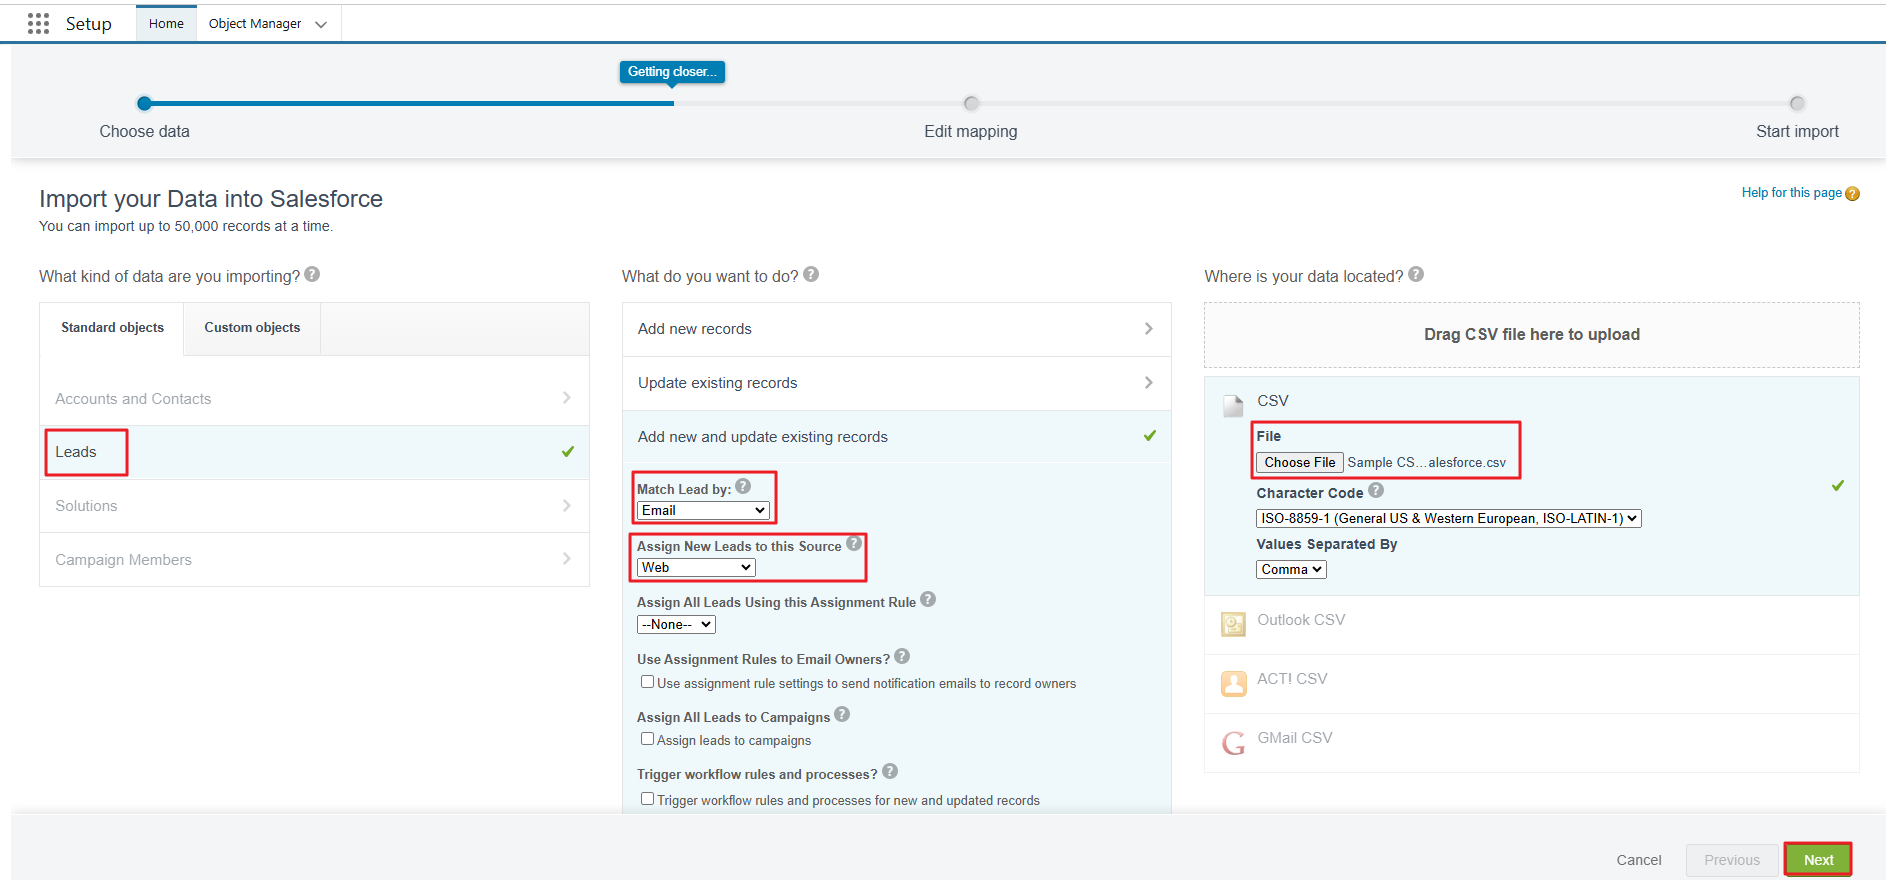
Now, select Leads > Add new and update existing records. Select ‘Email’ for Match Lead by and ‘Web’ for Assign New Leads to this Source. Then click on ‘Choose File’ and upload a CSV file. Once everything is set, click on Next button.
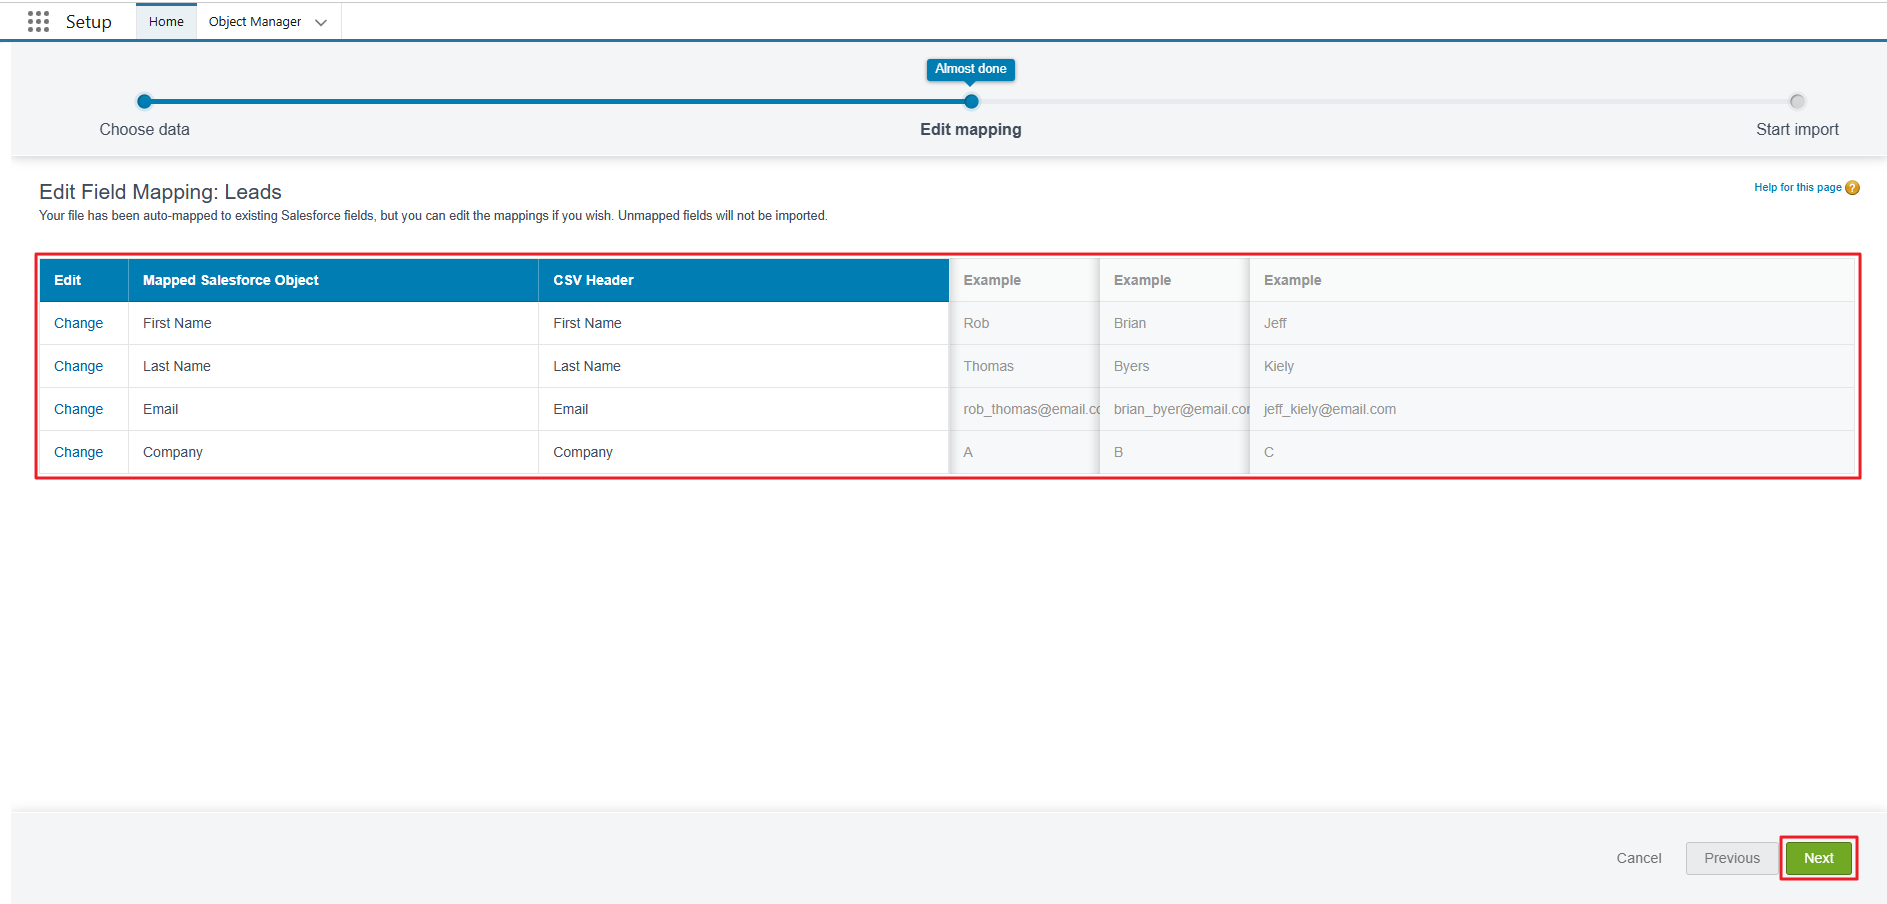
The imported fields of the CSV file has been auto-mapped by Salesforce fields as shown below. Click on the Next button.
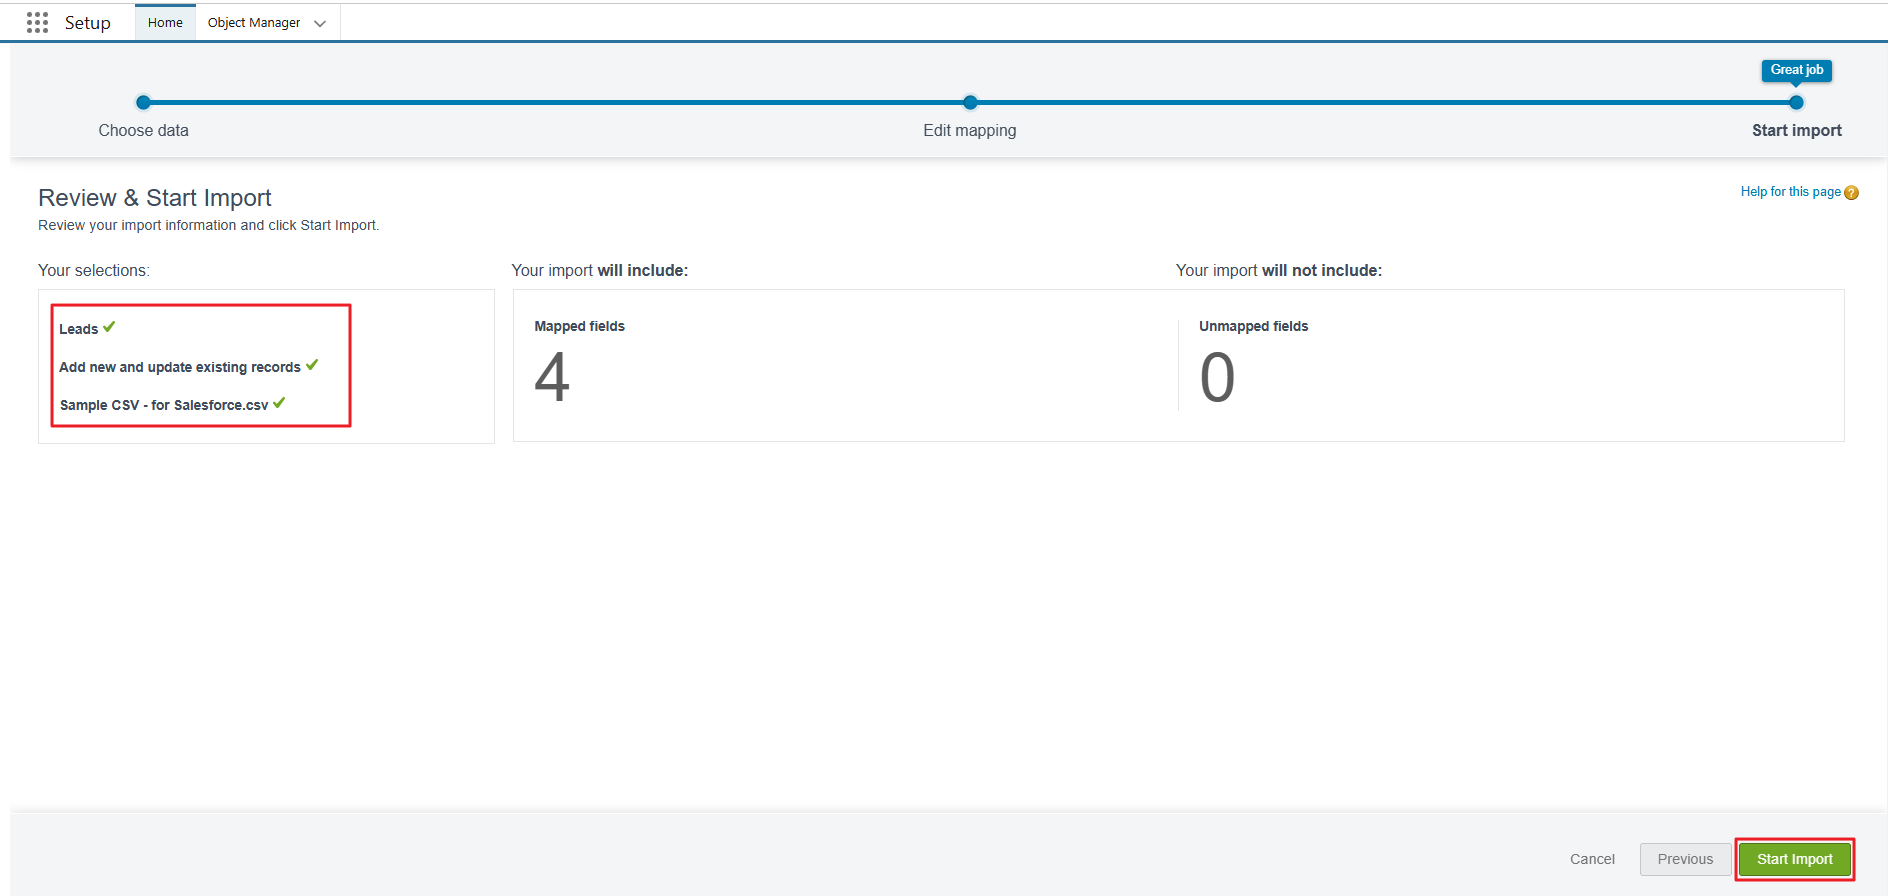
Review the selections carefully and then click Start Import.
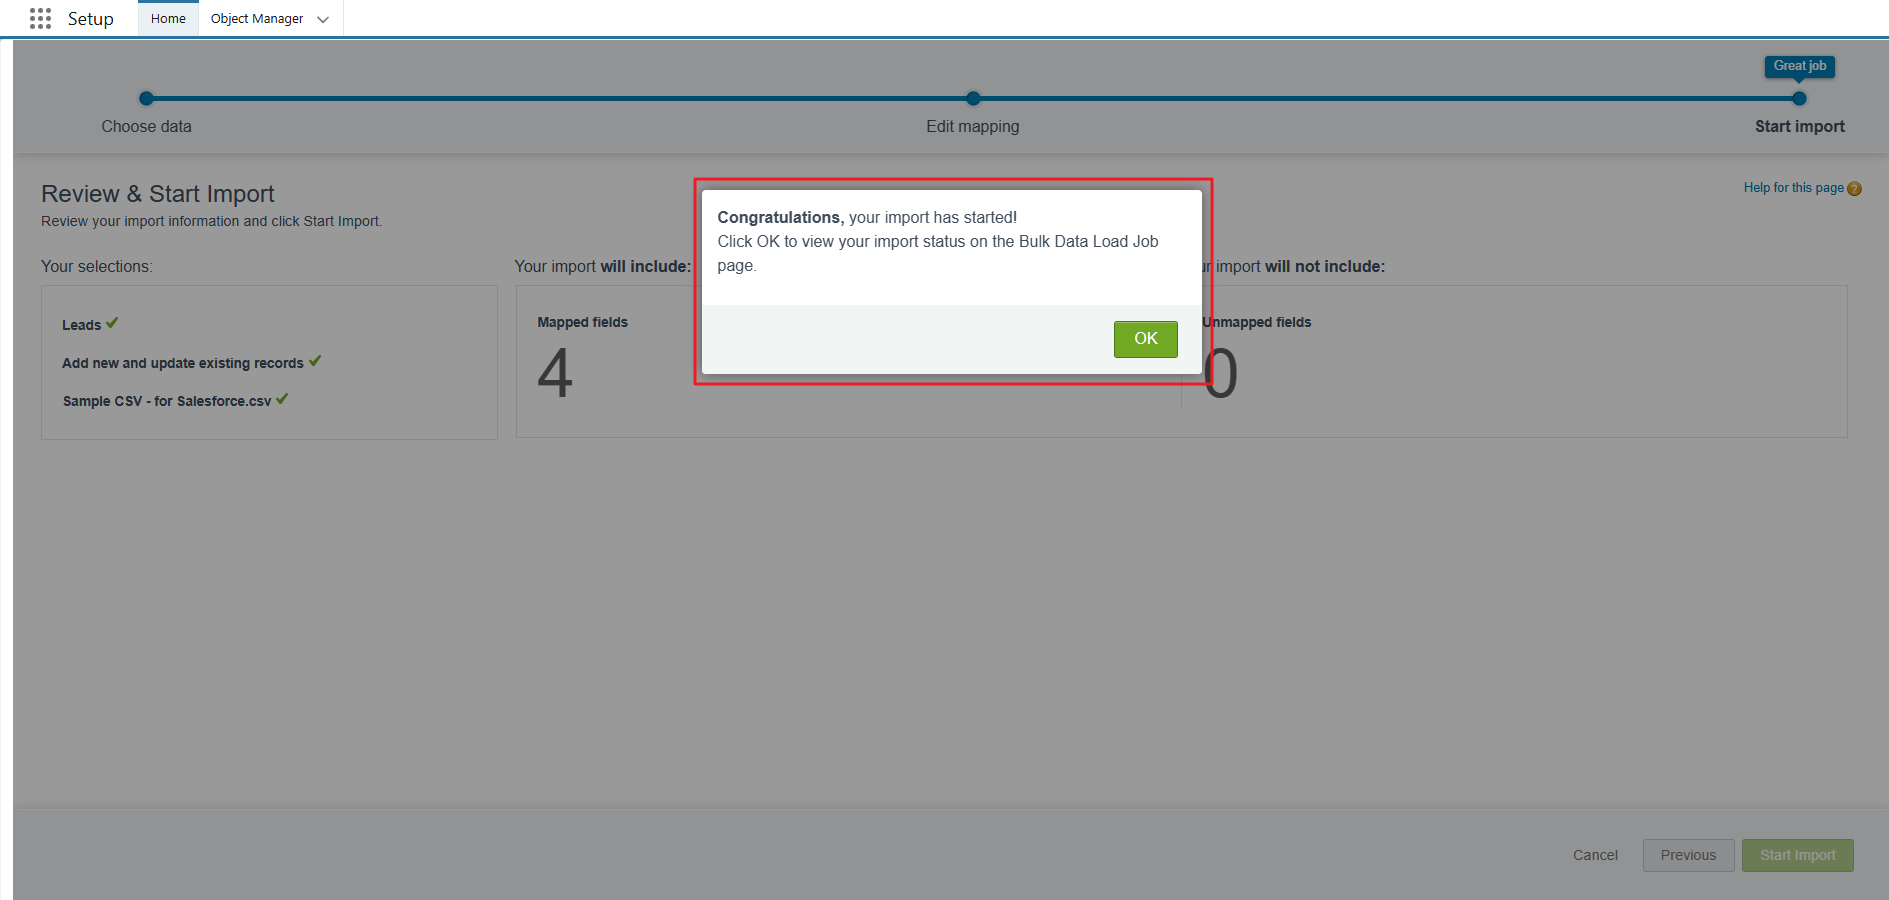
You will get a notification that your leads have been imported successfully. Click OK to close the popup.
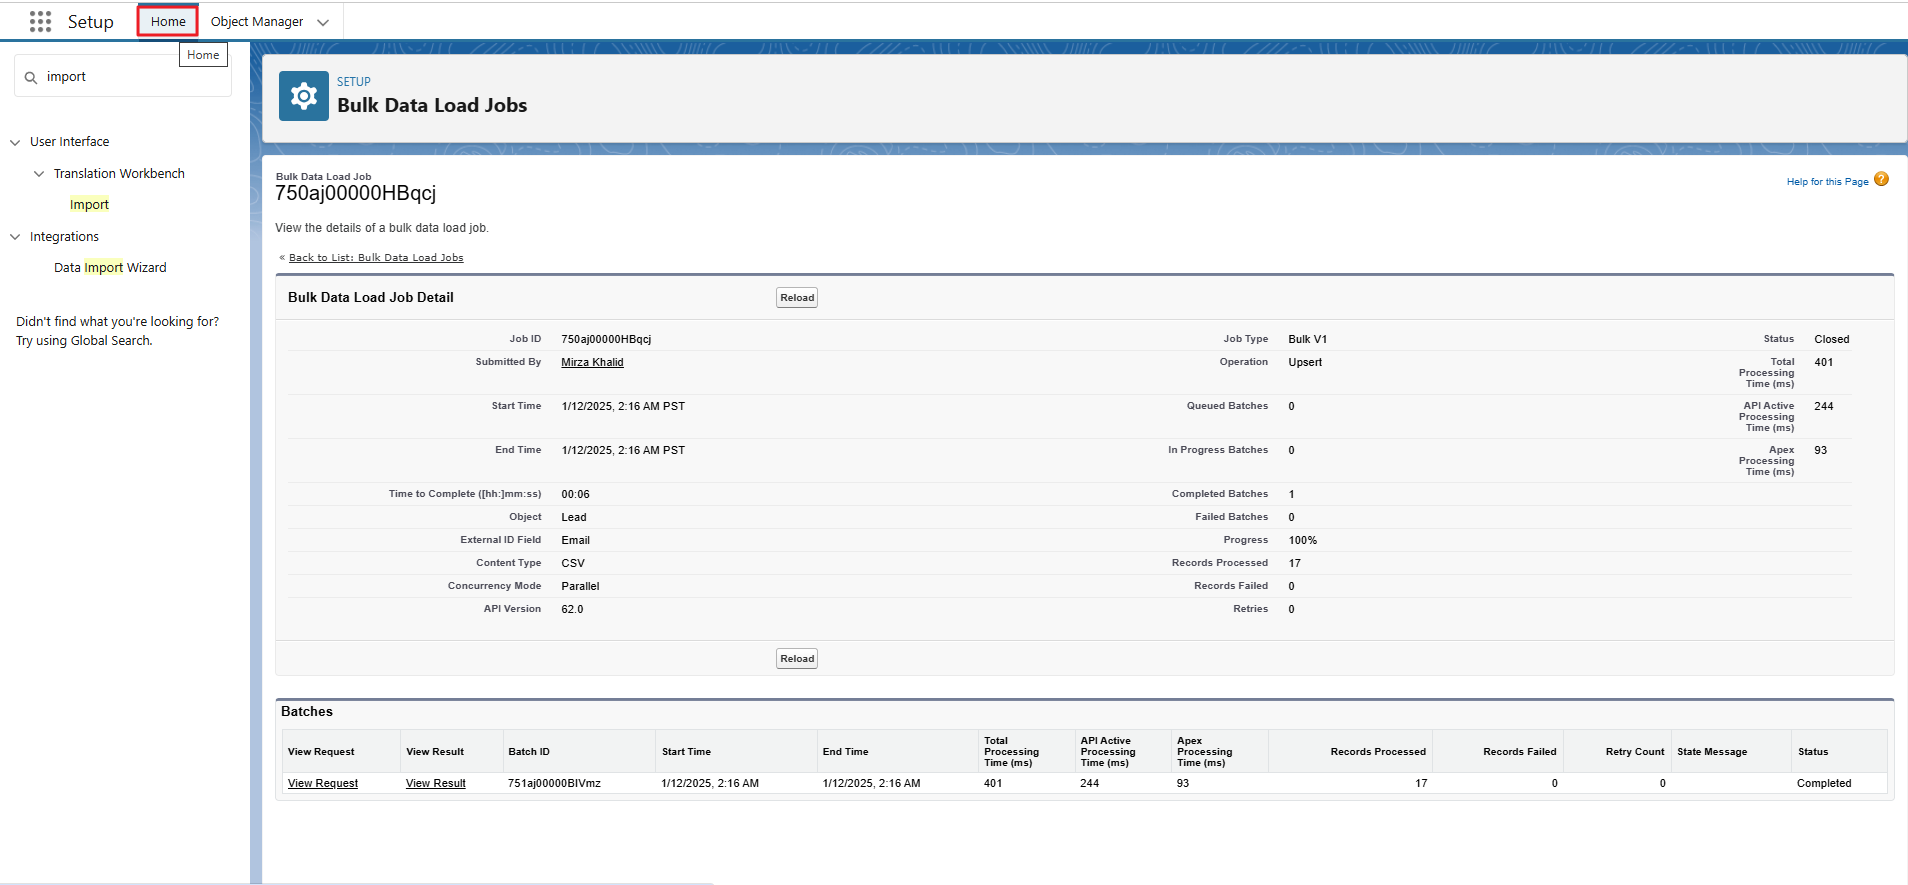
Upon clicking OK button, you will be redirected to the following page. Then click on Home.
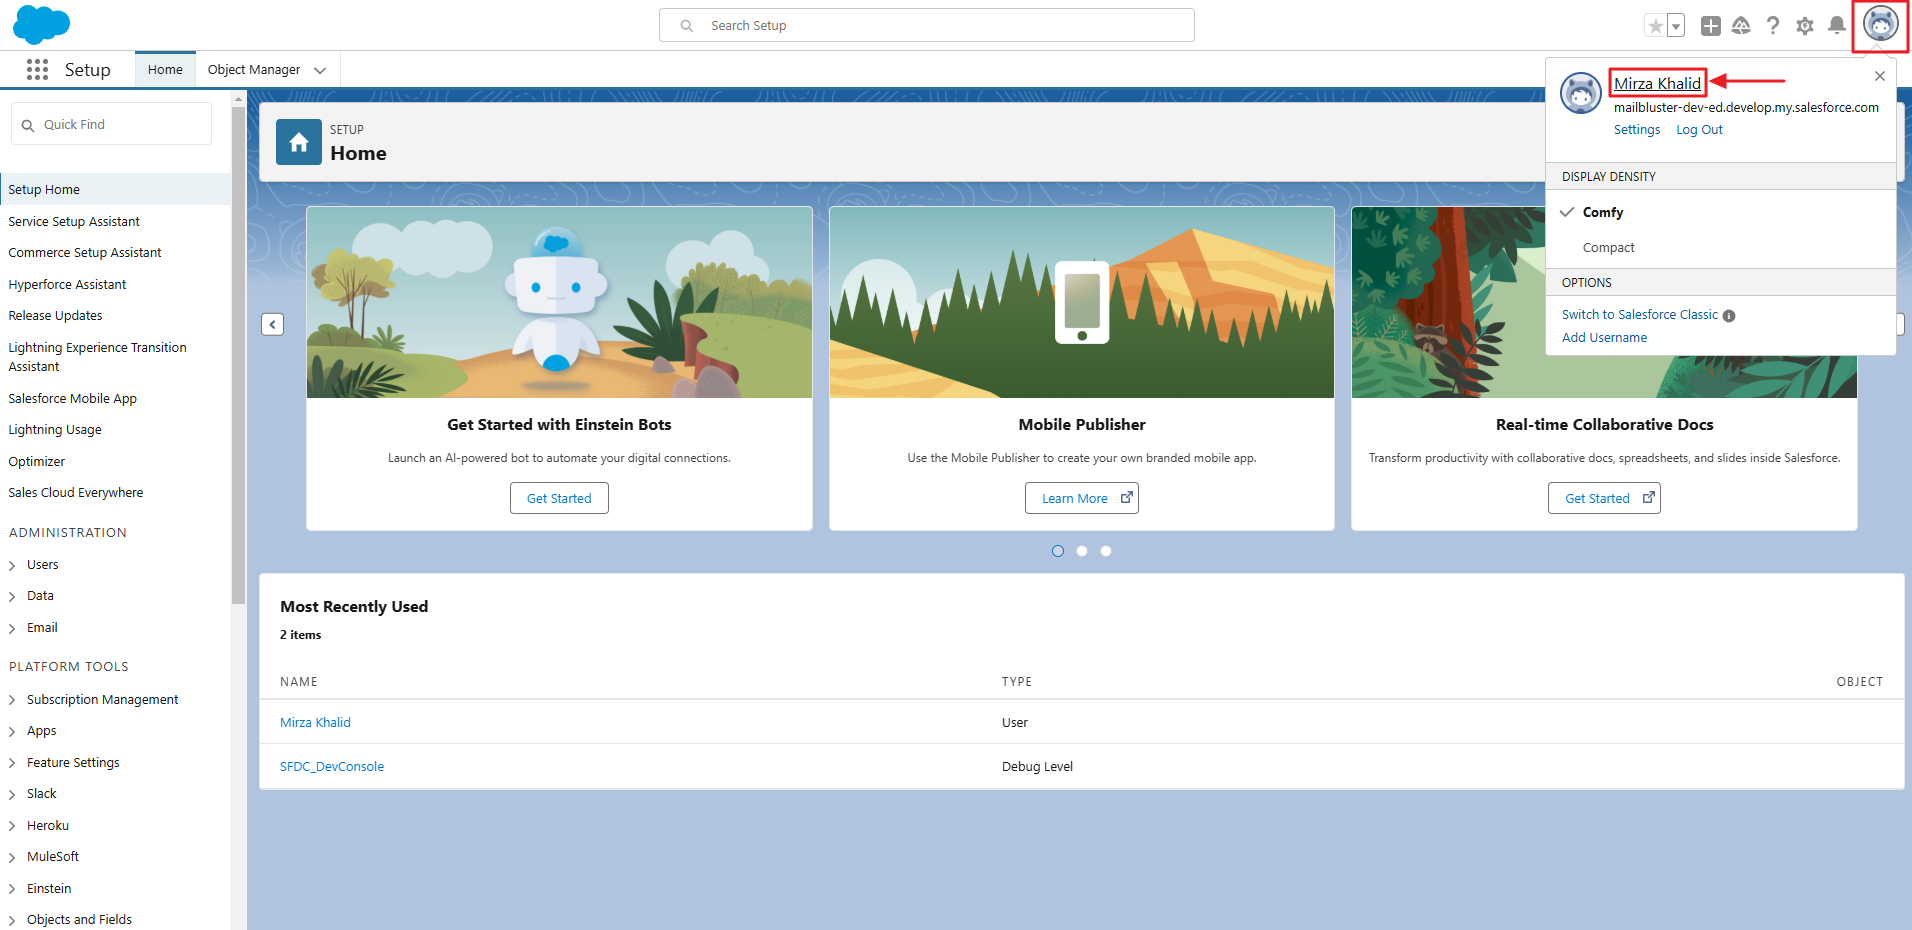
Now, click on your Profile Picture ->Your Name. This will redirect you to the Sales page.
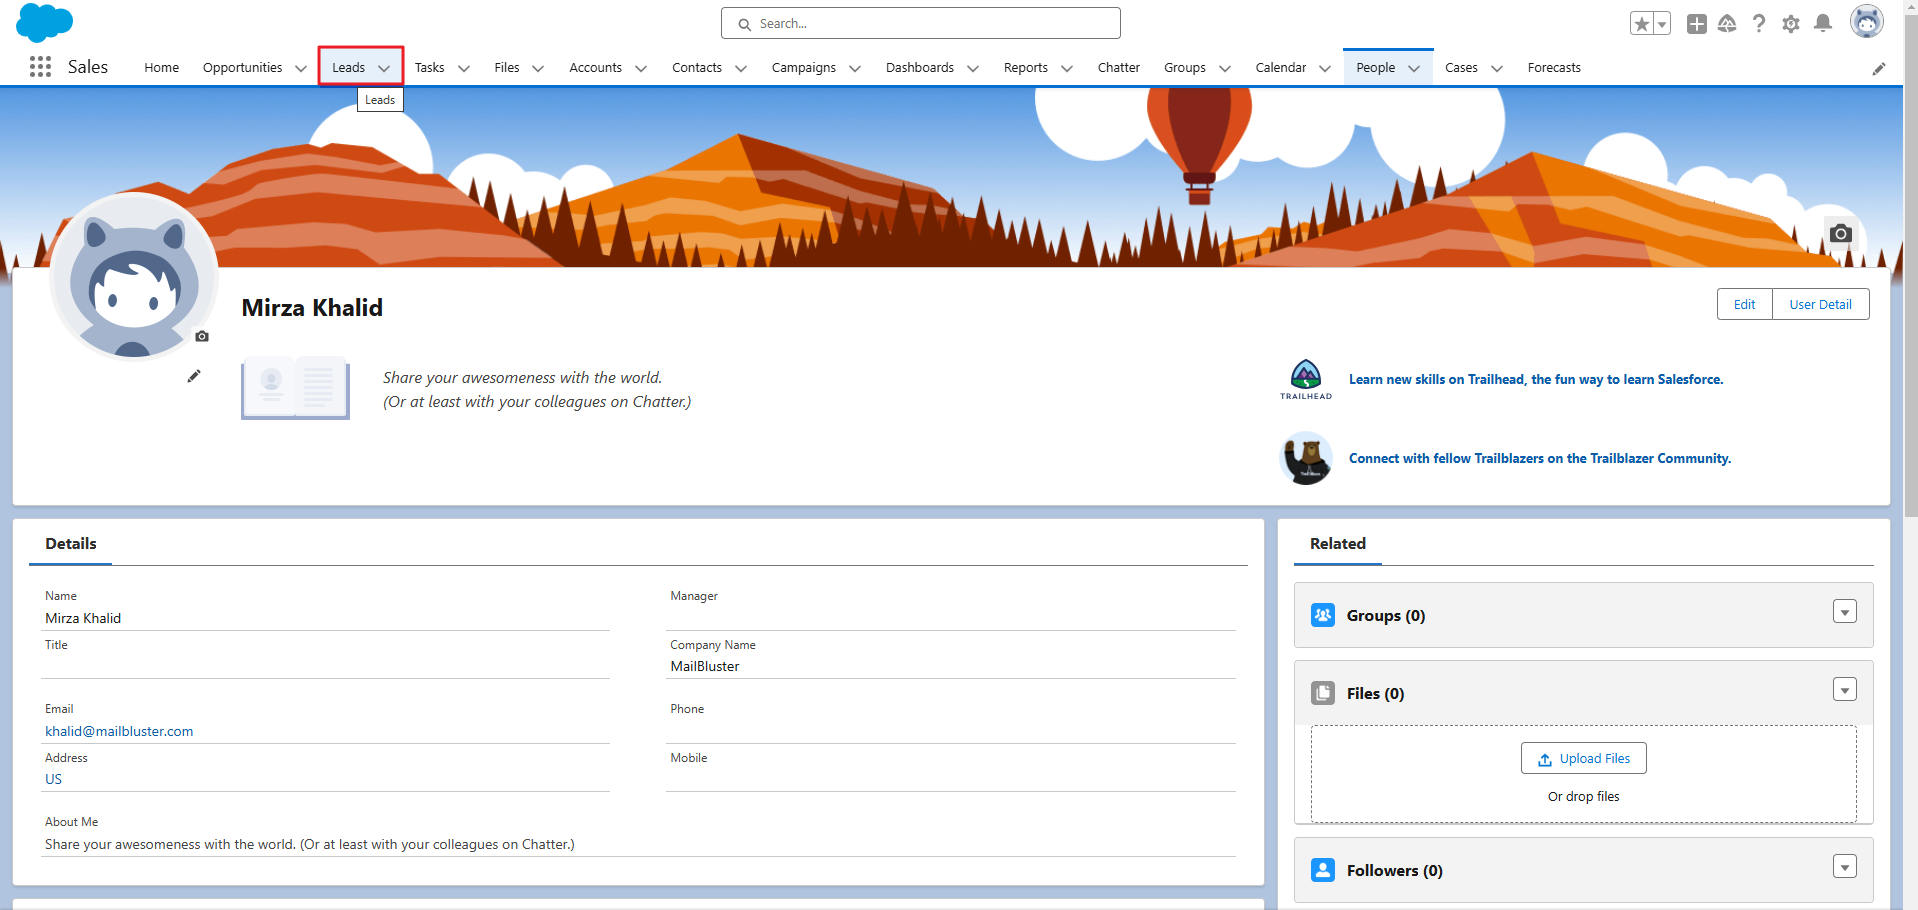
On the Sales page, click on Leads.
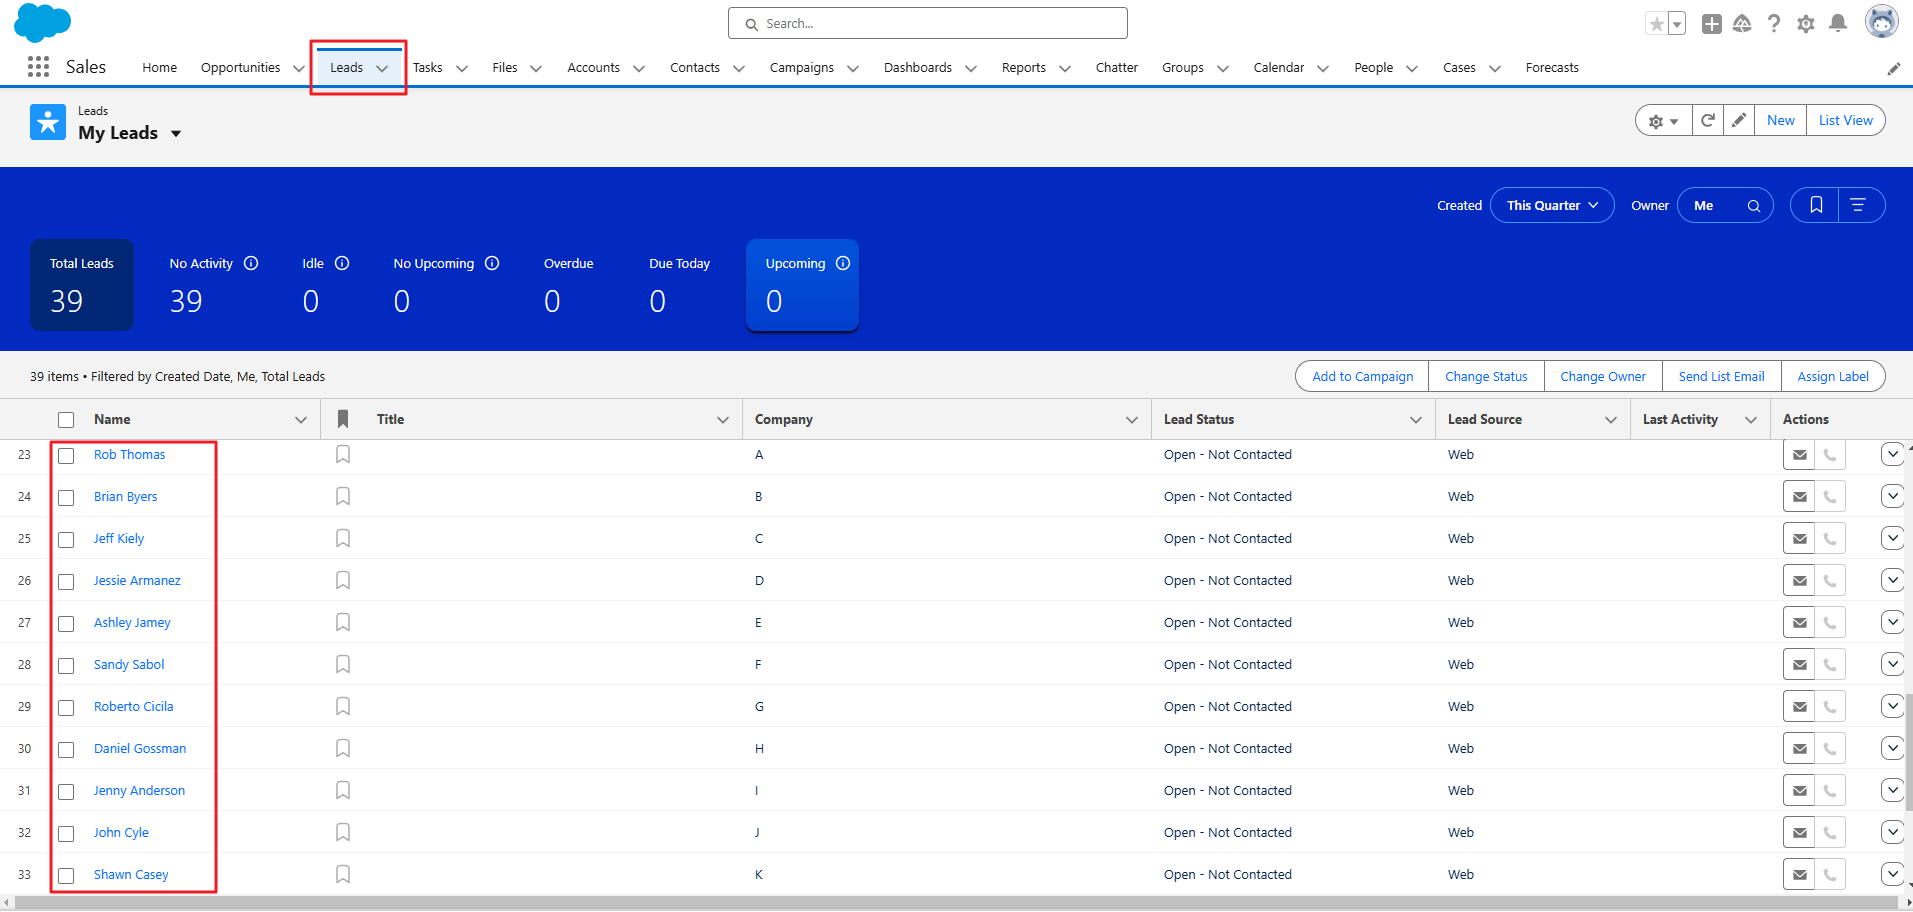
As you can see all of the imported leads are present here.
Now, we need a third party app called Pabbly for MailBluster and Salesforce integration. Salesforce offers numerous functionalities, including API integration for connecting external applications. In this guide, we will focus on the most convenient and easy-to-understand option. Signup with Pabbly Connect.
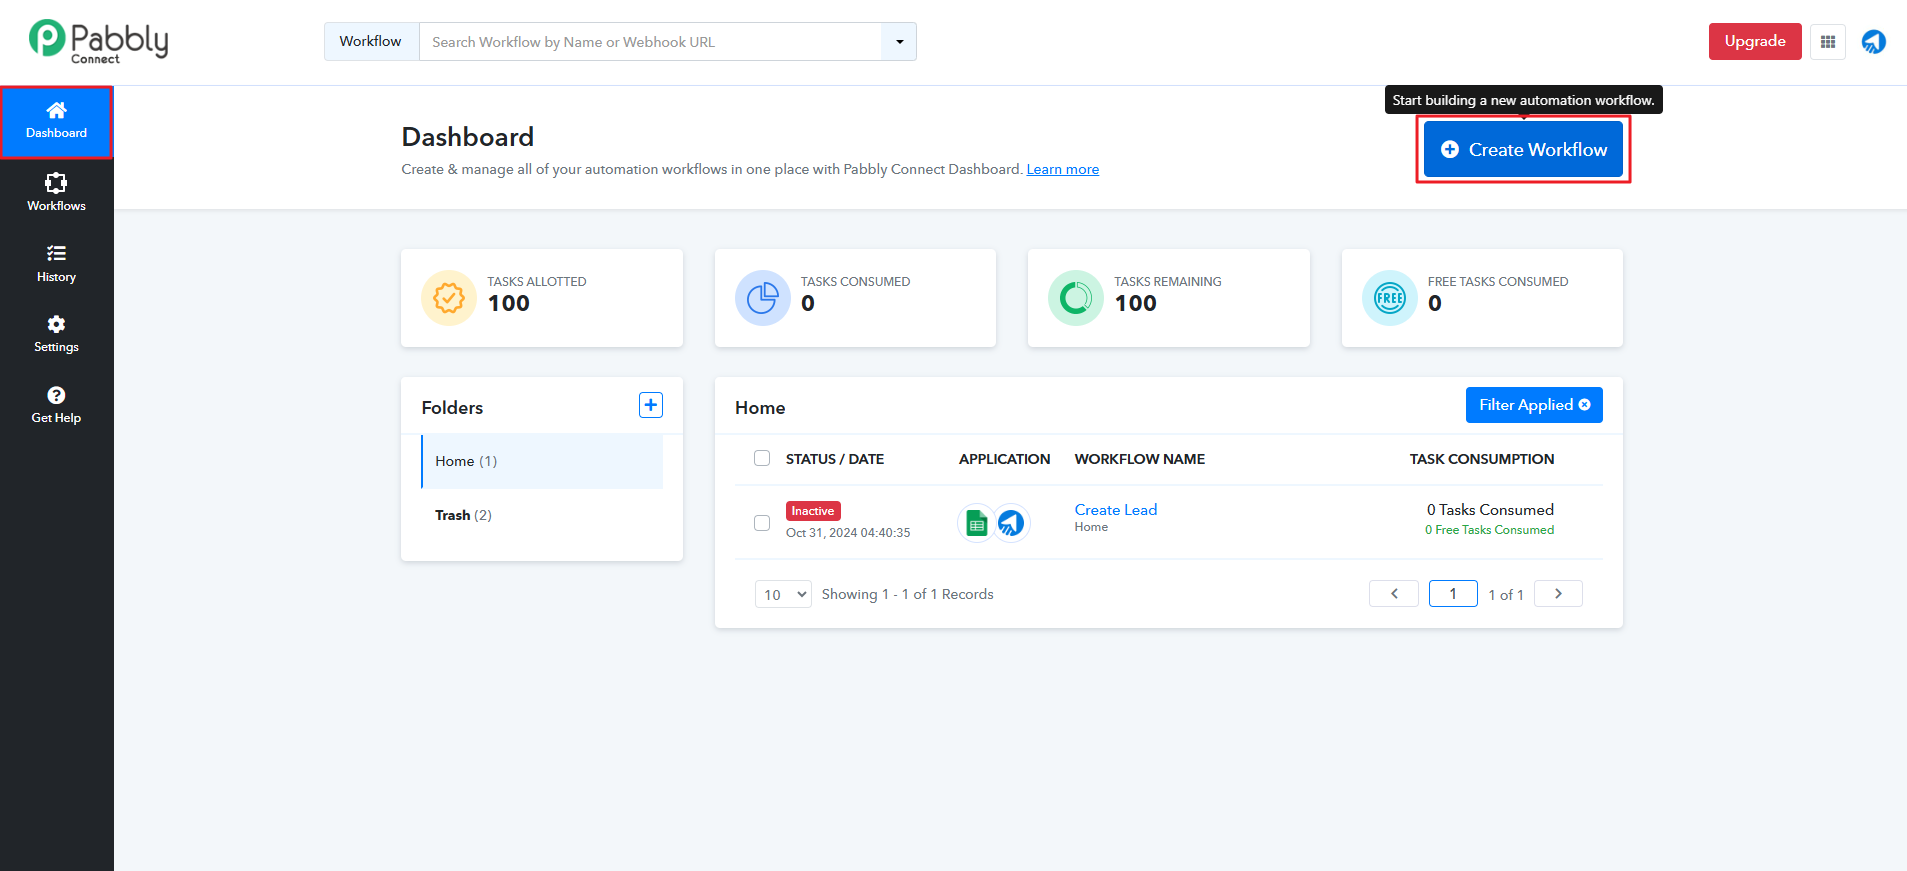
Click on Create Workflow button under Dashboard of Pabbly Connect.
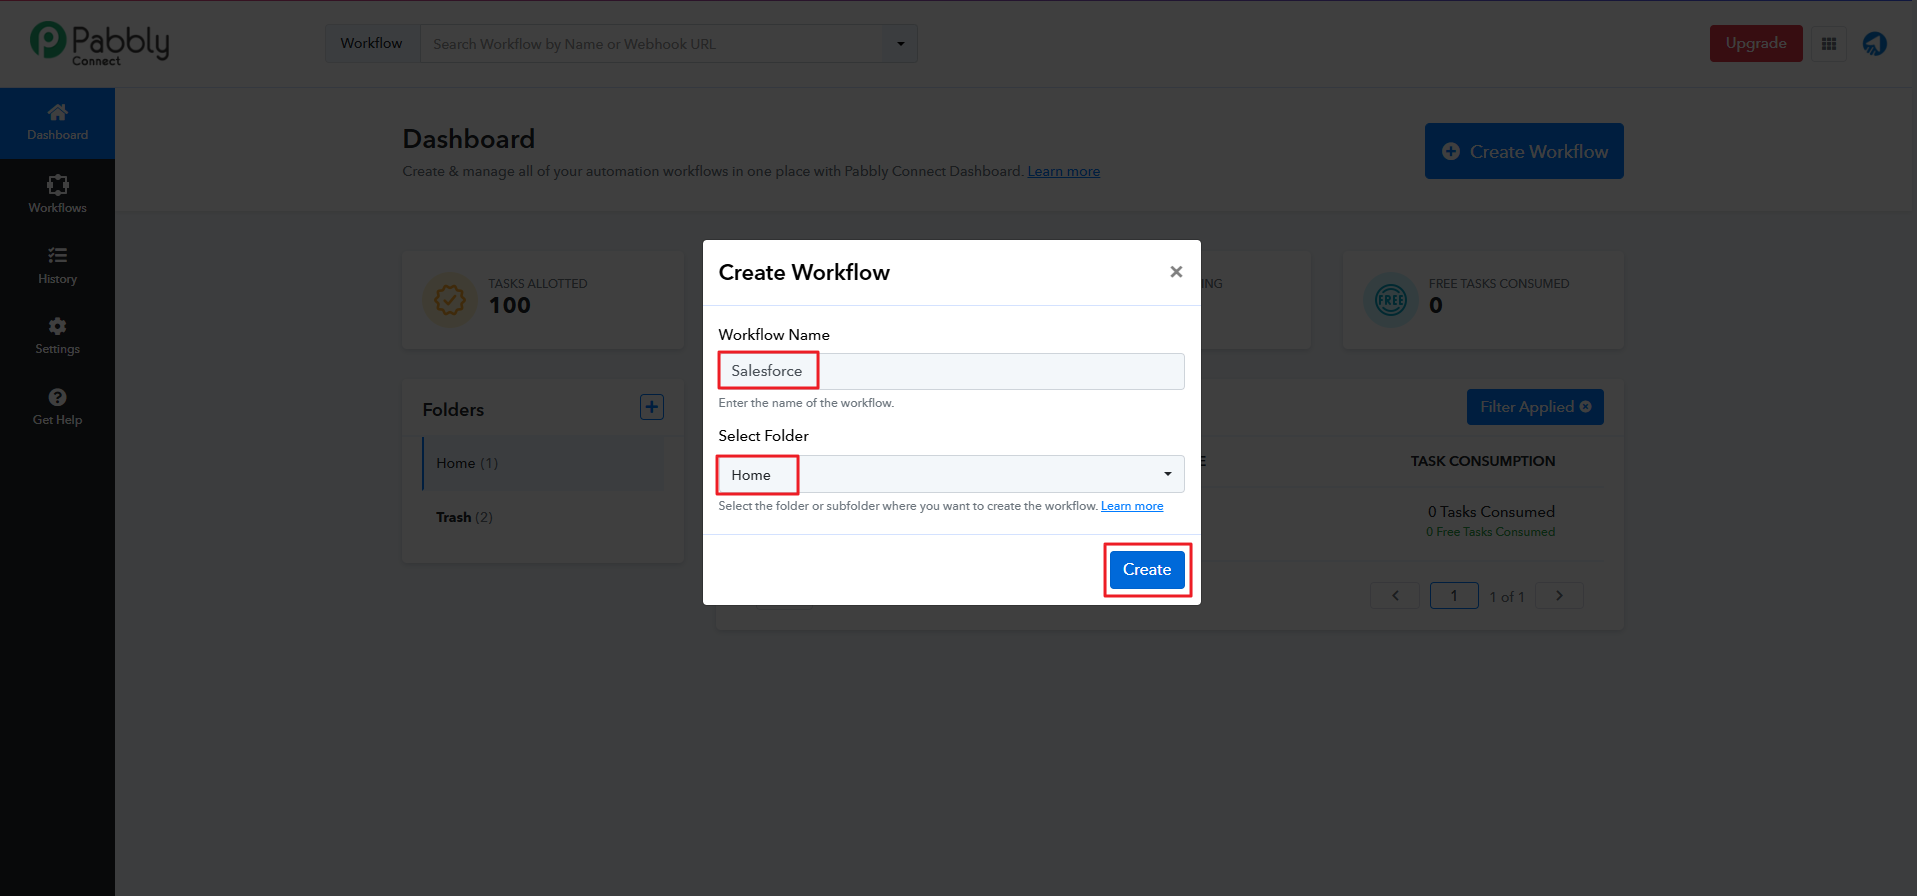
Write down the Workflow Name and Select Folder Home. Then click on Create button.
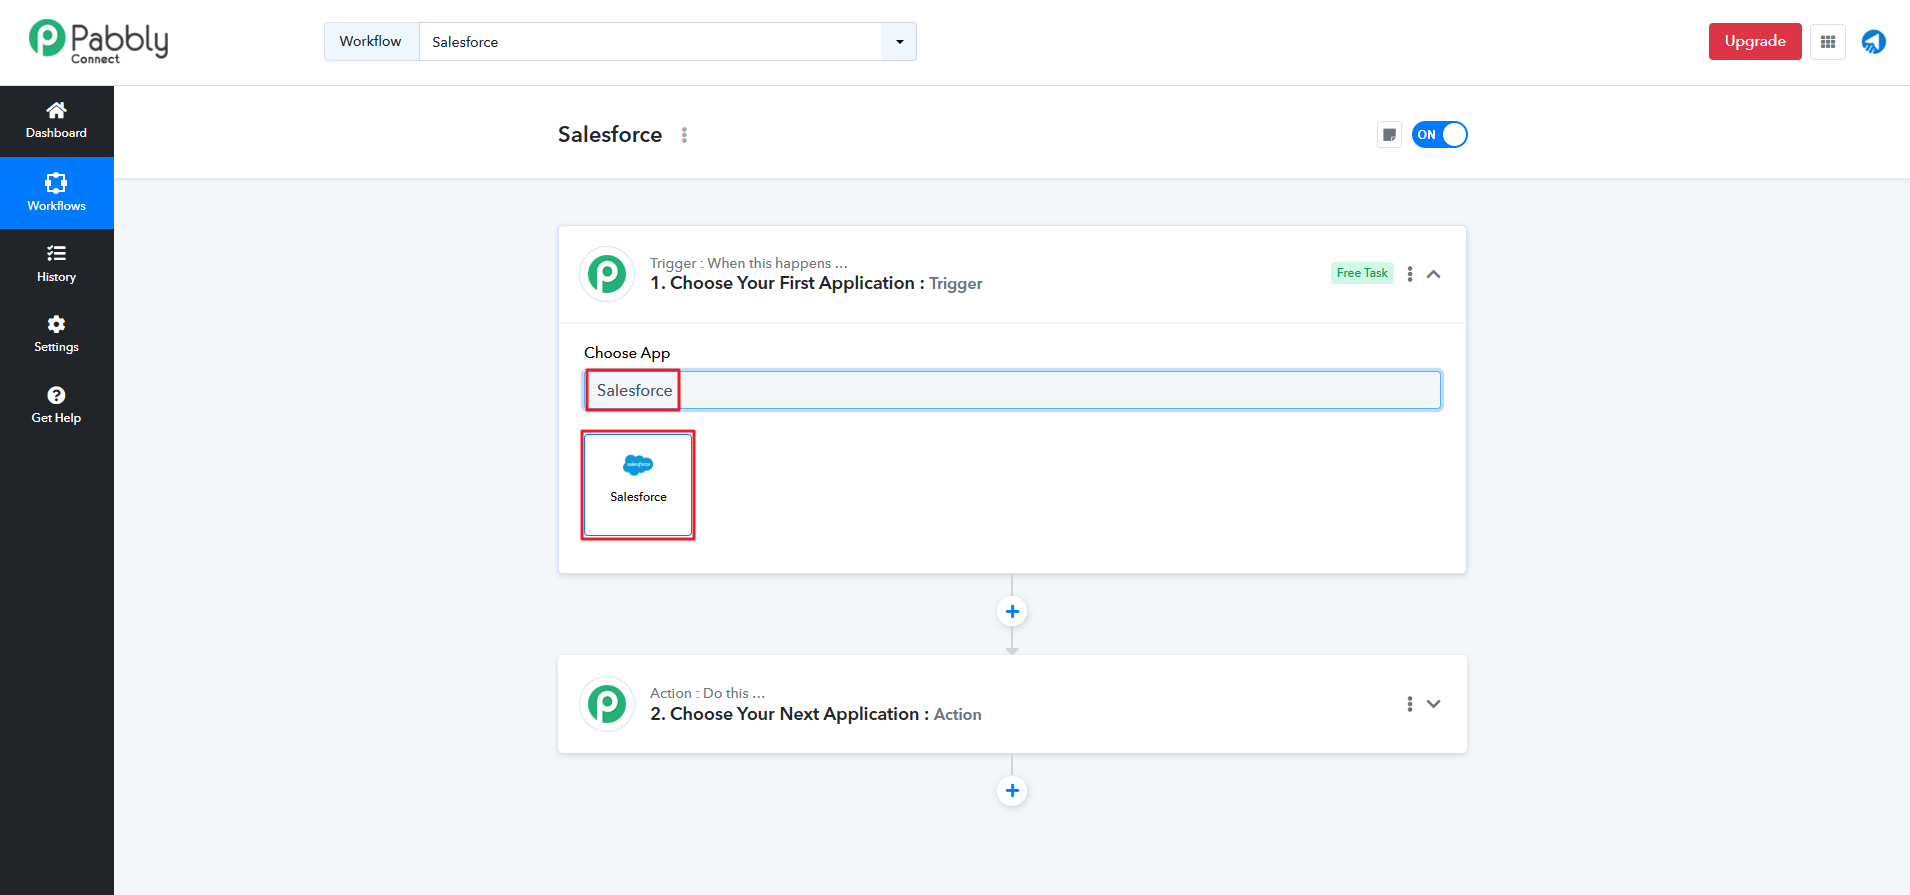
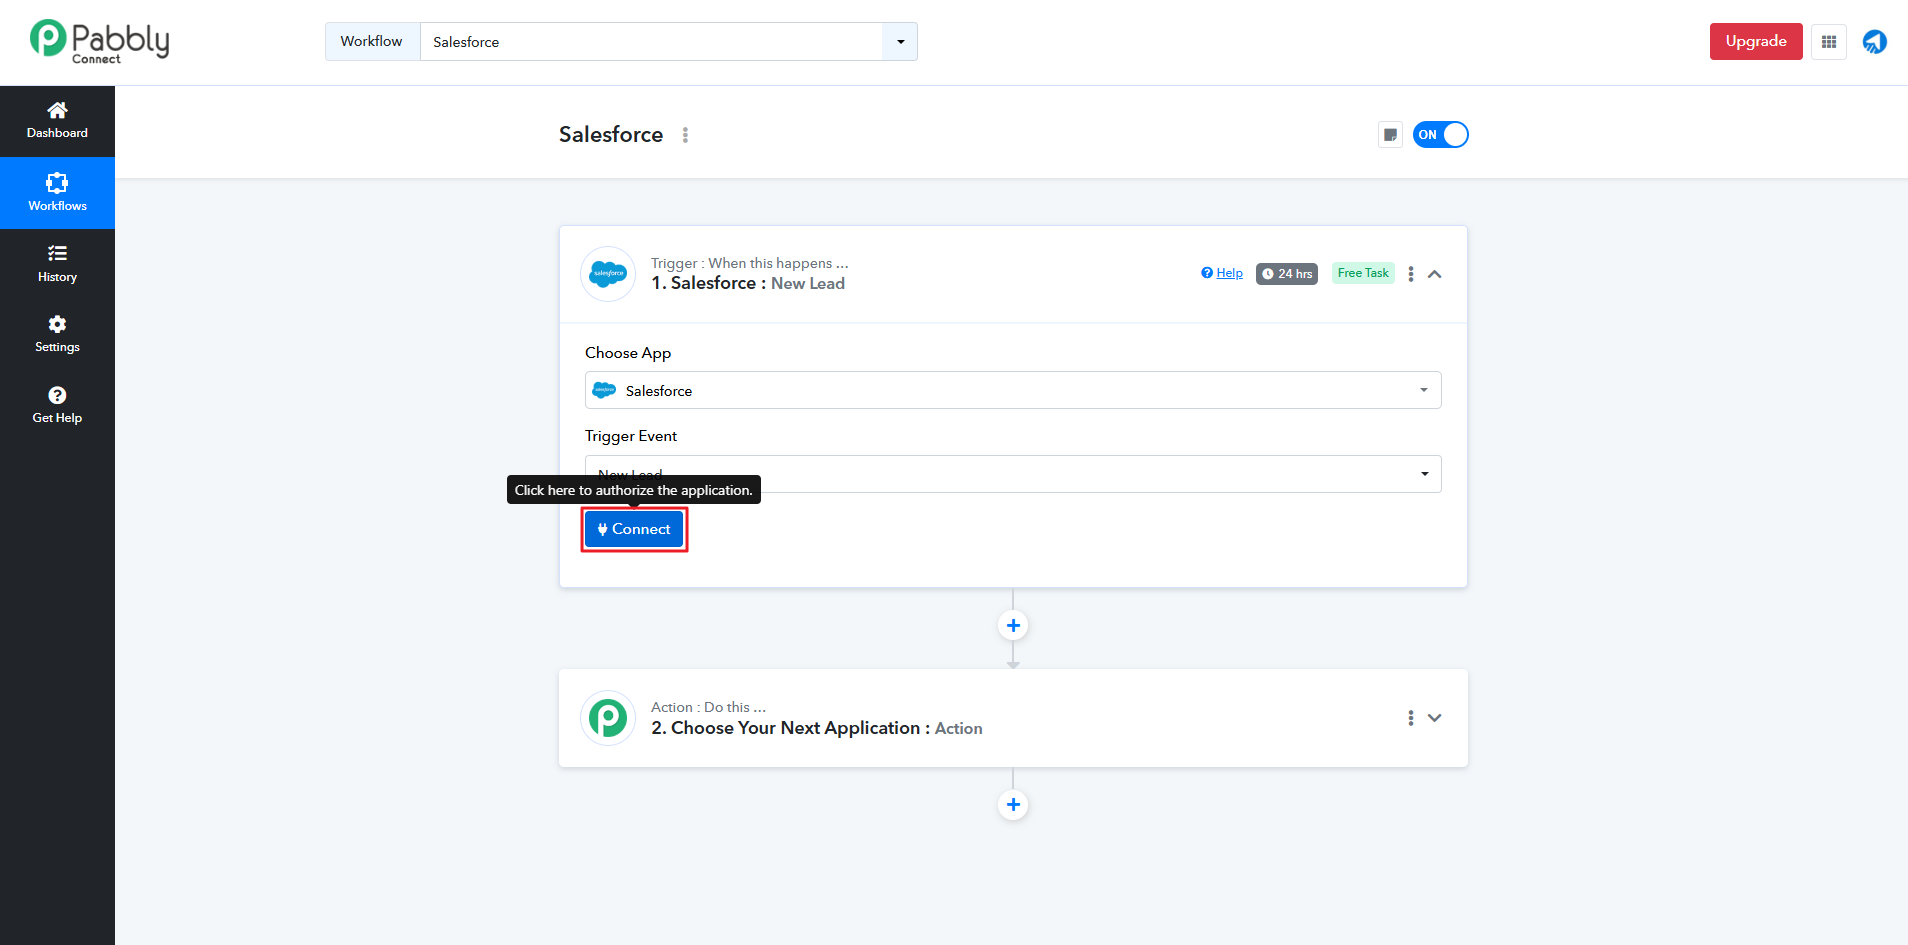
Select Salesforce under Choose App.
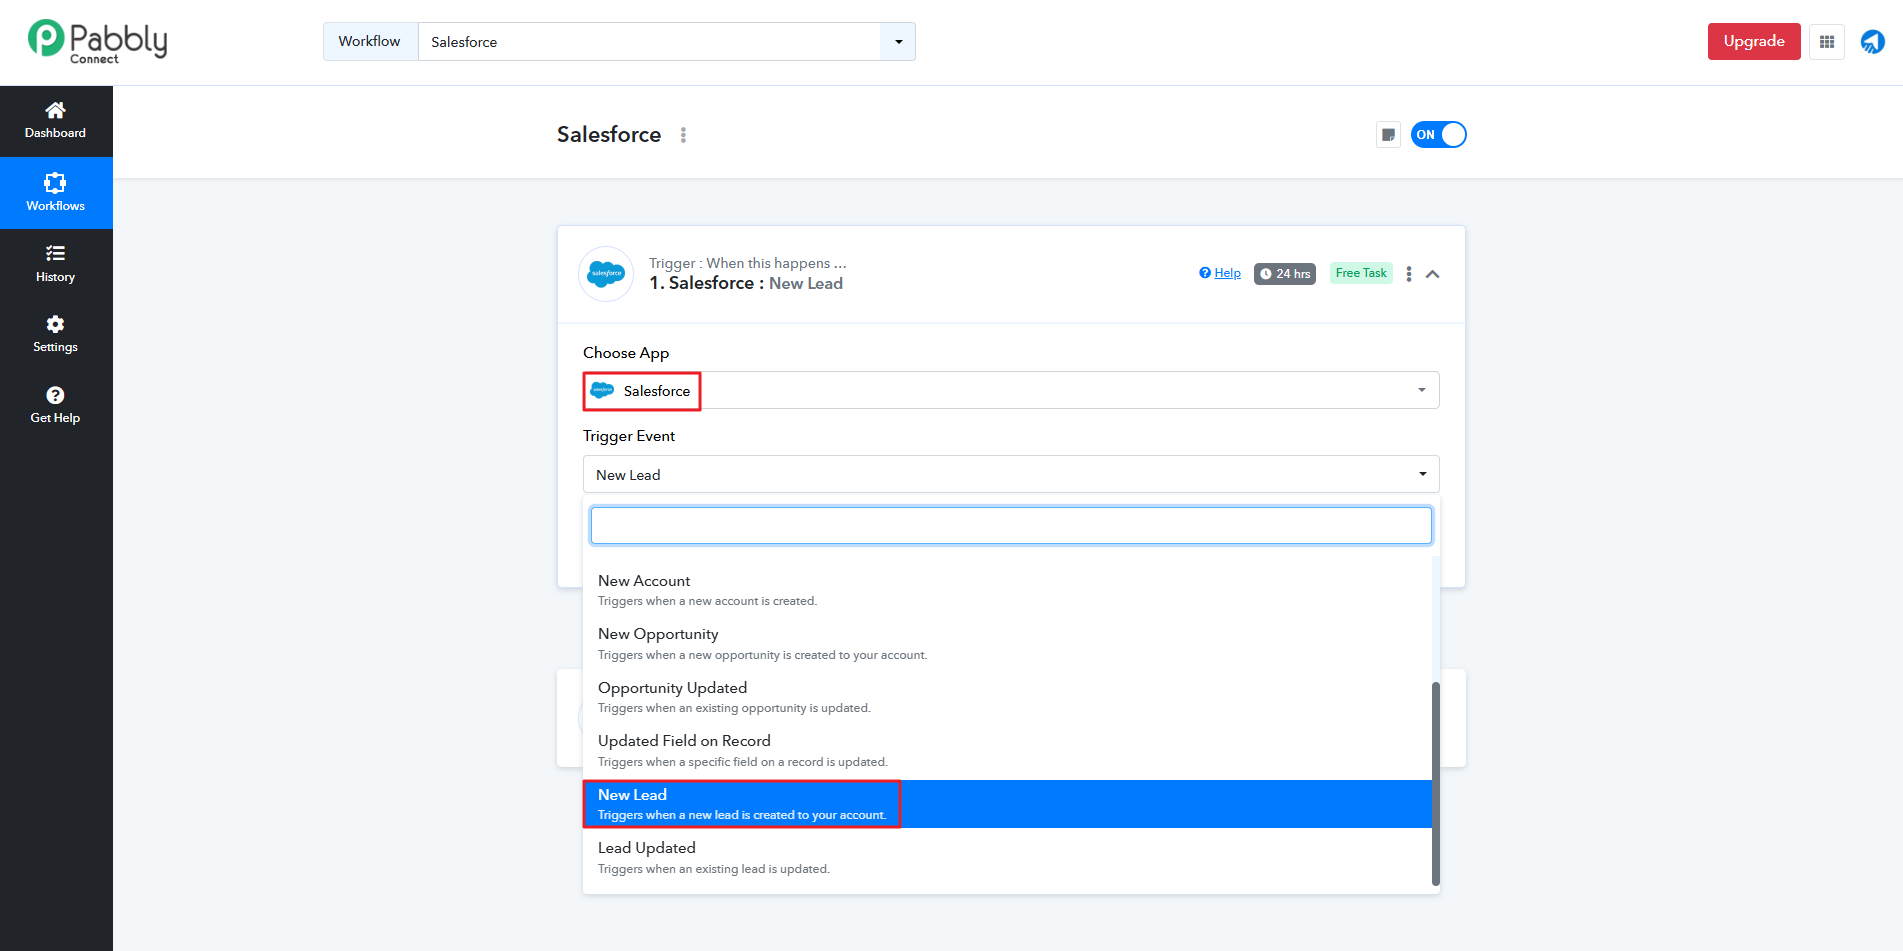
Then select New Lead under Trigger Event.
Now, click the Connect button.
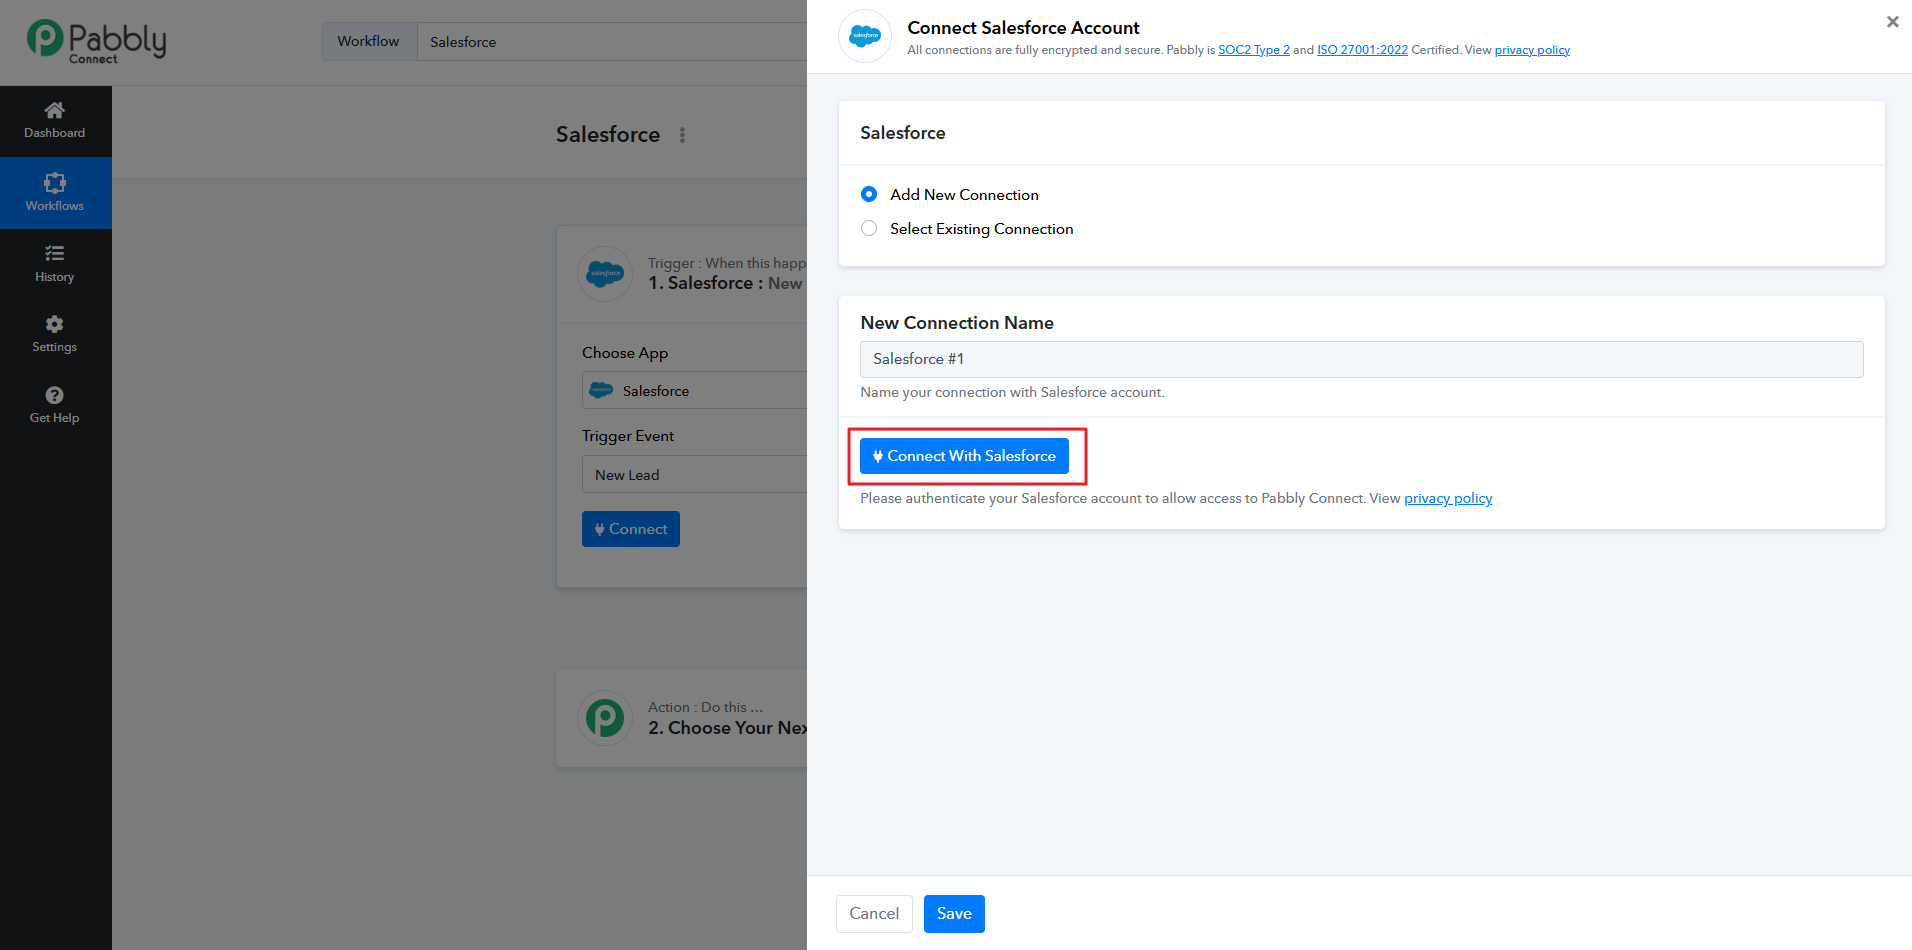
Click on Connect With Salesforce.
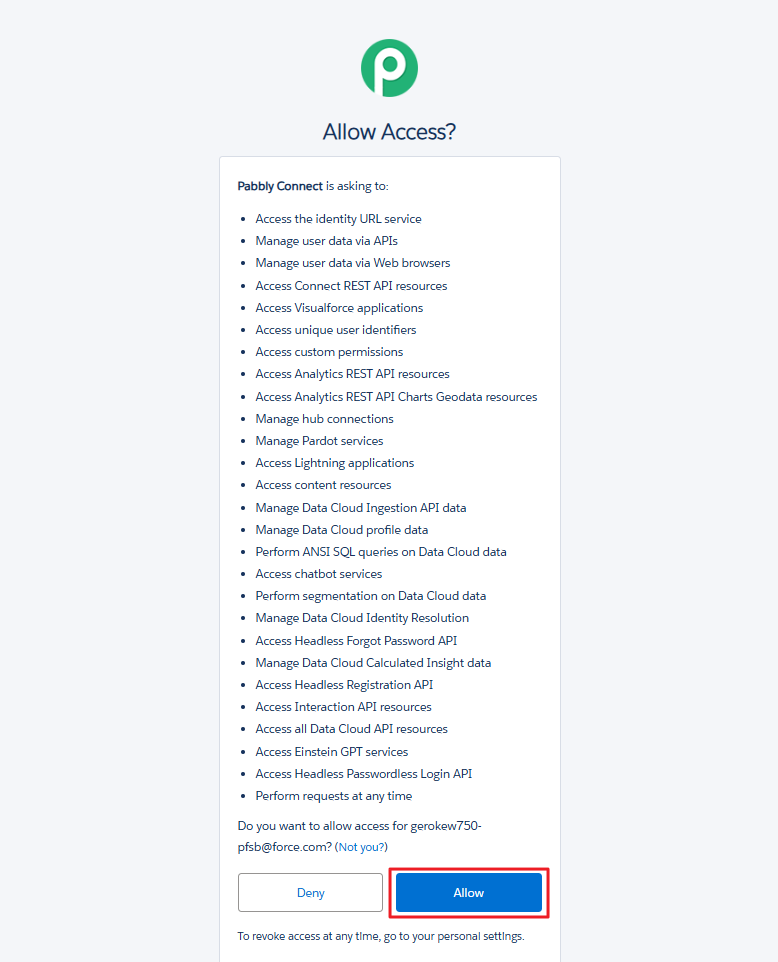
On the right side, a new window will pop up. Click Allow button. Authorization Successful message will appear.
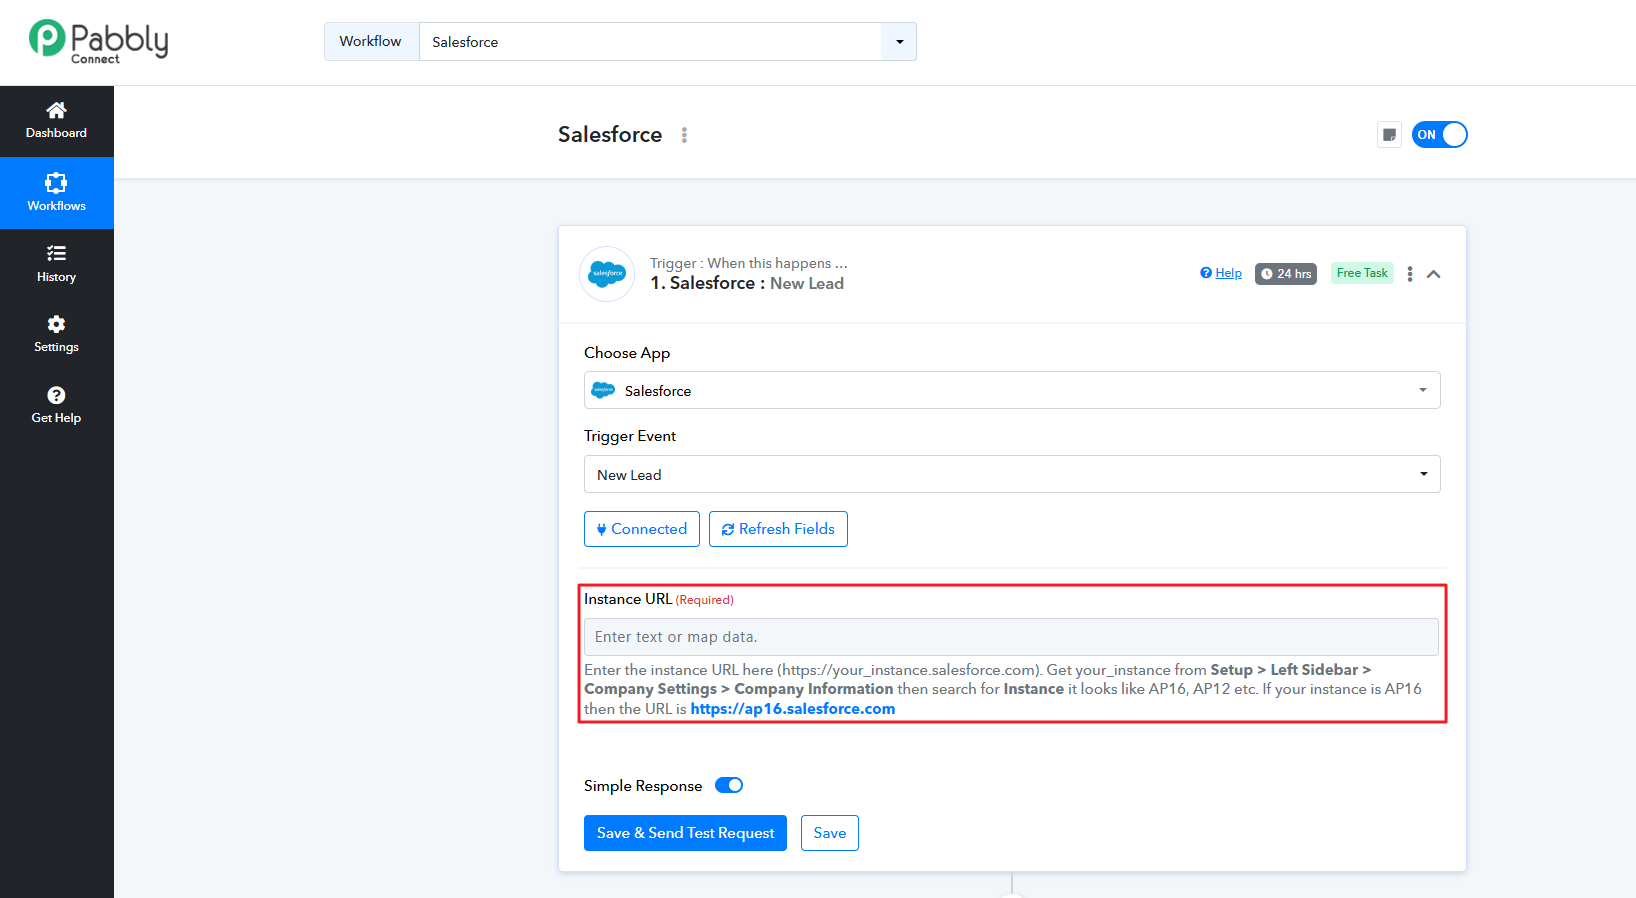
Now, you need to copy the Instance Code from Salesforce and then paste it here under Instance URL.
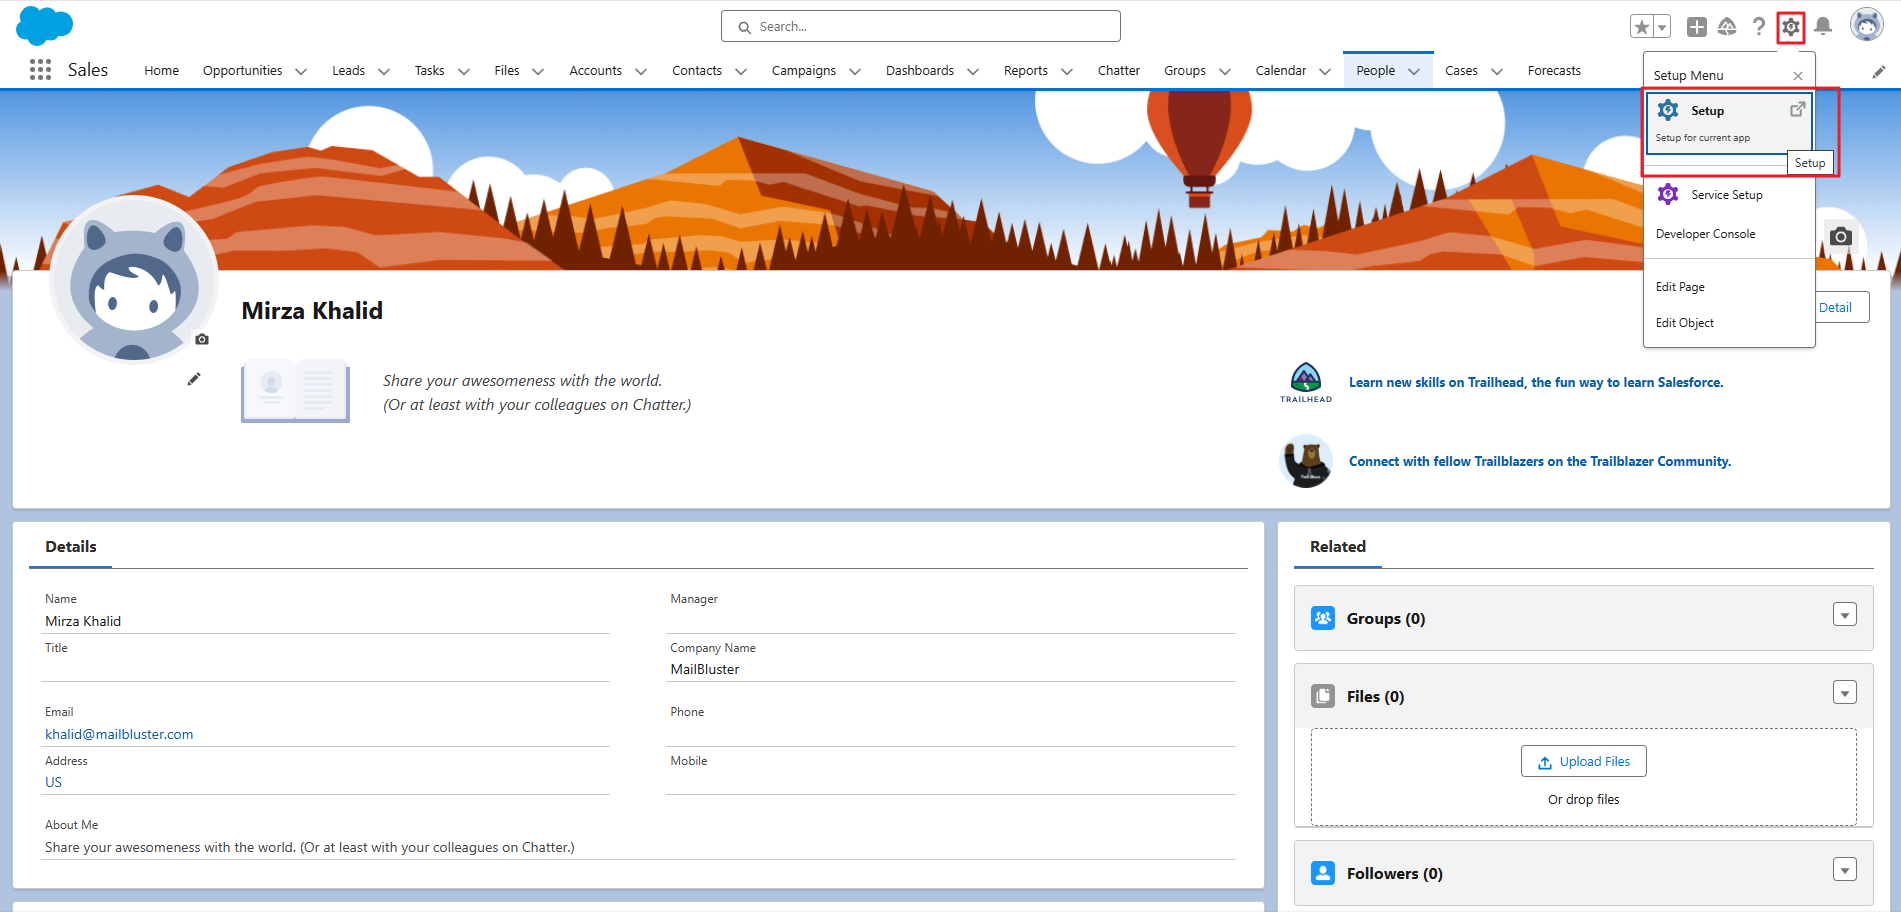
Go to Salesforce and click on the Setup icon and then on the dropdown list, click on Setup for current app.
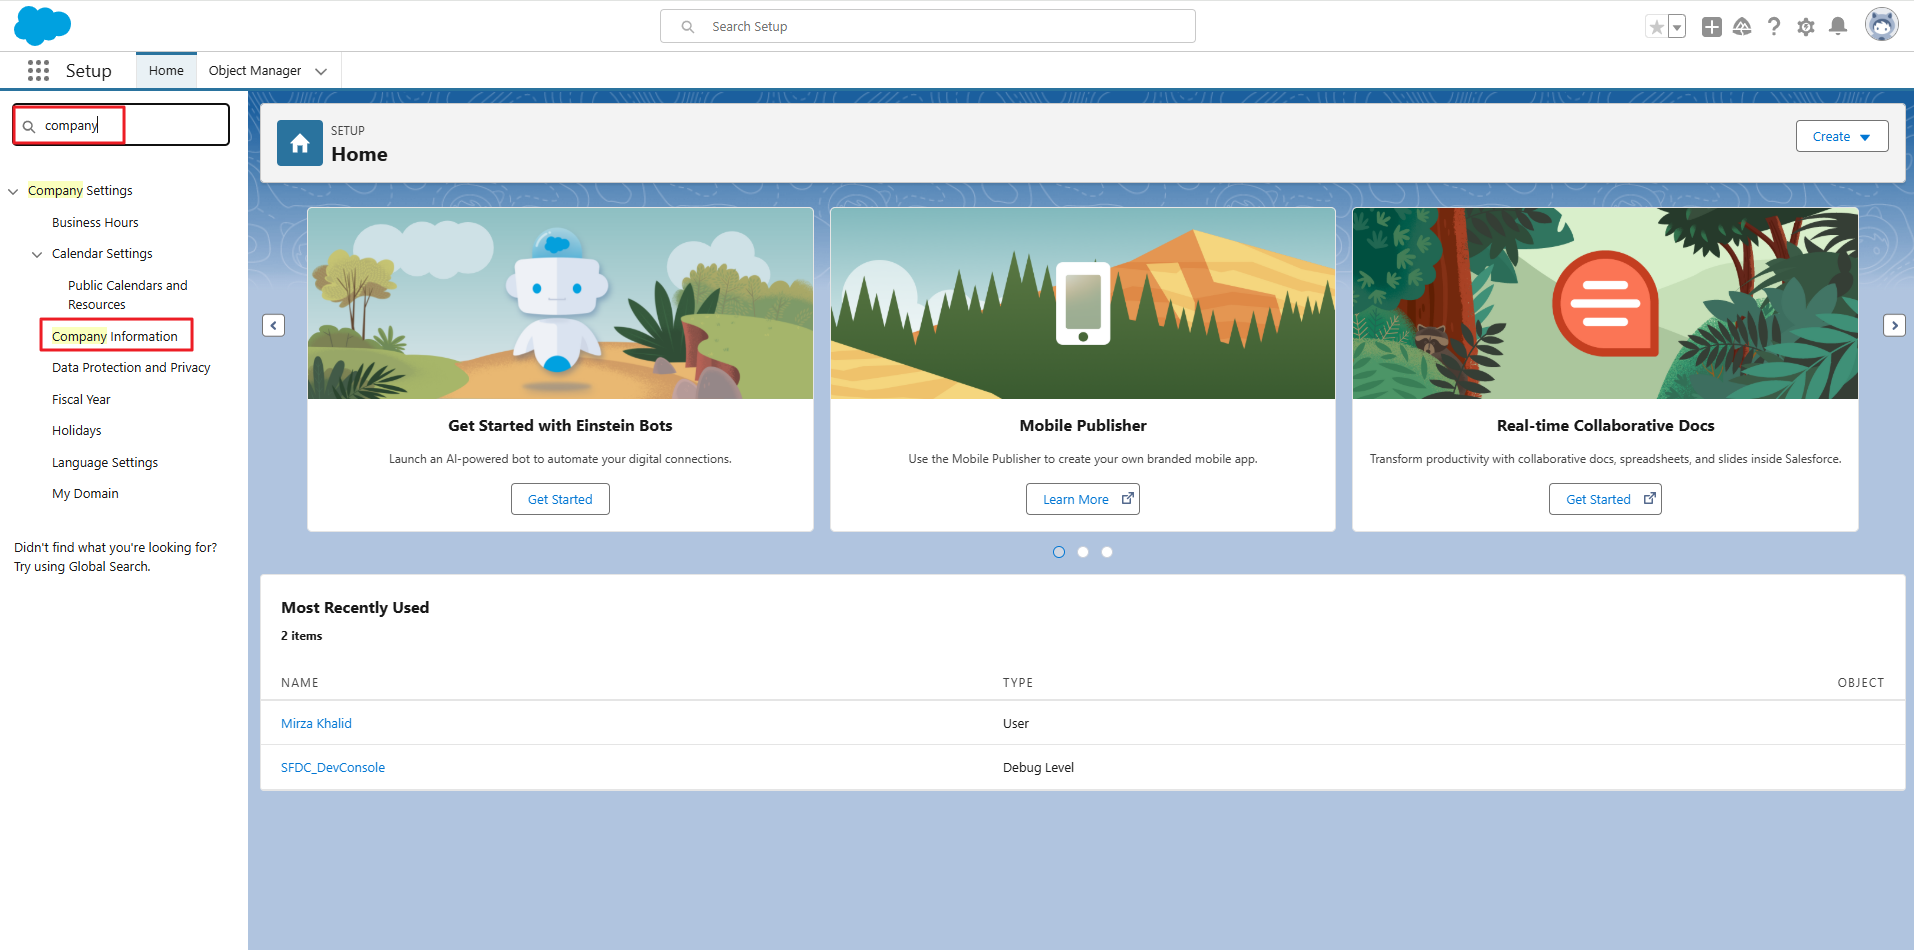
Type ‘company’ under search bar and click Company Information.
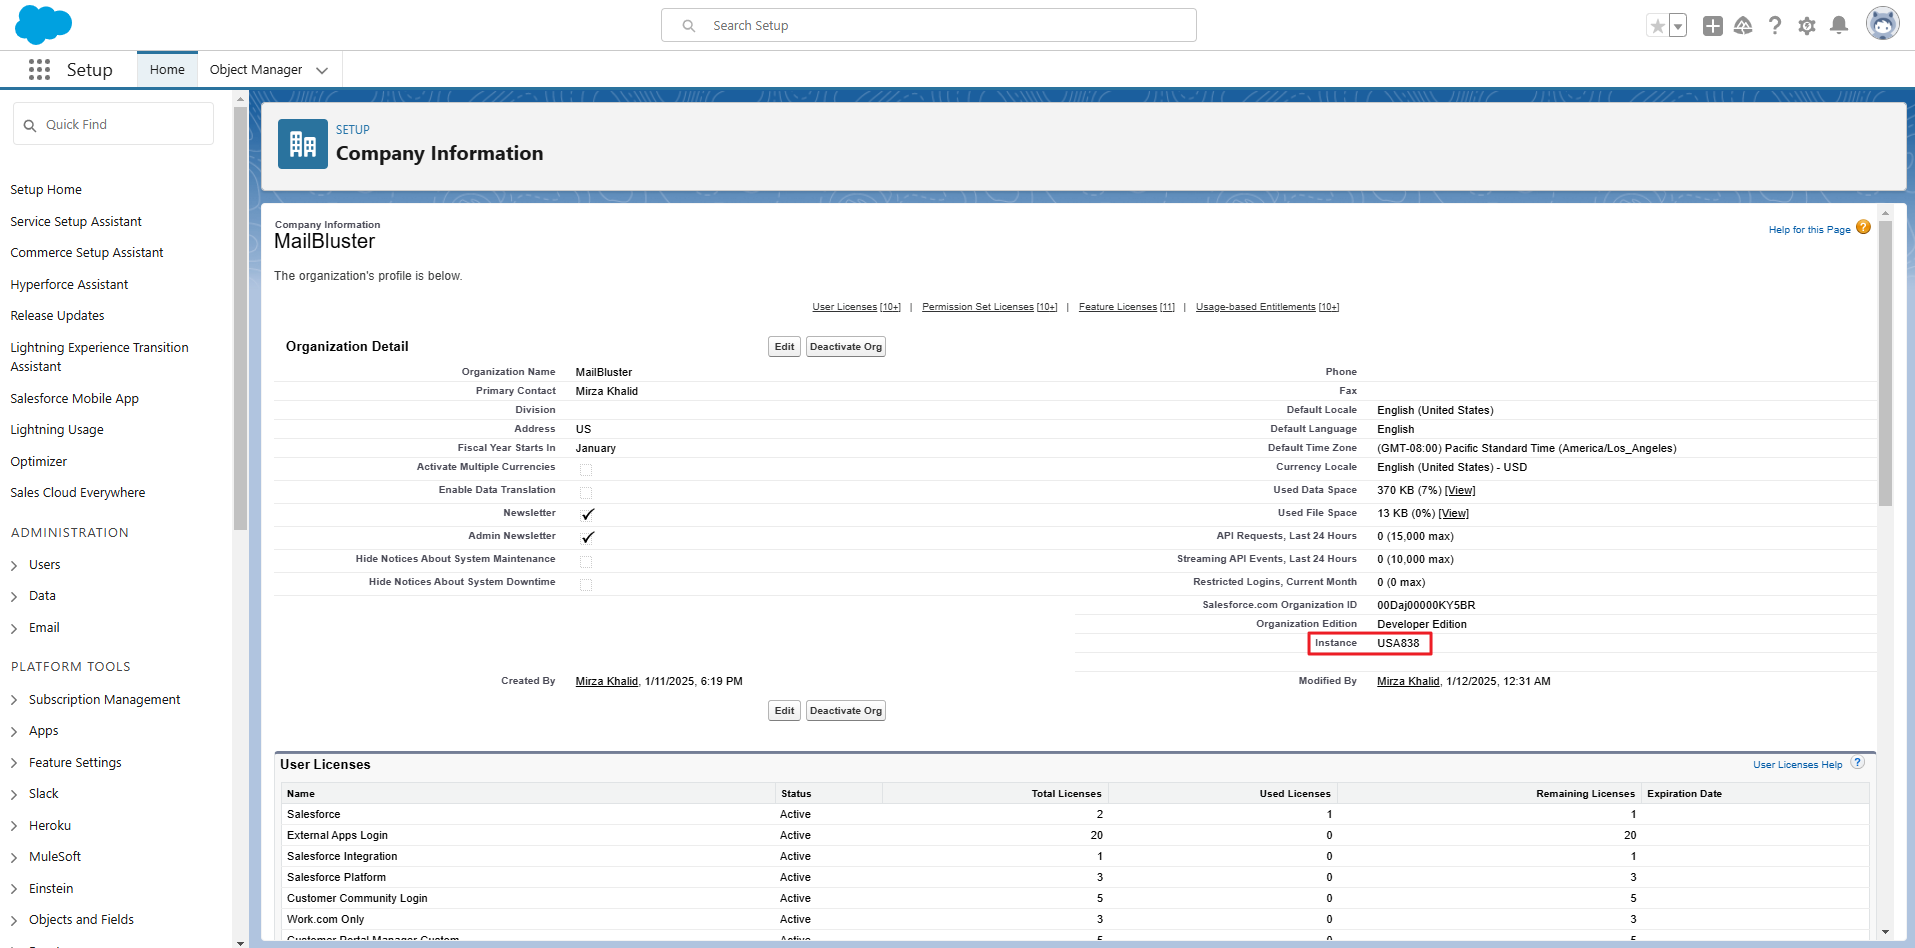
Inside the Company Information, you will find the Instance code.
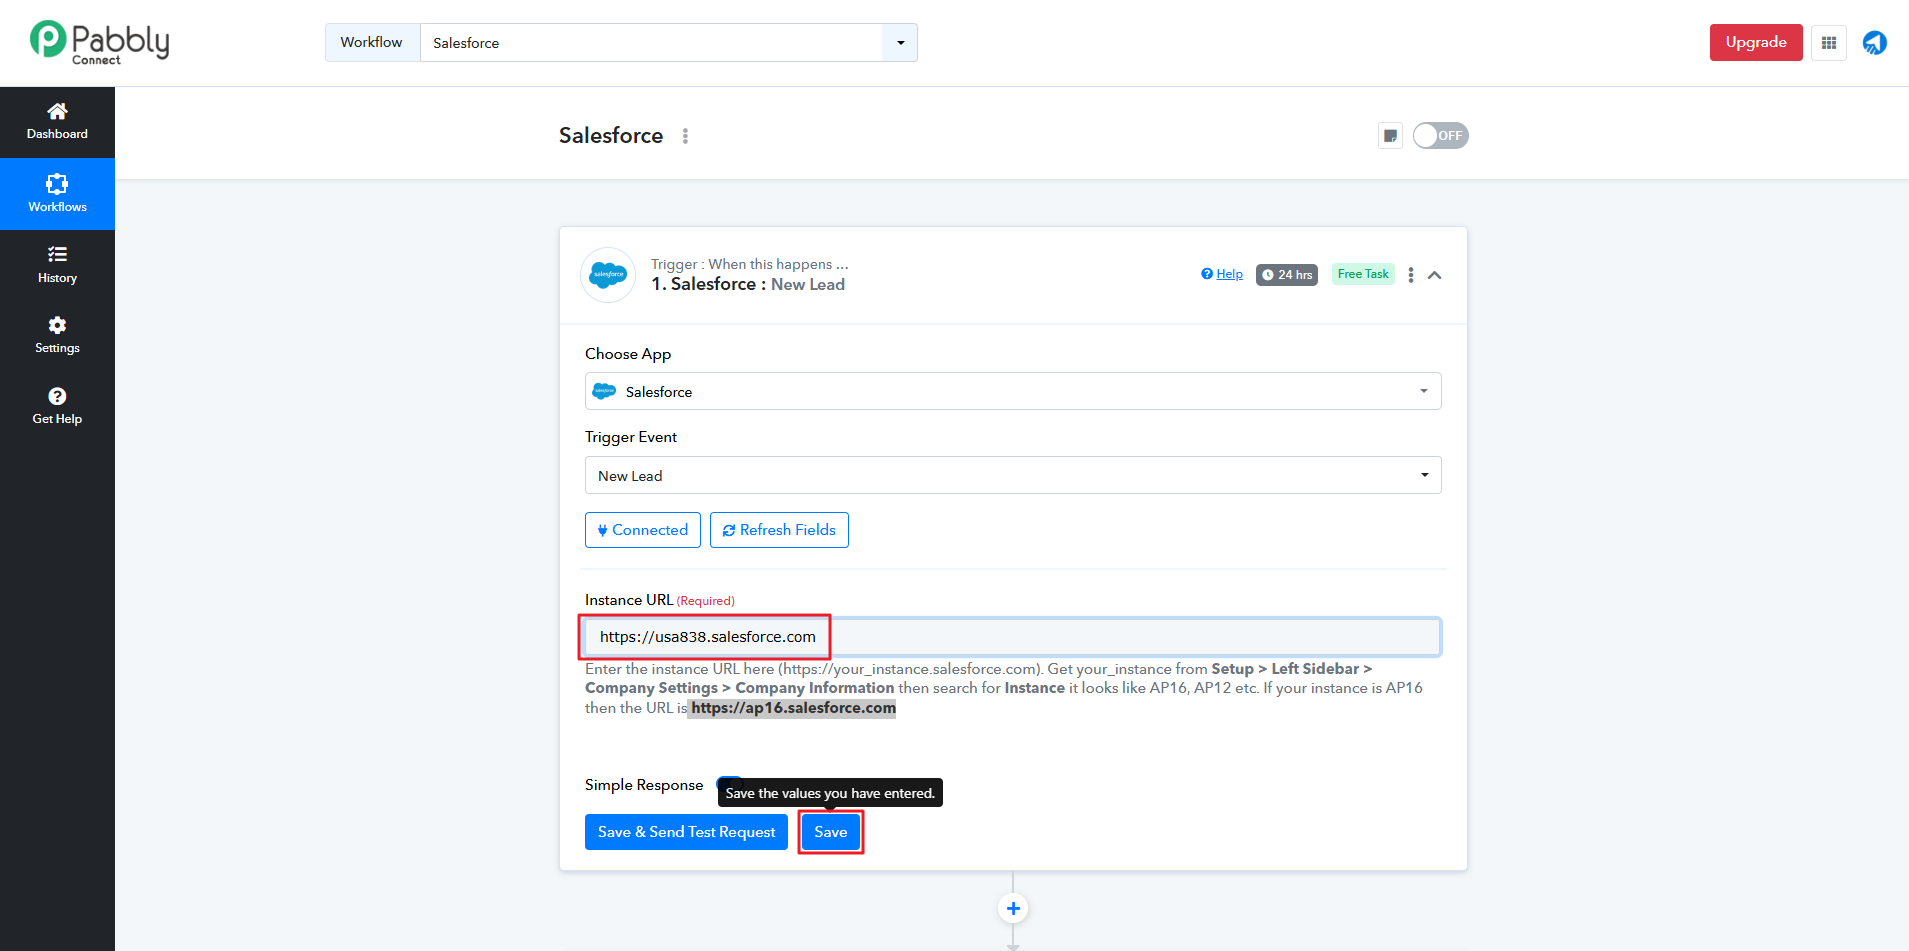
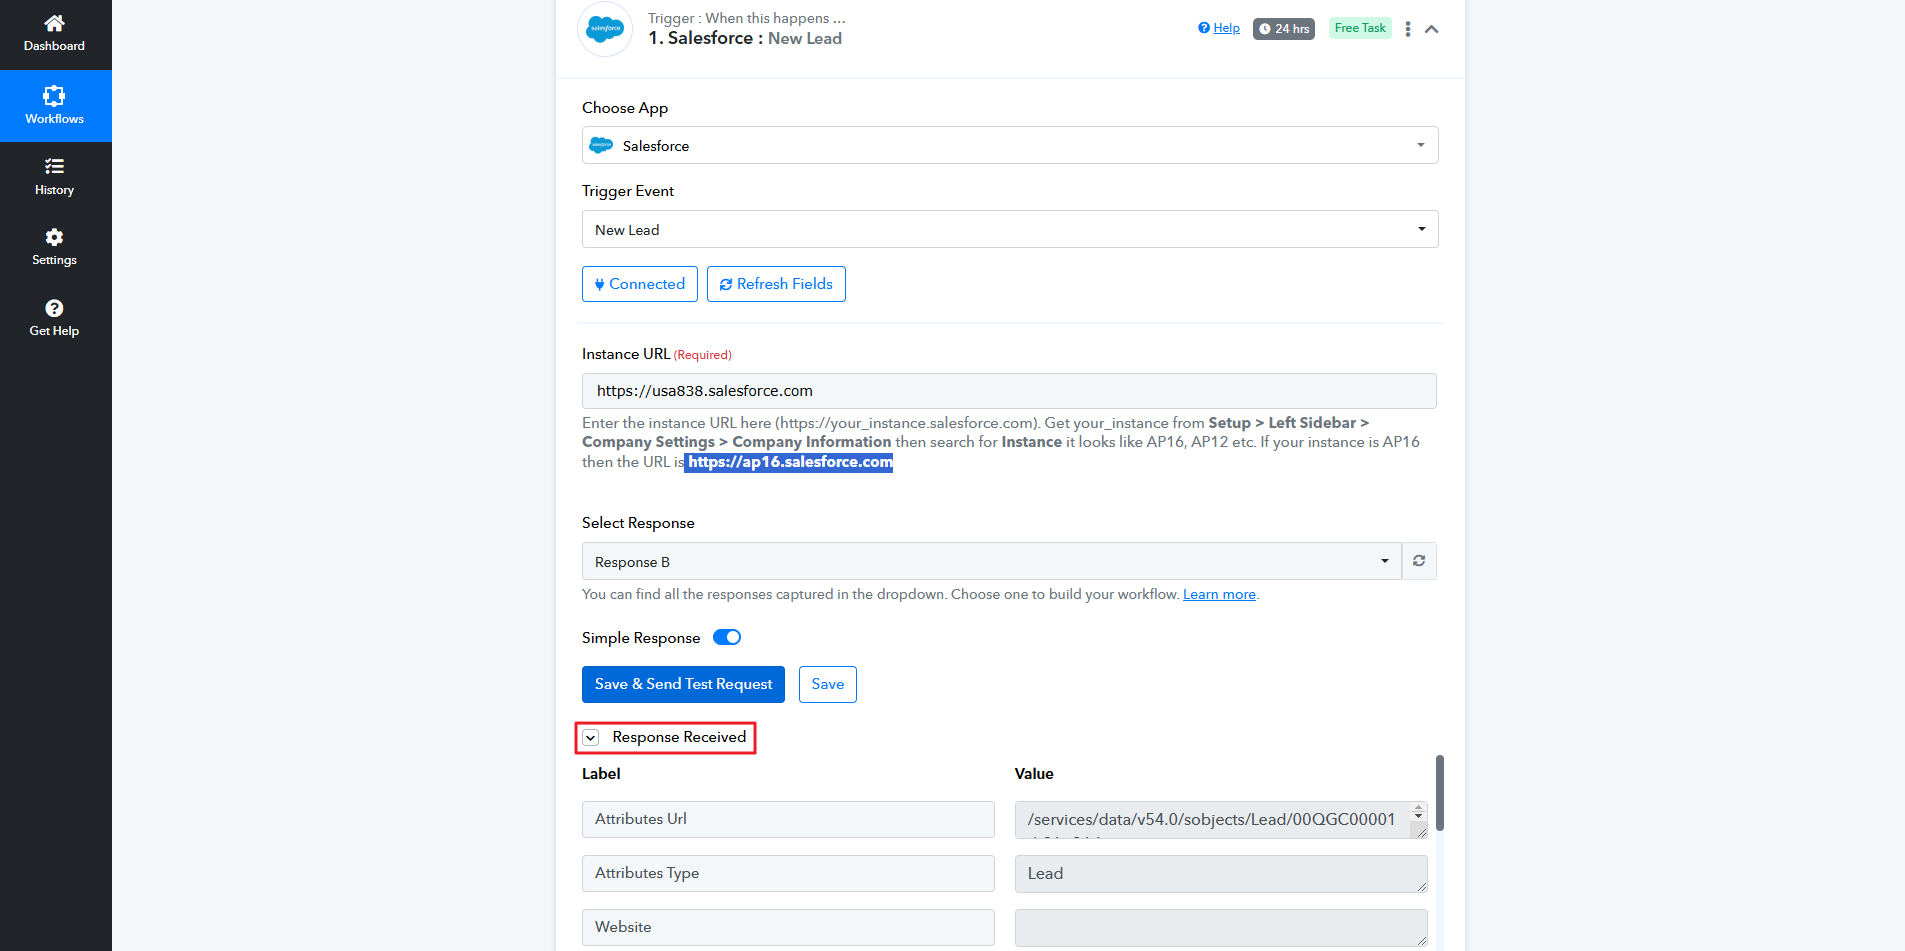
Now, go to Pabbly and paste the ‘Instance value’ inside Instance URL field in this format https://code.salesforce.com as shown below. Then click Save.
Type in Save & Send Test Request.

You will notice a Response Received from Salesforce.
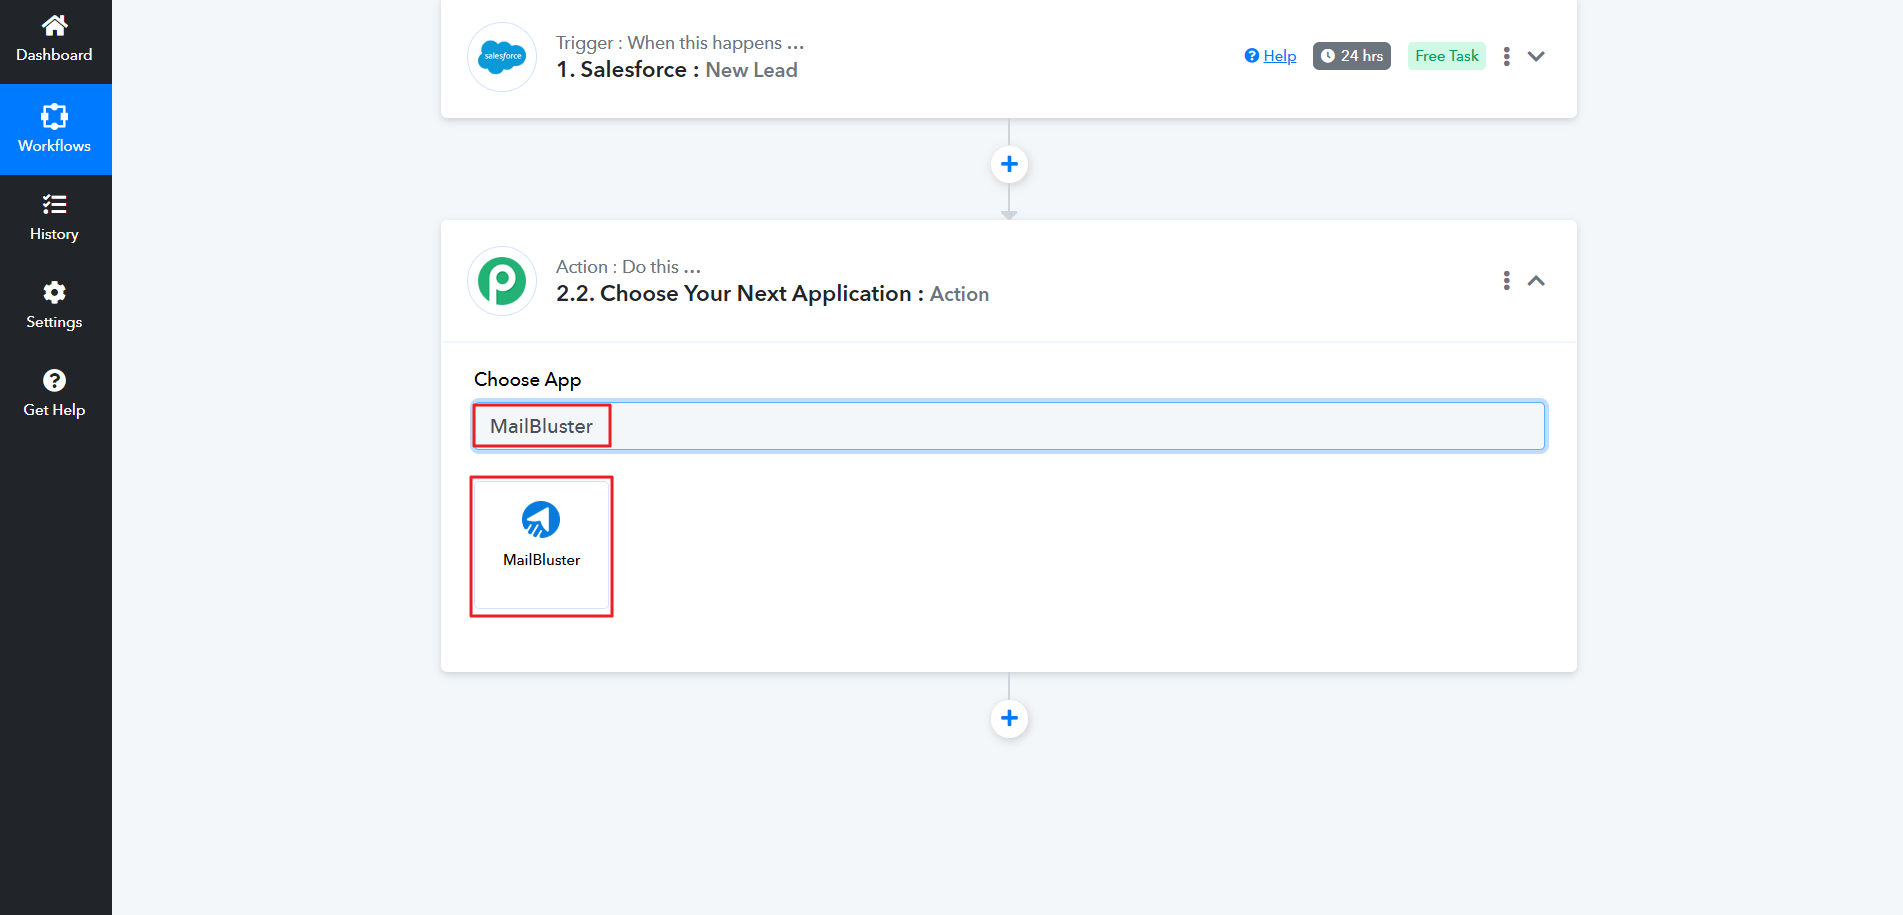
Now, it’s time to connect MailBluster with Pabbly. Pabbly requires API key from MailBluster to connect. So, type ‘MailBluster’ under Choose App and select MailBluster as shown below.
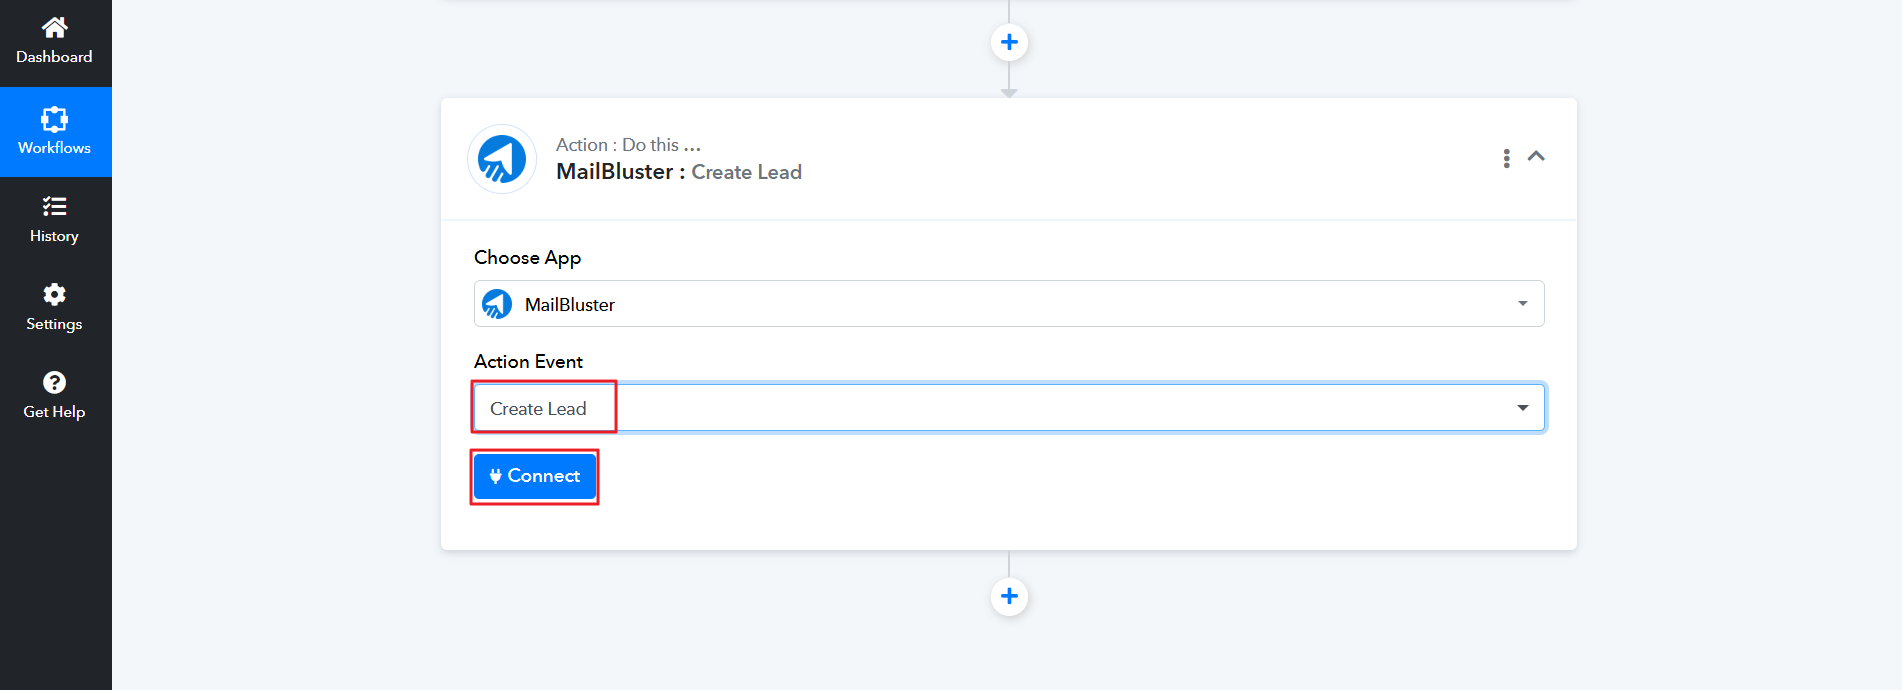
Now, select Create Lead from the dropdown list of Action Event as shown below. Then click Connect button.
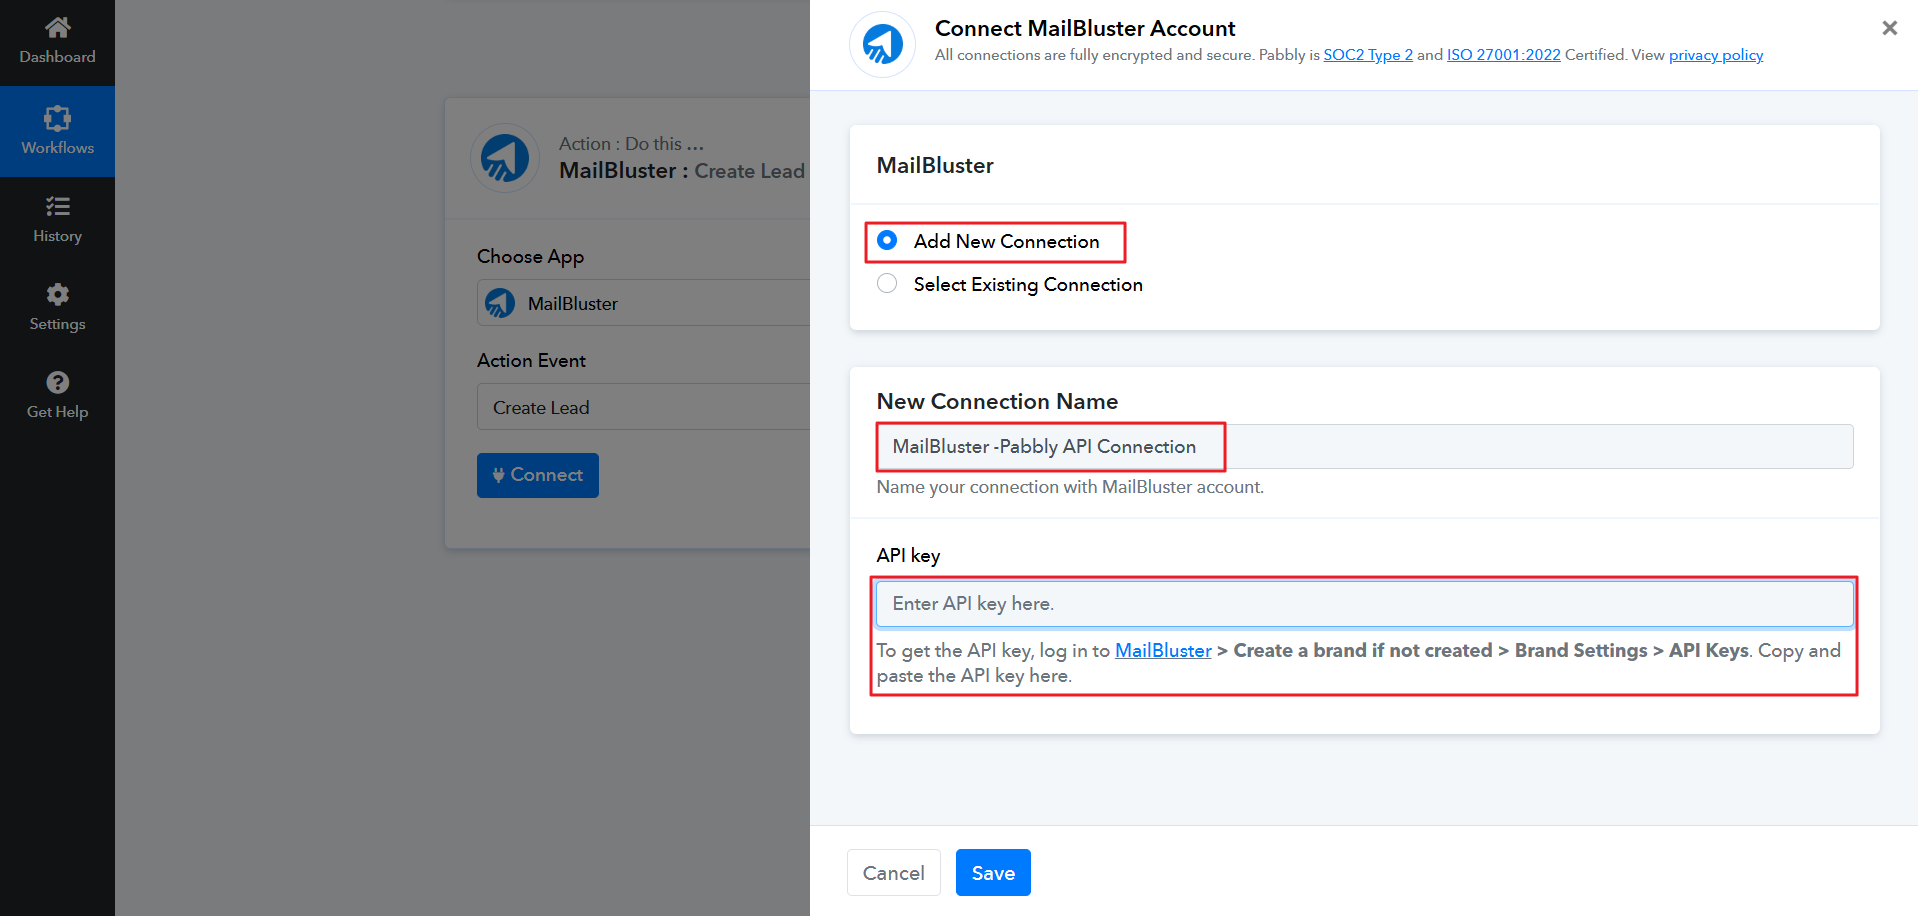
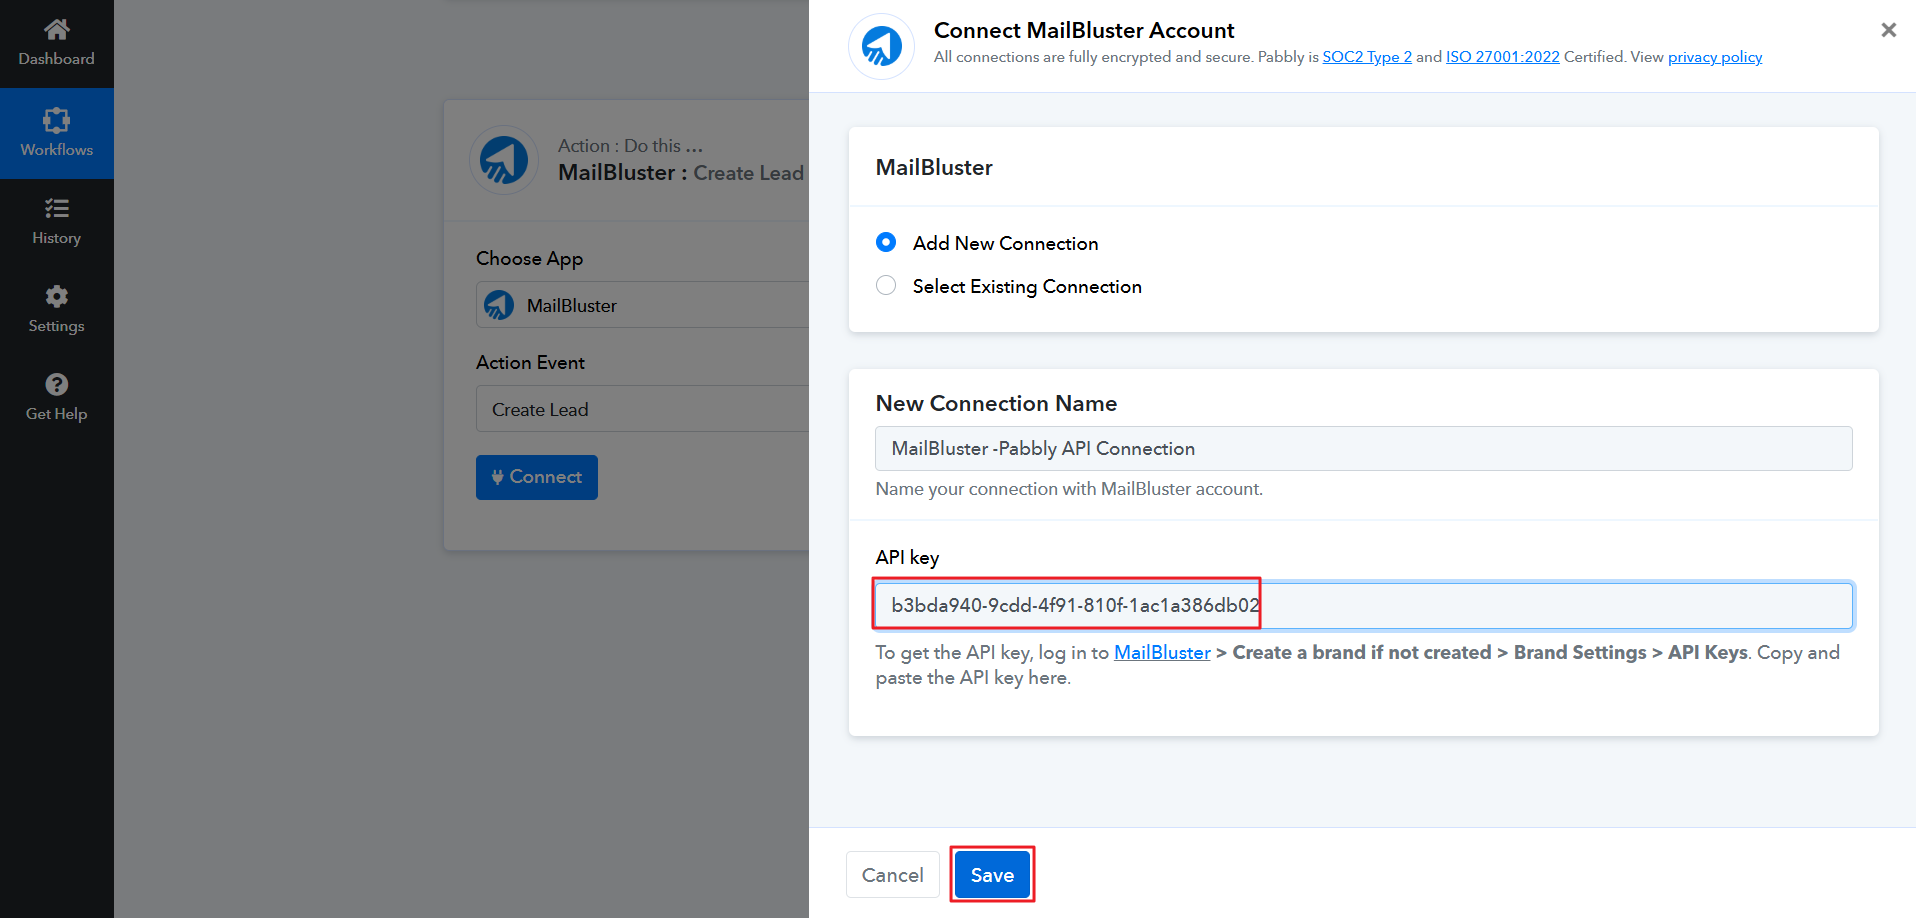
After clicking Connect, a window will popup. Select Add New Connection, write down New Connection Name. You will notice it wants an API key of MailBluster in the API key field. You need to generate the API key from MailBluster itself and paste it here.
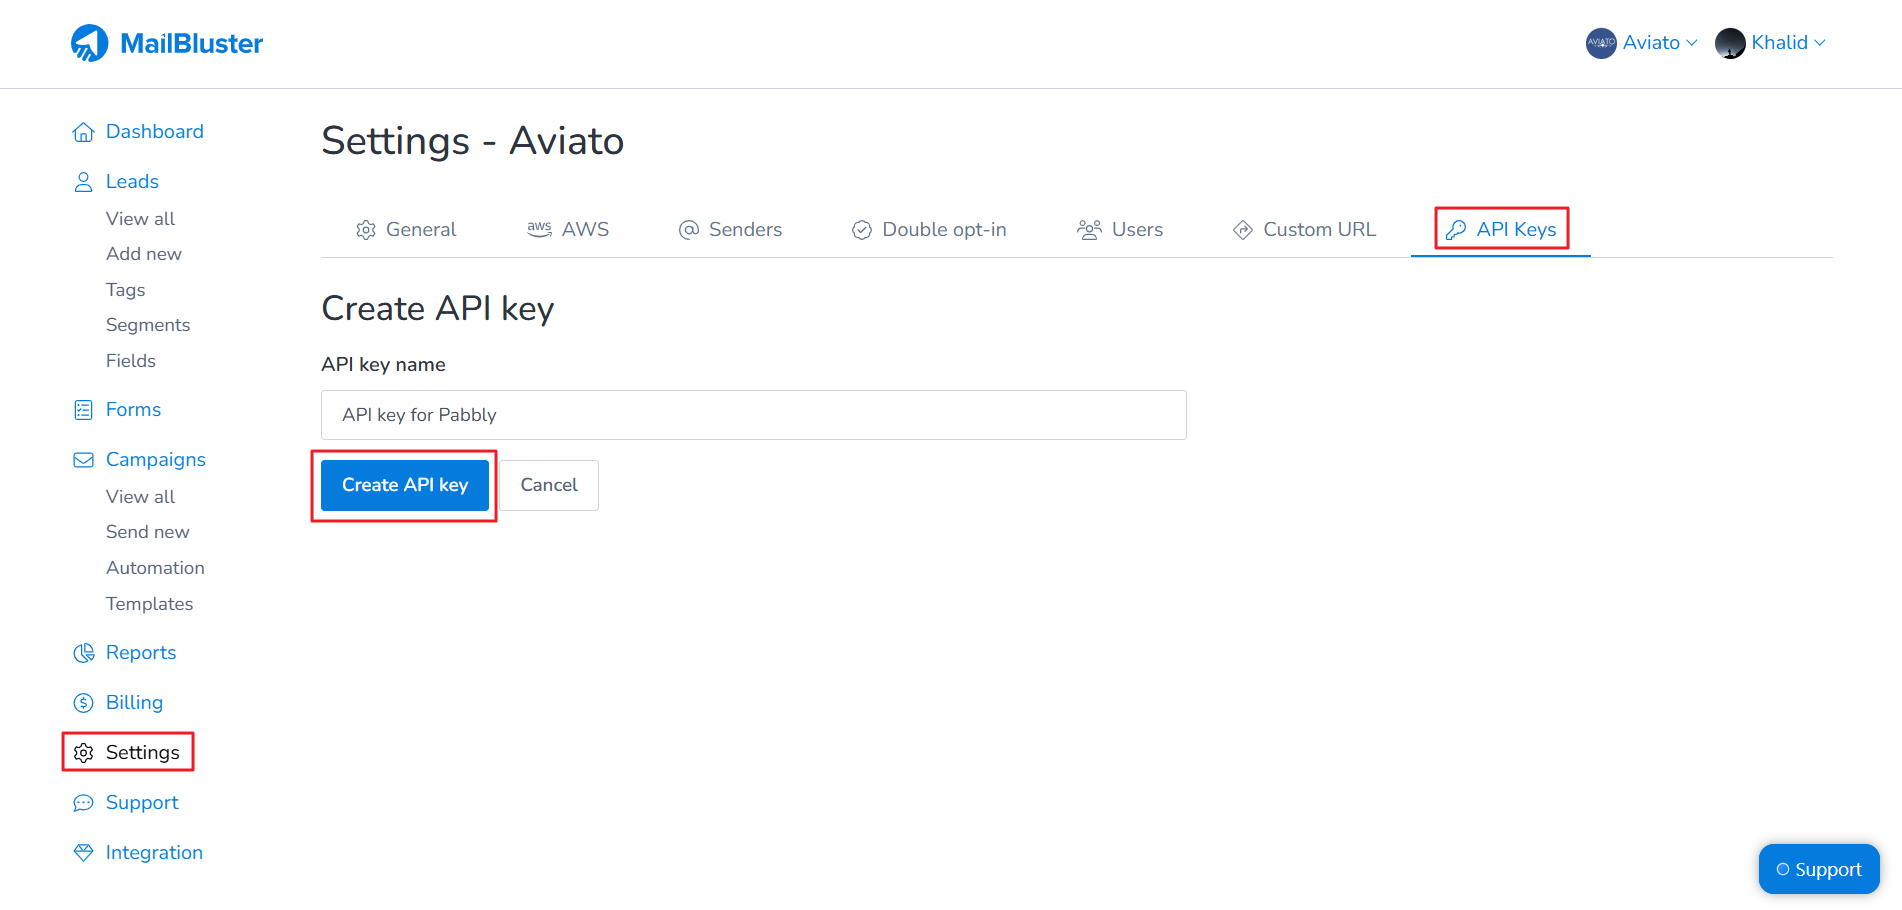
Sign in to your Brand in MailBluster. Then go to Settings > API Keys. Then click Create new.

Enter the API key name and click Create API key.
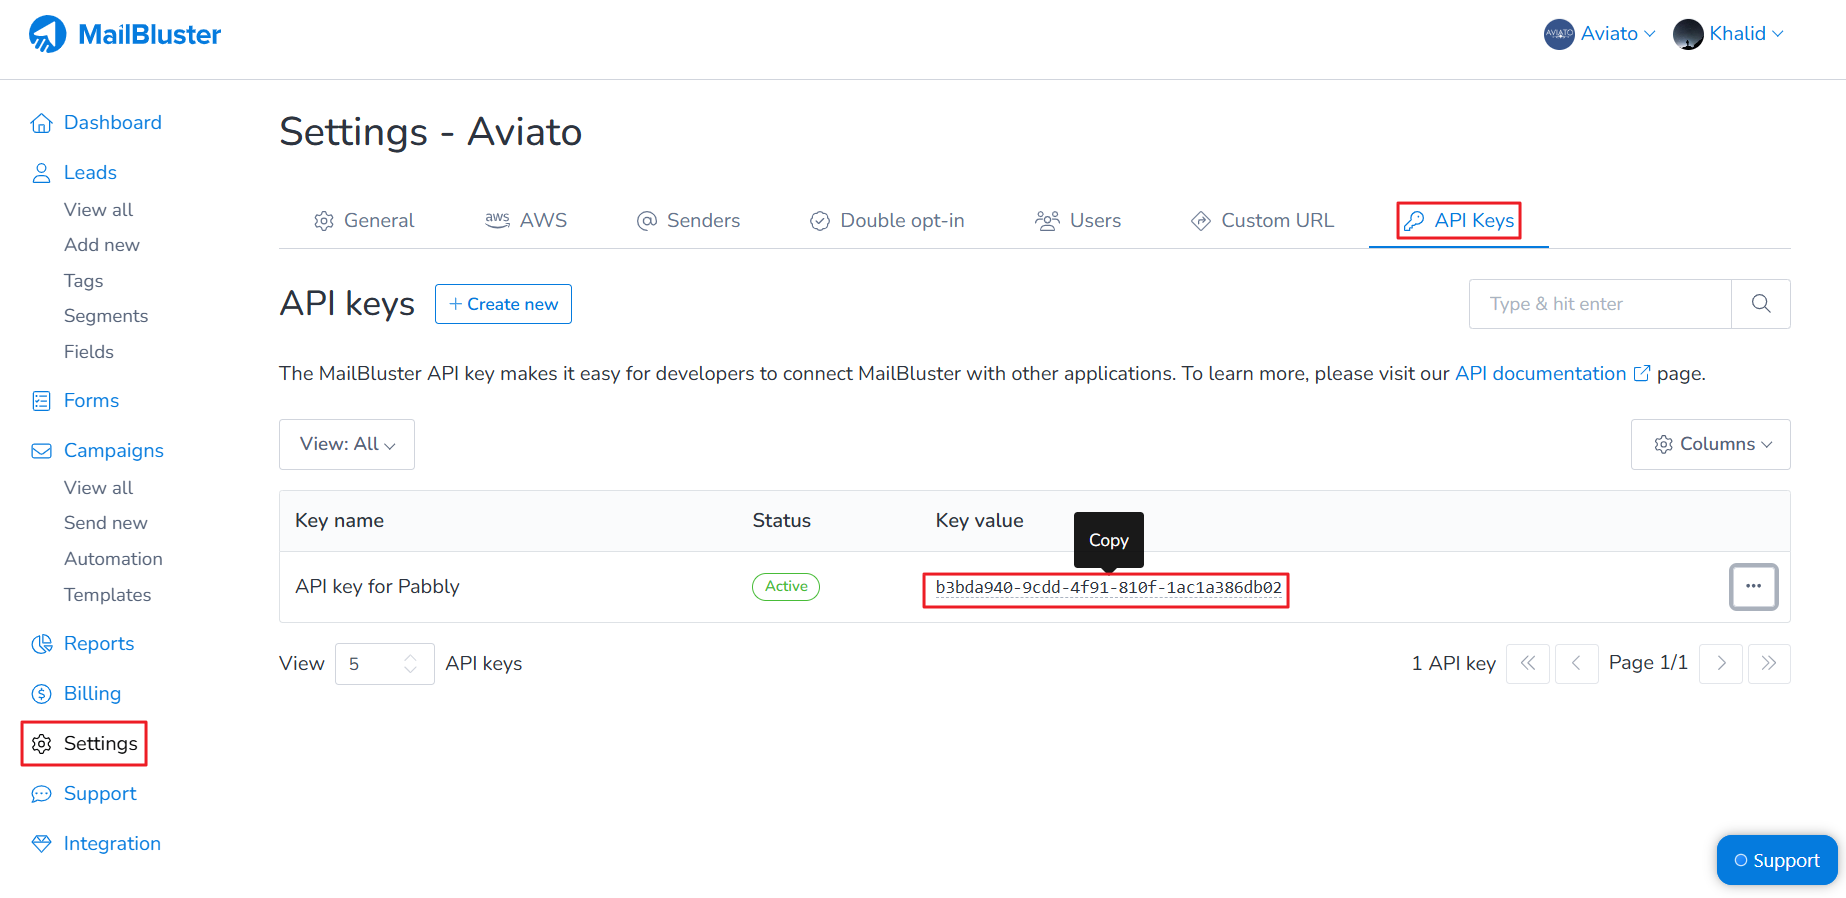
Copy the API key value from MailBluster.
And paste it on Pabbly Connect API key.
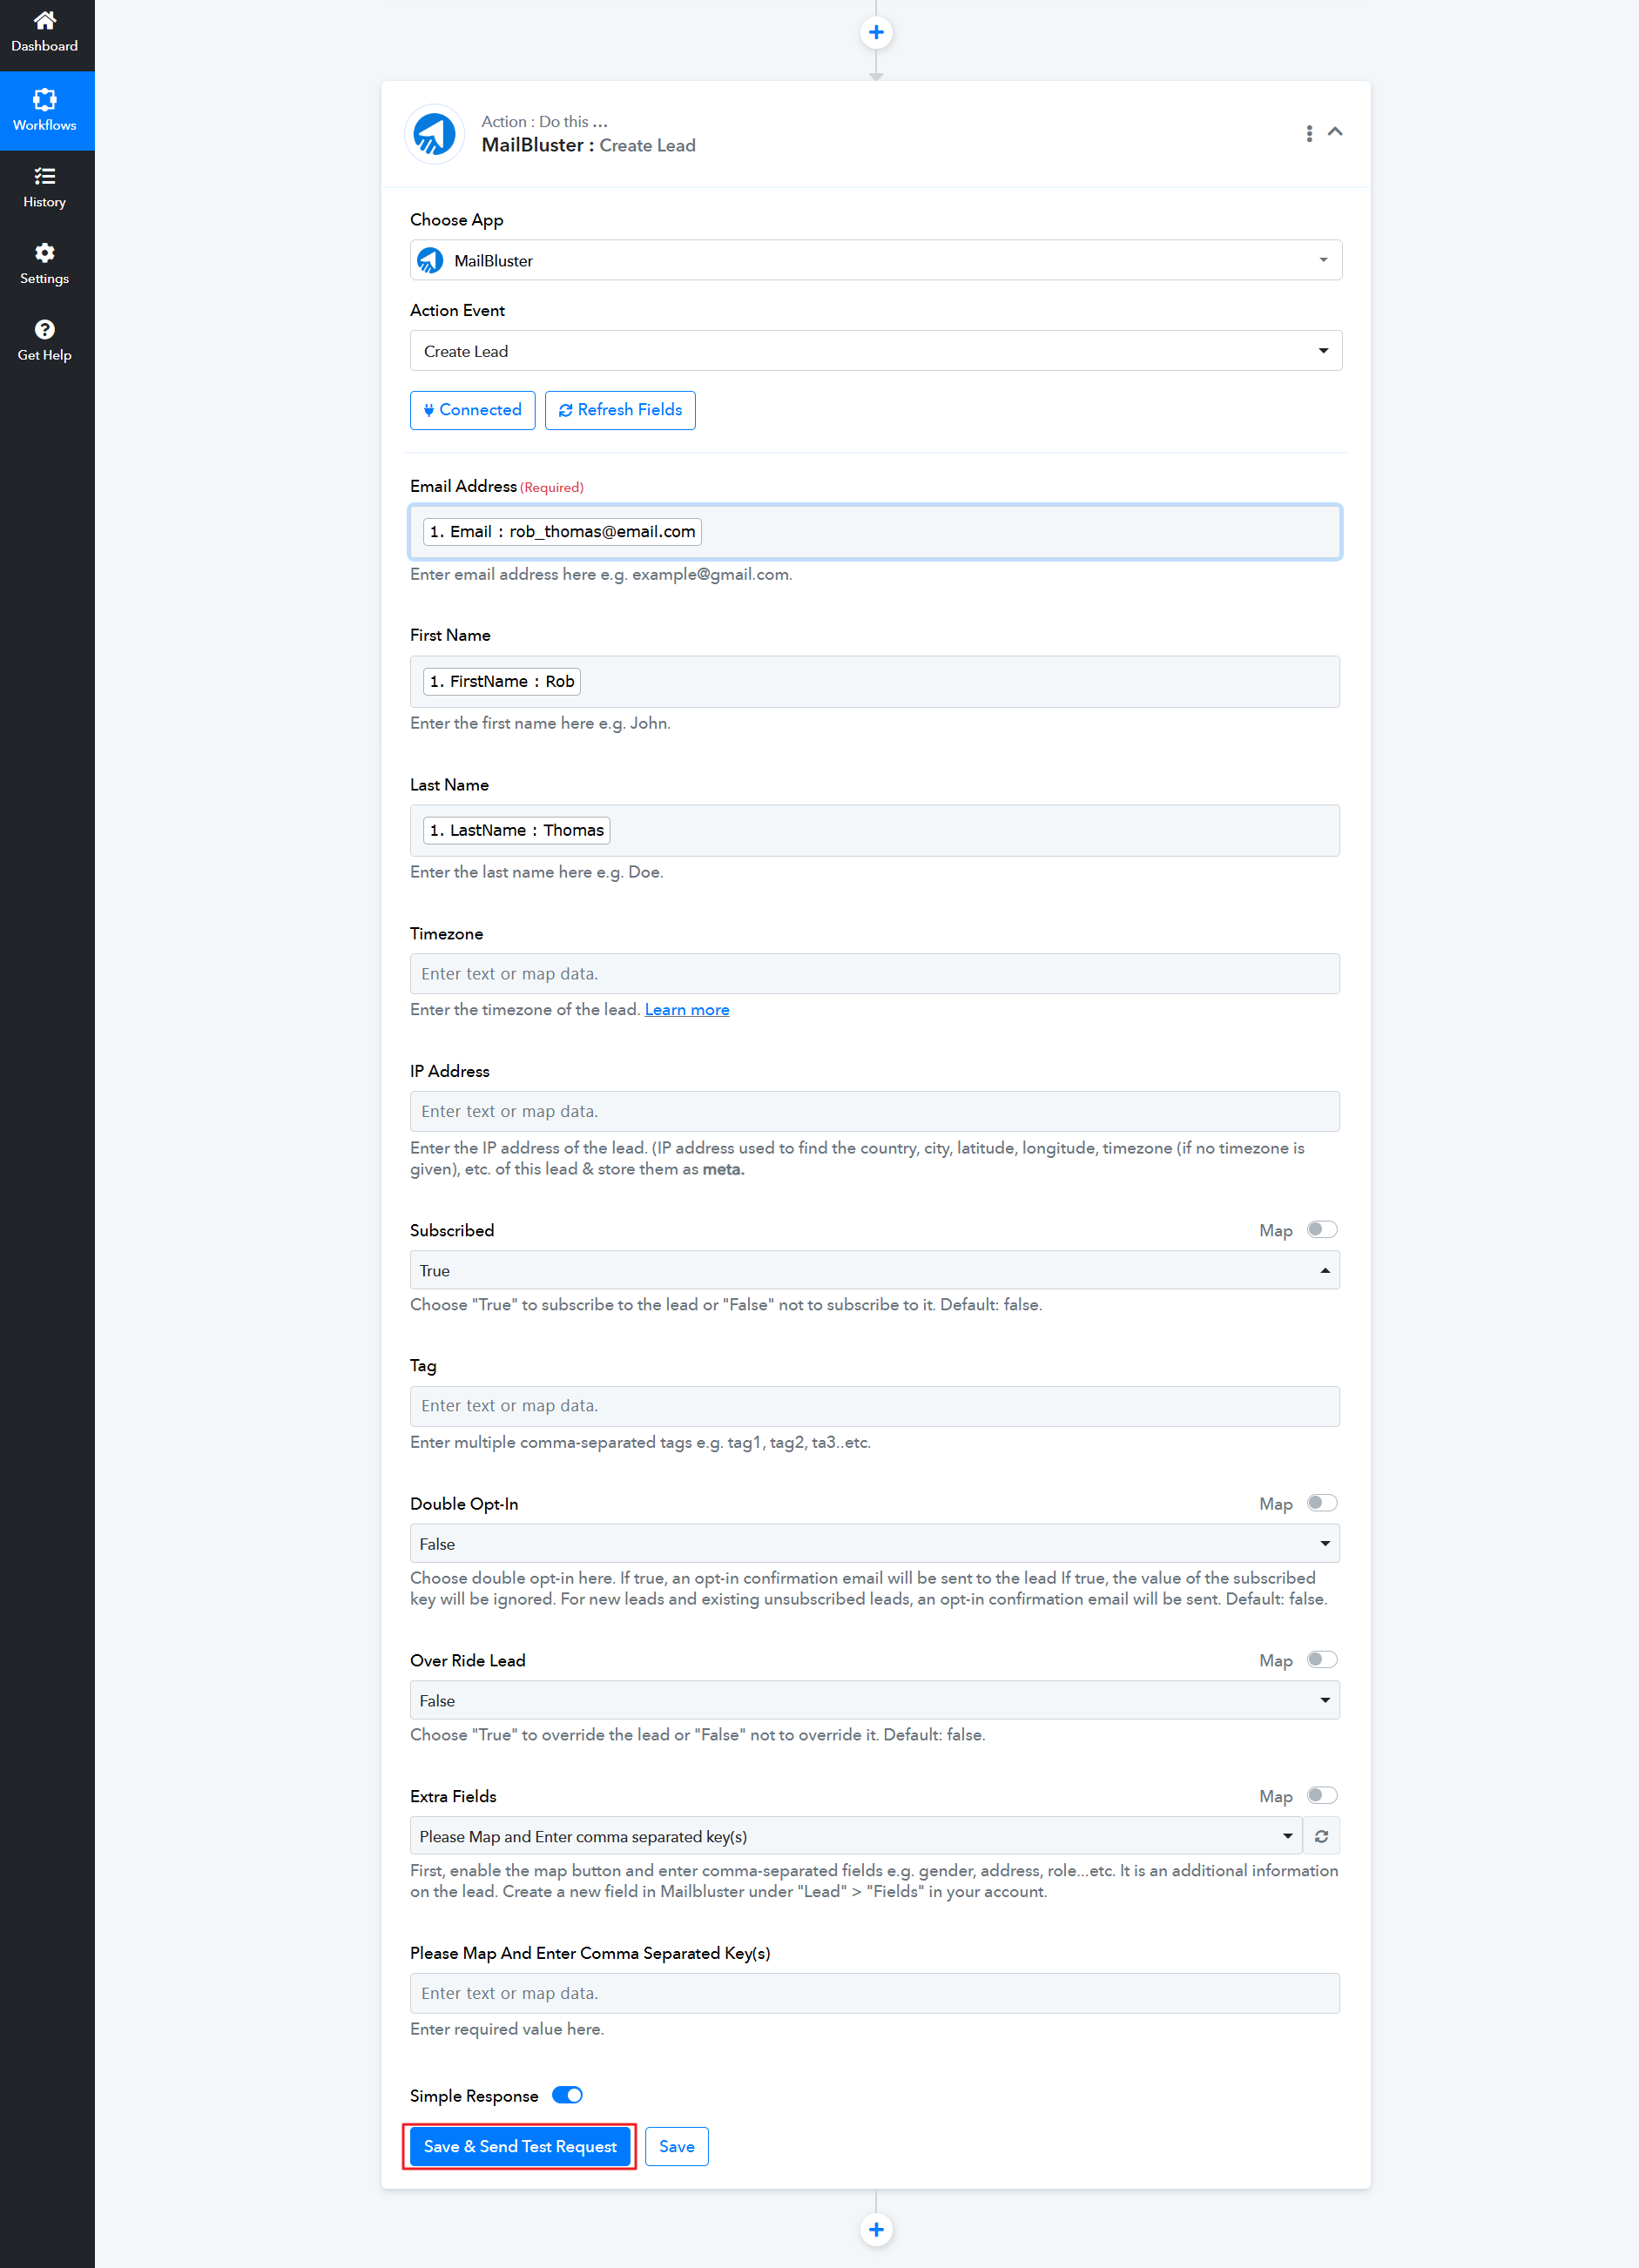
After connecting to MailBluster, add Email address as shown below.
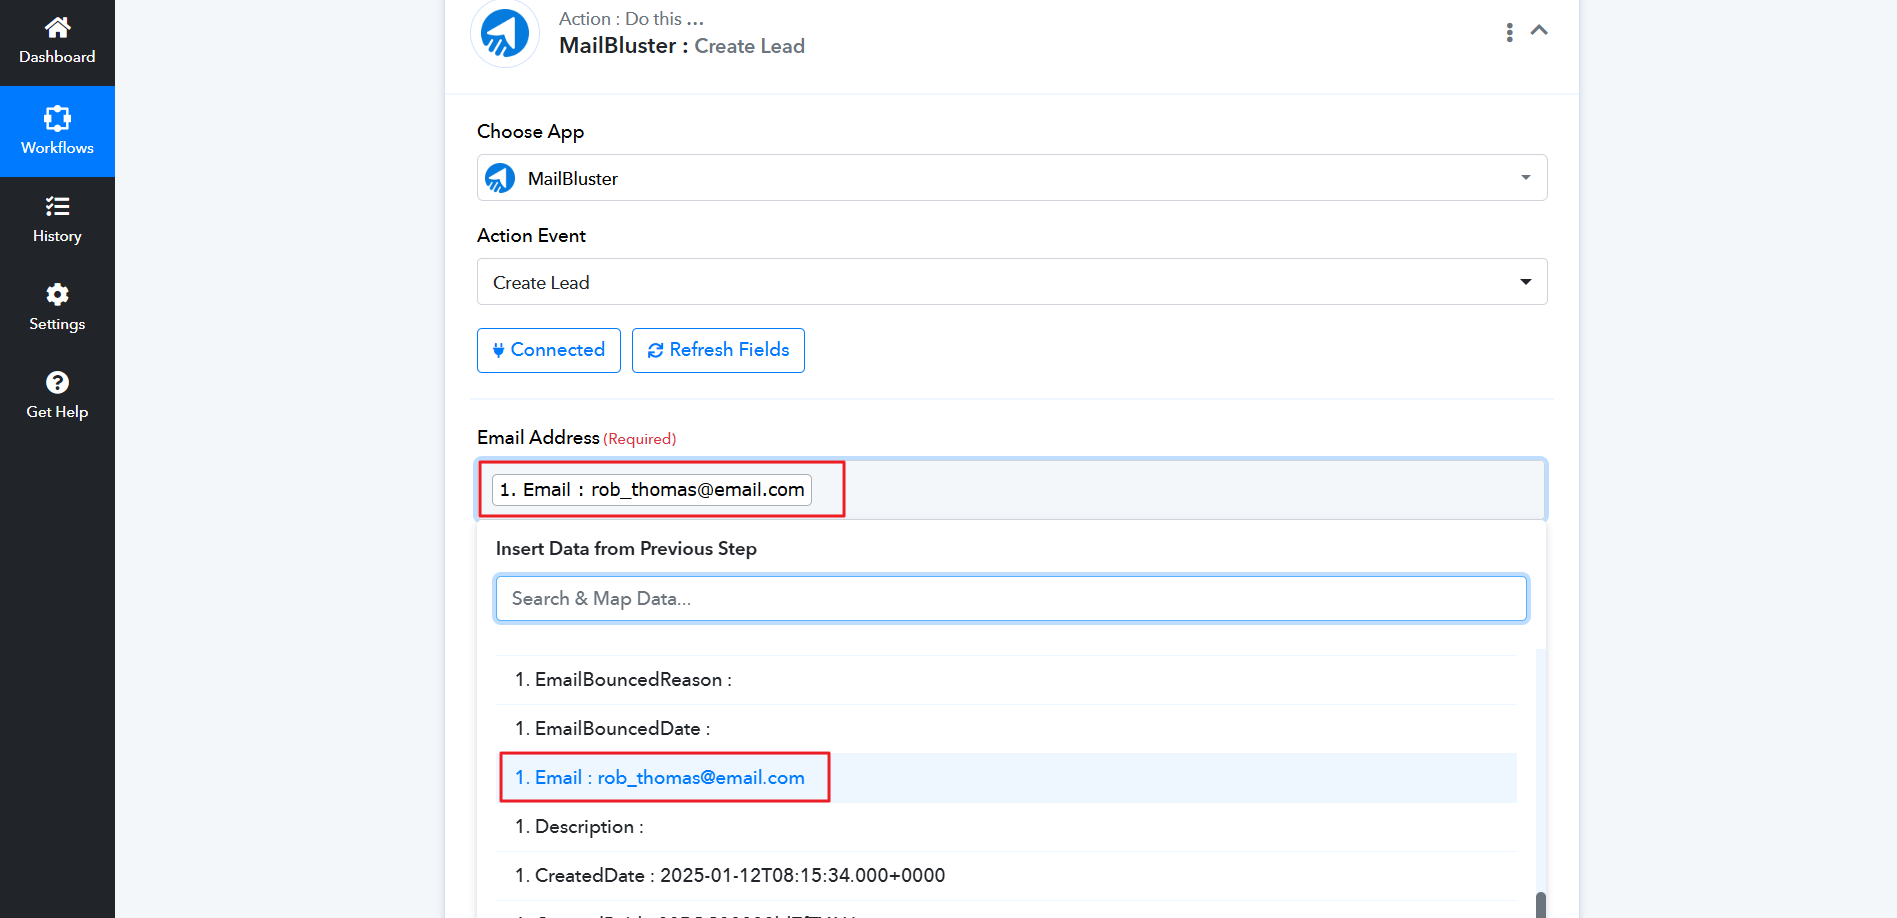
Then add First Name and Last Name on Insert Data from Previous Step. Then click Save & Send Test Request.
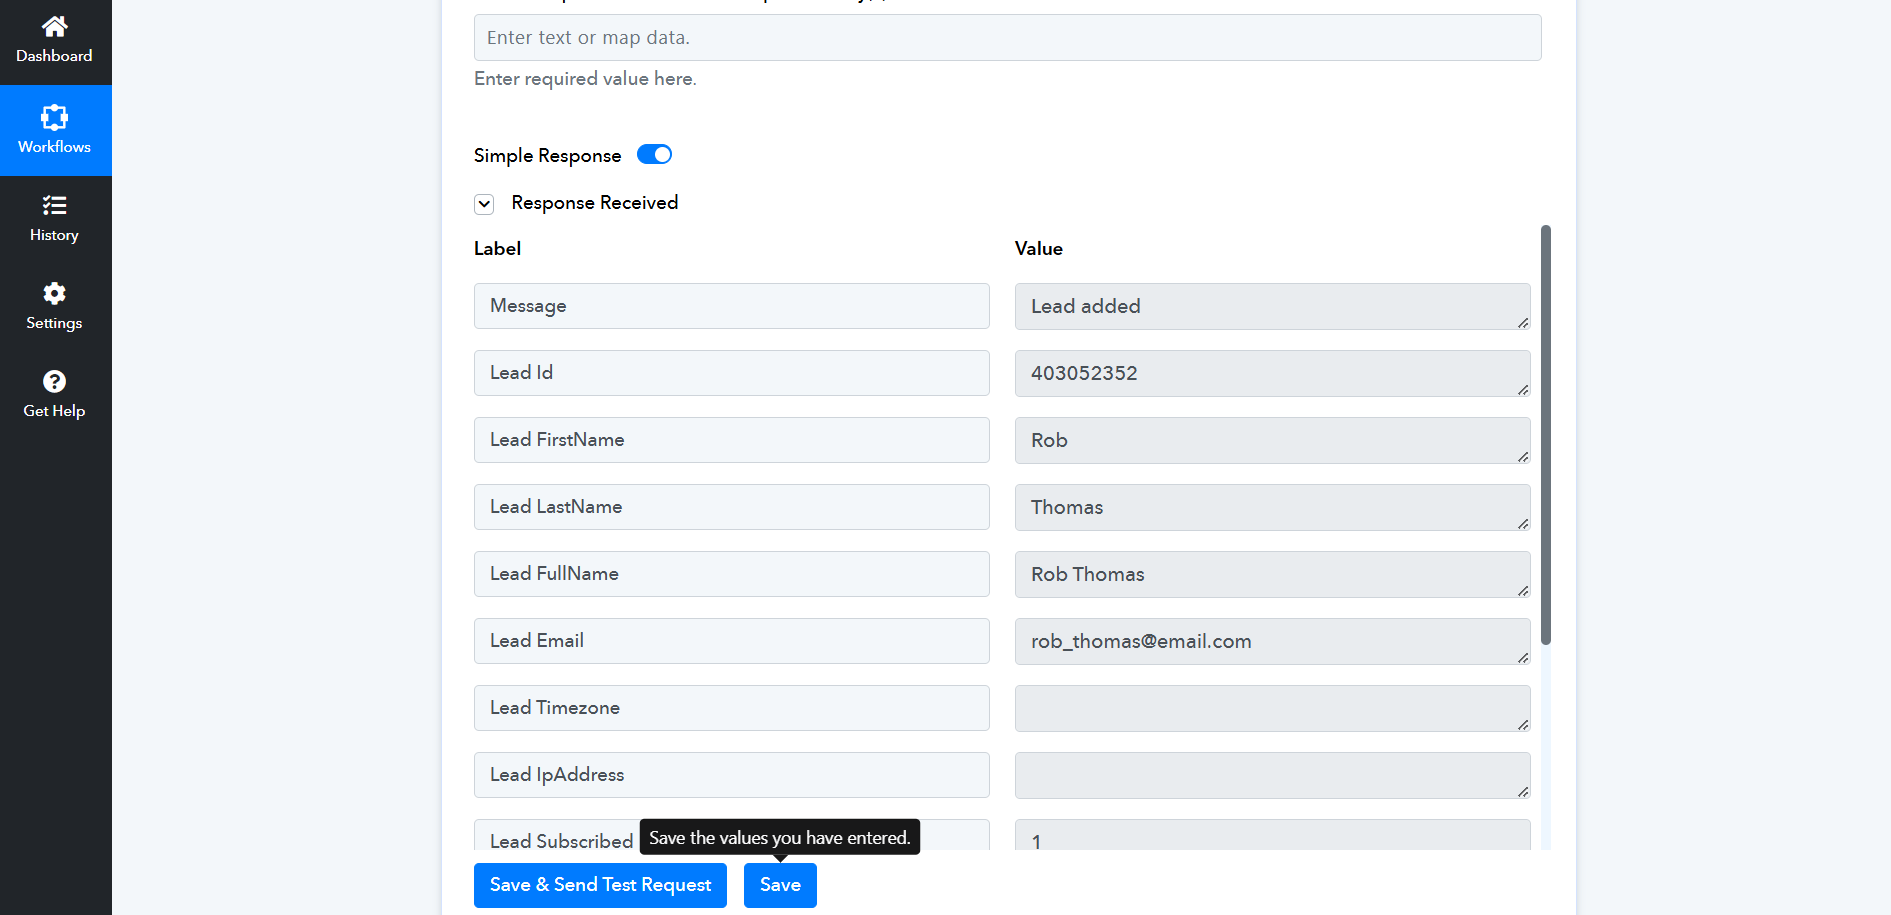
You will notice the Lead added message in Response Received as shown below.
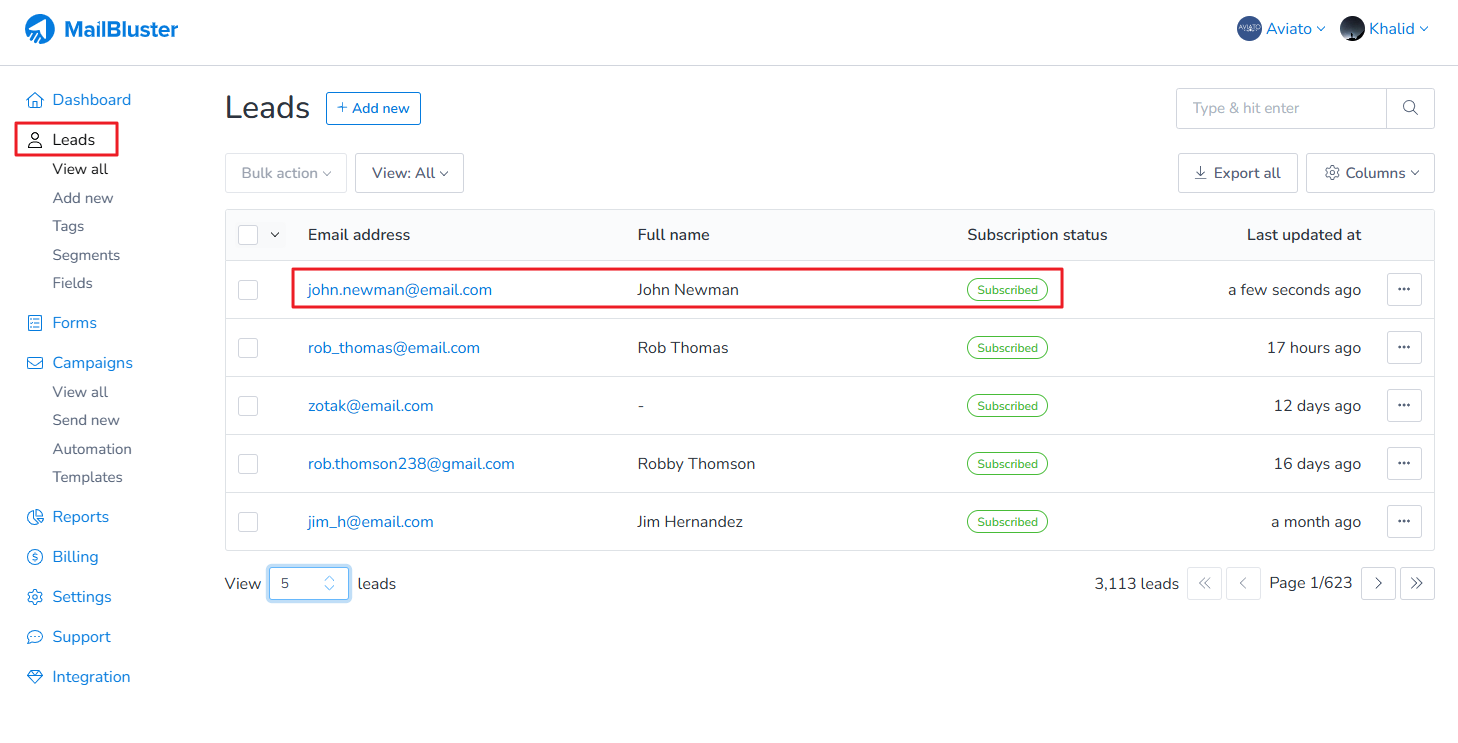
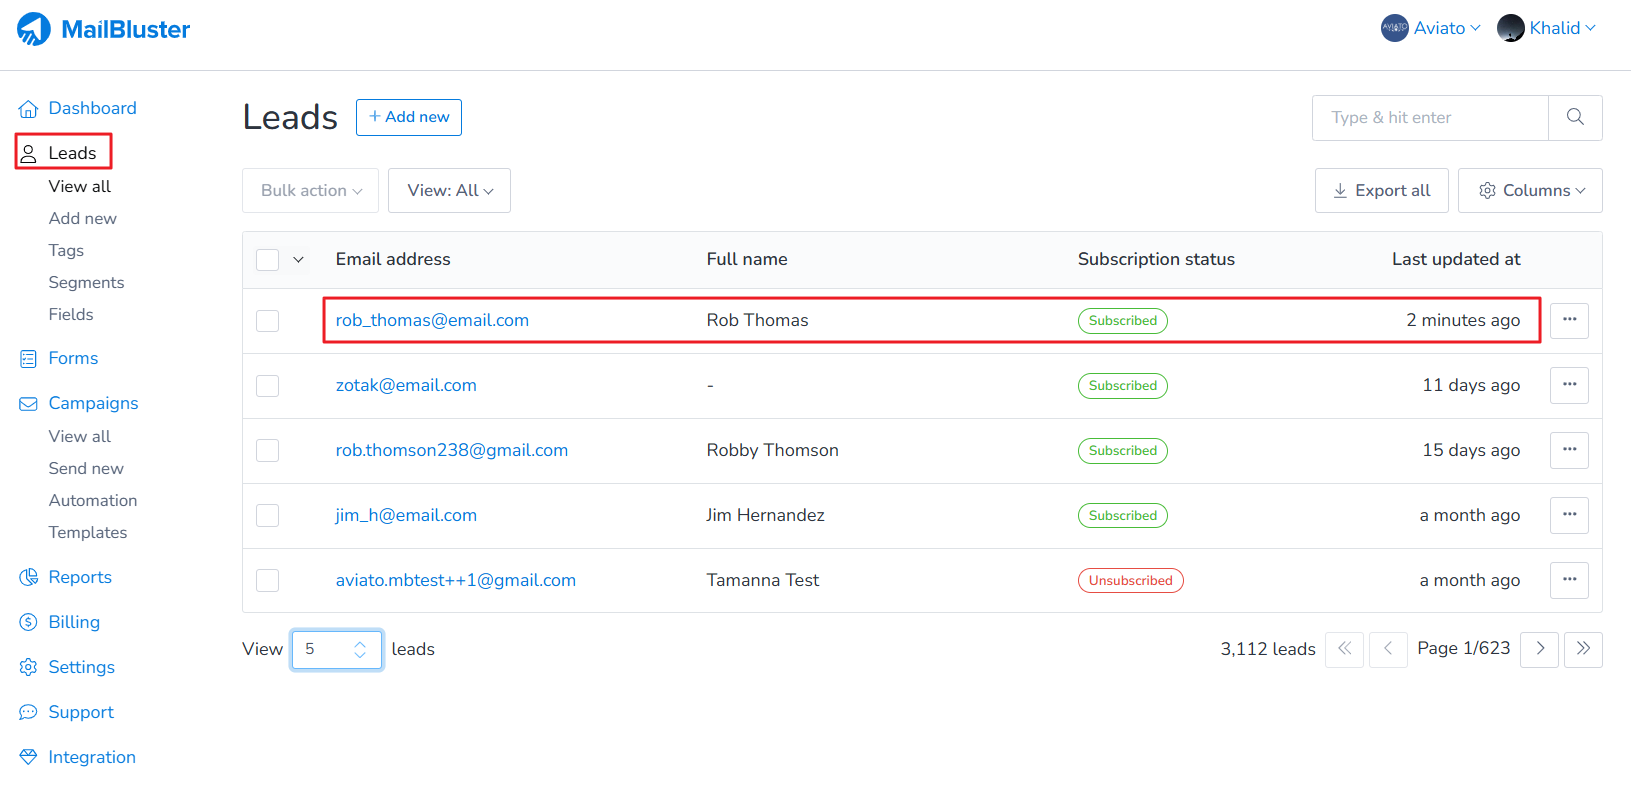
Check the lead in MailBluster > Brand > Leads.
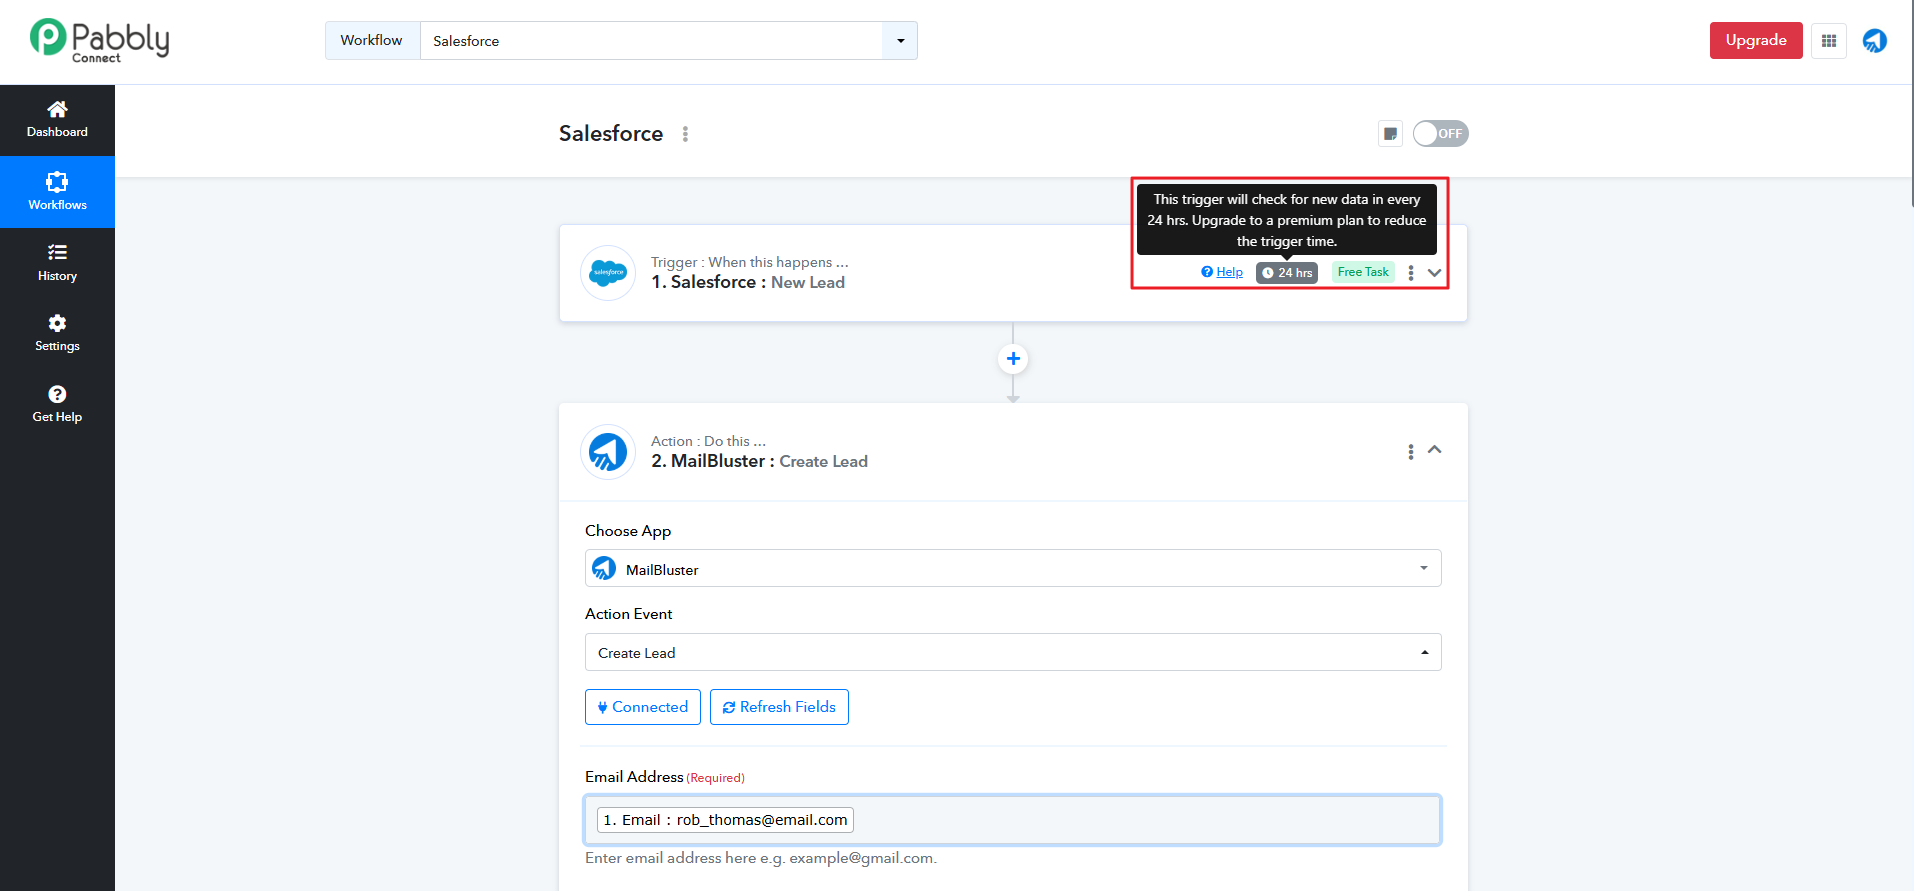
Please note, that Pabbly adds new leads from Salesforce every 24 hours. To add leads instantly, you will need to upgrade to their Premium plan of Pabbly.
Now, it’s time to check the integrity of the integration by adding a single lead in Salesforce.
To check, go to Salesforce, click the ‘+‘ icon, then select New Lead.
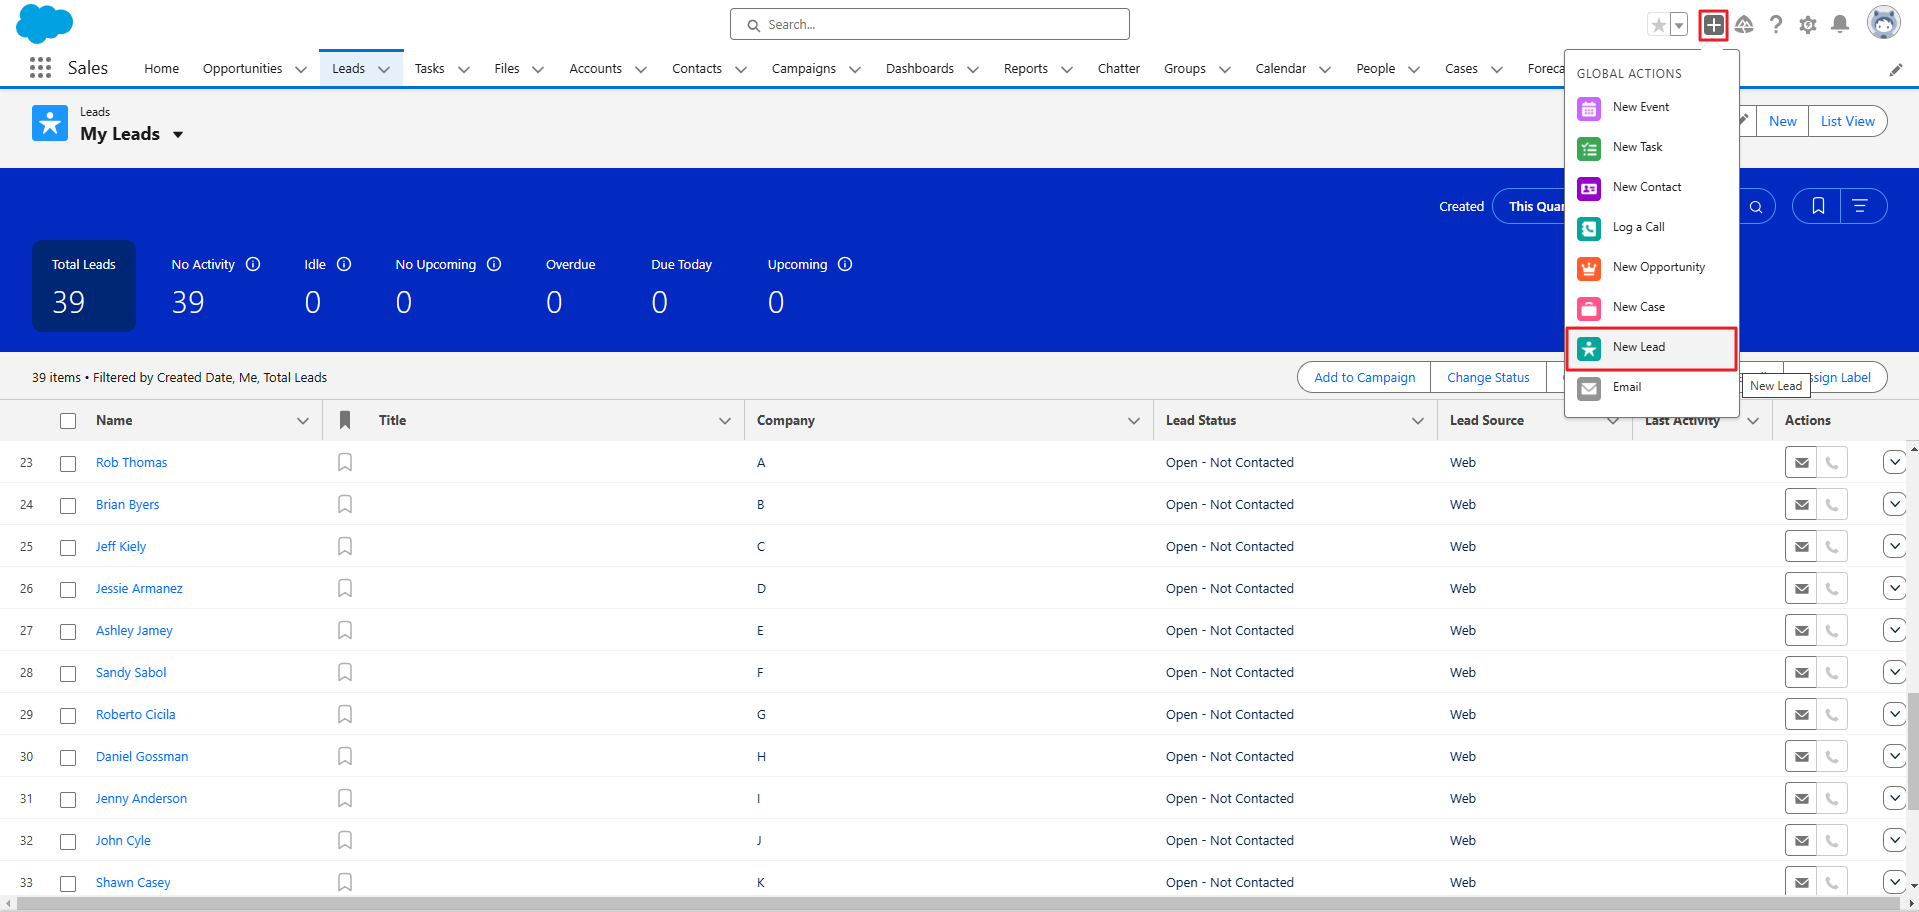
Fill out the form with ‘First Name‘, ‘Last Name‘ including the ‘Email‘ field and ‘Company‘, then click Save button and a confirmation message “Lead was created” will appear, indicating the lead has been added.

Now, you need to wait up to 24 hours for the lead to be added to MailBluster. Once the waiting period is over, check to confirm if the lead has been successfully added. Here we can see that the lead has been added to MailBluster. You can check by going to your Brand > Leads.