Here you will learn how to create and connect WordPress Forms using MailBluster WordPress Plugin.
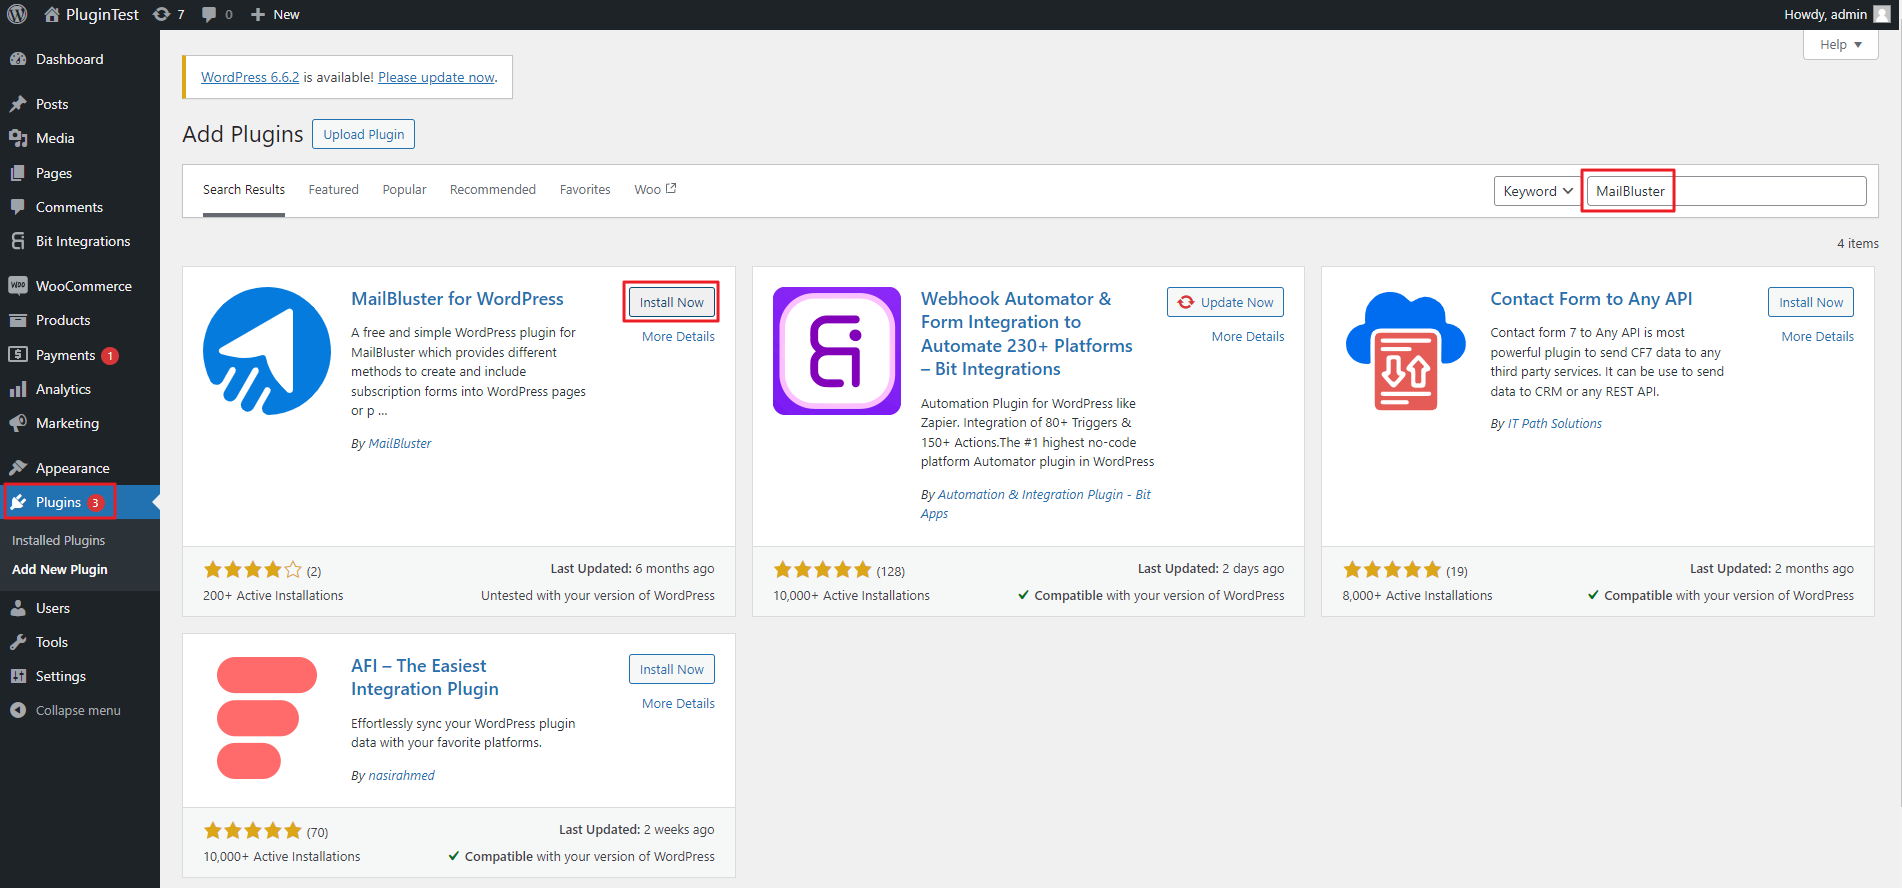
First, go to the admin panel of your WordPress site. Click on “Plugins,” then type “MailBluster” in the WordPress plugin search bar.
Then click Install Now.
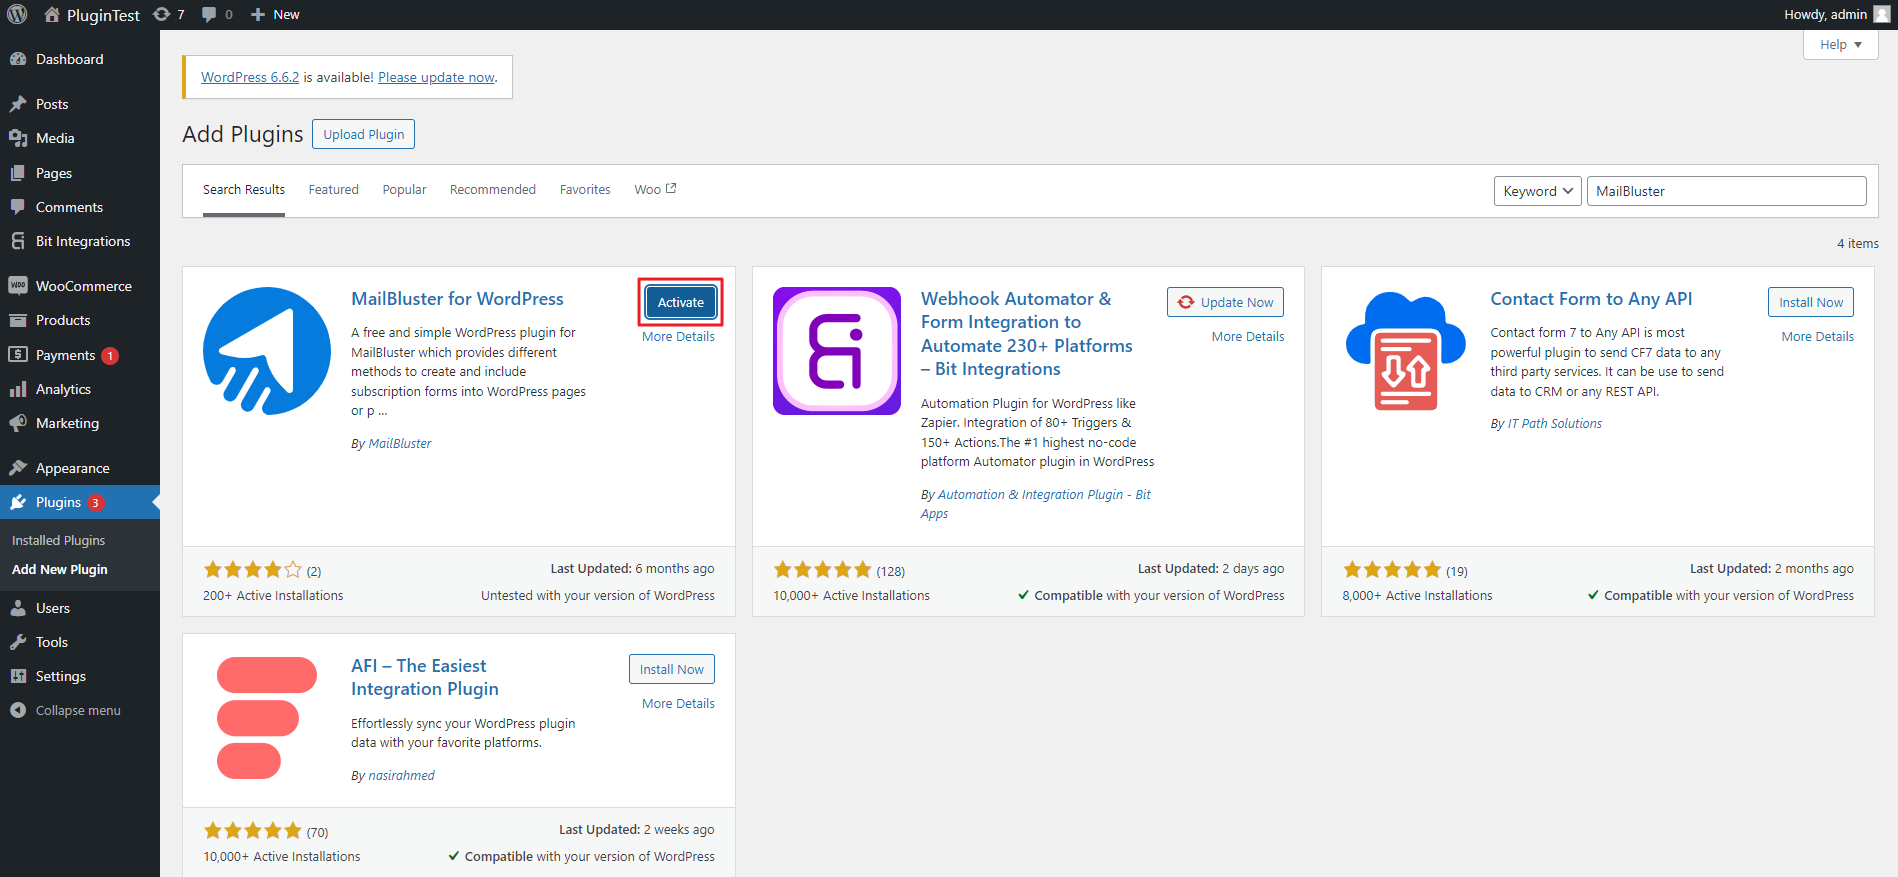
After the plugin installation is completed, click Activate Plugin button.
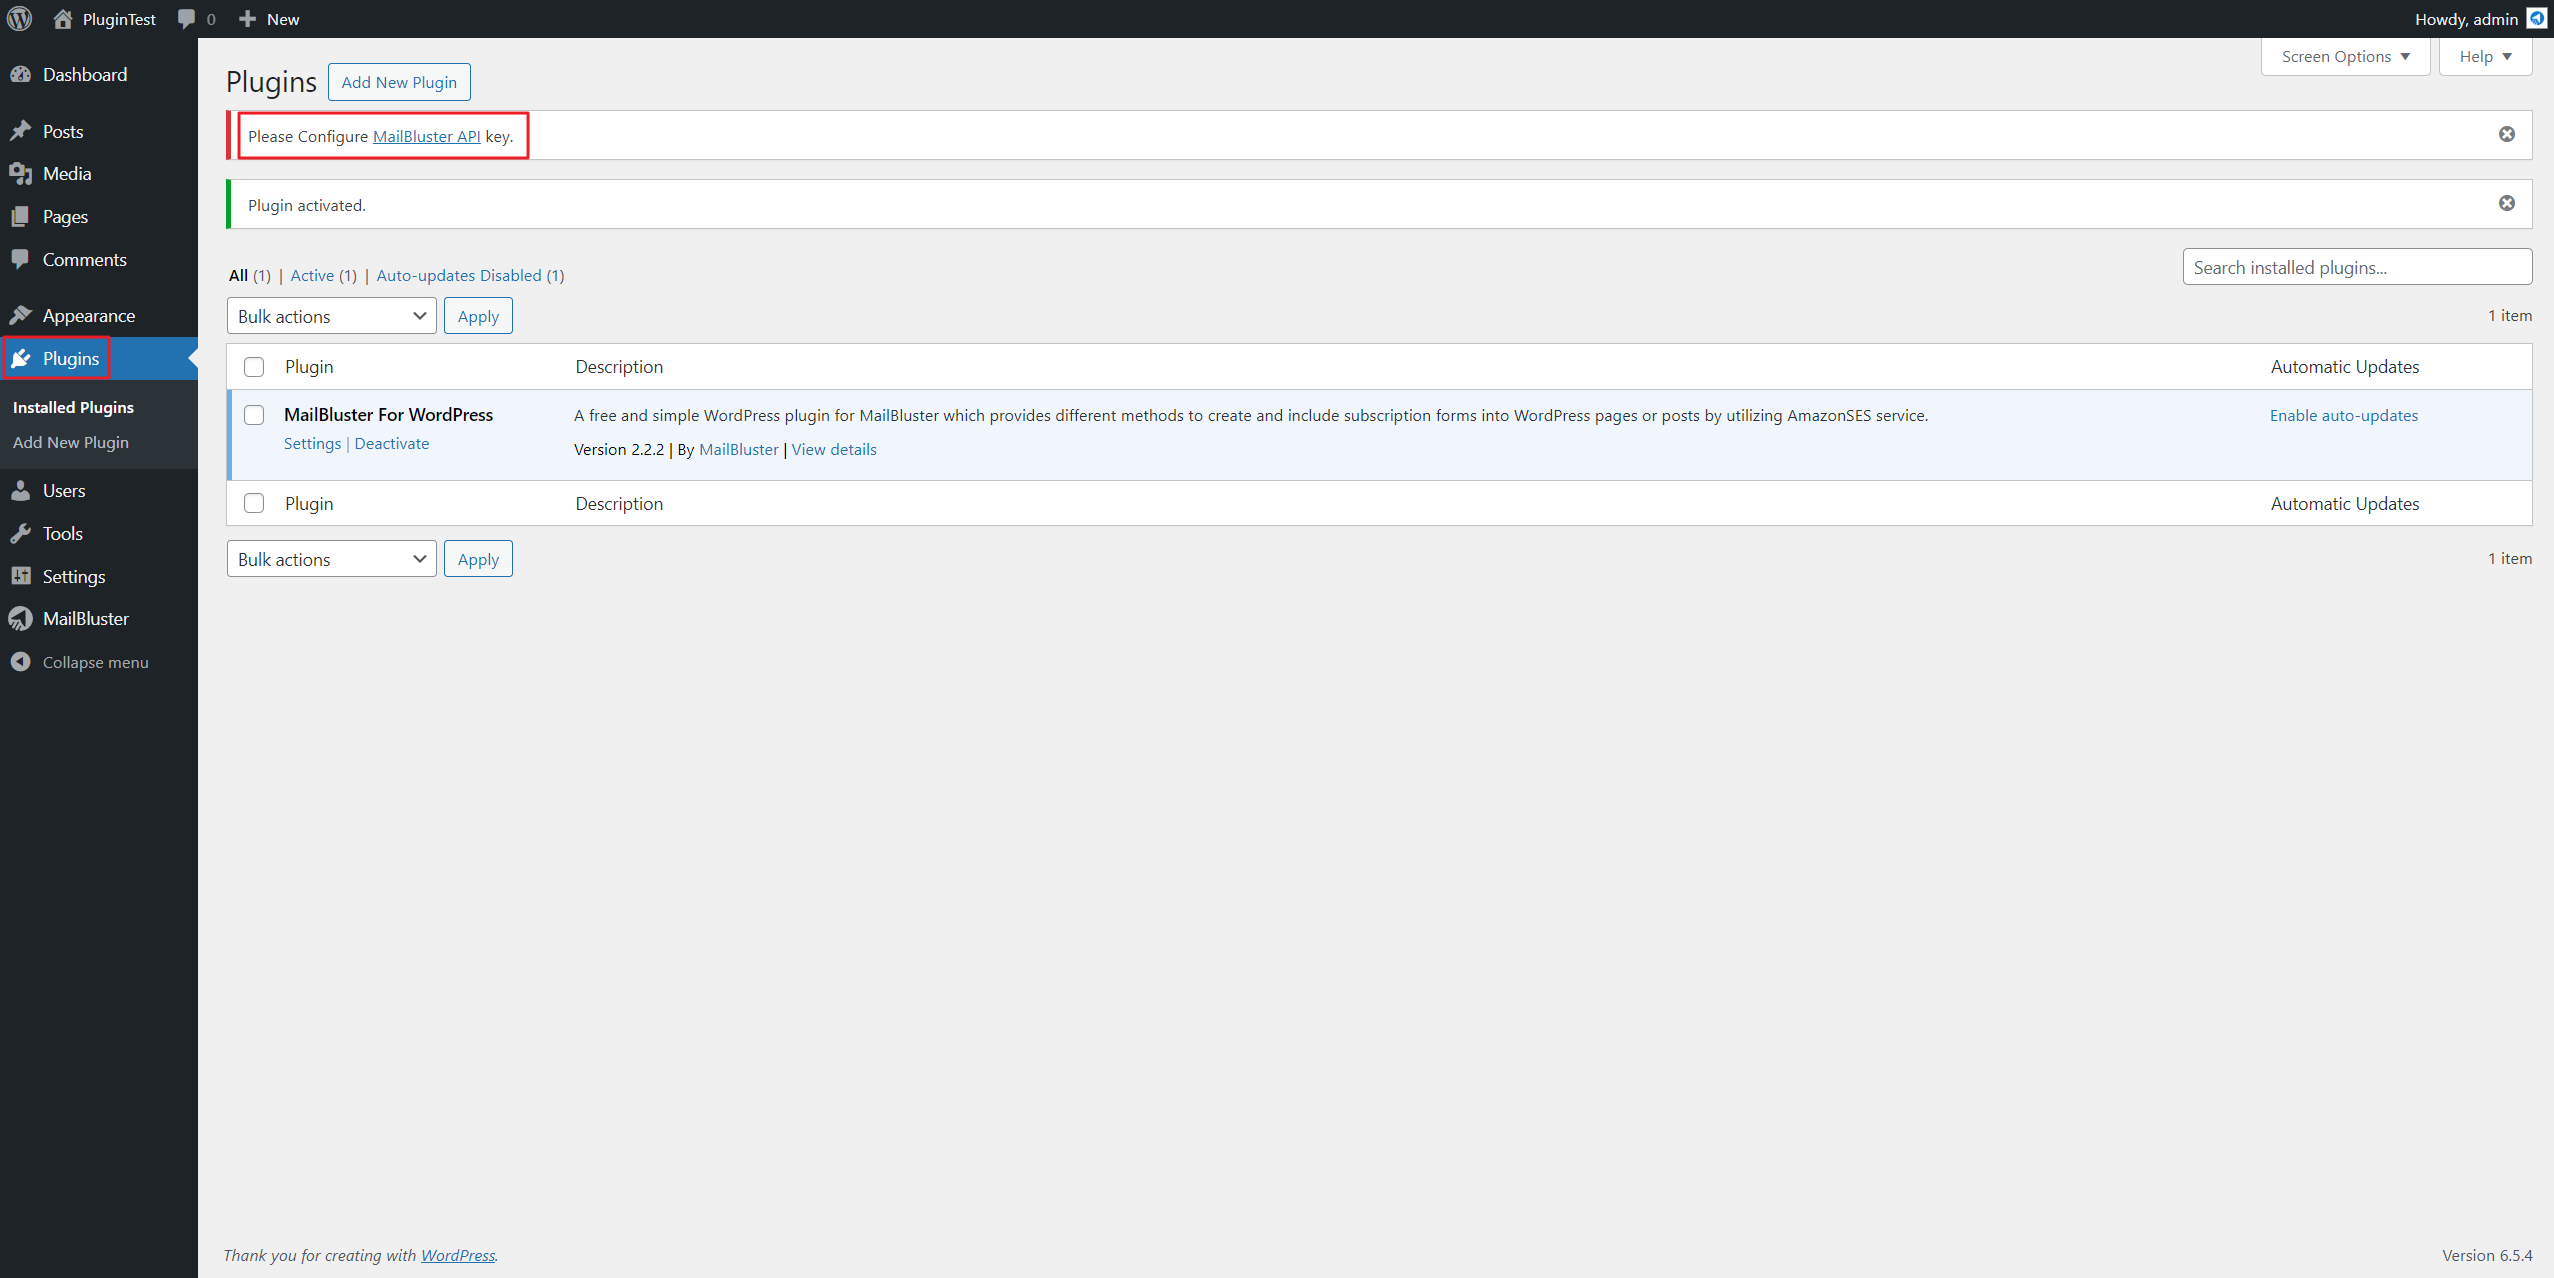
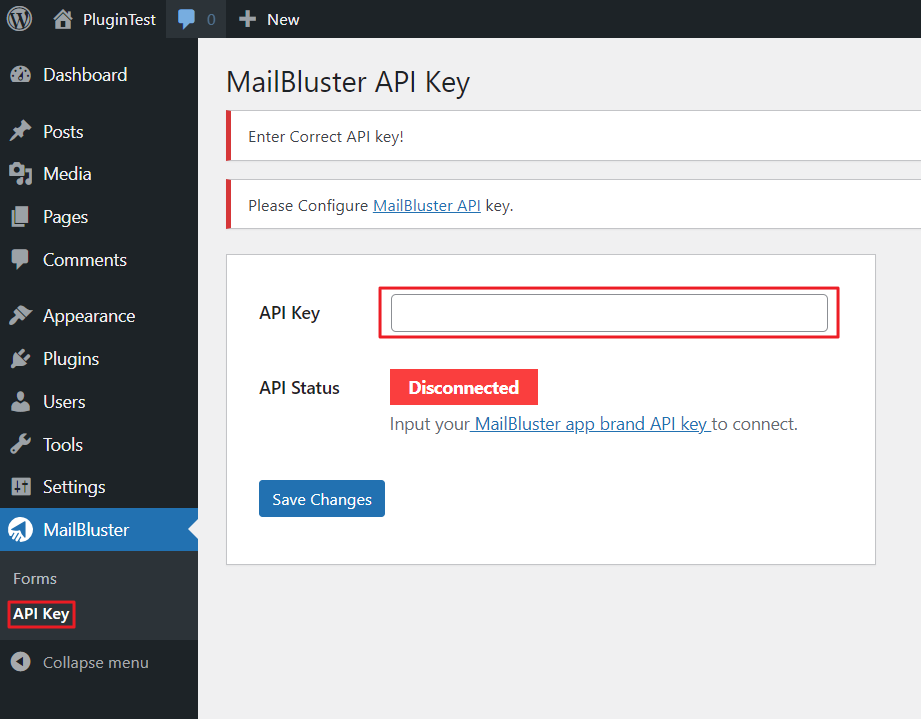
Now you need to configure MailBluster API key after the Plugin has been activated. Click on MailBluster API key as shown below.
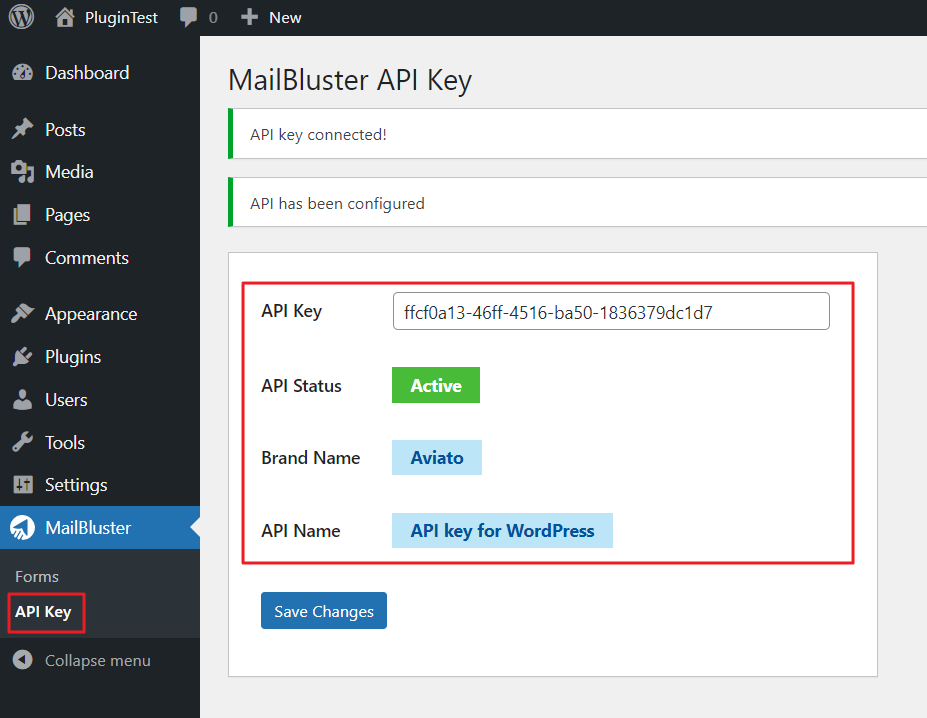
It will take you to the MailBluster API Key settings page where you need to insert the API Key to connect with the main MailBluster app.
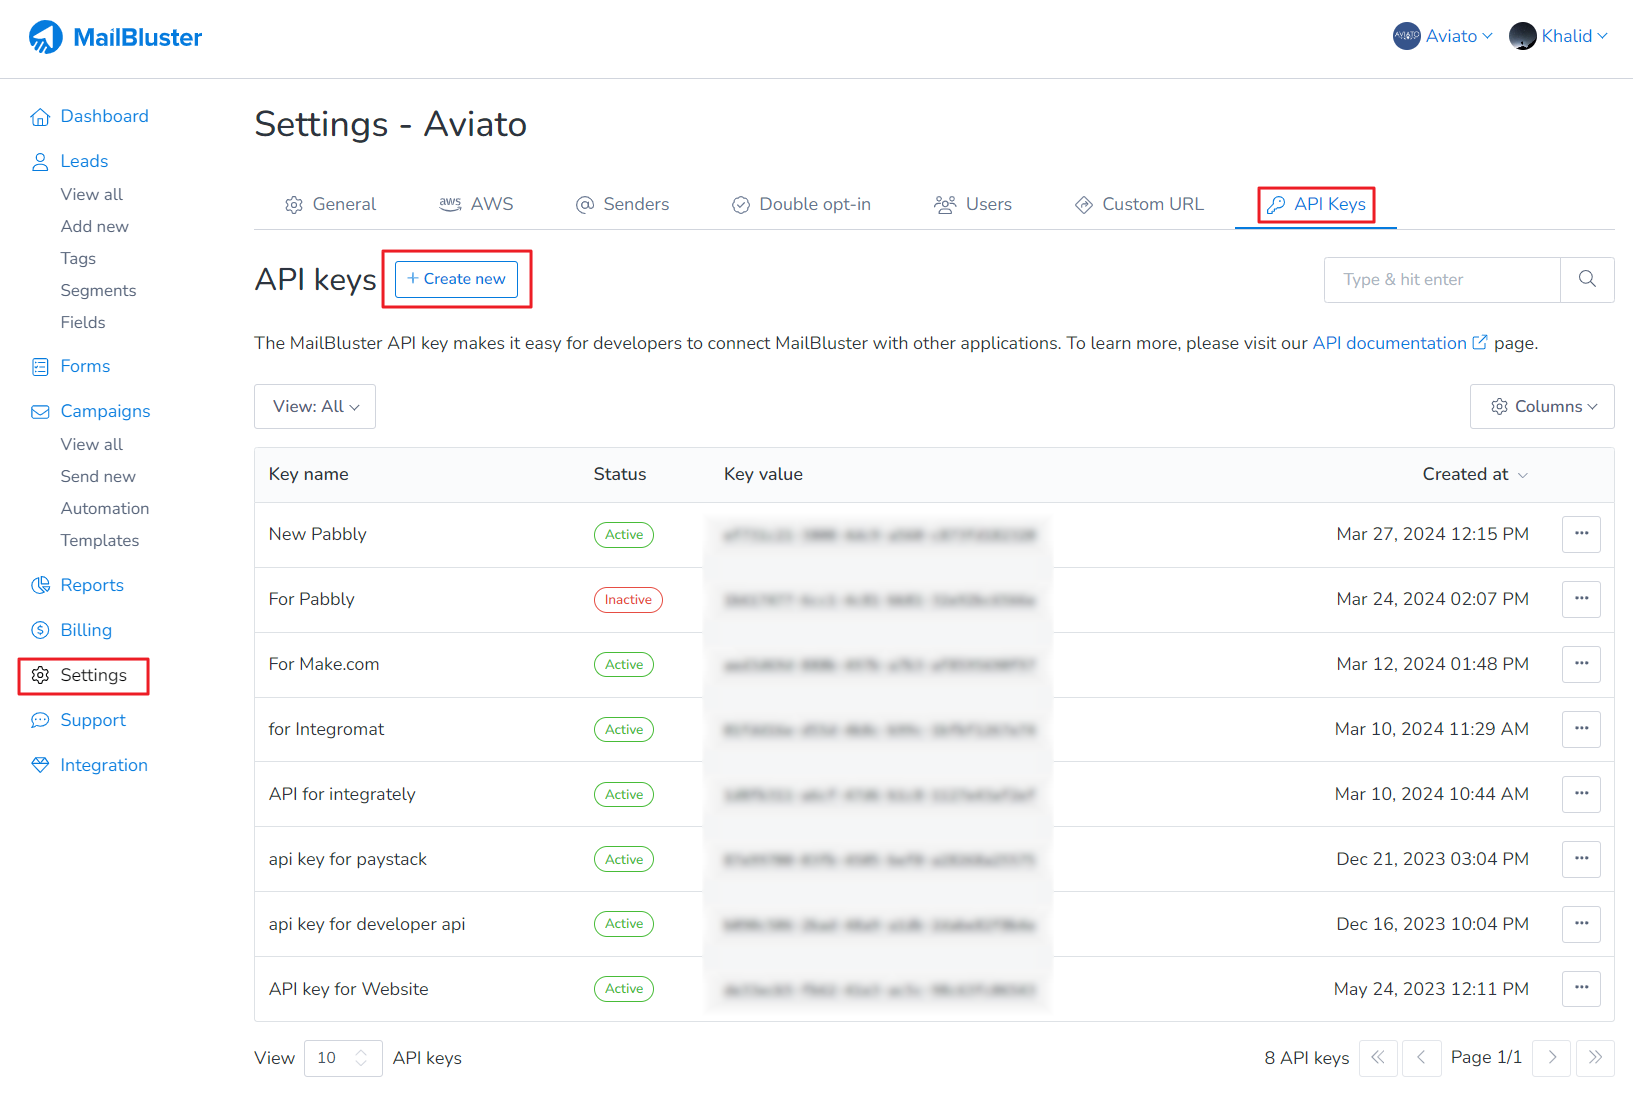
Sign into MailBluster, then go to your Brand > Settings >API Keys and then click Create new.
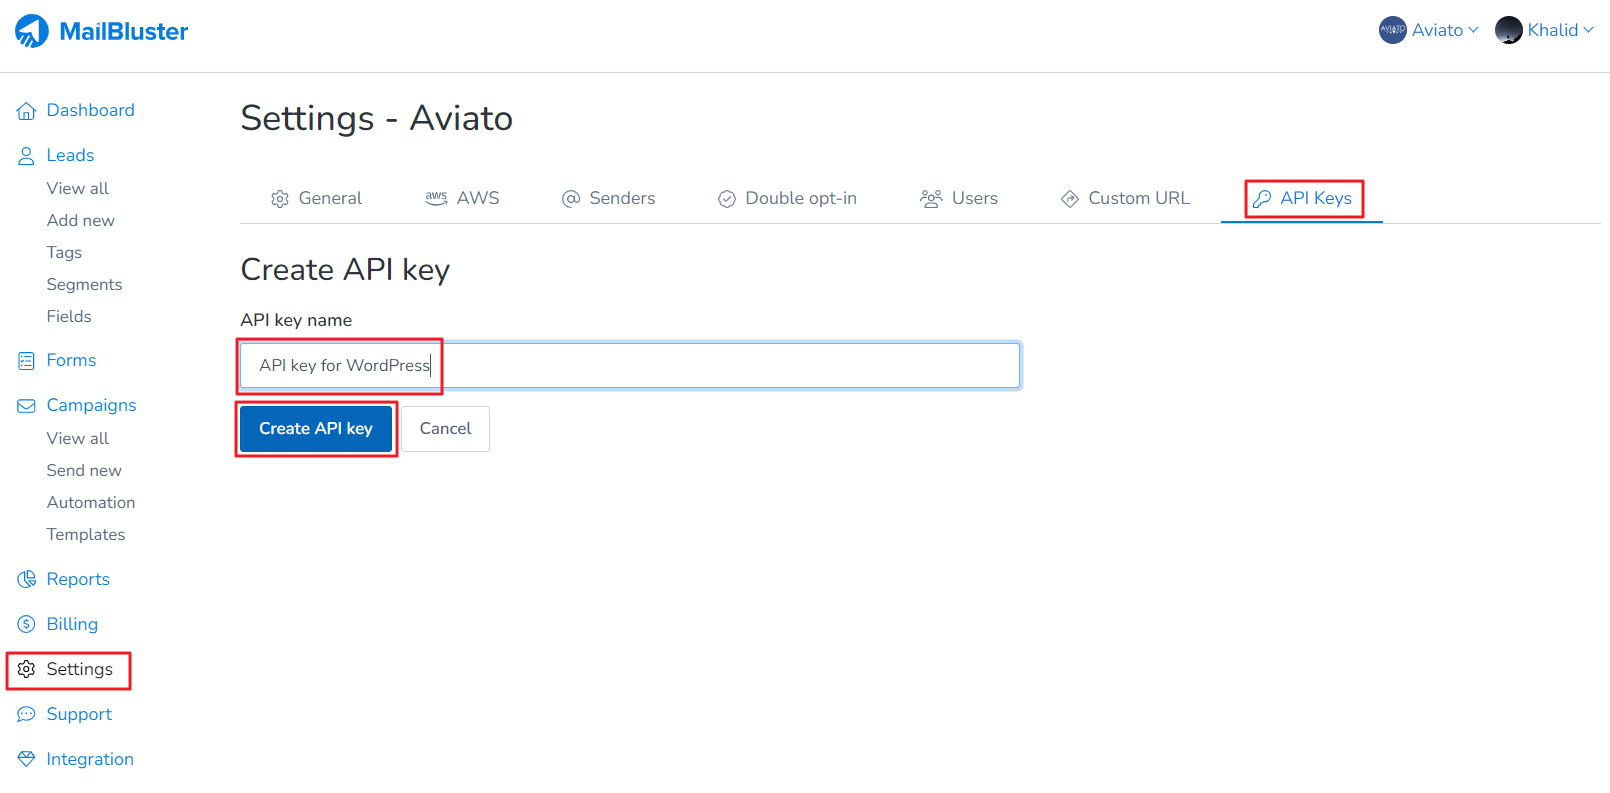
Now enter API key name, for example, API key for WordPress, and then click on Create API key.
API key value will be generated. You need to copy the key value of this API key.

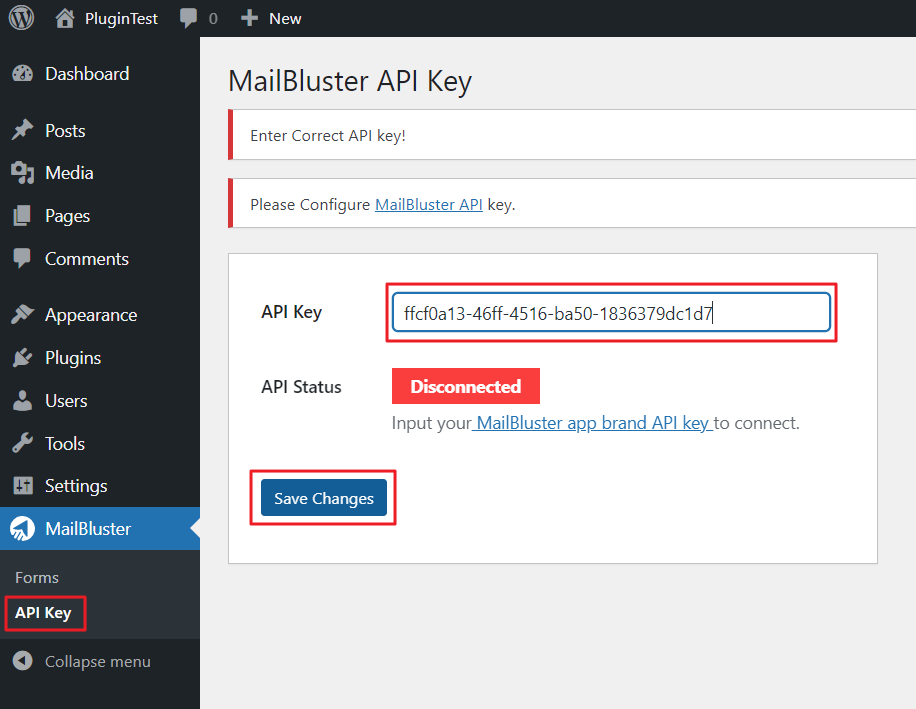
Paste the API key value and click Save Changes.
Your MailBluster Brand is now connected to your website through this API Key. Make sure API Status remains Active. You will also notice which MailBluster Brand is connected to this API key.
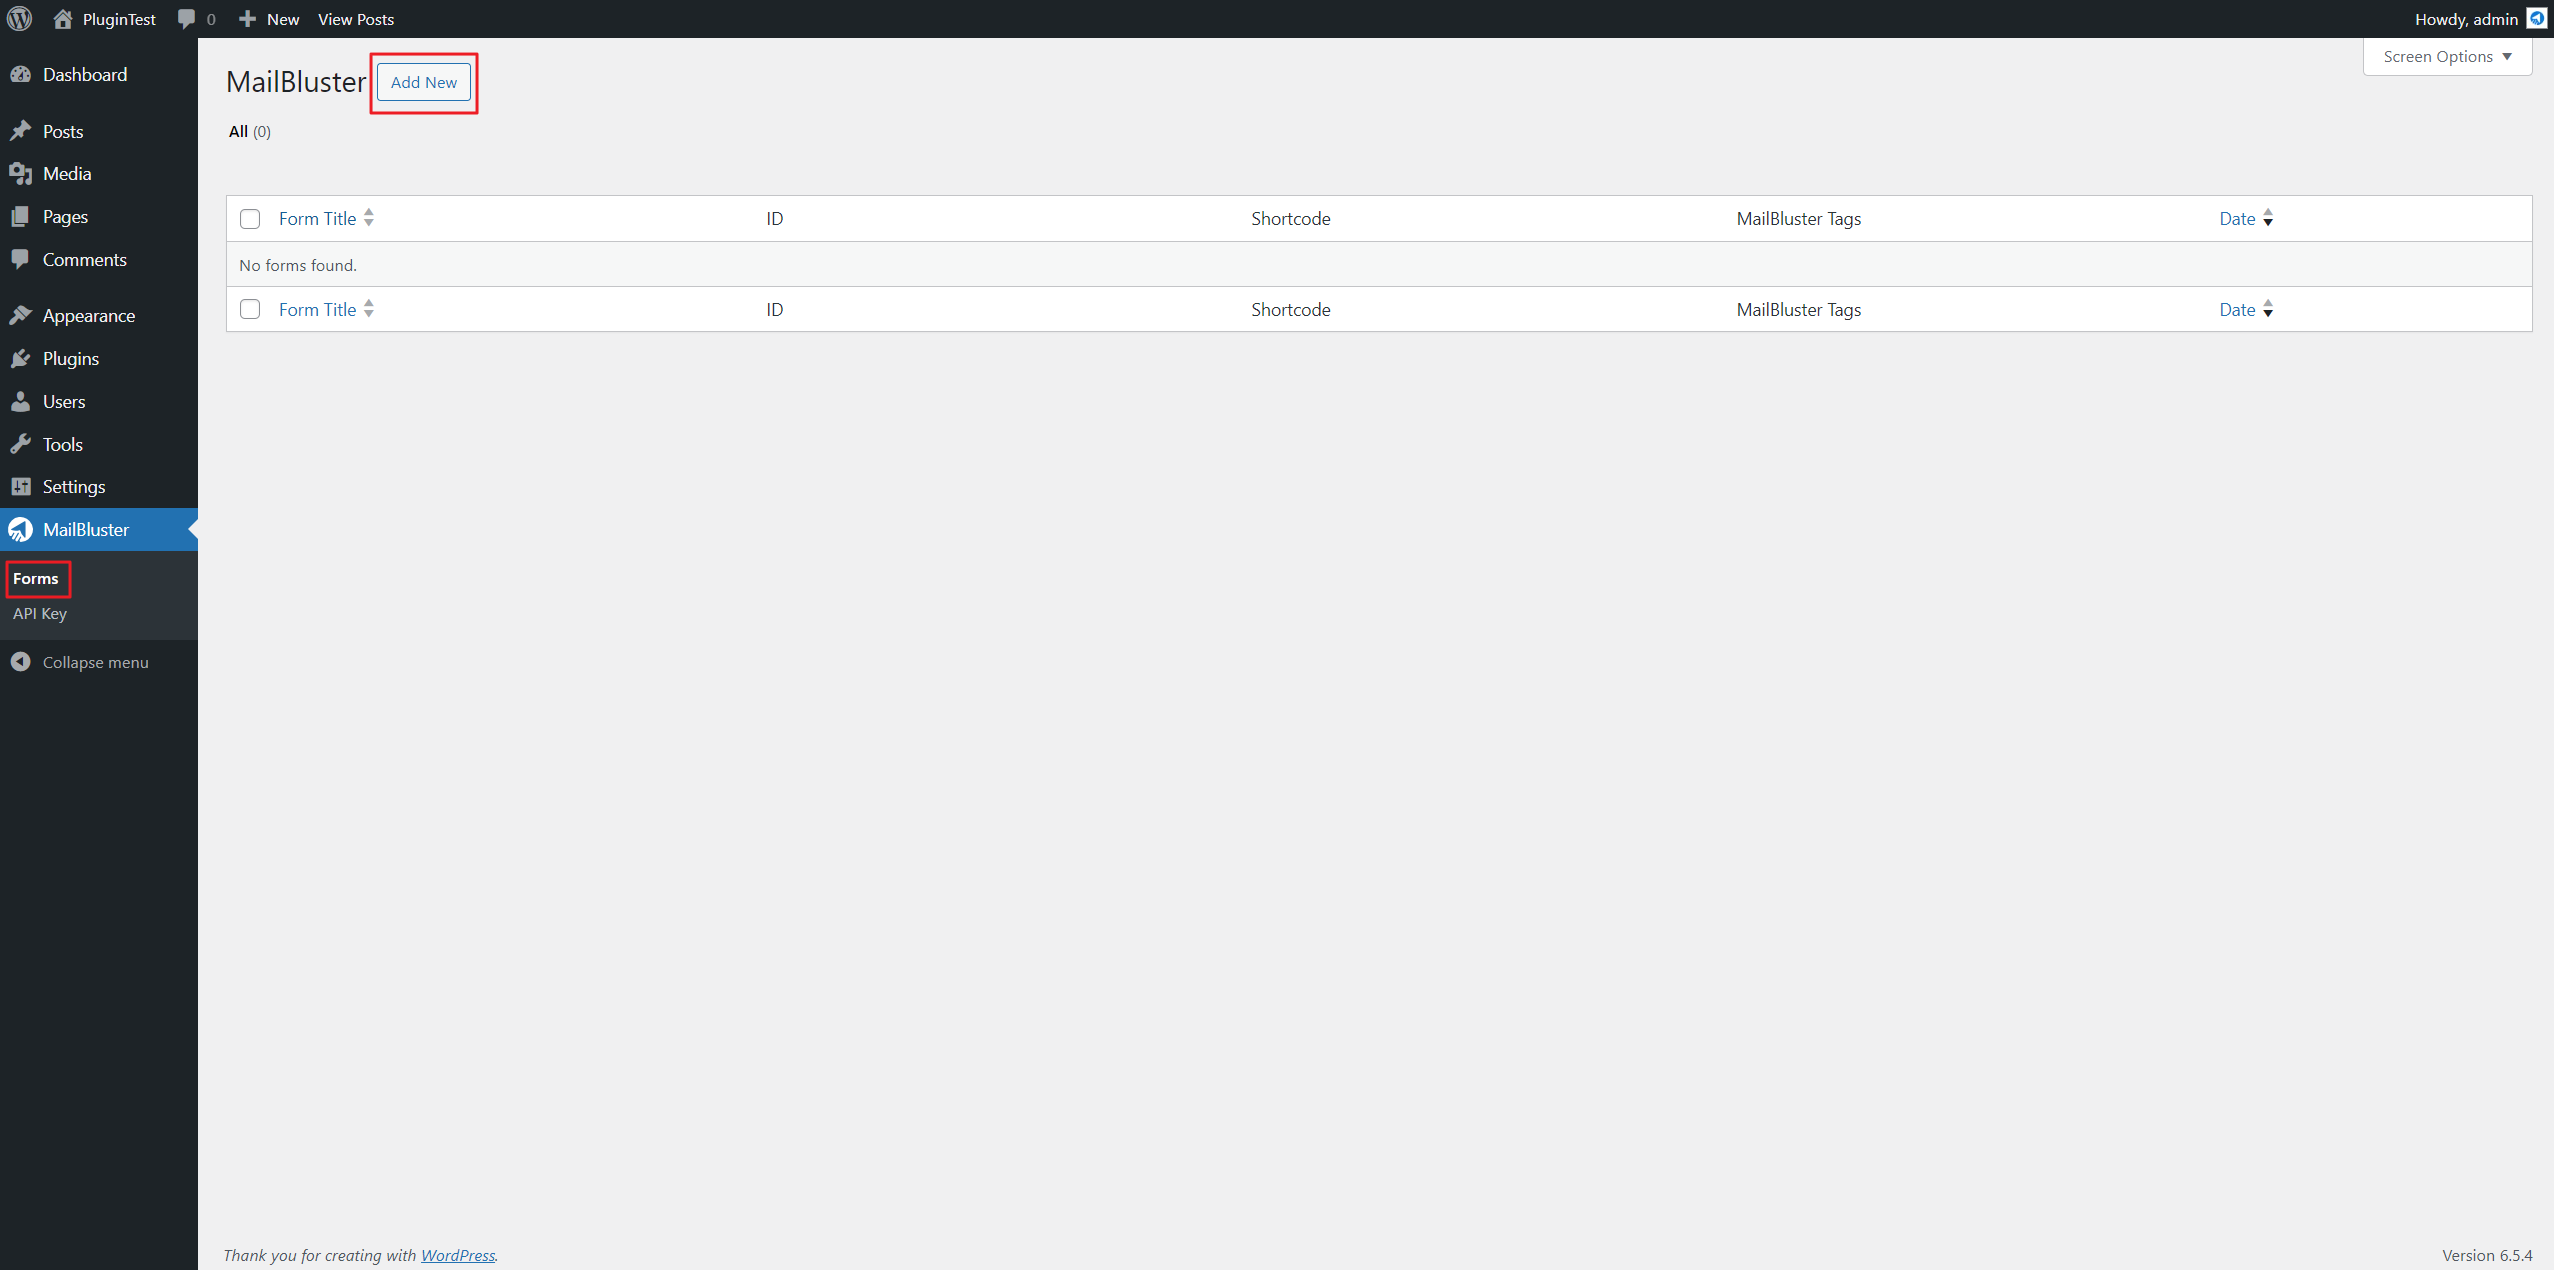
Now click on Forms and click Add New button.
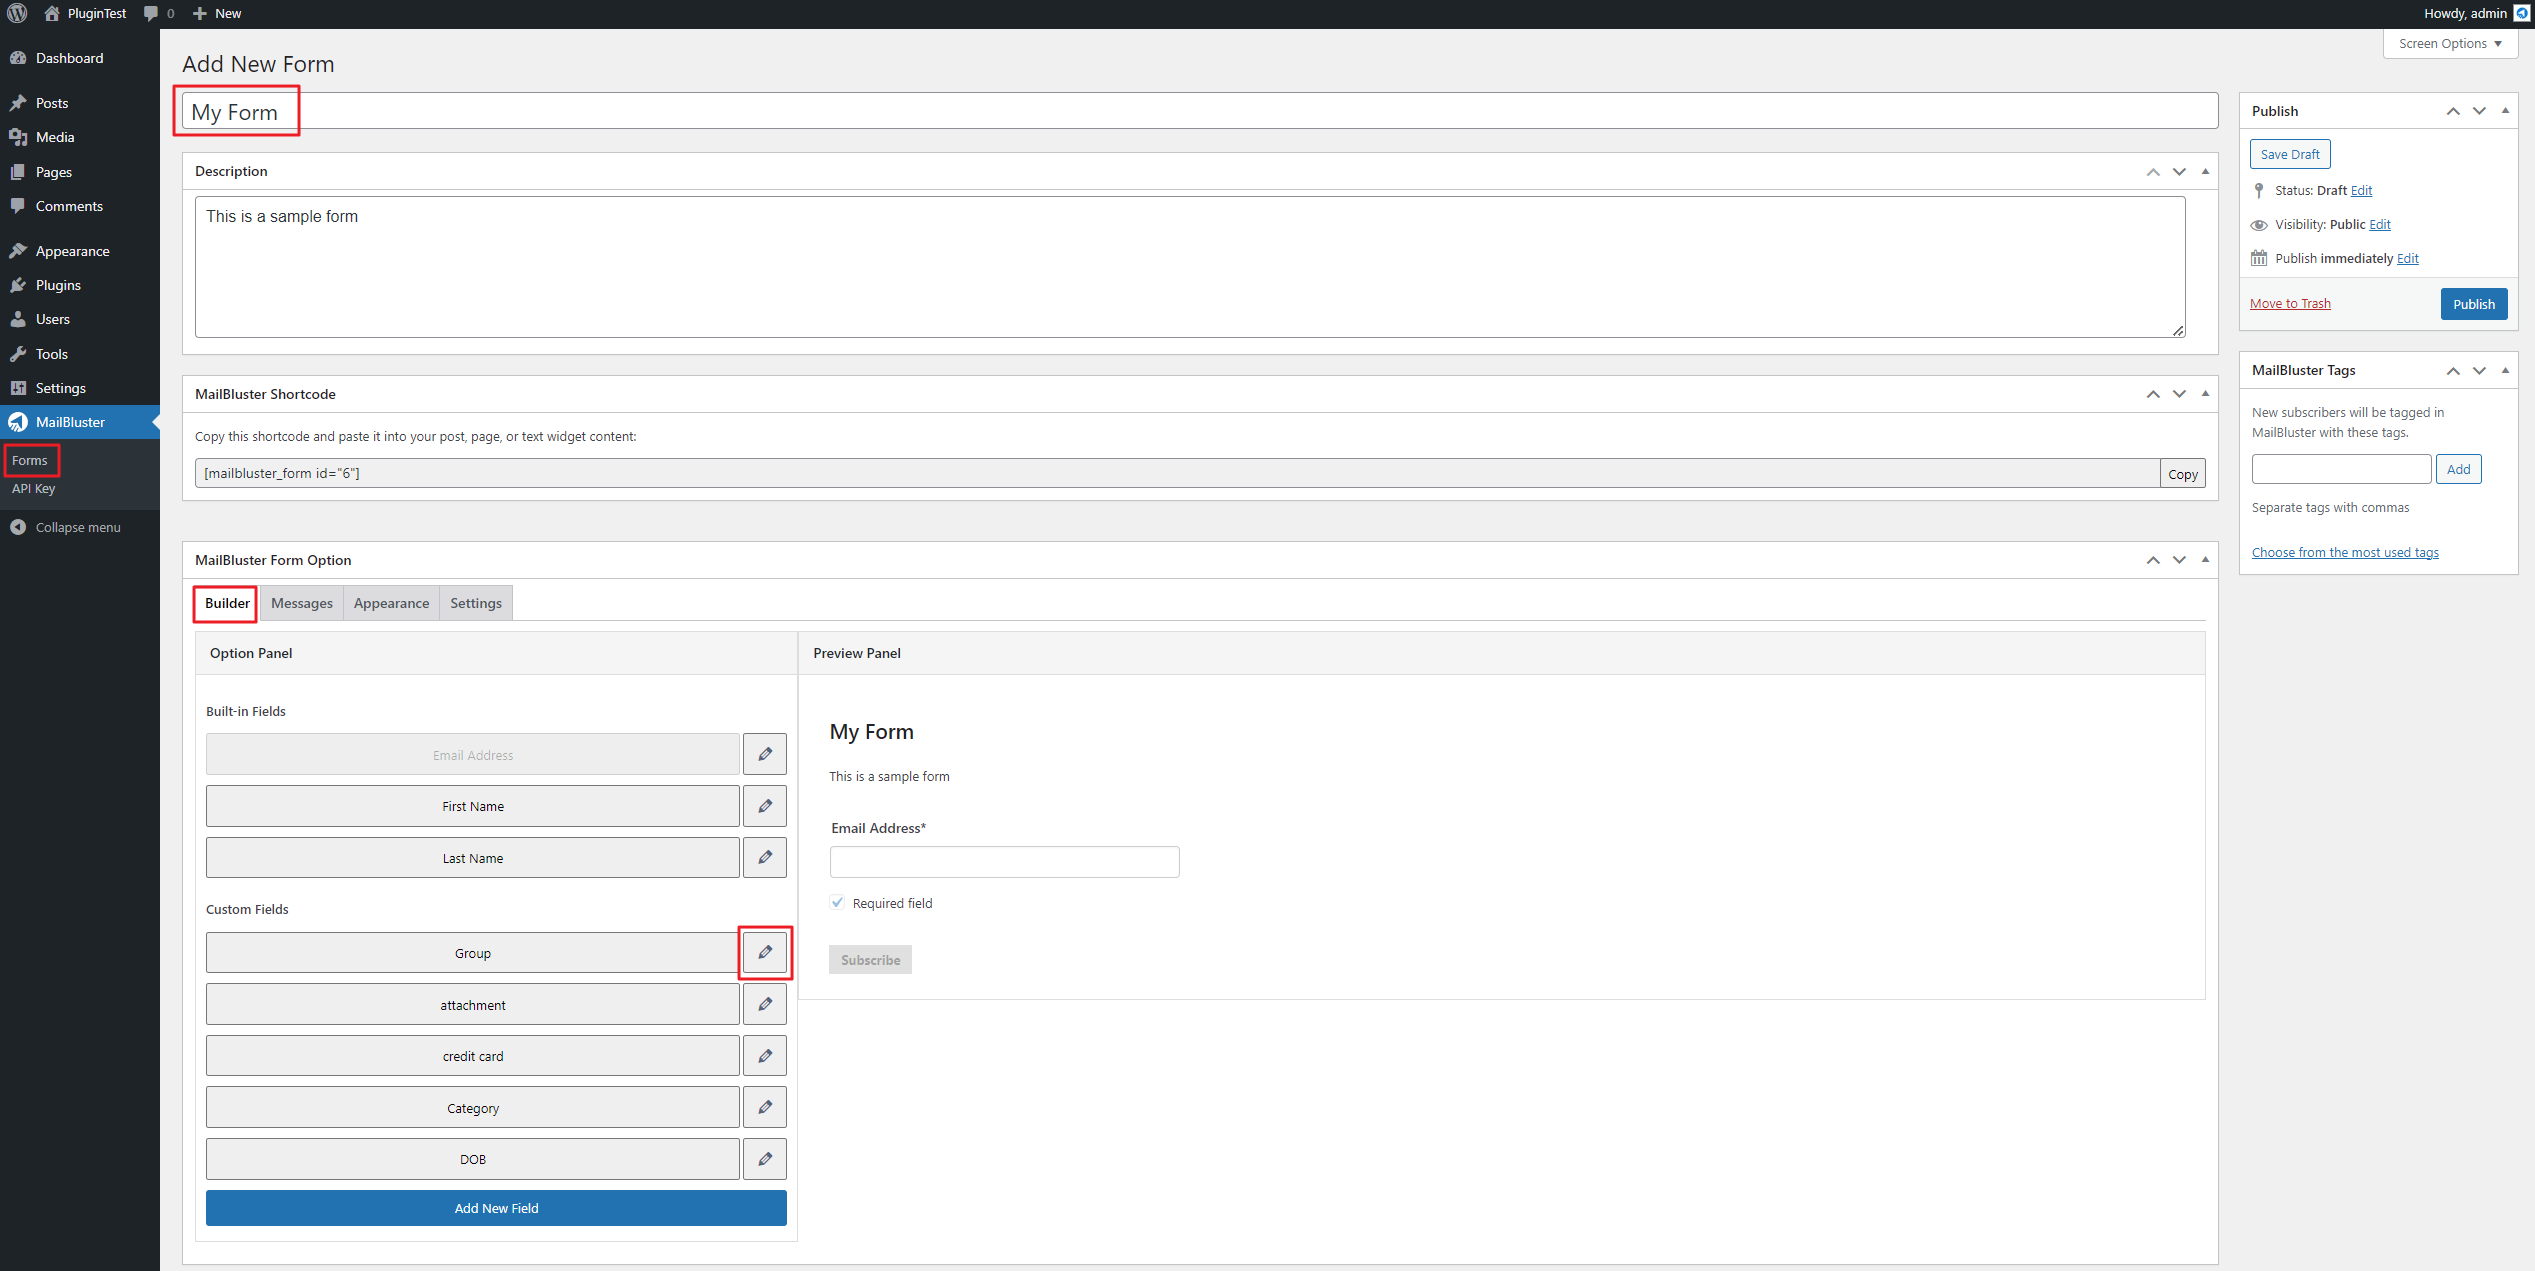
Write down the Form name, Description and Builder settings to edit the Form.
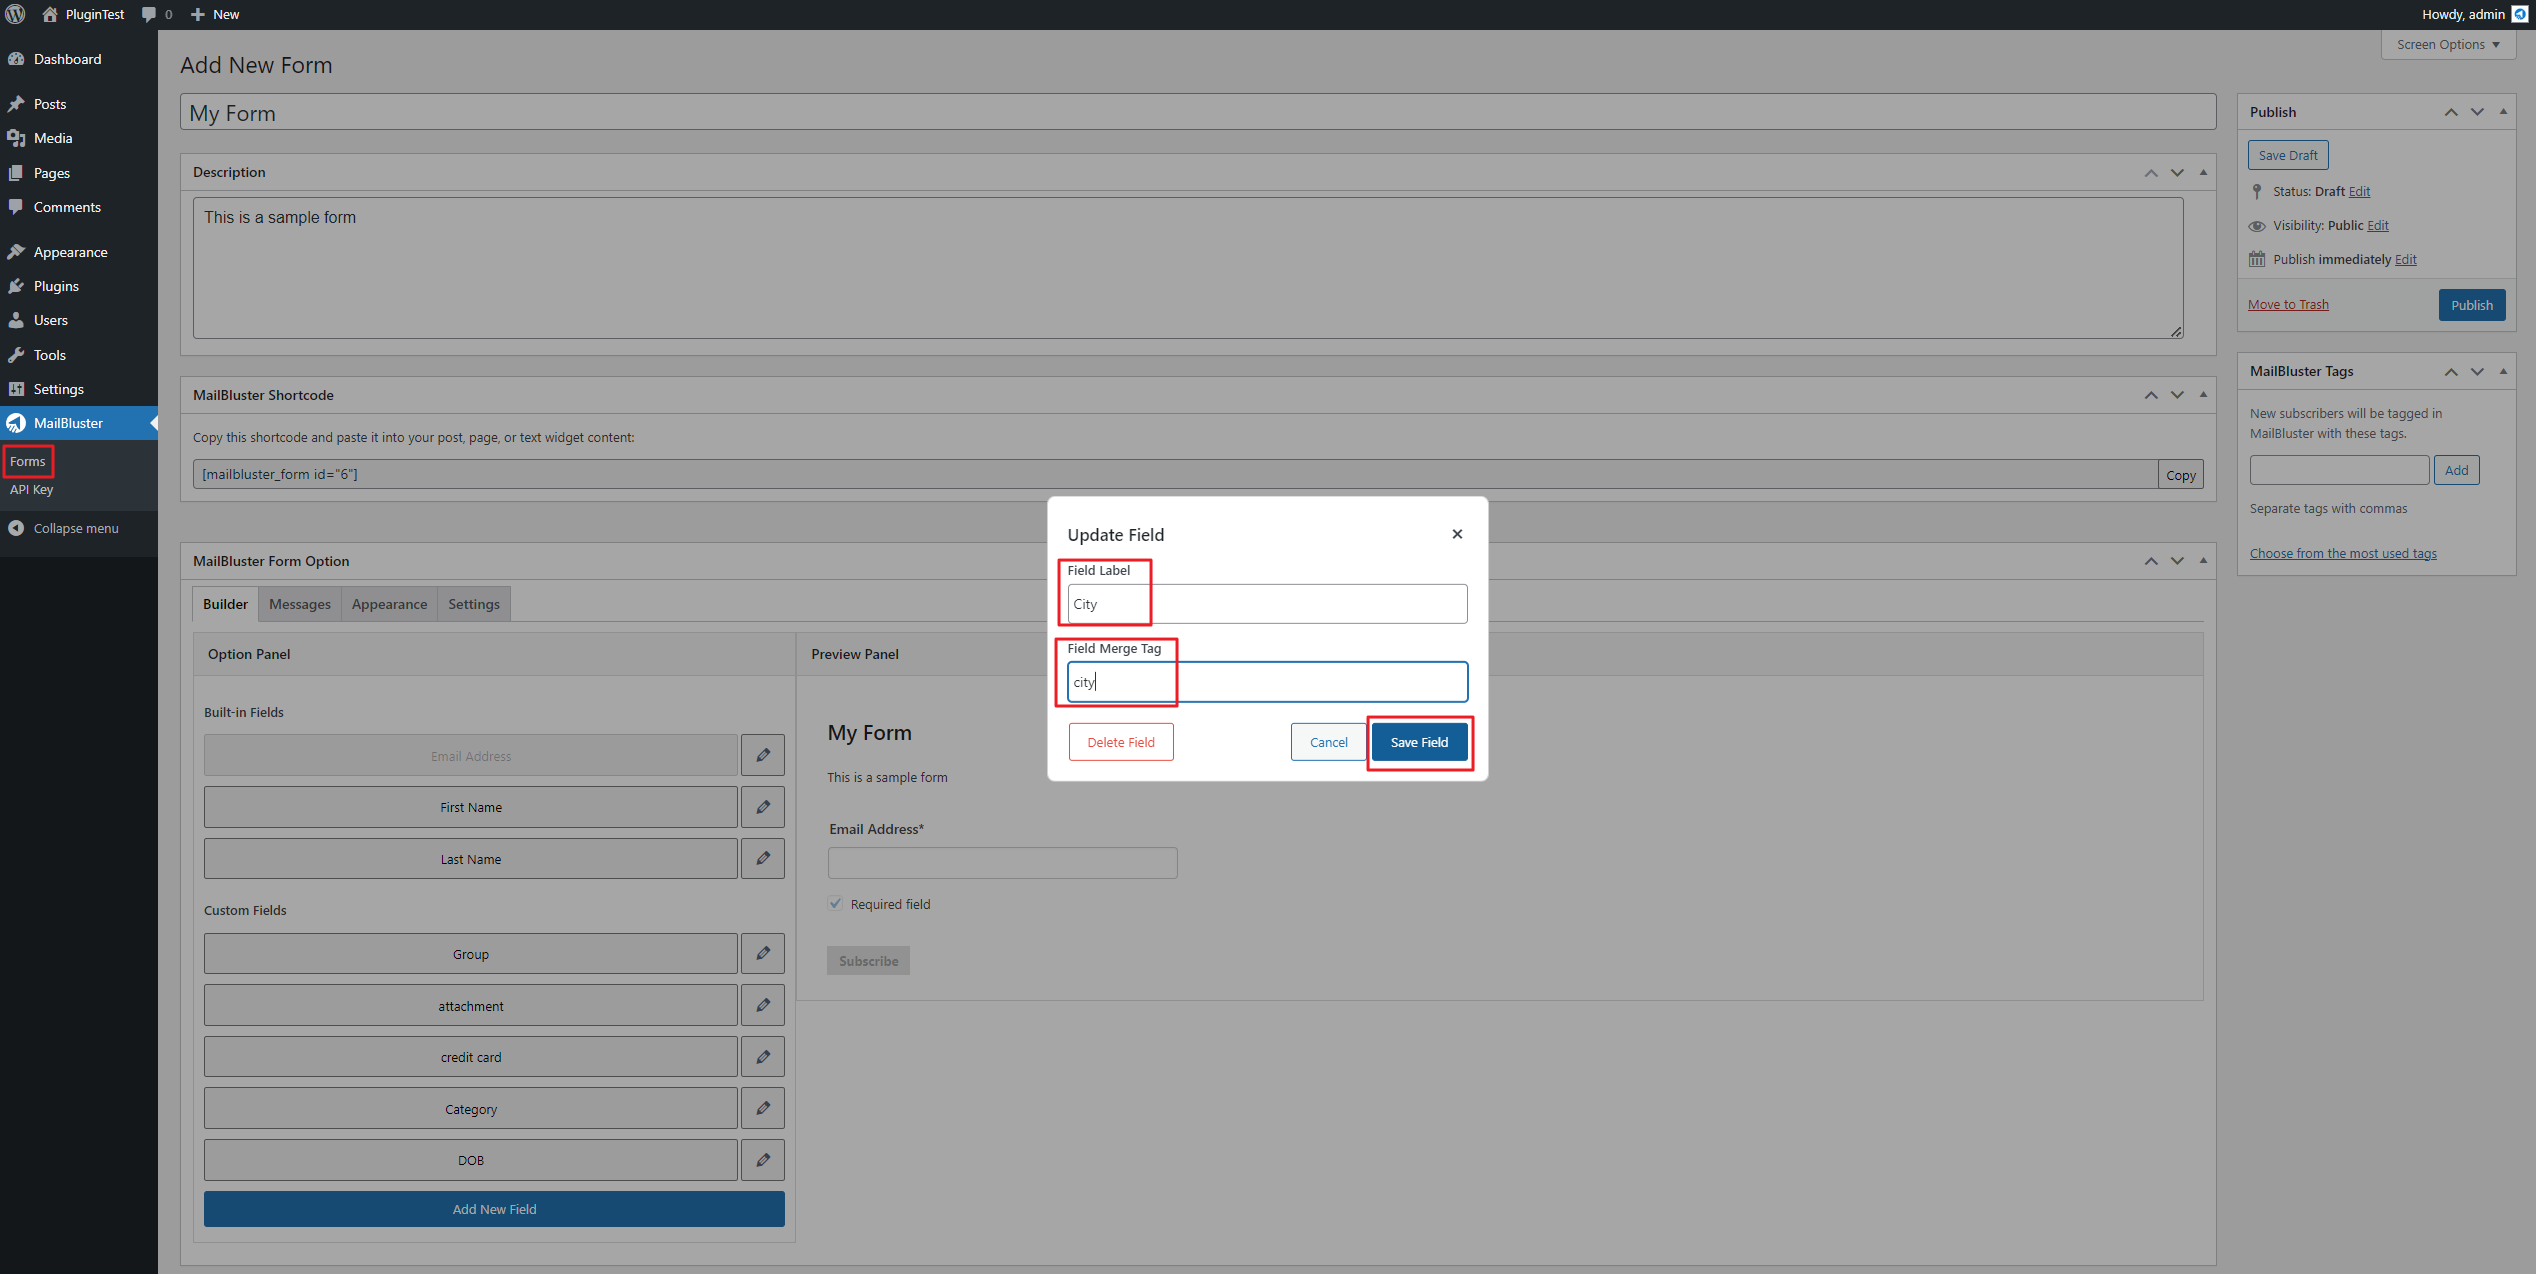
Here we are updating the field; we replaced it with ‘city’. Then click Save field.
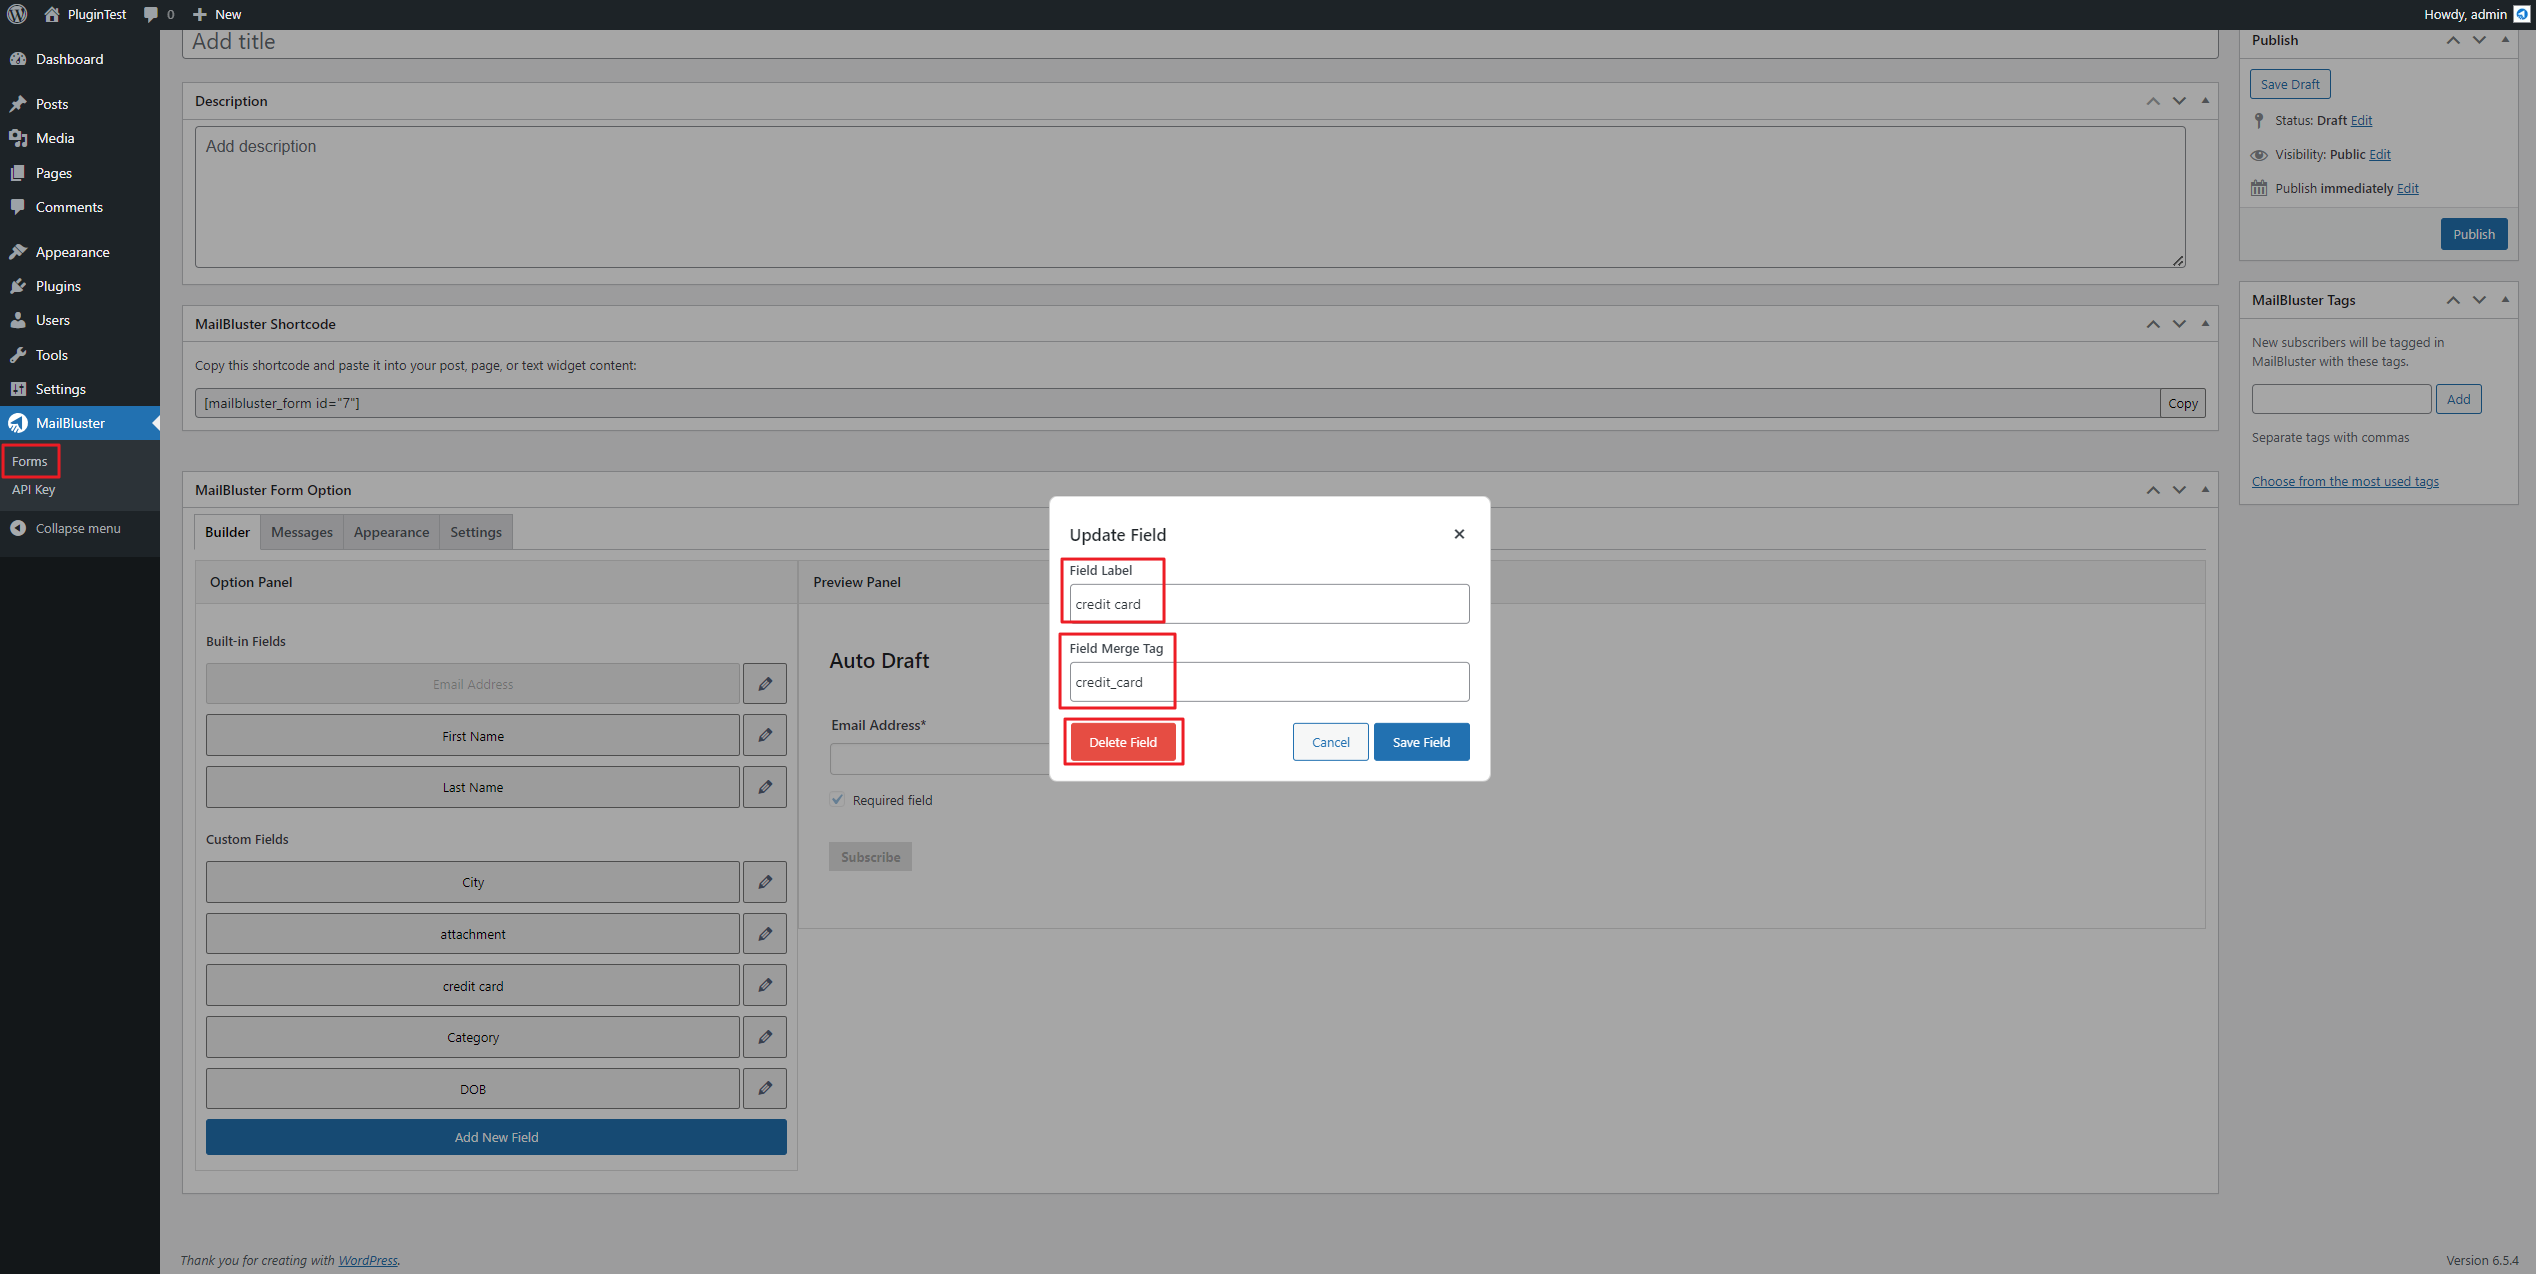
Here we are deleting/removing the “credit card” field and adding another field. Click Delete field to delete any current field.
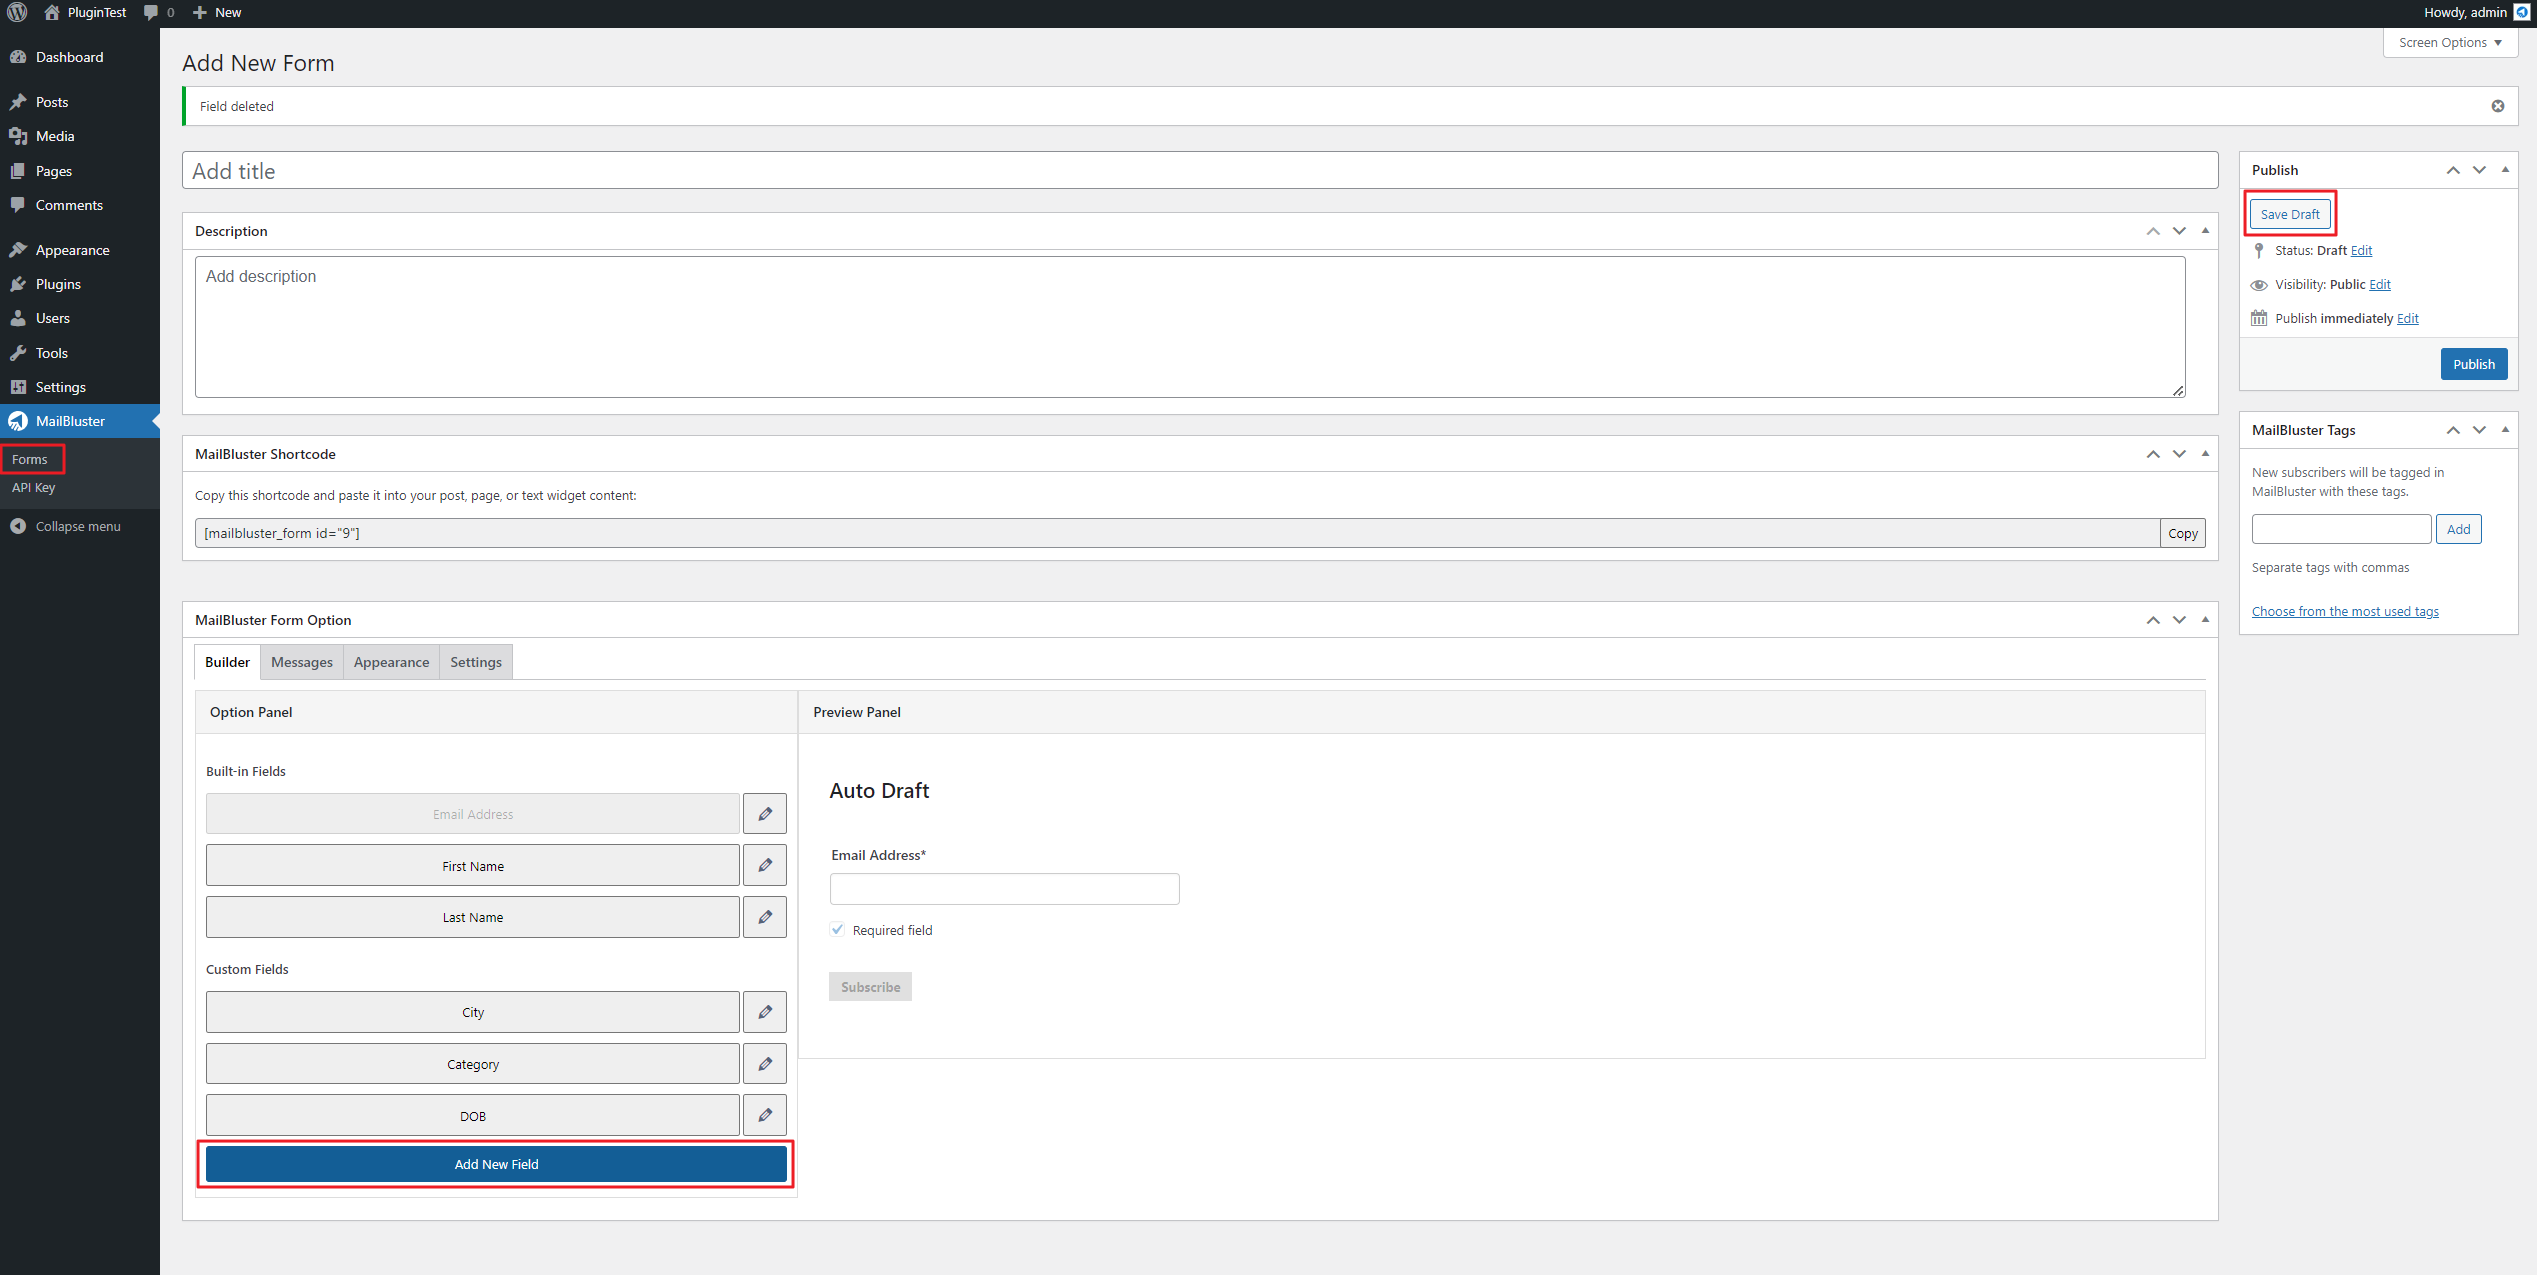
Now go to Forms and customize your form accordingly. Click Add New field. Be sure to click Save Draft to save your progress.
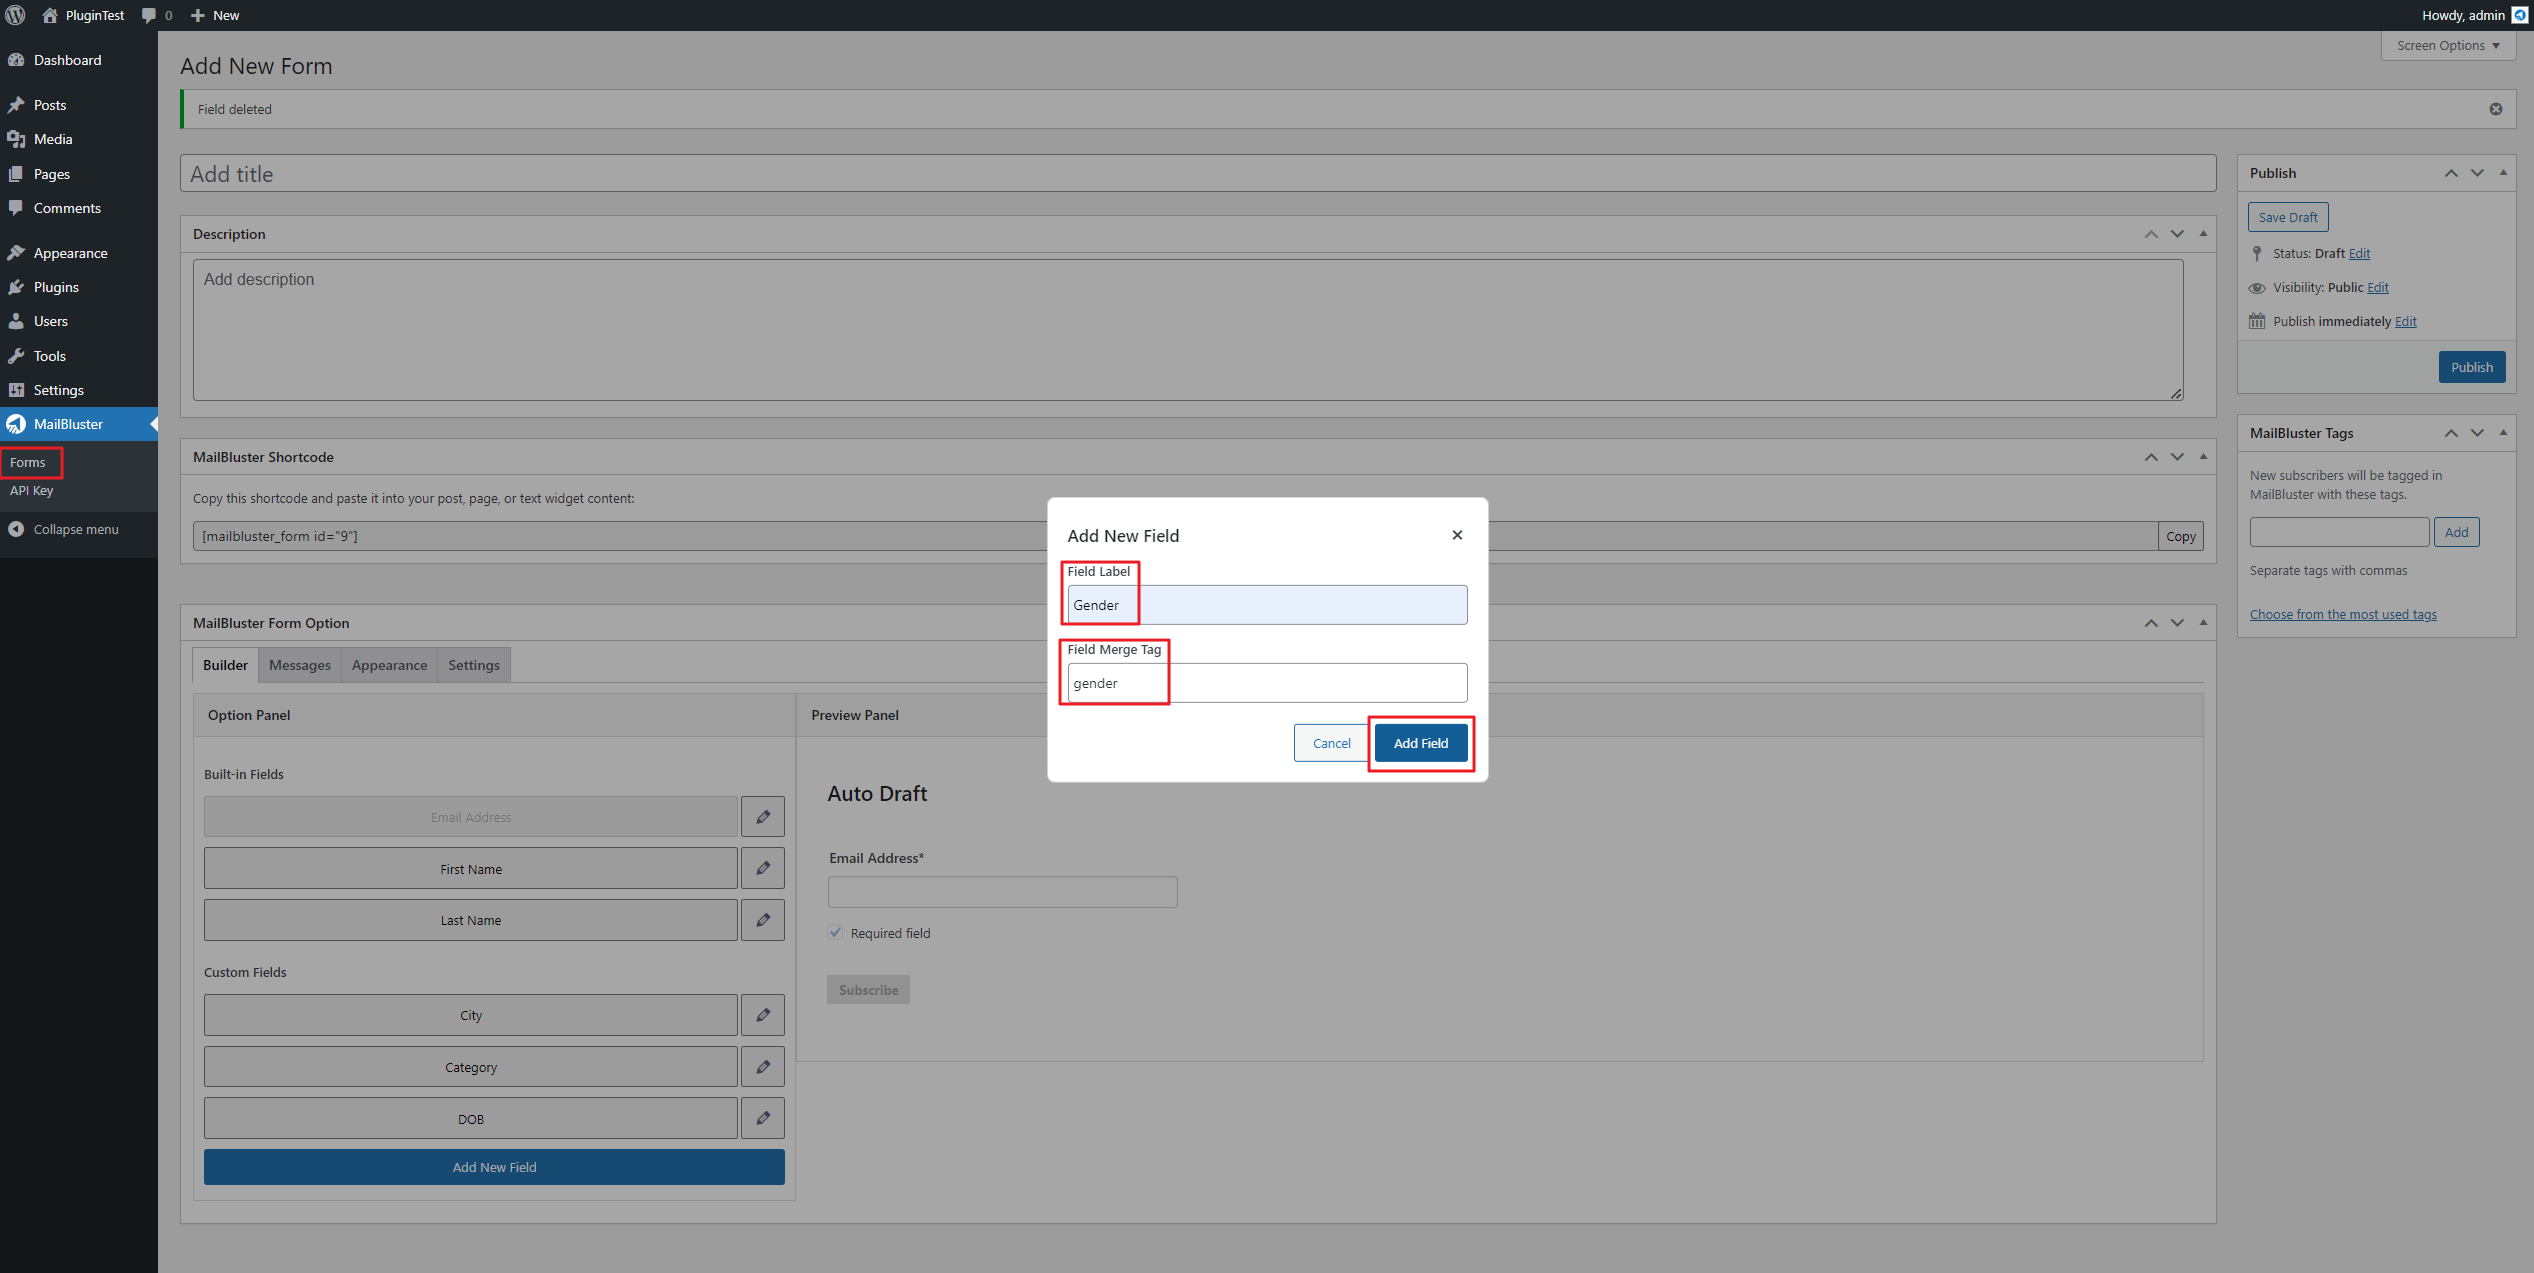
Add a new Field Label ‘Gender,’ and its Field Merge Tag ‘gender’ will be generated automatically. Then click Add Field.
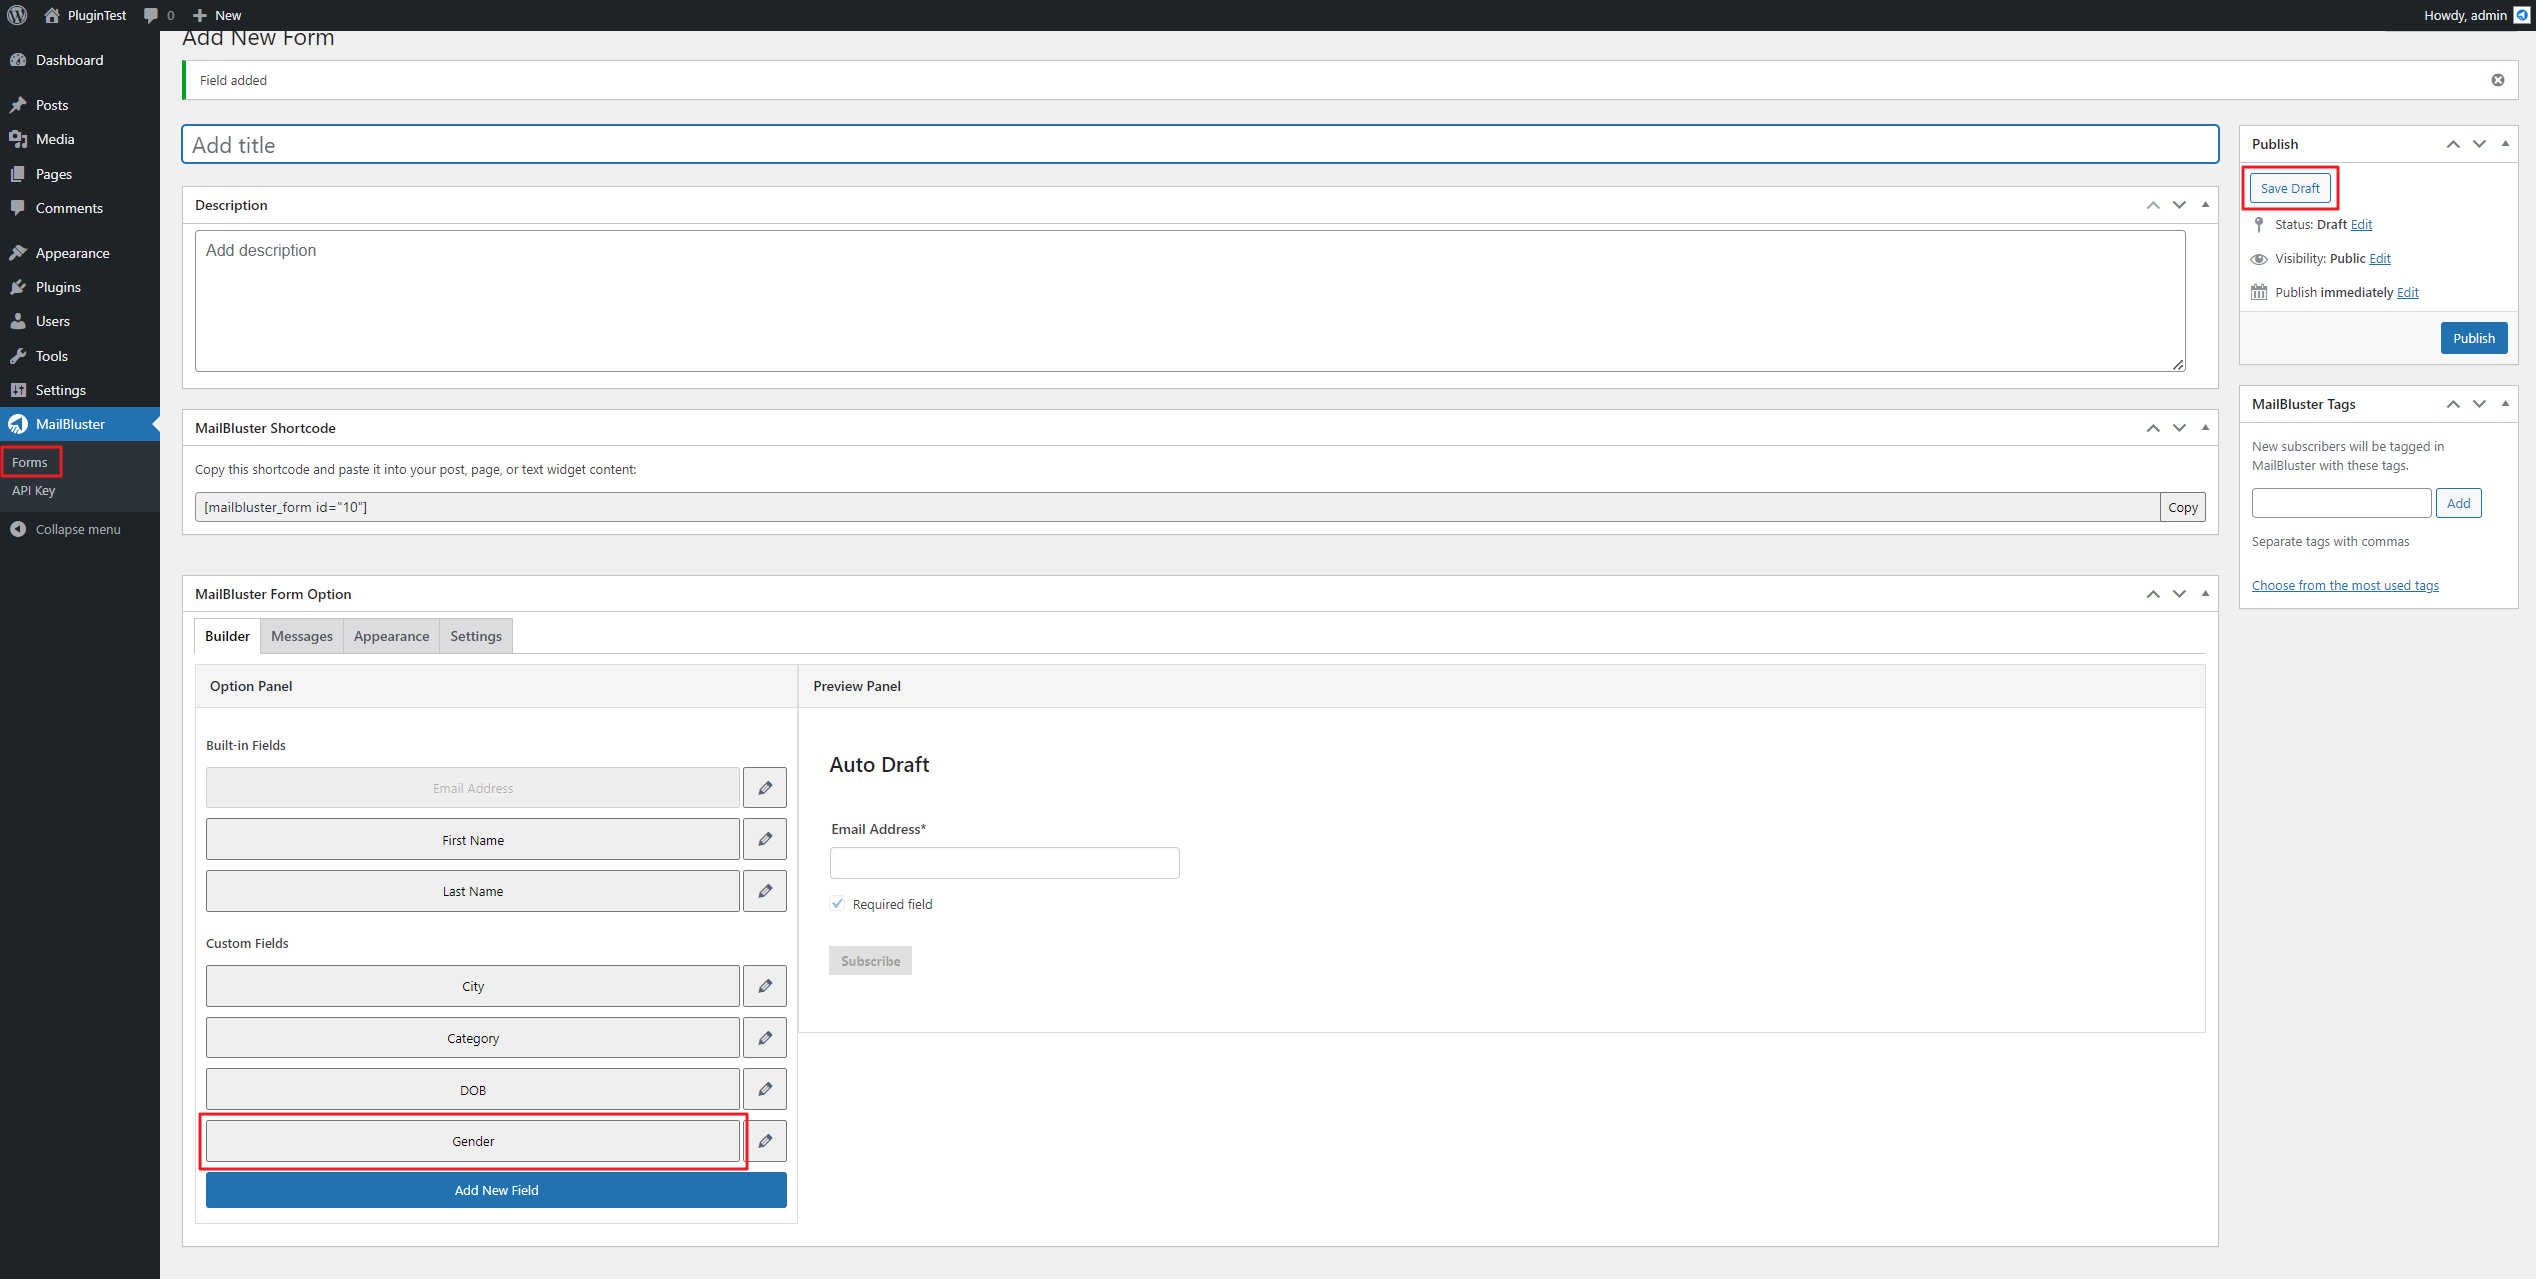
‘Gender’ field has been created. Click on Gender to add to Preview Panel. Now click Save Draft.
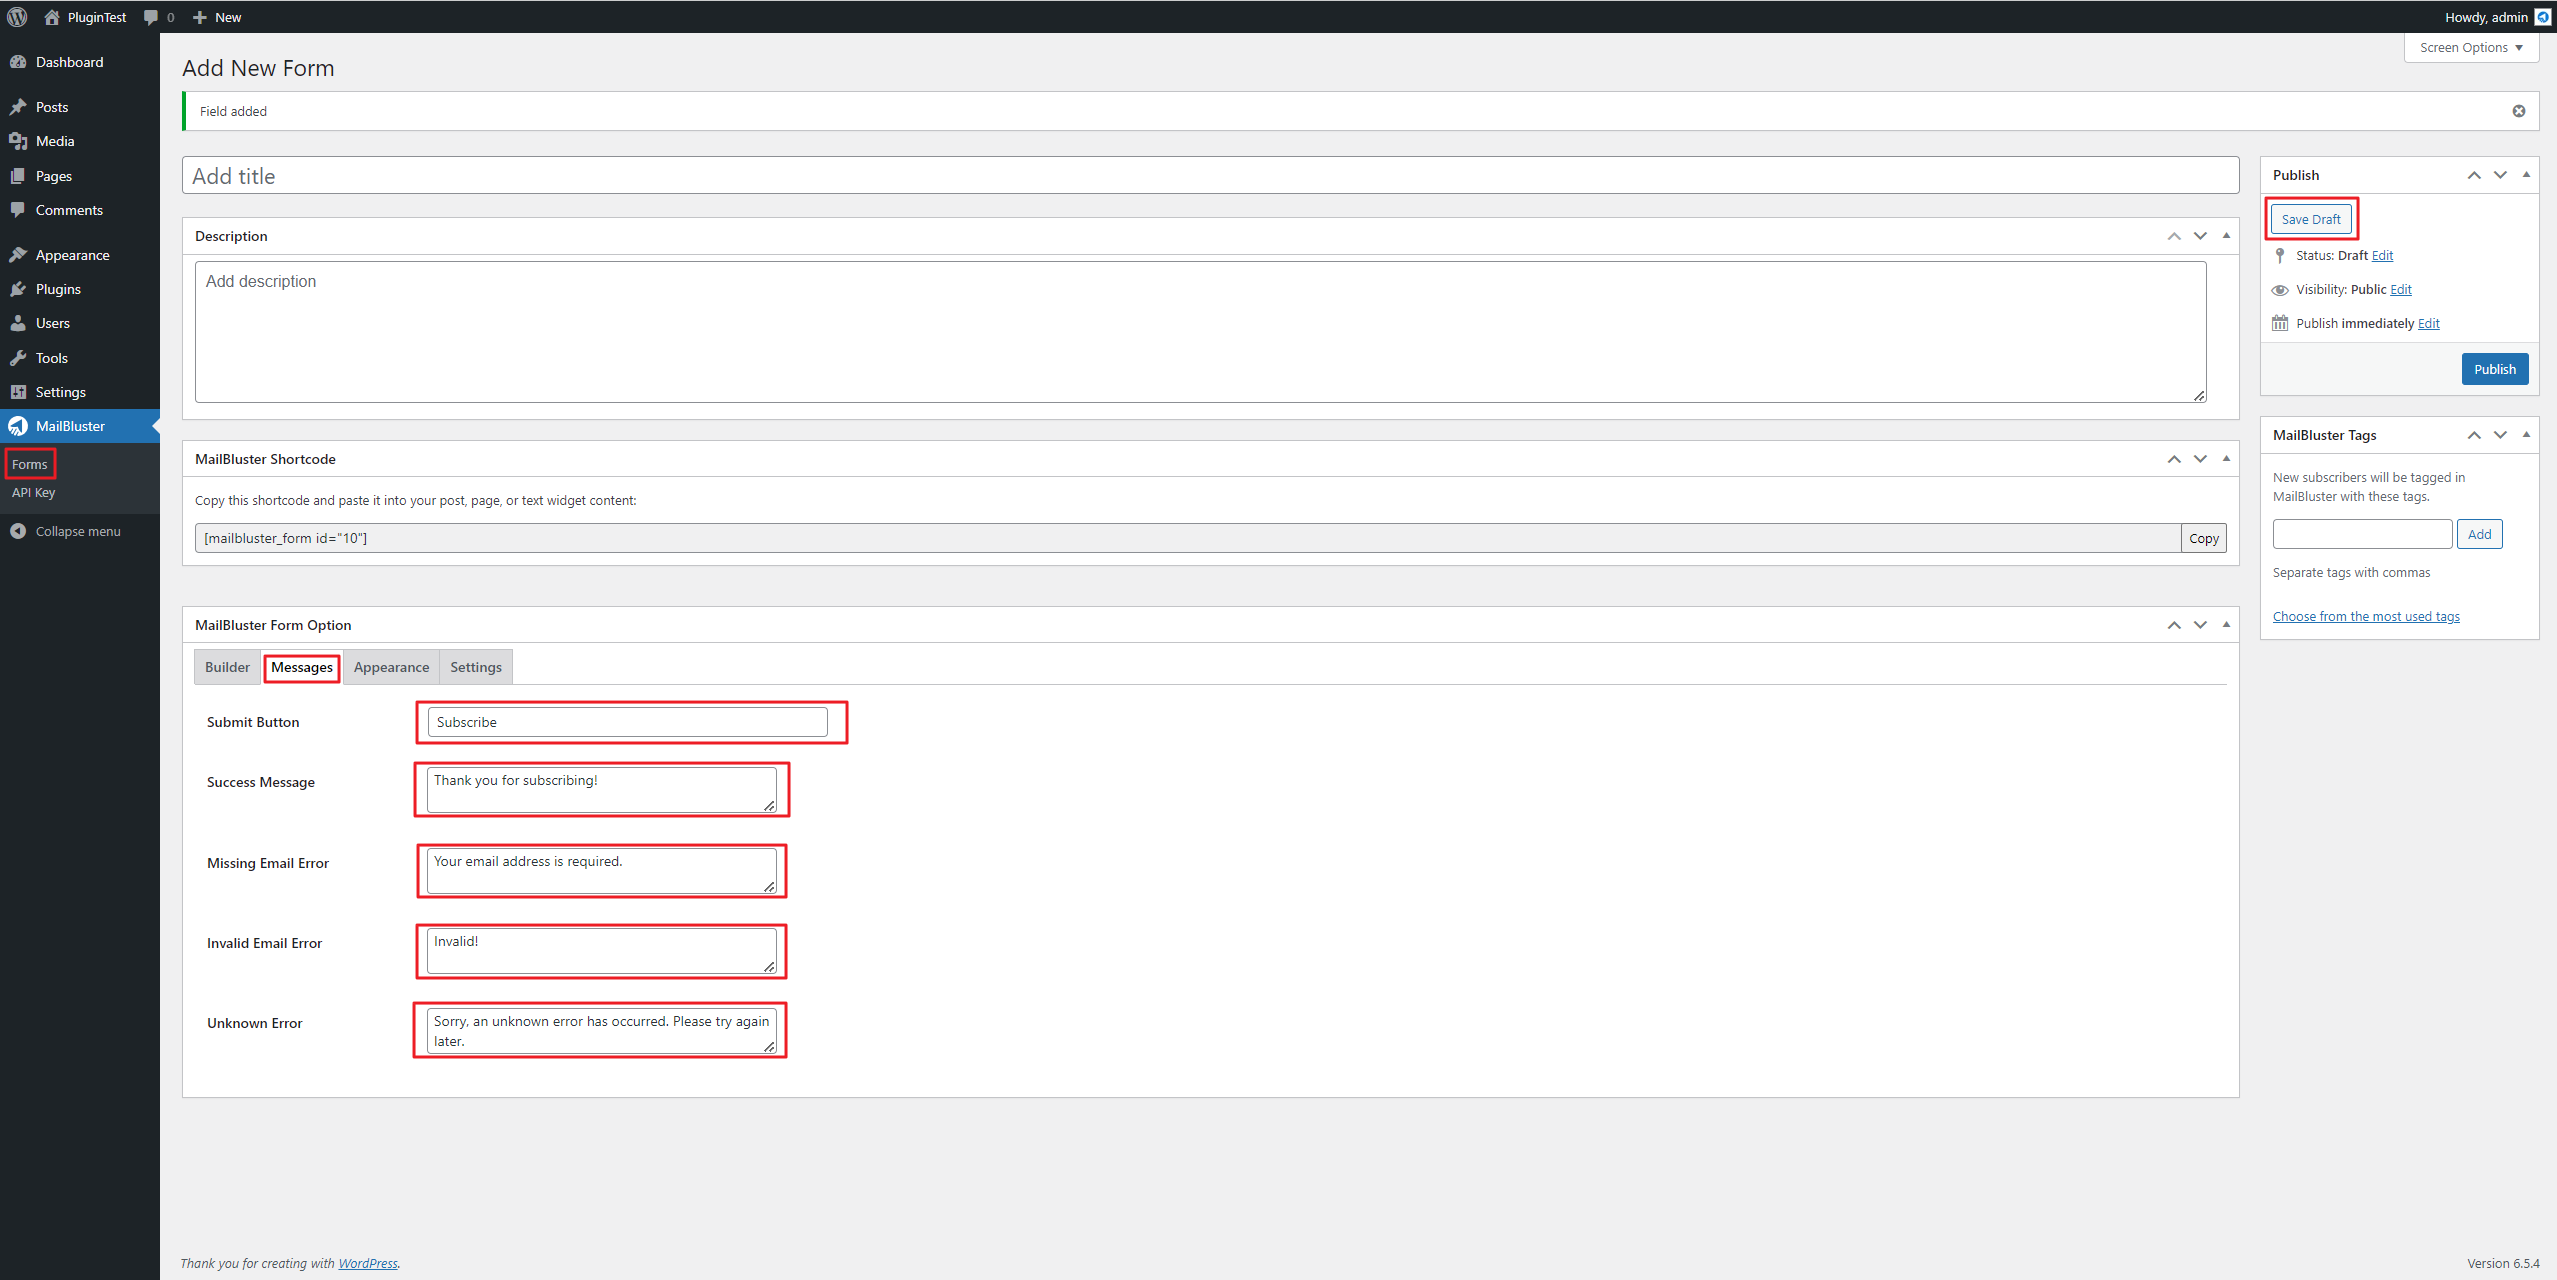
Click on the Messages tab to write your desired messages as shown below.
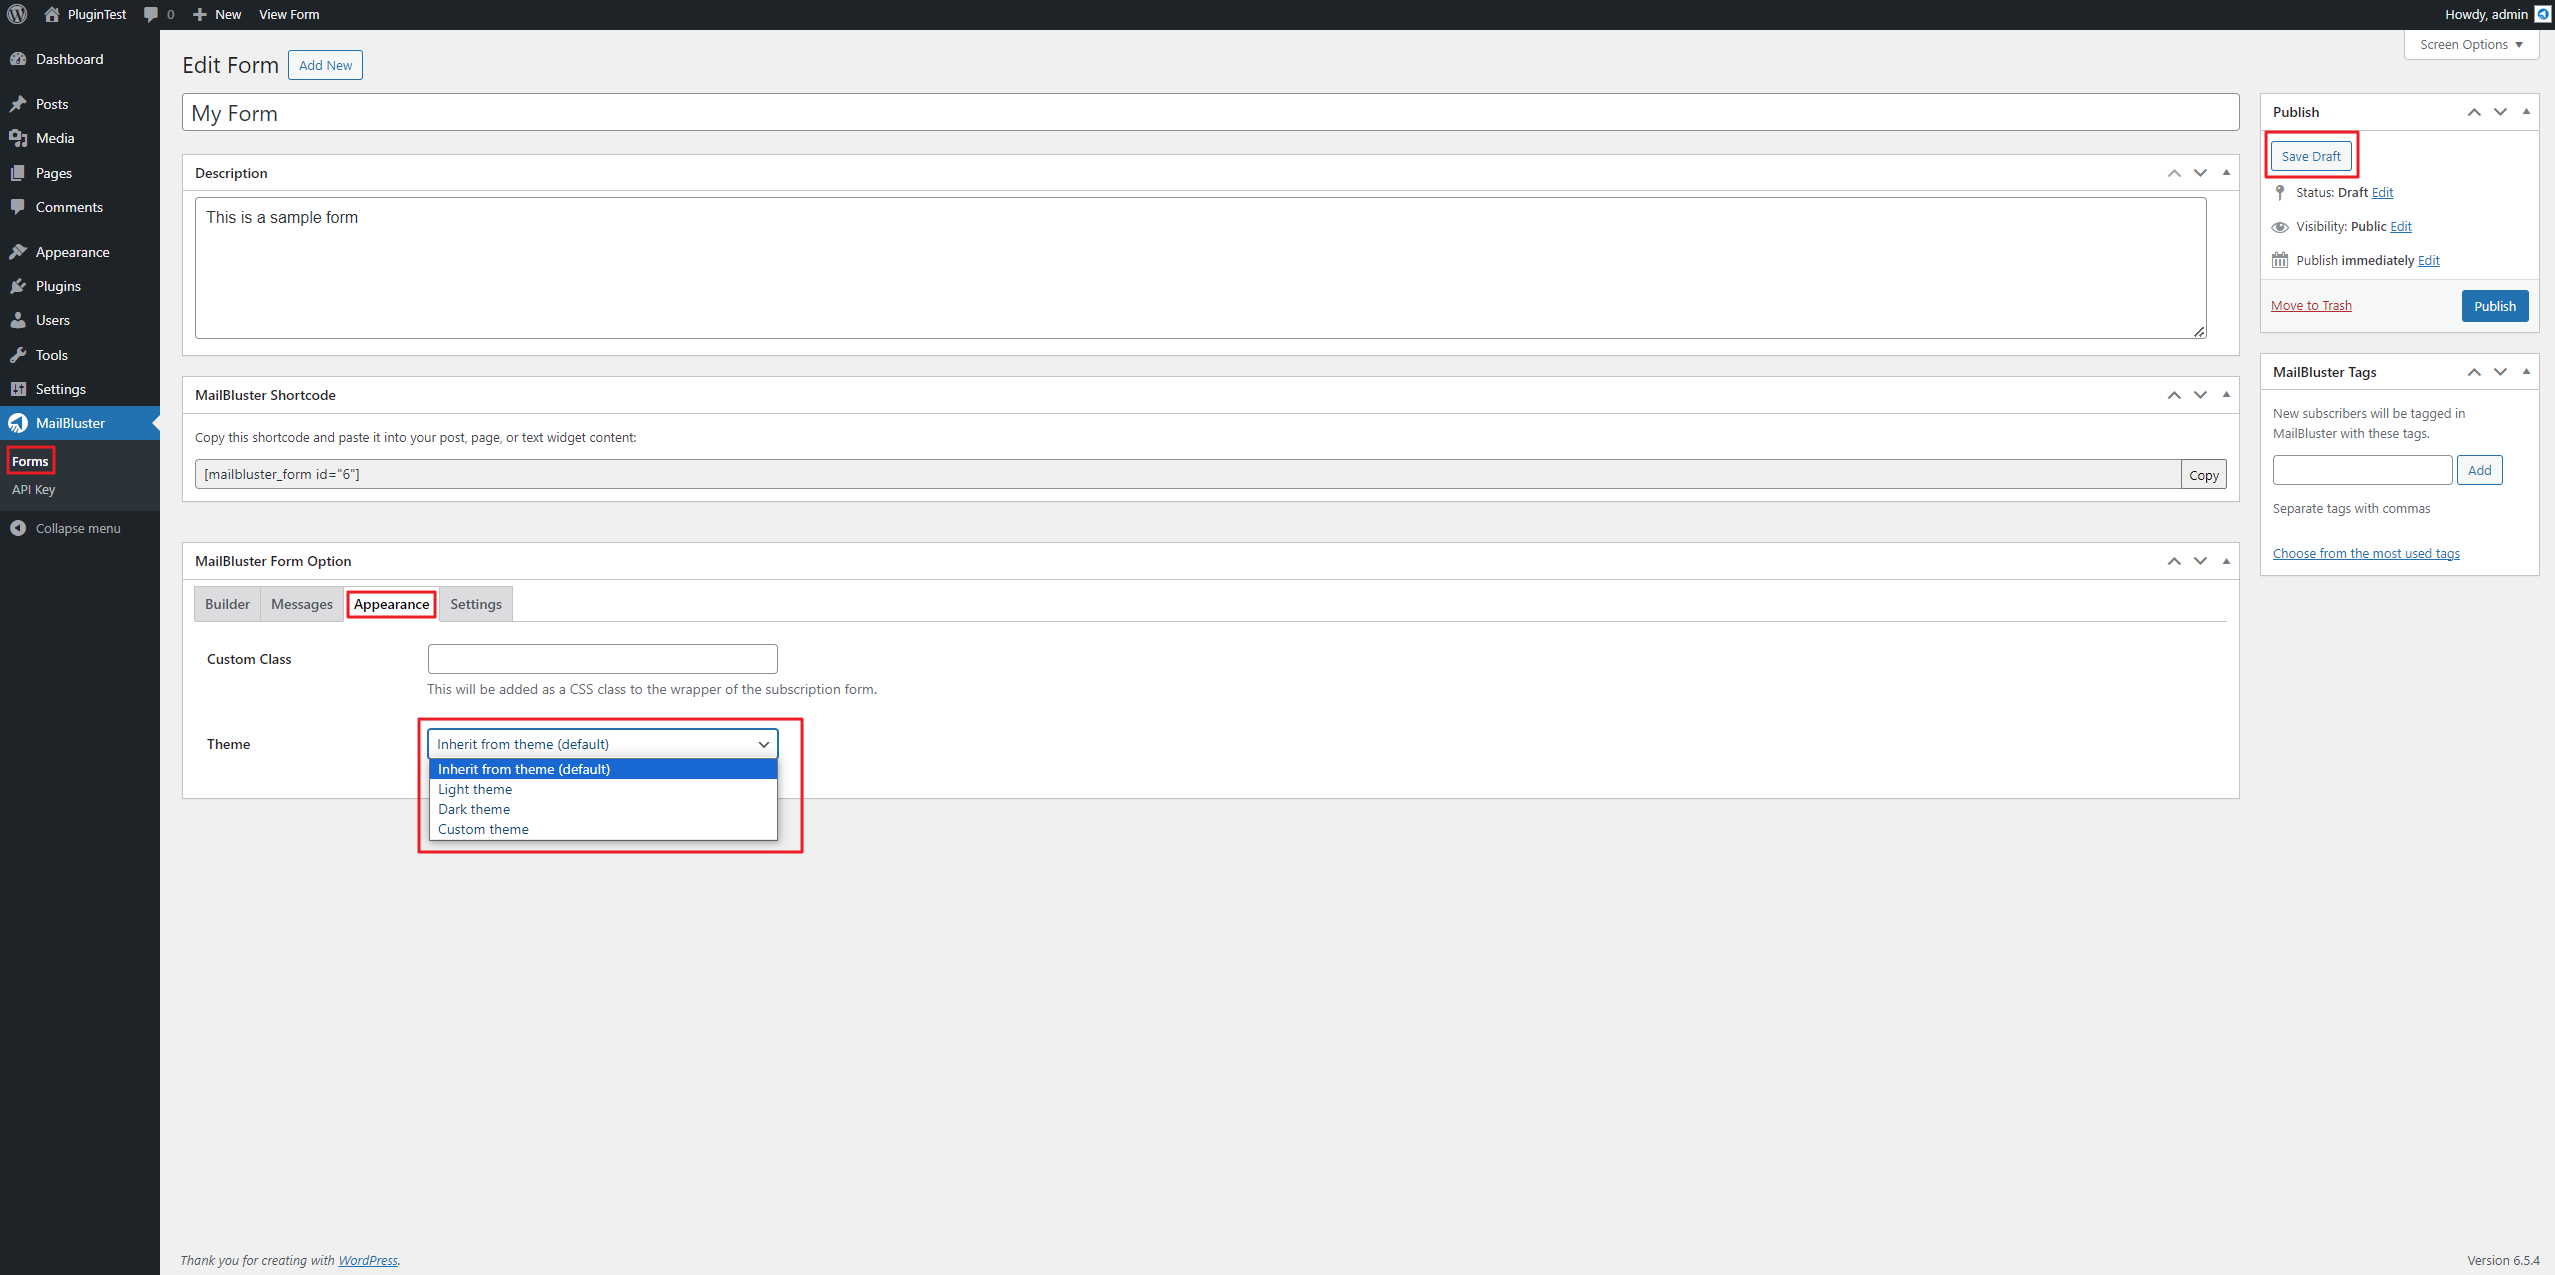
Click on the Appearance tab to change the design of the form. Hit Save Draft every time your change any settings.
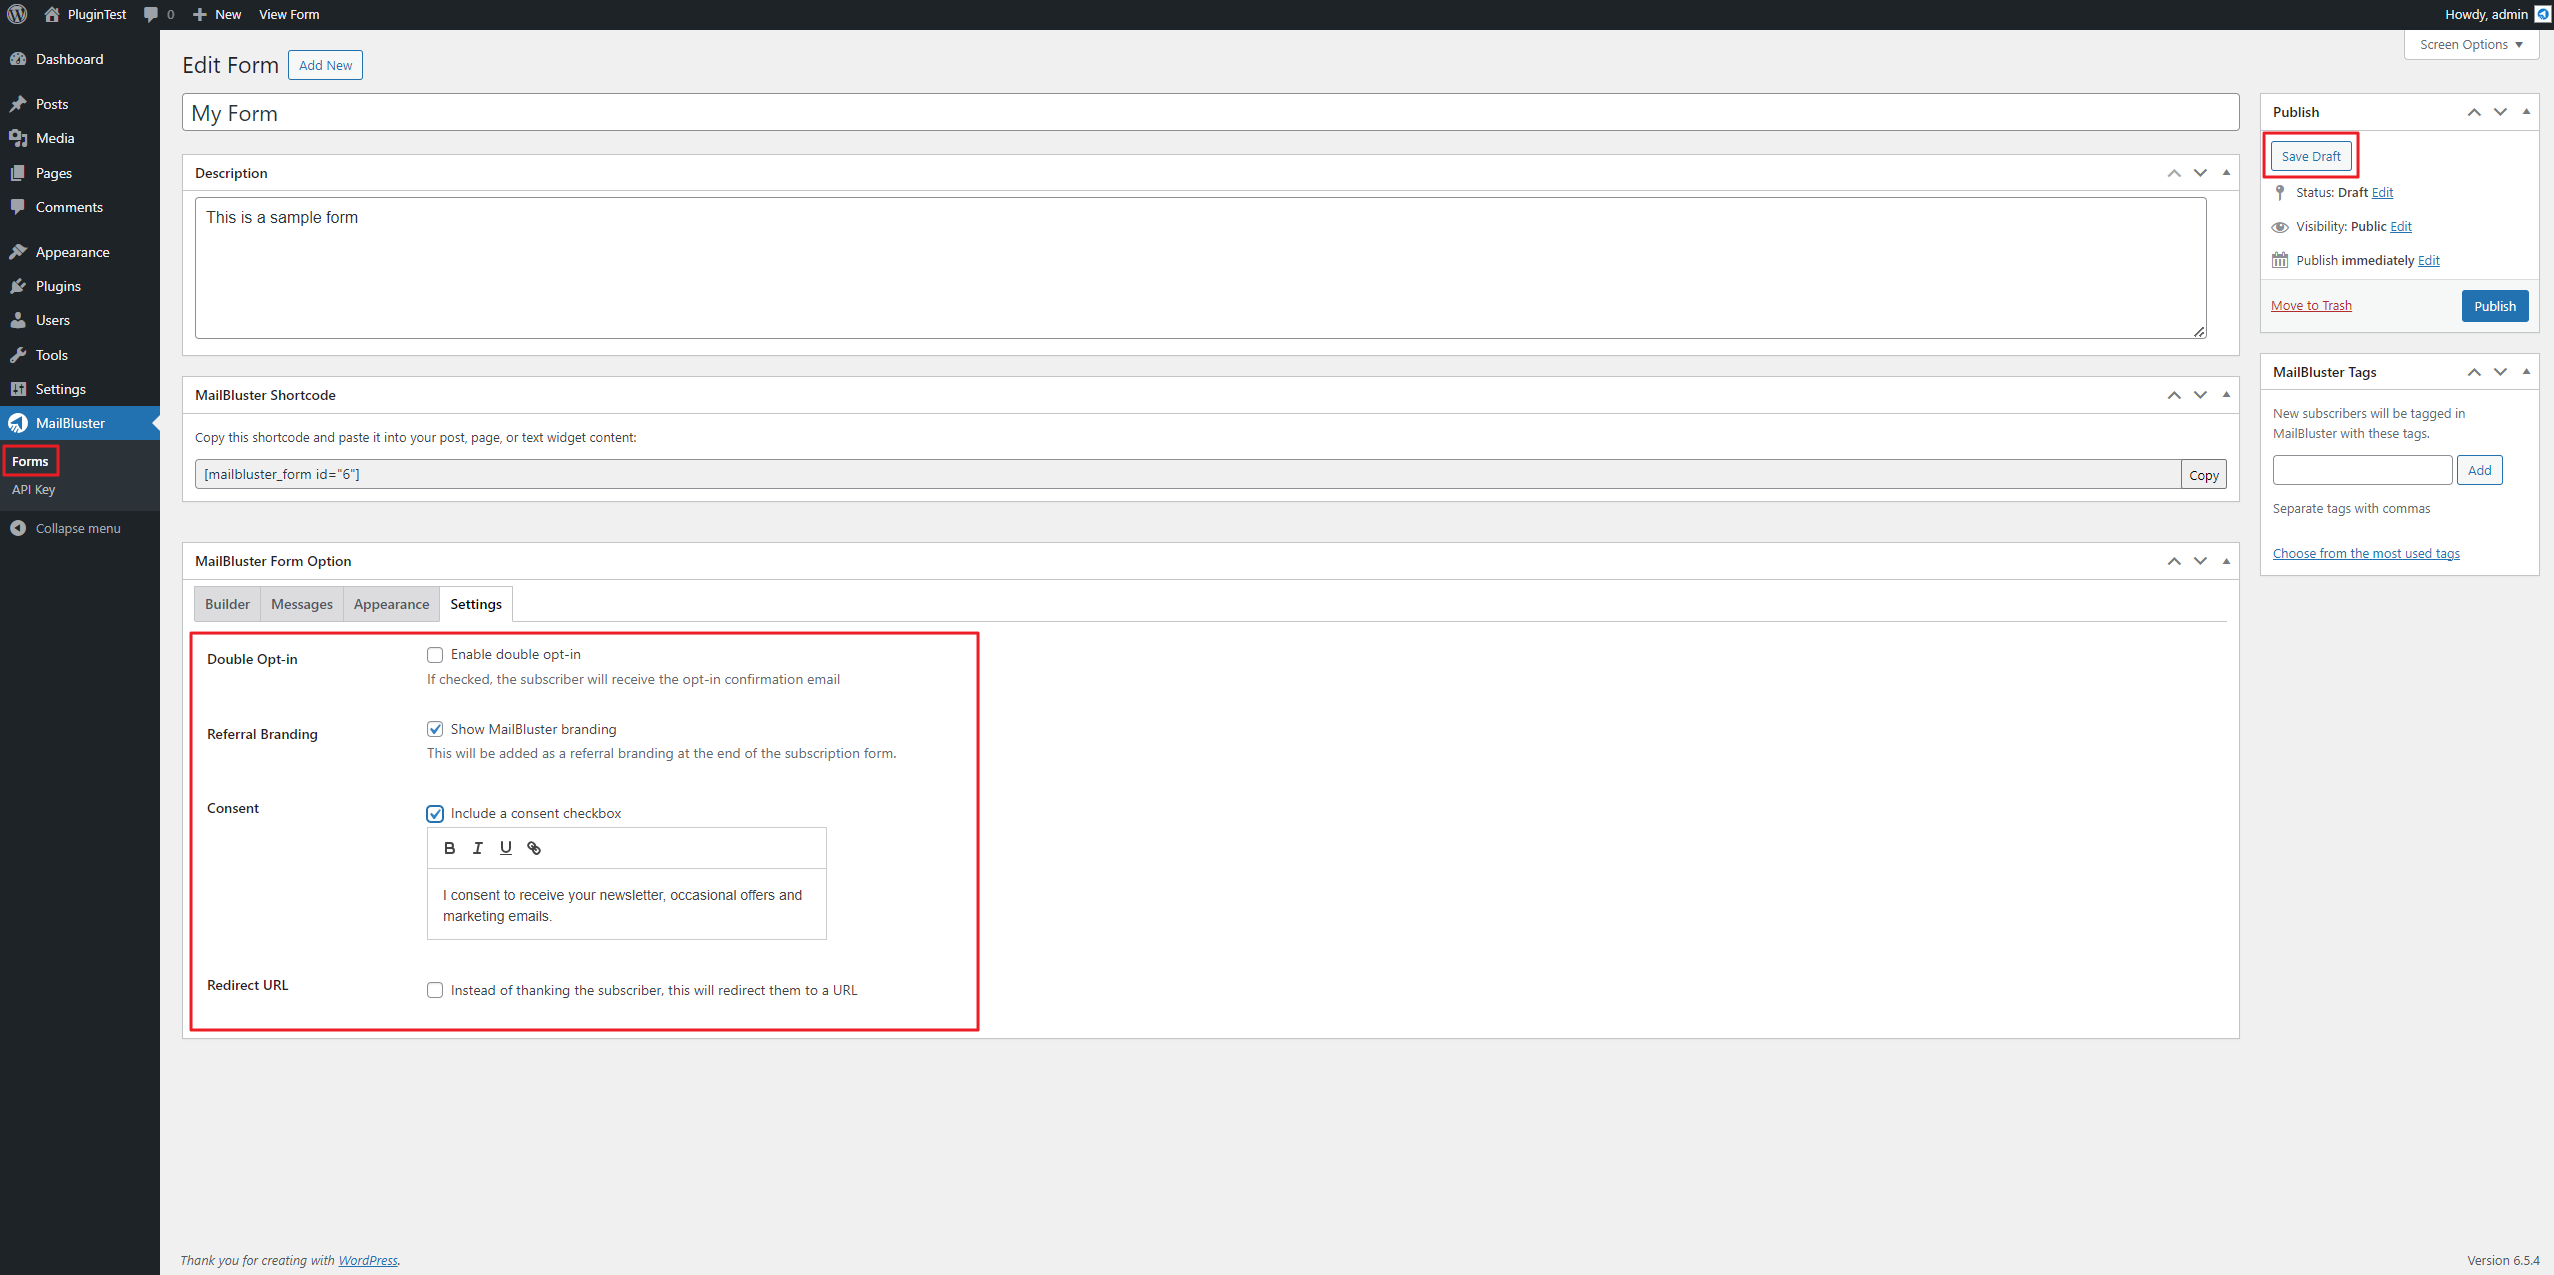
Click on the Settings tab to enable Double Opt-in, show MailBluster branding, add a consent checkbox, and set a Redirect URL according to your needs. Be sure to click Save Draft to save your settings.
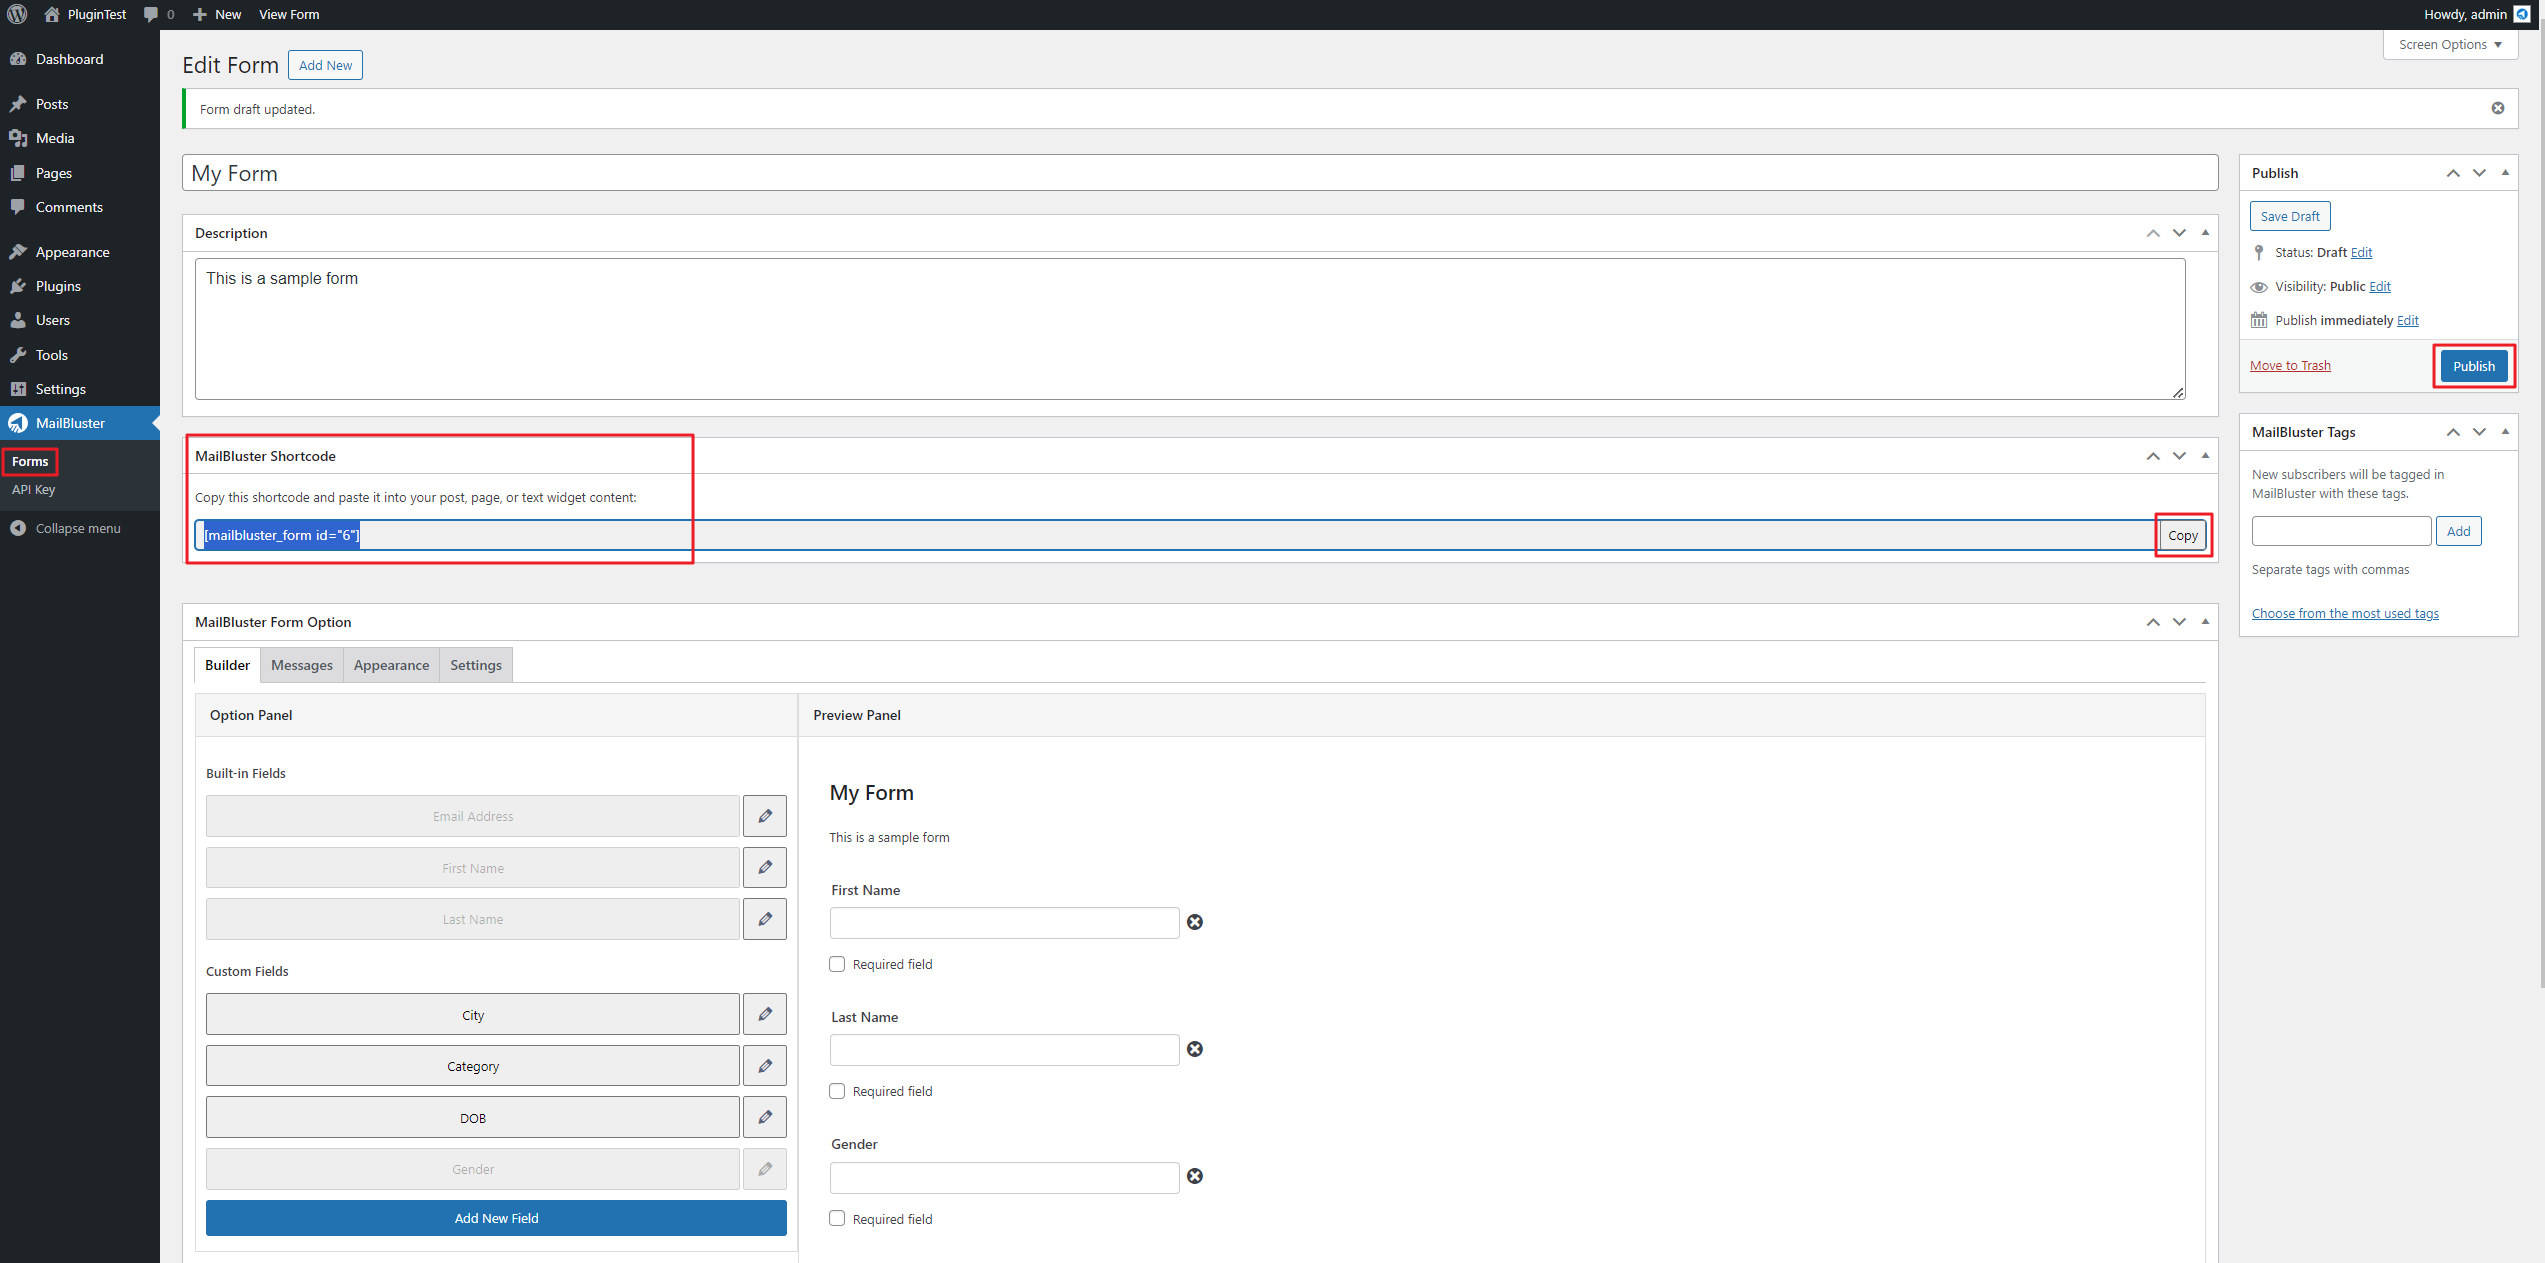
Now click on Forms, click Publish and the copy the MailBluster Shortcode as shown below.
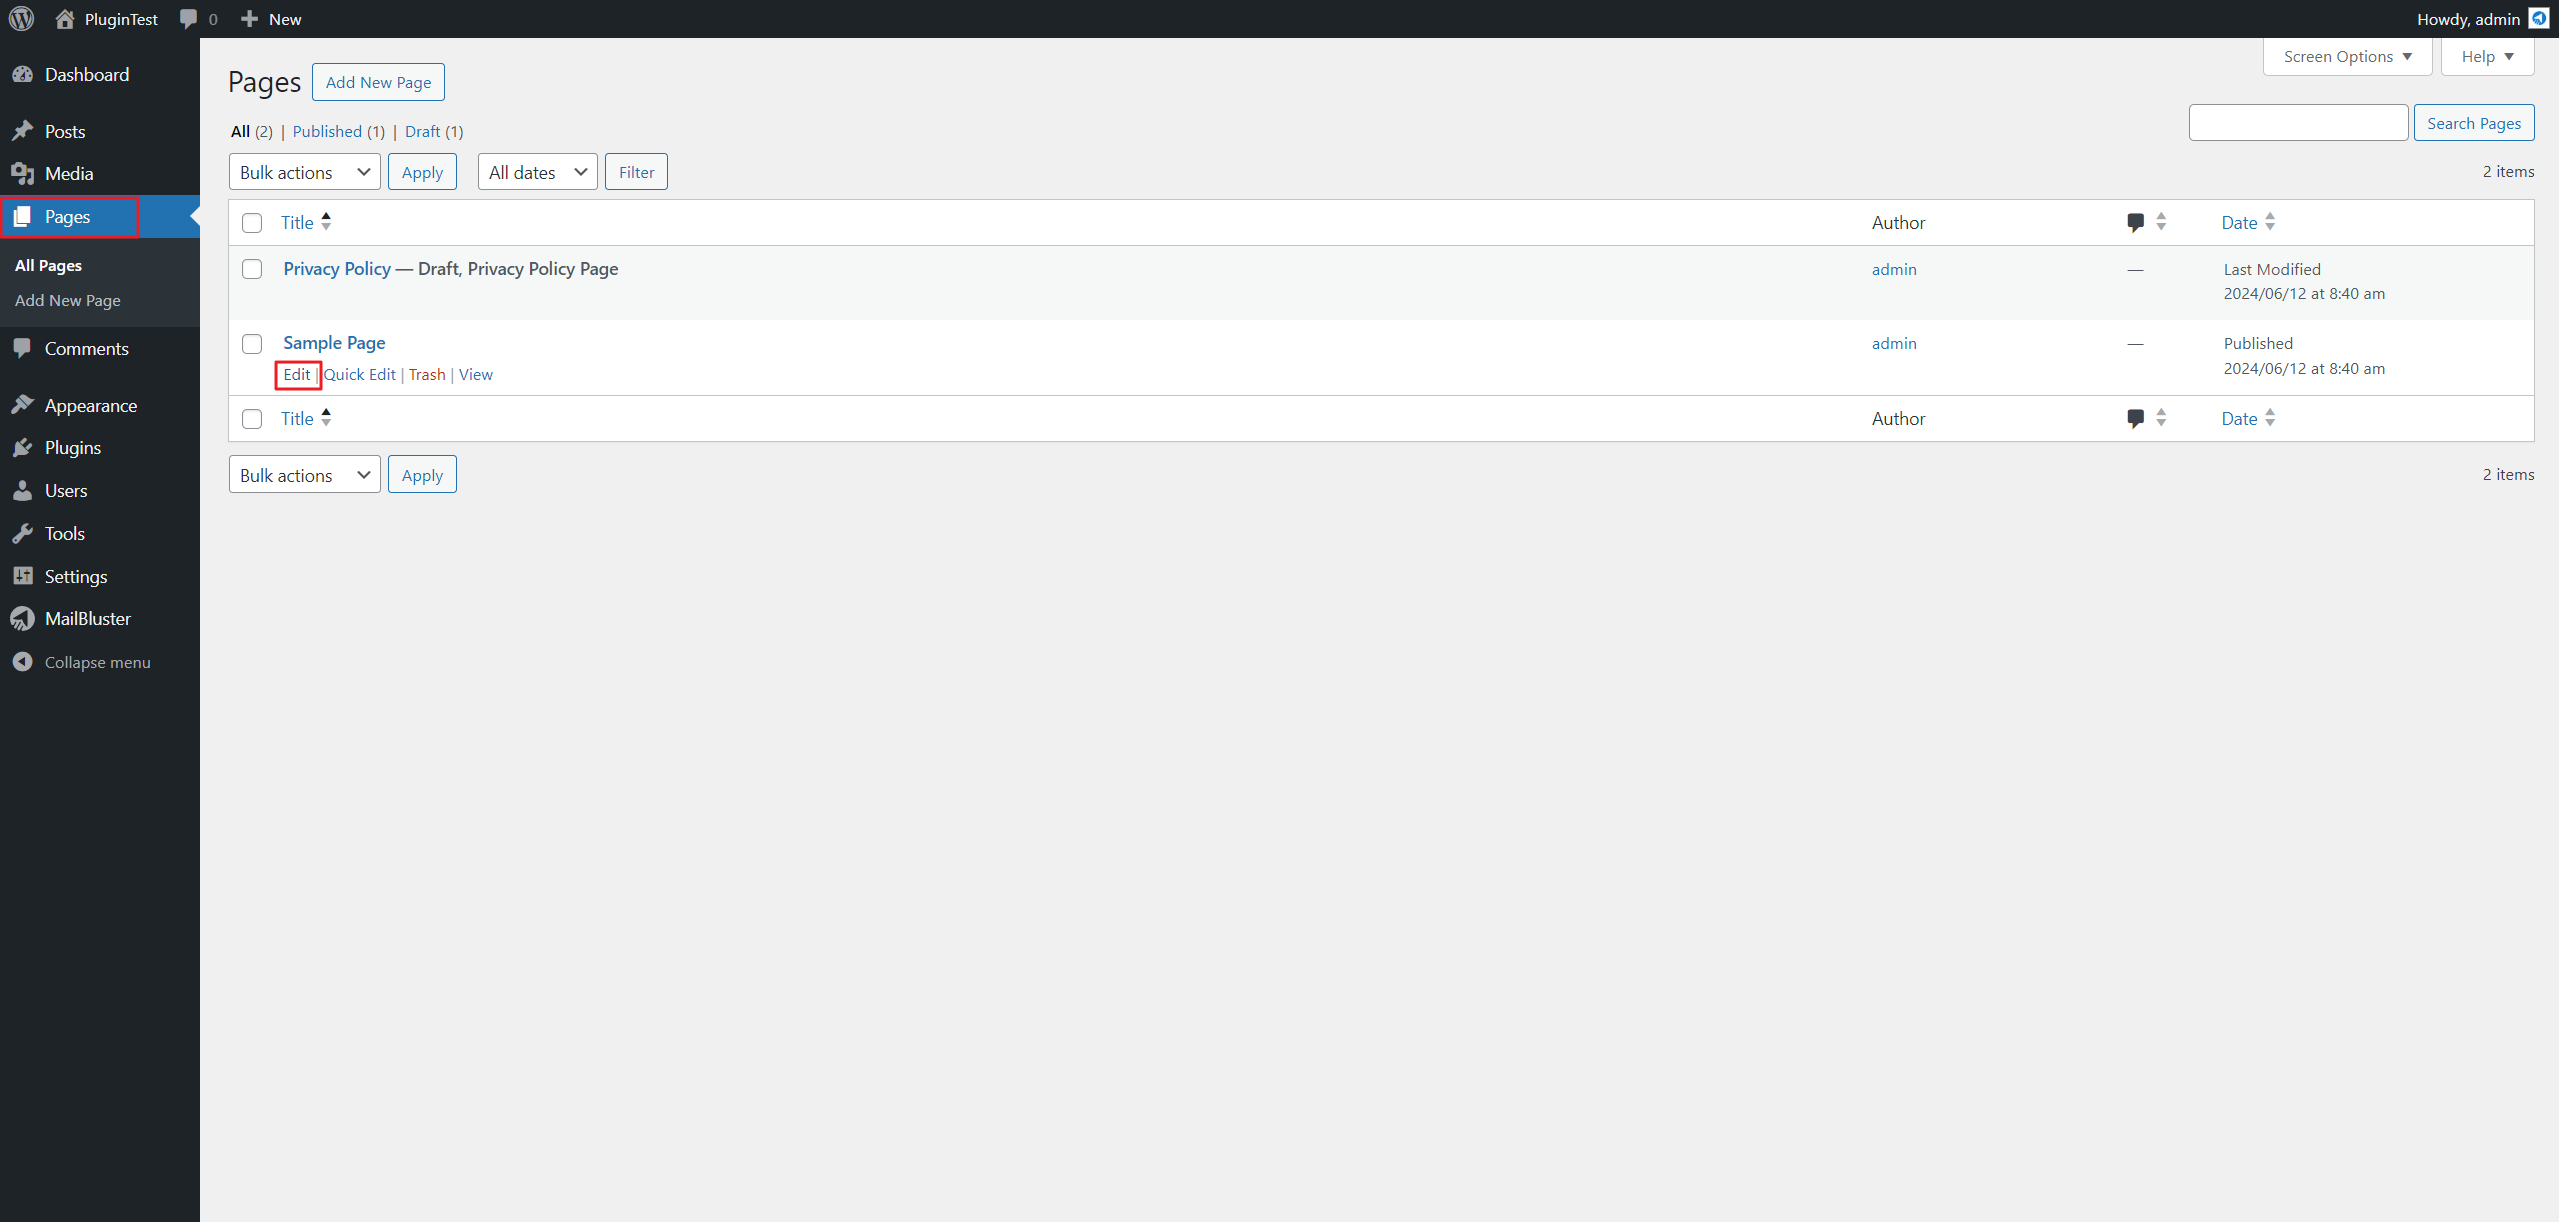
Now go to Pages and select your desired WordPress page. Click Edit.
Click the ‘+‘ symbol and drag and drop the Shortcode [/] into the WordPress page editor.
![Click the '+' symbol and drag and drop the Shortcode [/] into the WordPress page editor.](https://mailbluster.com/wp-content/uploads/2024/06/form28.png)
Now paste the MailBluster Shortcode under this [/] Shortcode field.
![Paste the MailBluster Shortcode under this [/] Shortcode field.](https://mailbluster.com/wp-content/uploads/2024/06/form29.png)
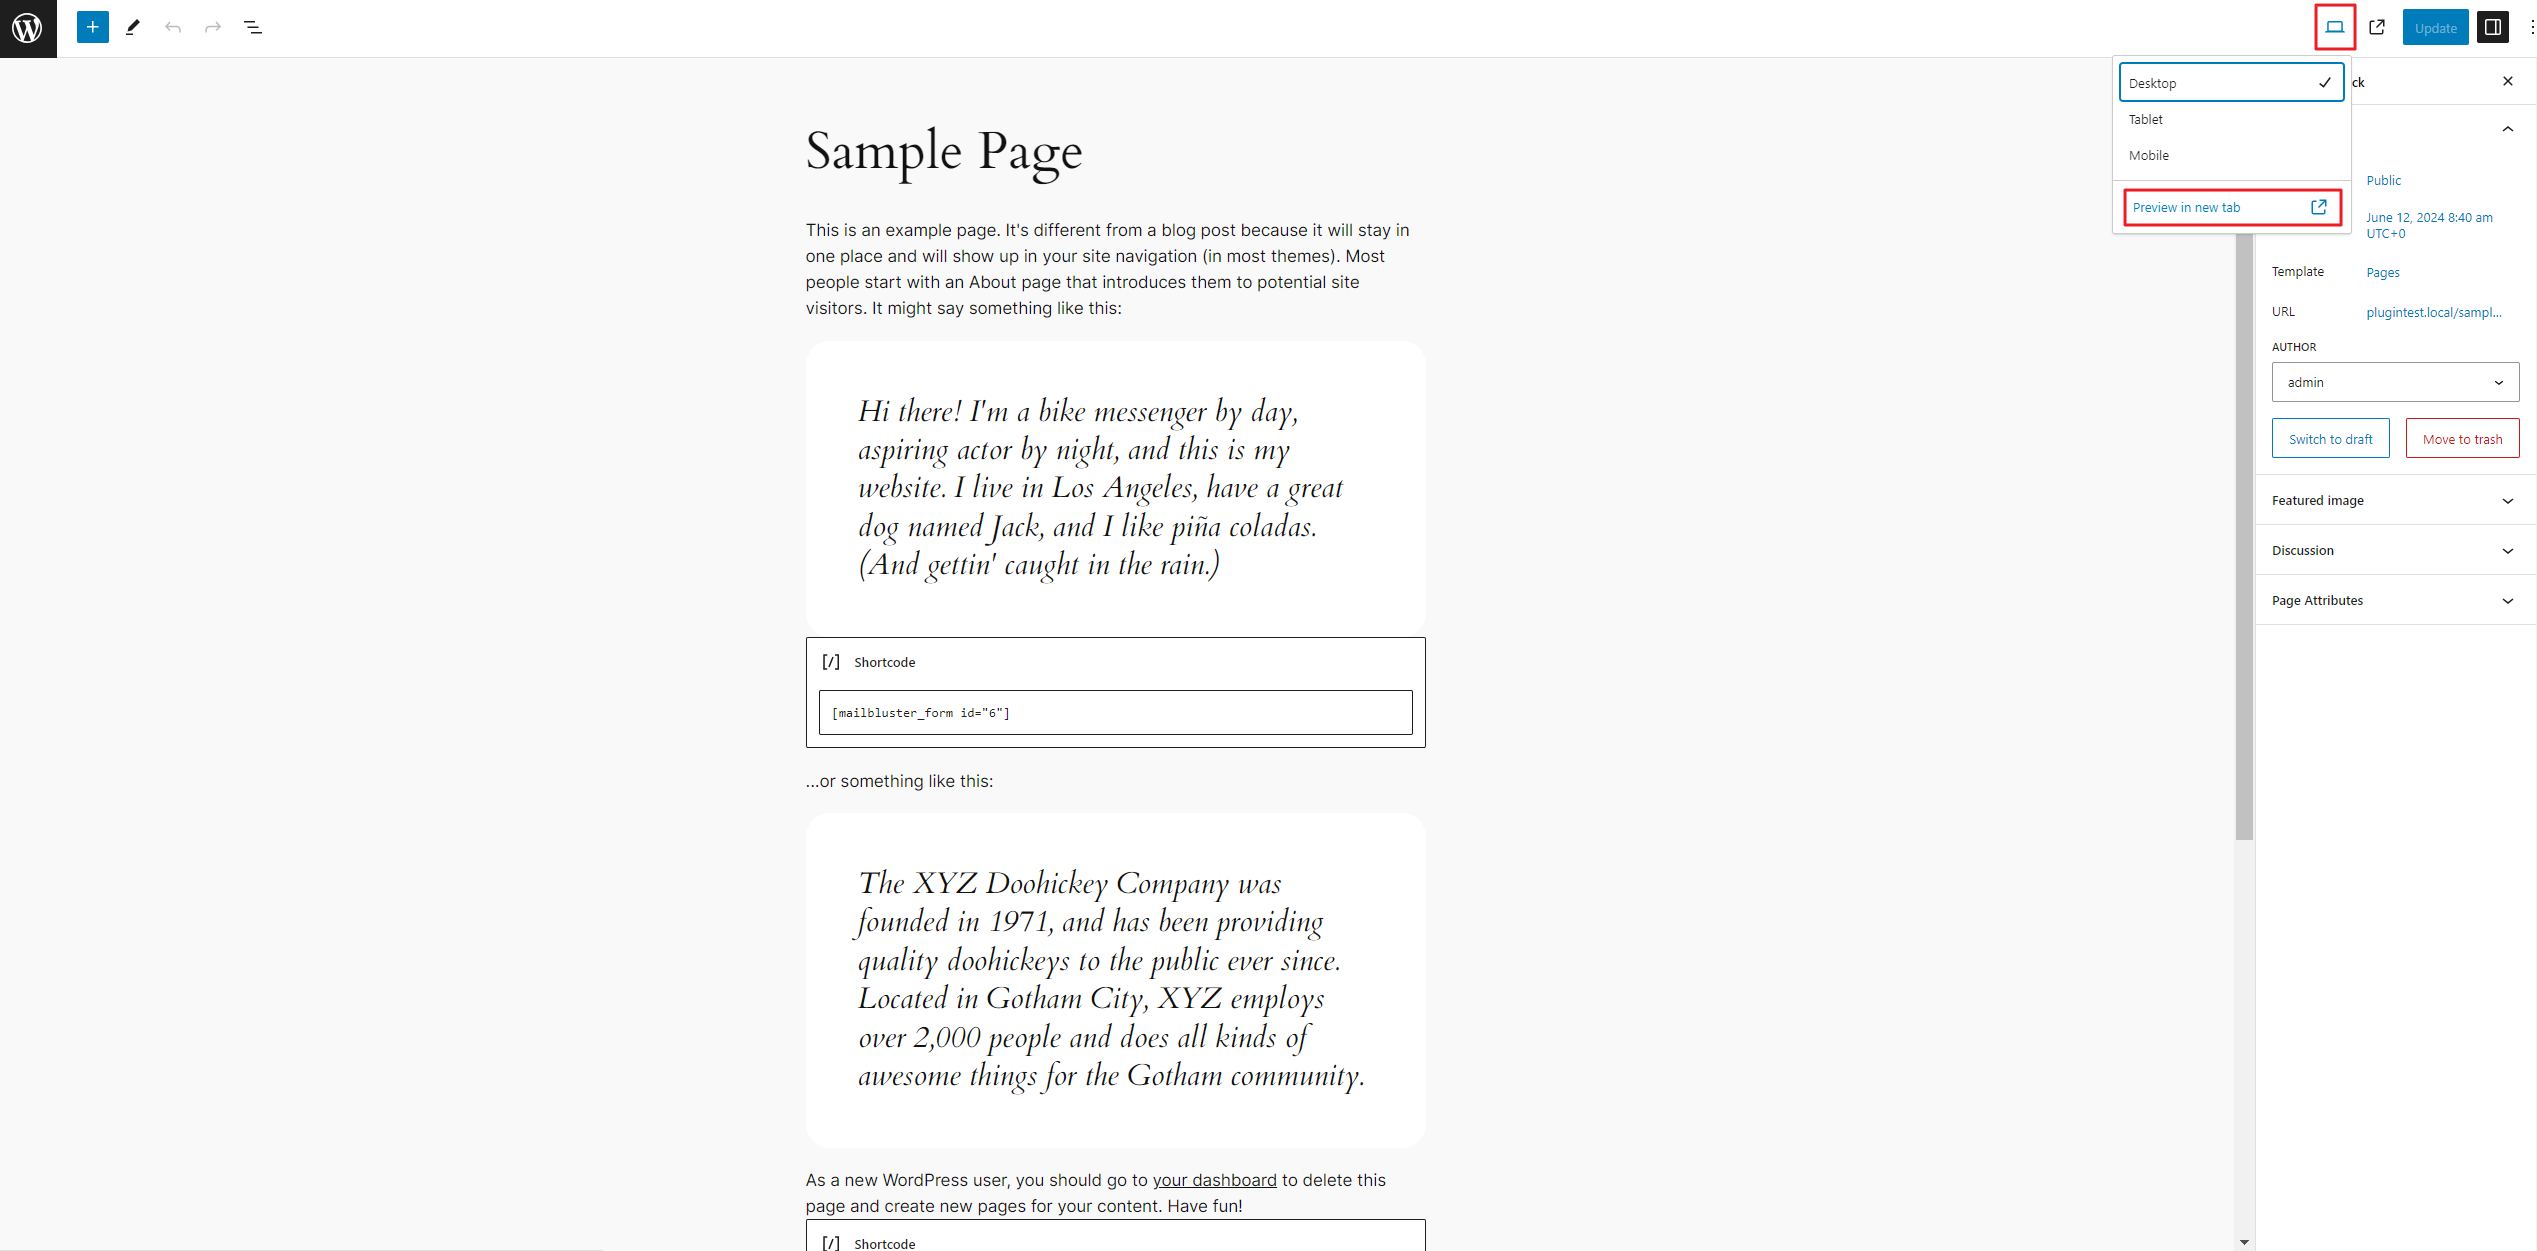
Now click on the Preview button and select Preview in new tab.
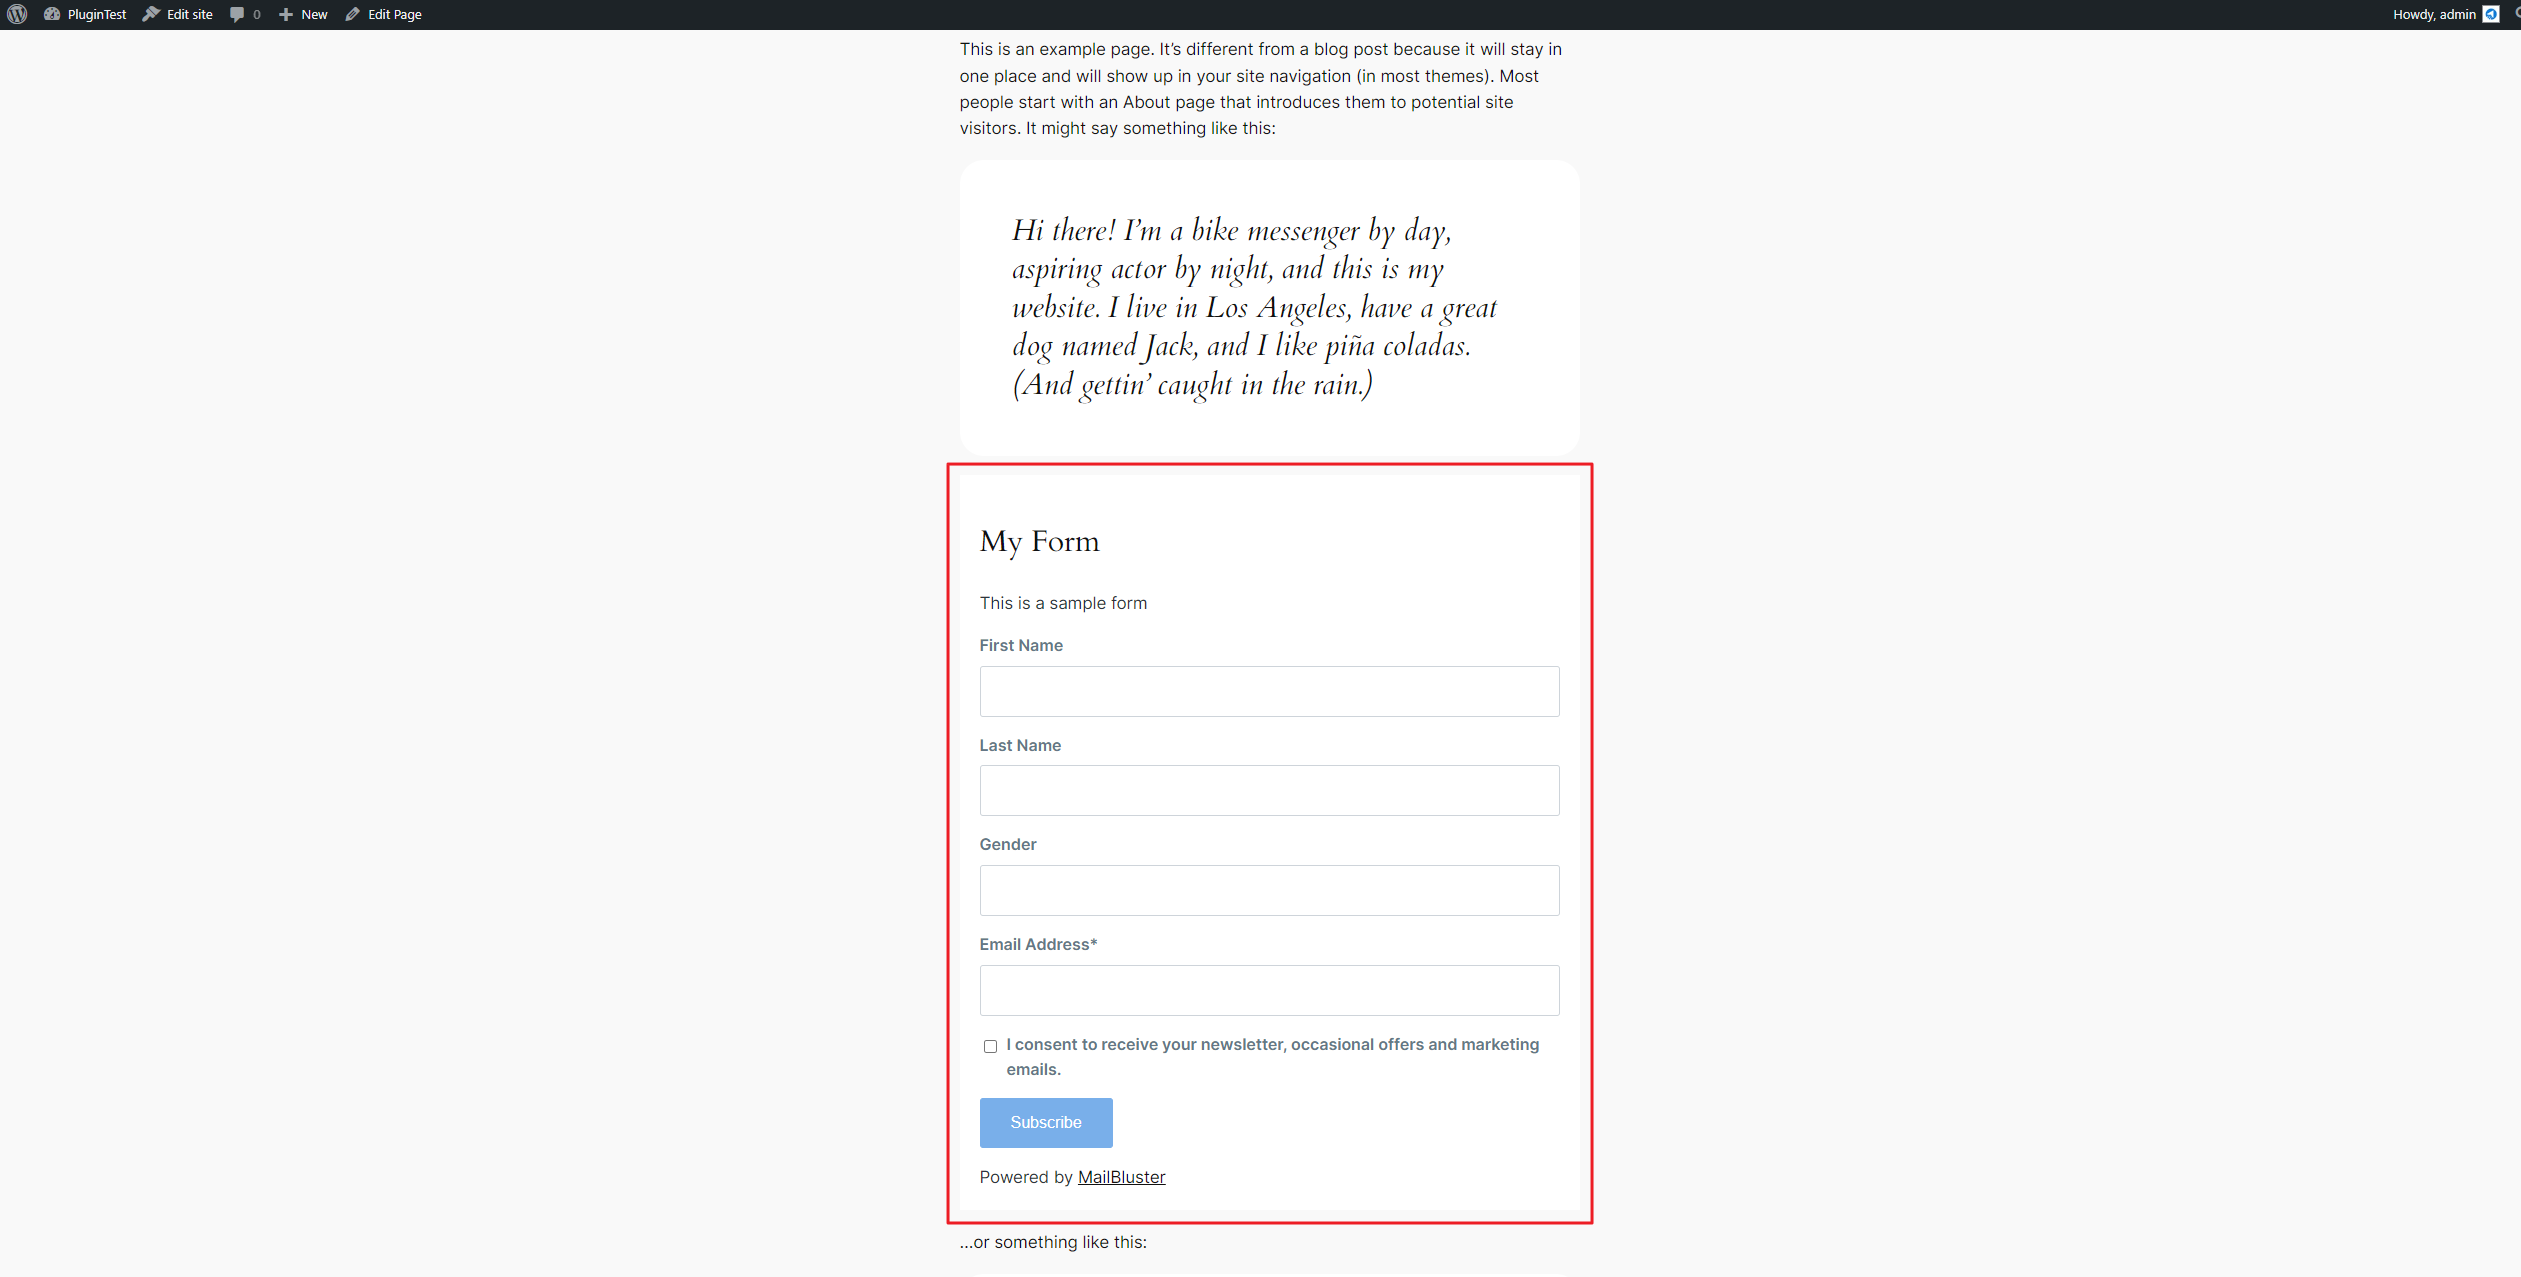
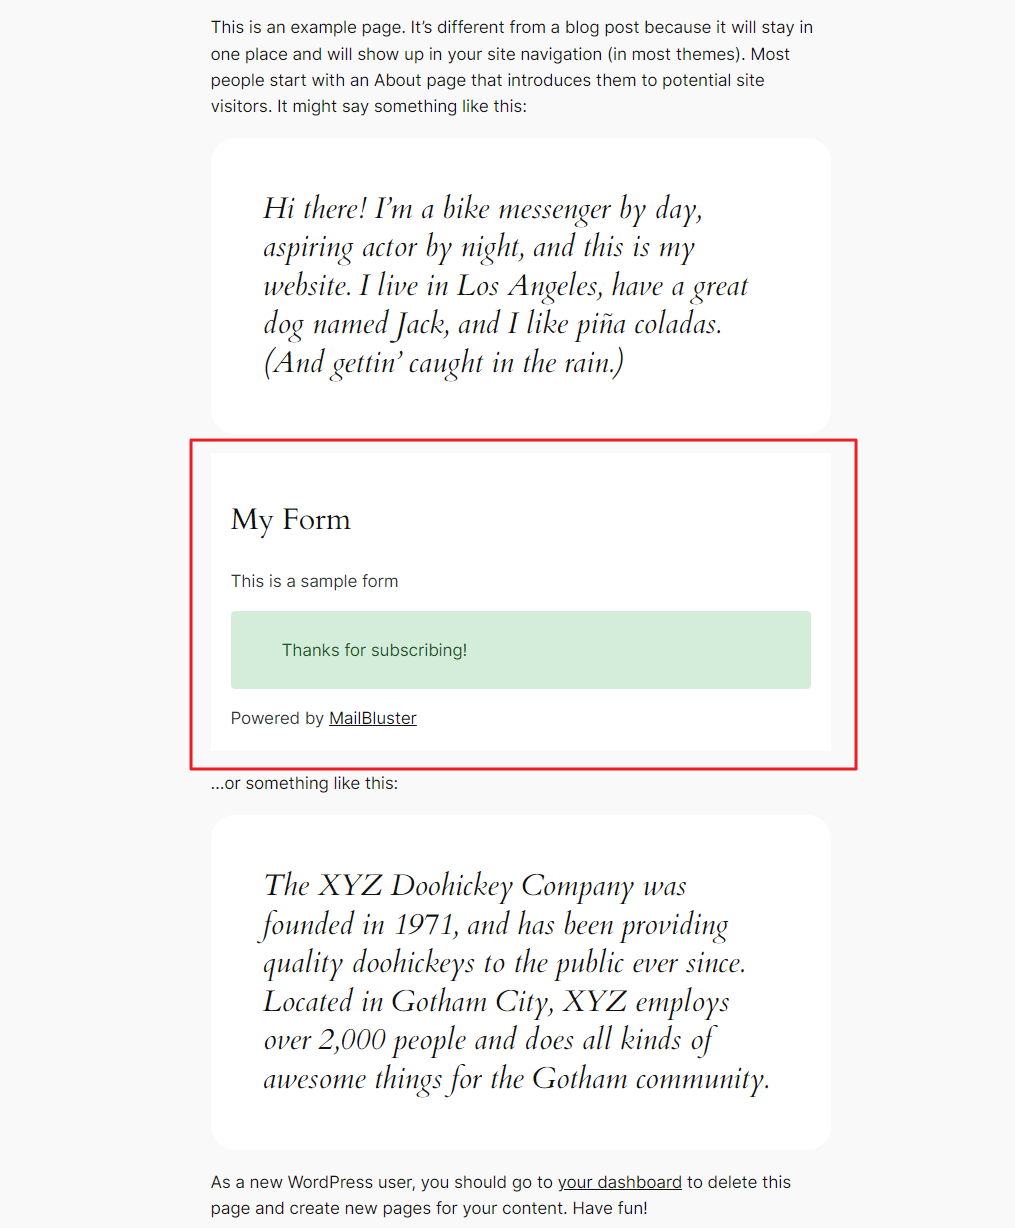
You will now see the Form made by the MailBluster Plugin.
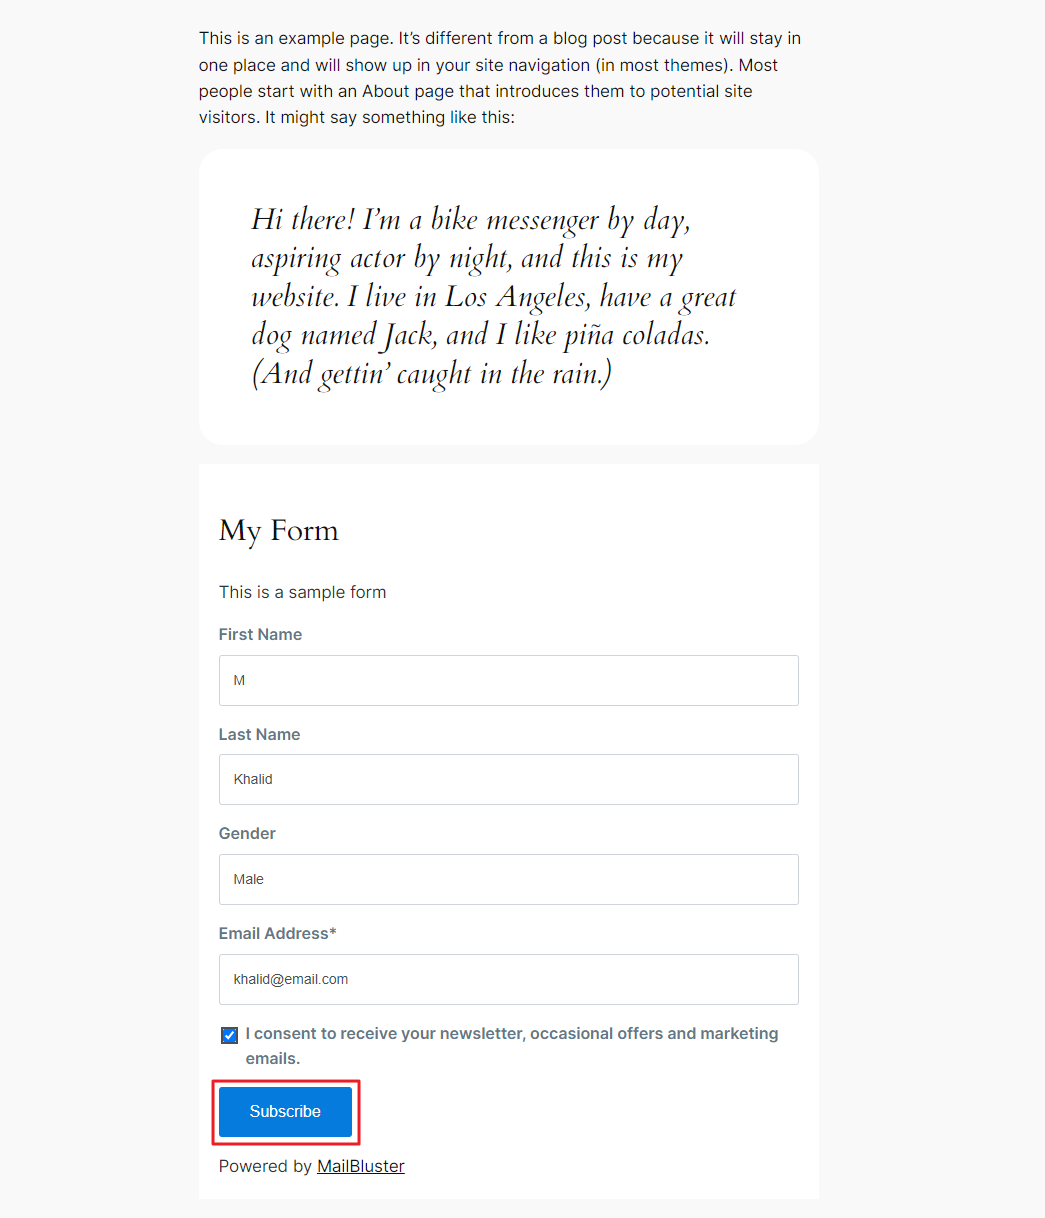
Fill up the form and then click Subscribe.
The confirmation message will appear as set in the configuration settings earlier.
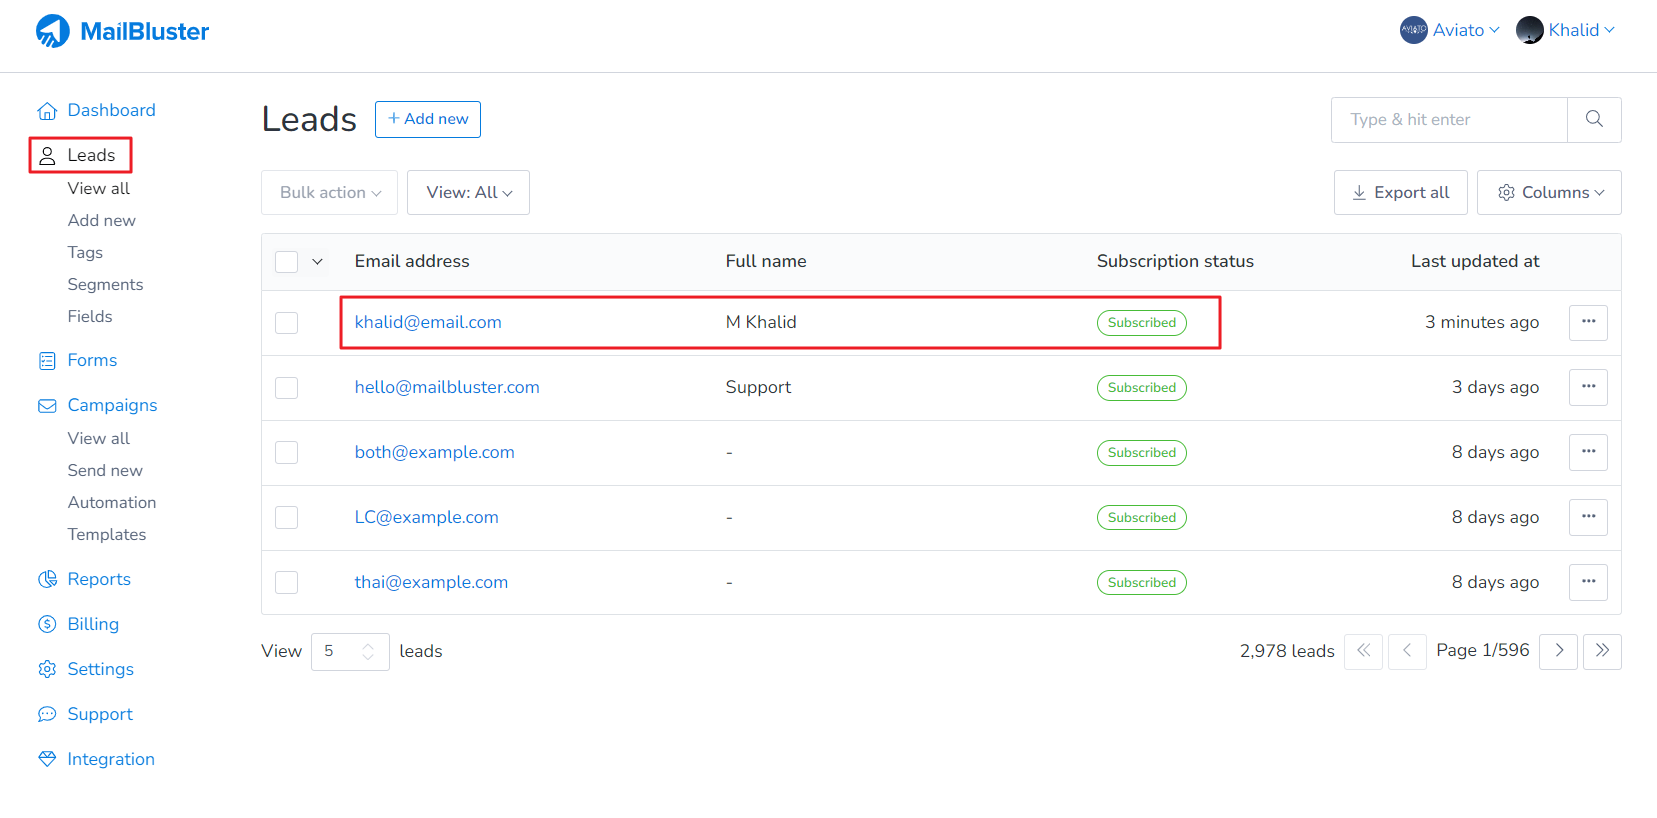
Sign into MailBluster > Brand and then go to Leads section. As you can see, the email ID, name, and subscription status are added to the MailBluster app from the WordPress Form page.